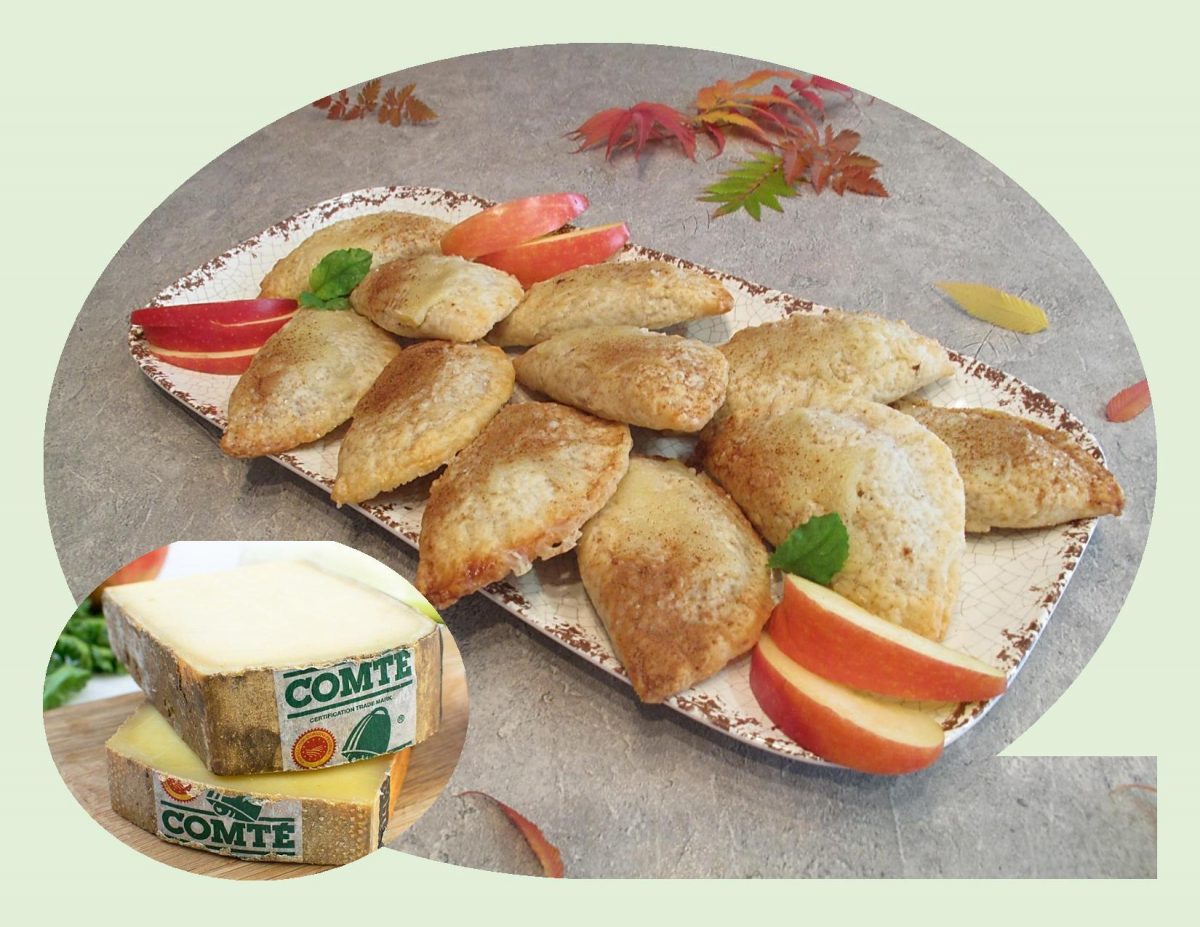
Cheese, generally speaking, is not a tough sell. Even so, it is hard sometimes to convince someone to stray from the usual cheesy standbys and try something new. Comte is a creamy, nutty tasting French cheese that absolutely deserves to be checked out.
A fairly firm cheese that can be sliced, cubed or grated. Besides being versatile for uses in both sweet and savory cooking, Comte has a good shelf life. If you buy a wedge and it doesn’t get entirely used up, it can sit in the fridge for a week or three and it will be fine.
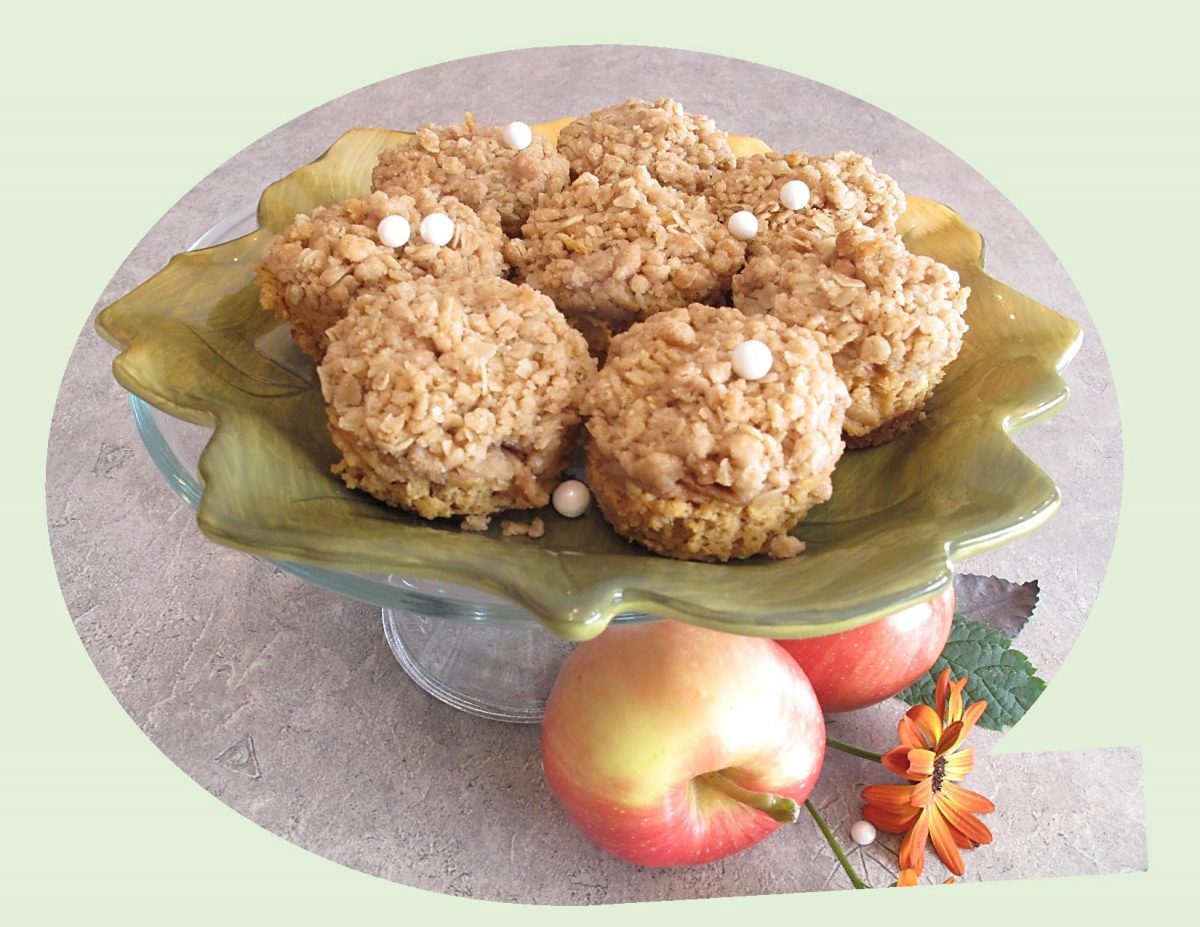
Cheese and dessert pairings are almost better than cheese and wine pairings. If you have the right cheese and dessert, the contrasting flavors complement each other so well you’ll never eat one without the other again. Your probably quite familiar with apple pie and cheddar cheese. The nutty, earthy flavor of the Comte cheese in these little pie bites definitely kicks that ‘sweet-savory’ appeal up a notch.
Print Recipe
Comte Apple Pie Bites
Votes: 1
Rating: 5
You:
Rate this recipe!
|
|
Votes: 1
Rating: 5
You:
Rate this recipe!
|
Instructions
Pastry
In a small bowl, whisk together flour, sugar & salt. Cube butter & cut into the flour mixture with a pastry blender until butter is about pea size & mixture resembles coarse crumbs.
Add cold water, 1 Tbsp at a time, mixing with a fork ONLY until dough starts to pull together. Turn the dough out on a lightly floured surface & shape into a disk. Wrap in plastic & chill for an hour.
Filling
Place the chopped apples, cinnamon, sugar & lemon juice into a skillet over medium high heat. Cook, stirring often, until all the liquid has completely evaporated & the apples have softened, about 7 minutes. Remove from heat & place in a small bowl; add flour. Stir to combine. Cool completely before using. If apples are too wet, drain away any excess liquid.
Assembly
Prepare egg wash. Remove pastry from fridge & roll out to 1/8-inch thickness. Using a 4-inch cookie cutter, cut into 18 rounds.
On each round place a heaping teaspoon of apple filling & sprinkle with a bit of Comte cheese. Fold in half & seal with a fork or alternately use a perogy cutter to cut , fold & seal.
Place the mini turnovers on a parchment lined baking sheet & keep in the fridge or freezer while you continue to make the rest of the pastries.
Baking
-
Brush egg was all over the pastry crusts. Sprinkle with a tiny bit of coarse sugar. Bake for about 14 minutes or until crust is golden brown.
Remove from oven, sprinkle with remaining cheese & place pastries on a wire rack to cool.
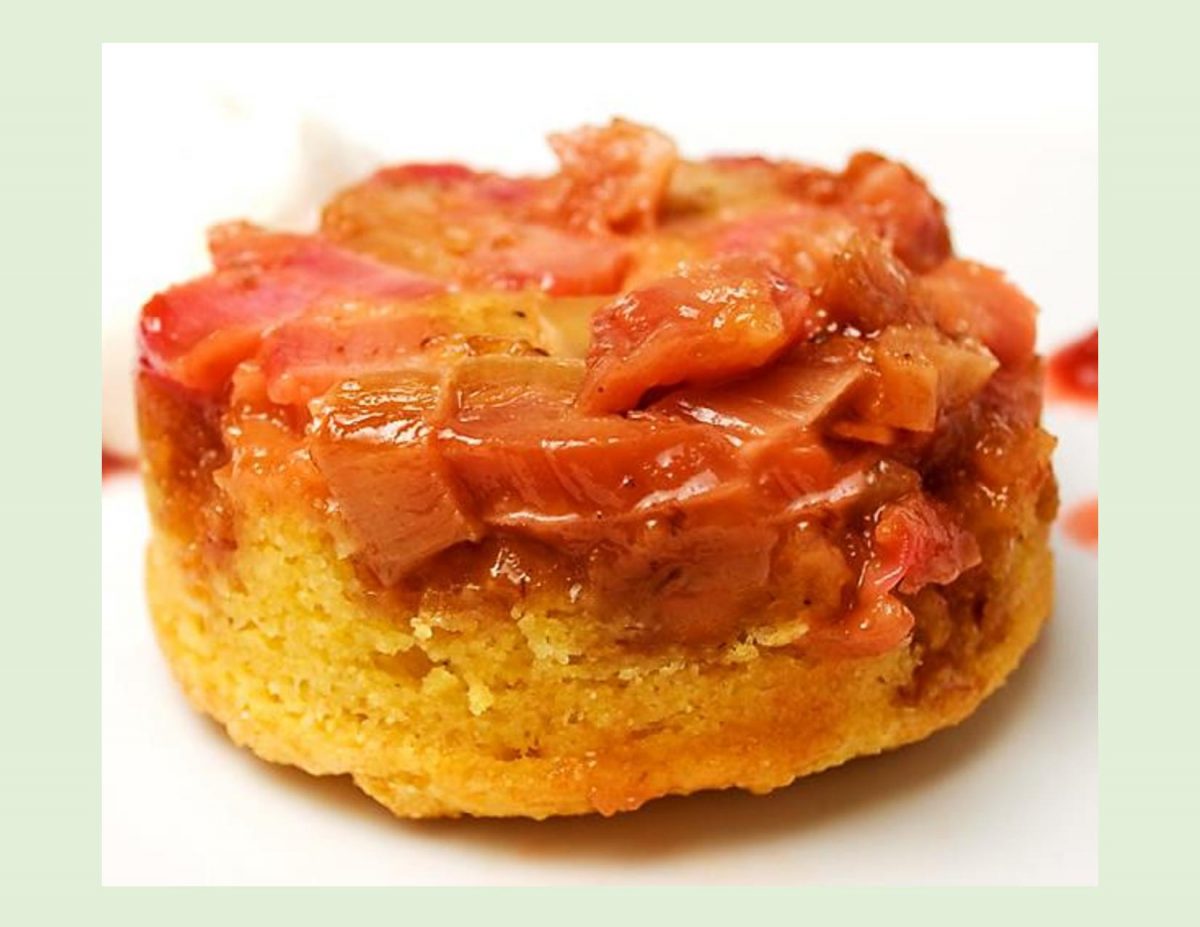
Switching up the way we cook rhubarb makes us fall in love with it all over again. Quite often rhubarb is stewed to use in various recipes. A good alternative is to roast it in the oven with a little orange juice & brown sugar. The roasting helps the rhubarb to keep its beautiful color, intensifies the flavor and it will retain its shape rather than turning to mush. Once you have roasted the rhubarb use as you would in any recipe using stewed rhubarb.
Cornbread is one of those culinary creations that pairs well with almost anything. Some dishes that include cornbread are well known and fairly common pairings, while others are still relatively new.
This particular recipe was adapted from the 1932 edition of The Guide to Good Cooking, published by Five Roses Flour. In the book, the basic recipe is for cornmeal muffins with a slight adaptation for fruit-topped Johnny Cake.
If these scones appeal to you, nothing says you can’t swap out the rhubarb for other fruits such as strawberries, raspberries, peaches or apples. Yum!
Print Recipe
Roasted Rhubarb Cornbread Scones
Votes: 1
Rating: 5
You:
Rate this recipe!
|
|
Votes: 1
Rating: 5
You:
Rate this recipe!
|
Instructions
Roasted Rhubarb
Preheat oven to 350 F. Line a baking sheet with parchment paper. Wash & dice rhubarb; spread over parchment paper. Drizzle with orange juice & sprinkle with sugar. The rhubarb will lose about half the volume during roasting. You will end up with about 4 cups. Roast about 45 minutes to an hour. Remove from oven to cool until needed. Refrigerate any leftover rhubarb.
Cornbread Scones
Coat 8 ramekins with baking spray & evenly distribute roasted rhubarb between them. Place on an edged baking sheet & set aside.
In a food processor, pulse oatmeal for a few seconds then add flour, cornmeal, salt, baking powder, baking soda, sugar, cardamom & anise powder. Pulse for a few more seconds to evenly mix. Add cold butter & pulse just slightly to cut in; do not over mix. Place in a bowl, add egg, orange zest, buttermilk & vanilla; combine ONLY until just mixed.
Place equal amounts of scone batter into each ramekin, filling no more than 3/4 full. Using an offset spatula, level the batter in each ramekin.
Bake for about 25 minutes or until batter has risen & tests baked. Remove scones from oven; allow to sit for 5 minutes, then invert each onto a serving tray.
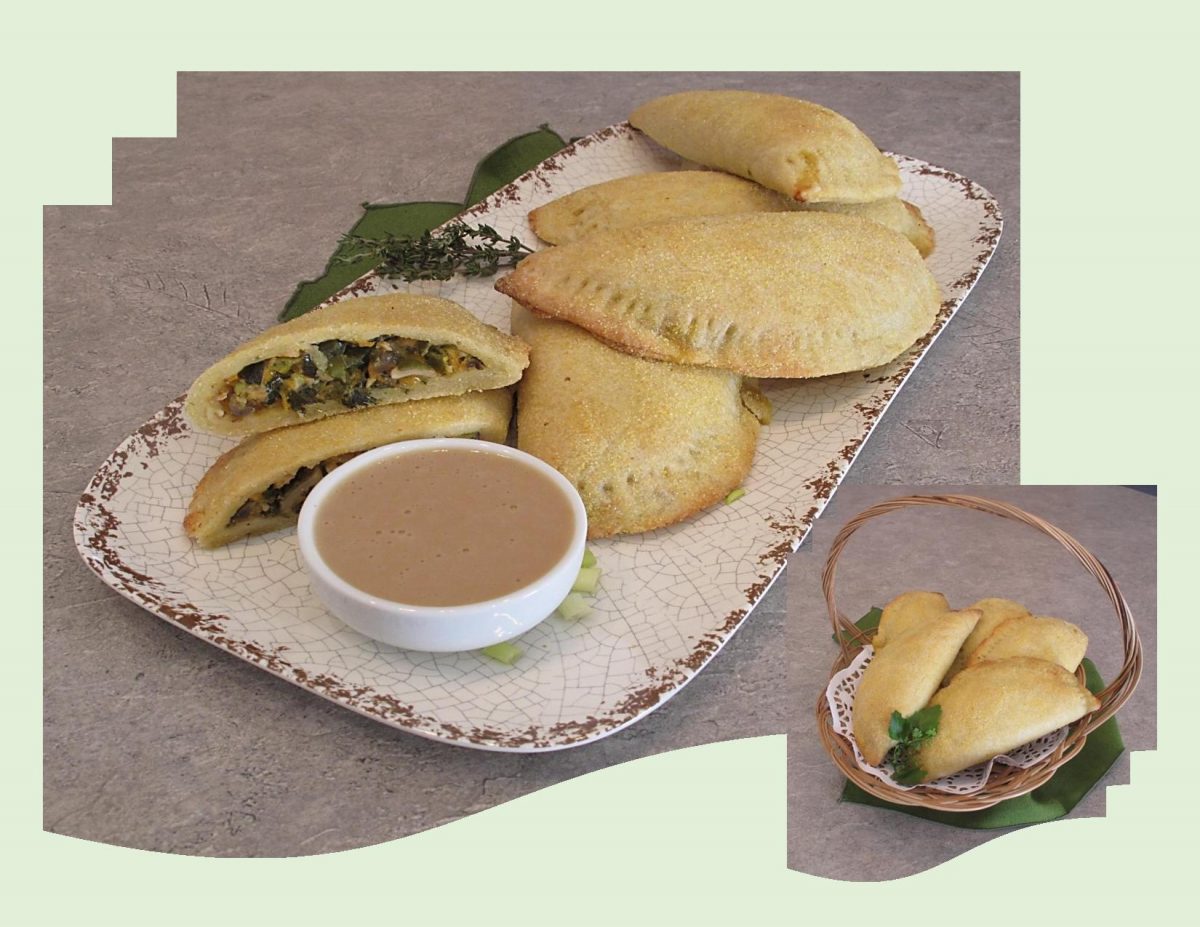
No matter what the stuffing or style is, love for the empanada is not a difficult one to understand. They are cheap, easy to eat, transportable, and versatile.
Empanadas look as good as they taste; perfect food for a picnic. Eating outdoors, spaced apart is probably one of the safest ways to gather during the ongoing pandemic crisis. The great thing about picnicking is that you can do it practically anywhere you can throw a blanket down. If you can’t make it to a park or field, your yard, porch or any flat surface with a little grass (or sand), some sun (& shade) will do.
Empanadas can be eaten for breakfast, lunch and dinner. They can be served as appetizers or snacks (hot or cold), but they can easily make a full and satisfying main course.
The very basics for an empanada are a combination of three things; dough, filling and a cooking method. The dough can be made from wheat flour, cornmeal, mashed plantains, potatoes, yuca, sweet potatoes etc. and the fillings can consist of meat, fish or vegetables. The cooking method is usually to be baked or fried although some can be cooked on a griddle or grill.
According to food historians, empanadas with seafood filling first appeared in a 1520 cookbook, published during the Moorish invasions.
I was real interested to see what I could do to make some salmon empanadas taste special. We found they were good as a hot meal served with the remaining ‘sauce’ or eaten COLD for a picnic lunch.
Print Recipe
Salmon Picnic Empanadas
Votes: 1
Rating: 5
You:
Rate this recipe!
|
|
Votes: 1
Rating: 5
You:
Rate this recipe!
|
Instructions
Cornmeal Pastry
In a small bowl, combine sour cream & ice water; set aside. In a large bowl, whisk together flour, 1/2 cup cornmeal, sugar & salt. Using a pastry blender or finger tips, cut in butter until mixture resembles both coarse crumbs & small peas. Sprinkle the cold sour cream mixture over dough, tossing with a fork to evenly distribute it. Do NOT overwork dough.
Cover bowl with plastic wrap & refrigerate for at least an hour.
Soy Sauce
In a skillet, melt butter & sprinkle with flour. Allow to cook for a few minutes. In a bowl, whisk together broth, milk & soy sauce. Slowly add to flour/butter mixture, stirring constantly until sauce thickens. Remove from skillet & set aside.
Filling
In the skillet, sauté salmon filet in 1 Tbsp oil until JUST cooked. Remove to a dish. With a fork, 'shred' salmon; set aside.
In the skillet, sauté vegetables in remaining Tbsp of oil for a couple of minutes. Add seasonings, shredded salmon, 1/3 cup prepared soy sauce & grated cheddar. Toss to combine; set aside to cool.
Assembly & Baking
Divide chilled pastry into 10 balls. Roll each one in cornmeal. Place a ball between 2 sheets of plastic wrap & roll into a 6-inch circle.
Divide filling into 10 portions. Place a portion on one side of the pastry circle, leaving about a 1/2-inch border (on filled side). With your fingertips, moisten edge of pastry with a bit of milk or water. Flip opposite side over filling & press edges together to enclose it well. Use a fork to make the classic look.
-
Repeat with remaining pastry & filling. Lay empanadas on a baking sheet lined with parchment paper. Bake for about 20 minutes or until pastry is baked & slightly browned.

Strawberries have been around for more than two thousand years. There are records of strawberries eaten as food as early as ancient Roman times as they probably grew wild in Europe.
Shortcake on the other hand, was a European invention. The ‘short’ in shortcake does not refer to stature or scope. Rather it derived from a 15th century British usage of ‘short’, similar to crumbly.
The true shortcake is neither bread, nor cake, nor pastry, though bearing what might be called a ‘differing likeness’ to each. It’s greatness lies in the contrasts of textures and flavors of simple cake, fruit and cream … hard & soft, moist & dry, sweet & tart, acid & cake. Shortcake proves the ideal base, as it is firm enough to stand up to the juicy berries and damp cream but absorbing only some of them without losing its identity or becoming a mushy mess.
The first strawberry shortcakes were made of heavy pastry that were somewhat similar to pie crust but a little thicker. The crust was baked, then split apart and filled with strawberries that had been mashed and sweetened and the whole thing covered with a sugared frosting. At some point the icing was replaced with whipped cream. Today, the shortcake ‘biscuits’ are sometimes replaced with sponge cake, angel food or even puff pastry.
July seems like the perfect time to indulge in some fresh strawberries!
Print Recipe
Strawberry Shortcake
Votes: 1
Rating: 5
You:
Rate this recipe!
|
|
Votes: 1
Rating: 5
You:
Rate this recipe!
|
Instructions
Shortcakes
Preheat oven to 375 F. Line a baking sheet with parchment.
In a bowl, whisk together flour, sugar, baking powder & salt. Add butter & work it into flour mixture with your fingers until it resembles coarse meal.
In a small bowl, whisk together the lemon zest, egg & 1/2 cup buttermilk. Add to the flour mixture & lightly mix until dough just comes together. Do not OVERMIX.
Turn the dough out onto a lightly floured work surface. With lightly floured hands, gently pat the dough into a 7-inch round about 1/2-inch thick. Cut into 8 equal wedges.
Space the shortcakes evenly on the prepared baking sheet. Brush tops with remaining 1 Tbsp buttermilk & sprinkle with the almonds. Bake until golden brown, 12-15 minutes.
Filling
In a large bowl, combine the strawberries, sugar & orange zest & juice. Allow to stand until sugar is dissolved & the mixture is syrupy, about 15 minutes.
Serving
Split the shortcakes. Place the bottom halves of the shortcakes on serving plates & top evenly with the strawberry mixture & yogurt. Cover with shortcake tops. Serve.
Recipe Notes
- Instead of cutting your shortcakes into wedges, you could bake them in tart molds for a fancier look.
CELEBRATING VICTORIA DAY!
For many Canadians, Victoria Day marks the unofficial beginning of summer. It is Canada’s oldest non-religious holiday and although we still hang on to the British Queen’s name (for old times sake), this truly Canadian holiday has everything to do with the end of the cold weather and short days and a lot to do with some great food.
This holiday is called ‘May Two-Four’ in some parts of Canada, a name that refers both to the date around which the holiday falls (May 24th) and Canadian slang for a case of twenty-four beers (a ‘two-four’), a drink popular during the long weekend.
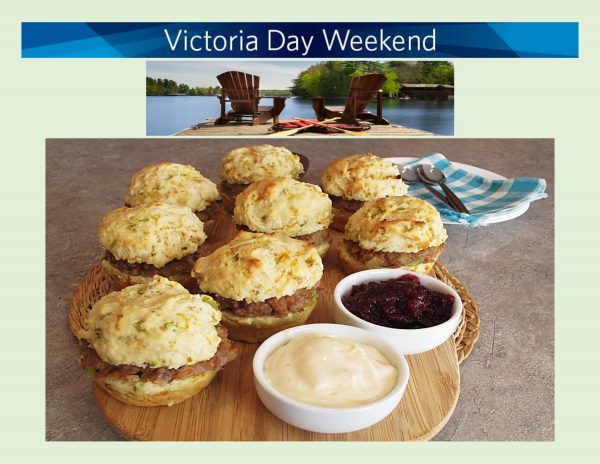
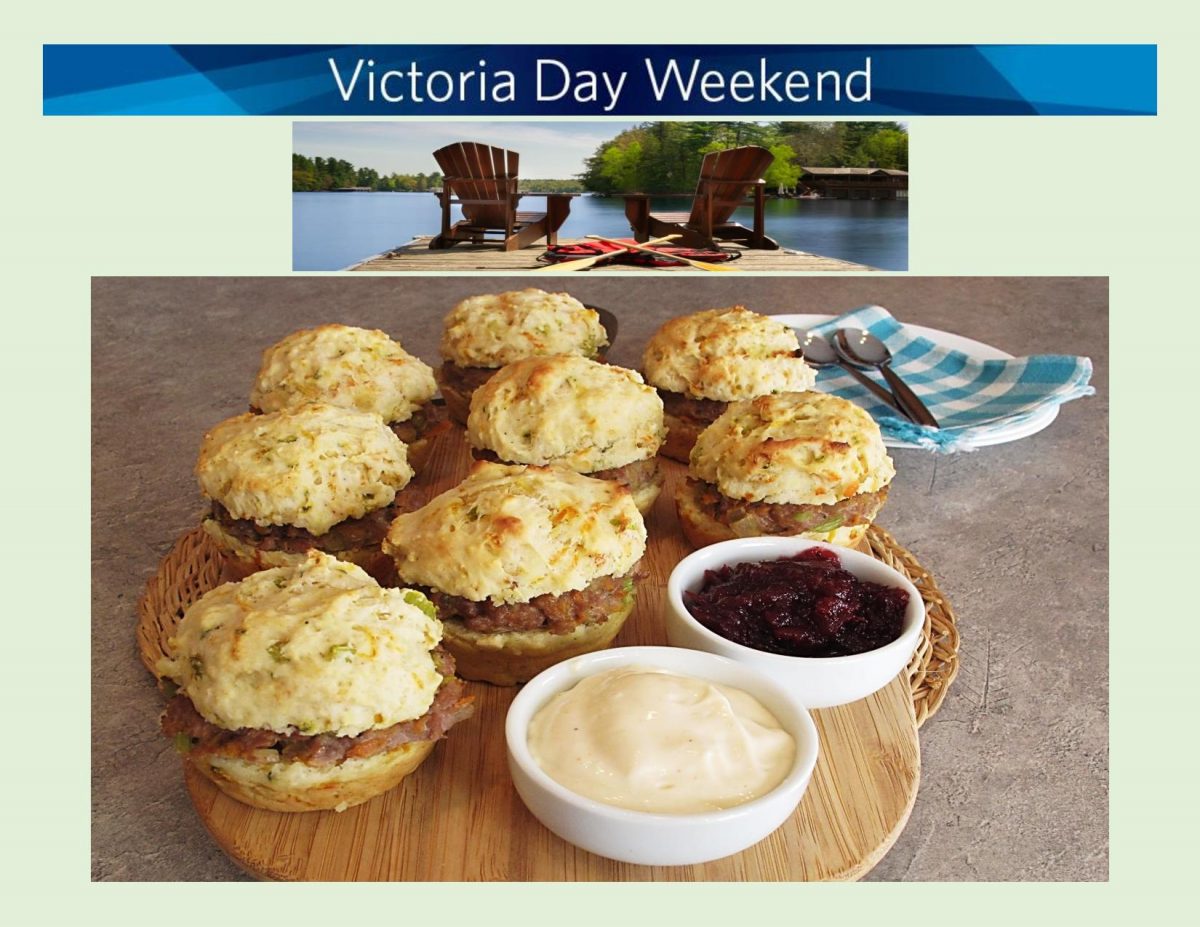
I’m sure, for many this weekend, barbecuing will be up front and center with burgers, steaks and ribs taking top billing. Brion & I decided to wait a bit longer to start barbecuing and have some turkey sliders today instead.
In keeping with some food history ….
The name ‘slider’ originated in the 1940’s when sailors in the US Navy would refer to mini-burgers as sliders because of their extreme greasiness. In just one or two bites, the burger would just slide right down. Fortunately around 2007, sliders evolved from miniature ‘grease bombs’ to elegant culinary creations that now appeal to people of all backgrounds and tastes.
There’s something inherently appealing about a small burger. For the diet-conscious, the idea of a small gourmet burger is more feasible. When dining out, ordering sliders instead of an average sized hamburger also allows you to try several different varieties as they are often served in pairs.
The modern day slider has been reinvented from the traditional beef patty to being made from chicken, pork and veal as well as various seafood options. Having our turkey sliders in stuffing biscuits definitely added that gourmet touch.
Print Recipe
Turkey Sliders in Stuffing Biscuits
Votes: 2
Rating: 5
You:
Rate this recipe!
|
|
Votes: 2
Rating: 5
You:
Rate this recipe!
|
Instructions
Stuffing
In a large skillet, heat oil on medium. Add all stuffing ingredients & cook about 15 minutes or until tender, stirring occasionally. Transfer to a bowl & cool completely.
Biscuits
Preheat oven to 450 F. Spray two 12-cup muffin pans with baking spray.
In a bowl, whisk together flour, sugar, baking powder, baking soda & salt until blended. Add butter; with finger tips, combine until mixture resembles coarse crumbs. Stir in buttermilk & one third of cooked, cooled, 'stuffing mixture' until JUST blended.
Divide among the 24 muffin cups (about 3 Tbsp each). Bake 15 minutes or until golden brown; transfer biscuits from pans to wire cooling rack.
Turkey Sliders
Line a baking sheet with foil paper. In a bowl, combine turkey, salt & remaining cooked 'stuffing mixture'. Form into 24 patties (2-inch width); place on foil-lined baking sheet & bake for 15 minutes or until cooked through.
Assembly
Slice warm biscuits in half. Add turkey patties & dollops of mayo & cranberry preserves.
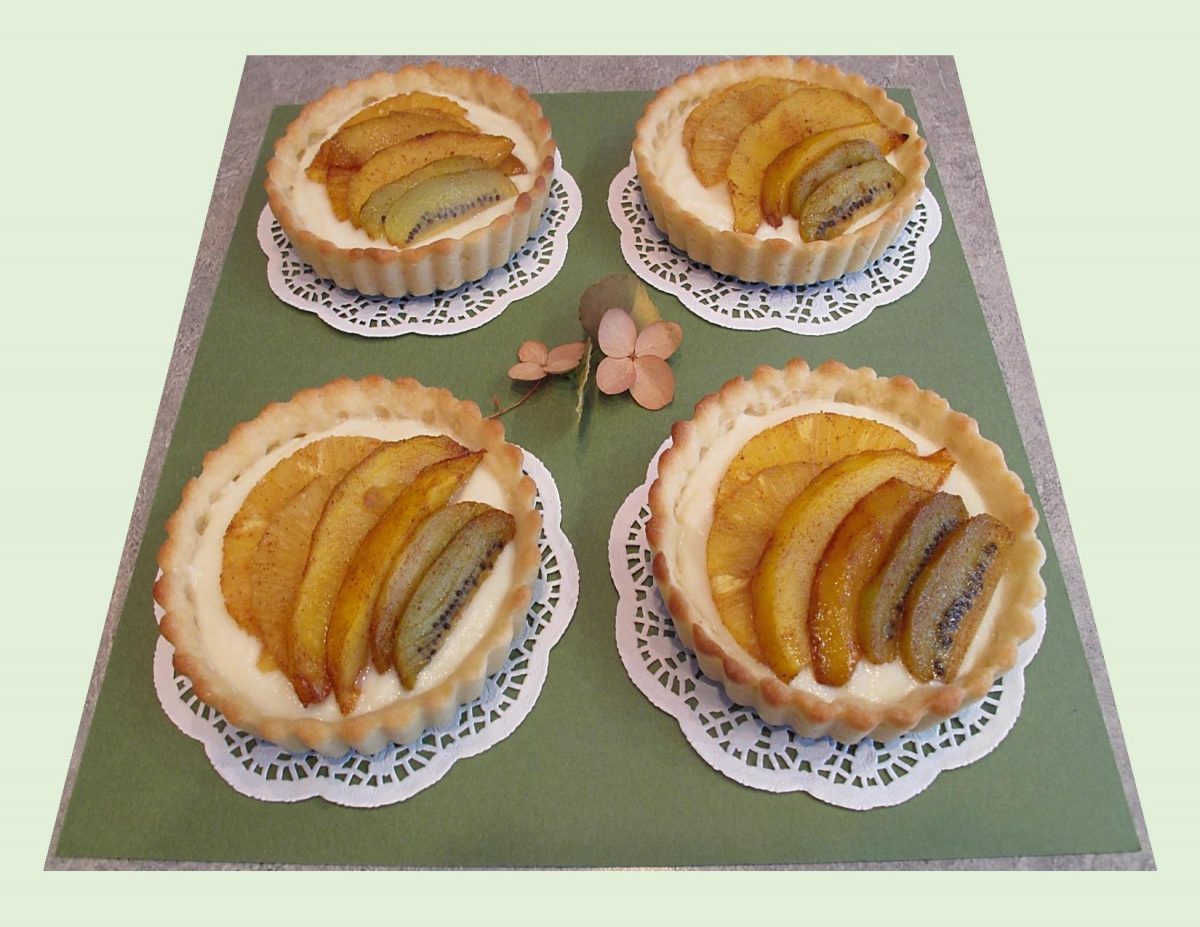
If you can’t have a tropical vacation at this time, why not enjoy some of the tropics in the form of dessert!
You may never have thought fruits were destined for you’re roasting pan. Although it does demand a bit of time and work, the return is worth it. Try it once and you will do it over and over again.
Fruit is a highly versatile item and its uses go far beyond a mere snack. During the summer months, grilled fruit is often a tasty end to a barbeque. Grilling caramelizes the fruits natural sugars and brings out the sweetness. During winter or colder months, continue the same process indoors by roasting and broiling fruit in the oven.
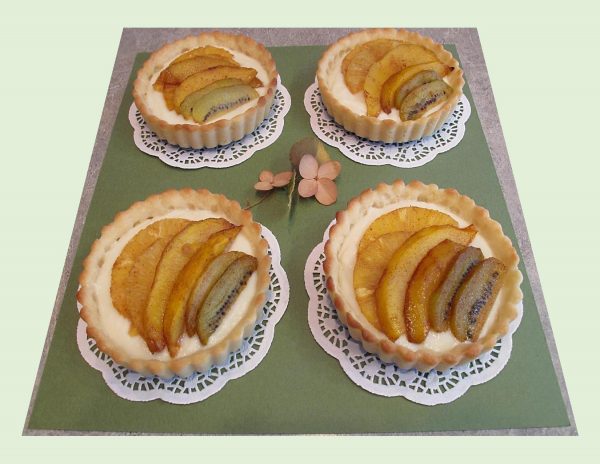
For the tarts on this blog, I roasted the fruit in the oven with a bit of extra butter and brown sugar as well as some spices to enhance the flavor. Another idea would be to arrange fruit slices on the filled tarts and sprinkle them with a bit of sugar. Then place tarts under the broiler until sugar bubbles and browns …. your choice!
Print Recipe
Roasted Tropical Fruit Tarts
Votes: 1
Rating: 5
You:
Rate this recipe!
|
|
Votes: 1
Rating: 5
You:
Rate this recipe!
|
Instructions
Shortbread Pastry
-
In a bowl combine butter & sugar, beat until light & fluffy. In another bowl whisk together flour & baking powder & add to butter/sugar mixture. Blend together.
Divide pastry between 6 individual tart pans. Using your fingertips, evenly press the dough into pans. Place on a baking sheet & blind bake for 10 minutes or until golden. Remove from oven & prepare custard & fruit.
Vanilla Cream Custard
In a small saucepan, bring milk to a simmer. In a bowl, whisk together sugar, cornstarch & salt. Add egg; whisk until blended.
Gradually whisk hot milk mixture into egg mixture. Return to same saucepan; whisk over medium heat until sauce thickens & boils, about 5 minutes. Whisk in vanilla & remove from heat to cool.
Roasted Tropical Fruit
Preheat oven to 450 F. Peel & thinly slice fruit.
In a small saucepan, melt butter & add brown sugar, salt, ginger, cinnamon, cardamom & vanilla; mix well.
Line a baking sheet with foil paper. Place sliced fruit on it & pour butter/sugar mixture over it. Gently turn fruit over to make sure all is evenly coated.
Bake for about 20-25 minutes, flipping over about half way through. The fruit is done when it turns a rich golden & begins to brown BEFORE it starts to blacken.
Assembly
Place pastry shells on a serving platter. Divide vanilla custard between tart shells. Top with roasted tropical fruit & serve. Any extra fruit can be enjoyed just as a dish of fruit or with yogurt.
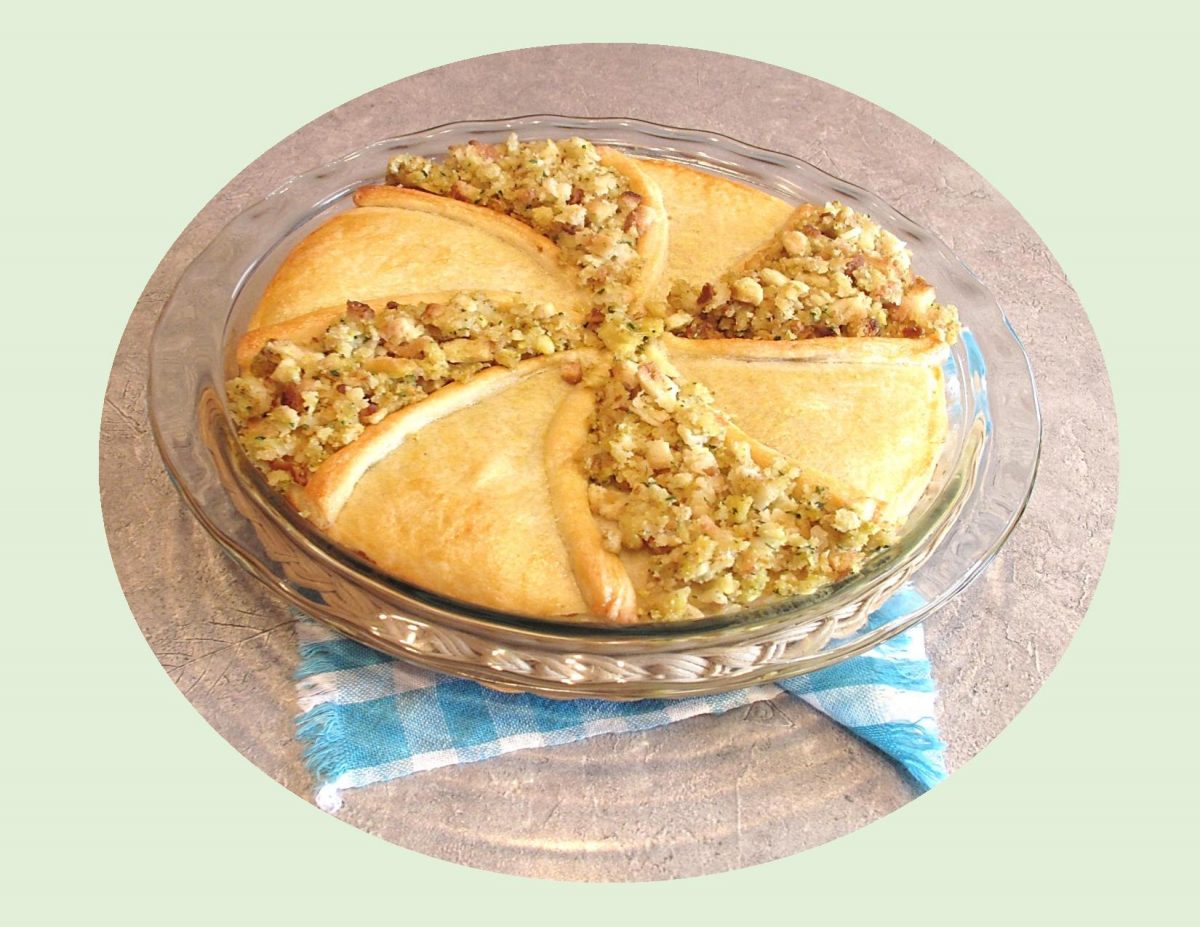
Meals like pot pies are classics for a good reason which makes them the foundation for endless inspiration. When you chose to ‘reinvent’ classic dishes, you must keep some of the elements that make the dish familiar and at the same time, you want to make the dish better, not just new. Taking a new approach to an ‘old school’ dish gives a chance to appreciate what was great about the original but making it new again.
Pot pie is a comfort food favorite which I have posted on this blog in many renditions over the years. Along with chicken I have featured seafood, beef as well as some pork & oyster pot pies.
Chicken is arguably one of the most favored proteins to put on the dinner table. Its valued for its nutrition, accessibility, low cost and most importantly its extreme versatility. Poultry serves as a blank slate and flavor absorbing foundation for every type of cuisine imaginable.
Print Recipe
Roast Chicken & Stuffing Pie
Votes: 1
Rating: 5
You:
Rate this recipe!
Ingredients
Sour Cream Cornmeal Pastry
Ingredients
Sour Cream Cornmeal Pastry
|
Votes: 1
Rating: 5
You:
Rate this recipe!
|
Instructions
Cornmeal Pastry
In a small bowl, combine sour cream & ice water; set aside. In a large bowl, whisk together flour, cornmeal, sugar & salt. Using a pastry blender or finger tips, cut in butter until mixture resembles both coarse crumbs & small peas. Sprinkle the cold sour cream mixture over dough, 1 Tbsp at a time, tossing with a fork to evenly distribute it.
After you have added all the sour cream mixture, dough should be moist enough to stick together when pressed; if not add additional cold water, 1 tsp at a time. DO NOT overwork dough. Press dough into 2 disks & wrap in plastic wrap. Refrigerate for at least 2 hours.
Chicken Filling
Dice previously roast or pan fried chicken; set aside. In a saucepan, melt oil & butter & add leek, mushrooms & garlic. Cook until fragrant & the leek has softened. Toss in the bacon & continue to cook for about 2-3 minutes; stirring to combine. Add diced roast chicken.
Sprinkle with the flour & seasonings; stir to combine. Add the stock & milk. Cook to reduce the sauce as well as it thickening it. Remove from heat & transfer to a bowl to cool then refrigerate for 20 minutes. Prepare Stove Top stuffing as directed on package.
Assembly
Preheat oven to 400 F. Prepare the egg wash in a small dish.
Remove pastry disks & filling from refrigerator. Allow pastry to sit for a few minutes to become workable. Roll out first disk to about 10 1/2-inches in diameter. Line a 9 1/2-inch pie dish with it. Fill case with chicken filling. Fold top inch of pastry over filling in a cupping fashion. Using about 2/3 of remaining pastry, roll it into a 9-inch diameter & place on top of filled pie.
Divide remaining dough into 8 strips. Place over covered pie resembling spokes of a wheel. On alternate wedges place chicken stuffing. Use egg wash on remaining four sections & on top of the narrow pastry strips.
Bake for 40 minutes or until golden & cooked through. If the top is browning too quickly, loosely cover with a layer of foil until done. Remove from oven & allow to cool somewhat before serving.

As if the flavor alone didn’t make these tartlets special, I decided to make them in some unique, little Scandinavian cookie molds. I’m not sure where and when I actually acquired these vintage tins, but since I have them, it seems a shame not to use them.
The molds are traditionally used to make a Scandinavian cookie known as ‘Mandelmusslor’ in Swedish or ‘Sandbakkels‘ in Norwegian. Some are simple fluted round molds while others are more decorative shapes. The trick is to make sure the dough is pressed down thinly and evenly into the individual tins. This will ensure even baking.
These cookies are traditionally served as a shell tipped upside down on a pretty plate. Alternately they can be filled with fresh fruit or a baked filling.
Print Recipe
Fig, Pear & Gorgonzola Tartlets
Votes: 1
Rating: 5
You:
Rate this recipe!
|
|
Votes: 1
Rating: 5
You:
Rate this recipe!
|
Instructions
Shortbread Pastry
In a bowl, whisk together flour, sugar & salt. Add cold butter, vanilla & lemon zest. Cut into flour mixture with a pastry blender until dough starts to come together & form clumps.
Preheat oven to 350 F. Divide pastry between 12 mini tartlet pans. Using your fingertips, evenly press the dough into pans. Place on a baking sheet & bake for 10 minutes. Remove from oven & place on a wire rack until you have your filling ingredients prepared.
Assembly
Quarter the pear & remove core. Halve each quarter & then thinly slice each one. Finely dice or crumble Gorgonzola cheese.
Place about a teaspoon of fig jam in the bottom of each tart shell. Top with pear slices, laying them in a fan shape, then divide Gorgonzola cheese between the 12 tartlets.
Place in the oven & bake for 20-25 minutes. Remove from oven & place on a wire rack until cool enough to remove tartlet pans. Serve warm or cold.
-
Recipe Notes
- Put a small ball of dough into the center of the cookie mold then using your thumb, press the dough down, working it up to the upper rim of the mold.
- It should be fairly consistent on the sides & bottom.


