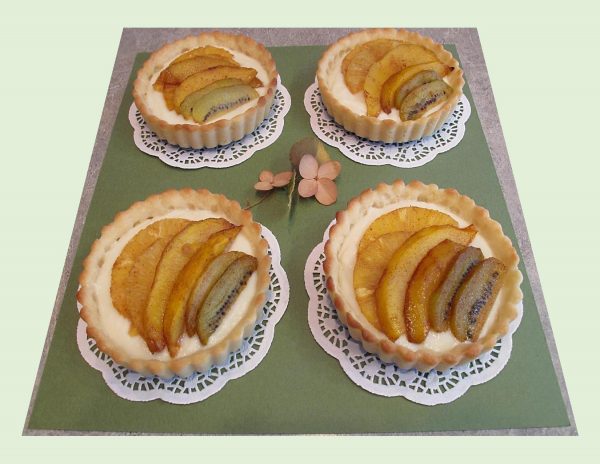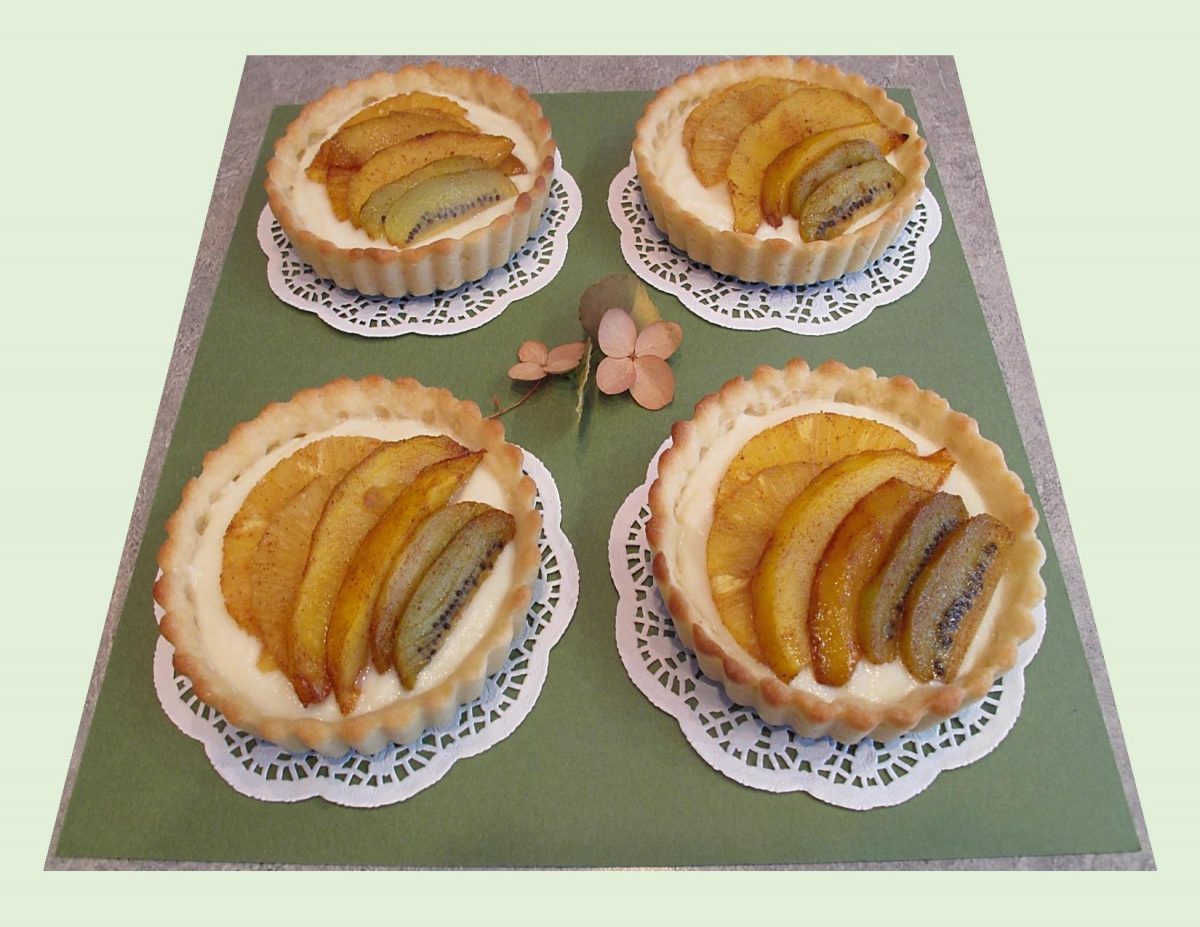
If you can’t have a tropical vacation at this time, why not enjoy some of the tropics in the form of dessert!
You may never have thought fruits were destined for you’re roasting pan. Although it does demand a bit of time and work, the return is worth it. Try it once and you will do it over and over again.
Fruit is a highly versatile item and its uses go far beyond a mere snack. During the summer months, grilled fruit is often a tasty end to a barbeque. Grilling caramelizes the fruits natural sugars and brings out the sweetness. During winter or colder months, continue the same process indoors by roasting and broiling fruit in the oven.
For the tarts on this blog, I roasted the fruit in the oven with a bit of extra butter and brown sugar as well as some spices to enhance the flavor. Another idea would be to arrange fruit slices on the filled tarts and sprinkle them with a bit of sugar. Then place tarts under the broiler until sugar bubbles and browns …. your choice!
Print Recipe
Roasted Tropical Fruit Tarts
Votes: 1
Rating: 5
You:
Rate this recipe!
|
|
Votes: 1
Rating: 5
You:
Rate this recipe!
|
Instructions
Shortbread Pastry
-
In a bowl combine butter & sugar, beat until light & fluffy. In another bowl whisk together flour & baking powder & add to butter/sugar mixture. Blend together.
Divide pastry between 6 individual tart pans. Using your fingertips, evenly press the dough into pans. Place on a baking sheet & blind bake for 10 minutes or until golden. Remove from oven & prepare custard & fruit.
Vanilla Cream Custard
In a small saucepan, bring milk to a simmer. In a bowl, whisk together sugar, cornstarch & salt. Add egg; whisk until blended.
Gradually whisk hot milk mixture into egg mixture. Return to same saucepan; whisk over medium heat until sauce thickens & boils, about 5 minutes. Whisk in vanilla & remove from heat to cool.
Roasted Tropical Fruit
Preheat oven to 450 F. Peel & thinly slice fruit.
In a small saucepan, melt butter & add brown sugar, salt, ginger, cinnamon, cardamom & vanilla; mix well.
Line a baking sheet with foil paper. Place sliced fruit on it & pour butter/sugar mixture over it. Gently turn fruit over to make sure all is evenly coated.
Bake for about 20-25 minutes, flipping over about half way through. The fruit is done when it turns a rich golden & begins to brown BEFORE it starts to blacken.
Assembly
Place pastry shells on a serving platter. Divide vanilla custard between tart shells. Top with roasted tropical fruit & serve. Any extra fruit can be enjoyed just as a dish of fruit or with yogurt.

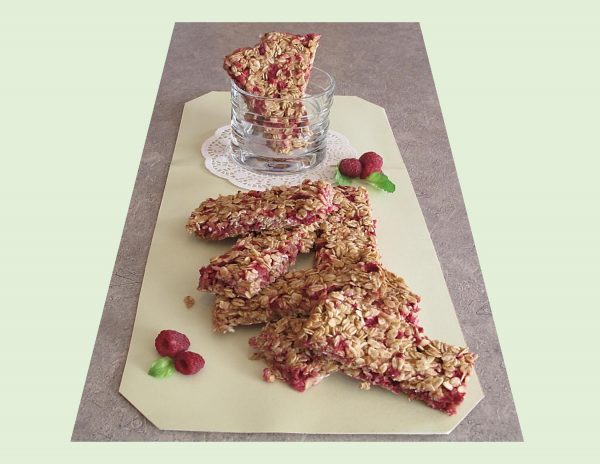
When I think of granola bars, the thin slabs of oats and honey of the 1970’s come to mind. What began as a ‘hippie’ craze gradually morphed into decadence with bars including chocolate chips, macadamia nuts, corn syrup and marshmallows. Great tasting but hardly healthy would you say!
The basic recipe often starts with old-fashioned rolled oats and a sweetener that acts as a binder. Honey seems to be a popular choice but other options include brown rice or maple syrup.
Flaked coconut is popular but not being a coconut lover, I opt for coconut oil instead. When it comes to nuts, along with nutrition they provide crunch. If you notice this recipe does not include them, its not for any other reason except that a nut allergy plaques me. Definitely add them if you can.
Customization comes to the forefront in your choice of dried or frozen fruit. Some choices might be dried dates, apricots, cranberries, pineapple or mango.
These bars make a nice breakfast treat or snack option, not to mention the word ‘healthy’.
Print Recipe
Chewy Raspberry Apple Granola Bars
Votes: 1
Rating: 5
You:
Rate this recipe!
|
|
Votes: 1
Rating: 5
You:
Rate this recipe!
|
Instructions
Preheat oven to 350 F. Lightly coat an 8-inch square baking pan with a nonstick cooking spray.
In a large bowl, stir together the oil & applesauce until smooth. Mix in milk, honey & cinnamon until thoroughly combined. Stir in the oats until evenly coated with the applesauce mixture. Gently fold in the raspberries.
Press the oat mixture into the prepared pan & bake for 16-19 minutes. Cool completely to room temperature in the pan before slicing into 10 bars.
In a country where sugar has historically represented both the agricultural and industrial goals, desserts are found everywhere. Generally they are very simple, made mainly with fruit and sugar.
Cuban cuisine is a fusion of Spanish, African and Caribbean cuisines. It differs from other Latin American cuisines and has almost nothing in common with Mexican cuisine. Cuban recipes tend to share spices and techniques with Spanish and African cooking with some Caribbean influence in spice and flavor. A small, but noteworthy, Chinese influence can be accounted for, mainly in the Havana area.
The fact that most Cuban desserts are extremely sweet (usually fruits and sugar are in equal quantities) has inspired the custom of eating them along with salted or cream cheese to help offset the sweetness.
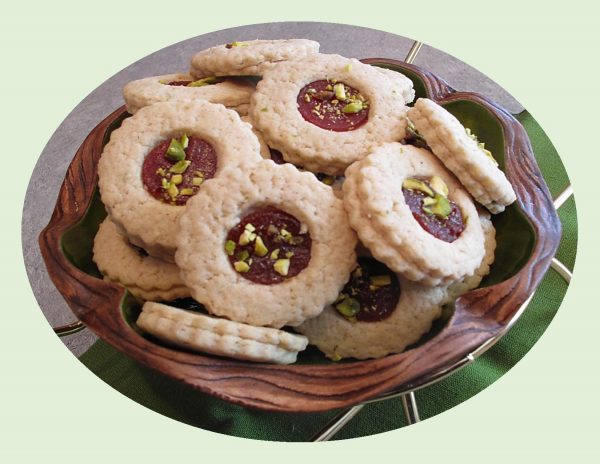
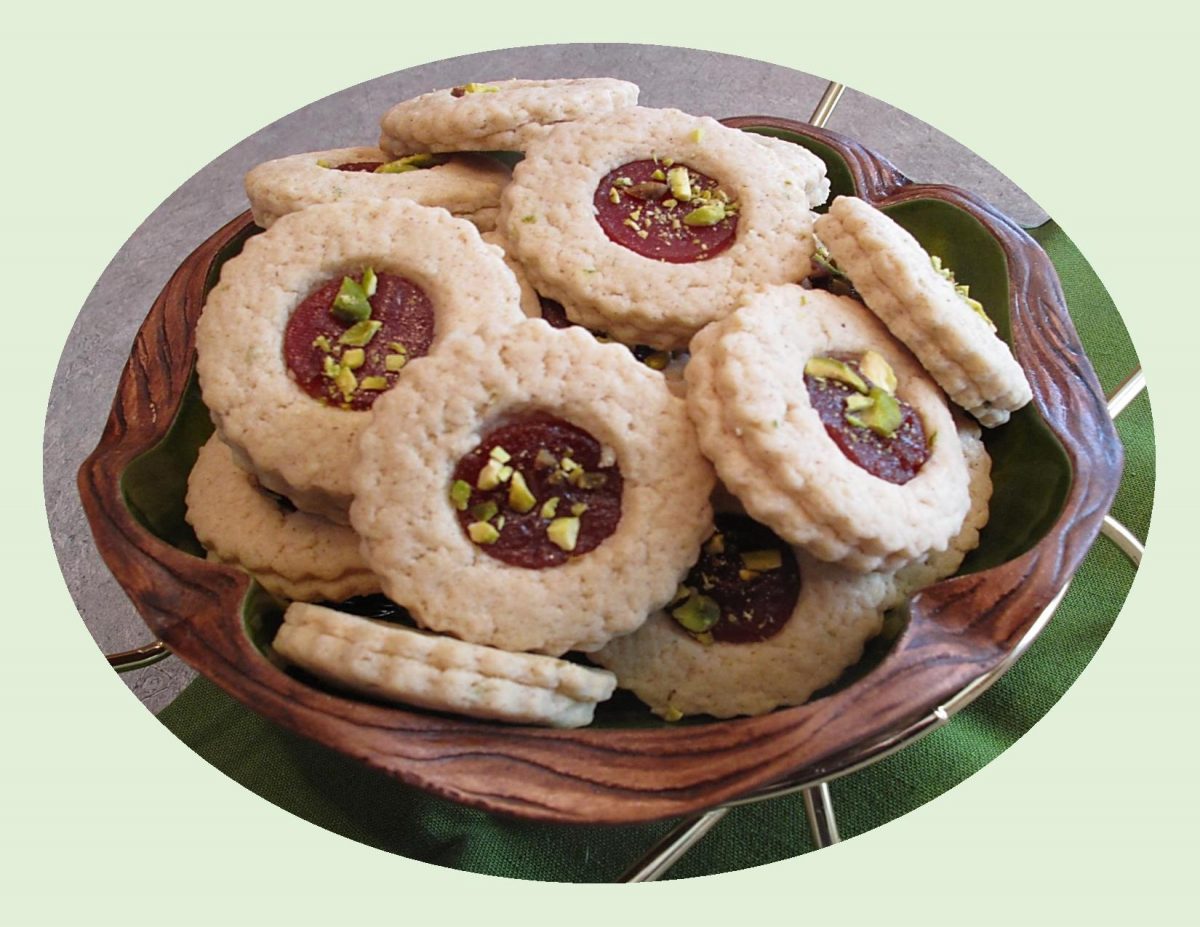
The use of the lime and rum flavor in these cookies makes their taste distinctly Cuban. Brings back memories from a past vacation we spent in Cuba.
Print Recipe
Cuban Sugar Cookies w/ Guava & Lime
Votes: 1
Rating: 5
You:
Rate this recipe!
|
|
Votes: 1
Rating: 5
You:
Rate this recipe!
|
Instructions
Preheat oven to 350 F. Line a 2 baking sheets with parchment paper.
In a medium bowl, whisk together flour, baking powder, cinnamon & salt.
In a large bowl, cream together butter & sugar with a mixer until light. Beat in lime zest & egg followed by lime juice & rum. Gradually beat in the flour mixture, scraping down the sides of the bowl as you work, until it comes together.
Divide dough into three portions, wrapping 2 in plastic wrap & place in refrigerator while you are working on the first piece.
Place the first piece on a lightly floured surface & roll out to 1/3-inch thickness. Using a lightly floured 2-inch round cookie cutter, cut out circles of the dough. Place on baking sheet. Repeat with remaining dough.
Cut pieces of guava paste into dime-sized circles or squares ( depending on what shape your guava paste comes in), making each approximately 1/4-inch thick. Lightly press one piece into the top of each cookie.
Bake for 13-16 minutes, until cookies are light gold at the edges. Cool on the baking sheet for 4-5 minutes, then transfer to a wire rack to cool. If you wish you can dust the cookies with powdered sugar.
Recipe Notes
- As an alternate idea, assemble them similar to a 'linzer' cookie. Roll half of the dough to 1/8-inch thickness; cut with a circular (more decorative) cookie cutter. Repeat with remaining dough but cut small circles in the center of these.
- On top of each plain cookie, place one with a hole in it. Press a guava 'circle' in the hole & sprinkle with a few chopped pistachios if you wish.
- I used this method for the blog picture. Same cookie just a bit fancier.
The vegetable cake idea is really not so strange if you consider that most of these dense moist cakes are either spice or chocolate. Who would guess that ‘vegetables’ would be lurking within?
When you think of how many veggies we have incorporated into our desserts, its amazing. Carrot cake is hardly novel having been around for decades but there is also beet torte, zucchini chocolate cake, sweet potato cake or the delicious chocolate sauerkraut cake just to name a few.
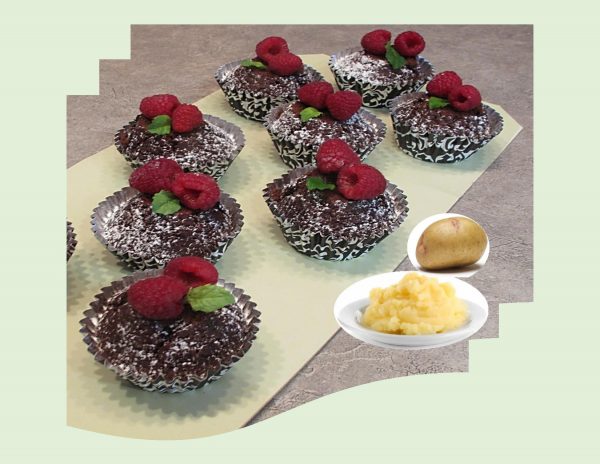
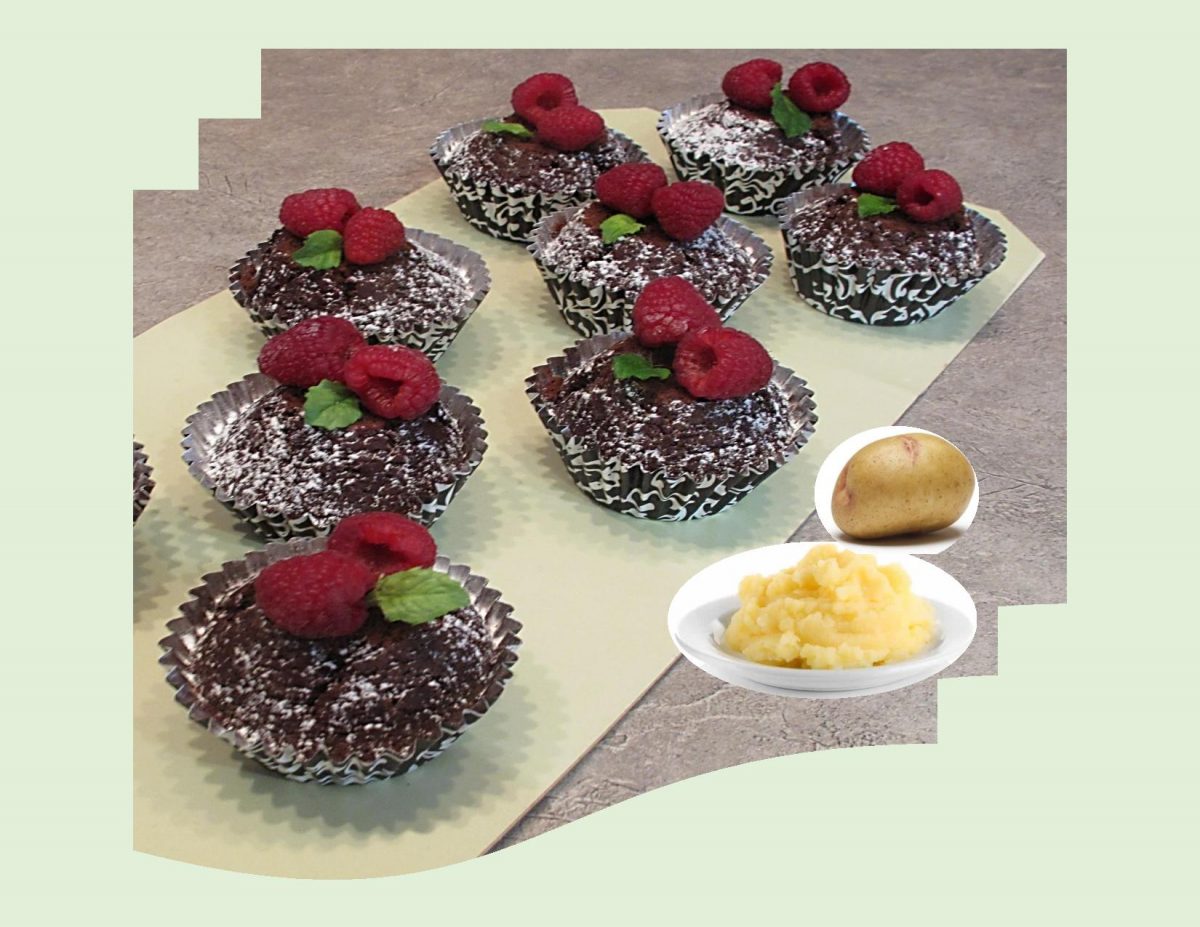
The popular chocolate potato cake recipe goes back to the early 1800’s, so its likely the oldest of them all. Like buttermilk, mashed potatoes make baked goods taste better, perhaps because both have the effect of making the cake crumb more tender.
It seems the humble potato is like a blank canvas and wears every role its put in with equal flair. This is a moist, rich cake so icing is purely optional.
Print Recipe
Vintage Chocolate Potato Cake
Votes: 1
Rating: 5
You:
Rate this recipe!
|
|
Votes: 1
Rating: 5
You:
Rate this recipe!
|
Instructions
Preheat oven to 350 F. Lightly oil a 9-inch round cake pan or a 12 cup muffin pan & line the base with parchment paper or paper cups.
In a large mixing bowl, whisk together sugar, oil & eggs then potatoes.
In another bowl, combine flour, cocoa, baking powder, baking soda, cinnamon, cardamom & salt. Alternately add dry ingredients & the buttermilk to the egg mixture, beginning & ending with the dry ingredients; stirring with a spoon or rubber spatula.
Spoon the batter into the prepared pan. Bake until the top springs back when touched lightly, 30-35 minutes.
Invert the cake onto a rack & allow to cool thoroughly. Transfer to a plate & dust with powdered sugar if you wish.
Recipe Notes
- Don't hesitate to add either some nuts or raisins for some extra flavor.
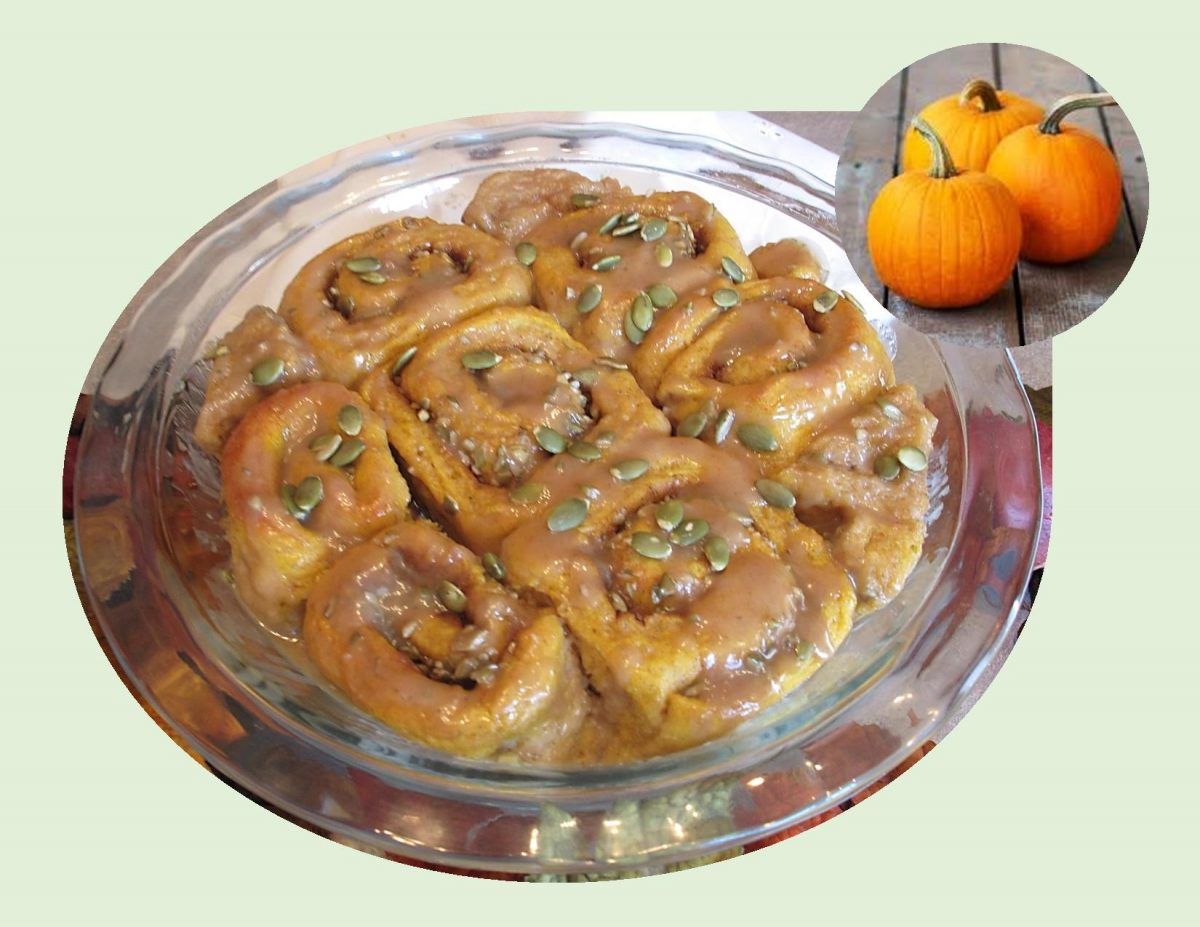
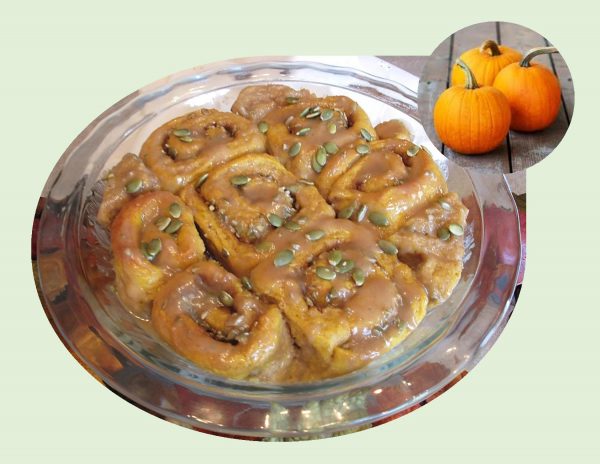
It doesn’t have to be fall to crave something pumpkin. It’s still a bit early for Halloween jack-o-lanterns but not too early for some pumpkin cinnamon rolls.
This recipe builds on the traditional cinnamon roll, but adds the magic of pumpkin and fall spices. The dough is more subtle, moist and not too sweet in taste. With the addition of pumpkin to the dough, it adds a nice vibrant orange color. The filling is the classic pumpkin pie spice mix, blended with butter and sugar. What makes the buns even more special is they are then ‘baked‘ in the spiced ‘sauce’ mixture. Last but not least, topped with some whole pumpkin seeds, adds a delicate crunchy texture.
Pumpkin, like zucchini, seem to grow in abundance so it is always nice when they can be used in either sweet or savory recipes.
Print Recipe
Pumpkin Cinnamon Buns
Votes: 1
Rating: 5
You:
Rate this recipe!
|
|
Votes: 1
Rating: 5
You:
Rate this recipe!
|
Instructions
In a small bowl, add yeast, lukewarm water & 1 tsp sugar. Allow to sit about 10 minutes until frothy.
In a large bowl, combine yeast mixture, butter, salt, cinnamon, eggs & pumpkin puree. Mix well. Add flour, one cup at a time, until well combined. Knead dough for about 8-10 minutes or until smooth & soft. Place dough in a greased bowl, cover with a tea towel & allow to rise for about 1 hour or until doubled in size.
While the buns are rising, place sauce ingredients (except pumpkin seeds), in a saucepan over medium-high heat. Cook, while whisking, until sugar has dissolved & ingredients are combined. Remove from heat & set aside to cool for a few minutes while you are preparing the buns.
In a small dish, combine filling ingredients, set aside.
LIGHTLY butter a 9 x 13-inch baking pan. Turn dough out onto a floured surface; roll out into a rectangle (about 12"x 18"), approximately 1/2-inch thickness. Spread the melted butter across the rolled out dough leaving 1/2-inch around the top edge. Sprinkle filling mixture over butter. Roll up tightly lengthwise towards the top edge. Using a sharp knife (or a string), cut dough into 12 slices. Place in prepared pan. Pour cooled sauce evenly over buns. You can reserve a bit for drizzling on top after they are baked if you wish.
Cover the buns with plastic wrap & a tea towel. Set aside in a warm place for 20 minutes.
Preheat oven to 350 F. Bake for about 20 minutes. Remove from oven; allow to rest for a few minutes then drizzle with remaining sauce & sprinkle with pumpkin seeds.
Recipe Notes
- Once the sauce is cooked & cooled, you can blend with a mixer or blender to keep it from separating if you wish.
Slow cooked meat is definitely not a new thing. Truly authentic pulled pork is actually a barbecue dish, cooked for hours over a charcoal pit until it falls apart, ready to be easily shredded or ‘pulled’ apart to serve.
I’m sure most of us have attended a classic Hawaiian Luau at one time or another in our lives. The main course of this Hawaiian feast is always the ‘kalua’ roast pork. Kalua is a traditional Hawaiian cooking method that utilizes an ‘Imu’, a type of underground steam oven.
My experience, was that it was definitely pull-apart tender but far too greasy for my liking. It has taken a lot of years for me to want to make even a North American version of this pulled pork idea. To my surprise, it didn’t turn out greasy and was pretty tasty.
The idea that it has to be roasted in an outdoor pit is really not true. It can be made easily in a standard domestic oven. Of course the seasonings, temperatures and serving methods are all open to debate.
Pork shoulder is ideal for pulling purposes, either bone-in or boneless. It has an optimum fat content that yields to create tender, ‘melty‘ meat, but its essential to cook it slowly to allow the protein to break down properly. Using a dry rub will also help create tenderness and flavor.
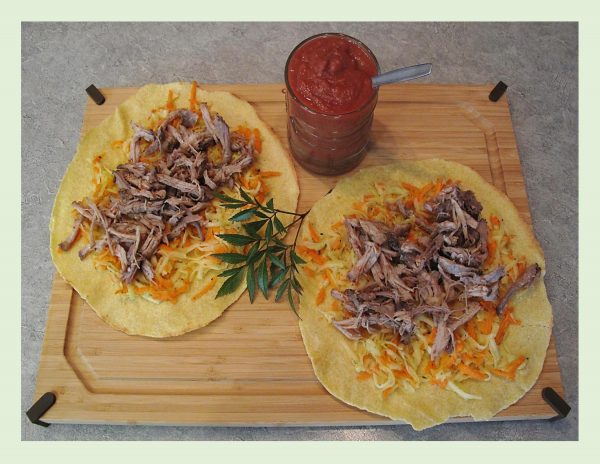
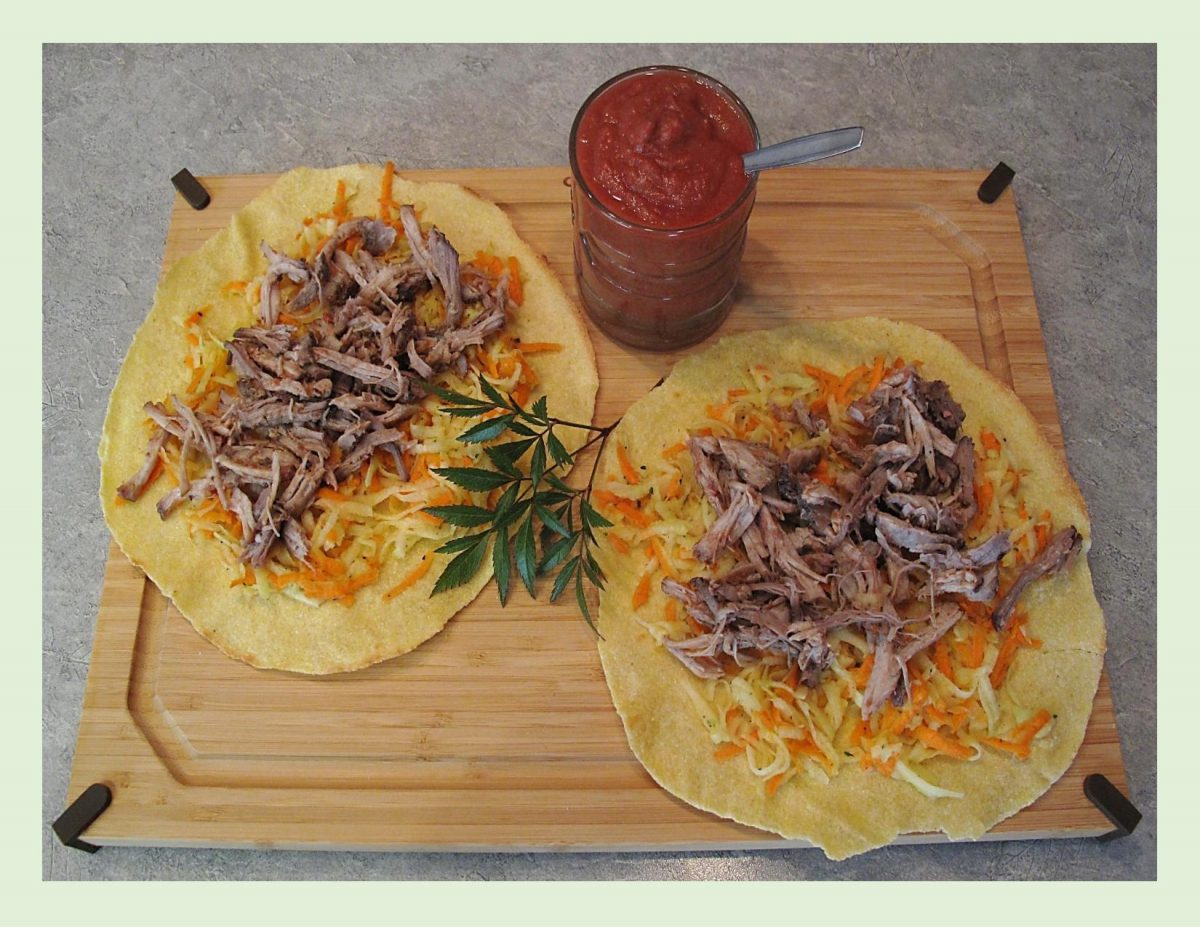
There are numerous ways you can serve pulled pork such as on some fresh brioche buns, with cornbread or in tacos. We are going to have ours in corn tortillas with some kohlrabi coleslaw and roasted rhubarb sauce.
Print Recipe
Pulled Pork w/ Roasted Rhubarb Sauce
Votes: 1
Rating: 5
You:
Rate this recipe!
Ingredients
Dry Rub for Pork Shoulder
Ingredients
Dry Rub for Pork Shoulder
|
Votes: 1
Rating: 5
You:
Rate this recipe!
|
Instructions
Pork Shoulder
Drizzle pork with 2 Tbsp of oil; sprinkle with spices & orange zest & rub into meat. Place in a plastic zip-lock bag & refrigerate overnight (about 24 hours).
Bring meat to room temperature. Preheat oven to 275 F. Place meat in a roasting pan & bake until thickest part registers 170 F. on a meat thermometer. Basically, roast until it's falling apart. Remove roast from oven & transfer to a large platter. Allow the meat to rest for about 10 minutes. While still warm, take 2 forks & 'pull' the meat to form shreds. Keep warm until ready to assemble tortillas.
Roasted Rhubarb Sauce
Prepare sauce on the day you START to marinate meat.
Preheat oven to 425 F. Line a baking sheet with foil & spray generously with non-stick cooking spray.
Place chopped rhubarb & garlic cloves on the prepared baking sheet. Roast for 15-20 minutes, or until rhubarb is soft.
Transfer the rhubarb & garlic to a food processor or blender. Puree with one cup of water until smooth.
Pour the puree into a medium saucepan. Add remaining ingredients & mix well. Add additional water, as needed, until sauce is desired consistency.
Bring to a simmer over medium-low heat. Simmer for 10-15 minutes. Cool before pouring into a small glass pitcher. Refrigerate any leftovers when meal is finished.
Kohlrabi Coleslaw
Prepare dressing in a screw-top jar; combine vinegar, oil, sugar, salt & pepper. Cover & shake well. In a bowl, combine kohlrabi & carrots; drizzle with dressing.
Assembly
During the roasting time of the meat, prepare kohlrabi coleslaw. When everything is ready, lay out warm tortillas, top with coleslaw & pulled pork shreds. Drizzle with prepared rhubarb sauce. Fold or roll tortilla & enjoy!
Recipe Notes
- Instead of drizzling the rhubarb sauce, you can put your shredded pork in a bowl with some rhubarb sauce & combine. I find that distributes the sauce more evenly ... just a personal preference.
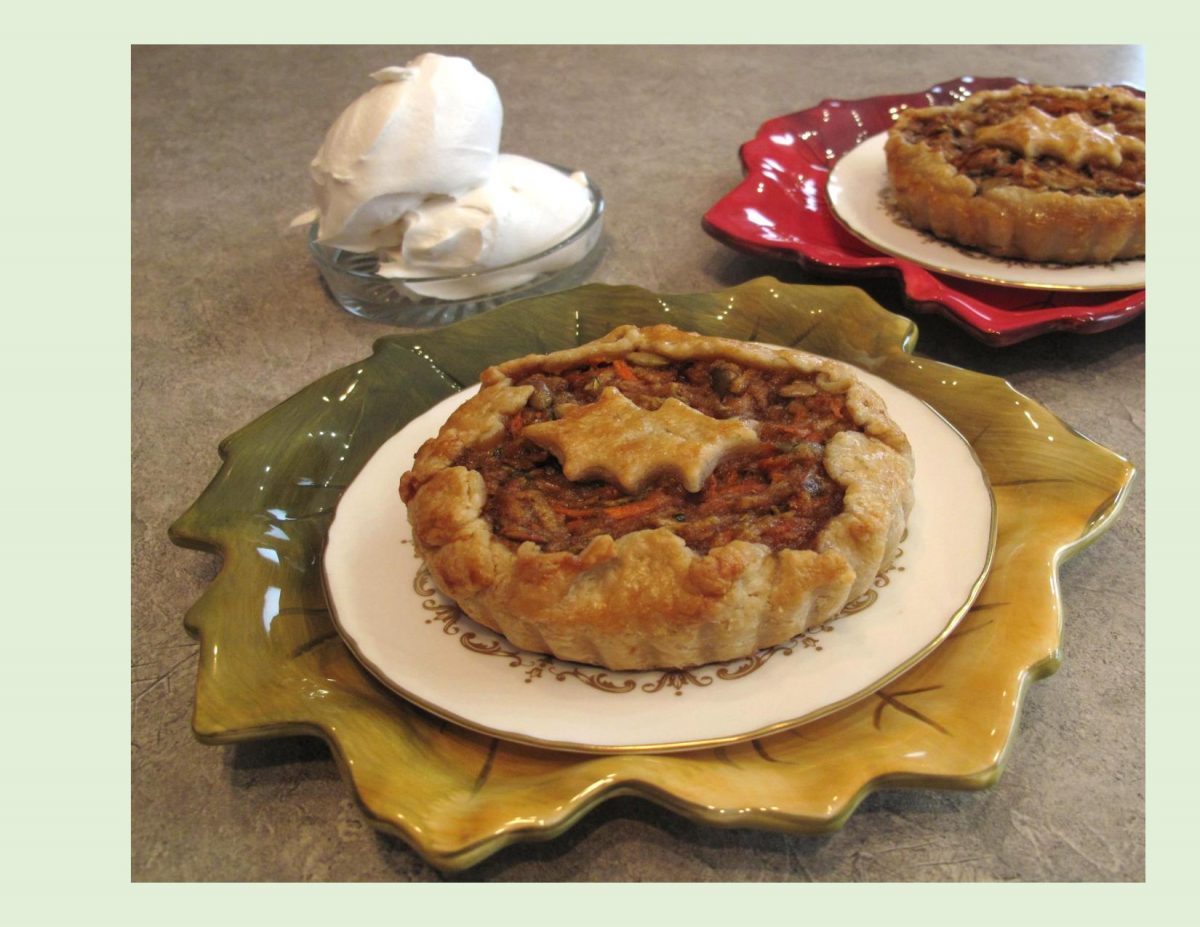
Its like a mix between carrot cake and apple pie. Vegetables and fruit in a pie …. this recipe never fails to be fantastic even if you don’t like zucchini.
The oral history of pie predates its written record. Many cooks stand by family secrets scrawled on stained index cards. It seems, pie is eaten for breakfast, with lunch and for dessert after dinner. In many ways, pie is more prized because it takes time and effort, a slice carries more importance than a cookie, but is less fussy than cake.
The perfect pie (or galette), is built on two things …. a well made crust with a flaky texture and golden color and a fresh, well set, flavorful filling.
The combination of carrots, apple and zucchini is something special. The carrots and zucchini are really interchangeable, so if you’d like to use more of one than the other, no problem.
When baked, zucchini has a similar texture to an apple; it gets soft but retains some texture. Add the same warm, fragrant spices as in an apple pie, lemon juice, a bit of extra sugar to compensate and you got it!
This recipe has been one of my fall favorites for many years and we still enjoy its wonderful flavor.
Print Recipe
Spicy Harvest Galette
Votes: 1
Rating: 5
You:
Rate this recipe!
|
|
Votes: 1
Rating: 5
You:
Rate this recipe!
|
Instructions
Prepare pastry & either use 6 mini flan pans or one 9"deep pie pan. Preheat oven to 425 F.
In a large bowl, combine apples, zucchini, carrots, nuts & flour; toss to coat.
In a medium bowl, cream together brown sugar & butter; add cinnamon, cardamom, salt, lemon juice, vanilla, orange zest & 2 eggs. Blend well. Add apple mixture & combine well.
Roll out pastry larger than your pans. Line pans leaving the jagged edge to fold over filling. Make a few pastry designs for the tops if you wish. Spoon filling into a pastry lined, mini pans. Flip rough edges over filling. Top with pastry in a fall leaf pattern. In a small dish, blend egg wash & brush over crust.
Bake for 40-50 minutes or until deep golden brown. If necessary, cover pies loosely with foil during last 15 minutes of baking to prevent excessive browning.
Serve warm with whipped cream. Store any 'leftovers' in refrigerator.
-
Recipe Notes
- I laid the grated zucchini on paper towel & placed the grated apple in a strainer while I prepared the rest of the ingredients. In both cases, I did NOT hand squeeze them as you still need some of that moisture to prevent having a dry filling when baked.
CELEBRATING LABOR DAY!
Although, we have not officially reached the first day of fall (Sept. 22), this part of the year often begins with a tinge of melancholy. Even so, there are many ways to appreciate Canada’s most sentimental season.
Part of our country’s appeal is its four season’s: Winter, Spring, Summer & Fall. We are entering the season of the fall harvest and the leaves on the trees begin their transformation to stunning shades of orange, red and yellow.
Labor day week-end gives us an opportunity to enjoy family and friends before summer is officially over. Whatever your choice of relaxation is, you know good food will play a big part in the week-end gatherings.
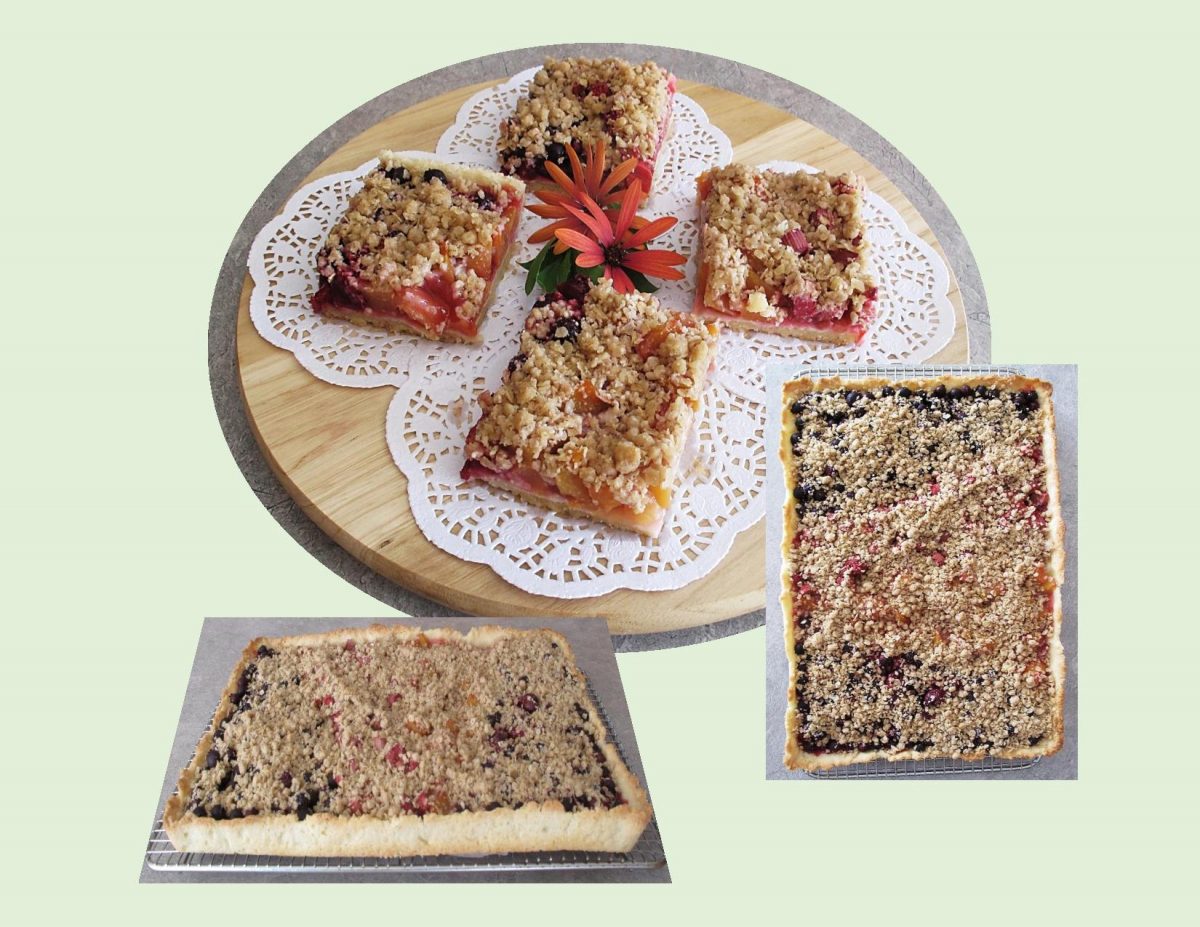
I’m sure you are all familiar with ‘slab’ pies. If not …. a slab pie is a shallow pie baked in a rimmed baking sheet instead of a pie pan. These are a genius way to serve a crowd with less fuss and less mess. Almost any fruit pie recipe will work in this format. Just double you pie recipe, bake it in a jelly-roll pan (15 x 10 x 1) which are a little smaller than the typical baking sheet and have 1-inch sides. Most will serve 15-20 people.
For the sake of choice, I went with four different fruits in one slab pie. That should cover it I think!
Print Recipe
Fresh Fruit Slab Pie
Votes: 1
Rating: 5
You:
Rate this recipe!
|
|
Votes: 1
Rating: 5
You:
Rate this recipe!
|
Instructions
Crust
Line a 15 x 10 x 1-inch jelly-roll pan with parchment paper; set aside. In a large bowl, beat butter & sugar until light & fluffy, about 5 minutes. Add vanilla & lemon zest; beat another minute, or until blended. Add flour & salt, mix until fully incorporated, taking care not to over-mix the dough.
Turn dough out onto paper-lined baking pan & evenly press into the bottom & about 1/2-inch up the sides of the pan. Place in refrigerator to chill for at least an hour or overnight.
Preheat oven to 350 F. With a fork, prick crust all over & bake for 20 minutes until JUST PALE golden in color. Remove from oven & cool slightly on a wire rack.
Filling
In a small saucepan, combine rhubarb with 1/4 cup water. Simmer 5-7 minutes ONLY until slightly softened. Strain rhubarb juice into a one-cup measure. Set aside. Place rhubarb in a dish until ready to assemble pie for baking.
Streusel
In a bowl, combine oats, brown sugar & flour. Add butter & mix until coarse crumbs form; stir in pecans.
Sauce
To reserved rhubarb juice in one-cup measure, add cherry juice & 3 Tbsp lemon juice. Add enough water to make one full cup. Return juice/water to small saucepan; add sugars & cornstarch. Cook until mixture boils & thickens.
Assembly
Place rhubarb, saskatoon berries, peaches & cherries in partially baked crust. Form each fruit in a diamond shape to give it a bit of pizzazz!
Drizzle hot sauce evenly over entire slab pie. Sprinkle streusel topping over all & bake in a 350 F oven for 25 minutes. Remove from oven & allow to cool on a wire rack before serving.
