CELEBRATING LABOR DAY!
It’s hard to believe Labor Day weekend is here already! In our part of the world, it signals the last of those coveted summer days. Celebrated in Canada as a national statuary holiday weekend. Labor Day weekend gives us an opportunity to enjoy family & friends before summer is officially over.
Part of Canada’s appeal is its four seasons: Winter, Spring, Summer & Fall. We are entering the season of the fall harvest and the leaves on the trees begin their transformation to stunning shades of orange, red and yellow.
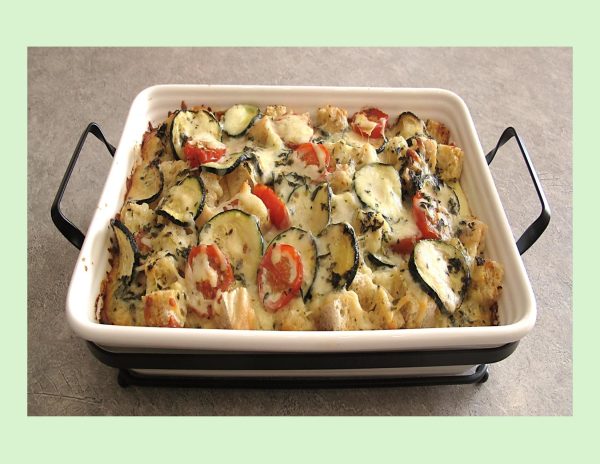
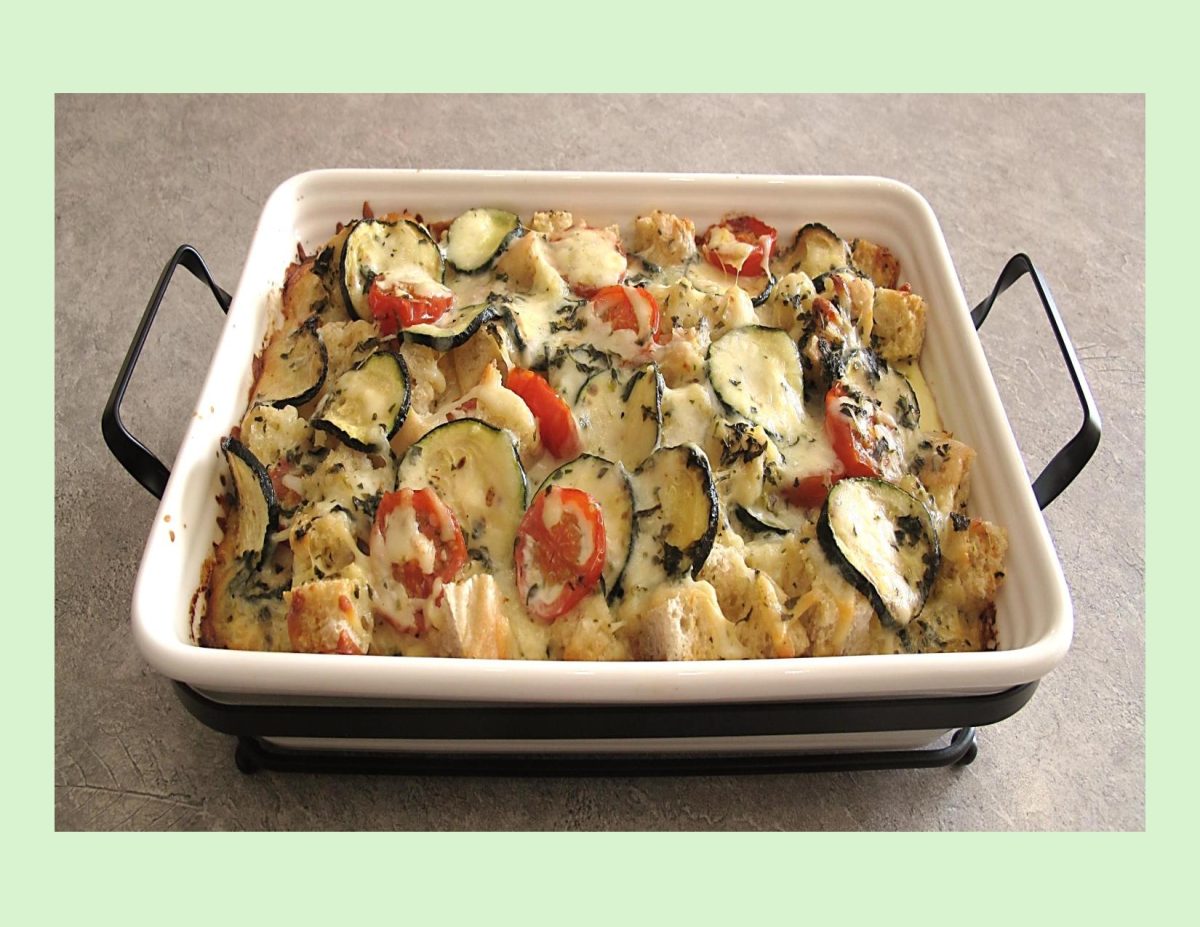
When I was giving thought to food for this day, a nice seasonal vegetable strata came to mind. For most families there’s ‘places to be and things to see’ on this day so why not start it with a breakfast dish that can be prepared the day before and baked in the morning.
Unlike quiche and frittata, strata originated in North America. The first known recipe, the cheese strata, dates back to 1902 and contains bread, white sauce and cheese.
A strata is usually a savory egg-bread casserole that’s baked in the oven or microwaved. Strata’s can be made with a variety of fillings including meats, cheese, vegetables or fruits. Usually, the bread and fillings are layered in a casserole dish with the egg mixture poured over top. The dish can be prepared the night before (or at least 2 hours before cooking) to allow time for the bread to soak up some of the egg mixture. What you’re left with is a fluffy, bread-pudding-like meal that’s completely customizable using your favorite ingredients.
Hopefully this strata will be a good choice for your family on this holiday.
Print Recipe
Tomato Zucchini Strata
Votes: 1
Rating: 5
You:
Rate this recipe!
|
|
Votes: 1
Rating: 5
You:
Rate this recipe!
|
Instructions
In an extra-large skillet, melt butter over low heat. Add tomatoes & zucchini. Cook for 5 to 7 minutes, stirring occasionally, or until tomatoes begin to lose their firm round shape; remove from heat.
Place half of the bread cubes in a greased 2-quart baking dish. Top with half of the zucchini mixture & half of the cheese. Repeat layers with remaining bread cubes, zucchini mixture & cheese.
In a large bowl, whisk together eggs, milk, parsley, basil, chives, garlic salt & pepper. Carefully pour egg mixture evenly over bread mixture in dish. Using the back of a spoon, gently press down on layers. Cover and chill at least 2 hours or up to 24 hours.
-
Remove casserole from fridge. Bake for 60 minutes or until puffed, golden & set. Let stand for 10 minutes before serving.
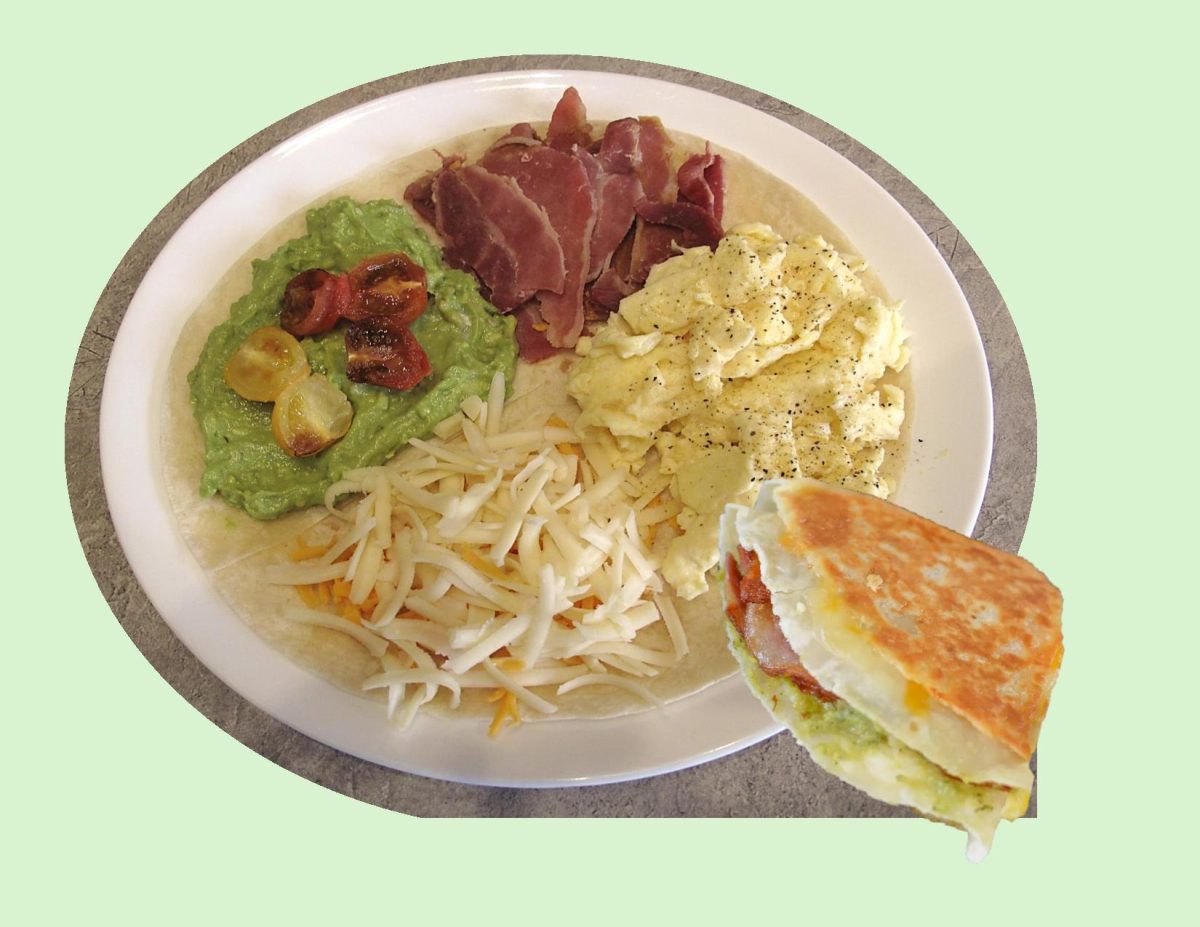
The TikTok tortilla trend is one of the best ‘hacks’ on folding tortillas to come out of 2020 Covid quarantine.
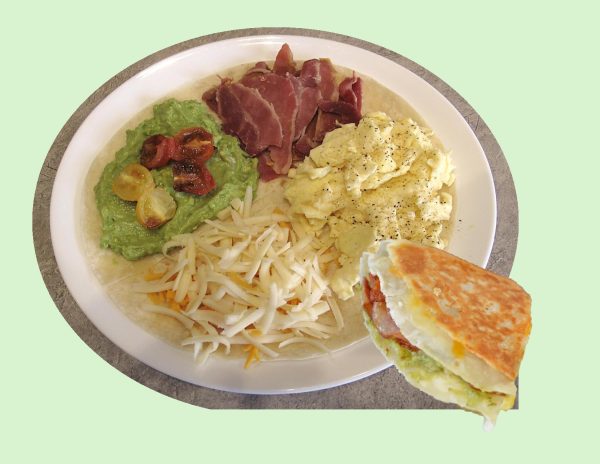
Starting online with a simple threefold of a large flour tortilla, each layer contains a different ingredient that folds into a perfect triangle that is then toasted in a skillet or panini press for a hand-held snack. This wrap method is especially convenient for those on the go as the folds prevent the hot fillings from spilling out, which can happen with normal sandwich wraps or quesadillas.
Plus, the trend ensures that you’ll get a perfect bite of fillings every time.
These folded wraps are endlessly customizable, which makes them great for summer when we are all so busy with summer activities. Making a quick wrap and being able to run out the door or maybe just steal a quiet moment on the deck seems like the perfect idea to me.
Print Recipe
Breakfast Wrap Tortilla
Votes: 1
Rating: 5
You:
Rate this recipe!
|
|
Votes: 1
Rating: 5
You:
Rate this recipe!
|
Instructions
Lay out a tortilla flat. In the middle of the tortilla along the bottom half, make a cut half way up the tortilla.
Put your ingredients into the four quadrants of the tortilla.
Start with one section and fold them one over the other.
Place the stacked tortilla in a greased skillet or panini press until golden brown.
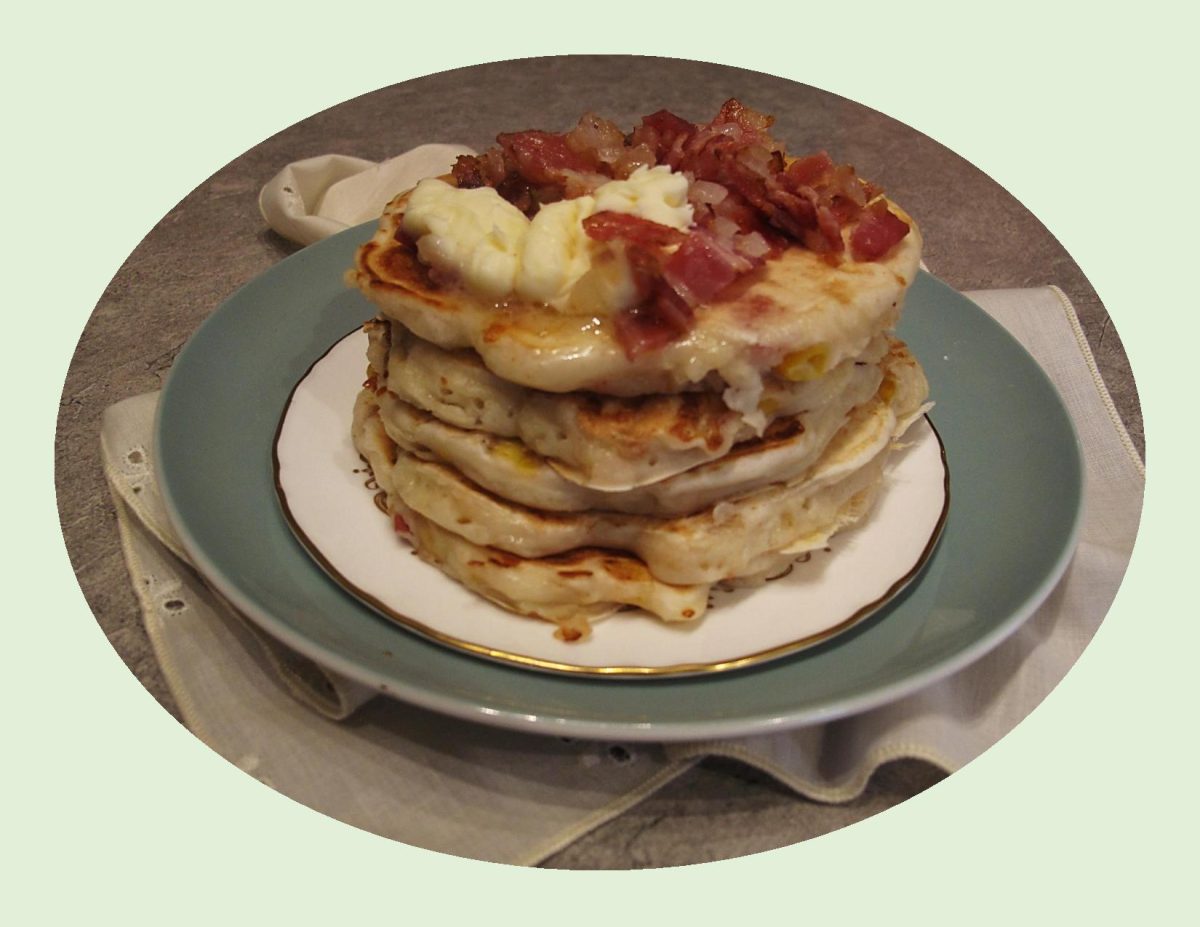
A griddle cake is another word for a pancake, but it seems to be used more often to indicate something more rustic and less breakfast-y than the word ‘pancake’. This makes it the perfect description for these bacon and corn cakes.
People began using the word ‘pancake’ during the 15th century, and the word became standard in 19th century North America. Previously, people referred to them as Indian cakes, hoe cakes, johnnycakes, journey cakes, buckwheat cakes, griddle cakes, and flapjacks. Early North American pancakes were made with buckwheat or cornmeal.
Pancakes have really stood the test of time with their extensive history. Each culture seems to have a unique take on them. People eat them for breakfast, lunch, and dinner all over the globe. Some examples of this transcultural food include crepes, potato latkes, Irish boxty, Russian blini, Welsh crampog, Indian poori, Hungarian palacsinta, and Dutch pannenkoeken.
Today I’m making some savory ‘griddle cakes’ stuffed with corn, crumbled bacon, onions, chives and Monterey Jack cheese. What’s not to love about that!!
Print Recipe
Bacon & Corn Griddle Cakes
Votes: 1
Rating: 5
You:
Rate this recipe!
|
|
Votes: 1
Rating: 5
You:
Rate this recipe!
|
Instructions
In a medium skillet, cook the bacon pieces until they begin to brown. Add the onion and continue to cook until the bacon is crisp and the onion is softened. Scoop out a heaping tablespoon of the bacon mixture for topping the griddle cakes upon serving- and set it aside.
While the bacon is cooking, combine the flour, chives, baking powder, salt and paprika in a medium bowl. Stir in the milk, egg and oil, just until moistened. Stir in the bacon mixture, corn and cheese. The mixture will be thick, if you wish, add a little more milk to thin out the batter.
Heat and grease a griddle or large skillet. Pour a heaping ¼-cup of the batter onto the griddle and cook until it is golden brown- 3 to 4 minutes per side. Repeat with the remaining batter.
Serve stacks of griddle cakes topped with a sprinkle of the reserved bacon/onion and warm maple syrup.

Today, February 19, is Family Day in Canada … a uniquely Canadian holiday occurring each year on the third Monday of February. It gives Canadians the chance to spend more time with their families and to celebrate the importance of the home and family life.
Alberta was the first province to adopt Family Day as a statutory holiday in 1990.
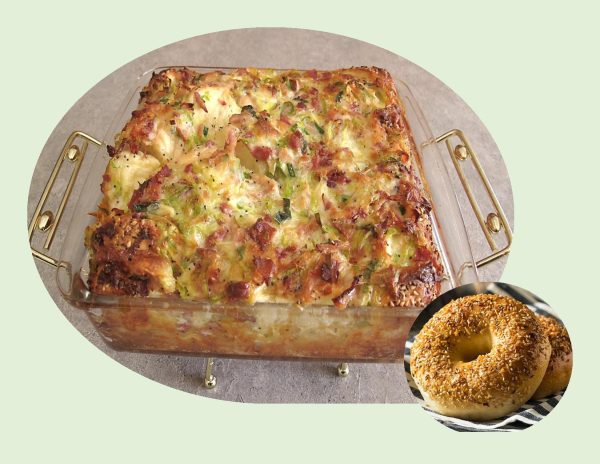
Although going out for brunch is always great, sometimes it’s nice to invite some of your family and friends over for a homemade brunch. Family day seems like the perfect opportunity for a bagel breakfast bake.
Did you know that ‘brunch’ is one of Canada’s favorite pastimes? It’s one of those meals that’s a little hard to describe. Timing-wise, it fits just after normal breakfast hours and could run as late as 3 pm. Generally, it’s considered a replacement for both breakfast and lunch. Plus, you get the best of both meals on offer; you might choose decadent French toast loaded with fresh berries, Canadian maple syrup, and whipped cream… or you might just as easily have steak and eggs. At brunch, anything goes… and often does!
The origins of brunch can be found in England in the 1890s. It was described as a wonderful post-church meal that would eliminate the need to get up early to eat on Sundays. Brunch has stayed true to its origins, especially in Canada, as a primarily Sunday meal to be consumed after church—or after a sleep-in. ‘Once upon a time’, most restaurants were closed on Sundays, so the concept of brunch became synonymous with hotels and motels in the early 20th century. At that time, folks looking for a bite to eat after church could drop into a local hotel restaurant on the way home and enjoy a delicious meal. Of course, this resulted in more restaurants remaining open on Sunday mornings, as they were leaving a huge pile of cash on the table by being closed.
Brunch’s continued popularity with restaurant-goers throughout the 20th century eventually has made it into a plausible everyday meal, although still mostly eaten during the weekend, to be enjoyed at any point between breakfast and lunch hours.
Print Recipe
Bagel Breakfast Bake
Votes: 1
Rating: 5
You:
Rate this recipe!
|
|
Votes: 1
Rating: 5
You:
Rate this recipe!
|
Instructions
Arrange bagels in a 9 x 9-inch square baking dish.
In a large bowl, whisk together eggs, milk, cheese, bacon, green onions, 1/2 tsp salt & 1/4 tsp pepper. Pour over bagels, pressing down slightly to submerge. Cover & refrigerate at least one hour or overnight.
Preheat oven to 350 F. Uncover dish & bake 45-55 minutes or until set.
Allow to cool 15 minutes before serving; garnish with additional green onion if you wish.

Christmas bread has a lot of different interpretations. The most traditional iterations involve sugar and spice, and often—but not always—yeast, and ultimately have strong cultural associations and country ties. One thing we can all agree on is that Christmas bread is celebratory, whether or not we observe the holiday. From the unleavened matzo of Passover to the German stollen of Christmas, from the British hot cross buns baked on Good Friday to the Russian kolach baked for any special occasion, bread in its many forms brings people together, linking traditions and generations.
The scent of Christmas spices, bread baking, and fresh-cut pine define holiday memories. Generations ago, the rich dough itself – lush with butter, eggs, dried fruit, sugar – relayed a cook’s generosity, her willingness to share the most precious ingredients in her pantry. The time and effort it took to make and bake the Christmas loaves expressed the cook’s devotion and love.
Last year, I was introduced to the liqueur known as Dom Benedictine. After doing much research into this interesting liqueur, I incorporated it in some savory and sweet recipes. We really enjoyed them so this year I was interested in doing a bit of recipe development to create a Christmas bread with it.
The story of Benedictine dates back to 1510 when a Venetian monk of the Abbey of Fécamp, Dom Bernardo Vincelli, created an elixir intended to support good health. It includes a combination of 27 herbs and spices derived from plants from around the globe, including juniper, myrrh, saffron, vanilla, thyme, coriander and more. The liqueur tastes primarily of honey and baking spices, with citrus peel, herb, and stone fruit notes.
So here you have it, my newly created Christmas bread tradition. Hope you can try it and enjoy it as much as Brion & I have.
Print Recipe
Benedictine Liqueur Christmas Braid
Votes: 1
Rating: 5
You:
Rate this recipe!
|
|
Votes: 1
Rating: 5
You:
Rate this recipe!
|
Instructions
Marinate raisins, candied fruit & cranberries in Benedictine liqueur overnight, Stir occasionally.
Dissolve yeast in 1/4 cup lukewarm water with 1 tsp sugar. Set aside for 5 minutes.
In a large bowl, sift 2 cups of the flour. Stir in yeast mixture & lukewarm milk. Cover with plastic & let stand in a draft free place until doubled in volume, about 1 hour. Punch down firmly & work in beaten eggs, 1/2 cup sugar, lemon zest, vanilla & pieces of softened butter.
Sift remaining 3 cups of flour with salt, cinnamon & cardamom & work 2 cups in to form a soft dough. Turn dough onto a lightly floured work surface. Knead in remaining cup of flour & fruit mixture. This becomes a very soft & buttery dough but is not sticky.
Invert the dough onto a lightly floured work surface & dust with flour. Cut the dough into four equal pieces & then stretch & roll each piece into a rope about 20 inches long. Lay the ropes parallel to one another (vertically). Pinch them tightly at the top, then fan them out.
Begin by taking the strand farthest to the right & weave it toward the left through the other strands using this pattern: over, under, over. Take the strand furthest to the right & repeat the weaving pattern again: over, under, over. Repeat this pattern, always starting with the strand farthest to the right, until the whole loaf is braided, Tuck the ends under to give the loaf a finished look.
Carefully transfer the braided loaf to a parchment-lined 13x18-inch baking sheet, brush with egg wash. Cover the loaf loosely with plastic wrap & allow to rise in a warm, draft-free spot until about 1 1/2 times the size, about 1-2 hours. Toward the end of the rising time, preheat the oven to 350 F. & set an oven rack in the middle position.
Gently brush risen dough again with egg wash. Place in an air-bake pan to prevent the bottom crust from browning too much.
Bake 40-45 minutes or until a nice golden brown. Cool on a wire rack. Combine powdered sugar & lemon juice/zest to make glaze. When braid is completely cool, brush loaf with lemon glaze & decorate to your liking.
Recipe Notes
- To see a more in-depth article on Dom Benedictine Liqueur, check out my blog from December 21/2022 - Benedictine Liqueur Cupcakes.

I’m not sure what it is about chocolate that makes it such a good pair with berries. Blueberries for one, are the perfect match for dark chocolate. Bitter, sweet, fruity and awesome!
Some years ago, Brion & I were in California at a winery sampling some of their wines. They offered us some chocolate covered blueberries and that wonderful flavor has never left me.
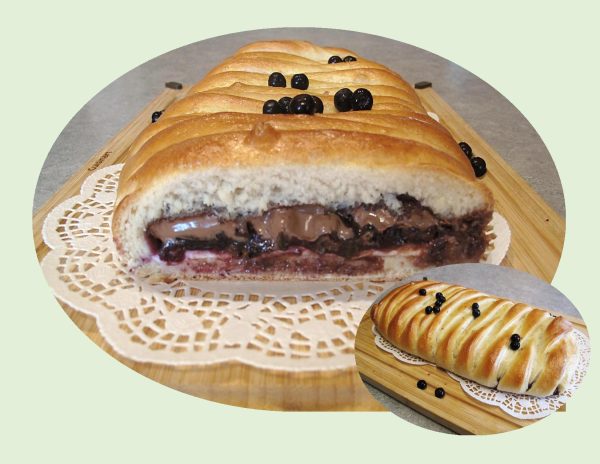
Since we are already into December and Christmas baking is up front and center, I thought it might be nice to experiment with a different filling for this yeast braid.
Christmas breads are often more decorative and have celebratory qualities to them, such as the Bulgarian Christmas Bread that symbolizes prosperity for the upcoming year. Other classic Christmas breads from around the world include Panettone or Stollen which are filled with fruits and nuts. Whether it’s for the sake of tradition or you just want to make something new and different, this is the best time of the year to get in the kitchen and whip up some beautiful ‘Christmas bread’.
Print Recipe
Blueberry Chocolate Yeast Braid
Votes: 1
Rating: 5
You:
Rate this recipe!
|
|
Votes: 1
Rating: 5
You:
Rate this recipe!
|
Instructions
Sweet Dough
In a small dish, heat milk to lukewarm. Add yeast & 1 tsp sugar; let sit for 5 minutes to allow yeast to activate. In a large bowl, whisk together remaining 1/4 cup sugar, melted butter, sour cream & egg. Add yeast mixture & stir to combine.
In another bowl, whisk flour & salt. Add flour mixture to yeast mixture 1 cup at a time, combining after each addition. Once the flour has been added, knead on a lightly floured surface for about 2 minutes.
Lightly grease the large bowl, place dough in it & cover with plastic wrap & a tea towel. Allow to rest for at least one hour, in a draft free place until dough has doubled in volume.
Blueberry Filling
In a saucepan, combine blueberries, sugar, cornstarch & lemon juice. Heat mixture over medium heat, stirring constantly, for several minutes until it thickens. Remove from heat & cool until ready to use.
Cream Cheese
Slice cream cheese in about 1/8-inch thick & about 4-inches in length. Lay out on a piece of plastic wrap to form a rectangle about 10 X 4-inches in size. Lay plastic wrap with cheese on a tray & place in refrigerator until ready to use.
Assembly/Baking
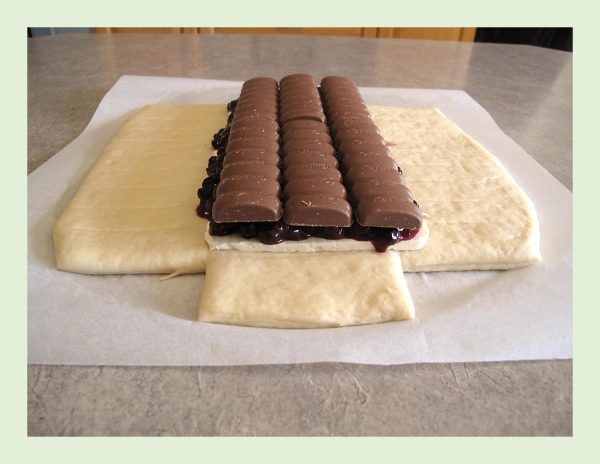
On a large sheet of parchment paper, roll risen dough into a rectangle 13 X12-inches in size. With a straight edge, mark it in thirds lengthwise. On the two outer pieces, mark 1-inch strips. At the top & bottom you will need a 1 1/2-inch piece. The center rectangle should be 10 X 4-inches in size.
Cut out the 4 corner 'wedges' as it will make a nice clean braid this way. ( I just made a couple of little sweet dough buns with a bit of jam filling with this excess dough.)
Start with the cream cheese layer. Using the plastic wrap, flip it in the center rectangle. Next, top the cream cheese with blueberry filling then lay the chocolate bar over all to complete the third layer.
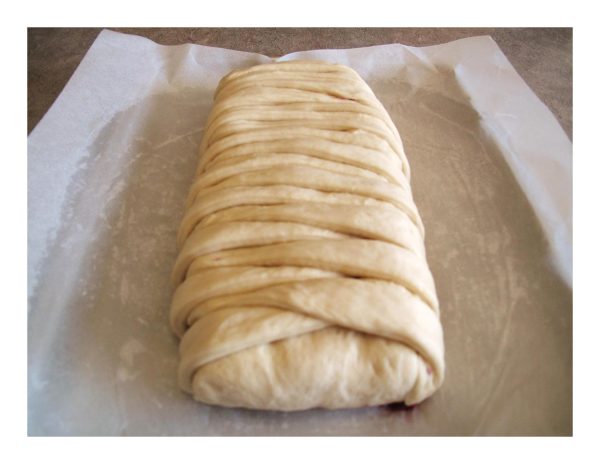
Cut the strips on either side of the braid. Pull the end dough pieces up over the filling then start to braid with the side strips until you reach the other end. Using the parchment paper, lift the braid onto a baking sheet. Cover with a dry tea towel & allow braid to rest & rise for about 30 minutes in a draft free place.
Preheat oven to 350 F. before the braid is finished rising.
Carefully brush braid with egg wash & bake for 30 minutes until it is browned nicely.
Remove from oven & cool slightly before serving. If you have leftovers for another day, warm the bread slightly so that the chocolate will be soft & runny. Yum!

There’s something fundamentally satisfying about the textural contrast of biting through a crisp savory shell into a juicy turkey burger. It’s not like burgers needed to be reinvented, but I’m all about trying new things to see if there’s something novel and delicious to be discovered.
Breakfast can be many things to many people. Hash browns come in many shapes and sizes. They can be prepared in various ways. Some consider it the ultimate breakfast food that needs to be served with eggs.
Brion has always enjoyed hashbrowns, not the diced, fried to a crisp in a deep fryer kind, but the nice shredded, golden kind. My inventions for new culinary techniques that revolutionize the way we eat usually happen in the middle of the night during a bout of insomnia. But all it takes is a quick Internet search to reveal that I’m far from the first person to have invented the cookery method, and hundreds of recipes already exist. Nevertheless, this idea for an interesting breakfast is a good example of that.
I crusted the turkey burgers with some shredded potatoes, so when they cook and get crispy, they act as a barrier that locks in all the juices. The roasted tomatoes add a nice little garnish to the burgers. I topped the burgers with poached eggs, because when you cut into it, the velvety, creamy yolk pours out onto the burger and acts as a sauce…and what goes better with potatoes than eggs, right? So, there you have it …. crispy, golden hashbrowns, meat, eggs & tomatoes …. what a breakfast!
Print Recipe
Breakfast Turkey Hashbrown Burgers
Votes: 1
Rating: 5
You:
Rate this recipe!
|
|
Votes: 1
Rating: 5
You:
Rate this recipe!
|
Instructions
Hashbrowns
Thaw shredded hashbrowns on paper towel. In a bowl, place the flour, cheese, egg, onion, garlic, coriander, smoked paprika, salt & pepper. Add 'dried' shredded hashbrowns. Using a fork, mix everything until combined being careful not to break up the hashbrowns. Set aside until burgers are ready to be coated with the mixture.
Turkey Burgers
In a bowl, combine burger ingredients & divide into 4 equal portions. Form into burger patties. Coat burgers with hashbrown mixture, gently pressing coating down to make sure it adheres well.
Roasted Cherry Tomatoes
In a small bowl, place cherry tomatoes & add some Italian dressing to coat. Place on a foil lined baking dish.
Cooking
-
In a skillet, heat 1 Tbsp EACH butter & olive oil. Carefully place hashbrown burgers in skillet & cook burgers on each side only until they are a golden brown. Remove to a baking pan & place in the oven to continue the cooking process until the meat is fully cooked. Roast the cherry tomatoes at the same time.
While the burgers are in the oven, prepare the poached eggs. Heat a small pot of water until it is almost at a boil. Add 1 Tbsp vinegar to help the eggs to congeal. Crack the eggs gently right above the surface of the water. Turn off the heat & cover the pot for about 3-4 minutes or until the whites of the eggs are fully cooked but the yolks are still runny. Remove the eggs with a slotted spoon.
When the burgers & tomatoes are cooked, remove them from the oven. Place them on serving plates & top each burger with a poached egg. Garnish with sprigs of fresh thyme if you wish.
