Rhubarb Carrot Cake

CELEBRATING MOTHER’S DAY!

Here in Canada, we set aside the second Sunday in May to honor our mother’s with expressions of love and gratitude.

As I grow older, I realize how many ways I unconsciously emulate my mother. I loved everything about her and as a kid I could never imagine life without her. But in the natural sequence of events, that’s not how it works. I guess along with many other things, I’m grateful for the fact that she was there through my childhood. She passed away at the age of sixty and although she is no longer on this earth, her wonderful memory will live on in our hearts forever.

We are fortunate to still have Brion’s mother, Dolores. We have been able to spend a bit of time with her recently, which was so precious.

This blog is especially to honor: the special memories of my mother for her endless giving of selfless love – my mother-in-law, Dolores, for her kind ways and raising that ‘special’ man I love sharing my life with –my sister Loretta who passed away 3 years ago and to my sisters, Marilyn & Rita, who give so much of themselves to be the great mom’s they are.

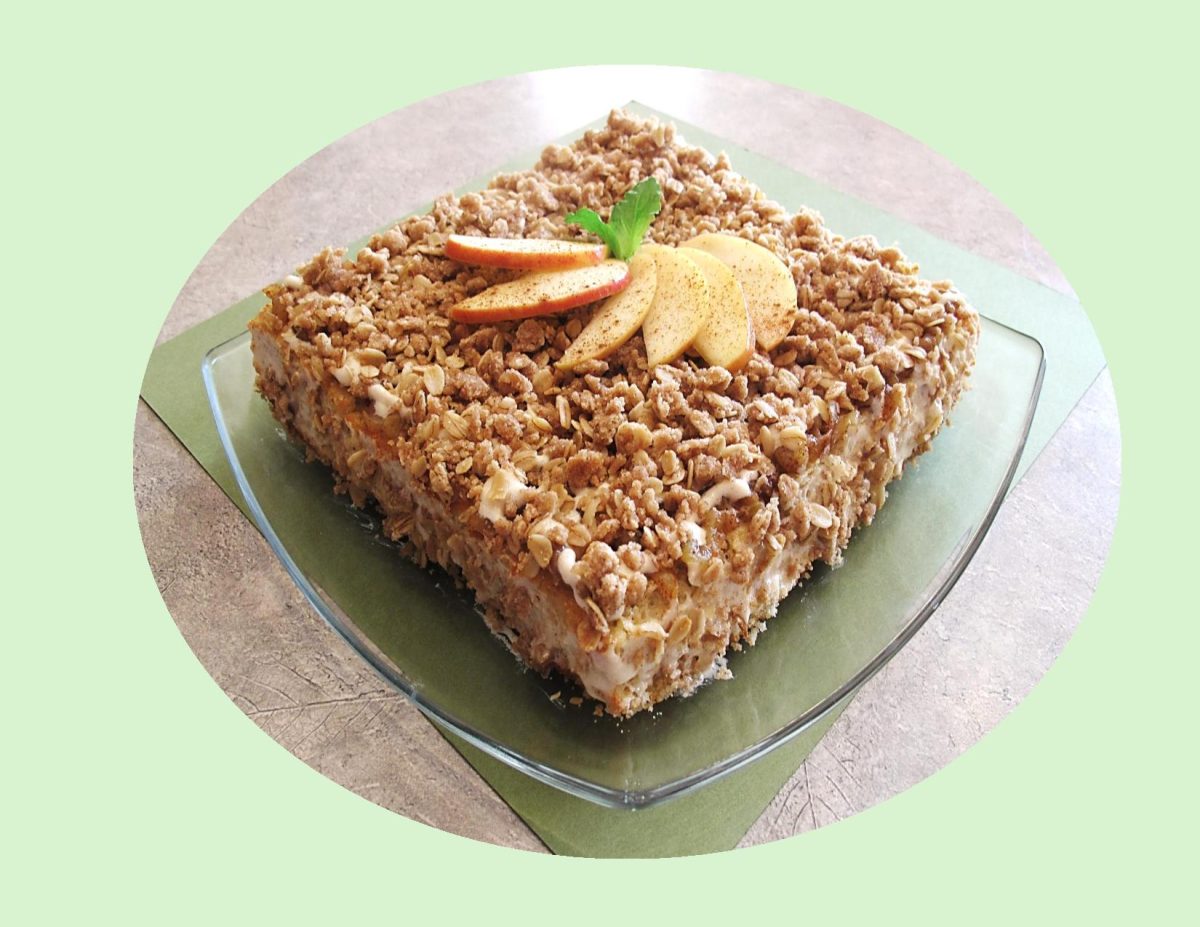
In honor of these special women, I’d like to post something to ‘celebrate’ this day. My choice this year is a rhubarb carrot cake with rhubarb cream cheese frosting.

Rhubarb has been a staple in Canadian history since the days of early European settlement, valued for its hardiness, versatility, and medicinal properties. Rhubarb was a reliable perennial for homesteaders and pioneers due to its ability to thrive in Canada’s cold climate. When the homesteaders moved on, and their farms crumbled back into the ground, the rhubarb patch often persisted. The same is true of modern-day cities; every time a house in an older neighborhood is demolished, the rhubarb often remains. The distinctive plants that remain on abandoned farmsteads across the country are a testament to this hardy heritage.

I recall with fond memory, my mother having at least six huge rhubarb plants that bordered her large produce garden on our family farm. At that time I really didn’t take a lot of interest in them, they were just always there and grew huge without anything more than rain and sunshine. Now, of course I love using rhubarb in everything I can think of, sweet or savory.

Vegetable cakes are great for making the most of the seasons. This recipe for rhubarb carrot cake is a recent, modern fusion of two older dessert traditions: carrot cake and rhubarb cake. The combination likely emerged in the late 20th or early 21st century as bakers experimented with popular seasonal flavors. What makes this rhubarb carrot cake so appealing is how the sweet, earthy carrots balance out the sharp tartness of fresh rhubarb. The carrots add this incredible moisture and natural sweetness, while the rhubarb provides these amazing tangy bursts that keep every bite interesting.

This ‘sophisticated’ cake features winter carrots and the first rhubarb of the year in a marvelous merging of two seasons. Of course, the rhubarb cream cheese frosting is truly ‘the icing on the cake’.

I hope anyone trying this recipe enjoys it as much as Brion & I did.

Print Recipe
Rhubarb Carrot Cake
Votes: 1
Rating: 5
You:
Rate this recipe!
Course dessert
Cuisine Canadian
Servings
Ingredients
Cake
Rhubarb Cream Cheese Frosting
Course dessert
Cuisine Canadian
Servings
Ingredients
Cake
Rhubarb Cream Cheese Frosting
Votes: 1
Rating: 5
You:
Rate this recipe!
Instructions
Rhubarb Frosting
  1. Combine chopped rhubarb, sugar & a splash of water in a saucepan on medium low heat. Stir regularly until rhubarb reduces. Adjust heat to low & continue stirring for 20 minutes until rhubarb thickens into a jam. Transfer rhubarb jam to a glass bowl & cool in the refrigerator.
  2. Whip butter & cream cheese on high until creamy. Add the rhubarb jam & vanilla to cream cheese mixture. Beat until combined. Add powdered sugar 1/2 a cup at a time & beat until smooth. Refrigerate until ready to use.
Cake
  1. Preheat the oven to 350 F. Butter either a 9 x 13-inch baking pan or 2 round 8-inch cake pans.
  2. In a large bowl, whisk together the eggs, melted butter, sugar, brown sugar & buttermilk.
  3. In a medium bowl, whisk together the flour, baking powder, cinnamon, cardamom, ginger & salt. Add to the egg mixture & blend well. Add the carrots & rhubarb, gently fold until evenly incorporated into the batter. Pour the batter into the prepared pan(s) & bake for 25 to 30 minutes or until a toothpick inserted in the center comes out clean. Set aside to cool.
Assembly
  1. If baking cake in the 2 layer version, spread the bottom of one cake with a bit of the frosting then top it with the other layer. Frost entire cake with remaining rhubarb frosting & decorate as you wish.
Recipe Notes

• Since there is only the two of us, I only used one layer & froze the other one for another time.

Pineapple Carrot Cake

Today, March 28th, marks the date of my mother’s birth. Although she left this earth 48 years ago, her memory remains crystal clear. She was a wonderful mother who made our lives so much better in ways we never realized. She set a good example just by the way she lived the ‘best version of herself’.

When this date rolls around each year, I like to post something on the blog that I think she would have enjoyed making. Baking was a ‘job’ she really seemed to enjoy, and our family certainly reaped the benefits of that.

Carrot cake is considered a spring dessert primarily due to its strong association with Easter celebrations, the bright, vibrant color of carrots representing the season. With Easter being just a week away I thought it would be a fitting recipe for today’s blog.

While it’s difficult to pinpoint the exact first instance of carrot cake being made in Canada, it’s likely that it became popular in the mid-20th century, alongside its rise in popularity in the United States. In the 1970’s, carrot cake was perceived as being ‘healthy’ due to the fact that carrots, raisins and nuts are all ‘good for us.’ Then along came that glorious cream cheese frosting that forever bonded the pair. While raisins are undoubtedly the oldest compliment to carrots, pineapple, apples or applesauce as well as walnuts have all become modern day add-ins of choice.

Today’s blog recipe for layered pineapple carrot cake is moist, not too sweet and filled with crushed pineapple and pecans. I’ve used a fluffy, pineapple cream cheese frosting for the filling as well as topping for this decadent dessert.

Print Recipe
Pineapple Carrot Cake
Votes: 1
Rating: 5
You:
Rate this recipe!
Course dessert
Cuisine Canadian
Servings
Course dessert
Cuisine Canadian
Servings
Votes: 1
Rating: 5
You:
Rate this recipe!
Instructions
Cake
  1. Place crushed pineapple in a fine mesh sieve over a bowl & push down on pineapple with a spoon to eliminate excess moisture. Set aside.
  2. Preheat oven to 325 F. Line three 8” round cake pans with parchment paper then spray with nonstick cooking spray WITH FLOUR or grease and flour pans.
  3. In a large bowl, mix all of the dry ingredients together. In a separate bowl, gently whisk eggs then stir in remaining wet ingredients, including drained pineapple, just until combined. DON'T OVERMIX.
  4. Stir wet ingredients into dry ingredients just until moistened, then stir in 2 ½ cups grated carrots until evenly combined, being careful NOT TO OVERMIX.
  5. Divide batter equally between prepared pans. Gently tap the pans a few times on the counter to get rid of air bubbles. Bake for 30-40 minutes, or until toothpick inserted into center comes out clean & the cakes begin to pull away from sides of pans.
  6. Let cakes cool in pans on wire racks for 15 minutes then invert onto wire racks to cool completely.
Pineapple Cream Cheese Frosting
  1. Using an electric mixer, beat the cream cheese & butter until creamy. Beat in the sour cream, vanilla & salt. Gradually beat in powdered sugar until the desired consistency is reached. Mix in pineapple preserves.
Assembly
  1. Place a small dollop of frosting in the center of the cake stand to keep the cake from moving and top with one leveled cake.
  2. Top cake with ¾ cup frosting & spread evenly. Top with a second cake & spread evenly with ¾ cup frosting. Top with remaining cake.
  3. Create Crumb Layer by scooping 1 cup of frosting into a smaller bowl. Frost cake starting with the top and working down until the cake is evenly frosted, removing any excess frosting. Refrigerate cake 30 minutes or until crumb layer has set. Refrigerate remaining frosting until ready to use.
  4. Frost the outside of cake with the remaining frosting. Decorate as you wish. Serve cake cold or at room temperature.
Recipe Notes

As you may have noticed in the blog picture, I divided the batter into thirds. We gifted a friend with a 2 layer cake & Brion & I kept 1 layer for us.
For the decorations, I simmered some dried apricots in the extra pineapple juice for a few minutes then sliced them & added some pepita seeds as well as black sesame.

Celebrating 10 Years of Blogging!

Today, February 14th 2026, is the tenth anniversary of the blog ‘Good Food & Treasured Memories’. Ten years ago, I decided to start writing a food blog. Brion and I had just spent three months in Ecuador. Prior to going, I needed to have a shoulder replacement operation. After we returned, I had the operation and with Brion’s help recovered successfully. The only thing was, even though my shoulder was much improved, it pretty much took me out of the workforce as I had known it before. After having been so busy in the previous years, it took a lot of ‘regrouping’ to settle it with myself that I had reached a different phase of my life. Prior to our time spent in Ecuador I had written and with Brion’s technical savvy, published two books.

In 2014, Good Food & Treasured Memories, my first ‘print’ copy memorabilia/cookbook was published with good success in Northern Alberta. It was followed by a second book in 2015 titled ‘The Taste of a Memory’. This book was written in memory of my parents, which took its readers back to a gentler time with some personal childhood memories. The book also contains a sweet and savory collection of at least 160 recipes about the ultimate ‘comfort food’ – bread pudding!

With the turndown in our economy, I wrote my first eBook, Living Large on a Lean Food Budget’, which outlines smart strategies for navigating a realistic food budget to keep ‘life in balance’. It was published on Amazon.com in March 2016 and is still available today.

With these projects finished, it seemed only natural to continue this passion for food and writing in the form of a food blog. Once again, Brion’s technical abilities came into play as I needed a very specific site to work with. I wasn’t interested in working with lots of sponsors that required me to advertise their products, etc. The whole purpose of the site was to post interesting articles along with some great food. Having spent 35 years in the food industry, food and food history is something I always gravitate to.

With much time and effort, Brion built a website with a clean, precise format I could work with. We decided to use the ‘Good Food & Treasured Memories’ name again as it was so fitting of its content.

With blogs, it’s not only the award winning sites that have something to offer; its the blogs written by people in their pajama’s at late hours of the night, created because those writers are dying to make something, to publish something, to give a voice to all the thoughts in their head, its the blogs written by people who don’t want to forget their recipes, who want them recorded somewhere for their friends and their nieces and nephews and their kids, its the blogs pursed for no other reason than because they’re fun.

Over the course of ten years I have enjoyed the many aspects of writing a food blog. In order to write about food and its history, I have done many hours of research to keep my articles accurate and interesting. Recipe development is and has always been something I love doing, so creating relevant recipes for each blog article put the icing on the cake so to speak.

Each year, at least 120 blogs with new articles and recipes have been added. When I first started writing the blog I had no idea how time consuming it would be. When I would look at other personal blogs and see they had only kept them up for a few years I wondered why. After ten years of blogging I now understand why. It definitely takes commitment to keep it current but I have also learned that good organization still allows you lots of time to do the other things that make life enjoyable such as spending time with my husband Brion.

With the website being available online at Google, Pinterest, Instagram as well as Facebook it is being read around the world. It has been so unique and rewarding receiving feed back from readers worldwide.

Thanks to everyone who has read and enjoyed the blog for the last ten years. It has been an incredible journey for me and I hope to continue blogging for many more.

Alice & Brion

Since it’s Valentines Day, I thought this strawberry rhubarb cake would be a fitting dessert for the occasion as well.

Print Recipe
Strawberry Rhubarb Crumble Cake
Instructions
Cake
  1. Preheat your oven to 325 F. Spray two 9 x 13 baking pans with nonstick spray, line the bottom of each pan with parchment paper and spray again. Set aside.
  2. In a medium bowl or measuring cup, whisk together the egg whites, whole egg, and vanilla. Set aside.
  3. In a bowl of an electric mixer, fitted with a paddle attachment, combine the dry ingredients together on low speed for 30 seconds.
  4. Add the butter one piece at a time, about every 10 seconds. Once all the butter is added, pour in the buttermilk and mix on low for about 1 minute, until the ingredients are incorporated.
  5. Scrape down the sides of bowl and begin to add the egg mixture in 3 separate batches, mixing on medium-low until light and fluffy, about two minutes. Fold once or twice to ensure the batter at the bottom of the bowl is incorporated and mix for another 20 to 30 seconds.
  6. Scrape down the sides of bowl and begin to add the egg mixture in 3 separate batches, mixing on medium-low until light and fluffy, about two minutes. Fold once or twice to ensure the batter at the bottom of the bowl is incorporated and mix for another 20 to 30 seconds.
  7. Divide batter evenly between the 2 pans (about ------- ounces of batter in each of the two 9 x 13 pans), spreading evenly with a small offset palette knife.
  8. Bake for about 25 to 30 minutes. Check cake around 23 to 25 minutes and then set the timer for 2-to-3-minute intervals if the cake needs to bake longer. You're looking for a few moist crumbs to come out on the toothpick when inserted into the center of the cake.
  9. Let the cake layers cool on racks for 10 minutes before inverting onto greased wire racks. Gently turn the cakes back up so the tops are up and cool completely. Once the cakes are cooled completely, level the tops if needed.
  10. Wrap each cake layer with plastic wrap and chill in freezer for at least an hour before using. The cake layers can be stored for up to a few days wrapped once in plastic wrap and frozen. To store longer than a few days, wrap twice in plastic wrap, then in foil, and seal in a zip-lock bag.
Compote
  1. In a medium size saucepan, combine the strawberries, rhubarb, sugar & vanilla over medium heat. Bring to a boil. Once the mixture is boiling, reduce the heat to low & let simmer, stirring occasionally, until the fruit is tender. Let cool completely before using in the cake. Can be made ahead of time and stored in an airtight container for up to a week.
Crumble
  1. Preheat your oven to 375 F. Line a baking sheet with parchment paper. Set aside.
  2. In a medium size bowl, combine the flour, sugar, salt & cinnamon. Whisk to blend. Add the cubes of butter & rub in with your fingertips. The mixture will stick together like clumps. Mix in the oats & nuts.
  3. Bake for 8 to 10 minutes, stirring the crumble halfway through. Let cool completely before using in the cake.
Buttercream
  1. In the bowl of a stand mixer fitted with the paddle attachment beat the butter on medium speed for about 2 to 3 minutes, until the mixture is light and fluffy. Adjust the mixer to low speed, slowly add the powdered sugar, followed by the heavy cream, clear vanilla extract & a dash of salt. Continue to beat the buttercream on medium-high speed for an additional 3 to 5 minutes. Before frosting your cake, mix the frosting by hand with a wooden spoon to push out the air pockets.
Assembly
  1. Place the first cake layer, top side up, on a cake board. Using an offset icing spatula, spread a thin layer of frosting over the cake layer. This creates a barrier between the cake and fruit filling, so the cake doesn't become soggy.
  2. Pipe a rim of frosting around the edge of the cake layer. This will help support the cake layers and prevent the fruit filling from spilling out. 2. Spread about 1/2 cup of the fruit filling on the cake layer. 3. Sprinkle about half of the crumble over the fruit filling. 4. Gently place the second cake layer top side down on the filling and crumble.
  3. Spread about 1/2 cup of the fruit filling on the cake layer. Sprinkle crumble over the fruit filling. Gently place the second cake layer top side down on the filling and crumble.
  4. Freeze the cake for about 10 minutes to help set the frosting and filling, making it a bit more stable for when you frost.
  5. After the filling is set, use a small amount of frosting to apply a crumb coat around the entire cake. Freeze the cake again for another 10 minutes to set the crumb coat.
  6. After the crumbs are locked in, continue to frost and decorate the cake.

Root Vegetable Apricot Cake

We’re entering the in between… that time when some days are super nice and the sun is shining and if you don’t look at the date on the calendar, you’d swear it’s the middle of July, and some days you need a jacket and it’s gloomy and you can feel the season changing in the air?

The time when the flowers are still blooming and the leaves are starting to change. Fall food is popping up in the stores and it’s more than just pumpkin spice everything.

So why not make a ‘root vegetable cake’? I know, you’re thinking you don’t really want anything called root vegetable cake. But keep an open mind because it’s just a cake with carrots, parsnips and some beets. They’re all shredded and combined with warm spices to make a hearty cake, dotted with dried apricots and pepita seeds. The spice and earthiness of the cake are complemented by the rich sweetness and subtle tang of the ginger cream cheese frosting.  Altogether, it’s pretty much the perfect bite – while the root veggies keep this cake soft and add a subtly sweet, earthy flavor; the apricots and pepita seeds add texture. Then it’s topped off with the luxurious creaminess of the ginger frosting. What’s not to love!

Print Recipe
Root Vegetable Apricot Cake
Votes: 1
Rating: 5
You:
Rate this recipe!
Servings
Servings
Votes: 1
Rating: 5
You:
Rate this recipe!
Instructions
Cake
  1. Preheat oven to 350 F. Grease the base & sides of a 8-inch round cake pan with a little oil. Line the base with parchment paper.
  2. Peel & grate the carrots, beets & parsnips into a large bowl. Zest an orange & add to the vegetables.
  3. Pour in the syrup, eggs & olive oil, then mix to combine. Next, fold in the flour, spices, baking powder, baking soda & salt.
  4. Finely dice the apricots, then add them to the bowl along with the seeds, then mix everything until just combined but DO NOT OVERMIX.
  5. Pour the mixture into the prepared cake pan & bake for 30 to 35 minutes, rotating the tin after 20 minutes, until the top is a light pink-golden tone. The cake should bounce back when pressed lightly, & a skewer inserted into the center will come out clean when fully cooked. Remove from the oven & leave to cool in the pan.
Ginger Frosting
  1. Place room temperature cream cheese, ginger & butter into a mixing bowl. Using an electric mixer. beat until creamy & smooth. Slowly add the powdered sugar until all is incorporated.
Assembly
  1. When the cake is completely cool, transfer to a plate, then finish with the icing, smoothing it over the sides & top of the cake. Decorate as you wish slice & serve.
Recipe Notes

If you are like me, maple syrup is not something I usually have on hand. Here's a good substitute ... 1/2 cup brown sugar, 1/4 cup water & 1/4 tsp maple extract. Place the sugar & water in a small saucepan. Simmer on low heat, stirring frequently, until sugar is dissolved & mixture thickens slightly, 3-5 minutes. Stir in maple extract (adjust to taste). Allow to cool before using (mixture thickens as it cools).

Chocolate Blueberry/Lemon Inlay Roll Cake

Today we are celebrating my husband Brion’s birthday. Family birthdays forever bring me back to my childhood days. My mother always made the birthday person’s favorite meal on their day along with a cake. Although she excelled at cooking in general, her creative talent was put to good use when she decorated our birthday cakes. As I follow her tradition, I wanted to bake something that was unique for Brion’s birthday.

One of the easiest ways to dress up a basic roll cake is with a design. This technique is one that originated in Japan. The cake rolls are also known as deco rolls’, as the cake rolls are decorated with patterns and baked. Rather than decorating the cake after it’s been baked, this technique pipes it directly onto the cake with batter.

In Japan, the roll cake tradition has continued, with unique flavors like matcha (green tea) and various cream fillings. The use of ‘inlay’ design creates an artistic presentation. The incorporation of unique flavors and decorative techniques continues to evolve and expands the appeal of this iconic dessert. 

With summer in full swing, our backyard is bursting with all its glorious flowers and foliage and even though he would rather I didn’t add his picture to my blog today, I wanted to share this garden view with you. I think it’s a great backdrop for a birthday picture, right!

HAPPY BIRTHDAY, MY LOVE … YOU’RE THE BEST

Print Recipe
Chocolate Blueberry/Lemon Inlay Roll Cake
Votes: 1
Rating: 5
You:
Rate this recipe!
Servings
Ingredients
Lemon Curd
Blueberry Filling
Whipped Cream Cheese Filling
Pattern Batter
Cake Batter
Servings
Ingredients
Lemon Curd
Blueberry Filling
Whipped Cream Cheese Filling
Pattern Batter
Cake Batter
Votes: 1
Rating: 5
You:
Rate this recipe!
Instructions
Lemon Curd
  1. Combine sugar & lemon zest in a saucepan. Either with the back of a spoon or your finger tips rub the zest into the sugar. This will coat the sugar crystals with fragrant oils from the lemon peel, adding a whole new dimension of intense lemon flavor to the curd.
  2. Add the whole egg & extra egg yolks to the saucepan with the lemony sugar & whisk until smooth. Mix in lemon juice.
  3. Add butter then place the saucepan over medium heat. Whisk gently & continuously for 6-9 minutes until thick enough to coat the back of a spoon. Do not walk away because it will transform very quickly. Once you see a bubble emerge from the surface, this indicates that it is thick enough. Do not let it boil.
  4. Immediately pour the hot curd through a fine mesh sieve to remove any pieces of lemon zest or cooked egg white into a dish. Place a piece of plastic wrap directly in contact with the surface & refrigerate until thoroughly chilled & ready to use.
Blueberry Filling
  1. Place all blueberry filling ingredients in a small saucepan. Heat on medium high until blueberries soften & mixture thicken, about 5 minutes. Remove from heat & allow to cool for 5 minutes or so then place in a blender & puree until smooth. This makes it easier when slicing the cake roll. Place in a small dish & cool until ready to use.
Whipped Cream Cheese Filling
  1. For best results, place bowl of the electric mixer & whisks in the freezer for a few minutes to make them real cold. When chilled, place cream cheese & powdered sugar in the bowl & beat together until smooth. Scrape down the bowl as needed. With mixer running on low, add the vanilla & stream in the whipping cream. Turn the speed up & whip until stiff peaks form. Refrigerate until ready to use.
Roll Cake Pattern
  1. Cream together butter, flour, sugar & egg white with a whisk until smooth. Place batter into a piping bag. Trace or free hand your pattern onto a piece of parchment paper. If you want a specific part of the image to appear on the top of the roll cake, place that part of your pattern about 3/4 of the way down the paper.
  2. Before putting the template onto a 10" x 15" jelly roll pan , using a pastry brush (or your fingers), grease the bottom (but not the sides) with vegetable oil. Line the bottom of the greased pan with the template, pressing down to remove any air bubbles. Set aside. By NOT greasing or covering the sides of the pan, the cake sticks to the sides of the pan, helping the cake to rise while baking.
  3. Pipe out your design, keeping in mind that the cake will be viewed in reverse. Place the pan in the freezer until the batter is frozen solid, for about 20 minutes.
Chocolate Cake
  1. Preheat oven to 350 F.
  2. In a small bowl, combine flour, cocoa, baking powder & salt. Set aside.
  3. In another bowl, whip egg whites until foamy, gradually adding HALF of the sugar. Beat until stiff peaks form. In a third large bowl, beat egg yolks until thick. Add remaining sugar, vanilla & water; beat until very thick. Gradually fold in flour mixture then egg whites gently folding JUST until fully incorporated so as not to deflate the eggs.
  4. Remove the jelly roll pan from the freezer & pour the cake batter over the frozen design. Gently tap the sheet against the counter to make sure that the batter gets down into all the little nooks & crannies of your design.
  5. Bake in the center of the oven until cake for about 15 minutes or until it tests done with a toothpick. Loosen edges & immediately turn cake onto a piece of parchment paper. REMOVE the parchment that was on the bottom of the cake (while it was baking). Starting at the narrow end, roll up cake in the parchment (you just turned the cake out on to) & cool completely.
Assembling the Cake Roll
  1. Once fully cooled, gently unroll the cake & separate it from the parchment paper.
  2. Spread an even layer of lemon curd onto the cake, leaving about an inch of space around the edges so the filling doesn't ooze out. Next, drizzle a wavy line of blueberry filling over the lemon curd. Then lastly, pipe some of the cream cheese filling in between your blueberry lines. Try to not OVERFILL the cake roll BUT giving it as generous amount of filling as possible.
  3. Very gently roll the cake back into its spiral shape. Set the cake on a platter with your design on top. Cover with plastic wrap & chill in refrigerator for at least 30 minutes or longer.
  4. Slice & serve.

Chocolate Beet Bundt Cakes w/ Saskatoon Berry Sauce

Pairing beets with chocolate might seem unusual at first glance, but it works beautifully in a cake. It gives an extra bit of complexity to something that’s already amazing. The beets add earthiness and make the cake dense and moist.

This idea is particularly associated with wartime rationing, when sugar and flour were scarce. While historically a frugal option, chocolate beet cake has become more of a novelty or trend in recent years, with modern bakers experimenting with the flavor profile and incorporating it into more elaborate recipes. 

It’s impossible to pinpoint exactly who ‘first’ paired saskatoons with beet cake, as such recipes are often developed over time and evolve through various culinary traditions.

Saskatoon berries, or serviceberries, are a staple ingredient in Canadian baking, particularly in pies, cakes, and jams. They are known for their sweet and nutty flavor. Given the historical context, it’s likely that the pairing of saskatoon berries with chocolate beet cake emerged organically in regions where both ingredients were readily available and used in baking. Bakers in these areas may have naturally incorporated saskatoon berries into their beet cake recipes, either as a topping, filling, or as part of the batter. 

These little Bundt cakes with their saskatoon berry topping make a very special summertime dessert when those precious berries arrive.

Print Recipe
Chocolate Beet Bundt Cakes w/ Saskatoon Berry Sauce
Votes: 2
Rating: 3.5
You:
Rate this recipe!
Servings
Ingredients
Beet Puree
Saskatoon Berry Sauce
Servings
Ingredients
Beet Puree
Saskatoon Berry Sauce
Votes: 2
Rating: 3.5
You:
Rate this recipe!
Instructions
Beet Puree
  1. Remove beet stems & peel. Rinse beets & chop into small cubes. Place beets in a small saucepan & add water. Cook for about 10 minutes or until fork tender. Remove from heat & allow to cool. Once cool, puree beets with a small amount of the cooking water in a blender or food processor.
Cake
  1. Preheat oven to 375 F.
  2. In a large bowl, place first 6 liquid ingredients & combine well. Add remaining ingredients & mix well.
  3. Scoop into 8 mini Bundt pans (or large cupcake pan), filling about 3/4 full. You can butter the pans or use silicon cups.
  4. For mini Bundt cakes bake only about 9 minutes or until they test done with a toothpick.
  5. Remove from oven & allow to cool slightly.
Saskatoon Berry Sauce
  1. In a small saucepan, combine cornstarch, sugar & salt. Add water & saskatoons. Stir while cooking until 'clear' & bubbling. Add margarine & lemon juice, stir then remove from heat.
Serving
  1. Place individual little Bundt cakes on dessert plates. Top with whipped topping & saskatoon berry sauce. Serve.

Strawberry Cheesecake w/ Danish Rum Balls

HAPPY VALENTINES DAY!

In keeping with Valentines Day, I’m pairing the classic duo of strawberry & chocolate today. At some point, in the many years I spent in the commercial food service industry, I learned the history of the iconic Danish Rum Balls or ‘Romkugler’. These legendary little sweets came about due to leftovers and day old cake that Danish bakers couldn’t sell. Even though they did their best to make the right amount of baked goods so that it would all be sold during the day, they always had leftovers which would not be fresh enough to be sold the day after. They came up with an idea to add jam & rum extract to the day old chocolate cake and the classic rum ball was created.

Today, the rum ball is not considered an unwanted leftover or solely made to avoid food waste. Instead, these little ‘cakes’ continue to appear on the present day bakery shelves.

I think these mini rum balls are the perfect compliment to the strawberry cheesecakes. Sweet, but heh …. its Valentines!!

Print Recipe
Strawberry Cheesecake w/ Danish Rum Balls
Votes: 1
Rating: 5
You:
Rate this recipe!
Servings
MINI CHEESECAKES
Ingredients
Cheesecake
Danish Rum Balls - Makes about 39 mini size
Servings
MINI CHEESECAKES
Ingredients
Cheesecake
Danish Rum Balls - Makes about 39 mini size
Votes: 1
Rating: 5
You:
Rate this recipe!
Instructions
Crumb Base
  1. In a small bowl, combine Oreo crumbs, sugar & melted butter (mixture should have the consistency of wet sand). Place 1 1/2 tablespoons in the bottom of each 'cup' of an individual cheesecake pan. Press the mixture down firmly to form the crust.
Cheesecake Batter
  1. Dice 150 gm strawberries. Reserve several strawberries for garnish.
  2. Process strawberries in a food processor slightly; add softened cream cheese, sugar, orange & lemon juices. Continue to process until very smooth.
  3. Soften gelatin in cold water; stir over low heat until dissolved. Beat into cheese mixture.
  4. Divide cheesecake batter between 14 individual 'cups' in cheesecake pan. Refrigerate 4 hours or overnight. Carefully remove cheesecakes from molds.
Mini Rum Balls
  1. In a food processor, process cake until crumbly. Add jam & rum then process until the dough has a uniform consistency.
  2. Roll dough into 1/2 oz. size balls. Refrigerate until chilled for about an hour..
  3. In a double boiler, melt chocolate with shortening, stirring until smooth. Roll balls in chocolate, allowing excess to drip off. Place on a piece of dry wax paper until set.
  4. When ready to serve, top each cheesecake with a rosette of whipped cream & a slice of strawberry garnished with a mint leaf. Serve with a Danish rum ball on the side.
Recipe Notes
  • If you're cheesecake pan only has 12 cups, use a mini muffin pan for the extra two cheesecakes.
  • If you want to increase the strawberry flavor in the cheesecakes add 1/2 tsp Lor Ann strawberry flavor to the batter and for some extra color, a bit of red GEL food coloring.
  • If you wish, don't hesitate to add finely chopped nuts to the rum balls or roll them in chocolate sprinkles.

Apple Crisp Snack Cake

In Canada, apples are available throughout the year. About 100 species of apples are grown in the country. With their bright colors, crisp texture and clean, slightly spicy flavor, apples are the perfect fall icon.

Today’s blog recipe is a bit of a different take on a beloved old classic. Apple crisp is a North American dessert which combines tender apples covered with a delectable crunchy topping. It is one of the common desserts that does not have the regular bottom crust and uses sliced or diced apples, generously doused in cinnamon and sugar, as the bottom layer.

The streusel which covers the apples can employ a wide variety of different flour types, nuts, and oats, commonly combined with butter and sugar. It results in a crumbly topping, which usually completely coats the apples, allowing them to release and cook inside the flavorful juices.

Apple crisp is believed to have stemmed from the British crumble, and today these two classics merely differ in their names. Even though the North American crisp was particularly made with oats, which resulted in a crunchier coating, nowadays both varieties can employ various ingredients.

This warm and spicy ‘apple crisp snack cake’ is a comforting twist on the favorite fall dessert. Filled with apples and topped with more apples, cream cheese drizzle the perfect crispy streusel. Orange pumpkins might be more popular this month, but there’s no better time than now to take advantage of apple fresh season.

Print Recipe
Apple Crisp Snack Cake
Votes: 1
Rating: 5
You:
Rate this recipe!
Course dessert
Cuisine American
Servings
SERVINGS
Ingredients
Apple Topping
Baked Crisp Topping
Course dessert
Cuisine American
Servings
SERVINGS
Ingredients
Apple Topping
Baked Crisp Topping
Votes: 1
Rating: 5
You:
Rate this recipe!
Instructions
Cake
  1. Preheat oven to 350 F. Line an 8 x 8inch baking pan with parchment paper. Set aside.
  2. Peel, core & grate apples. Sift flour, cornstarch, baking powder, cinnamon, allspice, cardamom & salt together in a medium bowl & set aside.
  3. Using a mixer, cream butter & sugar until light. Scrape the bowl & add the whole egg, mixing on medium-high for about a minute. Scrape the bowl again & add the egg white & vanilla; mix for another 2 minutes.
  4. Alternately fold in flour mixture & buttermilk, then gently fold in grated apples.
  5. Pour/spread batter into prepared baking pan. Bake for about 30-40 minutes or until a cake tester comes out with just a few moist crumbs. Allow to cool in pan on a wire rack.
Baked Crisp Topping
  1. Line a cookie sheet with parchment paper. Place all ingredients except butter in a bowl. Combine well then add softened butter. Mix until the mixture begins to form pea-sized clusters. Spread mixture evenly on the parchment lined cookie sheet, then bake at 350 F. for 5 minutes. Stir the topping around a bit, then bake for another 5 minutes until it begins to turn golden brown. Let crisp topping cool completely to room temperature. If crisp mixture is too chunky break it up with your fingers slightly.
Apple Topping
  1. Place apples , lemon juice & water in a small saucepan. Cook over medium heat until softened, but not falling apart. Add brown sugar, cinnamon & salt. Cook for a minute to dissolve sugar. Remove & cool until cake is baked & ready to top.
Drizzle
  1. Sift powdered sugar with salt. Set aside. Cream softened cream cheese & butter with a mixer for about 2 minutes. Add vanilla & mix to combine. Add powdered sugar & slowly incorporate into wet mixture. Add milk & beat to create a drizzle consistency.
Assembly
  1. When cake is cool, carefully & evenly spread apple topping over top of cake. Using a small piping bag, drizzle icing over apples (using a spatula, lightly spread a bit of drizzle on sides). Next, top cake with baked crisp topping. Slice & serve.
Recipe Notes
  • To make your own buttermilk, place 2 tsp of white vinegar or lemon juice in your measuring cup & add milk to equal 2/3 cup, stir & let stand until room temperature.
  • If you prefer cupcakes over the snack cake, no problem. Same idea just a different shape. Your choice!


Chocolate Sour Cherry Donuts w/ Amaretto Glaze

Fall is that time of year that we can enjoy some more of those wonderful cherries from our own little tree. The fact that we live in the northern part of Alberta, Canada and can eat cherries fresh from our tree is such a bonus.

Cherries are not native to North America, in fact both the sweet and sour varieties were brought to Canada and the U.S. in the 1600s by French and English settlers. The plants, especially the sour varieties, adapted well to our climate.
Sour cherries are a hardier plant than the sweet variety and are well-suited to growing in slightly cooler climates.
Even though these cherries are classed as a semi-sweet variety, there are still endless ways to enjoy them.

Unlike many fruits, which are at their best uncooked, sour cherries need a bit of sweetness and heat to reach their peak. Tart as vinegar, with a faint perfume of fresh fruit when raw, they need just a touch of sugar, then start them cooking and watch the tartness blossom. The aroma doesn’t fade, as one would expect; rather, the longer they cook the more it gains body and roundness, until the cherry fragrance becomes overwhelming, the fruit flavor more pronounced and the overall results unforgettable.

Most commercially produced cherry varieties, such as Bing do not cook well. These ‘sweet cherries’ may be wonderful eaten out of hand or tossed in a fruit salad, but they make bland preserves and flat, watery pies.

The tart bite of a sour cherry is glorified when transformed into any type of sweet preserve and can be used to good advantage in savory sauces where tartness is desirable. Chocolate and cherries are a classic marriage, so don’t hesitate to toss sour cherries into your favorite chocolate cake or brownie recipe as I did here.

Print Recipe
Chocolate Sour Cherry Donuts w/ Amaretto Glaze
Votes: 1
Rating: 5
You:
Rate this recipe!
Servings
Ingredients
Amaretto Glaze
Servings
Ingredients
Amaretto Glaze
Votes: 1
Rating: 5
You:
Rate this recipe!
Instructions
Donuts
  1. Preheat oven to 350 F. Spray a 6 cup donut pan with baking spray. Set aside
  2. In a large bowl, whisk the egg & sugars until well incorporated. Add in the milk, sour cream, melted butter & vanilla extract. Whisk until well combined.
  3. Using a sieve, sift in the flour, cocoa powder, baking soda & salt. Gently fold the dry ingredients into the wet mixture. The donut batter will be pretty thick at this point.
  4. Transfer the donut batter into a piping bag. Fill the donut cavities with chocolate cake batter about 1/4 full then top each with some cherries. Continue to pipe remaining cake batter on top of cherries on each donut. When baked, the donuts will have a cherry center.
  5. Bake the donuts for 17-20 minutes or until a toothpick inserted in the middle comes out clean. Let the baked donuts cool in the baking pan for 10 minutes then transfer them to a cooling rack. Let them cool completely before glazing.
Amaretto Glaze
  1. Whisk together glaze ingredients until smooth & pourable. Drizzle over cooled donuts & top with a few more cherry pieces if you wish.
Recipe Notes
  • Lor Ann  AMARETTO FLAVOR is sweet, with a slight cherry taste and a hint of almond that adds an extra layer of flavor to the donuts.


Breakfast Cereal Mini Cakes

Since they were introduced in 1941, Cheerios have been a staple in households across North America. They remain one of the most popular breakfast cereals on the market and are now available worldwide.

Cheerios are primarily made from whole grain oats and come in an assortment of flavors. In fact, there are at least 15 varieties — with seasonal ones appearing on occasion.

A bowl of cereal is perfect for a quick breakfast. Or lunch. Or, let’s be honest, dinner. And while these are perfectly acceptable uses of cereal, there is so much more you can do with them from snacks and desserts to buttery casserole coatings that take the morning mainstay to new heights.

To enhance these cupcakes, the regular milk is switched out for ‘cereal milk’ (milk that’s been soaked in sweet cereal).

Cereal milk tastes like that dense, slightly sweet, starchy, oaty milk from the bottom of the cereal bowl, that everybody loves to enjoy at the end.

The nostalgic and comforting combination of milk and cereal combined in this cupcake recipe is really quite special. These seem like kind of a ‘kid’ thing but I’m sure it won’t take long for them to disappear.

Print Recipe
Breakfast Cereal Cupcakes
Votes: 1
Rating: 5
You:
Rate this recipe!
Servings
MINI CUPCAKES
Ingredients
Mini Cakes
Servings
MINI CUPCAKES
Ingredients
Mini Cakes
Votes: 1
Rating: 5
You:
Rate this recipe!
Instructions
Mini Cakes
  1. Preheat oven to 350 F. Line a 24 cup mini muffin pan with cupcake liners. Set aside.
  2. In a liquid measuring cup, stir together the milk & 1/4 cup Very Berry Cheerios. Microwave for 30 seconds, stir, & set aside while you prepare the batter.
  3. In the bowl of a stand mixer, cream together the butter & sugar on medium speed until light & fluffy. Add in the eggs on at the time, scraping the bowl as necessary.
  4. In a separate bowl, whisk together the flour, baking powder, & salt. Using a fork, remove the cereal from the milk. Discard the cereal. Make sure you still have 1/2 cup milk, add more if necessary. Add the honey & vanilla extract to the milk. Whisk together.
  5. Gradually add 1/3 of the dry ingredients, mix to combine. Add 1/2 of the wet ingredients, mix. Repeat, ending with dry ingredients.
  6. Divide the batter between 24 muffin cups. Bake for 8-10 minutes, or until a toothpick comes out clean. Let cool in the pan for 5 minutes, then remove to a wire rack to cool completely.
Frosting
  1. In a bowl, whip cream cheese & butter. Beat on medium-low speed until smooth & combined, 1-2 minutes, scraping the sides of the bowl as needed.
  2. Sift powdered sugar into the cream cheese mixture & add the vanilla, lemon juice & salt. Beat the frosting on a low speed to combine, then increase the speed to medium-high & beat until light & fluffy, 1-2 minutes, scraping down the sides of the bowl once or twice.
  3. Add slightly crushed cheerios & FOLD into mixture gently. Top each COOLED mini cake with a dollop of frosting then sprinkle with extra cheerios.
Recipe Notes
  • If you prefer, bake in 12 regular size muffin cups.