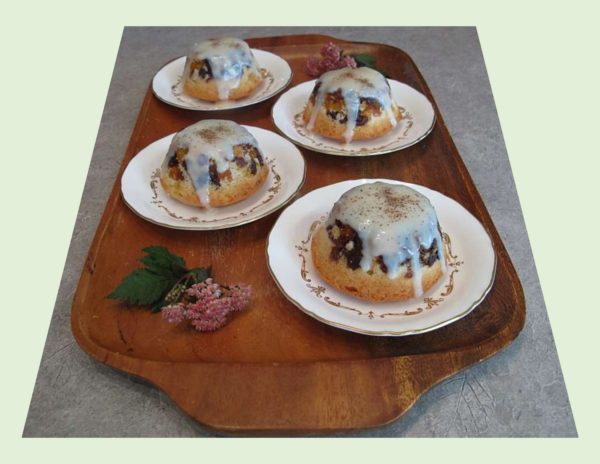
No other spice more completely captures the essence of the exotic. Cardamom’s complex flavor is difficult to describe. There’s nothing subtle about cardamom, so when used in all but sparing amounts it will dominate whatever its paired with. Used properly, it elevates sweet and savory dishes, adding layers of flavor.
A versatile spice, in that it can be used in everything from desserts to main courses. Relatively expensive, coming in after saffron and pure vanilla, but well worth the expense.
Today, I’m back to ‘recipe development’. My plan is to create some tender, little orange cakes and topping them with a fruit and spice mixture reminiscent of flavors from Morocco.
Print Recipe
Cardamom Fruit Cakes with Rum Sauce
Votes: 1
Rating: 5
You:
Rate this recipe!
|
|
Votes: 1
Rating: 5
You:
Rate this recipe!
|
Instructions
Fruit Topping Mixture
In a small bowl, combine dates, apricots, raisins, apple & remaining orange juice & zest from cake ingredients. Season with cardamom & mace; mix well. Preheat oven to 350 F. Lightly butter 6 custard baking cups. Divide fruit between them; covering bottom & pressing a bit up the sides. Set aside.
Cake
In a small bowl, beat together eggs & sugar until thick; gradually beat in oil. In a small dish, combine flour, baking powder & salt. Stir flour into egg/sugar mixture, then add orange juice. Combine well then add zest & vanilla.
Pour the batter over fruit in custard cups, dividing it evenly between them. Bake 15-20 minutes or until they test done with a toothpick. Allow the cakes to cool for about 5 minutes, then invert onto a rack to finish cooling. When ready to serve, place on individual dessert plates & drizzle with warm rum sauce.
Rum Sauce
In a small saucepan, over medium heat, melt butter. Combine sugar & cornstarch; stir into melted butter. Slowly pour in milk, stirring frequently until mixture begins to lightly boil. Continue cooking until thick, stirring constantly. Remove from heat & stir in rum extract. Serve warm.
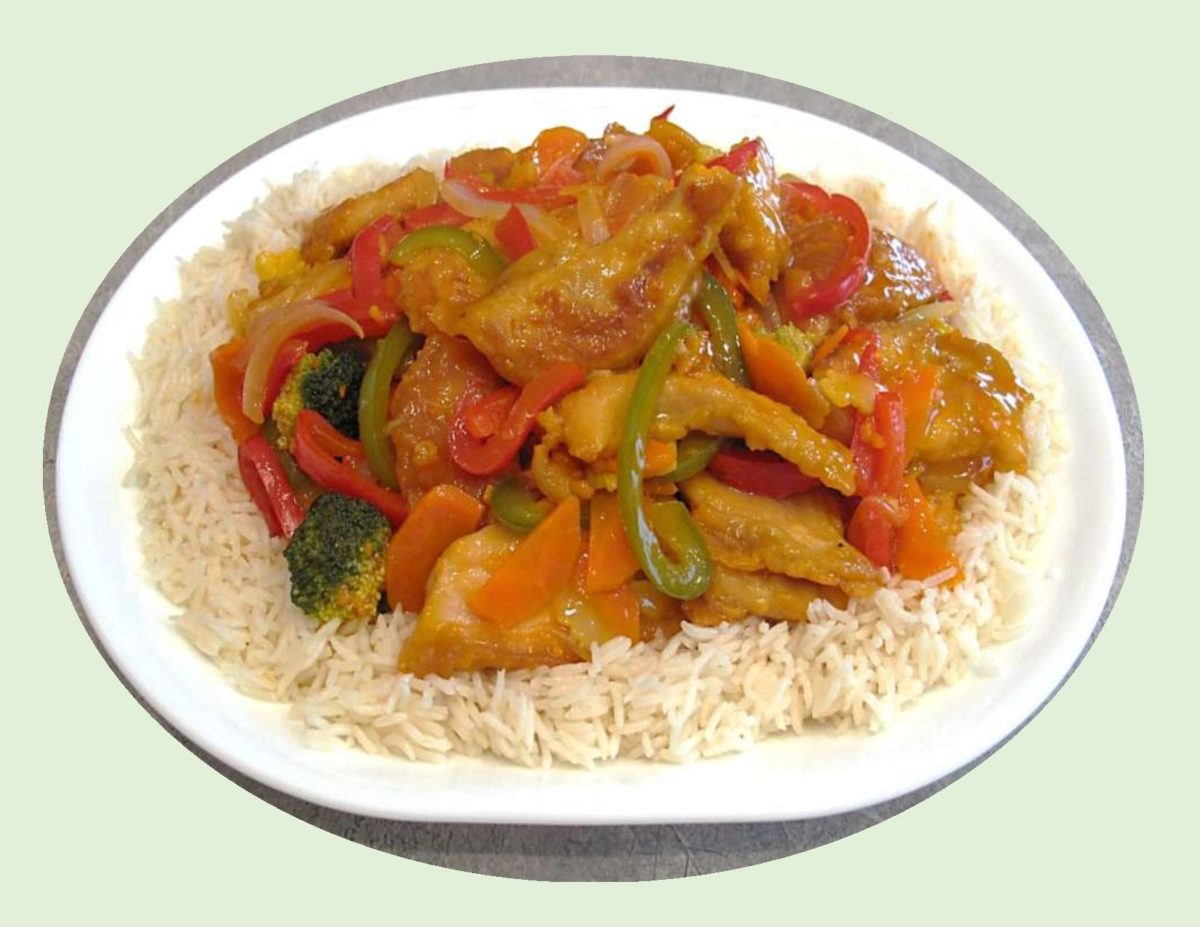
Though called Chinese food in North America, ‘orange chicken’ is rarely found in Chinese restaurants in China. It seems its more an Americanized mutation of the sweet & sour dishes found in China.
Chef, Andy Kao is credited with inventing orange chicken in 1987. Inspired by flavors from the Hunan Province of China, he developed the dish while he was employed as Panda Express’ executive chef in Hawaii.
I, personally, have never enjoyed eating anything that is coated in a heavy batter. Tempura is different from other fried fare due to its distinctive batter. It uses no bread crumbs and less grease than other frying methods. The light batter is made of cold water (sometimes sparkling water is used to keep the batter light) and soft wheat flour. Eggs, baking powder, baking soda, cornstarch, oil and/or spices may also be added.
Tempura batter is traditionally mixed in small batches for only a few seconds. Leaving lumps in the mixture along with the cold batter temperature, result in a unique fluffy and crisp structure when cooked. Over mixing tempura batter will result in activation of the wheat gluten, which causes the flour mixture to become soft and dough-like when fried.
The orange chicken I’m making today uses a nice light tempura batter, is grilled instead of deep fried, then coated with a unique and quick orange sauce (from kraftcanada.com). Add some Jasmine rice and veggies — perfect!
Print Recipe
Orange Tempura Chicken
Votes: 4
Rating: 4.5
You:
Rate this recipe!
|
|
Votes: 4
Rating: 4.5
You:
Rate this recipe!
|
Instructions
Vegetables
Prepare vegetables & saute in 1/2 cup chicken broth ONLY until tender-crisp. Drain broth & reserve for sauce when vegtables are sauteed.
Orange Sauce
In a small saucepan, combine dry jelly powder & cornstarch. Add broth, dressing, garlic & gingerroot; stir until jelly powder is dissolved. Add reserved broth from vegetables & cook until sauce is thickened, stirring frequently.
Tempura Batter & Chicken
Slice chicken into strips. In a small bowl, combine flour, cornstarch, baking soda & salt. In another small bowl, whisk egg with veg oil, soy sauce & ice water. Add to dry mixture, mixing only for a few seconds. Batter should be somewhat 'lumpy'.
Heat oil on an electric griddle to a medium heat. Dip slices of chicken in tempura batter with a fork, draining off excess. Place on griddle & fry about 7 minutes or until cooked through. Drain on paper towels.
Prepare Jasmine rice & place on a serving platter. Top with sauteed vegetables & chicken. Ladle orange sauce over vegetables & chicken. If you prefer, serve rice, veg, chicken & sauce all separately so everyone can make up there own combination.
Recipe Notes
- We always like quite a bit of sauce but if you don't, just make half a recipe of the orange sauce.
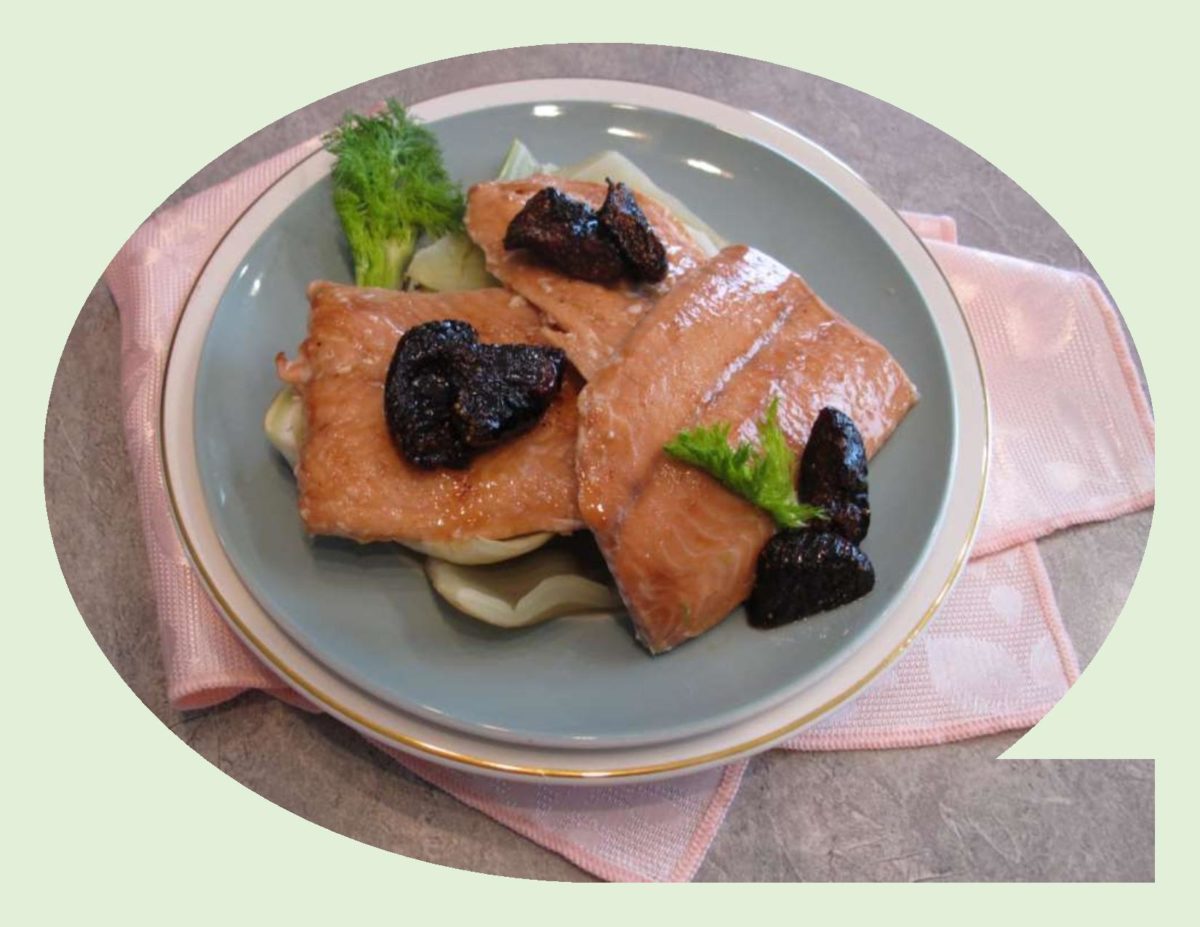
Figs, another symbol of Autumn, begin to ripen in late summer. Native to European and Middle Eastern regions but today are widely available around the world. This tear-drop shaped fruit is singular in appearance and flavor. From their characteristic perfumed fragrance to their fragile skin, that is often slit from ripeness, revealing drops of honeyed nectar.
I love the sweet earthiness of figs with all their little seeds, whether they are fresh or dried. Any recipe that calls for peaches, pears, prunes or dates can be substituted successfully with figs. Pairing them with the aromatic anise flavor of fennel is a great compliment to salmon as well as other entrees or baking.
Fennel has been a favorite of Italians for many years due to its mild sweet anise flavor. All parts of the fennel plant, including the bulb, stalk, leaves and seeds are edible.
This recipe is simple but has a wonderful flavor. We enjoyed it served over Jasmine rice.
Print Recipe
Salmon with Roasted Figs & Braised Fennel
Votes: 1
Rating: 5
You:
Rate this recipe!
|
|
Votes: 1
Rating: 5
You:
Rate this recipe!
|
Instructions
Fennel
Preheat oven to 375 F. Cut outer leaves of fennel off & discard. Remove stalks, reserving a few fronds for garnish if you wish. Cut the fennel into quarters leaving root in tact. Place a large oven-proof pan over medium-high heat. Add olive oil & allow to heat. Place fennel into the pan ; cook & sear to a golden brown, about 3-4 minutes. Season with salt & pepper & add the chicken broth. Place in preheated oven & roast for about 10 minutes or until slightly soft but still holding quite a bit of firmness in center.
In a small saucepan, combine honey, vinegar & chili powder. Heat & simmer for 3 minutes. Quarter figs & place them on a baking sheet. Drizzle figs with the honey mixture. Place in the oven & roast for 4 minutes or until warm, bubbly & caramelized but still holding their shape.
Salmon
Season salmon fillets with salt & pepper. In a large non-stick skillet, add vegetable oil & heat. Place salmon in skillet & fry on each side until flesh is opaque & translucent in the center. Do not overcook. Serve immediately with the roasted caramelized figs.
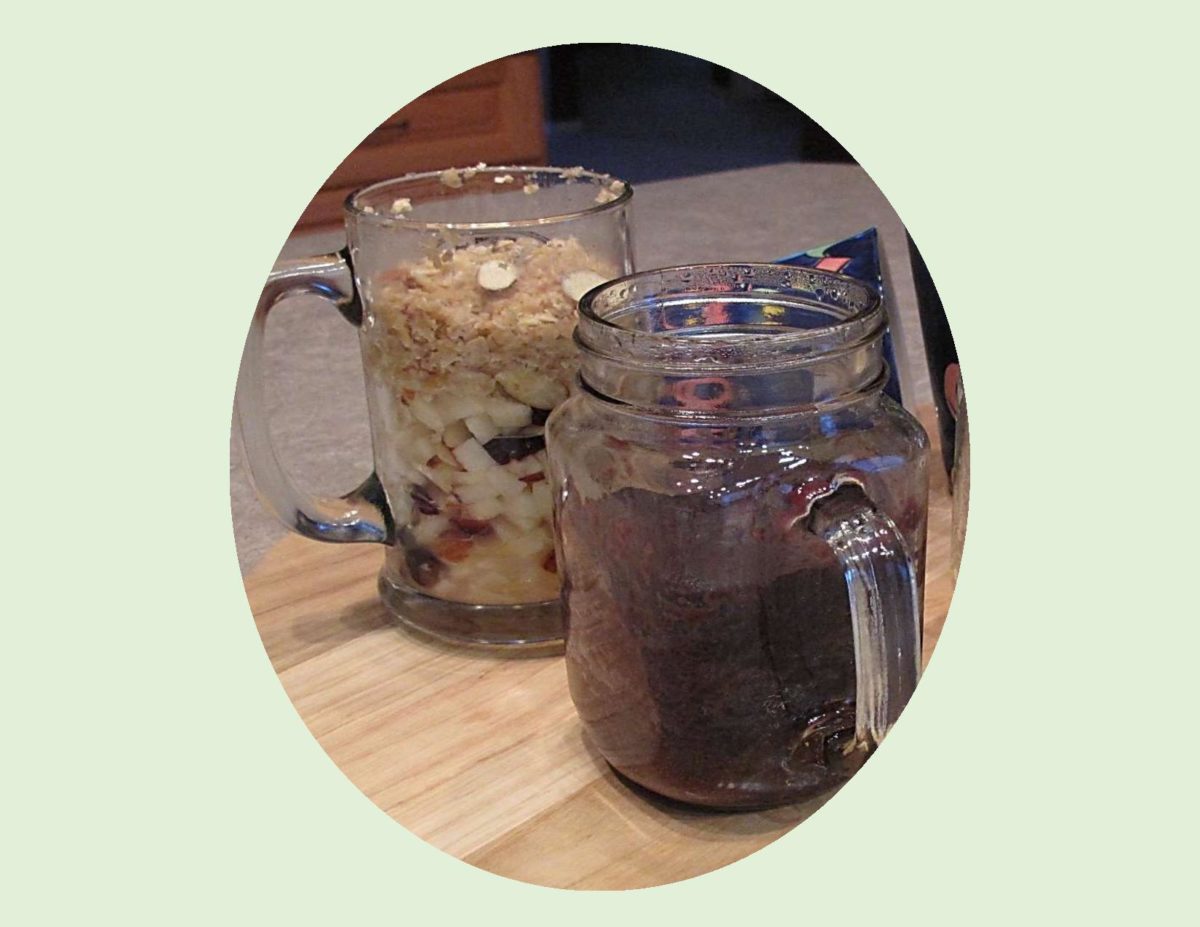
Mug cakes have been around for a while. We seem to like eating food out of mugs. Whether it’s a mug full of chili or just some cereal and milk, we like being able to hold our whole meal in our hands and enjoy it by the spoonful. Mug cakes have gained popularity not only because they are delicious, but because you can make them in five minutes. The technique uses a mug as the cooking vessel and takes just a few minutes to toss in the ingredients. It then goes into the microwave; as the butter in the mixture heats up, it creates air pockets that will cause the cake to quickly rise. The problem is that microwave baking is tricky and not every ‘cake-in-a-mug’ recipe you come across will work well.
I’ve tried a few with varying degrees of success. Nevertheless, they are a great way to satisfy an emergency homemade treat craving without even turning on the oven.
Here are some ideas you might like to try.
Print Recipe
Mug Crumble Cake/ Chocolate Mug Cake
Votes: 1
Rating: 5
You:
Rate this recipe!
|
|
Votes: 1
Rating: 5
You:
Rate this recipe!
|
Instructions
FRUIT CRUMBLE MUG CAKE
In a small bowl, combine apple with sugar & butter. Divide between 2 mugs. Cover each with plastic film & pierce several times. Cook in microwave for 1 minute at 800 watts or 50 seconds at 1000 watts. Add dried fruit & nuts & stir.
In a bowl, combine butter, brown sugar, oatmeal, flour & salt with your fingertips. Crumble on top of fruit in each mug. Microwave for 1 1/2 minutes at 800 watts or 1 minute 10 seconds at 1000 watts. Remove mugs from microwave & sprinkle with sliced almonds.
CHOCOLATE MUG CAKE
In a small bowl, combine dry ingredients. Add milk & oil; whisk together until smooth. Divide between 2 mugs & microwave on high for about 70 seconds. Remove from microwave. Cool a bit before eating.
Recipe Notes
- Be aware that success will depend on knowing how to adjust the cooking time according to YOUR microwave strength (watts). Be careful not to overcook your mug cakes.
- Each recipe should yield 2 mugs worth.

This meal, better known in German ‘circles’ as Weisse Bohnensuppe & Plachinda. Kind of an unusual pairing of sorts — bean soup with a sweet pumpkin pastry?? It is one of those meals my mother used to make that got pushed into the back of my memory. With pumpkin season approaching and the weather feeling like fall, hearty soups start to come to mind.
Once again I set out to bring back the ‘taste of a memory’. Of course, this usually starts with some discussion about the meal with my sister Loretta. Between the two of us we can usually remember enough so I can attempt to recreate the taste.
It seems most recipes you find on the internet make plachinda as individual turnovers. I think I recall my mother making it in a rectangle casserole dish with the pastry on the bottom and up the sides and the filling showing. I decided to make it as a ‘jelly roll’.
Here’s my ‘spin’ on this much loved meal. Good but as usual never quite as wonderful as my mother’s.
Print Recipe
White Bean Soup with Pumpkin Pastry
A full-bodied soup with a rich appetizing flavor served with a German pumpkin pastry.
Votes: 1
Rating: 5
You:
Rate this recipe!
Ingredients
Pumpkin Plachinda Filling
Ingredients
Pumpkin Plachinda Filling
|
Votes: 1
Rating: 5
You:
Rate this recipe!
|
Instructions
White Bean Soup
Cover beans with water in a large stock pot & soak overnight.
Rinse & drain beans well; return to pot with ham bone & 12 cups water. Simmer uncovered for 2 hours.
Add parsley, onions, garlic, celery with tops, salt & pepper as well as the extra 6 cups of hot water. Simmer, uncovered for 1 hour or until vegetables are tender. Remove ham bone, dice the meat & add to soup. Serve with pumpkin plachinda.
Pumpkin Plachinda
In a small bowl, combine filling ingredients; set aside. Preheat oven to 350 F. Lightly grease a 9 x 13-inch baking pan (or line with parchment paper).
In a medium bowl, combine flour, sugar, baking powder & salt. Whisk together eggs, milk & oil; add dry ingredients, working into a soft, stiff dough. Turn onto a lightly floured piece of parchment paper. Roll dough into a 14 x 14-inch square; spread pumpkin filling down the center & half way out to the sides -- about 1/4 -inch thick.
Fold outside third of the dough over filling, repeating with the last third; pinch to seal. Leaving plachinda on paper, transfer to a baking sheet. If preferred, individual turnovers can be made instead. Bake for about 35-40 minutes or until golden brown. Slice & serve warm.
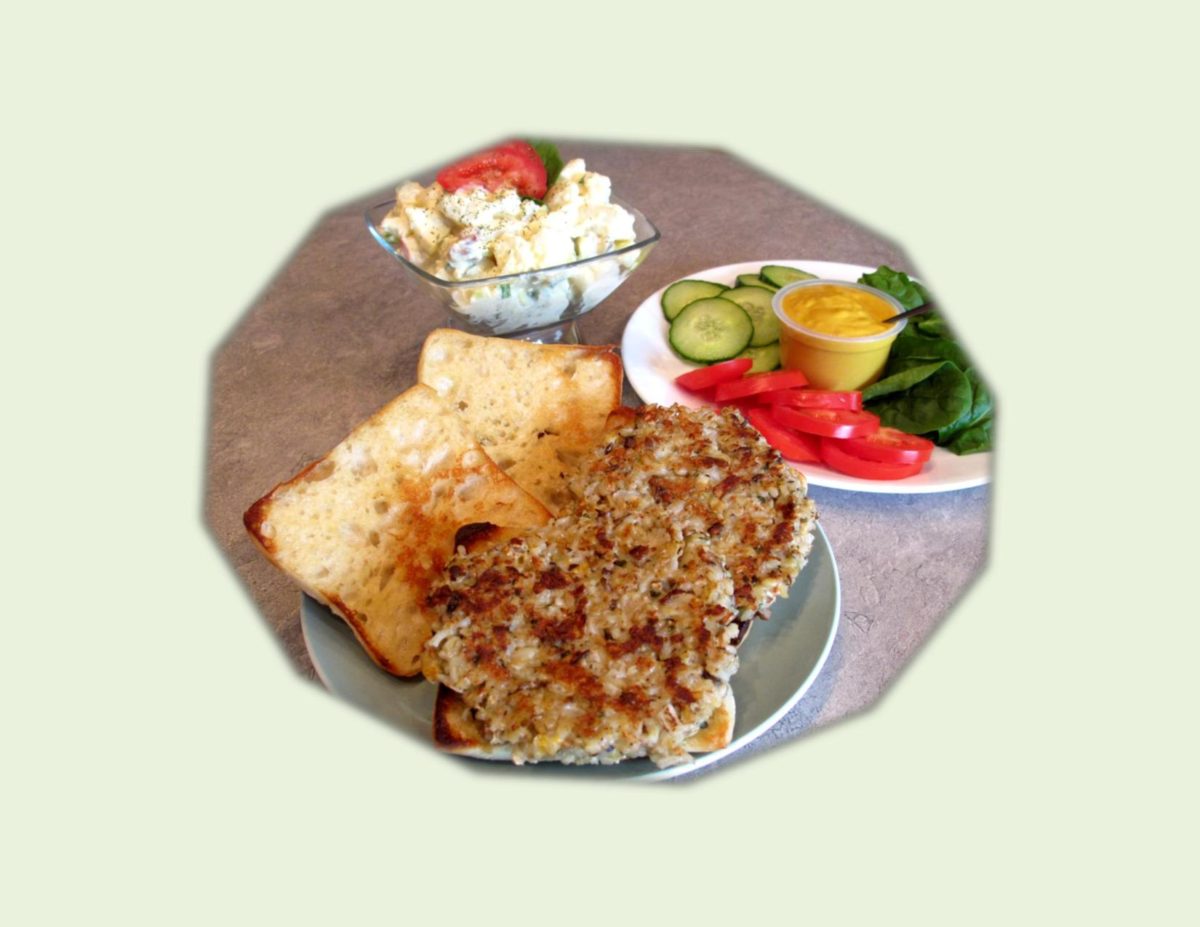
Some of my favorite foods have always been vegetables and grains. Being a farmer’s daughter I guess it all makes good sense. When ever I had the opportunity to try a ‘veggie’ burger in our travels I would do so only to be disappointed.
When my parents were still alive, they lived in Southern Alberta. Whenever Brion & I could take time from our jobs, we would make a weekend trip to see them. We would leave Edmonton right after work on a Friday night. We always made Red Deer our supper stop and then continue on. The trip usually took about five hours.
Our favorite restaurant at that time was a place called Glenn’s. I came across the perfect Garden Grain Burger on their menu, which tasted like non other I had tasted before. For a long time I tried to replicate it with no real success. Then one day I happened to see a recipe on the tasteofhome.com website that had all the same ingredients. I tried it, made a few very minor adjustments and loved it.
I’m passing it on to you today, adding it to the ‘burger series’. Even if you are not into vegetarian eating I’m sure you will enjoy the flavor. The ingredient list is long but it makes twelve patties so some can be frozen for another meal when time is of the essence.
Print Recipe
Garden Grain Burgers
A satisfying combination of brown rice, bulgur wheat, oats, mushrooms & cheese gives an almost nutty flavor to this meatless 'burger'.
Votes: 1
Rating: 5
You:
Rate this recipe!
Ingredients
- 1/2 cup brown rice, uncooked
- 1/2 cup bulgur, uncooked
- 1 Tbsp salt-free seasoning blend
- 1/4 tsp poultry seasoning
- 2 cups water
- 2 cups fresh mushrooms, finely chopped
- 3/4 cup old-fashioned oats
- 112 grams (1 cup) mozzarella cheese, part-skim, shredded
- 30 grams (1/4 cup) cheddar cheese, low-fat, shredded
- 1/3 cup onion, finely chopped
- 1 cup cottage cheese, fat-free
- 1/2 cup egg substitute
- 2 Tbsp fresh parsley, minced
- 1 tsp salt
- 1/2 tsp dried basil
- 1/4 tsp celery seed
- 1 Tbsp veg oil
- 12 Ciabatta buns or your choice
- lettuce, tomato slices, mustard for toppings
|
Votes: 1
Rating: 5
You:
Rate this recipe!
|
Instructions
In a large saucepan, combine the rice, bulgur, seasoning blend, poultry seasoning & water; bring to a boil. Reduce heat; cover & simmer for 30 minutes or until rice is tender. Remove from heat; cool completely. Cover & refrigerate overnight if possible.
In a large bowl, combine the mushrooms, oats, mozzarella cheese, cheddar cheese & onion. In a food processor, process cottage cheese & egg substitute until smooth; add to the mushroom mixture. Stir in parsley, salt, basil, celery seed & chilled rice mixture. Shape 1/2 cupfuls into patties.
On a large non-stick griddle, cook patties in oil for 5 minutes on each side or until lightly browned & crisp. Serve on lightly grilled buns with mustard, lettuce & tomato slices.
Recipe Notes
- If you decide to freeze some of the patties, do so before grilling. 'Flash freeze' them on a tray individually, then wrap in foil tightly & place them in a plastic bag in a air tight plastic container. When you are ready to use them just thaw & grill.
