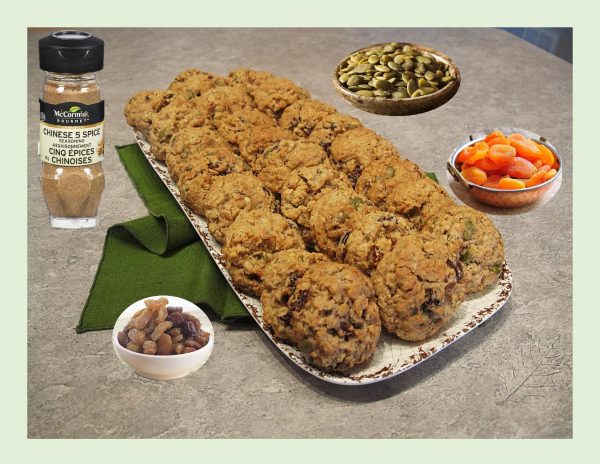
I’ve always been a huge fan of Chinese 5-spice. The aroma and flavor are just pure magic. This peppery-sweet mixture provides endless options for its use.
Perhaps the most amazing thing about this spice blend is how well it compliments both sweet and savory dishes.
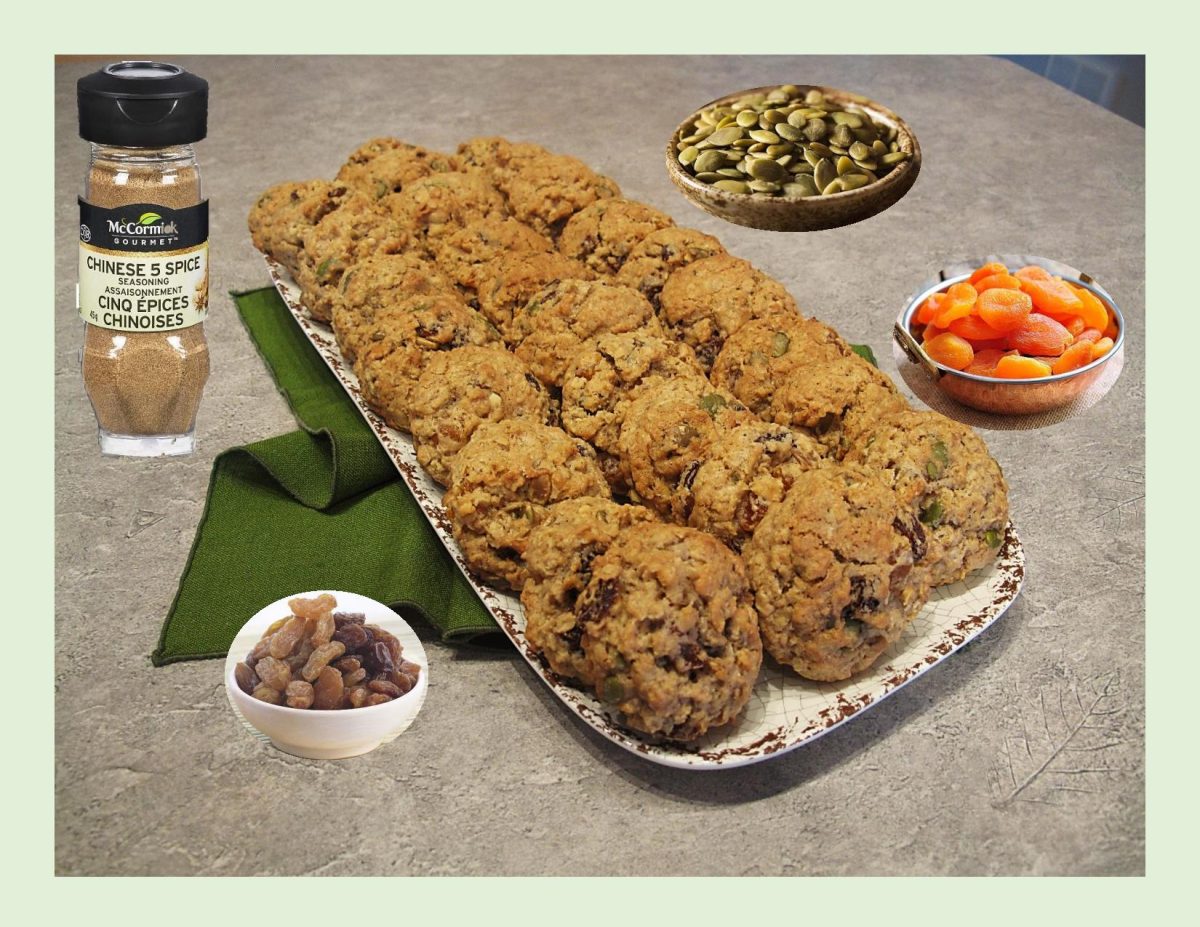
In this recipe, the apricots offer a subtle sweetness to these cookies, while the Chinese 5- spice adds a spicy perspective and chopped pepitas add a nutty crunch. Blend that all together with oatmeal & raisins and you get a nice range of flavors.
Print Recipe
Apricot Raisin Five-Spice Oatmeal Cookies
Votes: 1
Rating: 5
You:
Rate this recipe!
|
|
Votes: 1
Rating: 5
You:
Rate this recipe!
|
Instructions
Cream butter & sugars together well. Add egg & vanilla; beat until light & fluffy.
Sift together flour, five-spice powder, nutmeg, salt & baking soda.
Fold the dry ingredients into the creamed mixture. When the dry ingredients are almost incorporated, add the oatmeal, raisins, apricots & seeds.
Chill the dough for about an hour before baking for best results.
-
Scoop onto parchment lined cookie sheet about 2 1/2 inches apart. Bake for about 10 minutes. Do not over bake or the cookies will lose their chewy texture.
-

Crepes come in many flavors and styles and can be eaten as appetizers, side dishes, main courses or desserts. Barley flour is nutty and nutritious and perfect to use in crepes.
Barley has always been a grain I have enjoyed. Not only a good choice in soups and entrees, but perfect when ground into flour for baked goods. Barley has a weaker gluten than wheat flour, however, so it may not rise as well as recipes made with wheat flour. As a result, barley flour is usually mixed with wheat flour when baking yeast breads.
An underrated and underused grain, barley is actually Canada’s 3rd largest crop after wheat and canola. More barley is grown in Alberta than any other province.
That lovely nutty flavor that works well with fruits like apples and pears, is amazing in a savory meal of chicken and mushrooms.
Most of us don’t think nutrition when we think of crepes. Generally, crepes use all-purpose flour, milk and butter with more butter added to the pan. These crepes use whole barley flour in both the crepes and the filling .. how good is that!
Print Recipe
Chicken & Mushroom Barley Crepes
Votes: 1
Rating: 5
You:
Rate this recipe!
|
|
Votes: 1
Rating: 5
You:
Rate this recipe!
|
Instructions
Crepes
In a bowl, combine flour & salt. Whisk in milk until mixture is smooth.
Heat a small non-stick skillet or crepe pan (6-8-inches) over medium-high heat. Brush bottom of pan with oil. Using a 1/4 cup measure of batter, add to pan & quickly tilt pan to cover bottom with batter.
Shake pan to loosen crepe & cook until edges of crepe begin to curl & it no longer sticks to the pan, about 30 seconds.
Gently flip crepe over & cook for a few seconds. Remove from pan & set aside. Repeat with remaining batter.
Sauce
In a saucepan over medium-high heat, melt butter, sauté mushrooms & garlic until lightly browned. Add flour, stirring until completely mixed in. Gradually stir in milk, salt, pepper & dried herbs; cook until thickened, stirring constantly.
If you are using broccoli florets, cook in microwave for 1 or 2 minutes to precook slightly.
Preheat oven to 375 F. Set out a 9 x 13-inch baking pan.
Set aside 1 cup of the sauce. Into remaining sauce add the chicken, broccoli & 1/2 of the grated cheese; gently combine.
Spread a small amount of reserved sauce in bottom of baking pan. Divide filling between crepes. Gently fold each side of the crepe to the middle. Place crepes seam side down in baking dish & top with 1/2 of sliced green onion, remaining sauce & cheese.
Since the sauce is fairly thick, I set the pan of crepes into another pan that had about 1/2-inch of water in it to create a 'water bath'. This helped them to cook without getting to crisp on the bottom.
Cover the pan with a sheet of foil & bake for 30-45 minutes. Remove from oven & sprinkle with remaining green onion. Serve.
Recipe Notes
- If you would prefer to make smaller crepes, use a 1/8 measuring cup or 2 Tbsp instead of the 1/4 cup measure. It should give you roughly 10 crepes.

I guess I’ll have to take the blame for Brion’s love of dessert. When we were first married years ago, he really didn’t care much about sweets. I, on the other hand, had grown up in a German family where every meal was finished with something sweet. It didn’t have to consist of anything more than a dish of vanilla pudding, but it was sweet and that’s what mattered. Funny how something like that can become so ingrained in your life. Of course, over time Brion has come to like dessert as much as I do, not really a good thing now that we are getting older … hmmm!
But I need to explain today’s decadent blog dessert. I just happens, we are celebrating Brion’s birthday so we are pulling out all the stops and having cheesecake! Of course, some of it will probably end up in the freezer but that works to.
Brion and I have never been much on giving each other ‘gifts’ for special occasions. Our time spent together ‘just living’, whether its at home or on a vacation has always been the best gift. Throughout our married life Brion has always gone above and beyond to look after us. I’m grateful to have the privilege of such a loving and caring husband.
So here we are, celebrating you, my love with rhubarb cheesecake and all the trimmings. Life is good!
HAPPY BIRTHDAY WITH LOVE!
Print Recipe
Rhubarb Cheesecake
Votes: 1
Rating: 5
You:
Rate this recipe!
|
|
Votes: 1
Rating: 5
You:
Rate this recipe!
|
Instructions
Candied Rhubarb Curls
Make the simple syrup, combining the sugar & water in a small pot and heating until dissolved. Let the syrup cool to room temperature, add gel food coloring stirring to combine. Using a paring knife (or try a vegetable peeler), slice long, thin strips of rhubarb from the outer stalk. Soak the ribbons in the cooled simple syrup for about 5 minutes.
Preheat the oven to 200 F. Line or lightly grease a baking sheet. Lay each ribbon on the baking sheet. Bake until the ribbons have dried out. Note: they will still be sticky and flexible from the heat.
If you want to make curls, work with one or two ribbons at a time so the remaining ribbons can stay soft in the oven. Wrap each ribbon loosely around skewers or the handles of cooking utensils, and let dry for around 10 minutes before gently sliding the curled ribbons off.
Rhubarb Layer
Cook rhubarb, sugar & water. Simmer for 8 minutes over medium heat. Add in the cornstarch & cook 2 more minutes. Set aside to cool.
Cheesecake Layer
Beat together the cream cheese with icing sugar until smooth then add eggs. Try not to overmix at this point. Refrigerate until ready to use.
Crust/Crumb Layer
Line a 9-inch springform pan with foil paper. Crumble together butter, flour, oats, brown sugar & salt. Add two thirds of the mixture to springform pan & press firmly. Add walnuts to the remaining crumbs & set aside.
Assembly
If using a silver springform pan, bake at 325 F. If using a dark nonstick springform pan, bake at 300 F. Bake bottom layer of crumbs for 10 minutes. Remove from oven, pour cheesecake mixture over the crust & spread with a spoon, being careful not to disturb the crust layer too much.
Spread the rhubarb mixture on top of the cheesecake.
Crumble the remaining crust/crumb mixture evenly over the top & lightly press down.
Bake until topping is golden brown & cheesecake is set, about 50 minutes.
Cool completely, then decorate with fresh strawberries, rhubarb curls, chocolate malt balls & silver sugar pearls or as you wish.
Recipe Notes
- You will have extra candied rhubarb to nibble on!
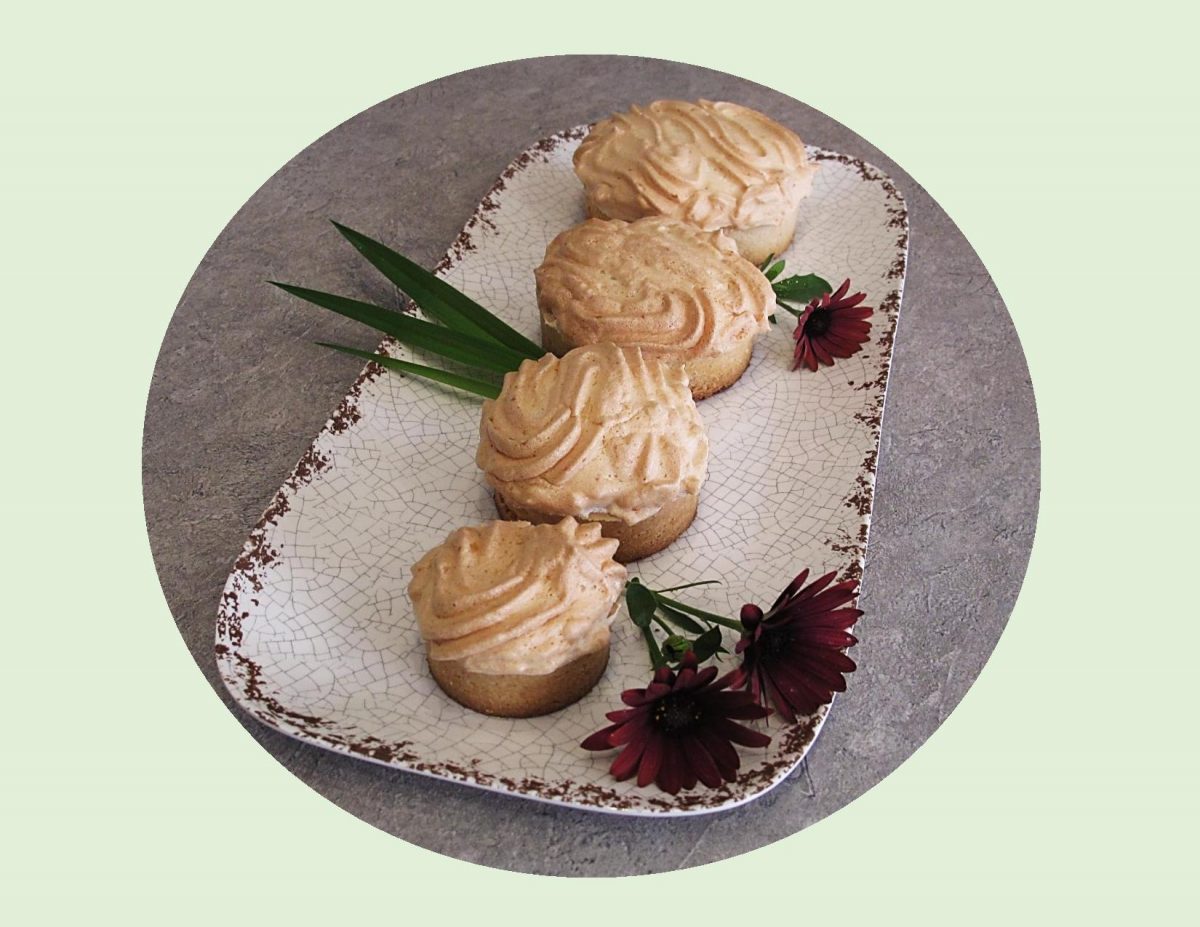
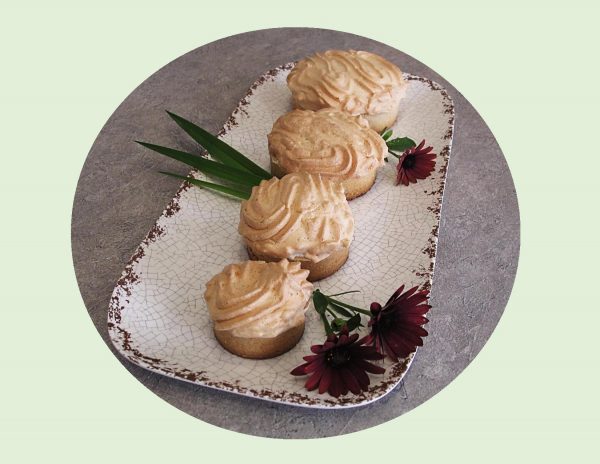
There’s just something incredibly refreshing about pineapple tarts with their tangy, bright, acidic flavor nestled in shortbread crusts. Adding meringue puts a tropical twist on the classic meringue pie making them a perfect summer treat.
When it comes to making meringue, simple ingredients and instructions can lull you into thinking preparation is quick and easy. Make it once under the wrong conditions, however, and you may quickly change your mind.
Meringue is temperamental. Getting it right can be a tricky process. Weeping meringues aren’t very pretty. The meringue pulls back from the crust, moisture beads on the topping, and a clear liquid forms below the crust. It doesn’t hurt the pie but it’s not presentable.
Years ago, when I worked in the commercial food industry, I started using the idea of adding cornstarch to meringue to help stabilize it. Cornstarch is especially helpful in hot, humid weather when a meringue is most likely to absorb extra moisture.
The science behind this ‘secret ingredient‘ is that cornstarch is composed of long molecules that it is believed insert themselves between egg white proteins to prevent them from clotting too much while meringue is baking. Corn starch molecules also provide more hold for meringue. It will be easier to cut and is less likely to weep.
Brion & I are not crazy about meringue but do enjoy it for a treat once in a while.
Print Recipe
Pineapple Meringue Tarts
Votes: 1
Rating: 5
You:
Rate this recipe!
|
|
Votes: 1
Rating: 5
You:
Rate this recipe!
|
Instructions
Shortbread Crust
-
In a bowl combine butter & sugar; beat until light & fluffy. In another bowl whisk together flour & baking powder; add to butter/sugar mixture. Blend together. Divide pastry between 6 individual tart pans. Using your fingertips, evenly press the dough into pans. Place on a baking sheet & blind bake for 10 minutes or until golden. Remove from oven & allow to cool.
Pineapple Filling
In a saucepan, combine cornstarch & sugar. Gradually add water, stirring until mixture is smooth. Add lemon zest & undrained pineapple. Stir constantly over medium heat until mixture starts to boil. Reduce heat, boil 2 minutes while continuing to stir. Remove from heat, quickly stir in butter & egg yolks blending well. Allow mixture to cool to room temperature.
Meringue
In a small saucepan, combine water & cornstarch. Heat & stir until it boils & thickens. Cool thoroughly.
Beat egg whites & salt until a stiff froth. Add sugar gradually, beating until stiff & sugar is dissolved. Add vanilla & cornstarch mixture. Beat until blended & stiff.
Assembly
Divide pineapple filling between tart shells. Pipe meringue over tarts sealing to edges. If not sealed well, meringue will shrink when cool. Bake in 350 F. oven about 10 minutes until golden. Cool away from drafts.

Rhubarb is the rebel of the vegetable world. It looks like celery, tastes like sour candy, its leaves are poisonous and unlike most spring and summer produce, its barely edible raw. With such a feisty personality, its no wonder some are intimidated to cook it.
More than any other fruit or vegetable, rhubarb to me is the sign of the changing season. It is the signal that summer is arriving in those ruby red or speckled green & pink stalks. I snap up what I can in the garden and when I see it at the supermarket. I take all I can and more, slicing and freezing the excess for rhubarb cravings that come in winter.
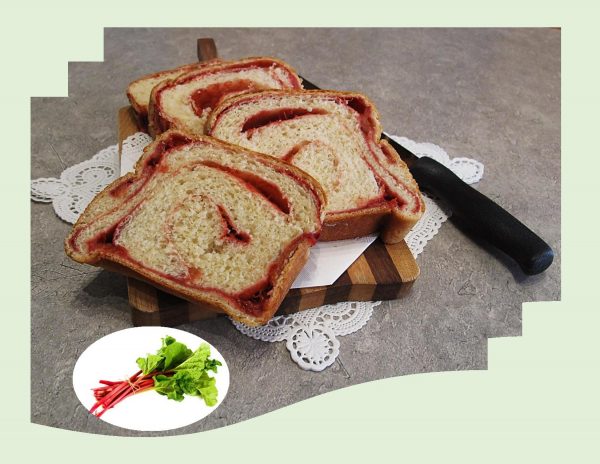
Year-round, I save rhubarb recipe ideas I hope to make once I get my hands on the first stalks of the season. No summer would be complete without cinnamon rhubarb bread …. still warm from the oven and the heavenly smell of cinnamon in the air!
Print Recipe
Cinnamon Roll Rhubarb Bread
Votes: 1
Rating: 5
You:
Rate this recipe!
|
|
Votes: 1
Rating: 5
You:
Rate this recipe!
|
Instructions
Rhubarb Filling
In a saucepan, combine all ingredients except vanilla & food color. Heat to medium high & stir occasionally until rhubarb begins to break down completely. Remove from heat, stir in vanilla & food coloring; allow to cool to room temperature.
Dough
In a small dish, combine yeast with lukewarm water & 1 teaspoon of the sugar. Allow to sit for a few minutes until frothy.
In a large bowl, slightly melt butter; cool a couple of minutes then whisk in egg. In another bowl, whisk together flour, salt & remaining sugar. Add yeast mixture to butter mixture, whisking together. Add flour mixture, combine then turn on a floured work surface & knead for about 5 minutes. Dough will be very soft but not sticky.
Lightly grease bowl, place dough ball in it & cover with a towel. Place in a draft-free place & allow to rise for about 20 minutes. Butter a 9 x 5-inch loaf pan; set aside
Turn the dough onto a lightly floured work surface & press down to deflate it. Fold in the two opposite sides to meet in the middle, then fold in the remaining two sides to meet, so that you've formed the dough into a square. Press down to flatten it slightly, then cover loosely and let stand for 10 minutes
With a floured rolling pin, rolling the dough to form a rectangle that's 12 by 22 inches. Make the corners as square as possible. If you're having trouble with the dough shrinking back, pause briefly before trying again.
Spread rhubarb/cinnamon filling over the dough, leaving a 1-inch border around the edges. Now fold the two long sides of the dough in one at a time, so that the meet each other in the middle. Pinch them together gently to seal the seam. Gently roll over the surface with a rolling pin to flatten the folded dough to about 7 by 25 inches.
Starting at the narrow end, roll up the dough, making a thick spiral. When you get to the end, brush a little egg wash on the loaf at the spot where the end will hit. Pinch the end a bit to seal it.
Carefully & gently place the roll, seam side-down in the buttered pan. The roll of dough should nearly fill it. Cover it loosely with plastic wrap & place in a warm, draft-free place to rise for about 25-30 minutes, until almost doubled & about 2 inches above the top of the pan. Meanwhile, adjust the oven racks so that you have one rack one-third up from the bottom of the oven.
-
Lightly brush remaining egg wash over loaf & bake for about 20 minutes. You may need to cover the top loosely with aluminum foil towards the end of baking to prevent over-browning. Bake until the loaf, when removed from the pan, sounds hollow when tapped with your fingertips. Cool on a rack.
Glaze
Make glaze by whisking together 2 Tbsp rhubarb filling, 1 cup powdered sugar, and enough lemon juice to make the glaze pourable (1-2 tbsp should do it). When bread has slightly cooled, drizzle with glaze if desired.

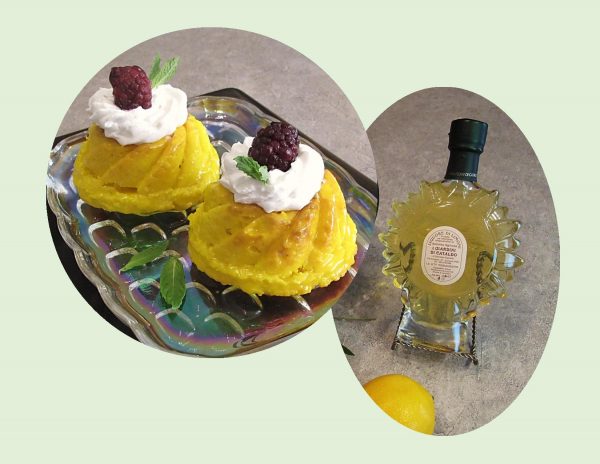
Limoncello, (pronounced lee-mon-CHAY-low) the Italian lemon liqueur, is known for its refreshing sweet and tangy flavor. It is made from lemon rinds, alcohol and sugar. Although, traditionally served as an after dinner drink, it is a wonderful ingredient to use in cooking and baking.
Families have passed down recipes for limoncello for generations, as every Italian family has their own recipe. In the winter of 2013, Brion and I spent some time travelling Italy. It was in Sorrento where we tasted limoncello for the first time and loved it. As we walked through the quaint artisan shops packed together onto a maze of medieval alleys, we came across one that sold liqueurs & confectionery. One of the treats that they made were limoncello sugar coated almonds … to die for!
Limoncello origins are disputed. Some say it was created by monks or nuns while others credit the wealthy Amalfi Coast families or even local townsfolk. In any case, its roots are in Southern Italy, primarily along Italy’s Amalfi Coast and the Sorrentine Peninsula known for their meticulous lemon cultivation. These lemons are considered the finest lemons for making limoncello. Prized for their yellow rinds, intense fragrance, juicy flesh and balanced acid.
Today, I’m using limoncello not only in the cake but the glaze as well. This is definitely a refreshing cake, great for a summer picnic or dinner.
Print Recipe
Glazed Limoncello Cakes
Votes: 1
Rating: 5
You:
Rate this recipe!
|
|
Votes: 1
Rating: 5
You:
Rate this recipe!
|
Instructions
Cake
Preheat oven to 350 F. Spray an 8-inch square cake pan with cooking spray or baking pans of your choice.
Whisk sour cream, white sugar, canola oil, eggs, 3 tablespoons limoncello, and lemon zest together in a large bowl.
Sift flour, baking powder, baking soda, and salt together in another bowl. Add flour mixture to sour cream mixture; stir with a wooden spoon until batter is just combined. Pour batter into prepared cake pan or pans.
Bake for about 35 minutes OR until a toothpick inserted into the center comes out clean. Cool cake(s) in the pan for 5 minutes.
Glaze
Whisk powdered sugar and 2 tablespoons limoncello liqueur together in a bowl until glaze is thin and smooth. Drizzle glaze over the top of the cake. Cool cake completely before serving. Top with a bit of whipped cream if desired.
Recipe Notes
- You may need a bit more glaze if you have made individual cakes as I did here.
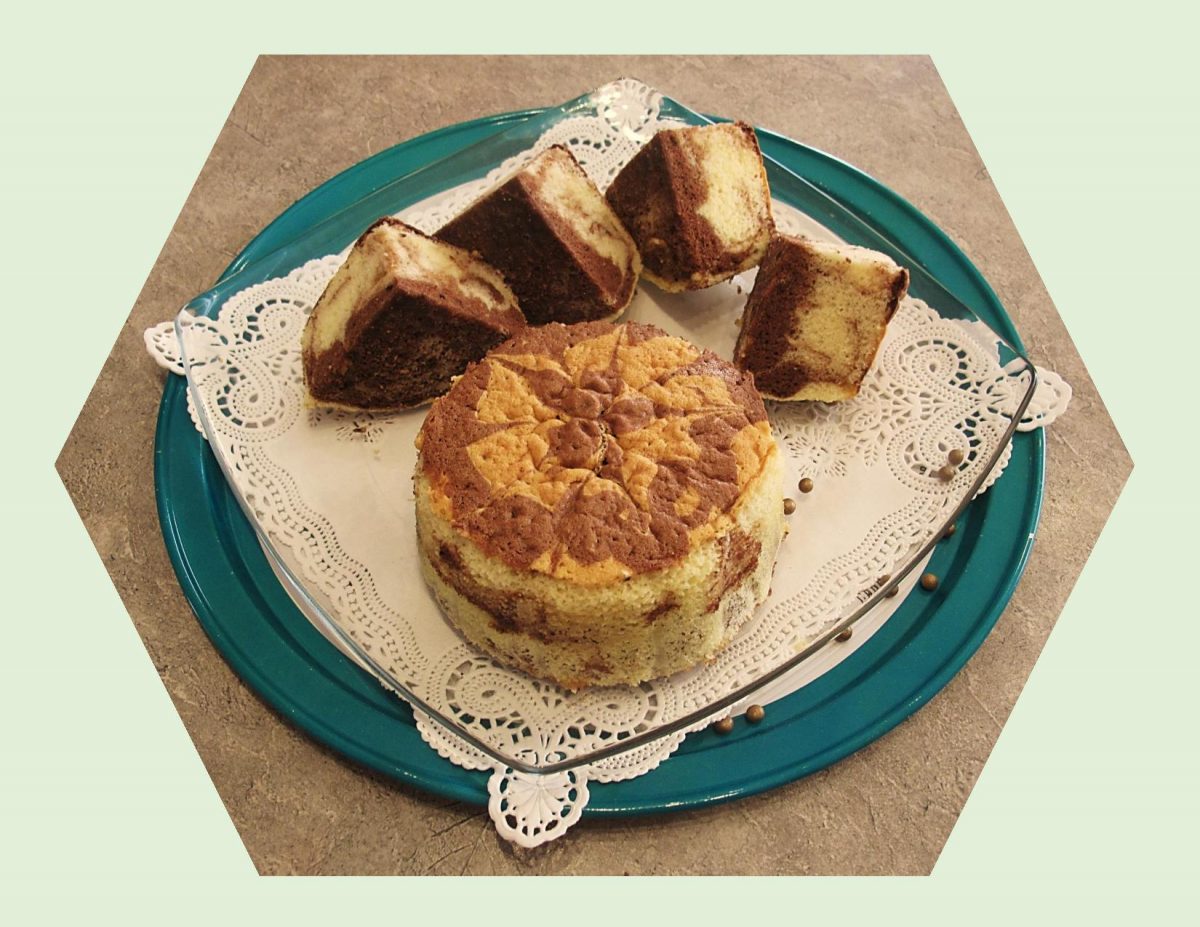
The idea of lightly mingling two different batters in one cake seems to have originated in early 19th century Germany. The earliest version of marble cake consisted of a kugelhopf (sweet yeast bread), one half of which was colored with molasses and spices to achieve a dark colored batter. Bakers next began to do the same thing with sponge cake batter.
The marble cake came to North America with German immigrants. It wasn’t until the late 19th century, when chocolate gained a greater hold on the North American public, that ‘marble cake‘ as we know it today really took shape. The first known recipe to appear in an American cookbook went with the spice and molasses variety, though the base was a butter cake rather than a sponge or yeasted cake. Jewish German bakers eventually introduced the idea of using chocolate to create the darker batter in marble cakes.
Of course, there is no right or wrong way to create the marbling effect. The only thing to know is that you should not overmix the batter. The colors are supposed to mingle but stay separate creating the distinct marbling design.
Print Recipe
German Marble Cake
Votes: 1
Rating: 5
You:
Rate this recipe!
|
|
Votes: 1
Rating: 5
You:
Rate this recipe!
|
Instructions
Preheat oven to 325 F. Either butter or line with parchment paper, (2) 5-inch mini springform pans; set aside.
In a bowl, melt butter, in microwave. In a small bowl, sift flour, baking powder & salt; add to butter & combine.
In a small bowl, whisk together egg yolks, milk & vanilla then add to butter mixture. Whisk until combined.
Beat egg whites until foamy then gradually add sugar; beat until stiff peaks form. Fold into batter.
In a small cup with a spout, place about 1/2 cup of the batter & add cocoa powder. Fold in to combine.
Divide white batter between 2 prepared pans. Pour chocolate batter onto each cake forming circles with it. Using a wooden skewer, make lines from the center out making a spider web design.
Bake for 45 minutes on bottom rack of the oven or until cake tests done with a wooden pick. Remove from oven, allow to cool for about 5 minutes on cooling rack. Flip over & cool in pans for at least 30 minutes. We enjoyed a small bit of raspberry puree with the cake.


