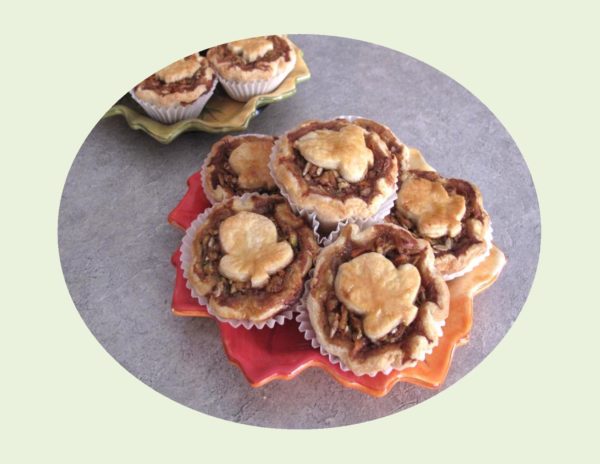
Harvest Pie / Tarts

The name of this pie definitely conjures up a cornucopia  of fall flavors. The idea of combining fruit and vegetables has forever appealed to me.

I have always had a love for zucchini as far back as I can remember. Even though it is served as a vegetable, its technically a fruit because it comes from a flower. It has a golden blossom that grows under the leaves.

A member of the gourd family, zucchini is an easy to grow, summer squash, native to Central America and Mexico. Zucchini became quite popular after the 1940’s with the interest in Italian cookery.

In 1992, I came across a recipe in a little ‘Pillsbury Classic Cookbook’ for HARVEST PIE.  It had a great combination of apples, zucchini, carrots and spices. If you like these ingredients, this ‘classic’ will become a favorite fall ‘go to’ dessert recipe for you.

Print Recipe
Harvest Pie
Votes: 1
Rating: 5
You:
Rate this recipe!
Course Brunch, dessert
Servings
Votes: 1
Rating: 5
You:
Rate this recipe!
Instructions
  1. Preheat oven to 425 F. Line a 9-inch DEEP pie with pastry.
  2. In a large bowl, combine apples, zucchini, carrots, nuts & flour; toss to coat.
  3. In a medium bowl, beat brown sugar & margarine until well blended. Add cinnamon, nutmeg, salt, lemon juice, vanilla, orange zest & 2 eggs; blend well. Add to apple mixture; mix well.
  4. Spoon filling into pie crust-lined pan. Top with second crust & flute; slit crust in several places. In a small bowl, blend egg & water; brush over top crust. Bake for 40-50 minutes or until deep golden brown. Cover pie loosely with foil during the last 15 minutes of baking to prevent excessive browning.
  5. Serve with whipped cream if desired.
Recipe Notes
  • Oven temperatures often vary, so if you prefer, bake pie at a bit lower temperature.

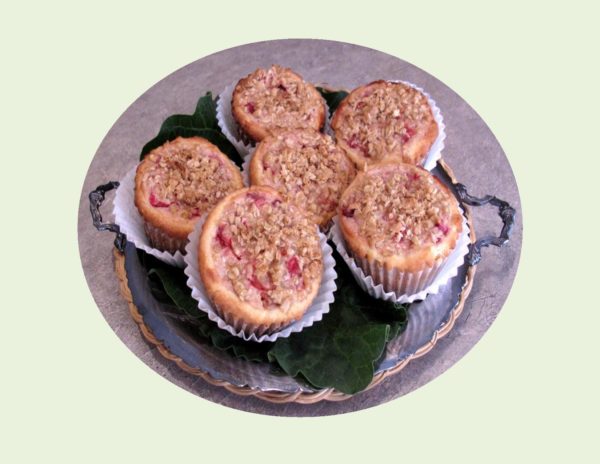
Rhubarb Sour Cream Pie or Tarts

Rhubarb was originally cultivated for its medicinal properties and was not used in European cooking until the late 18th century. The history of rhubarb is very complicated but simply put there are only two broad categories, medicinal and culinary.

Thought of by many as an old fashioned ‘vegetable’, it never has really fallen out of favor. In Germany, rhubarb season is from April until June. There are countless recipes using rhubarb as the German people are very passionate about eating produce they have grown themselves.

I have an inherited love of rhubarb — the way it tastes, its huge beautiful foliage, its hardiness, productiveness …….

RHUBARB SOUR CREAM PIE  (German Rhabarber Sauerrahn Kuchen) has been in my pie ‘go to’ file forever. The combination of these two ingredients works magic. Just for something different, I decided to use the same recipe but make it into tarts today.

Print Recipe
Rhubarb Sour Cream Pie / Tarts
Votes: 1
Rating: 5
You:
Rate this recipe!
Course Brunch, dessert
Servings
Ingredients
Course Brunch, dessert
Servings
Ingredients
Votes: 1
Rating: 5
You:
Rate this recipe!
Instructions
  1. In a small bowl, combine oatmeal, brown sugar, margarine, flour & citrus zest. Cut in margarine until mixture is crumbly. Set aside.
  2. Preheat oven to 400 F. In a large bowl, combine sugar, cornstarch, cinnamon & nutmeg; beat in sour cream & egg. Gently fold in rhubarb. Pour into pastry shell. Sprinkle topping mixture over the filling.
  3. Bake at 400 F. for 15 minutes. Reduce heat to 350 F. & bake for 35-40 minutes or until topping is golden brown. Cool on a wire rack before slicing.
Recipe Notes
  • In order to obtain nice slices, refrigerate pie until cold then slice & heat a bit in the microwave if preferred.

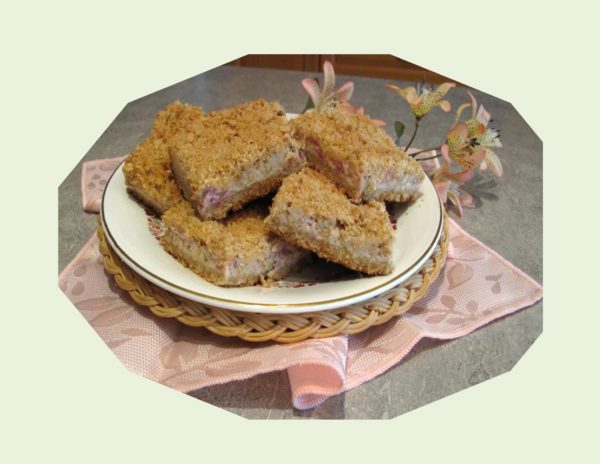
Rhubarb Cheesecake Squares

The thought of rhubarb is a nostalgic thing for me. I have memories of my mother’s neat row of rhubarb plants growing along the edge of her garden. Magically each spring they would reappear from what had been frozen ground only a few short weeks before. While other plants still lay dormant, the large fan shaped rhubarb leaves quickly gathered enough sunlight to produce some juicy stalks. 

Tucked in behind the water fountain, in Brion and my flower garden, are three rhubarb plants. Originally we had put them there to show off that huge foliage as well as being used in my cooking. Time has passed and with our trees becoming more mature, they are getting more shade than they like. Nevertheless, last year they were still producing in late September.

I’m going to start off this season with some RHUBARB CHEESECAKE SQUARES,  a favorite recipe that comes from tasteofhome.com

Print Recipe
Rhubarb Cheesecake Squares
Votes: 1
Rating: 5
You:
Rate this recipe!
Course Brunch, dessert
Cuisine American, European
Servings
Course Brunch, dessert
Cuisine American, European
Servings
Votes: 1
Rating: 5
You:
Rate this recipe!
Instructions
  1. In a small bowl, combine flour, oats & brown sugar. Cut in butter until crumbly. Set aside 1 cup crumb mixture; press remaining mixture onto bottom of a greased 9-inch square baking dish. Set aside. Preheat oven to 350 F.
Filling
  1. In a small bowl, beat cream cheese & sugar until smooth. Beat in salt, vanilla, cinnamon & nutmeg. Add egg; beat on low speed just until combined. Stir in walnuts & rhubarb. Pour over crust. Sprinkle with reserved crumb mixture.
  2. Bake for 35-40 minutes or until set. Cool on a wire rack for 1 hour. Refrigerate for at least 2 hours before cutting into squares.
Recipe Notes
  • If you are wanting to use frozen rhubarb, measure rhubarb while still frozen, then thaw completely. Drain in a sieve, but do not press liquid out.

Carrot Cake Roll

From breakfast to dessert, healthy to decadent, traditional to innovative, the carrot cake is considered a timeless classic that never goes out of ‘style’. It was probably borne out of necessity, making use of the carrots’ natural sweetness, evolving from the carrot pudding of medieval times. Carrots contain more sugar than any other vegetable besides the sugar beet.

In the 1970’s, carrot cake was perceived as being ‘healthy’ due to the fact that carrots, raisins and nuts are all ‘good for us’. Then along came that glorious cream cheese frosting that forever bonded the pair. While raisins are undoubtedly the oldest compliment to carrots, pineapple, apples or applesauce as well as walnuts have all become modern day  add-ins of choice.

I remember my mother making a jelly roll cake  when I was growing up. It was a sponge cake baked in a sheet pan. She would spread a layer of jam over it when it was cool and roll it up. It looked unique and tasted great. Of course, today a cake roll is very common place with many variations. As far as carrots are concerned, you can transform this versatile veggie into everything from energy bars and smoothies to cinnamon rolls and cookies etc, etc, etc…. My choice today is to make a CARROT CAKE ROLL with CREAM CHEESE FILLING,  yum!!

Print Recipe
Carrot Cake Roll
Votes: 1
Rating: 5
You:
Rate this recipe!
Course dessert
Cuisine American, German
Servings
Course dessert
Cuisine American, German
Servings
Votes: 1
Rating: 5
You:
Rate this recipe!
Instructions
Carrot Cake Roll
  1. Preheat oven to 350 F. Line a jelly roll pan ( 10 x 15") with parchment paper & spray with baking spray.
  2. With a hand mixer, beat eggs on high for 5 minutes, until frothy & dark yellow. Beat in sugar, oil & vanilla. In a small bowl, whisk together flour, baking powder, salt & spices. Stir into wet ingredients just until blended. Fold in dry carrots.
  3. Spread batter in prepared pan. This makes a very thin layer; use a spatula to make sure it is spread evenly to the corners of pan. Bake 10-15 minutes. Test cake with a toothpick to be sure it is completely baked. While cake is baking, spread a clean kitchen towel on work surface. Sprinkle with powdered sugar. As soon as cake comes out of oven, turn it over on towel. Remove parchment paper carefully.
  4. Working at the short end, fold the edge of the towel over cake. Using the help of the towel, roll cake tightly. Let cool completely while rolled, at least an hour.
Filling
  1. While cake is cooling, make filling. Beat butter & cream cheese together until smooth. Stir in powdered sugar & vanilla; beat until smooth.
  2. When cake is cool, carefully unroll the towel. Spread the filling evenly over cake & re-roll tightly. Chill about 30 minutes to an hour. Dust with powdered sugar, if desired, slice & serve.
Recipe Notes

Apfel-Streuselkuchen – German Apple Coffee Cake

German-inspired yeasted coffee cake is a very popular type of cake all over Germany and Austria. It is very different from the typical butter cake associated with streusel coffee cake in North America. Whereas a butter cake is rich, sweet and fine grained, kuchen is light and slightly porous with a complexity of flavor that can only be found in yeast leavened baked goods. Of course, there are many different variations, but the important part is the streusel or crumbled topping, which consists  of a combination of flour, sugar, butter and spices.

In the past, most German towns and cities had orchards planted all around them, on land that belonged to the community. Cows or sheep grazed underneath the trees and people were free to pick the fruits when they became ripe. Today most of those common lands have been turned into suburbs and the trees are gone. Destruction of the remnants of ancient orchards is ongoing, contributing to the loss of heirloom varieties. Even though the diversity of choice is decreasing, the apple is still by far the most popular fruit in Germany.

Here is my best adaptation of an  APPLE STREUSEL COFFEE CAKE   that I think you might enjoy to try.

Print Recipe
Apfel-Streuselkuchen - German Apple Coffee Cake
Votes: 2
Rating: 4.5
You:
Rate this recipe!
Course Brunch, dessert
Cuisine European, German
Servings
Ingredients
Coffee Cake
Apple Filling
Streusel Topping
Course Brunch, dessert
Cuisine European, German
Servings
Ingredients
Coffee Cake
Apple Filling
Streusel Topping
Votes: 2
Rating: 4.5
You:
Rate this recipe!
Instructions
Coffee cake
  1. In a large bowl, combine yeast, 1/8 cup sugar & lukewarm water; allow to dissolve. Stir in remaining 1/8 cup of sugar, salt, milk, sour cream, lemon juice & vanilla; mix well. Add egg & blend.
  2. With fingertips, rapidly work the butter into 2 1/2 cups of the flour until coarse, meal-like consistency. Add to the yeast mixture & knead in bowl, adding more flour if necessary to make a smooth, elastic dough. Shape into a ball & place in a lightly buttered bowl. Cover tightly and let rise in a draft-free place until doubled in bulk.
Apple Filling
  1. Peel & slice apples. In a small saucepan, combine all filling ingredients except pecans. Cook over medium heat, stirring constantly until apples are tender, & juice has evaporated. Stir in pecans; set aside to cool.
Streusel Topping
  1. In a small bowl, combine flour, sugar, salt, cinnamon & lemon zest. With fingertips, rub in butter until mixture is coarse & crumbly. Set aside.
  2. When dough has doubled in size, turn out on a lightly floured piece of wax paper. Press out gently into a rectangle about 10 x 14-inches in size. Spread apple filling to within 1/4-inch of edges & very gently press into dough. Roll up from the wide end, jelly-roll fashion.
  3. Preheat oven to 375 F. Butter a 9-inch tube or bundt pan. Sprinkle half of the streusel in pan. Carefully, (dough will be very soft) with the help of the wax paper, fit the roll into the pan so that the ends of the dough join. Pinch ends of together. Sprinkle cake with remaining streusel. Bake for 30 minutes. Remove from oven & allow cake to cool before slicing.

Stollen Bread Pudding with Spiced Orange Sauce

Now comes the time to use up all those remaining tidbits of holiday baking still in the freezer. For those who haven’t tried it, sweet bread pudding is perhaps the ultimate comfort food. It’s simple to make, requires no special equipment and uses basic ingredients. It’s not even particularly beautiful on the plate, but it sure tastes good.

Just about every culture that makes bread has it’s own version of bread pudding. An open textured loaf with lots of holes become little pockets of custard. If you choose a bread that is quite ‘airy’ but has good chewiness, your pudding will strike a satisfying balance between lightness and body. In contrast, a loaf with a tight crumb makes a compact pudding with a dense texture.

The custard is what binds the bread together and creates the pudding’s lusciousness. Milk, eggs, sugar and flavoring are the basic elements but of course, other variations can be layered in as well.

Bread pudding was definitely a dessert my mother made since she baked bread every week. At that time it was pretty basic but nevertheless homey and good.

Today, January 22, our family celebrates the birthday of my sister, Marilyn. Birthdays were always made to be special as we were growing up. Not so much as to gifts but in regards to the family acknowledgement of ‘your’ day. My mother loved having a reason to use her cake decorating skills, so your birthday cake was always very unique. 

For something special to mark the occasion, I have prepared               STOLLEN BREAD PUDDING with SPICED ORANGE SAUCE  on my blog.

                      WE SEND BIRTHDAY WISHES TO YOU, MARILYN —

                                ENJOY YOUR DAY TO THE FULLEST!


Print Recipe
Stollen Bread Pudding with Spiced Orange Sauce
A delicious variation on a classic made with heavenly German stollen bread.
Votes: 1
Rating: 5
You:
Rate this recipe!
Course Brunch, dessert
Cuisine German
Servings
Course Brunch, dessert
Cuisine German
Servings
Votes: 1
Rating: 5
You:
Rate this recipe!
Instructions
Bread Pudding
  1. Arrange stollen cubes to fit compactly into a buttered 9 x 9-inch baking dish. Do not compress to tightly; set aside any leftover cubes. Whisk together eggs & 1 cup powdered sugar until the sugar is dissolved & the mixture becomes light yellow in color. Add cream, vanilla & Grand Marnier; whisk to combine. Stir in a pinch of salt, nutmeg, lemon & orange zest.
  2. Pour mixture over stollen cubes. Cover & refrigerate for 30 minutes. Preheat oven to 350 F. Remove bread from refrigerator, uncover & dot the top of the pudding with butter & sprinkle with 2 Tbsp. powdered sugar.
  3. Set baking dish into a shallow roasting pan, larger that baking dish. Set them onto the center rack of the oven. Pour hot water into larger pan until it reaches about halfway up the side of the pudding dish. Bake until fully set & a knife inserted into center comes out clean, 60-75 minutes. Carefully remove the pudding from the water bath & cool for at least 15 minutes before serving.
Spiced Orange Sauce
  1. Melt butter in a saucepan over low heat. Stir in sugar, Grand Marnier, water, cardamom & salt. Over medium heat, stir until sugar is fully dissolved & the liquid is heated through. Remove from heat. In a small bowl, whisk egg until well beaten. While whisking egg, slowly pour 2 Tbsp. of the hot mixture into bowl with the egg. Then, while whisking the mixture vigorously, slowly pour the warmed egg mixture back into the sauce.
  2. Place the saucepan back over low heat, gently stirring the sauce, raising the temperature slowly to medium. Continue stirring until the sauce thickens, about 1-2 minutes. Spoon over pudding & serve immediately.

German Stollen – In the Spirit of Tradition

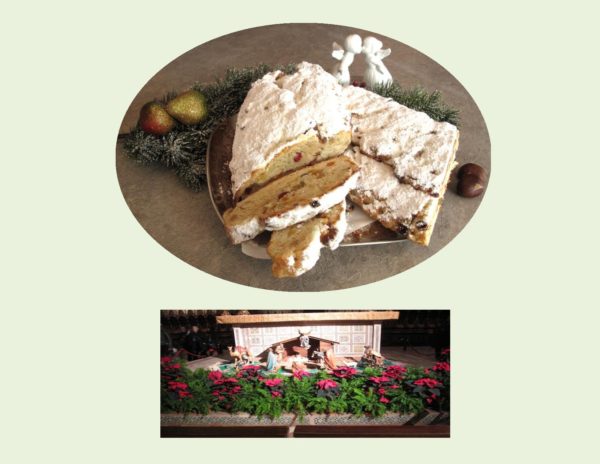
I realize we are still weeks away from Christmas, but there are some things that are just better if given the time to ‘ripen’ and develop a rich and complex flavor. German stollen, also known as (Weihnachtsstollen or Christstollen) is one of them.

In my previous blog I mentioned that stollen was a close ‘kin’ to fruitcake, but one thing it is not – is fruitcake! Stollen is a yeast bread  that is fortified with a colorful collection of candied fruit, citrus peel, raisins/currants, nuts, spices such as cinnamon, nutmeg, cardamom, mace or cloves, brandy or rum and lots of butter.

The tradition of Christmas stollen dates back to 14th century Germany. The sweeteners in this period were honey and dried fruits; until the 17th century, sugar was a scarce and expensive commodity. For this reason, sweets were only meant for times of great festivity and joy.  Originally it was made without milk or butter because these items were forbidden by the church during Advent. That changed in 1490 when Pope Innocent VIII signed the ‘butter document’ allowing bakers to use butter. It was much later when the use of milk was finally permitted.

The cake’s distinctive shape, which it retains to this day, is meant to symbolize the Christ child ‘wrapped in swaddling clothes, lying in a manager’. Baked loaves are brushed with butter then cloaked in a thick layer of powdered sugar.

Holiday food traditions are a miraculous mix of time, place, ideology and ingredients. Often times, a single person can be the catalyst for a family culinary tradition. They bring it to the table as a delectable ‘gift’, wrapped with their own cherished memories and life experiences, enriching our holiday celebrations.

When I think of German stollen, a very unique memory comes back to me. One of the few newspapers my folks were interested in and had access to was the ‘Free Press Weekly Prairie Farmer’. It was a small newspaper published by the Manitoba Free Press for the prairie provinces in Canada. The newspaper’s middle section, ‘Home Loving Hearts’, contained ads from people requesting  pen pals  across Canada as well as recipes, ads for patterns of aprons, dresses, pot holders, baby clothes and knitting.

It was here my mother acquired a pen pal by the name of Renate Leitner in about 1956, that lasted for over 20 years, until the time of my mother’s passing. Every Christmas, Mrs. Leitner would send our family a beautiful loaf of German stollen bread in the mail. I remember how we looked forward to receiving it and how good it always tasted. This definitely attests to the durability of this bread.

Print Recipe
German Stollen (Weihnachtsstollen or Christstollen)
If made several weeks in advance it allows it to mellow and soften into a glorious fruit bread.
Votes: 1
Rating: 5
You:
Rate this recipe!
Course Brunch, dessert
Cuisine German
Servings
loaves
Ingredients
Course Brunch, dessert
Cuisine German
Servings
loaves
Ingredients
Votes: 1
Rating: 5
You:
Rate this recipe!
Instructions
  1. Marinate raisins, candied fruit & almonds in rum overnight, Stirring occasionally.
  2. Dissolve yeast in 1/4 cup lukewarm water with 1 tsp sugar. Set aside for 5 minutes.
  3. In a large bowl, sift 2 cups of the flour. Stir in yeast mixture & lukewarm milk. Cover with plastic wrap & let stand in a warm place until doubled in volume, about 1 hour. Punch down dough firmly & work in beaten eggs, 1/2 cup sugar, lemon zest, vanilla & pieces of softened butter.
  4. Sift remaining 3 cups of flour with salt, nutmeg & cardamom & work in 2 cups to form a soft dough. Turn dough onto a lightly floured work surface. Knead in remaining cup of flour mixture to form a smooth and satiny dough without any stickiness. Work in fruit & nut mixture.
  5. Divide dough in half. On a lightly floured surface, pat or roll each portion into an oval shape about 12 x 8 inches (30 x 20 cm) & 3/4 inch (2 cm) thick. Brush each piece with melted butter & fold the dough over lengthwise, almost in half.
  6. Preheat oven to 350 F. Lightly press edges together to seal (brush tops with a beaten egg if you wish). Bake 35-40 minutes or until golden. Cover with foil if loaves are browning to fast. Brush warm loaves with melted butter & dust thickly with powdered sugar. Cool on a rack. When completely cool, wrap tightly in foil & keep in a cool place for 2-3 weeks to ripen.
Recipe Notes
  • You can customize your filling ingredients any way you like. For example,  use dried cranberries or cherries instead of raisins -- candied citrus peel or candied ginger instead of citron peel -- your favorite dried fruit instead of apricots. You can even use sweet poppy seed paste or marzipan to fill your stollen -- your choice!
  • Stollen freezes well so it can be made weeks in advance of Christmas.
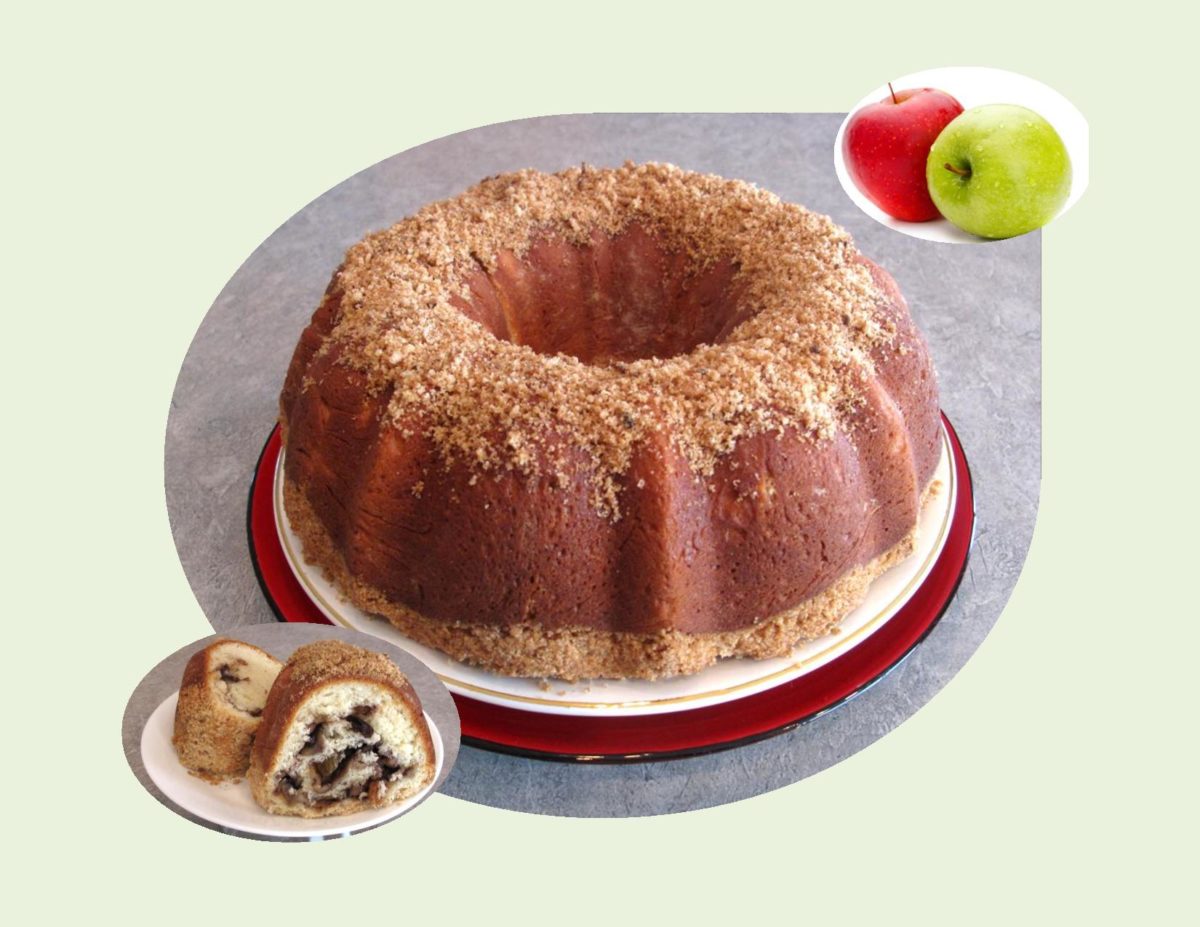
Zucchini / Apple Bundt Cake with Limoncello Drizzle.

No doubt the biggest problem vegetable gardener’s have with the squash ‘family’, is it’s frightening productivity even when growing conditions are marginal. It’s growth is so rapid that when heat and moisture are ideal, you could be picking your zucchini daily. That being said, there’s no such thing as too much zucchini in my opinion. A member of the gourd family, its versatility is amazing! From appetizers to dessert, zucchini covers every recipe category.

This Zucchini-Apple Bundt Cake  is a healthy veg/fruit combo topped with a refreshing Limoncello Glaze. Authentic limoncello is made from Italian lemons, which come from the Amalfi coast in Italy. Families have passed down recipes for limoncello for generations, as every Italian family has their own recipe. In the winter of 2013, Brion and I spent some time travelling Italy. It was in Sorrento where we tasted limoncello for the first time and loved it.

Print Recipe
Zucchini / Apple Bundt Cake with Limoncello Drizzle.
Zucchini, apple & limoncello create an explosion of flavors in this moist bundt cake.
Votes: 1
Rating: 5
You:
Rate this recipe!
Course dessert
Servings
Ingredients
Zucchini-Apple Cake
Apple Streusel Filling
Limoncello Glaze
Course dessert
Servings
Ingredients
Zucchini-Apple Cake
Apple Streusel Filling
Limoncello Glaze
Votes: 1
Rating: 5
You:
Rate this recipe!
Instructions
Apple Streusel Filling
  1. Peel & chop apples. In a small bowl, combine apples with remaining filling ingredients & mix well. Set aside. If you prefer, you can cook everything except nuts for 3-4 minutes & then stir in nuts. Cool before adding to cake.
Zucchini-Apple Cake
  1. In a large bowl, beat zucchini, sour cream ( or yogurt), sugar, egg whites, oil, egg & vanilla until well blended. In a small bowl, combine flour, baking powder, baking soda & salt; gradually beat into zucchini mixture until blended.
  2. Preheat oven to 325 F. Spray & flour a bundt cake pan. Spread 1/3 of the batter in pan; spoon 1/2 of filling carefully over cake. Top with another 1/3 of cake batter then remaining filling, finishing with last 1/3 of cake batter.
  3. Bake for about 50 minutes or until a toothpick inserted near center comes out clean. Cool for 5-10 minutes before removing from pan to a wire rack to cool completely.
Limoncello Glaze
  1. In a small dish, mix together powdered sugar & limoncello liqueur. When cake is cool, drizzle slowly over top.

Thanksgiving Day in Canada

The second Monday of October has been the day Canada has celebrated Thanksgiving since 1957. We have now entered into our Autumn season with all it’s breathtaking fabulous fall foliage. Part of Canada’s appeal is it’s four seasons that offer changing landscapes and temperatures. 

I, for one, have always loved the changing seasons. That’s not to say that I like freezing cold and slippery roads but that I have come to understand the important role each one plays in the ‘big picture’. When Brion and I initially landscaped our property, careful consideration was given to what plants were planted. Over the years it has developed into a beautiful tapestry of color through our growing season.

Growing up on the farm, Fall was an especially busy time with the grain crops being harvested, garden vegetables being canned, frozen or just stored for use over the coming months. So much needed to be done before winter would set in. As a teenager it all just seemed like a lot of work. Even as hard as my parents worked at making a living from farming, I think they felt a real sense of satisfaction in what they were able to achieve. I realize now that even without being aware of it the visual beauty of the farmland at harvest was imprinted on me forever.

Thanksgiving Day in Canada is linked to the European tradition of harvest festivals. A common image seen at this time of year is a cornucopia, or horn, filled with seasonal fruit and vegetables. The cornucopia, which means ‘Horn of Plenty’ in Latin, was a symbol of bounty and plenty in ancient Greece. Turkeys, pumpkins, ears of corn and large displays of food are also used to symbolize Thanksgiving Day.

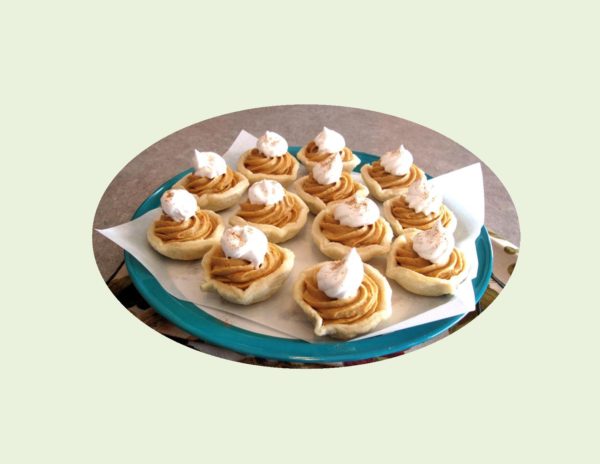
Over the years, Brion and I have chose to have a variety of different meats for our Thanksgiving meal. Turkey is always the tradition for our Christmas dinner and since the two holidays come fairly close together, why not! All that being said though, we decided this year to roast just the turkey breast with stuffing. I also incorporated some of that wonderful Butternut squash with cranberries into the meal as well. For dessert we are having some pumpkin chiffon tarts. As a ‘kid’, I remember having a great dislike for the regular pumpkin pie — you know the kind –‘solid’. Then one year my mother made pumpkin  ‘CHIFFON‘  pie. Well, now that was glorious and I have loved it ever since.

Today in my recipes I have only included the Butternut Squash with Cranberries and Pumpkin Chiffon Tarts. I thought I’d get into the turkey and stuffing recipes later in the season.

Happy Thanksgiving Day!

Print Recipe
Butternut Squash with Cranberries / Pumpkin Chiffon Tarts
Votes: 1
Rating: 5
You:
Rate this recipe!
Course dessert, Main Dish
Servings
Ingredients
Butternut Squash with Cranberries
Pumpkin Chiffon Tart Filling
Pastry
Course dessert, Main Dish
Servings
Ingredients
Butternut Squash with Cranberries
Pumpkin Chiffon Tart Filling
Pastry
Votes: 1
Rating: 5
You:
Rate this recipe!
Instructions
Butternut Squash with Cranberries
  1. Preheat oven to 375 F. Split squash in half; place hollow side down on a lightly buttered baking sheet. Bake for about 45 minutes or until completely soft to the touch.
  2. In a small skillet, saute celery & onion in margarine until tender. Add the apple, salt, lemon juice & pepper. Cook, uncovered, over medium-low heat until apple is tender, stirring occasionally. Stir in cranberries, sugar & water. Cook & stir until berries pop & liquid is syrupy. If you prefer, you could process this mixture for a couple of seconds in a food processor.
  3. Remove seeds & membrane from cooked squash; mash well. Add cinnamon, nutmeg, balsamic vinegar & maple syrup. Place some squash in individual custard dishes. Make a hollow in the center for the cranberry 'filling'. Add cranberries & serve.
Pumpkin Chiffon Tart Filling
  1. In a medium saucepan, combine first 7 ingredients; mix well. Add pumpkin, evaporated milk, regular milk & egg yolks; combine well. Cook, stirring constantly, until mixture thickens to a heavy custard. Boil 2 minutes, add 1 Tbsp margarine. Place wax paper over custard to prevent a 'skin' from forming. Let custard become cold (it can be refrigerated overnite at this point, finishing it the following day) then stir in 1/4 cup orange juice.
  2. Whip envelope of dessert topping with 1/2 cup milk & 1/2 tsp vanilla until stiff peaks form. It should yield about 2 cups. Put aside the amount you need to garnish tarts with. Fold remaining whipped dessert topping into custard. Spoon custard into a large pastry bag with a large 'star' tip. Fill baked mini tart shells. Decorate with a small dollop of dessert topping.
Pastry
  1. Sift together flour, baking soda, baking powder & salt. Cut in white & yellow Crisco shortening. In a 1 cup measuring cup place egg & vinegar; beat well. Add enough COLD water to fill cup. Pour all at once over flour mixture, mixing until pastry pulls away from sides of bowl. This should only take a couple of minutes, making sure not to over mix pastry. Roll out on floured surface. Using the bottom side of tart pans, cut pastry circles & place over each 'cup'. Bake at 350 F. until golden. Cool on wire rack before filling with pumpkin custard. If your using purchased shells follow baking instructions & cool before filling as well.
Recipe Notes
  • This pastry & pumpkin chiffon custard recipe was one I started using many years ago while working in the food industry. They were some of my favorites because they were pretty much 'fail proof'. If you want to make a double batch of each it will give you 4 - 9-inch pies. You can make them up to the point of decorating. Freeze until needed then just bring them out & thaw, decorate and you got a nice little homemade dessert just like that!

Oatmeal Spice Cake with Broiled Topping

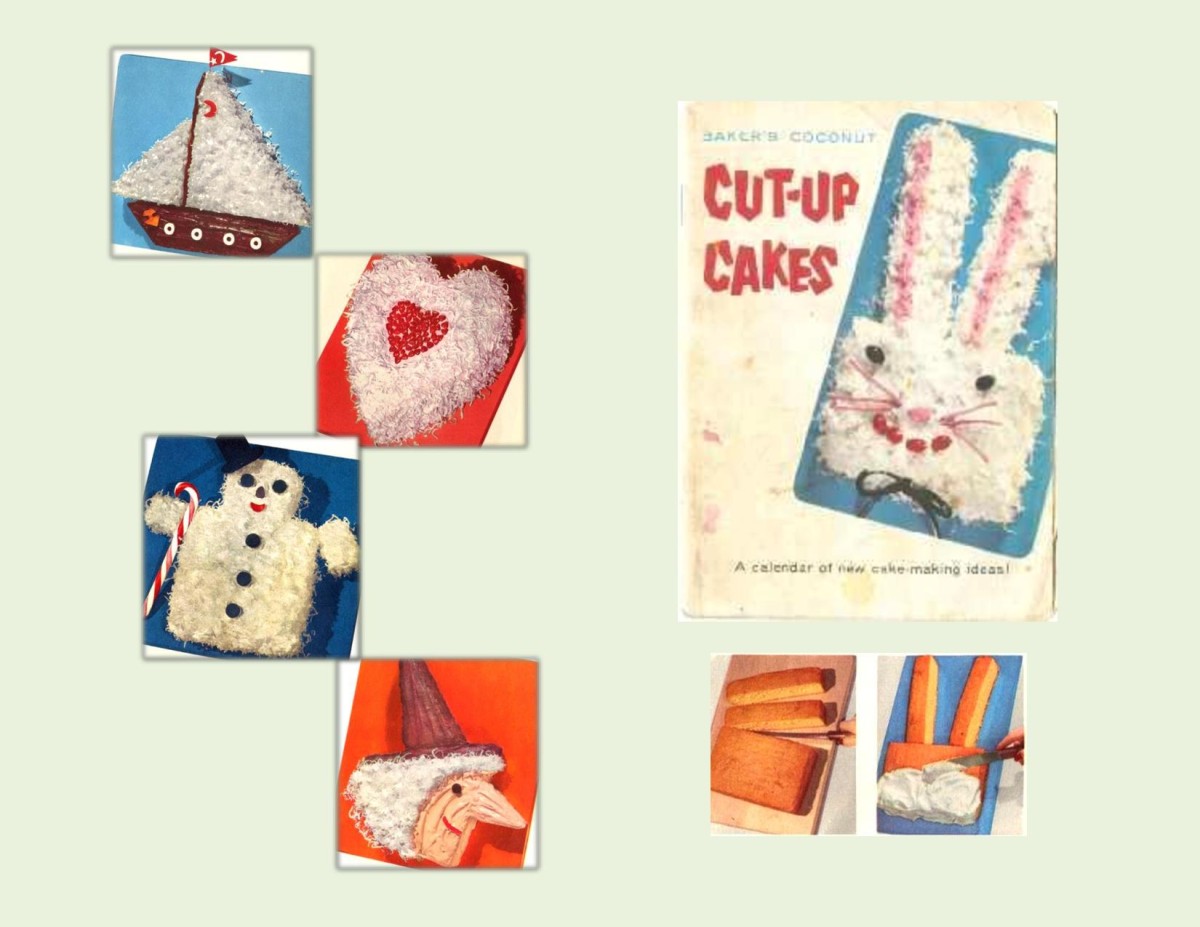
In about 1956, Baker’s Angel Flake Coconut (General Mills) came up with the idea of ‘cut-up cakes’. My mother always had a love for cake decorating and this idea just added a whole new dimension. The company printed a little booklet with a year’s worth of cut-up cake directions.

The cakes were popular because no special tools or pans were needed. Cakes were baked from your own recipe or from cake mixes, usually in either a 13 x 9″ pan or two 8 or 9″ layers. After the cake was cooled, you followed a pattern given in the recipe booklet and cut the cake as directed with a knife, then put the pieces together to form the desired shape. The cake pieces were then covered with frosting, making it appear as one solid cake.

Most of the designs usually incorporated coconut into the decoration. It looked great and of course we loved it. This was the forerunner to the baking industry developing ‘character’ cake pans in shapes of anything imaginable.

Although this old fashioned oatmeal cake came from that time period, it was not used for one of these cut-up cakes. I just thought it would be nice to include it in this blog since it had that wonderful tasting broiled topping made with the well known ‘Angel Flake‘ coconut. This cake was so good but one minute too long under that broiler could destroy it!

Print Recipe
Oatmeal Spice Cake with Broiled Topping
A dense, moist, classic oatmeal cake that has stood the test of time.
Votes: 2
Rating: 4.5
You:
Rate this recipe!
Prep Time 20 minutes
Cook Time 38 minutes
Passive Time 10 minutes
Servings
people
Ingredients
cake
Frosting
Prep Time 20 minutes
Cook Time 38 minutes
Passive Time 10 minutes
Servings
people
Ingredients
cake
Frosting
Votes: 2
Rating: 4.5
You:
Rate this recipe!
Instructions
  1. In a small bowl, pour boiling water over oatmeal & margarine; let stand for 10 minutes. Preheat oven to 350 F. Grease a 9 x 9" baking dish. In a large bowl, beat eggs with sugar until fluffy. Add vanilla & oat mixture, blend well. Sift together flour, baking powder, salt, nutmeg & cinnamon. Combine flour mixture to creamed mixture, blending carefully. Pour into prepared baking pan; bake 35 minutes or until tests done. Cool for 10 minutes. Do not remove from pan. For Frosting: Combine all ingredients. Spread evenly over cake. Broil until frosting becomes bubbly. WATCH CAREFULLY! Let cake cool enough for the topping to be absorbed into the cake.