Saskatoon Berry Tarts

Saskatoon berries are very high on my list of nostalgic memories from my childhood. How these little berries can evoke such a flood of treasured thoughts is amazing. Our family farm was located in Southern Alberta, (Canada). If you were to stand on our farmhouse, west veranda, the sight of the ‘foothills’ came into view (foothills are an upland area that flank the eastern side of the Rocky Mountains).

How wonderful it was to be able to pack a picnic lunch on a Sunday afternoon and be able to drive there. It was like a whole different world. A landscape of long ridges and rolling hills covered in native lodgepole pine, aspens and spruce trees. The small streams wound their way through meadows of dwarf birch, willow and prairie grasses. You could easily come across some of the beautiful wildlife such as elk, moose or deer that lived there.

This is where our family would go to pick saskatoon berries. Very often we were accompanied by family friends or relatives. It was such a great time, everyone picking berries together, eating Mom’s fabulous fried chicken and potato salad (etc. etc.) for our picnic lunch. I was looking at some pictures from those times. We must have had some hot dogs on one occasion and I burnt my mouth it seems. What priceless memories!

With ‘saskatoon season’ in full swing, Brion and I thought it would be great to pick our own this year. It certainly can’t get any fresher than that. We chose the U-Pick farm called GROVE BERRY PATCH. This is a family owned and operated farm with 20 acres of saskatoon berries and 1 acre of raspberries, black currants, highbush cranberries and vegetables. They are located 1.5 km south off Highway 16A on Spruce Valley Road, Spruce Grove, Alberta, Canada.

It was such a nice little adventure. The morning was beautiful and the atmosphere of the berry farm and its family owners was very enjoyable. We picked a pail full of gorgeous saskatoons in a short space of time. I had originally started out with thinking I would post one recipe but of course, its turns out to be three. They consist of some Saskatoon Rhubarb Tarts, Saskatoon Butter Tarts and some Saskatoon Cream Cheese Tarts. Yum!

We are adding a few pics, not only of the tarts but some from the berry farm as well as a couple from my childhood days. Hope you enjoy the blog.

Print Recipe
Saskatoon Berry Tarts
Votes: 2
Rating: 5
You:
Rate this recipe!
Course dessert
Servings
Ingredients
Pastry
Filling for SASKATOON RHUBARB TARTS
Filling for SASKATOON BUTTER TARTS
Filling for CREAM CHEESE SASKATOON TARTS
Course dessert
Servings
Ingredients
Pastry
Filling for SASKATOON RHUBARB TARTS
Filling for SASKATOON BUTTER TARTS
Filling for CREAM CHEESE SASKATOON TARTS
Votes: 2
Rating: 5
You:
Rate this recipe!
Instructions
Pastry
  1. In a medium bowl, whisk together flour, baking powder & salt until completely combined. Cut in butter with a pastry cutter or fork.
  2. Measure the vinegar into a liquid measuring cup, then add enough ice cold water to make 1/2 cup. Pour over flour mixture, gently stir with a fork ONLY until combined. Wrap dough in plastic wrap & place in refrigerator for a minimum of an hour so it can chill well. When ready to use, Roll out dough on a lightly floured work surface. Using a 3 1/2" cookie cutter, cut out tart shells & place them in tart pans.
Saskatoon Rhubarb Filling & Streusel
  1. In a small saucepan, combine saskatoons, diced rhubarb, sugar & cardamom. Set aside. In a small bowl, combine water, lemon juice & cornstarch. Whisk together to make a slurry. Add to to saucepan & cook on medium heat, stirring until mixture becomes thickened. Remove from heat; add vanilla & allow to cool before using.
  2. FOR STREUSAL: Place all streusal ingredients in a small dish & combine with finger tips until crumbly. Spoon berry filling into tart shells & top with streusal. Bake at 375 F. until pastry is golden.
Saskatoon Butter Tart Filling
  1. FOR BERRY TOPPING: In a small saucepan, mix together berries & water; simmer for 10 minutes over low-medium heat. In a separate bowl, mix together sugar & cornstarch then add to the berries & combine. Stir in lemon juice; simmer until mixture slightly thickens. Set aside to cool.
  2. FOR BUTTER TART LAYER: First beat together eggs. In a saucepan, melt the butter then add sugar, vanilla, cream, raisins & beaten eggs. Bring to a boil over medium heat & boil for 3 minutes. Set aside to cool. TO ASSEMBLE: Place a heaping Tbsp of butter tart mixture into each shell, then fill remainder of the tart shell with the berry topping mixture. DO NOT MIX. Bake at 375 F. for 15-18 minutes or until pastry is golden. Cool before removing from tart pans.
Cream Cheese Saskatoon Tart Filling
  1. FOR BERRY TOPPING: Crush 1 cup of saskatoon berries & place in a small saucepan with 1 cup of water. Simmer about 2 minutes. Strain & return berry juice only to saucepan. Combine sugar & cornstarch; add to sauce. Cook over low heat, stirring constantly until mixture is thick & clear. Remove from heat & stir in remaining 2 cups of saskatoons to glaze & stir gently. Pre-bake tart shells.
  2. FOR CREAM CHEESE LAYER: In a small bowl, blend together cream cheese, lemon zest, sugar & heavy cream. Divide cream cheese mixture between baked tart shells. Top with generous portions of berry topping & serve.
Recipe Notes
  • The pastry recipe will yield about 48 mini tarts. I had doubled the pastry recipe because I wanted to make all 3 kinds. It's so nice to have some in the freezer for future use.
  • If you make the pastry in 2 separate batches it seems to be nicer for some reason.
  • If you happen to have any filling left over, it freezes well for another time.
 

Angel Cake Roll w/ Lemon Cream & Balsamic Strawberries

Angel Food cake is definitely a nostalgic dessert for many of us. I have always been intrigued by the experience of nostalgia, an emotion defined as, ‘a wistful desire to return in thought or in fact to a former time in one’s life, to one’s home or homeland, or to one’s family and friends; a sentimental yearning for the happiness of a former place or time’.

Growing up on a farm where chickens and eggs were part of the equation, angel food cake with fresh fruit was a special summertime treat.

The crown jewel of cakes when it comes to a light, and fluffy texture. Butter-less, oil-less and yolk-less, this cake is a fat-free marvel ( of course, don’t mention the sugar calories, if that matters ).

I recall my mother’s angel food cake, amazingly tall and light as a feather. It had its own special pan and was always cooled, precariously balanced upside down on the kitchen counter.

It seems that the earliest print evidence for commercial angel food cake MIX was around 1942. The brand was called EZY Angel Cake Mix produced by a company called Blair Inc. from Atchison, Kansas in the USA. In 1949 a full page ad promoting this product stated:

‘all you have to do is add water … For ease in preparation, the ingredients have been divided into two separate plastic bags. One contains the mix of egg whites, flavoring slice, salt and sugar; the other contains the special flour mixture. Contents of the first bag, with the addition of water, are beaten to the proper stiffness and the contents of the second bag are then folded into the mixture. The batter is poured into a tube pan and baked in a hot oven. It’s just that simple! Results have proven to be uniform in all cases, enabling anyone to make an angel food cake of such airy, snowy goodness that it delights the most particular tastes. The mix comes in two sizes — a large 14-egg package and a medium sized 8-egg package. Once you have tried it, you won’t want to be without it. Your family will love it…”.

Brion has always loved angel food. I was thinking since his birthday is getting close, it was a good time to make some in a cake roll style with lemon filling and balsamic strawberries. If you feel like trying this recipe, its your choice to either use a mix or do it from scratch. I’m sure it will be great either way.

Print Recipe
Angel Cake Roll w/ Lemon Cream & Balsamic Strawberries
Votes: 2
Rating: 4
You:
Rate this recipe!
Course dessert
Cuisine American
Servings
Ingredients
Angel Food Cake Roll
Lemon Cream Filling
Balsamic Strawberries
Course dessert
Cuisine American
Servings
Ingredients
Angel Food Cake Roll
Lemon Cream Filling
Balsamic Strawberries
Votes: 2
Rating: 4
You:
Rate this recipe!
Instructions
Angel Cake Roll
  1. Preheat oven to 350 F. Line a 15 X 10-inch jelly roll pan with parchment paper, set aside. Crack the eggs & separate the whites into a mixing bowl. Set whites aside to warm to room temperature.
  2. Measure flour, cornstarch & 1 cup powdered sugar carefully into a large bowl. Whisk together; SIFT the flour mixture into another large bowl then SIFT mixture back into first bowl and then again into the second bowl ( you are sifting the mixture 3 times ). Set aside.
  3. Whip the egg whites with a mixer on medium speed until foamy. Add the cream of tartar & salt; continue whipping on high speed until soft peaks form. While continuing to whip on medium-high speed, add the 1/2 cup powdered sugar slowly - about 2 Tbsp at a time - until fully incorporated. Increase the speed to high & whip until hard peaks form, adding the extracts as it whips.
  4. Using a wire whisk, fold the flour mixture into the whipped egg whites about 1/4 cup at a time, making sure to fold very gently & slowly, so as not to deflate the egg whites. This is a critical step, so take your time.
  5. Pour batter into prepared pan & smooth out top carefully. Bake for 25-30 minutes or until cake springs back when touched lightly in center. Cool cake for 5 minutes in pan; turn out onto a dish towel dusted with powdered sugar. Carefully peel off parchment paper, cool for 1 minute & cut off crisp edges of cake. Starting at narrow end, roll up cake & towel together. Place seam side down, on a wire rack & cool for 5 minutes.
Lemon Cream Filling
  1. WHILE CAKE IS BAKING, combine the pudding mix & milk together in a bowl. Chill to set up for 20 minutes. In another bowl, beat together cream cheese & lemon zest until smooth. Stir in the 'set' pudding & chill again until cake is ready to fill.
Balsamic Strawberries
  1. Slice the strawberries & place in a bowl. Add balsamic vinegar, extract (or Chambord liqueur), honey & salt. Combine & set aside.
Assembly & Serving
  1. Carefully unroll cake & spread the filling over entire cake. Again roll up as tight as you can; place on a piece of plastic wrap & roll up tightly. At this point you can either place your cake roll in the freezer overnight or chill it in the refrigerator for a few hours before cutting & serving. Top with some balsamic strawberries.
Recipe Notes
  • If time is short, prepare a one-step angel food cake mix instead of the 'scratch' cake.

Blackberry Scones with Chambord Glaze

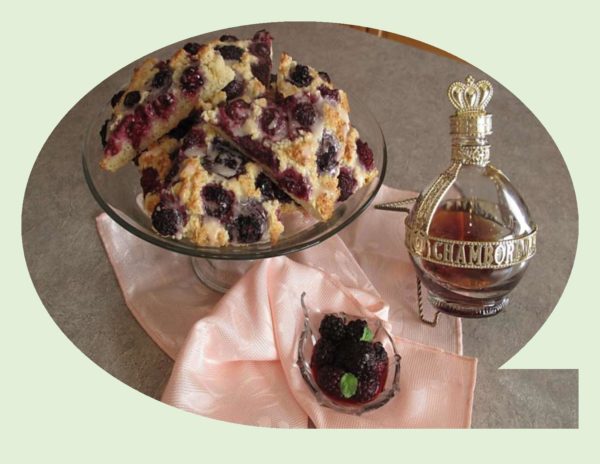
Blackberries seem to be my thing this summer. Its funny how every season, something peaks your interest and you want to use it in everything. Since blackberries are pretty tart and quite expensive most of the time, their not always top priority but—.

I happened to come across this scone recipe the other day. It uses self-rising flour, a staple I don’t always have on hand. The recipe seemed interesting in the way that it used buttermilk and lemon zest and not a lot of sugar with these tart berries. Mind you, they do have a bit of glaze on them.

If your not familiar with self-rising flour, it is a mixture made up of regular flour, baking powder and salt. The leavening power of the baking powder is mixed evenly throughout the flour, so you will automatically get that nice rise out of your baked goods every time.

Self-rising flour was invented in England in the 1800’s as a way for sailors to create better baked goods while on board. The idea was patented in the USA around 1849, which eventually led to the creation of mass-market baking mixes such as Bisquick, cake mixes, etc. Self-rising flour should only be used for its specific purpose as it will not work well with breads that are yeasty.

You can make your own by combining 1 cup of all-purpose flour, 1 1/2 tsp baking powder and 1/4 tsp fine salt. Keep in mind that most store-bought self-rising flours will contain a ‘softer’ or lower protein content flour than your typical all-purpose flour. This means that your end result, should you use regular all-purpose flour, will be slightly less tender (but still good).

Because of the baking powder, self-rising flour has a shorter shelf life than other flours. For that reason, it is always sold packaged in small quantities.

All that being said, these scones are amazingly tender. The glaze was truly ‘the icing on the cake’. They are sooo-– good!

Print Recipe
Blackberry Scones with Chambord Glaze
Votes: 1
Rating: 5
You:
Rate this recipe!
Course Brunch, dessert
Cuisine American, European
Servings
Course Brunch, dessert
Cuisine American, European
Servings
Votes: 1
Rating: 5
You:
Rate this recipe!
Instructions
Scones
  1. Preheat oven to 375 F. Line a baking sheet with parchment paper.
  2. In a large bowl, whisk together flour, sugar, baking soda and lemon zest. With fingertips, cut in butter until mixture resembles coarse crumbs.
  3. In a small bowl, whisk together buttermilk, egg & vanilla; add to flour mixture. Fold in just until incorporated then carefully fold in blackberries. Place dough on parchment paper lined baking sheet. With lightly floured hands, pat dough into an 8-inch circle. Score into 8 wedges. Bake 20 minutes or until golden & test done. Cover lightly with foil if over browning before baked. Remove from oven to a cooling rack. Cool before glazing.
Glaze
  1. In a small dish, combine glaze ingredients & drizzle over cooled scones.

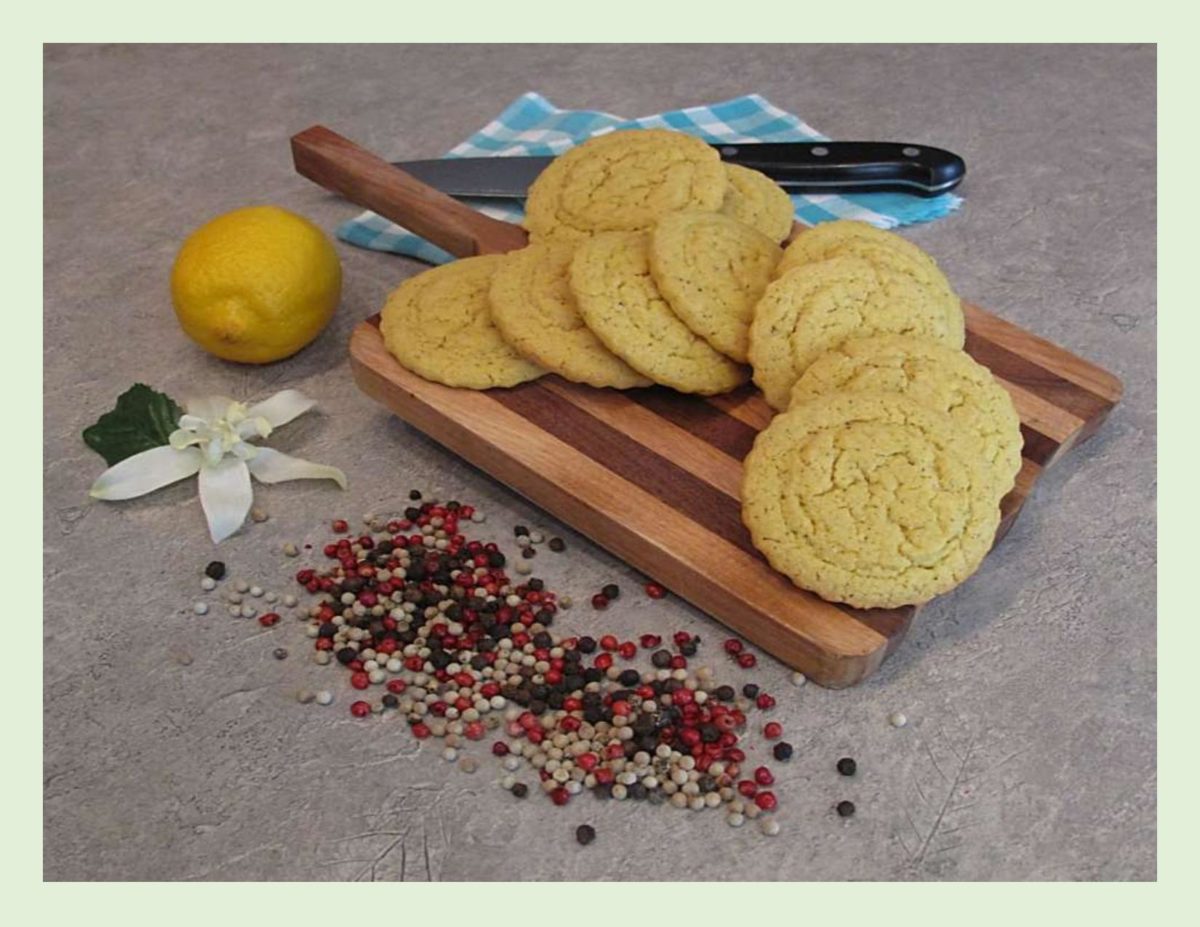
Lemon Pepper Shortbread Cookies

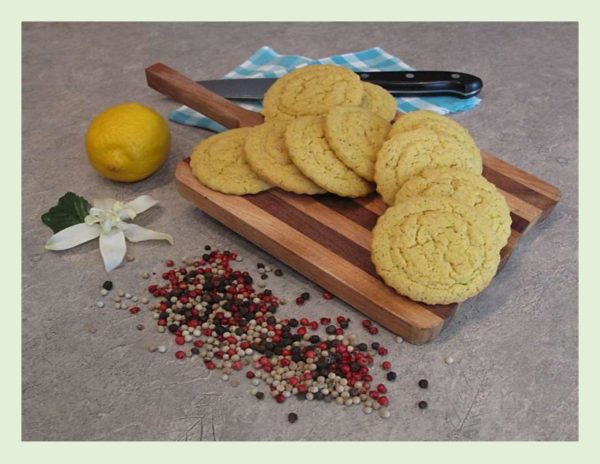
Grinding pepper over our savory meals is very much the ‘norm’, but when you add it to sweet desserts it preforms a strange chemistry, especially against a mellow backdrop of vanilla.

Adding flavor to cuisines of all nations, black pepper is the most widely produced and popular spice in the world. Pound for pound, it is also the least expensive spice.

Contrary to popular belief, pepper is not intended to be used like salt. Although, it holds a special spot right beside the salt on our dinner tables, it is not a flavor enhancer but rather a spice.

There is a distinct and undeniable earthiness to the flavor of black pepper, one that is biting, hot, piney, pungent, woody and sharp all at the same time.

Using pepper in baked goods or sprinkling it on fresh fruit is not exactly a new idea. Gingerbread and pfeffernuse have long been spiced with pepper. No matter how you use black pepper, its a spice of grand proportions.

These ‘pepper’ cookies are real handy since you can freeze them and ‘slice & bake’ when needed. The flavor combo is exceptional.

Print Recipe
Lemon Pepper Shortbread Cookies
Votes: 1
Rating: 5
You:
Rate this recipe!
Course dessert
Servings
Ingredients
Course dessert
Servings
Ingredients
Votes: 1
Rating: 5
You:
Rate this recipe!
Instructions
  1. In a bowl, cream butter, sugar & vanilla until light & creamy.
  2. In another bowl, whisk together flour, cornstarch, baking powder, salt, lemon zest & spices.
  3. Add the dry ingredients to creamed mixture alternately with the milk. Combine only until incorporated. Turn dough out onto a work surface & divide in half. Roll each portion into a log about 1 1/2-inch in diameter. Wrap each log tightly in plastic wrap & refrigerate until firm ... at least 2 hours or freeze until needed.
  4. When ready to bake, preheat oven to 350 F. Line a baking sheet with parchment paper. Remove the plastic wrap & slice into 1/4-inch thick rounds. Place on baking sheet & bake for 6 minutes, rotate pan & continue baking for an additional 6 minutes. The edges of the cookies will be firm, but the tops will be soft. Cool on a wire rack.

Hot Cross ‘Pockets’

Rich and decadent, dotted with dried fruit and nuts and fragrant with spices, what’s not to love about Hot Cross Buns?  When I think of Easter baking, there are two items that come to mind. An egg, rich Easter bread, baked in a cylinder loaf, and hot cross buns. ‘To die for’ is the only way I can describe the ones my mother made for us.

In medieval times, eating  hot cross buns marked the end of Lent because they were made from dairy products which were forbidden during Lent. Plain buns were traditionally eaten, hot or toasted, beginning on Shrove Tuesday through to Good Friday.

While hot cross buns are now sold throughout the year, they were once reserved for Good Friday alone. The rejection of traditions, categories and boundaries, etc. seems to be the accepted ‘norm’ in today’s society. It destroys specialness and undermines difference. I love traditions and enjoy specific things or foods associated with them on the actual occasions. As I researched these classic buns, I realized that there are as many ways to make them as there are families who bake them.

Sometimes the dough is slashed to make the cross. Other times a flour and water paste or a sweet icing is used to create the symbol. Then the same sweet dough can be made into a loaf form, bread pudding or french toast. 

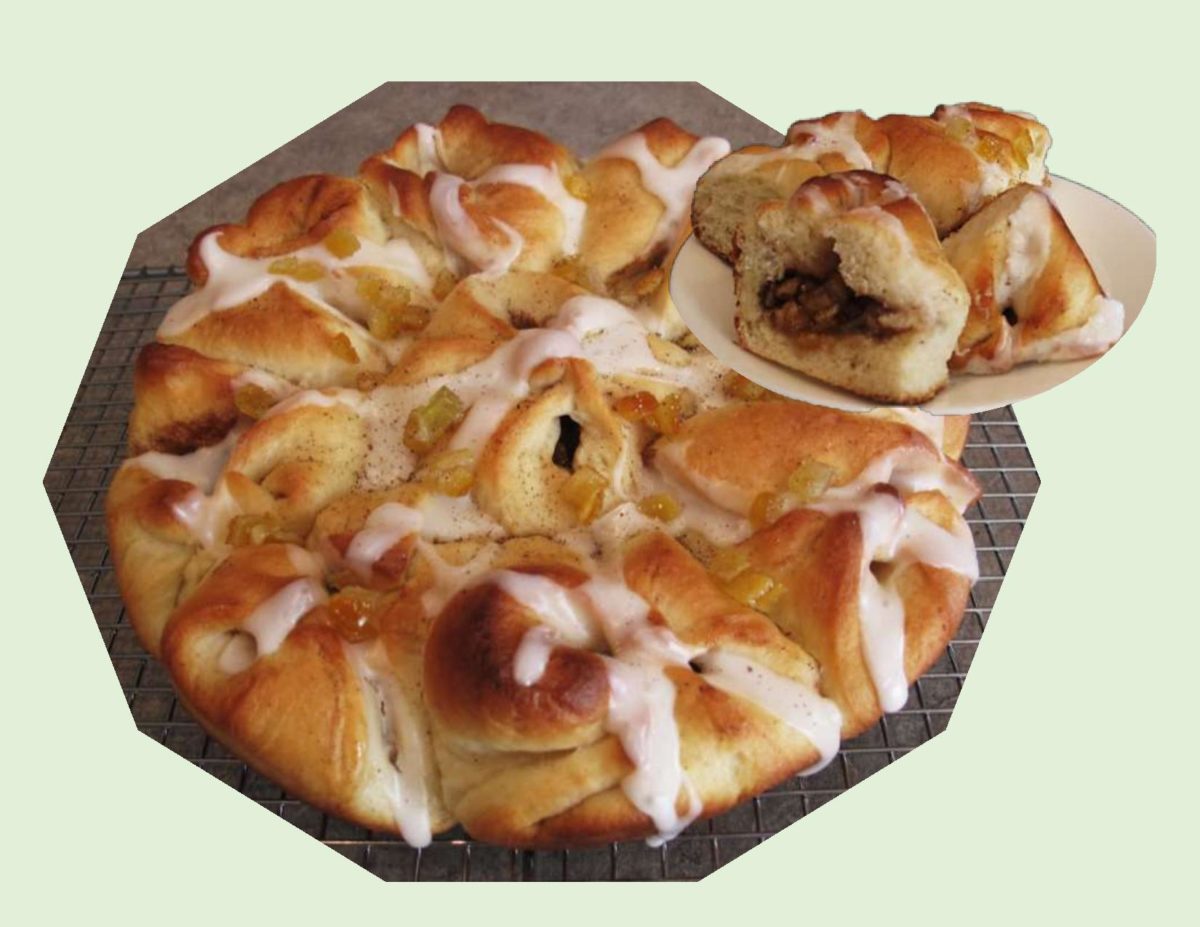
On that note, I thought, why couldn’t these little treasures be ‘filled’ and baked in a round pan like pull-apart buns. I liked the nice presentation it gave as well as that wonderful traditional flavor.


Print Recipe


Hot Cross 'Pockets'

Votes: 1
Rating: 5
You:
Rate this recipe!

Course Brunch, dessert

Servings


Ingredients

Course Brunch, dessert

Servings


Ingredients

Votes: 1
Rating: 5
You:
Rate this recipe!


Instructions
Fruit Filling
  1. In a small bowl, combine citrus peel, cranberries, apricots & rum extract. Set aside to marinate while preparing dough. When ready to use, add chopped almonds. Drain off any excess extract.

Dough
  1. In a small dish, heat milk to lukewarm. Add yeast & 1 tsp sugar; let sit for 5 minutes to allow yeast to activate. In a large bowl, whisk together remaining 1/4 cup sugar, melted butter, sour cream & egg. Add yeast mixture & stir to combine.

  2. In another bowl, whisk flour, spices & salt. Add flour mixture to yeast mixture 1 cup at a time, combining after each addition. Once all flour has been added, knead dough on a lightly floured surface for about 2 minutes.

  3. Lightly grease the large bowl, place dough in it & cover with plastic wrap & a tea towel. Allow to rest for at least one hour, in a draft-free place until dough has doubled in volume.

  4. Punch down dough; divide into 18 equal pieces & roll each with a rolling pin. Divide, drained fruit mixture between rolls. Pull corners toward the center, pinching to form pockets. Place filled pockets in a round baking pan with the pinched corners up. Cover with plastic wrap & a tea towel; allow to rise for an hour or until doubled in size.

  5. Preheat oven to 350 F. Bake pockets about 20 minutes or until baked & golden. Remove from oven; cool before drizzling with glaze in the form of a cross on each bun.

Glaze
  1. In a small dish, combine powdered sugar & lemon juice; mixing until a smooth consistency for drizzling.


Recipe Notes
  • If you wish, don't hesitate to brush each pocket with egg wash before baking. Probably easiest to do it with your finger tips.

Swiss Easter Rice Tart

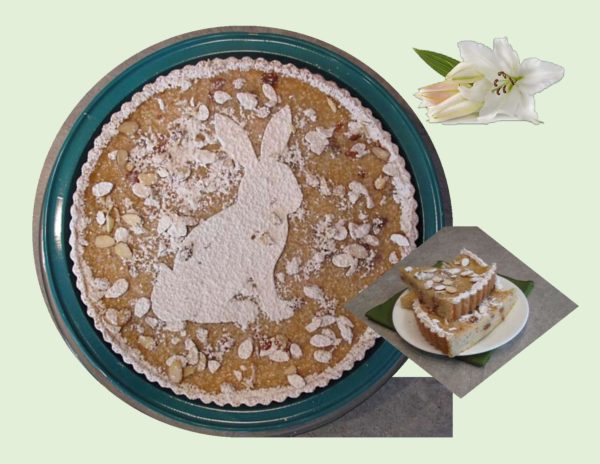
With Easter coming up real soon, why not bake something different this year or should I say, different for me. Swiss Rice Tart  has a custard type filling made with rice, eggs, milk, citrusy lemon zest, ground almonds all baked in a sweet, crunchy pastry. Traditionally only served during Easter time in Switzerland, it is a wonderful non-fussy and unusual brunch dish/dessert item.

It took a bit of time to try and learn some history of this Easter specialty. It seems that the first available recipes for a similar tart are from the end of the 16th century. In a cookbook by Anna Wecker, (the first German cookbook to be published by a woman) there was mention of a similar tart. In some of the early recipes, Parmesan cheese was included in the dough but this was abandoned for a sweeter crust. Another version used bread as a starchy filling instead of rice or semolina and the flavoring was rosewater and wine. By the 19th century, the tart, as it is known today, made its way into the rotation of most Swiss bakeries.

The key to getting the right consistency for the filling is to slightly overcook the rice from the beginning as it needs to to become smooth and creamy. The ground almonds, amaretto liqueur and raisins all add richness to the flavor of this ‘rice pudding baked in a crust’.

Print Recipe
Swiss Easter Rice Tart
Votes: 1
Rating: 5
You:
Rate this recipe!
Servings
Ingredients
Sweet Pastry Crust
Rice Custard Filling
Topping
Servings
Ingredients
Sweet Pastry Crust
Rice Custard Filling
Topping
Votes: 1
Rating: 5
You:
Rate this recipe!
Instructions
Pastry
  1. In a food processor, pulse flour, sugar, salt & baking powder to blend. Add butter & pulse about 3-4 times, until butter is in pea- size pieces. Sprinkle in the ice water; pulse another 4 times. Turn dough out on a lightly floured work surface & knead gently a few times to form a disk. Wrap in plastic wrap & refrigerate at least an hour.
Custard Filling
  1. In a small bowl, combine amaretto liqueur & raisins & allow to marinate until ready to add to filling.
  2. In a large saucepan, bring water to a boil. Stir in rice, lower heat to medium & cook until rice is soft & water is absorbed. Add evaporated milk, skim milk, butter, sugar & salt. Bring to a quick boil. Reduce heat to low & add amaretto liqueur ONLY, setting raisins aside.
  3. Simmer until mixture has thickened almost to a 'risotto' consistency, about 20 minutes. Remove from heat & place the saucepan in a bowl of ice water for 10 minutes to cool mixture.
  4. Preheat oven to 350 F. & place oven rack in the lowest position. When cooled, pour rice mixture into a bowl; add lemon zest & raisins. Mix ground almonds with the 1 Tbsp flour & fold into mixture along with eggs.
  5. Press chilled pastry evenly into tart pan. Trim edges flush with pan. Pour filling into pastry dough & bake about 35 minutes, until filling is set & golden. Cool on a wire rack. Dust with powdered sugar & almond slices (create a design if you wish) before serving.
Recipe Notes
  • This recipe was adapted from a site called cuisine Switzerland.
  • I had used a 10-inch tart pan for mine but there was a small amount of filling left over which had to be baked in a casserole dish.
  • I would suggest using a 10-inch spring form pan instead so the pastry sides could be higher to accommodate the extra filling.

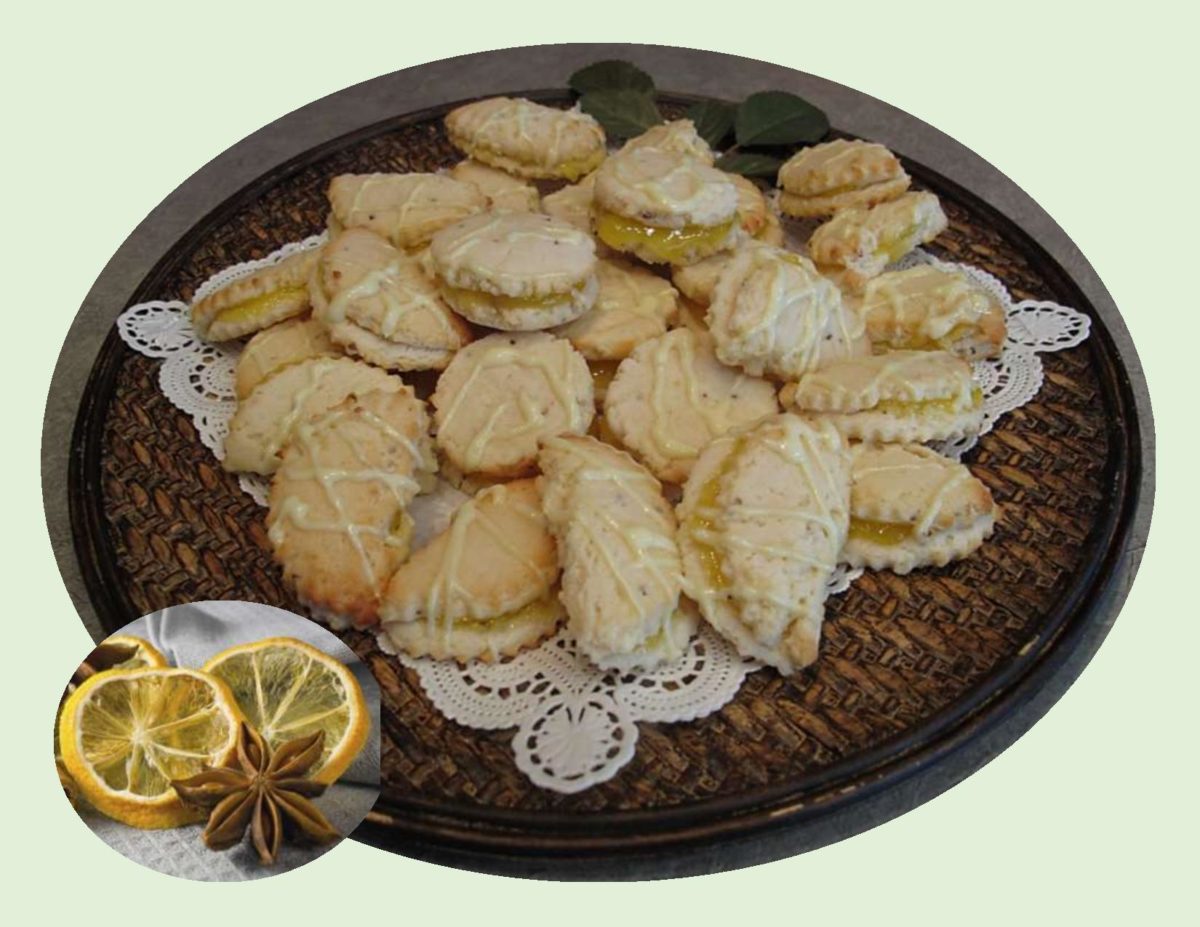
Anise-Lemon Cheesecake Cookies

Spring gives good reason to celebrate the taste of fresh lemon. Next try pairing it with cream cheese and anise in some tender little cookies. Amazing!

Cheesecake itself, has been a dessert many of us have loved for years. Using cream cheese has become so common, it is used in just about any application you can think of sweet or savory. Cheesecake cookies are the perfect back drop to showcase the unique taste of anise.

Slightly sweet, anise has an appealing licorice-like flavor and aroma. It has been a popular herb in holiday and special occasion treats for centuries, around the world. Since it requires at least 120 frost free days to ripen the seeds, anise is difficult to grow in cooler regions. The fact that it has a long tap root also makes it hard to grow in a container indoors. Seeds, extract and oil are all used in cooking, but the leaves can also be tossed in salads or dropped into the water when boiling shellfish.

To complete this cookie creation today, I made an eggless lemon curd to sandwich them with. I found this recipe was best made over two days. Use the first day to prepare the dough, bake the cookies and make the lemon curd. Waiting a day to assemble the cookie sandwiches gives both cookies and curd ample time to cool. This is definitely a cookie designed with flavor in mind.

Print Recipe
Anise-Lemon Cheesecake Cookies
Votes: 1
Rating: 5
You:
Rate this recipe!
Course dessert
Servings
Course dessert
Servings
Votes: 1
Rating: 5
You:
Rate this recipe!
Instructions
Lemon Curd
  1. In a small saucepan over medium heat, combine lemon juice, sugar, lemon zest & salt, stirring well to dissolve sugar. Add the cornstarch mixture & the milk, stirring well to combine. Cook until mixture begins to thicken, about 5-6 minutes, stirring constantly until the first few bubbles appear on the surface. Add butter & food color; continue to cook until resembles thick pudding. Transfer to a dish; cover with plastic wrap & allow to cool completely before placing in refrigerator. Chill at least 2 hours in the refrigerator or preferably overnight.
Cookies
  1. Preheat oven to 350 F. Line a baking sheet with parchment paper.
  2. Beat cream cheese & butter together at high speed until fluffy & smooth; 1-2 minutes. Add sugar & beat until fully incorporated & fluffy; 1-2 minutes. Beat in eggs, lemon zest, anise extract & seeds.
  3. In another bowl, whisk together flour, baking powder & salt. Gradually add the dry ingredients to the butter mixture. Mix ONLY until blended, DO NOT OVER MIX. Batter will be sticky. Using a small scoop, drop cookies onto prepared baking sheet.
  4. Bake for 10-11 minutes. Cookies should be light in color, not browned & just starting to brown on the bottom. Cool cookies on baking sheet for a few minutes before transferring to a wire rack to cool completely.
Assembly
  1. The following day, lay out half of the cookies; spoon 1 heaping teaspoon of lemon curd onto the center of each cookie. Top each with the remaining cookies & gently press together until the filling reaches the edges of the cookies.

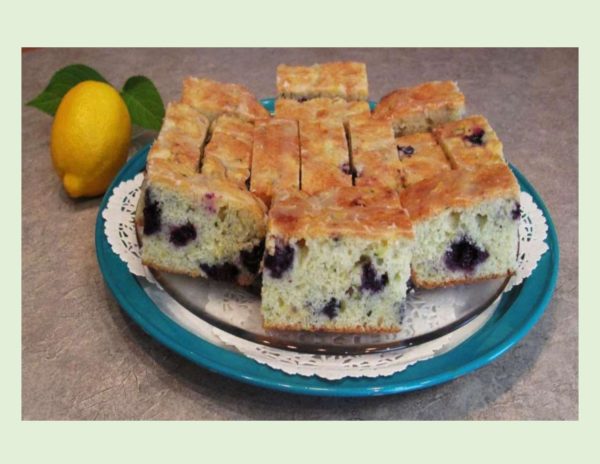
Blueberry Zucchini Bars with Lemon Glaze

There’s no question, fresh blueberries are a pleasure to bake with. But, along with being quite expensive, their season is short. As a result, frozen ones become the backbone of winter blueberry desserts. Using them in a pie presents no problem. When it comes to putting them into a batter, frozen berries bleeding juice, turn that golden hue into a shade of purple green when baked. Not good! I’ve found a simple solution is to rinse the berries in cold water, then gently dry them between layers of paper towel. You will probably lose a bit of the berries nutrition, but for most part, the juice and vitamins will remain inside.

Pairing zucchini with fruit in baked goods might seem a little odd but no different than using carrots in cake. Zucchini has grown in popularity over the years due to its amazing growth rate in the garden and its versatility. It can be sauteed, baked, poached, stuffed, eaten raw and of course baked into breads, cakes, scones etc., etc.

These little blueberry/zucchini bars are extremely moist and tender. The lemon in the batter and the glaze takes them to the level of amazing in my opinion. We just loved them.

Print Recipe
Blueberry Zucchini Bars with Lemon Glaze
Votes: 5
Rating: 4.4
You:
Rate this recipe!
Course dessert
Cuisine American
Servings
Ingredients
Course dessert
Cuisine American
Servings
Ingredients
Votes: 5
Rating: 4.4
You:
Rate this recipe!
Instructions
Batter
  1. Preheat oven to 350 F. Grease a 9 X 13-inch ( or 15 X 10 X 1) baking pan.
  2. In a small bowl, combine zucchini, buttermilk, lemon zest & lemon juice; toss to combine. In a large bowl, cream butter & sugar until light & fluffy. Beat in eggs, one at a time. In a third bowl, whisk 3 1/4 cups flour, baking soda & salt; gradually add to creamed mixture alternately with zucchini mixture, mixing well after each addition. Toss blueberries in remaining flour; fold into batter.
  3. Transfer batter to prepared pan, spreading evenly. Bake 50 minutes for 9 X 13-inch size or until light golden & a toothpick inserted in center comes out clean. Remove from oven to a wire rack.
Lemon Glaze
  1. In a small bowl, mix glaze ingredients until smooth; spread over top while bars are still warm.
Recipe Notes
  • This recipe easily divides in half for a smaller amount using an 8 X 8-inch baking pan.
Stollen Pull-Apart Ring

For me, stollen is  one of those nostalgic foods that brings back lots of great memories. It all started when my mother’s ‘pen pal’ (of 20 years), would send our family a loaf of her homemade stollen bread through the mail at Christmas. She lived in different province of Canada than we did and it seemed so amazing to receive this perishable item through the postal service. Nevertheless, it left a lasting imprint on me to become one of those precious ‘taste of a memory’ foods.

Over time, I have made this traditional German Christmas specialty in various ways. This year my choice is to make it as a pull-apart bread. This term refers to a bread formed from pieces of dough, placed next to and on top of each other in a pan and baked. This bread required no knives to serve.

An interesting concept that has been called many names such as bubble bread or loaf, jumble bread, monkey bread etc. Initially it was formed pieces of yeast dough dipped in butter and baked in a loaf to be served with jam or preserves. In 1942, General Mills (Betty Crocker) promoted ‘Hungarian Coffee Cake’, which consisted of balls of yeast dough dipped in melted butter, then in sugar frequently mixed with cinnamon and/or chopped nuts. It was baked in a ring pan because the central tube helped prevent the center from being under baked and sinking due to all the butter. ‘Betty Crocker’ had a real way for turning unknown recipes into mainstream ideas.

By the 1990’s, General Mills promotions began entitling this sugar coated treat as ‘Monkey Bread’. However, it may have been silent-screen movie star, ‘Zasu Pitts’, who provided this whimsical name. The term and recipe initially appeared in the Thursday, February 8th, 1945 edition of the Winnipeg Free Press (Canada) in the column ‘Culinary Clinic’. Zasu was most often remembered for her extraordinary name, huge eyes and fluttering fingers. Besides acting, she had a passion for cooking and published a 93 page cookbook in 1963.

Most of the early recipes called for rolling out the dough and cutting it into diamond shapes instead of forming balls. The widespread popularization of money bread corresponded to the advent of the commercial refrigerated biscuit dough in the 1950’s. One of the later innovations is to insert a little cinnamon-sugar coated cube of cream cheese in the center of each dough ball or drizzle with a cream cheese glaze.

For my pull-apart stollen, I’m using a yeast-free recipe. It’s an interesting version that mimics the traditional flavor well. To serve, you can pull-apart the bread rolls or slice it  — your choice!

Print Recipe
Stollen Pull-Apart Ring
Votes: 1
Rating: 5
You:
Rate this recipe!
Course Brunch, dessert
Servings
Ingredients
Course Brunch, dessert
Servings
Ingredients
Votes: 1
Rating: 5
You:
Rate this recipe!
Instructions
  1. Grease a tube pan & set aside. In a bowl, combine candied peel, water & extracts; set aside. In a large bowl, combine flour, sugar, almonds, baking powder, salt, & spices. Cut in butter until it resembles fine crumbs.
  2. Preheat oven to 350 F. To candied peel mixture, add cottage cheese, eggs, lemon zest & raisins. Combine well with flour mixture. Arrange scoops of stollen batter into tube pan. Bake about 40-45 minutes or until test done. Cool on wire rack. Dust with powdered sugar.

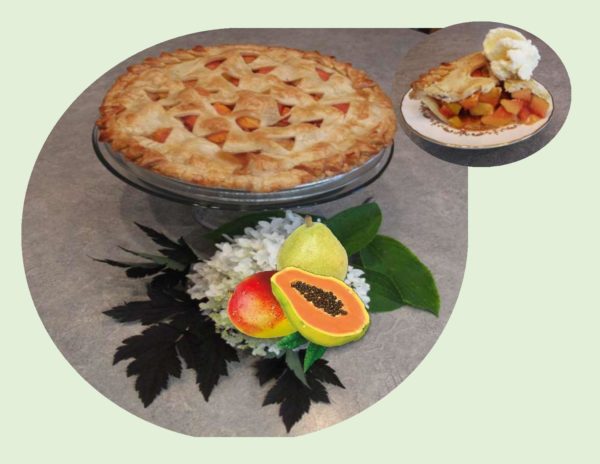
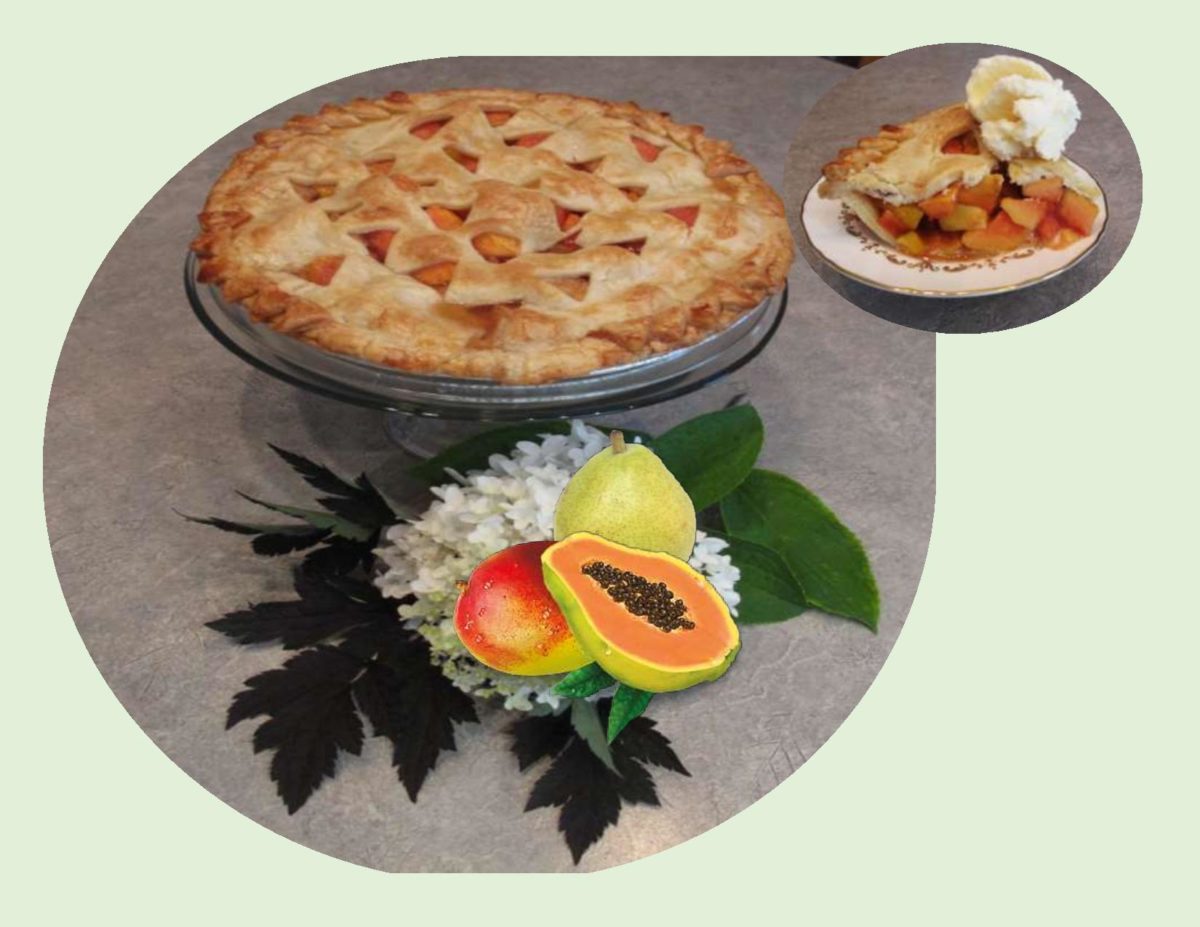
Papaya, Mango & Pear Pie

A wide variety of fruit has be used to make pie, from crisp apples to juicy berries or tender stone fruit. Tropical fruit, not as commonly used, can make amazing additions to pie filling creations. One such combo is papaya and mango.

Once considered exotic, papaya can now be purchased pretty much throughout the year. A very versatile fruit which contains enzymes that help in tenderizing meat as well as using it in salads, puddings, yogurt, chutney etc. For the sweetest flavor, select a papaya with a yellowish-orange skin that yields to the touch. Green papaya can be peeled like a carrot. It is similar to winter squash and can be baked or barbecued in the same fashion.

Mangoes have a rich sweetness with an aromatic floral note that isn’t present in many other fruits. As well as holding their shape during baking, mangoes become extremely tender, which makes them an excellent choice for pie filling.

Regardless of what type of pie your eating, the general consensus is that it should have a base made of some kind of pastry. When people first began cooking food in ovens there was little to protect the filling from searing heat. As a result, juices would fizzle out and everything would burn rather quickly. As a solution, dough was used to protect the filling. The dough or pastry absorbed the juices, making the entire case and filling a dish in itself. Since then, many complex forms and fillings have evolved in the world of pie making.

My objective today, was to create a ‘tropical’ pie. I had picked up a papaya as well as a couple of pears on my last shopping trip. I already had some mango chunks in the freezer. I thought pears would compliment the papaya and mango well. Between the fruit and spice combos, the flavor was just incredible. I think I ‘nailed it’!

Print Recipe
Papaya, Mango & Pear Pie
Votes: 1
Rating: 5
You:
Rate this recipe!
Servings
Ingredients
Pastry Crust
Servings
Ingredients
Pastry Crust
Votes: 1
Rating: 5
You:
Rate this recipe!
Instructions
  1. Prepare pastry if making from 'scratch'. Line a 8-9-inch pie pan. Peel & core papaya, mango & pear. Cut & dice into 1/2-inch pieces. In a large bowl, combine fruit with lemon zest & juice. In a small bowl, mix cornstarch, sugar, spices & salt. Carefully mix 3/4 of dry mixture with fruit reserving remainder for later.
  2. Preheat oven to 400 F. Pour filling into pastry lined pie dish. Sprinkle with the rest of dry mixture & dot with butter. Roll out pastry for top crust. Make into design of choice or just place over pie; pinch top & bottom together to form a seal & cut 'vents'. Brush with egg wash & sprinkle with sugar.
  3. Place in oven & bake for about 10-15 minutes to bake bottom crust somewhat then reduce heat to 375 F. & bake another 30 minutes or until golden brown & filling is bubbling.