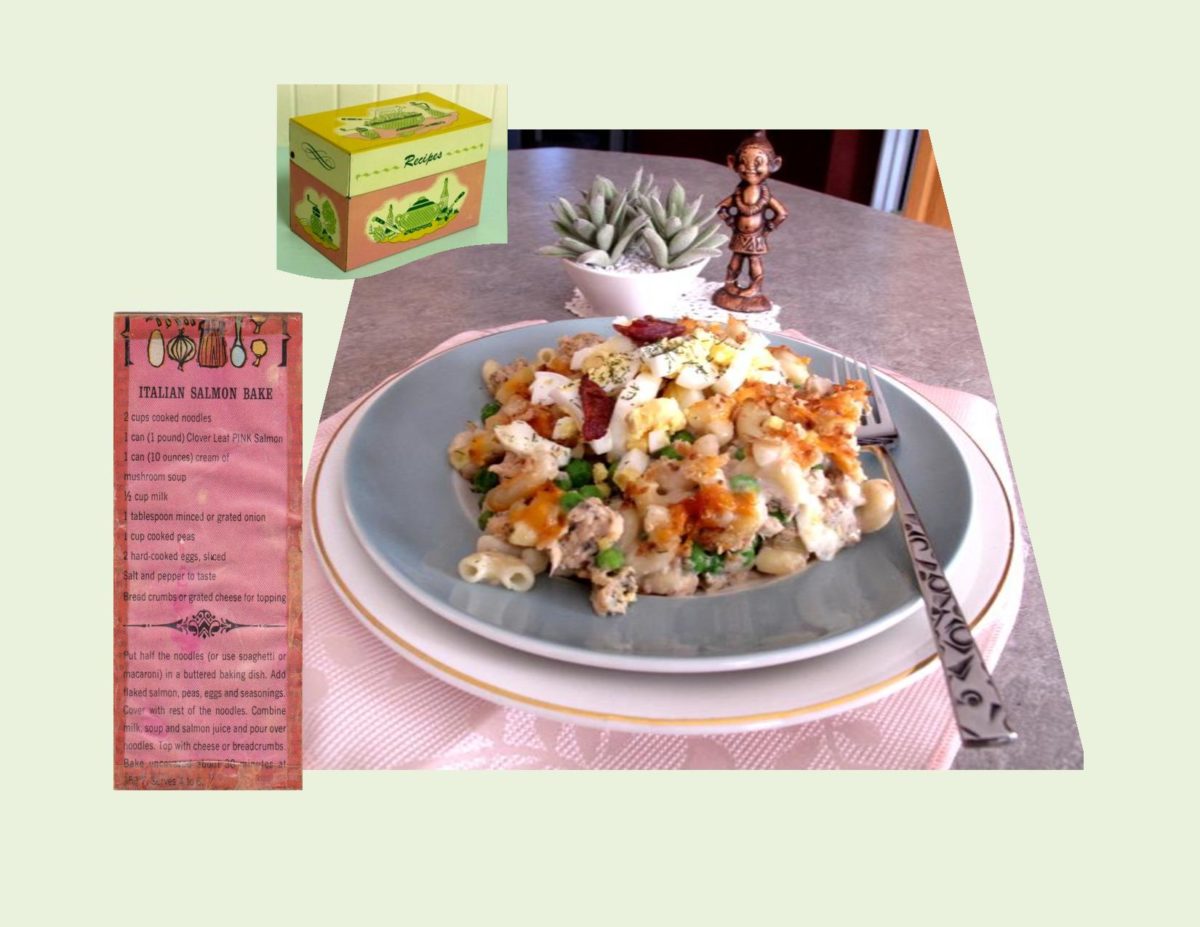
The 1950’s became the decade of casseroles. ‘One Pot’ meals have been around since mankind first invented cooking utensils but were rediscovered in the 1930’s.
Culinary habits of the 1950’s were practically defined by casseroles. The legendary ‘Tuna Noodle’ and ‘Green Bean’ casseroles, were the two that have endured the test of time and are still around today. Most others have faded away, largely because they simply weren’t that good.
One day when I was going through my mother’s little recipe file boxes, I happened to come across one such recipe. It appeared to be from the ‘Clover Leaf’ company. I vaguely recall her making it but decided to try it. I’m sure at that time, it was probably made with either tuna or salmon. I added a few extra spices just to ‘kick’ it up a notch and we really enjoyed it. As Brion put it, ‘great little comfort food meal’.
Print Recipe
'Retro' Tuna/Salmon Pasta Bake
Comfort food of yesteryear.
Votes: 1
Rating: 5
You:
Rate this recipe!
|
|
Votes: 1
Rating: 5
You:
Rate this recipe!
|
Instructions
Preheat oven to 350 F. Boil macaroni. Place half of the macaroni in a buttered 9 x 9-inch baking pan. Add drained, flaked salmon (or tuna), peas, eggs & seasonings; cover with the rest of the macaroni.
Combine soup, milk & salmon juice; pour over all. Top with cheese or breadcrumbs or a combo of both. Bake uncovered about 30 minutes.
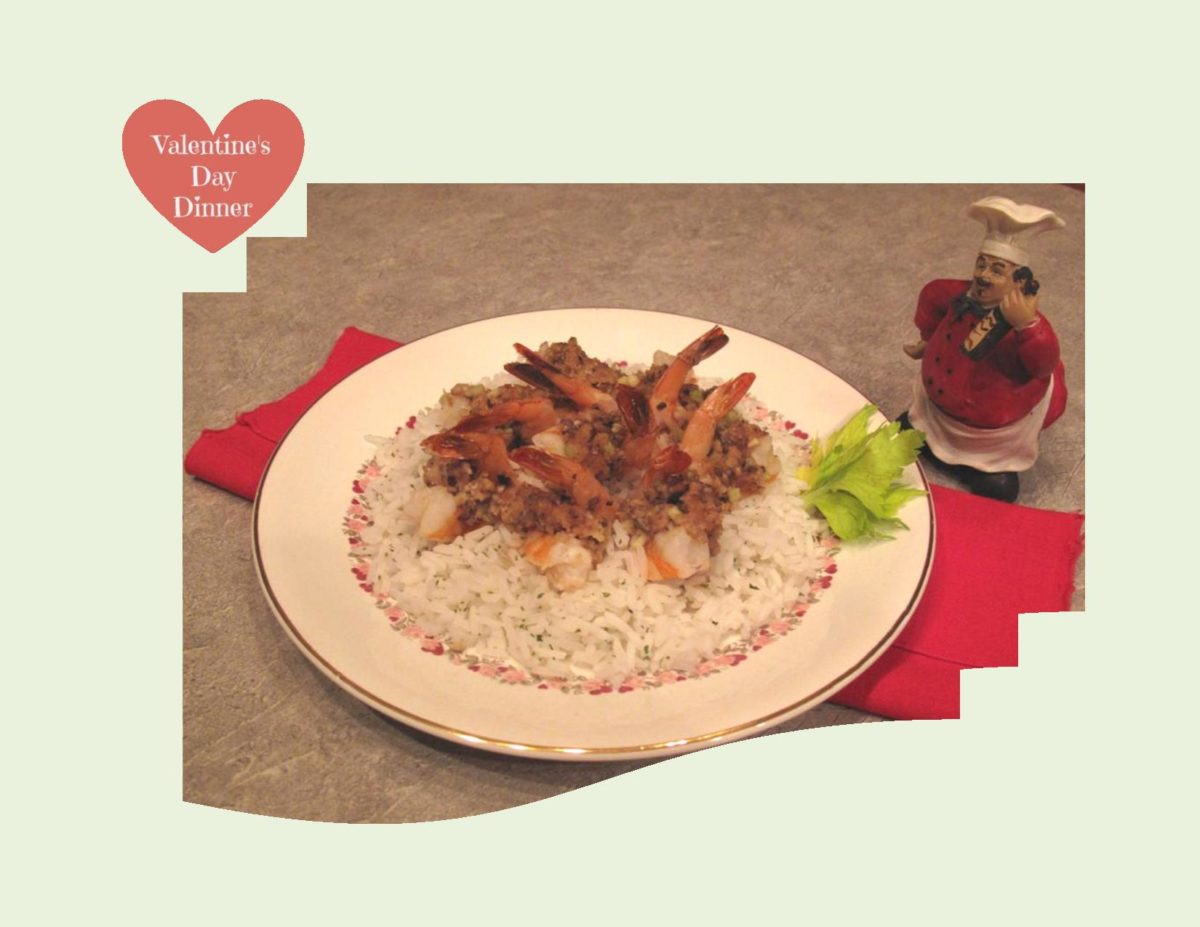
HAPPY VALENTINES DAY!
A day when ‘love is in the air’ — roses to be purchased, chocolates and valentine cards to be shared and dining over that special, very intimate supper meal. If only our world would focus more on this emotion all year around instead of just for one day. As I get older, the idea of cherishing each day and the people you care about the most has become so important.
Today is also important to me as it is now one year since I started publishing my blog. With the help of my husband Brion, we have posted 85 blog articles. These stories and recipes are being shared on Facebook and pinterest as well as our website. I have enjoyed the wonderful feedback I’m getting from many different countries as well as friends and family here at home. Thanks to all of you who have followed my blog and I hope you will continue to find it interesting.
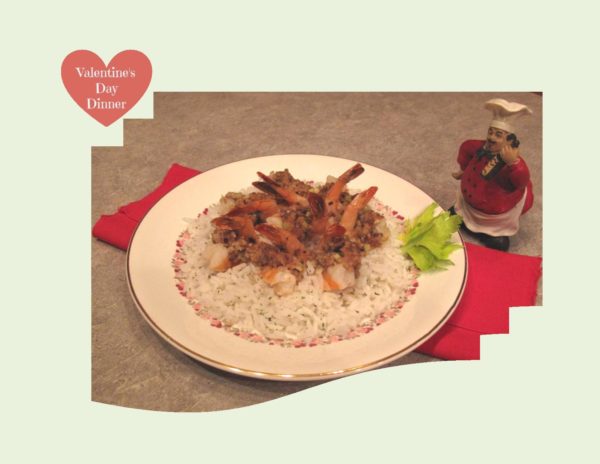
Brion and I share a love of seafood so my Valentine supper is Mushroom Stuffed Shrimp. This meal lends itself to being an appetizer as well as a main course dish. Not a lot of fuss and muss, just a nice little elegant meal for the two of you to enjoy.
Print Recipe
Mushroom Stuffed Shrimp
Votes: 1
Rating: 5
You:
Rate this recipe!
|
|
Votes: 1
Rating: 5
You:
Rate this recipe!
|
Instructions
Jumbo Shrimp
Peel & de-vein shrimp, leaving tails on. Butterfly each shrimp along the outside curve. In a small bowl, whisk together soy sauce, honey, water, ginger & garlic powder. Add raw shrimp & marinate for at least 30 minutes.
Stuffing
In a small bowl, dissolve bouillon in hot water. Stir in remaining stuffing ingredients. When marinated, remove shrimp from marinate & open shrimp flat & place with tails up in a buttered 9 x 13-inch baking pan. Spoon about 1 teaspoon of stuffing onto each shrimp.
Bake at 375 F. for 5-8 minutes or until shrimp turns pink. Serve over rice as a main course.

While I was giving some thought to something different and interesting for supper today, a unique memory came back to me. I don’t know if you are familiar with Black Iberian Ham. Brion and I certainly were not aware of the Iberian pigs until we had traveled in Spain and Portugal one year.
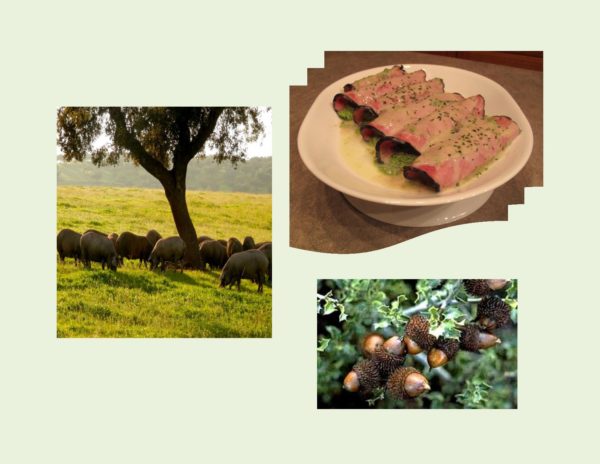
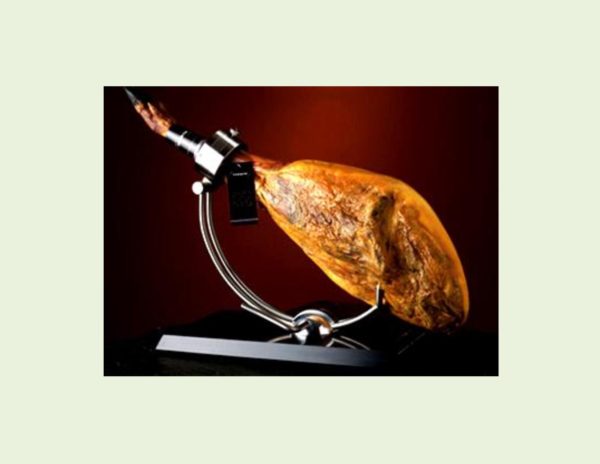
Iberian pigs have black skins and hooves and very little hair. Their history is steeped in mystery. Beginning with the acorns from oak tree pastures in Spain to their long curing process. Magically each ham is transformed into one of the world’s most exquisite foods.
Immediately after weaning, the piglets are fattened on barley and corn for several weeks. During the spring and summer, cattle and sheep graze on the oak forest pastures. In fall and winter, when the acorns are falling from the trees, the Iberian pigs are then allowed to roam in the pastures and oak groves to feed naturally on grass, herbs, acorns and roots until slaughtering time approaches. At that time, the diet may be strictly limited to olives and acorns for best quality Iberian ham. It is possible for a pig to eat 10 kilos of acorns in a day.
The hams from the slaughtered pigs are salted and left to begin drying for two weeks, after which they are rinsed and left to dry for another four to six weeks. The curing process then takes at least 12 months although some producers cure their hams for up to forty-eight months. The extraordinarily long curing process is possible because of the huge amount of fat on each ham. Over that time period, they loose nearly half their weight as the fat drips away.
The curing hams hang where open windows allow mountain air to ‘caress’ them as they transform from a piece of pork into the ultimate flavored BLACK IBERIAN HAM.
Brion and I have always found that travel is unmistakably the most interesting form of learning one can experience.
This recipe for HAM & SPINACH ROLLS, although quite simple, makes a nice little elegant meal in a short space of time.
Print Recipe
Ham & Spinach Rolls
A nice way to transform basic into special.
Votes: 1
Rating: 5
You:
Rate this recipe!
|
|
Votes: 1
Rating: 5
You:
Rate this recipe!
|
Instructions
Preheat oven to 350 F. In a food processor, place egg, 1/3 of soup, onion, garlic powder & salt & pulse for 30 seconds. Add half of the milk, spinach, mustard, bread, thyme & Parmesan. Blend another 30 seconds.
Lay ham slices on work space and divide filling evenly among them. Arrange filled ham rolls in a shallow baking dish. Combine remaining soup & milk; spoon evenly over rolls. Bake, covered for 15 minutes, remove foil & bake 10 more minutes or until bubbly & filling is cooked through. If preferred, garnish with dried parsley.
-
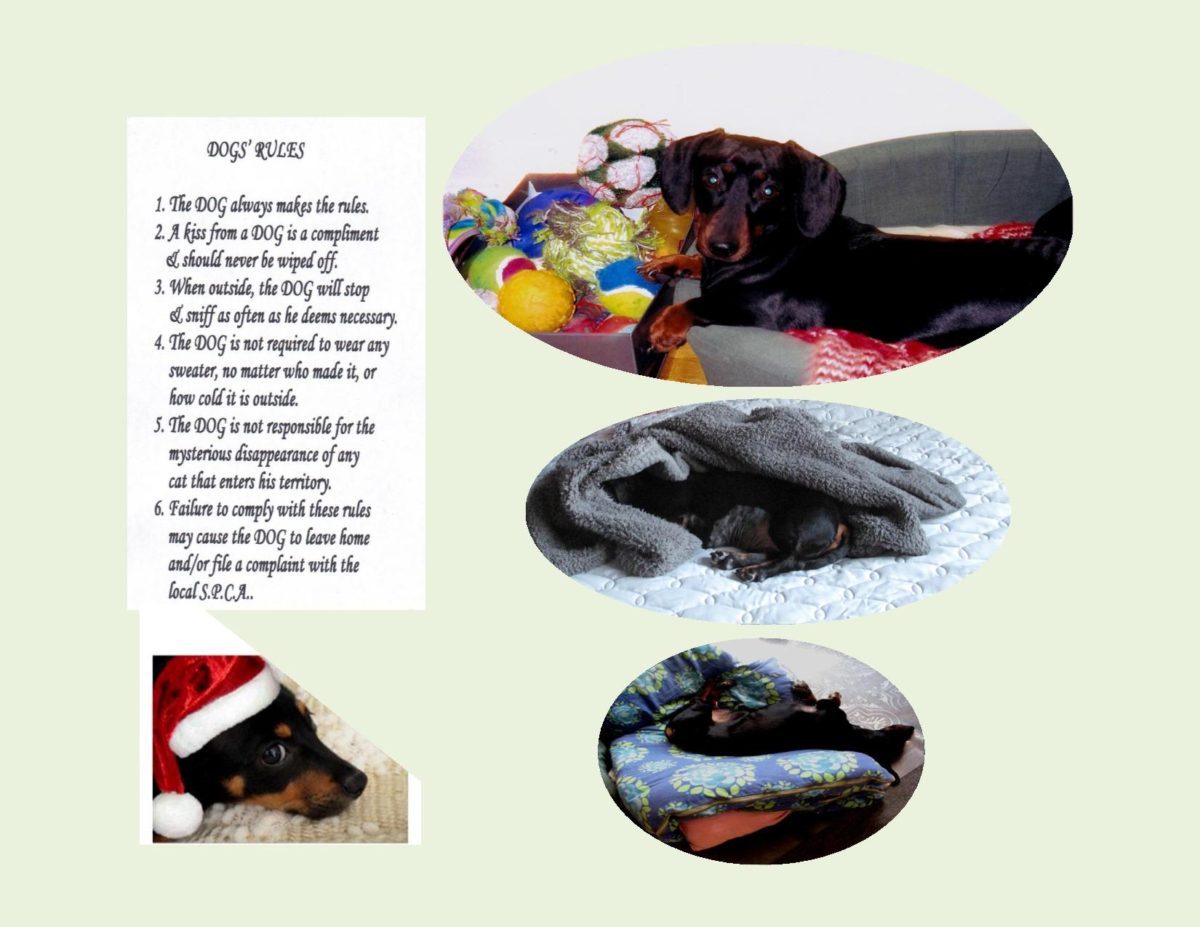
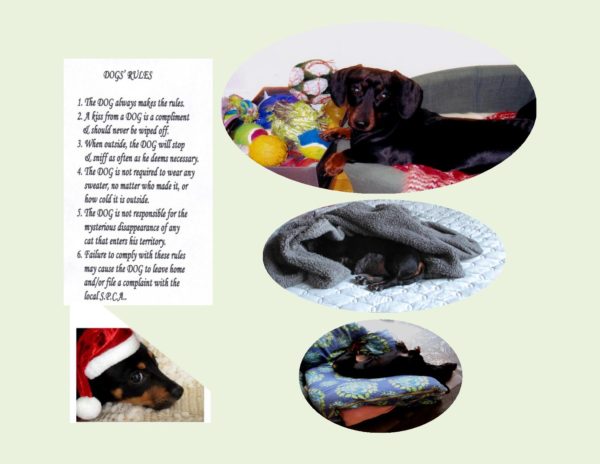
Today, December 21st, a very special member of our family is having his 13th birthday. He is ‘our’ little mini German Dachshund with the Mexican name. My sister Loretta, adopted Amigo when he was only two months old, so needless to say, they are inseparable.
Amigo is everything you could want in a pet. I’m pretty sure he feels his mission in life is to play ball. He has never been one to like being left alone or to play by himself. Being so incredibly smart, it only takes a few minutes for him to understand what you are doing, playing or even thinking!
On occasion, Loretta has put him in our care. He accepts Brion and I like going to stay with your aunt and uncle and very quickly adapts to our routine. Curious, charming, brave, stubborn and comical are all words generally used to describe Dachshunds and certainly they describe our ‘Miggy’. He has probably done more airplane travel than a lot of people. Although travelling in any mode is not his thing, if Loretta is going somewhere, no question, he’s going to.
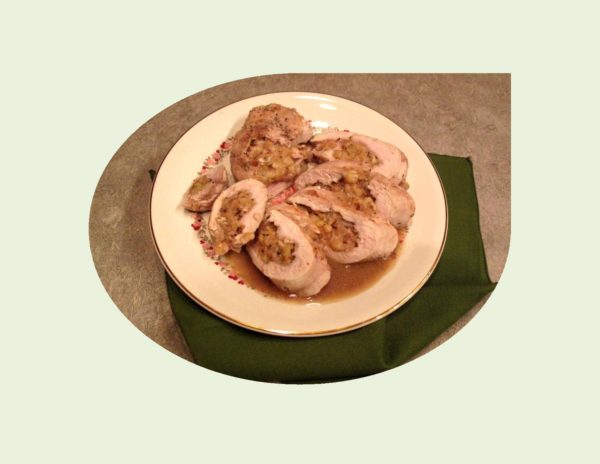
Since this is supposed to be a ‘story and food‘ blog I guess I should get to the food part. Since Amigo loves chicken I decided to post STUFFED BREAST of CHICKEN with APPLES, WALNUTS & BRIE today. Now that’s not to say he’ll be eating any but it kind of fits the occasion.
HAPPY BIRTHDAY TO AMIGO!
Print Recipe
Stuffed Chicken Breasts with Apples, Walnuts & Brie
That magic of combining sweet & savory makes these chicken breasts just a bit more special.
Votes: 1
Rating: 5
You:
Rate this recipe!
|
|
Votes: 1
Rating: 5
You:
Rate this recipe!
|
Instructions
In a large skillet, saute onion in 1 Tbsp. butter about 1 minute. Add apple; cook 2-3 minutes longer or until apple is golden brown. Remove from heat; add walnuts, rosemary & a dash of salt & pepper.
Flatten chicken breasts to 1/4" thickness; sprinkle with garlic powder & remaining salt & pepper. Place apple mixture & Brie on half of each chicken breast; fold over. Secure with toothpicks if necessary.
In same skillet, brown chicken in remaining butter. Stir in cider vinegar & 1/4 cup apple juice. Bring to a boil. Reduce heat; cover & cook for 15-20 minutes or until meat thermometer reads 170 F.
Remove chicken to serving platter; discard toothpicks. Combine cornstarch & remaining apple juice; add to the pan. Bring to a boil; cook & stir for 2 minutes or until thickened. Serve with chicken.
Recipe Notes
- This recipe is another one of my favorites I acquired from the tasteofhome.com site.
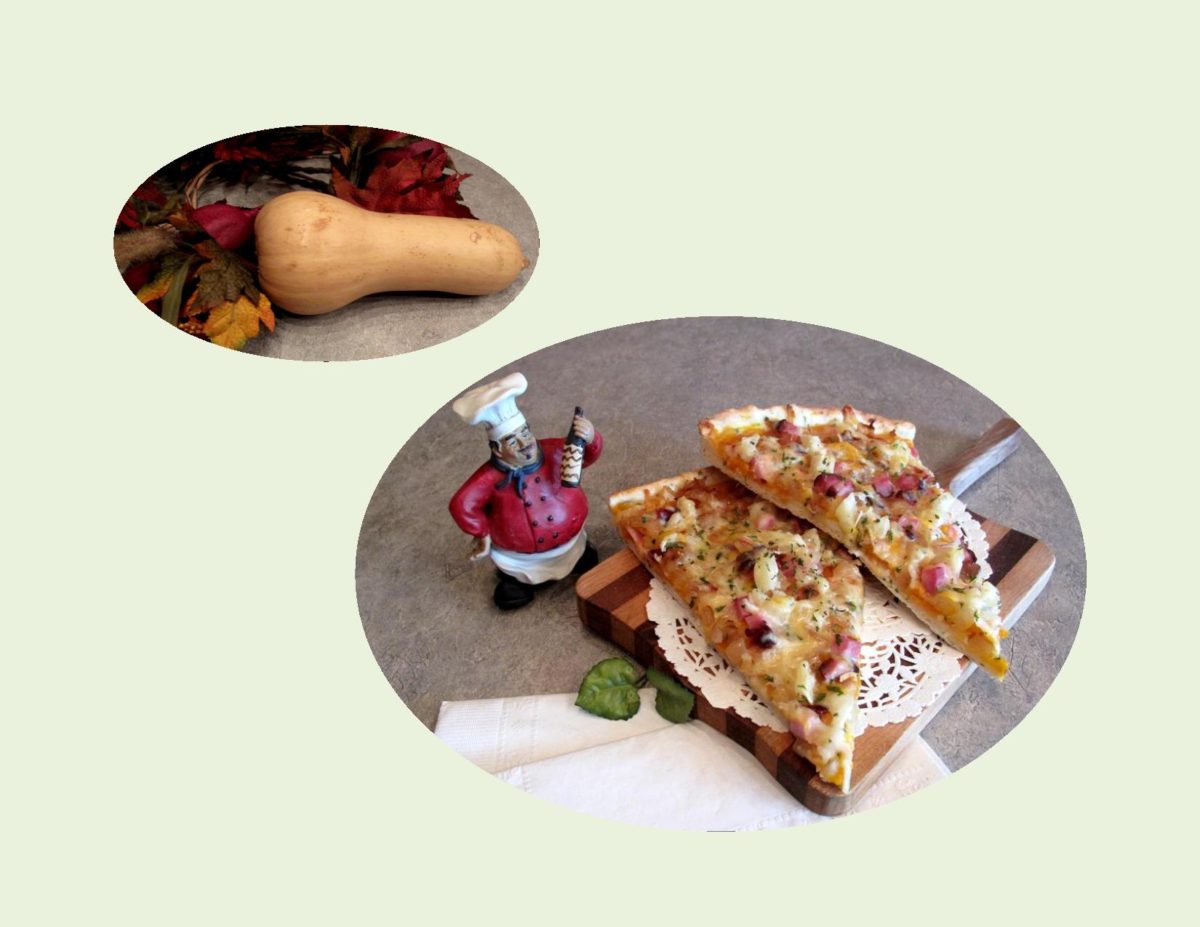
A few years back, Brion and I discovered how good Butternut squash was. I’m not sure why it took so long but since then I’ve tried to make up for lost time. Being a winter squash I had served it with a cranberry stuffing as a side dish that Christmas. This sweet, nutty tasting squash has since then worked it’s way into numerous meals at our house.
The ebook I have on AMAZON right now, includes about 50 recipes in it. One of the recipes that we have enjoyed a lot is this Ham & Butternut Squash Pizza. For anyone who has a problem with yeast, the crust uses baking powder instead. This recipe puts a whole new spin on a traditional ham & pineapple pizza.
Print Recipe
Ham & Butternut Squash Pizza
Caramelized onions & butternut squash on an 'old favorite', ham & pineapple pizza.
Votes: 1
Rating: 5
You:
Rate this recipe!
|
|
Votes: 1
Rating: 5
You:
Rate this recipe!
|
Instructions
Butternut Squash Sauce
Preheat oven to 400 F. Line a baking sheet with parchment paper. Split butternut squash down the middle & scoop out seeds & fibrous strings. Place the cut side down on baking sheet; roast until it becomes very soft & mushy. Remove from oven; allow to cool then scoop out flesh & place in a food processor. Blend until smooth with milk (or broth), salt & pepper. Adjust if necessary so you end up with a nice 'sauce' for the pizza. Set aside.
Caramelized Onions
Heat oil in skillet until hot. Add onion & sprinkle with salt. Cook & stir about 15 minutes or until moisture is evaporated & onion is soft. Reduce heat; sprinkle with vinegar. Cook & stir until golden. Stir in brown sugar; cook & stir until caramel brown in color.
Pizza Crust
In a medium bowl, measure dry ingredients for pizza crust. Make a well in center & add milk. Stir until dough leaves the sides of the bowl. With buttered hands, gently knead 5-6 times then press into one 14-inch pizza pan.
Pizza Assembly
Spread with 'sauce'; sprinkle with mozzarella ( or nacho) cheese, onion, ham & pineapple. Top with remaining Gorgonzola (or Gouda) cheese. Bake for 20-25 minutes until crust is browned.
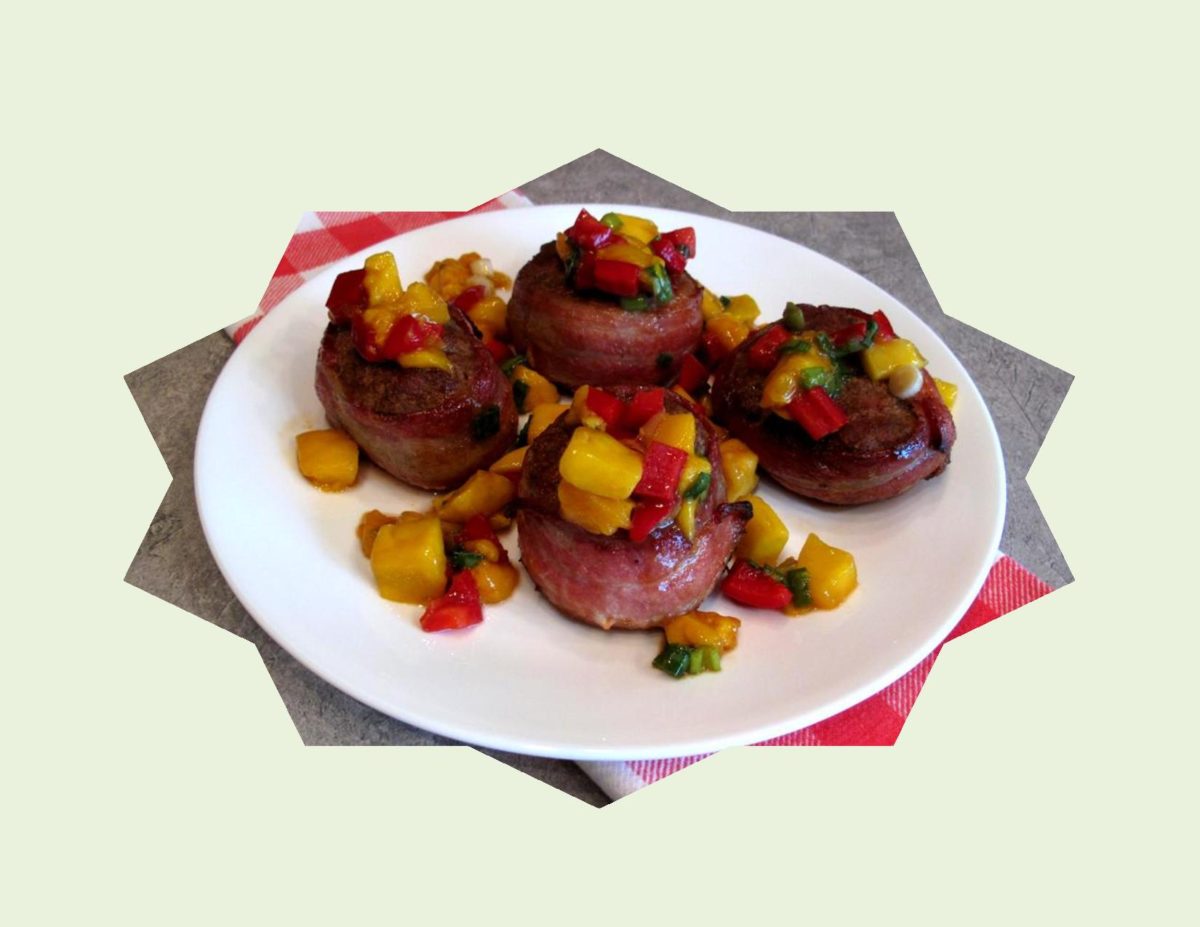
Today’s pork is leaner and more tender due to breeding and feeding changes over the last number of decades. Ounce for ounce, pork tenderloin is almost as lean as boneless, skinless chicken breast as well as being economical. Its one of those meats that can be an elegant company meal or used in a stir fry for a weekday supper. Pork tenderloin’s mild flavor partners well with sweet and savory ingredients. Unbelievable in its versatility, you can cook it whole, slice into medallions, butterfly and stuff it, or use it in stir fry. It’s great grilled, roasted or simply seared.
When I was growing up on the farm, pigs were a part of the ‘mixed farming’ my parents did. At that time, there wasn’t much about the animal I cared for. They squealed, smelled and were not much fun to feed. My parents cured their own bacon, which always seemed to be so salty to my liking. To this day, bacon is not something that has a big draw for me for that reason.
My dad was not a man that did any cooking. With my mother being such a fabulous ‘cook’, there certainly was no need. For some reason, every once in a while, dad thought he would show us the way he thought bacon should be cooked. The cast iron frying pan was made ‘smoking’ hot to which he would then put the bacon in to fry it. That little episode was definitely cause to have to ‘air’ out the house for the next couple of hours!
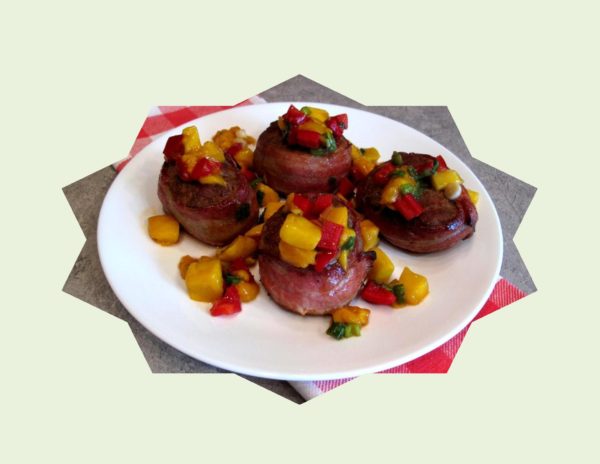
Years later I have come to enjoy today’s lean pork tenderloin as a staple in my rotating household menu choices. With mangoes being quite plentiful right now, it seemed fitting to feature some Spiced Pork Medallions with Mango Salsa.
Print Recipe
Spiced Pork Medallions with Mango Salsa
Seasoned tenderloin wrapped in bacon and served with a fruity mango salsa
Votes: 1
Rating: 5
You:
Rate this recipe!
|
|
Votes: 1
Rating: 5
You:
Rate this recipe!
|
Instructions
Mango Salsa
Mix together cubed mangoes & red pepper, green onions & sauce. Set aside.
Tenderloin
Cut tenderloin into 4 equal pieces. Flatten cut side down into about a 3 1/2" circumference. In a small bowl, mix together all SPICE RUB ingredients. In a resealable plastic bag, combine medallions & spice rub, seal bag & shake well. Refrigerate for several hours.
When ready to cook, wrap bacon slice around edge of each medallion; secure with wooden toothpicks. Heat BBQ to medium-high heat. Grill 8-10 minutes on each side or until done (160 F.)
OR
Heat a large skillet sprayed with cooking spray medium-high heat. Add medallions; cook, partially covered 25 minutes or until done (160 F.) , turning after 15 minutes.
Serve topped with Mango Salsa.
Recipe Notes
- Mango Salsa can be marinated with other choices of 'sauces' or salad dressing marinades if you prefer something less sweet.
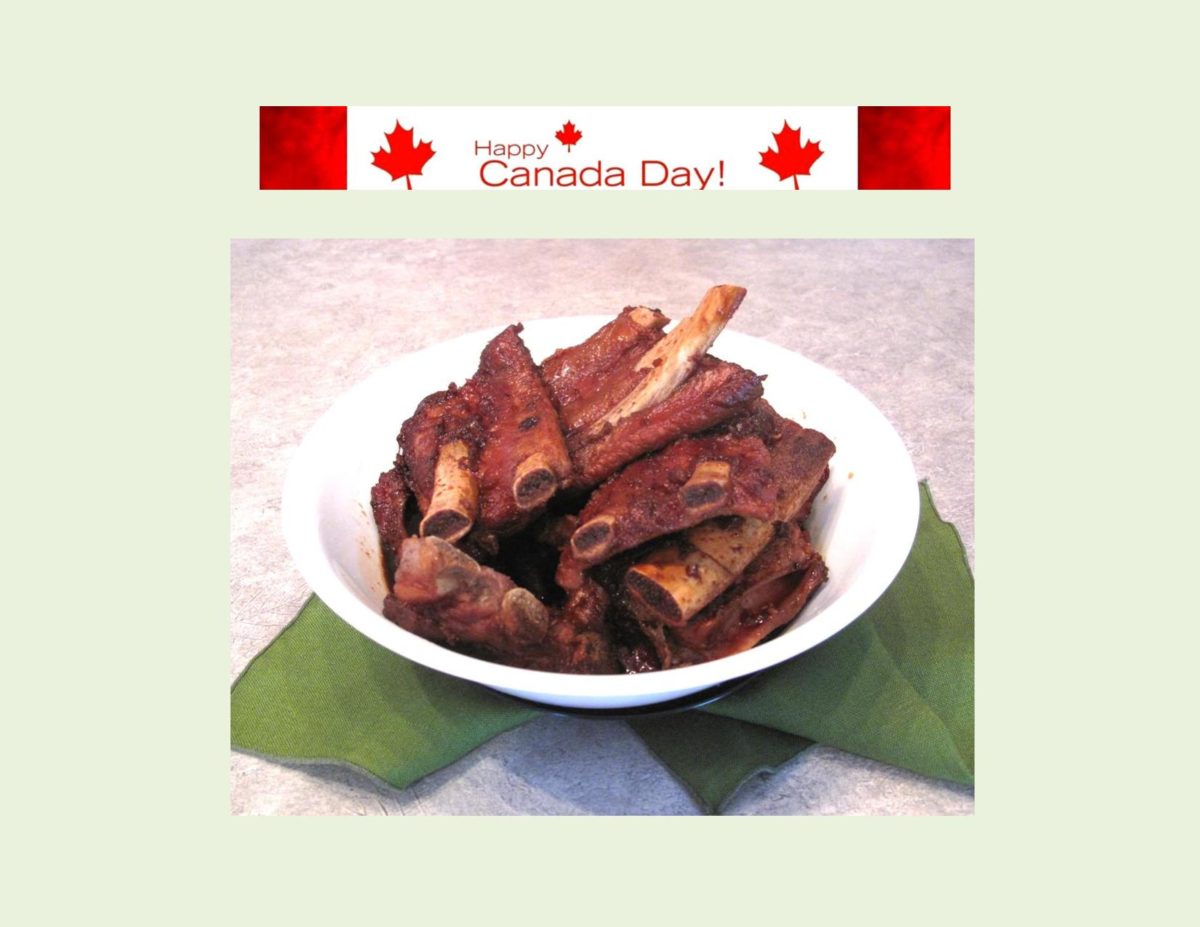
HAPPY BIRTHDAY, CANADA!
Can you believe it, July 1 has rolled around already. Where does the time go? Anyway it’s Canada’s 149th birthday so let the celebrations begin. Summer entertaining is all about laid-back get-together’s with family and friends and of course, great food.
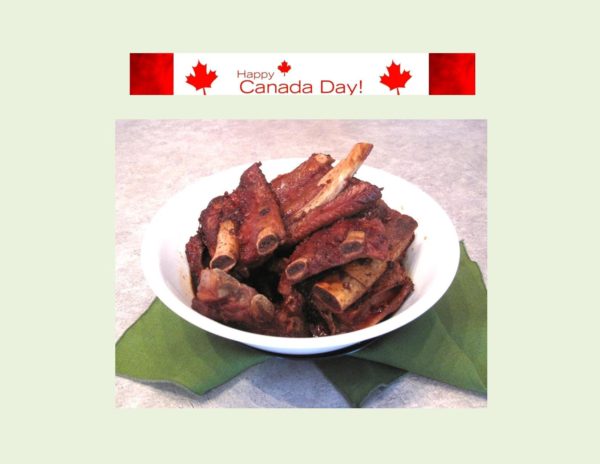
Along with the parades, concerts, carnivals, festivals and firework displays, food is always a big part of it all. I’m sure there will be a great number of succulent ribs being served. Brion and I don’t eat a ton of ribs but we do really enjoy them when we do. For my own little ‘rib fest’ today I decided to do some ‘Honey-Garlic Glazed Ribs’.
Of course, there are many trains of thought when it comes to what makes the best and most tender ribs. Some folks like to par boil or bake somewhat prior to barbecuing, others use a dry rub or marinate and some just choose to barbecue using their favorite sauce glaze. Whatever works for you is what counts.
In this recipe you can either simmer for 45 minutes on top the stove or bake slowly (at 250 F. for 2-3 hrs.) in the oven first. I find either way it gets rid of a lot of the fat content as well as helping to make them tender. After that the ribs are coated with the sauce (which contains baking soda as a tenderizer). At this point you can either bake the ribs at 350 F. or wrap them in foil and place on the barbecue. However you choose to make them, I think you will find them sticky but good!
Print Recipe
Honey-Garlic Glazed Ribs
Cooking method saves on barbecuing time without sacrificing tenderness.
Votes: 1
Rating: 5
You:
Rate this recipe!
|
|
Votes: 1
Rating: 5
You:
Rate this recipe!
|
Instructions
Remove silver lining from the back of the slab of ribs. Cut across the bones to form 'riblets, then into 3-4 ribs per portion.
Place ribs in a large stockpot & cover with water. Bring to a rolling boil, cover & SIMMER for 45 minutes to an hour. Drain.
Meanwhile, in a LARGE bowl, combine honey, soy sauce, vinegar, minced garlic & brown sugar. Stir until honey & sugar are completely dissolved, then stir in baking soda. The mixture will begin to foam. Transfer ribs to the bowl & turn to coat.
Preheat oven to 350 F. On a large piece of foil, arrange the ribs meaty side up; pour excess sauce over all & sprinkle with garlic powder. Fold the sides of the foil over the ribs & seal tightly on all sides. Place ribs on a baking sheet & bake for 30 minutes or until ribs are very tender.
Recipe Notes
- Ribs can be par boiled or baked the day before & refrigerated until ready to bake or barbecue.
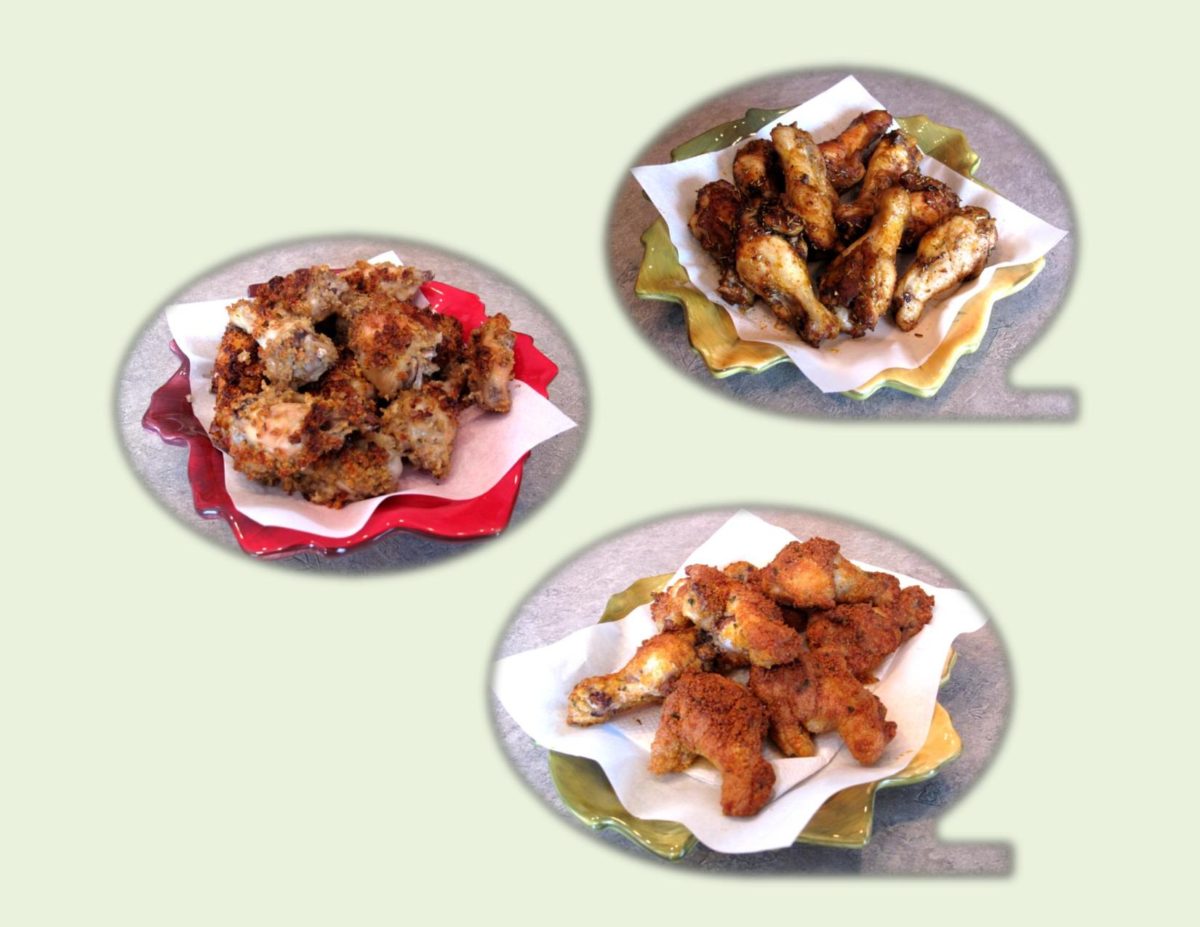
Chicken wings — versatile, affordable and one of North America’s most undisputed favorite ‘finger foods’. Even if they are classed as an appetizer, there is no problem fitting them in as the main course of a meal. The thing I like about them is how many different flavors you can give them. Gone are the days when everything had to be deep fried to taste good. Whether you prefer to barbecue them outdoors or bake in the oven, ‘wings’ taste great!
It seems like the grocery store meat counters have endless amounts of chicken wings in stock at this time. Of course, like most things nowadays, you have your choice — full wings, wing drumettes, wing tips and split wings. Good grief, we are so spoiled for choice! Then we go to cook them and there is more choice.
When I needed to make some of these tasty little morsels for company ‘finger food’ gatherings three of my favorites were ‘Parmesan’, ‘Rosemary’ and ‘Savory’ wings. I hope you enjoy them as well.
Print Recipe
Chicken Wing Drummettes
Make everyone happy -- make some of all three kinds!
Votes: 1
Rating: 5
You:
Rate this recipe!
|
|
Votes: 1
Rating: 5
You:
Rate this recipe!
|
Instructions
Parmesan wings
Preheat oven to 350 F. Line a 11 x 17 x 1-inch baking pan with foil. Place a 10 x 18-inch wire (cooling) rack on top. Combine parmesan cheese, parsley & spices in a large resealable plastic bag. Dip each chicken drumette in melted butter. Place a few in the bag at a time. Toss to coat evenly. Arrange drumettes in a single layer on wire rack. Bake uncovered for 45-55 minutes or until cooked.
Rosemary wings
Preheat oven to 375 F. Line a 11 x 17 x 1-inch pan with foil; spray foil with baking spray. In a resealable plastic bag, combine oil & spices. Add chicken; toss to coat evenly. Place drumettes on prepared pan. Bake for about 45 minutes or until cooked.
Savory wings
Preheat oven to 350 F. Line a 11 x 17 x 1-inch baking pan with foil. Place a 10 x 18-inch wire (cooling) rack on top. Combine bread crumbs & seasoning mix in a large resealable plastic bag. Dip each chicken drumette in melted butter. Place a few in the bag at a time. Toss to coat evenly. Arrange drumettes in a single layer on wire rack. Bake uncovered for about 45 minutes or until cooked.
Recipe Notes
- Whenever I have made wings, I prepared them to baking point early on in the day and popped them in the oven just prior to serving time.

I’m sure the appeal of mushrooms isn’t for everyone. For me, I love that earthy taste. There is hardly anything you can’t use mushrooms in from appetizers to main course.
I remember when I was growing up on the farm we would sometimes find edible mushrooms especially on humid days. My father had an area where hay bales where kept for feeding the cattle in the winter. It seemed this was where these mushrooms would pop up. There was never any great amount — just enough so we each had a taste. Mom would fry them in butter and they were so good.
For company barbecues, I used to make a stuffed mushroom that everyone really enjoyed. The recipe used a frozen souffle product from the Stouffer company. The only problem was every time I needed it I couldn’t seem to find any to buy. Since there are endless kinds of stuffed mushrooms, why not just make a different kind? That would have been too easy! In this recipe I tried to achieve the same kind of spinach souffle.
Print Recipe
Mushroom Caps with Spinach Souffle
Nice light, tasty little morsels, great as hors d' oeuvres or part of the main meal
Votes: 1
Rating: 5
You:
Rate this recipe!
|
|
Votes: 1
Rating: 5
You:
Rate this recipe!
|
Instructions
In food processor, combine eggs, soup, onion, garlic powder, & salt; pulse for 30 seconds. Add spinach, bread crumbs, thyme, nutmeg & Parmesan. Blend for another 30 seconds. Set prepared souffle mixture aside.
Preheat oven to 400 F. Remove stems from mushrooms. Wipe mushrooms with a towel as opposed to rinsing them with water. Dip outside of 'cap' in bottled, Zesty Italian dressing. Place in a shallow baking dish; stuff caps with souffle mixture & sprinkle with a few more seasoned crumbs. Bake 15 minutes or until souffle mixture is set.
Recipe Notes
- This recipe is easily halved or make the amount of mushrooms you need then bake the rest of the souffle mixture in a casserole dish.
- Mushrooms can be made earlier in the day & placed in refrigerator until ready to bake & serve.
- If you prefer, use an extra topping such as grated cheddar or bacon bits.

For as long as I can remember, I personally have had a love affair with the ‘Big Sur’ coastline in California, USA. The spectacular beauty of this rugged 145 km (90 mile) coastline, with the natural drama playing out between land and sea is breathtaking.
Over the years many of our vacations have either been in this area or it has made a fabulous ending to a long flight coming back from Europe, before returning home to Canada.
One of the special memories I have from this vicinity was the quaint little European-style village of Carmel-by-the-Sea, located about 190 km (120 miles) from San Francisco.
Some 30 years ago, actor Clint Eastwood, was elected mayor of Carmel for a two-year term. During that time he opened a restaurant/bar there called the ‘Hogs Breath Inn’. You had to enter it through a long , cobblestone alley corridor. The outdoor patio was nestled between the restaurant and the bar. A massive wall mural and numerous stone fireplaces all added tremendously to the wonderful ambiance. It was here that I first tasted a Portobello Mushroom Burger.
Every time Brion and I have returned to Carmel, we have made a point of eating lunch at the Hogs Breath Inn, just so I could taste that burger again. The Portobello mushroom seemed to have been marinated and then grilled on a barbecue. On top of it were some battered onion rings, lettuce and tomato. All of this came in a grilled Ciabatta bun with pickles and a side dish of your choice.
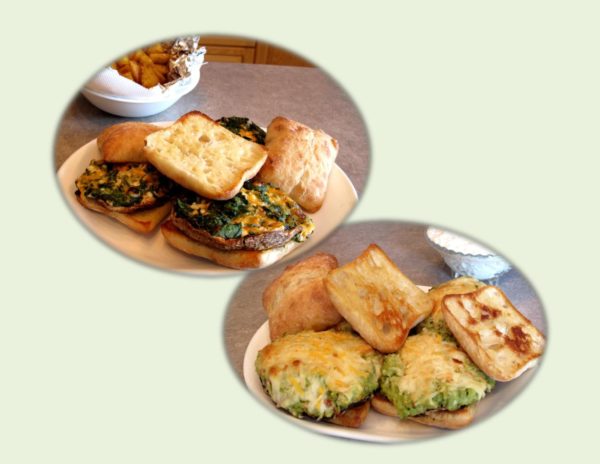
Of course, never having been someone who could just leave it at that, I had to see if I could push this idea just a bit further. Along came some more recipes for the ‘Stuffed Burger Series’. If you like these ingredients, I think you will really enjoy them.
Print Recipe
Portobello Mushroom Burgers
Votes: 1
Rating: 5
You:
Rate this recipe!
Ingredients
Seafood-Avocado Portobello Mushroom Burgers
- 2 Tbsp butter,
- 2 leeks, finely chopped all of white & part of green
- 1 garlic clove, minced
- 2 avocados, large, peeled & mashed
- 1/4 tsp garlic powder
- 1/4 tsp salt
- 1/2 tsp lemon juice
- 1/4 cup onion, minced
- 2 pieces sun-dried tomato, chopped fine
- 120 grams crabmeat
- 120 grams shrimpmeat
- 1/4 cup Zesty Italian dressing
- 30 grams Parmesan cheese
- 55 grams Asiago cheese, shredded
- 30 grams mozzarella cheese, shredded
- 6 Portobello mushrooms, large
- 6 Ciabatta buns or your choice
Spinach-Cheese Portobello Mushroom Burgers
Ingredients
Seafood-Avocado Portobello Mushroom Burgers
- 2 Tbsp butter,
- 2 leeks, finely chopped all of white & part of green
- 1 garlic clove, minced
- 2 avocados, large, peeled & mashed
- 1/4 tsp garlic powder
- 1/4 tsp salt
- 1/2 tsp lemon juice
- 1/4 cup onion, minced
- 2 pieces sun-dried tomato, chopped fine
- 120 grams crabmeat
- 120 grams shrimpmeat
- 1/4 cup Zesty Italian dressing
- 30 grams Parmesan cheese
- 55 grams Asiago cheese, shredded
- 30 grams mozzarella cheese, shredded
- 6 Portobello mushrooms, large
- 6 Ciabatta buns or your choice
Spinach-Cheese Portobello Mushroom Burgers
|
Votes: 1
Rating: 5
You:
Rate this recipe!
|
Instructions
Seafood-Avocado Filling
Remove brown gills from the undersides of mushrooms using a spoon; discard gills. Remove stems, reserve for another use if desired. Melt butter in a large skillet over medium heat; add leek & garlic, & saute until tender. Remove from heat; cool.
Gently combine mashed avocado with next 7 ingredients in a medium bowl; stir into cooled leek mixture.
Dip round side of mushroom caps into Italian dressing; drain slightly. Arrange rounded sides down in a foil baking dish. Sprinkle parmesan cheese evenly into mushroom caps; then top evenly with seafood/avocado mixture, pressing filling to compact slightly. (Can be made 6 hours ahead. Cover & refrigerate if making in advance.)
Preheat oven or barbecue to 350 F. Combine Asiago & mozzarella cheese; sprinkle mushrooms with cheese mixture. Place foil baking dish with mushrooms in oven or on barbecue. Bake until tender & filling begins to brown, about 35 minutes. If necessary, cover loosely with aluminum foil so tops don't burn. Serve on slightly grilled Ciabatta buns. Serves 6
Spinach-Cheese Filling
Remove brown gills & stems from mushrooms. Dip round side of mushroom caps in Italian dressing; arrange, rounded side down, in a foil baking pan. Preheat oven or barbecue grill to 400 F.
Place spinach in a microwave safe bowl, sprinkle with a few drops of water & microwave on high for one minute. Chop cooked spinach; mix with cheddar & cottage cheese, garlic powder, onion powder, red pepper flakes, salt & pepper. Spread spinach mixture onto prepared mushroom caps.
Bake in oven or on barbecue until mushrooms are tender, about 12 minutes. Nice served on slightly grilled wholewheat buns. Serves 4