German Banana-Orange Pancakes

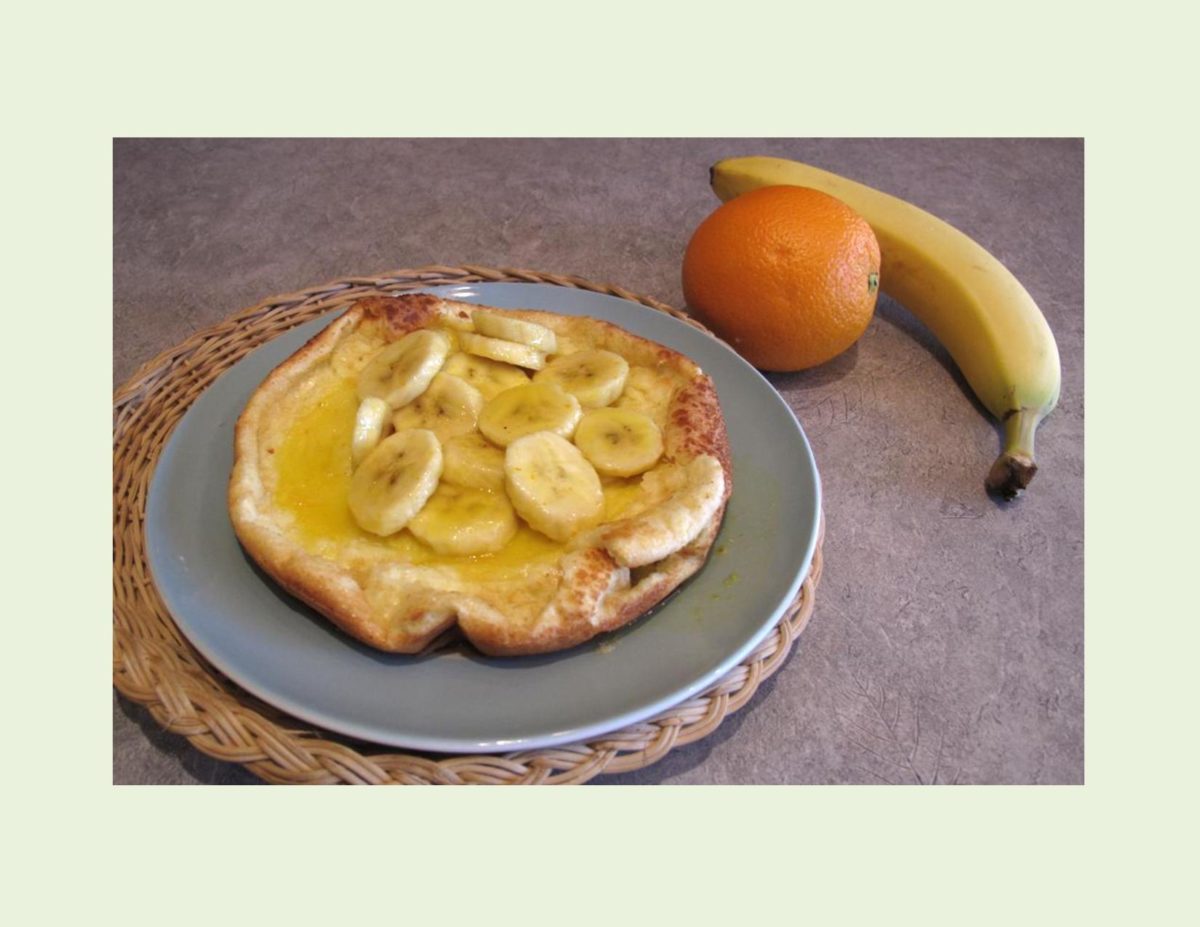
You could say the German pancake is a cross between a souffle and an omelet. Baked in a round pan with sides, it is quite similar to a Yorkshire pudding in which the center is sunken. It derived from the German Pfannkuchen  and is also called Dutch baby pancake. This light, airy pancake is crispy around the edges while retaining a tender, custard like middle.

In most cases these pancakes would be served with lemon slices, powdered sugar and butter. My choice today is to serve them with sliced bananas drizzled with orange sauce.

This is one of the simplest dishes to prepare and one of the most impressive to serve. I don’t actually recall my mother making these but we certainly did eat the more ‘common’ pancakes, which were so good as well.

Print Recipe
German Banana-Orange Pancakes
Votes: 1
Rating: 5
You:
Rate this recipe!
Servings
Ingredients
Pancakes (2 - 9" pancakes)
Banana/Orange Sauce
Servings
Ingredients
Pancakes (2 - 9" pancakes)
Banana/Orange Sauce
Votes: 1
Rating: 5
You:
Rate this recipe!
Instructions
Pancakes
  1. Preheat oven to 400 F. Generously butter two 9-inch cake pans. In blender, process eggs gently until light in color. Add remaining ingredients; process until smooth & pour into pans. Bake 20 minutes; reduce heat to 350 F. & bake 10 minutes more. Slide onto warm plates. Prepare banana/orange sauce WHILE pancakes are baking.
Banana/Orange Sauce
  1. In a skillet, combine butter, sugar, orange juice & zest; bring to a boil. Peel bananas & slice; add to orange sauce. Stir to coat. Remove from heat. Pour banana/orange sauce over baked pancakes & serve.

German Bierocks

With my passion for food history and preparation, there is always a draw that pulls me back to my German roots. A lot of these recipes I recall my mother making but some are new to me that I just can’t resist trying.

In 2016, I posted a couple of recipes ( one in April and the other in August) for Potato Bread that had a meat filling baked inside. These take sandwiches to a whole new level and are so great for picnics — the perfect meal all in one.

The hand held meat ‘pie’ has a worldwide history. The British serve Cornish pasties, while empanadas are found throughout Central and South America. Italians are drawn to calzones (which are often made without meat). That brings me to eastern Europeans with their bierocks.

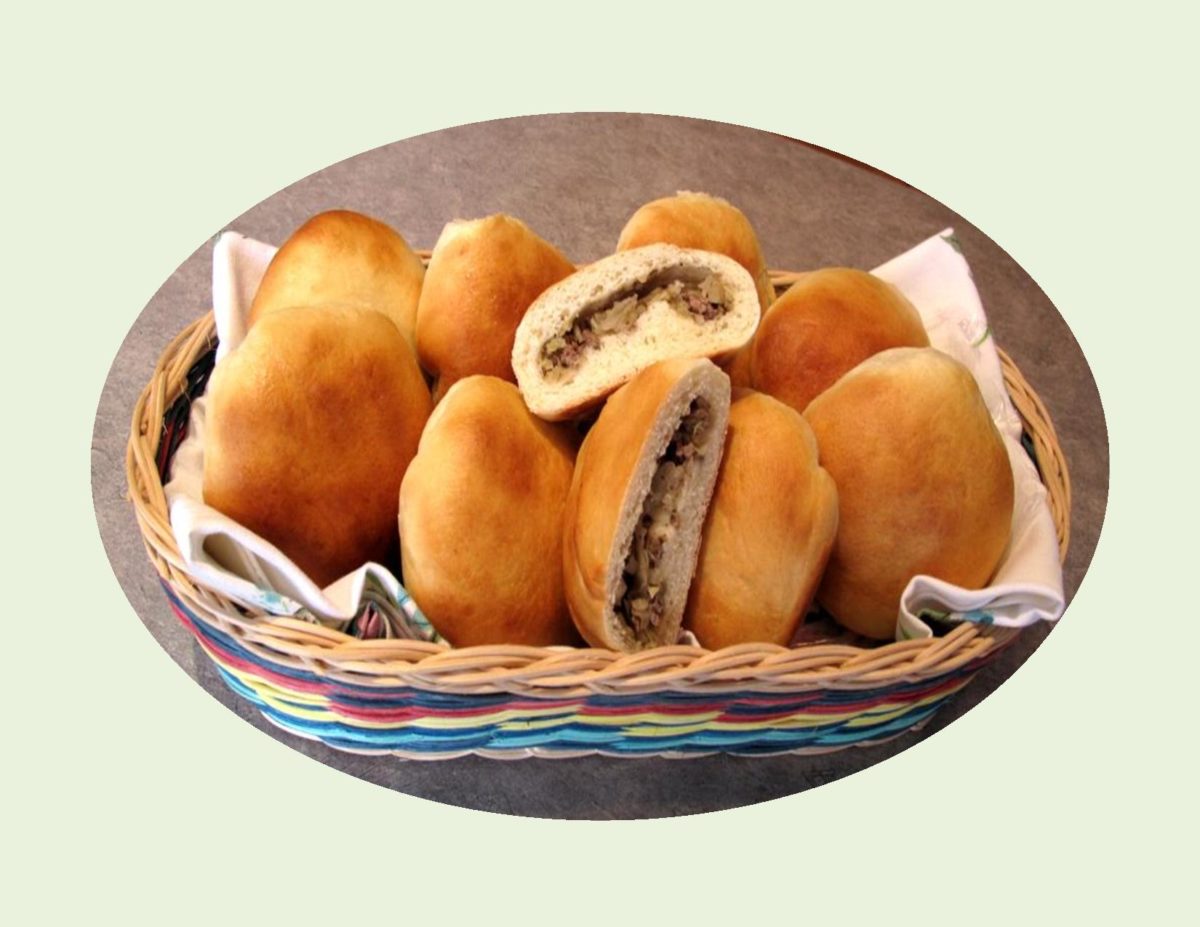
A bierock is made from a yeasty dough stuffed with ground or shredded beef, cabbage and onions. They were created to be carried by miners and farmers to work so they could enjoy a hearty lunch. What began as a ‘pocketful’ of beef and cabbage eventually led to the Reuben  that we know today. The BIEROCK  is a characteristic food of Germans from Russia.

These bierocks freeze well, so making them ahead of time is no problem. Just take them out of the freezer in the morning to thaw by lunch time. You can warm them in the microwave for 1-2 minutes in 30 second increments to heat through if you wish.

Print Recipe
German Bierocks
Votes: 6
Rating: 3.5
You:
Rate this recipe!
Course Lunch, Main Dish
Cuisine European, German
Servings
Ingredients
Dough
Course Lunch, Main Dish
Cuisine European, German
Servings
Ingredients
Dough
Votes: 6
Rating: 3.5
You:
Rate this recipe!
Instructions
Dough
  1. In a large bowl, place milk & butter. Microwave for 30 seconds at a time until butter has melted. Add sugar & whisk to dissolve. Whisk mixture until it has cooled to lukewarm. Sprinkle yeast over milk mixture & allow to stand 5-10 minutes, until foamy. Whisk again, adding in 2 cups of flour, egg & salt.
  2. Stir in remaining flour, 1/4 cup at a time until dough comes together. On a floured surface knead dough 10-15 minutes until soft, smooth dough forms, adding flour as needed. Dough should be tacky but not sticking to your hands.
  3. Shape dough into a disk; place in a greased bowl, turning dough to coat. Cover loosely with plastic wrap & place in a warm, draft-free place to rise, about 1 hour or until doubled in bulk.
Filling
  1. In a large skillet, brown meat until almost cooked, 5-7 minutes. Drain grease from pan, add onions & cook 2-3 minutes or until they begin to soften. Add cabbage & cook 7-10 minutes, until cabbage is tender. Remove from heat & season with salt & pepper.
Forming Bierocks
  1. Place dough on a floured work surface, knocking it back. Divide into 8-12 balls (about 85 g each). Flatten each ball to a circle 4-5" in diameter. Spoon 2 large Tbsp of filling onto the center of each circle, leaving edges clear. Bring the edges together & pinch them to seal dough completely. Continue with rest of the filling & dough.
  2. Place the shaped 'bierocks' on a greased baking sheet & allow to rise, covered 30-45 minutes until roughly 1 1/2 times the original size. Preheat oven to 375 F. during the last 10 minutes of rising time. Brush bierocks lightly with milk & bake 20-25 minutes or until golden & hollow sounding when tapped. Remove from oven & cool on a wire rack.
Recipe Notes

German Plum Cake / Tart

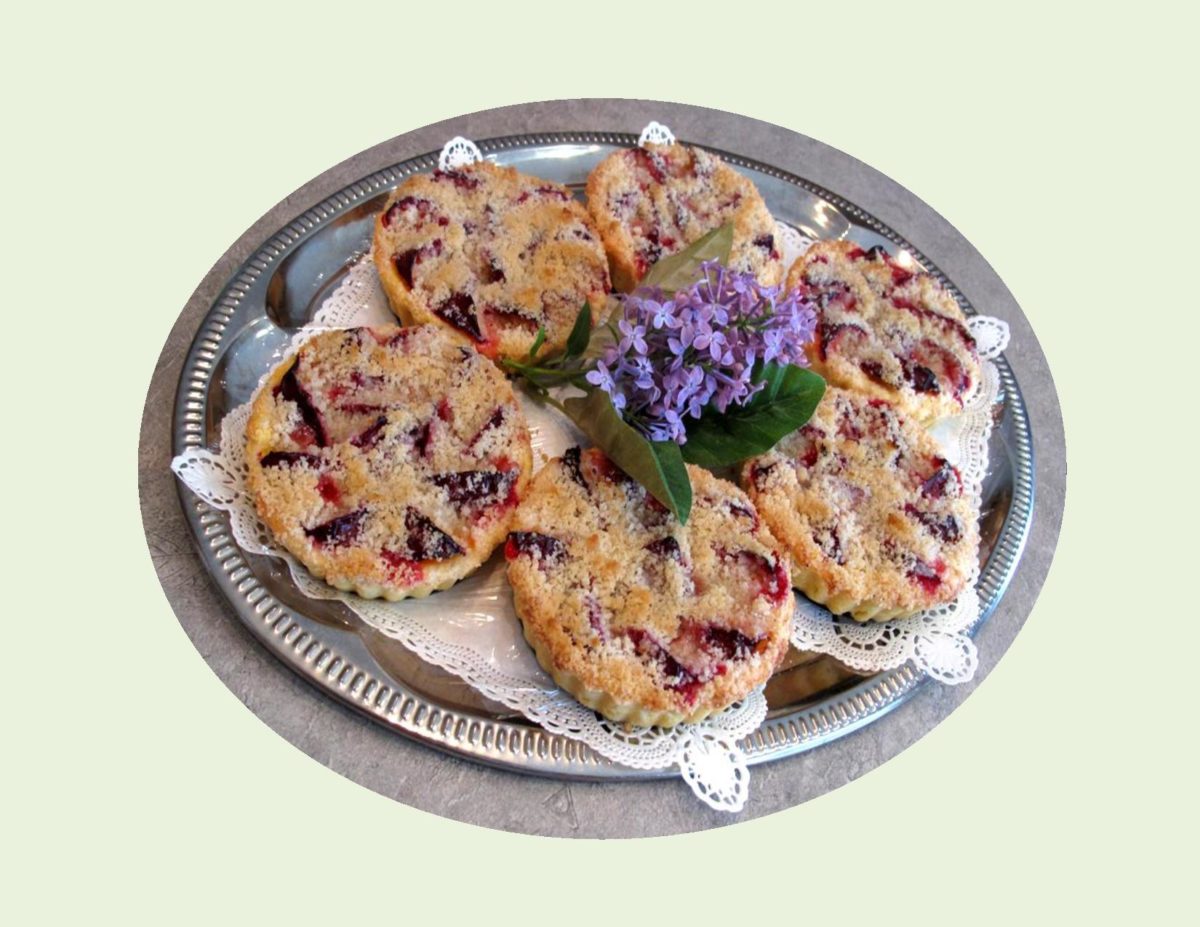
I know it sounds quite ordinary but we are not just talking about just any plum cake. Variations of the German specialty, ‘zwetschgenkuchen’, exist where some versions are made with a shortbread pastry verses a yeast dough, some have streusel – some do not – some are round, other’s are rectangular. One thing for sure is that they all use the plump, sweet, juicy European plums also known as Italian Prune Plums or Empress Plums. This variety is ideal for cooking not only because of their texture but also because their flavor becomes more complex through cooking.

Fruit and yeast-based cakes are a German hallmark with this cake being a perfect example. Its not overly sweet, has a touch of tartness to it, a small hint of cinnamon and that tender yeast dough.

When I was growing up and my mother used Italian Prune Plums in her canning or baking, I just thought it was because they were available at the time. I had no idea that they played such a special part in German baking until I was older.

I realize this is probably not the kind of thing you feel like making on a hot summer day. I suggest putting it on hold for a rainy day because it is well worth the effort. Just to encourage you further, I’ve added an alternate yogurt dough you could use instead of the yeasted one which would speed things up.

Print Recipe
German Plum Cake / Tart
Votes: 1
Rating: 5
You:
Rate this recipe!
Course Brunch, dessert
Cuisine American, German, Italian
Servings
Ingredients
Streusel
Yogurt Cake Dough (an alternate to use instead of yeast dough)
Course Brunch, dessert
Cuisine American, German, Italian
Servings
Ingredients
Streusel
Yogurt Cake Dough (an alternate to use instead of yeast dough)
Votes: 1
Rating: 5
You:
Rate this recipe!
Instructions
Yeast Dough
  1. In a large bowl, dissolve yeast in 1/3 cup warm milk & allow to become frothy, about 5-10 minutes. With an electric hand mixer, beat together sugar, salt, warm melted butter, egg & vanilla. When yeast is ready, Combine with egg mixture. Add flour, 1 cup at a time to wet mixture. Stir well after each addition; dough should become smooth & elastic. It will not be firm enough to knead into a ball, more like thick batter. Cover loosely with plastic wrap & set in a warm, draft-free place to rise for an hour or until doubled in bulk.
Streusel
  1. In a small bowl, combine streusel ingredients. Using fingertips, rub mixture until it resembles coarse meal.
'ALTERNATE' Yogurt Dough
  1. In a bowl, whisk together flour, sugar, baking powder & salt. In small bowl, beat together yogurt, milk, oil & vanilla. Make a well in center of dry ingredients; add wet mixture & combine until dough forms a ball.
To make Plum Cake Tarts
  1. Generously butter eight - 4 x 3/4" mini tart pans or press out a rectangle of dough about 8 x 10" size on a baking sheet or a jelly-roll pan could be used. For tart pans, divide dough into 8 pieces & press dough out over bottom & up sides. For the rectangle shape, dough could be rolled out on parchment paper & laid directly on pan.
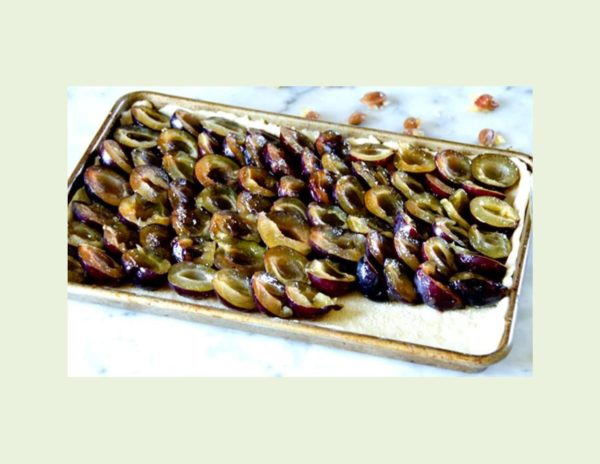
  2. Lay plums close together in rows, covering the entire dough. If using YEAST DOUGH, set pan in a warm place & let rise rise an hour. Sprinkle the streusel over the top & bake at 350 F. for 30-35 minutes or until top is golden. If using YOGURT DOUGH, evenly sprinkle farina over dough before placing the plums on the pastry ( it helps to keep the pastry from becoming soggy). Arrange plums on pastry; distribute streusel over cake. Bake at 350 F. for 30 minutes or streusel is light golden.

Cheese Crusted Apple Pie

CELEBRATING FATHER’S DAY!

Father’s Day, that special day set aside to honor our fathers and the father figures who have influenced our lives. A father’s love is such a special gift beyond compare. You only know the meaning when he is no longer there.

My father passed away in 2005 and Brion’s in 2011. The passage of time will never dim those precious memories we have of them. They followed very different paths in their life’s journey; my father was a farmer and Brion’s an army soldier. Both of them gave so much of themselves to their life’s work as well as to their families.

There are not enough words to describe how important my father was to me and the powerful influence he continues to be in my life even though he’s gone.

As a tribute to our dad’s on Father’s day, I am featuring a CHEESE CRUSTED APPLE PIE.  Both of them loved apple pie so it seems like a good choice for the blog recipe.

Print Recipe
Cheese Crusted Apple Pie
Votes: 1
Rating: 5
You:
Rate this recipe!
Course Brunch, dessert
Cuisine American, German
Servings
Ingredients
Cheese Pastry
Filling
Topping
Course Brunch, dessert
Cuisine American, German
Servings
Ingredients
Cheese Pastry
Filling
Topping
Votes: 1
Rating: 5
You:
Rate this recipe!
Instructions
Cheese Pastry
  1. In a large bowl, whisk together flour, salt & cheese. Cut in half the shortening to resemble coarse meal; then remaining shortening until it resembles small peas. Add water, a little at a time, mixing lightly with a fork. Shape dough into a firm ball; chill for 10 minutes.
  2. Preheat oven to 400 F. On a lightly floured surface, roll pastry out to fit a 9-inch flan pan; trim edges. Cover pastry with a piece of parchment paper; cover with dried beans & bake for 7 minutes. Carefully remove beans & bake another 7 minutes. Remove from oven & cool.
Filling
  1. Chop apples coarsely, place in a saucepan with lemon juice; cover & cook about 10 minutes or until just tender. Stir in flour, sugar & cinnamon; cool to room temperature.
Topping
  1. In a small bowl, combine sugar, flour & pecans. Rub in butter until mixture is coarse & crumbly.
  2. Place filling into pastry shell, sprinkle with topping. Bake at 400 F. for 15 minutes; reduce heat to 375 F. & bake further for 15 minutes. Cool to room temperature. Decorate with whipped cream, extra chopped pecans & powdered sugar, if desired.
Recipe Notes
  • Due to the fact that ovens sometimes vary in temperature, you may need to adjust the baking temperature a little higher or lower than recipe states.

Seafood Lasagna Roll-Ups

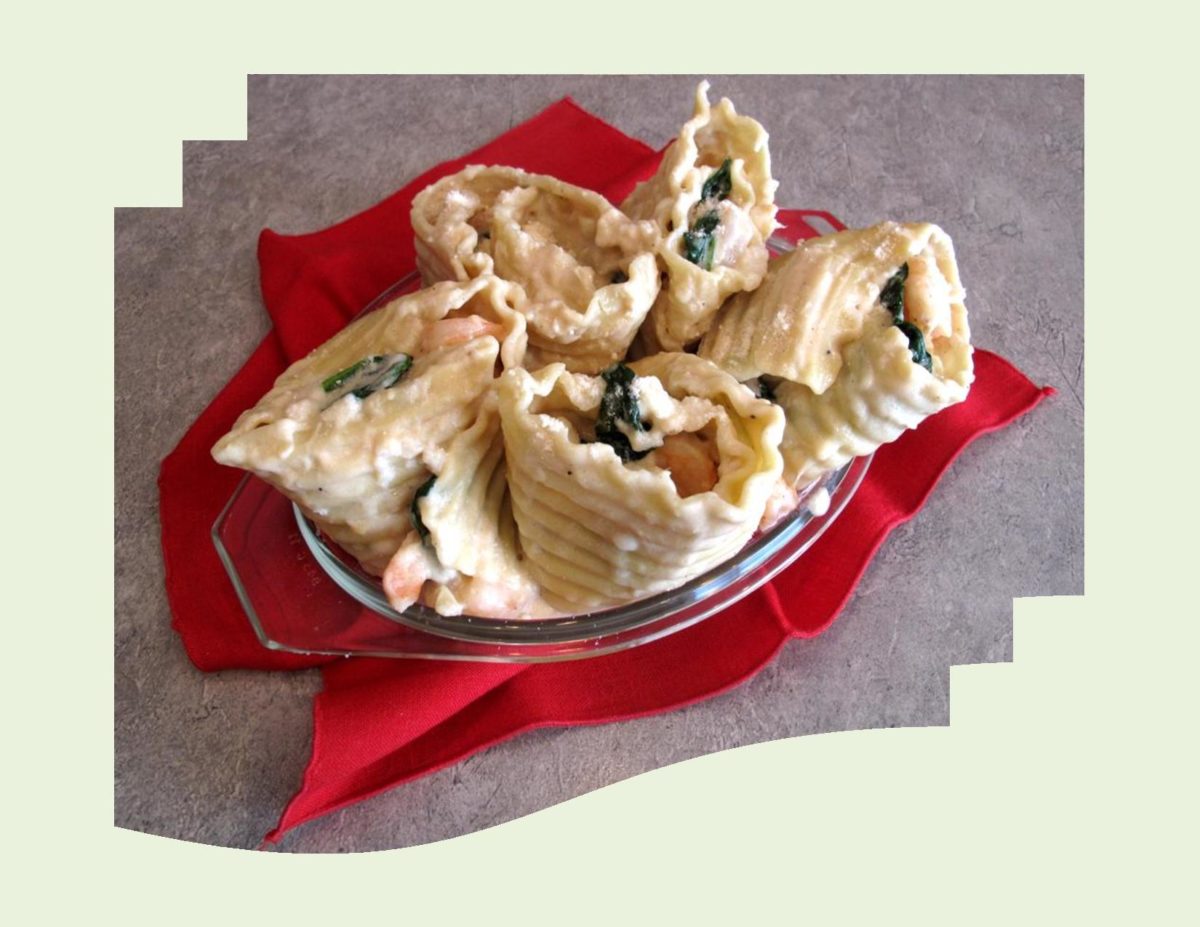
Lasagna has a rich history as a comfort food. Originally it resembled layered macaroni and cheese rather than its present form. The origin is a little unclear but none involve Italy. However, Italians have been credited with its name of ‘lasagna’.

Present day lasagna has become very versatile with recipes such as vegetarian and seafood which use either red or white sauce. Although, lasagna has been a favorite meal of many people, it also comes with a high fat and calorie count. That being said, there are numerous ways to change that. In traditional lasagna, substitute ground turkey or use extra lean ground beef. In the case of a white sauce, substitute fat free plain yogurt for sour cream and use skim or 1% milk to reduce the fat content. Using low fat or non fat ricotta cheese, fat free cottage cheese or part skim mozzarella cheese helps to boost the calcium and protein contents without adding a lot of fat.

In any case, lasagna is just too good to not enjoy it.  These SEAFOOD LASAGNA ROLL-UPS  can be made with a light version of either homemade or purchased Alfredo sauce. We absolutely loved this meal!

Print Recipe
Seafood Lasagna Roll-Ups
Votes: 1
Rating: 5
You:
Rate this recipe!
Course Lunch, Main Dish
Cuisine American, Italian
Servings
Votes: 1
Rating: 5
You:
Rate this recipe!
Instructions
  1. Prepare lasagna noodles according to package directions. Rinse under cool water; reserve. In a large skillet melt butter. Saute spinach until wilted. Remove to paper towels. Add shrimp & scallops to skillet; saute for 3-4 minutes until opaque & just barely cooked; reserve. Grate mozzarella cheese.
  2. Preheat oven to 350 F. Butter a small casserole dish. On a large piece of wax paper, line up lasagna noodles in a row. Spoon about 1/4 cup of Alfredo sauce onto each noodle & spread.
  3. Alternately top with shrimp & scallops, cooked spinach, shrimp/scallops, spinach & crab meat. Sprinkle noodles with grated cheese. Roll each noodle & stand or lay in casserole dish. Spoon remaining Alfredo sauce over rolls.
  4. Place a pan with a small amount of water in it, under the casserole dish & place in the oven. This will help the noodles from becoming dry during baking time. Very loosely, cover with foil, just to keep the noodles from drying on top. Bake for 30 minutes or until slightly bubbly. Sprinkle with Parmesan cheese; allow to sit 5-10 minutes before serving.
Recipe Notes
  • If you prefer to make your own sauce, I had noticed the tasteofhome.com website has a very similar recipe making the sauce from scratch. It looks real good if you have the time.

Chicken Wings Risotto

A popular and versatile dish, risotto is served extensively in the kitchens and restaurants of the world. The history of risotto is naturally tied to the history of rice in Italy. Rice was first introduced to Italy and Spain by the Arabs during the middle ages. The humidity of the Mediterranean was perfect for growing shorter-grained rices.

A hearty rice dish, risotto is rich with the flavors of the stock used in its making, as well as saffron, and any of the hundreds of ingredients that pair so perfectly with it.

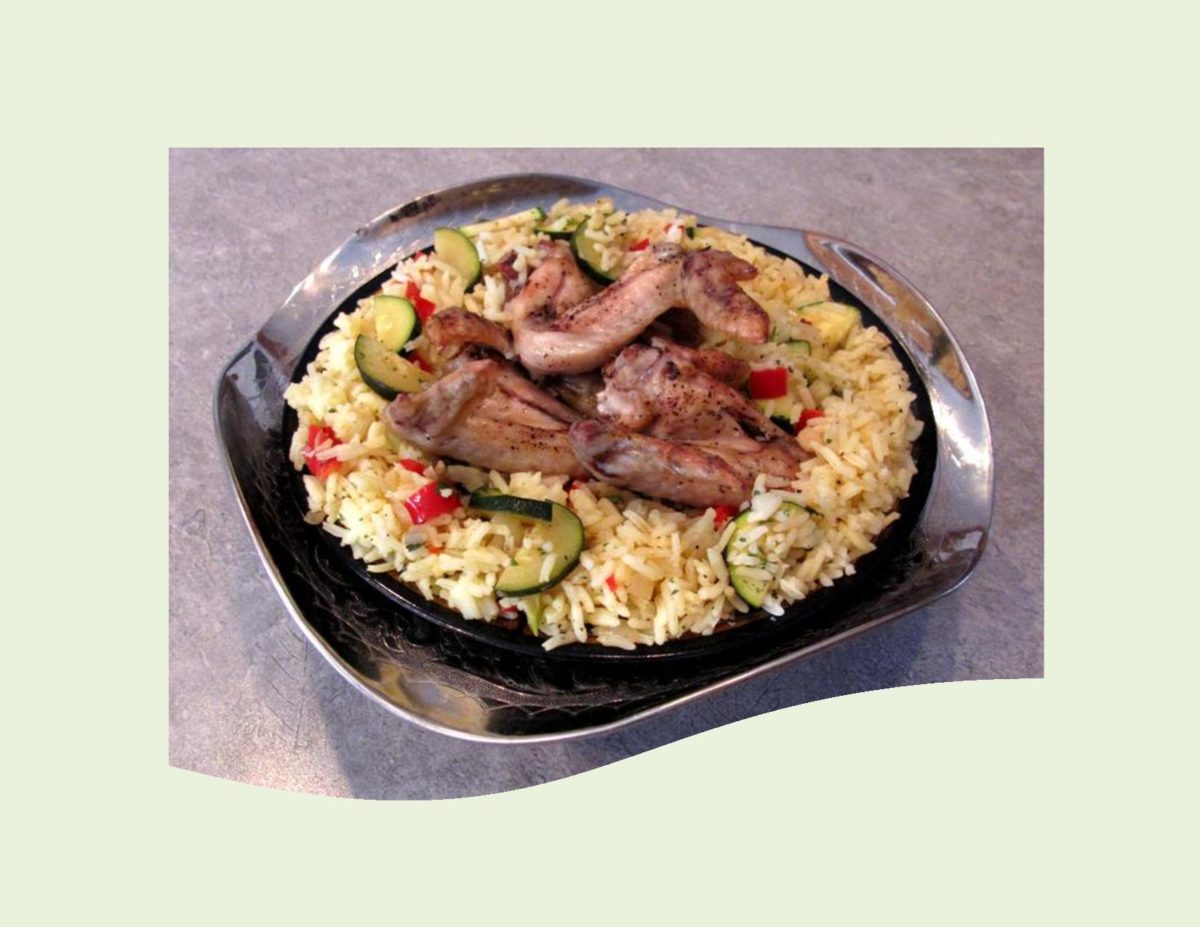
The key components of this simple but elegant dish are: rice, stock (usually chicken), onions, butter, wine, parmesan and saffron. It can be served by itself or as an accompaniment to other dishes. The starchy component of the dry grain mixed with the stock creates a thick, creamy sauce.

Brion is a ‘wing’ man. He LOVES chicken wings and rice so it seems quite fitting to make a CHICKEN WING RISOTTO.

Print Recipe
Chicken Wings Risotto
Votes: 1
Rating: 5
You:
Rate this recipe!
Course Main Dish
Cuisine American, Italian
Servings
Course Main Dish
Cuisine American, Italian
Servings
Votes: 1
Rating: 5
You:
Rate this recipe!
Instructions
  1. In a large skillet, heat butter & oil; add wings, cook until golden brown on both sides; Remove from skillet to paper towels & drain skillet.
  2. In skillet, melt extra butter; add onion & garlic; cook until tender. Add pepper, shallots, zucchini, celery & saffron, cook another minute. Add wine, rice, water, chicken bouillon cube & chicken wings, bring to a boil, cover, reduce heat & simmer for 20-25 minutes or until all the liquid is absorbed. Remove from heat, stir in parsley.
Recipe Notes
  • Saffron is extremely expensive to buy in our part of the country. A good trade off would be turmeric or just use the spices that appeal to you.

Mushroom Stuffed Shrimp

HAPPY VALENTINES DAY!

A day when ‘love is in the air’ — roses to be purchased, chocolates and valentine cards to be shared and dining over that special, very intimate supper meal. If only our world would focus more on this emotion all year around instead of just for one day. As I get older, the idea of cherishing each day and the people you care about the most has become so important.

Today is also important to me as it is now one year since I started publishing my blog. With the help of my husband Brion, we have posted 85 blog articles. These stories and recipes are being shared on Facebook and pinterest as well as our website. I have enjoyed the wonderful feedback I’m getting from many different countries as well as friends and family here at home. Thanks to all of you who have followed my blog and I hope you will continue to find it interesting.

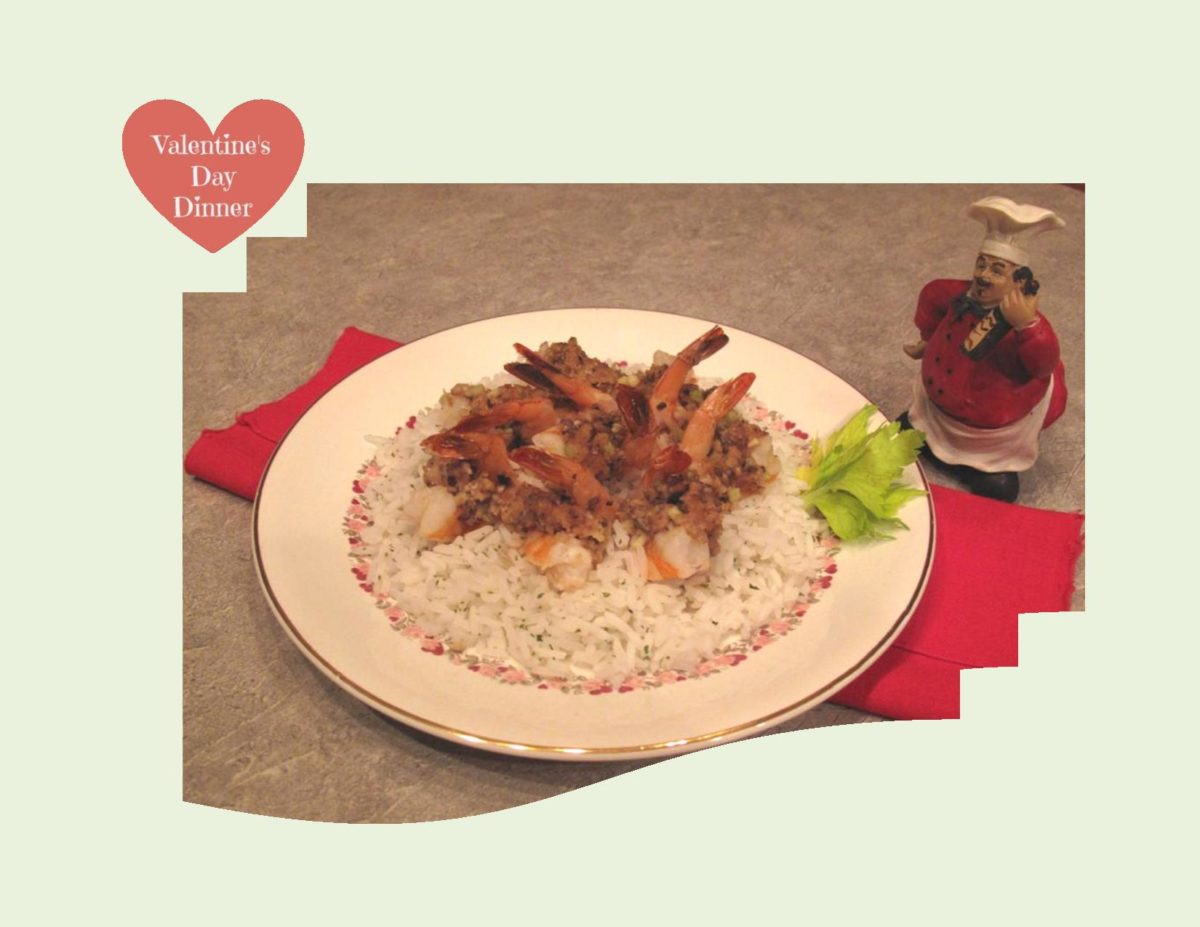
Brion and I share a love of seafood so my Valentine supper is Mushroom Stuffed Shrimp. This meal lends itself to being an appetizer as well as a main course dish. Not a lot of fuss and muss, just a nice little elegant meal for the two of you to enjoy.

Print Recipe
Mushroom Stuffed Shrimp
Votes: 1
Rating: 5
You:
Rate this recipe!
Servings
Votes: 1
Rating: 5
You:
Rate this recipe!
Instructions
Jumbo Shrimp
  1. Peel & de-vein shrimp, leaving tails on. Butterfly each shrimp along the outside curve. In a small bowl, whisk together soy sauce, honey, water, ginger & garlic powder. Add raw shrimp & marinate for at least 30 minutes.
Stuffing
  1. In a small bowl, dissolve bouillon in hot water. Stir in remaining stuffing ingredients. When marinated, remove shrimp from marinate & open shrimp flat & place with tails up in a buttered 9 x 13-inch baking pan. Spoon about 1 teaspoon of stuffing onto each shrimp.
  2. Bake at 375 F. for 5-8 minutes or until shrimp turns pink. Serve over rice as a main course.

Stollen Bread Pudding with Spiced Orange Sauce

Now comes the time to use up all those remaining tidbits of holiday baking still in the freezer. For those who haven’t tried it, sweet bread pudding is perhaps the ultimate comfort food. It’s simple to make, requires no special equipment and uses basic ingredients. It’s not even particularly beautiful on the plate, but it sure tastes good.

Just about every culture that makes bread has it’s own version of bread pudding. An open textured loaf with lots of holes become little pockets of custard. If you choose a bread that is quite ‘airy’ but has good chewiness, your pudding will strike a satisfying balance between lightness and body. In contrast, a loaf with a tight crumb makes a compact pudding with a dense texture.

The custard is what binds the bread together and creates the pudding’s lusciousness. Milk, eggs, sugar and flavoring are the basic elements but of course, other variations can be layered in as well.

Bread pudding was definitely a dessert my mother made since she baked bread every week. At that time it was pretty basic but nevertheless homey and good.

Today, January 22, our family celebrates the birthday of my sister, Marilyn. Birthdays were always made to be special as we were growing up. Not so much as to gifts but in regards to the family acknowledgement of ‘your’ day. My mother loved having a reason to use her cake decorating skills, so your birthday cake was always very unique. 

For something special to mark the occasion, I have prepared               STOLLEN BREAD PUDDING with SPICED ORANGE SAUCE  on my blog.

                      WE SEND BIRTHDAY WISHES TO YOU, MARILYN —

                                ENJOY YOUR DAY TO THE FULLEST!


Print Recipe
Stollen Bread Pudding with Spiced Orange Sauce
A delicious variation on a classic made with heavenly German stollen bread.
Votes: 1
Rating: 5
You:
Rate this recipe!
Course Brunch, dessert
Cuisine German
Servings
Course Brunch, dessert
Cuisine German
Servings
Votes: 1
Rating: 5
You:
Rate this recipe!
Instructions
Bread Pudding
  1. Arrange stollen cubes to fit compactly into a buttered 9 x 9-inch baking dish. Do not compress to tightly; set aside any leftover cubes. Whisk together eggs & 1 cup powdered sugar until the sugar is dissolved & the mixture becomes light yellow in color. Add cream, vanilla & Grand Marnier; whisk to combine. Stir in a pinch of salt, nutmeg, lemon & orange zest.
  2. Pour mixture over stollen cubes. Cover & refrigerate for 30 minutes. Preheat oven to 350 F. Remove bread from refrigerator, uncover & dot the top of the pudding with butter & sprinkle with 2 Tbsp. powdered sugar.
  3. Set baking dish into a shallow roasting pan, larger that baking dish. Set them onto the center rack of the oven. Pour hot water into larger pan until it reaches about halfway up the side of the pudding dish. Bake until fully set & a knife inserted into center comes out clean, 60-75 minutes. Carefully remove the pudding from the water bath & cool for at least 15 minutes before serving.
Spiced Orange Sauce
  1. Melt butter in a saucepan over low heat. Stir in sugar, Grand Marnier, water, cardamom & salt. Over medium heat, stir until sugar is fully dissolved & the liquid is heated through. Remove from heat. In a small bowl, whisk egg until well beaten. While whisking egg, slowly pour 2 Tbsp. of the hot mixture into bowl with the egg. Then, while whisking the mixture vigorously, slowly pour the warmed egg mixture back into the sauce.
  2. Place the saucepan back over low heat, gently stirring the sauce, raising the temperature slowly to medium. Continue stirring until the sauce thickens, about 1-2 minutes. Spoon over pudding & serve immediately.

Savoring Greece

January is kind of a different month — all the holiday hoopla is done for another year, in our part of the country its fairly cold, bringing on the winter ‘blaas’. I have numerous friends that say they find themselves feeling a bit ‘down’ at this time. That being said, It seemed the perfect time to be a ‘mental traveler”. I’d like to share an experience Brion & I had which was totally amazing.

Your day begins in central Greece. A misty fog blankets the Kalambaka Valley as the tour takes you to your morning destination.

Here, in the shadow of the Pindus Mountains and just beyond the town of Kalambaka, massive gray colored pinnacles rise out of the valley towards the sky. Over thousands of years, this landscape has been sculpted by wind and water into a strange and breathtaking sight. Perched miraculously on the tops of these pinnacles are monasteries. The area is called  METEORA   and literally means ‘columns in the sky’.

The sandstone peaks were first inhabited by Byzantine hermits in the 11th century, who clamored up the rocks to be alone with God. Though it is unknown how the first hermits reached the tops of these vertical rock faces, it is likely that pegs were hammered into tiny gaps in the rocks. Around 1382 the first monastery was built. By the 1500’s, 24 monasteries were built on these sheer cliffs, but by the 19th century most had fallen to ruin.

Because there were no steps, the main access to the monasteries was by means of a net that was hitched over a hook and hoisted up by rope and a hand cranked windlass to winch towers over hanging the chasm. Monks descended in nets or on a retractable rope ladders up to 40 meters long to the fertile valley below to grow grapes, corn and potatoes.

The natural rock buildings blend so evenly with the scenery, they are hard to spot at first. Only the red tile roofs give them away. Centuries of weather have caused natural streaking of the rock which acts as a camouflage. In the 1920’s, roads, pathways and stairs were built to make today’s remaining six monasteries more accessible as they are now largely dependent on tourist donations.

Inside the walls of these monasteries, life goes on as it has for more than 900 years. Wine is still made in giant oak vats where the monks climb in with bare feet to crush grapes. Most of the carpentry and masonry tools are hand made in the same style as their ancestors. Terracotta pots/bowls are fired by hand pumped bellows on a furnace. Traditional icons are painted using hand ground pigments bonded with egg yolk to make tempera paint that was common in the middle ages.

Among the existing monasteries is a convent called Saint Stephen’s that was built in 1798. The occupying nuns are courteous and friendly, but no visitor gets past them with bare shoulders or knees. Novices holding piles of blue aprons and capes meet the visitors at the gate. Anyone not meeting the exacting dress code must don the local sackcloth or be turned away.

To experience this rare geographical phenomenon is something you will not forget easily. If you have the opportunity be sure to take it. In the meantime I hope you have enjoyed this mental journey I have taken you on.

Now, in keeping with the food part of the blog, I made a savory  GREEK SPANAKOPITA PASTA  meal. Easy, quick and tasty.

Print Recipe
Savory Greek Spanakopita Pasta
Votes: 1
Rating: 5
You:
Rate this recipe!
Course Lunch, Main Dish
Cuisine Greek
Servings
Ingredients
Course Lunch, Main Dish
Cuisine Greek
Servings
Ingredients
Votes: 1
Rating: 5
You:
Rate this recipe!
Instructions
Pasta
  1. Cook pasta in salted boiling water 8-10 minutes, until al dente. Drain & set aside.
Cheese Sauce
  1. In a heavy saucepan over medium heat, heat the milk until hot but not boiling. Combine flour & butter in another saucepan. Whisk until the mixture has gently bubbled for 2 minutes, being careful not to brown the flour.
  2. Begin to add the hot milk to the flour mixture a little at a time while whisking vigorously. Continue to add the milk until it is fully incorporated. Bring the mixture to a boil, reduce heat to low; simmer, stirring constantly, until it thickens, 6-8 minutes ( it will resemble heavy cream). Crumble the feta cheese & add to hot sauce, whisking until smooth. Add dill & pepper; stir. Remove from heat & let cool.
  3. Preheat oven to 375 F. Squeeze water from frozen, thawed spinach. Toss the pasta, cheese sauce, spinach, ricotta & garlic in a large bowl until well combined. Taste to see if any more salt & pepper is needed.
  4. Place in a casserole dish & top with Parmesan Cheese. Bake for 20-30 minutes, until cheese browns a little.
Recipe Notes
  • If you prefer to make this a day ahead of baking, cover well & refrigerate.
  • If you do not care for feta cheese you can substitute 285 grams of either Gorgonzola or mozzarella in place of the 140 grams of feta.

Thumbprint Cookies

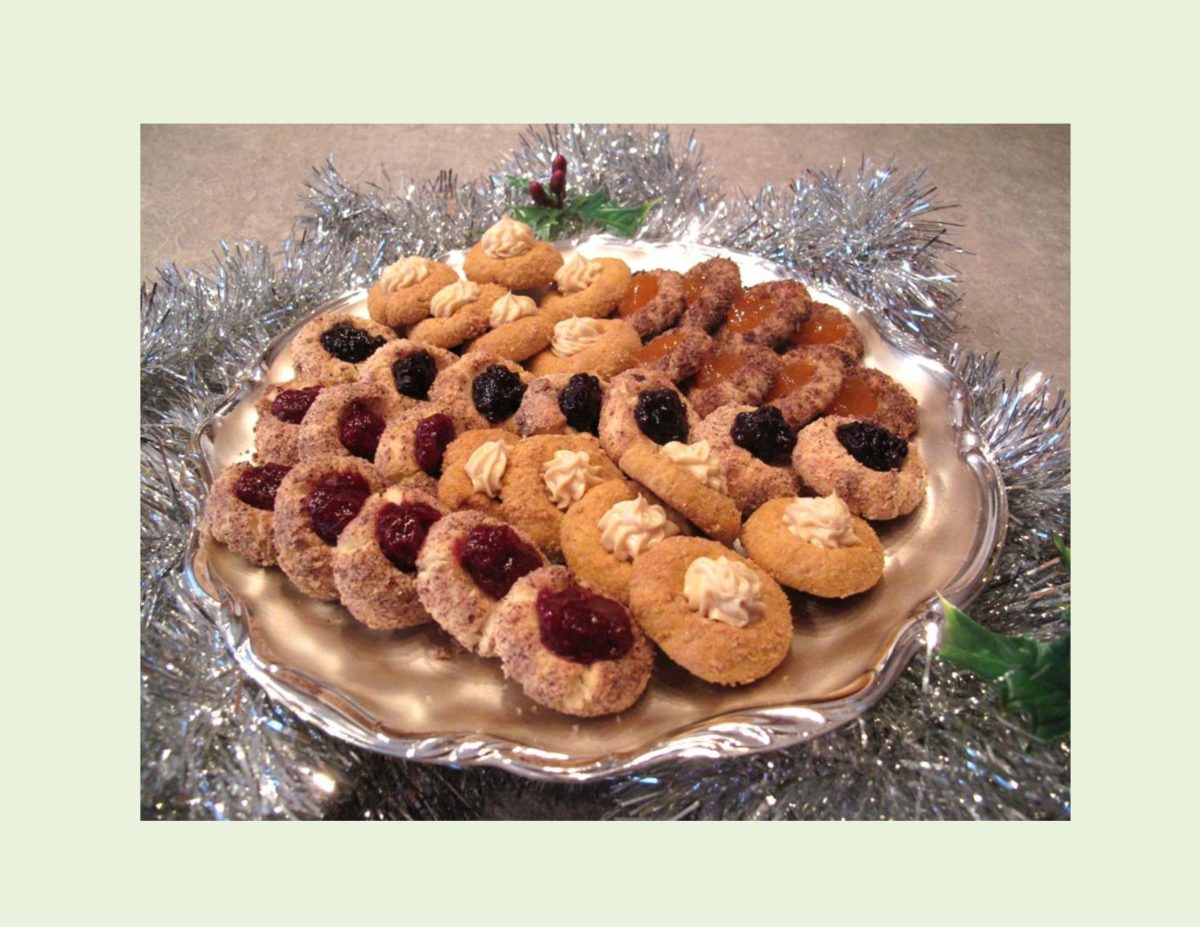
THUMBPRINT or THIMBLE COOKIES – are such a great little cookie with so many variations that they remain among the holiday favorites. Of course it’s not hard to figure out the meaning behind their name. Similar to filled cookies, you can either fill the divot you make in them either before or after you bake them.

Here is a good example of the phrase ‘the same only different’. Four varieties of thumbprint cookies you might want to add to your office cookie exchange list, if they are not already on it.

                                       SPICED PUMPKIN CREAM CHEESE * LEMON BLUEBERRY

                                                             RASPBERRY ANISE * FIG & FLAX

Print Recipe
Thumbprint Cookies
By Christmas cookie standards -- they are pretty healthy, right!
Votes: 1
Rating: 5
You:
Rate this recipe!
Course dessert
Cuisine American
Servings
(each recipe)
Ingredients
Spiced Pumpkin Cream Cheese Thumbprint Cookies
Cream Cheese Filling
Lemon/Blueberry Thumbprint Cookies OR (Raspberry/Anise)
Fig & Flax Thumbprint Cookies
Course dessert
Cuisine American
Servings
(each recipe)
Ingredients
Spiced Pumpkin Cream Cheese Thumbprint Cookies
Cream Cheese Filling
Lemon/Blueberry Thumbprint Cookies OR (Raspberry/Anise)
Fig & Flax Thumbprint Cookies
Votes: 1
Rating: 5
You:
Rate this recipe!
Instructions
Spiced Pumpkin Cream Cheese
  1. In a medium bowl, combine butter with brown & white sugar. Add egg, pumpkin, flour, spices & salt; mixing until a thick dough forms. Preheat oven to 300 F. Line a baking sheet with parchment paper. Scoop balls (about 2 tsp size), 1-inch apart from each other. Using your thumb or a sewing thimble, make a divot in the center of each ball. Bake for 25 minutes or until slightly brown. Remove cookies from oven; while hot, deepen any of the divots if needed. Place on cooling rack.
  2. In a small bow, combine cream cheese filling ingredients, mixing well. When cookies are completely cool, spoon a small amount of filling into each of the divots. Top each with a bit of crystallized ginger.
Lemon Blueberry or Raspberry Anise Thumbprint Cookies
  1. In a medium bowl, cream butter & sugar well. Beat in egg yolks & extract. Stir in lemon zest, then fold in flour & salt until fully incorporated & a soft dough forms. Wrap in plastic wrap & chill about an hour. Preheat oven to 350 F. Line a baking sheet with parchment paper. Form dough into 1-inch balls; roll in hazelnuts & place on baking sheet about 2 inches apart. Using your thumb or a sewing thimble, make a divot in the center of each ball. Bake for 16-18 minutes or until slightly golden. Remove cookies from oven; while hot, deepen any divots if needed. Place on cooling rack & cool completely before filling centers with preserves.
Fig & Flax Thumbprint Cookies
  1. In a medium bowl, beat butter & 1/4 cup brown sugar with an electric mixer until creamy. Add egg yolk & vanilla; beat until combined. In another bowl, whisk together flour, 2 Tbsp ground flax seeds, cream of tartar, spices & salt. Slowly add flour mixture to the batter & beat on low until just combined, scraping down the sides as needed.
  2. Preheat oven to 350 F. Line a baking sheet with parchment paper. In a small bowl, place the egg white. In a small dish, combine 1/4 remaining brown sugar with 1/4 ground flax seeds. Roll slightly rounded teaspoons of dough into balls. Dip one ball at a time into the egg white & then roll in the sugar mixture. Place 2 inches apart on baking sheet; press divots in each ball. Bake about 15-17 minutes or until slightly golden. Remove from oven; check if divots need to be deepened. Place on cooling rack & cool completely.
Recipe Notes
  • With the Blueberry, Raspberry & Fig recipes, you can bake the cookies for about 15 minutes then add the preserves & bake another 3-4 minutes. I find it easier to store or freeze the cookies if I put the preserve in at serving time -- personal preference only.
  • I rolled my spiced pumpkin cookies in gingersnap crumbs just for a little added flavor.
  • Apricot preserves are another good choice for the flax thumbprints and probably easier to find depending where you live.