MENU
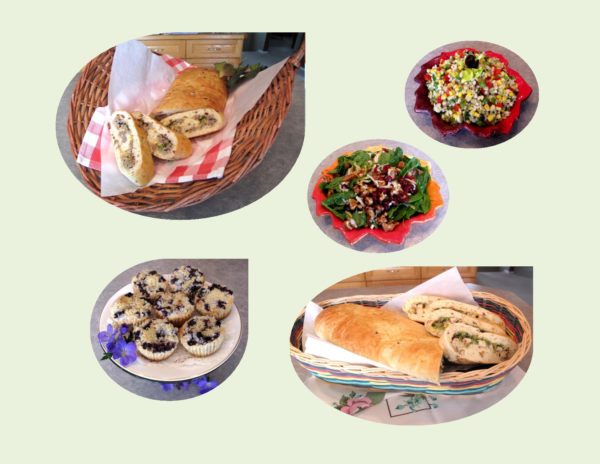
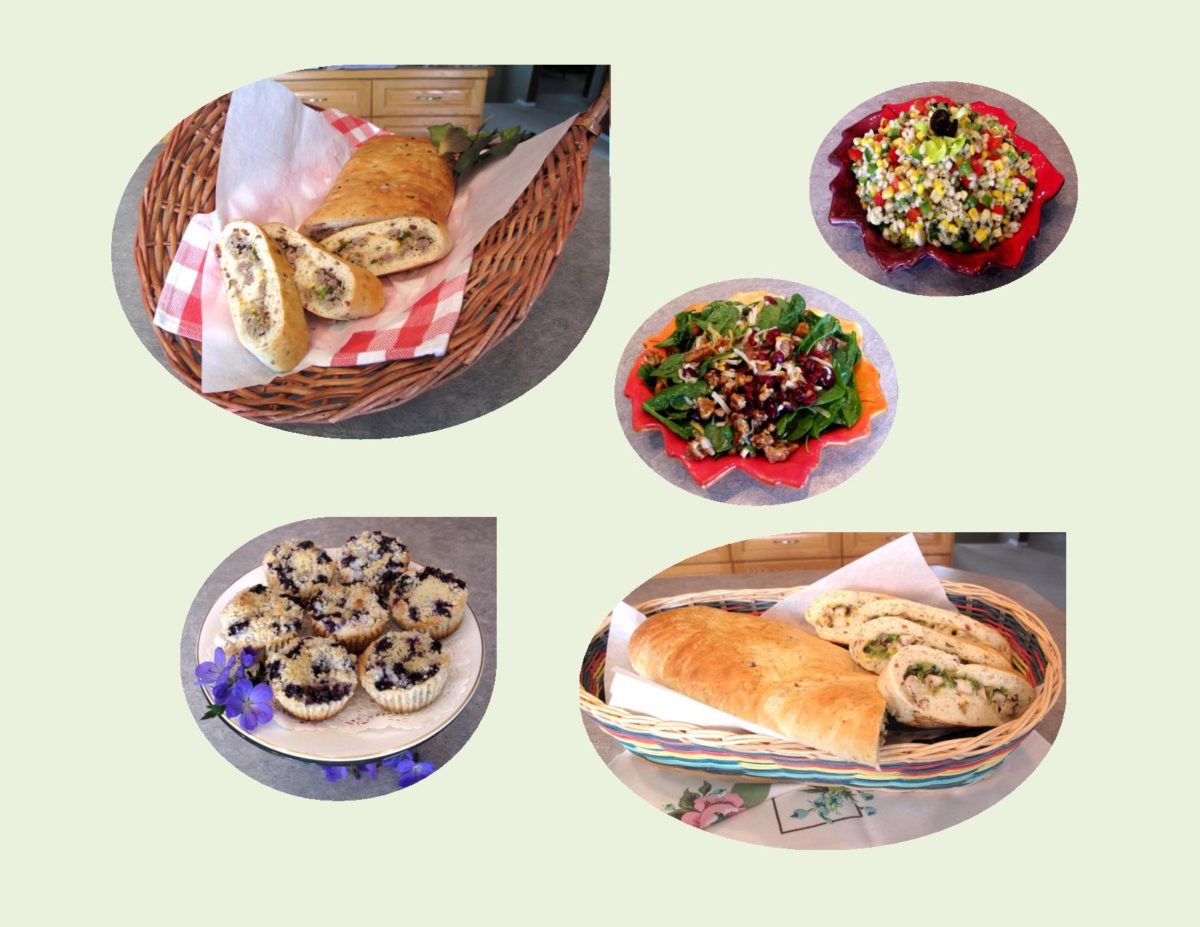
SPICED CHICKEN POTATO LOAF * SAVORY PORK POTATO LOAF
BARLEY, CORN & PEPPER SALAD * CANDIED NUT & GORGONZOLA SALAD
SOUR CREAM BLUEBERRY TARTS
Print Recipe
Savory Pork Stuffed Potato Loaf
Recipes from some of this picnic menu are featured in previous blog posts.
SPICED CHICKEN STUFFED POTATO LOAF - from April 8/16.
SALADS - from June 9/16.
SOUR CREAM BLUEBERRY TARTS - from July 7/16.
Votes: 1
Rating: 5
You:
Rate this recipe!
|
|
Votes: 1
Rating: 5
You:
Rate this recipe!
|
Instructions
Savory Pork Filling
In a large bowl, combine water & seasonings. Add pork & mix well. In a skillet, cook pork mixture until no longer pink. Remove from heat; drain on paper towels while it cools.
Potato Loaf
Boil potato, mash & cool. Fry bacon, drain & crumble. In a small bowl, combine yeast with lukewarm water; whisk until yeast is dissolved. Let stand about 3 minutes until foamy. Add butter, salt, sour cream & potato; mix well. Add bacon; mix until just combined.
Stir in flour, one cup at a time. When dough is completely blended, turn onto a lightly floured surface. Knead dough about 10 minutes, until smooth & elastic. Place dough in a lightly greased bowl, cover with plastic wrap & let rise in a warm place until doubled in size, about 1 hour.
Remove risen dough from bowl, turn onto lightly floured surface; roll dough to about a 12" x 15" rectangle. Place a large piece of parchment on a sheet pan. Roll dough onto your rolling pin then unroll onto parchment paper. Place 1/2 of the cheese down the center of dough, top it with pork, green onions & remaining cheese.
Fold short ends in about 1". Using parchment, roll from the long side in a jelly roll fashion. Press down slightly to make a flatter shape. Cover with plastic wrap; allow to rise for 15 minutes while preheating oven to 375 F. Brush with egg wash if preferred. Bake for 25-30 minutes until golden.
Recipe Notes
- If time is of the essence, use purchased frozen bread dough or pizza crust.
- This picnic is definitely favored by men due to the 'hearty' potato loaf sandwiches.

MENU
WILD MUSHROOM & GOUDA QUICHE — SHRIMP & VEGETABLE QUICHE
FRESH SPINACH SALAD — FRUIT KABOBS & HONEY YOGURT
Print Recipe
Summer Picnic Menu #2
Quiche is great whether it is served hot or cold making it a nice picnic meal.
Votes: 1
Rating: 5
You:
Rate this recipe!
Ingredients
Wild Mushroom & Gouda Quiche
- 1-9" 'deep dish' pastry shell, thawed
- 2 Tbsp margarine
- 1 green onion, sliced
- 454 grams wild mushroom 'blend' (enoki, crimini, oyster, portobello, button)
- 2 tsp garlic, minced
- 2 cups broccoli florets,
- 1/3 cup red pepper
- 2 Tbsp bacon bits
- 100 grams Gouda cheese (smoked or plain), shredded
- 3 eggs
- 3/4 cup milk
- 1 tsp thyme, dried
- 1 1/2 tsp salt (adjust to your preference)
- 1/2 tsp pepper
Shrimp & Vegetable Quiche
- 1-9" 'deep dish' pastry shell, thawed
- 340 grams frozen shrimp, cooked & thawed
- 1 1/2 cups fresh broccoli, chopped
- 3/4 cup red pepper, diced
- 1 small onion, diced
- 40 grams Italian cheese blend, shredded
- 70 grams cheddar cheese, shredded
- 3 eggs
- 3/4 cup milk
- 1 tsp fresh basil 'paste'
- 1/2 tsp EACH dry mustard, dill weed, garlic powder, & onion powder
- 1 tsp vegetable salt OR regular if you prefer
Fruit Kabobs with Honey Yogurt Dip
|
Votes: 1
Rating: 5
You:
Rate this recipe!
|
Instructions
Wild Mushroom & Gouda Quiche
Preheat oven to 350 F. Slice green onion & mushrooms. Saute in margarine; add garlic, stirring often. Allow to cook for 5 minutes uncovered so moisture will evaporate. Cut broccoli into florets; add to pan along with red pepper & bacon bits. Cook another 6 minutes; remove from heat. Whisk together eggs, milk & seasonings.
Sprinkle 1/2 of the Gouda cheese in quiche shell. Top with vegetable mixture; then remaining Gouda. Gently pour seasoned egg/milk mixture over all. Bake about 40 minutes or until quiche tests done. Since quiche is made with milk instead of cream (to lighten up on the calories) it tales a bit longer to bake.
Shrimp & Vegetable Quiche
Preheat oven to 350 F. Microwave vegetables ONLY, for a few minutes to soften SLIGHTLY; lay on paper towel along with thawed shrimp to take up some of the moisture. Whisk together eggs, milk & seasonings.
Sprinkle Italian cheese blend over bottom of quiche shell. Top with shrimp, vegetables & cheddar cheese. Gently pour seasoned egg/milk mixture over all. Bake on middle rack for 50-60 minutes or until just 'set'. Cover crust with foil, if necessary, to prevent over browning.
Fresh Spinach Salad
In a large salad bowl, combine salad ingredients. Toss with salad dressing just before serving time or let each person put their own on at the picnic.
Fresh Fruit Kabobs with Honey Yogurt
In a small bowl, combine yogurt & honey (cinnamon if using). Prepare fresh fruit of choice, cutting into bite size cubes. Thread onto 8" wooden skewers. Place in serving container along with sealed container of honey-yogurt dip.
Recipe Notes
- If you prefer, quiche can be made individually for easy serving.

When I think back over the years, I have many fond memories of picnics. For the most part, picnics differ from barbecues in that the food is usually served cold. They can be large or small events with the food varying from a simple sandwich or pot luck to an elegant gourmet feast. In any case, it’s a fact that dining ‘al fresco’ makes food taste so much better.
Having been raised in rural Alberta, Canada a community summer picnic was always a special event. It would be held at a one of the ‘country schools’ in our farming community. The men would play a game called ‘horseshoe’ while they visited. This game involved throwing metal horseshoes a set distance to land over a metal peg that had been pounded in the ground. Each family would bring a contribution to the picnic food. The women would set up this wonderful feast on picnic tables at lunch time. The kids ‘mingled’, chased around, drank kool-aid and loved every minute of it. The variety of pot luck meals the women would bring made it so special.
Later on in my life, I recall a few other picnic memories that are precious to me. One occasion when Brion and I were staying in Carmel, California, USA. Just outside Carmel is the Point Lobos State Reserve. It runs adjacent to the beautiful Pacific ocean. Numerous times we would pick up a sandwich with a juice/pop and spend the afternoon walking the beach and enjoy our ‘picnic’ lunch there. Another time we were staying further down the California coast and decided to take a wine country tour. The tour was with a company called Wine Affair. You were picked up at your hotel and it lasted about 5 1/2 hours. It was very personal with only one other couple, ourselves, and the driver/guide. He took us on a scenic drive through the Paso Robles wine country. We enjoyed breathtaking views of the countryside with it’s beautiful vineyards as well as wine tasting at six different wineries. At lunch time we arrived at a estate winery called Summerwood (which I have show cased in my blog photos). Here our guide took us to a lovely patio setting overlooking the estate vineyards. He then laid out an amazing gourmet ‘picnic’ lunch for the four of us to enjoy. What’s not to love about picnics!
Over the next few blogs, I thought it would be fun to create four picnic menus that maybe would inspire some summer picnic ideas. Some of the recipes I have featured in earlier blogs and a few new ones I’ve added.
The first one includes Easy Pork Short Ribs, Picnic Oven Fried Chicken (from the April 11/16 blog), Potato Salad (from June 9/16 blog) Oriental Rice Salad, and Easy Individual Fruit Pizzas.
Print Recipe
Summer Picnics - Part One
Votes: 1
Rating: 5
You:
Rate this recipe!
Ingredients
Easy Individual Fruit Pizzas
Ingredients
Easy Individual Fruit Pizzas
|
Votes: 1
Rating: 5
You:
Rate this recipe!
|
Instructions
Easy Pork Short Ribs
Remove any fat & cut ribs into serving size pieces; place in a large resealable plastic bag. In a small bowl, whisk together remaining ingredients; pour over ribs. Seal bag & turn to coat; Refrigerate for several hours, turning bag occasionally.
Preheat oven to 350 F. Place a large piece of foil paper on a baking tray. Make 'temporary' sides on sheet of foil paper. Lay ribs in the center & pour marinade over them. Bring up two edges over center & fold down twice. Fold in side edges, allowing a each to have a small 'air vent'. Bake for 1 1/4 hours or until meat is tender. Remove ribs to a platter to cool. Ribs will be a great served cold with the rest of your picnic menu.
Oriental Rice Salad
To cold, cooked rice add peas, celery, onion & water chestnuts. Combine with salad dressing & refrigerate for at least 1 hour. Toss with chow mein noodles shortly before serving time.
Easy Individual Fruit Pizzas
In a small bowl, beat cream cheese, powdered sugar & orange zest until smooth. Beat in 1/2 cup strawberries until well blended. Spread 2 Tbsp on one side of each rice cake. Arrange prepared fresh fruit on top of strawberry cream cheese in patterns of your choice.
Recipe Notes
- This recipe for Oriental Rice Salad I had been given by a friend in 1988. She had made it with a dressing which contained curry. I have never enjoyed the flavor of curry so I have been using other dressing ideas. Being such a simple salad it will lend itself easily to other choices.

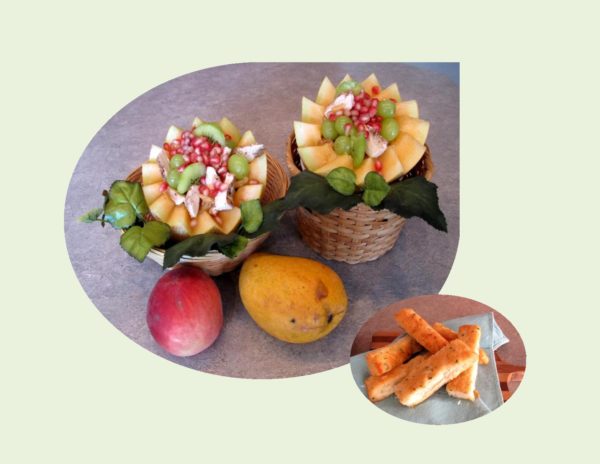
I guess I’m way behind the times because until recently I had never heard of Sugar Kiss melons. I have had this recipe for cantaloupe filled with a fruity chicken salad in my ‘file’ for many years. Each summer when we are sizzling in the summer heat, it’s one of those cool, main dish salads that is so nice to serve. It checks all the boxes — easy to make, great tasting and a visual treat. I have seen it on many websites so others must enjoy it as well.
So, I’m at the grocery store searching for the ‘ultimate’ cantaloupe when I spot some melons called ‘Sugar Kiss’. I decided to buy one for my salad. Wow! What a bonus that turned out to be. Curious, I tried to find out a bit more about them. It seems the growers have developed a whole family of melons under the ‘Kiss’ name. Along with Sugar Kiss comes Summer Kiss, Golden Kiss and Honey Kiss.
The Sugar Kiss melon seems to have originated from Taiwan. It has the outside and inside appearance of a cantaloupe but that’s where the similarities end. The flesh is soft and unbelievably juicy, so much that when you eat it down to the rind you can still squeeze some juice onto your spoon. The flavor is rich and exceptionally sweet.
I hope you find time to give this recipe a try using the Sugar Kiss melon. If you like this kind of a combination it will certainly be for you.
Print Recipe
'Sugar Kiss' Melon with Chicken & Pomegranate
Pairing well spiced chicken with the sweetness of the fresh fruit makes this a great combination.
Votes: 1
Rating: 5
You:
Rate this recipe!
|
|
Votes: 1
Rating: 5
You:
Rate this recipe!
|
Instructions
Melon / Filling
Before cutting, wash melons well, (preferably with a natural fruit & veggie wash). Cut each melon in half making zigzag cuts. Scoop out; discarding seeds & membrane. Remove melon fruit & cut into bite-size pieces; draining melon pieces as well as the shells (of course, drinking the juice).
Mix melon pieces with chicken & spoon equal portions into the empty shells. Top with grapes & pomegranate seeds. Garnish with sliced kiwi.
Lime - Honey dressing
In a small dish, combine dressing ingredients & mix well. Pour over filled melons & serve.
Recipe Notes
- For the cooked chicken I used the 'Picnic Oven Fried Chicken' recipe from the blog I had posted on April 11/16. I used boneless/skinless chicken breasts.
- Bread sticks make a tasty add-on to this salad, if preferred.
- Make sure you spare yourself the mess when you seed your pomegranate by doing it in a bowl of water.
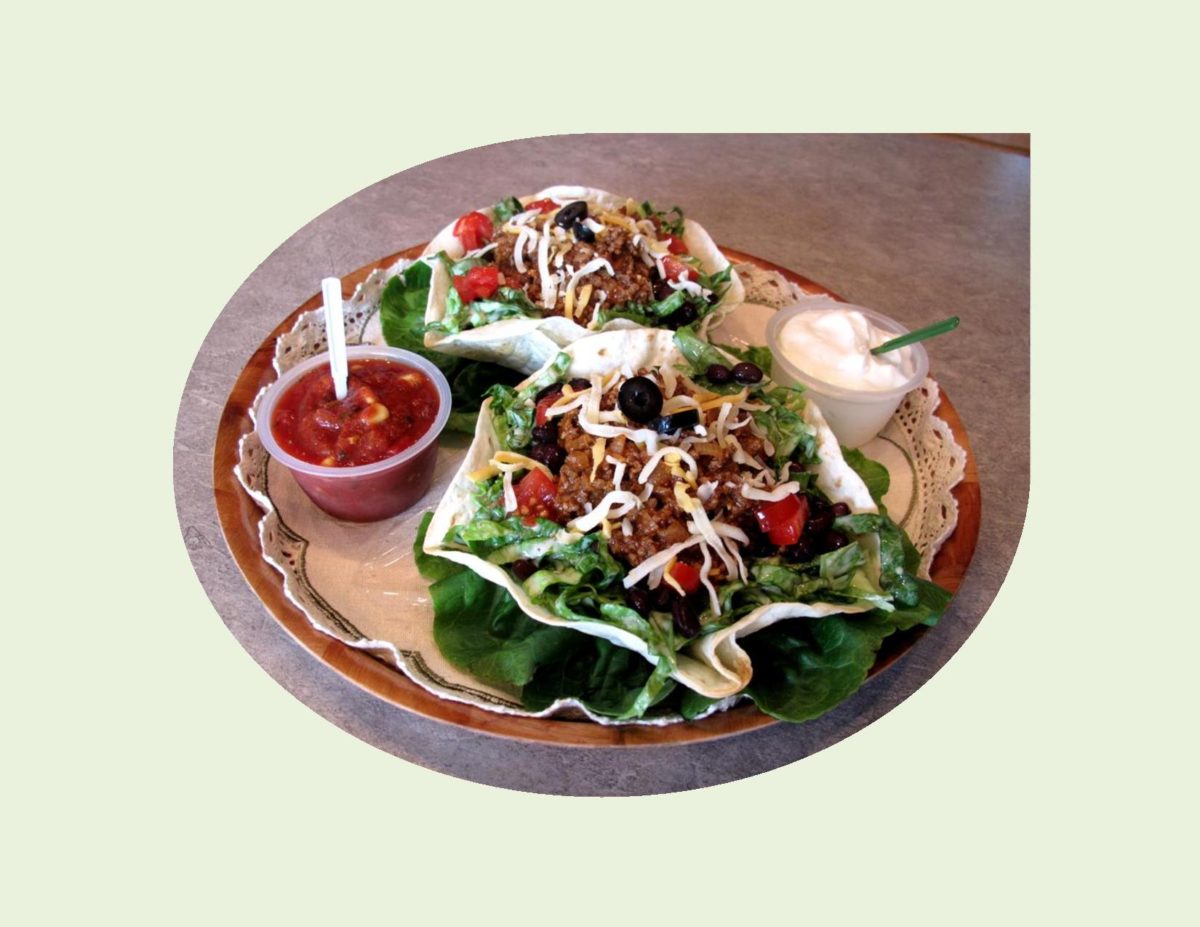
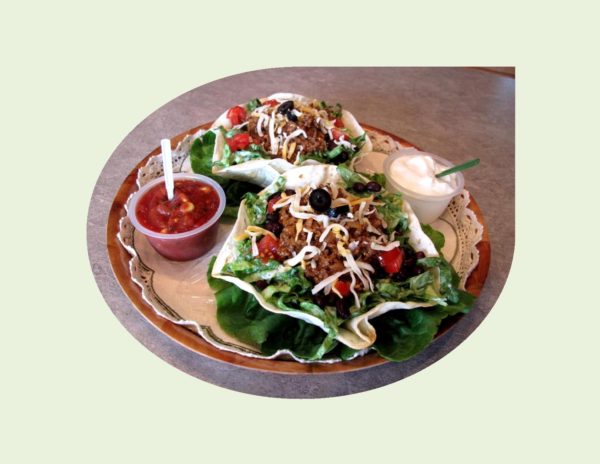
Summer time is salad time! Taco Salad is the full meal deal, infinitely customizable, inviting experimentation and creativity. Being so versatile, it can be enjoyed in almost any setting.
This Texas-Mexican inspired salad was very popular in the late 1960’s. It’s name comes from the Texas-Mexican Railway. Pioneers brought Anglo influences to Texas, where the Texas-born Mexicans lived. As a result, the ingredients from their different cultures blended together. Tex-Mex combines elements of Anglo, Spanish and Mexican.
The taco salad is unique in that it can be served in an edible tortilla bowl. I recall in the food industry, this meal had huge visual appeal for the customer. How could you resist ordering one after seeing it’s impressive presentation? The ingredients in a taco salad can vary according to preference and can be made to fit into any type of cuisine with different seasonings and modifications.
Typically the taco salad includes lettuce, beans, tomatoes, green onion, meat, cheese and sour cream. Other condiments might include guacamole, salsa, garlic and cumin.
The salad featured in today’s blog picture is the beef version but I have included similar recipes for chicken and vegetarian ideas as well. Tortilla bowls are easily made by baking them in the oven. No need to add those calories by deep frying them. I love the full meal salad idea — be it a Chef’s salad, Cobb, Taco you name it! I hope you will enjoy one to this summer.
Taco Salad doesn't have to be 'old school' and boring --- customizing it to your personal tastes makes a huge difference.
Votes: 1
Rating: 5
You:
Rate this recipe!
Ingredients
Salad Ingredients
- 6 cups romaine, shredded
- 230 grams cherry tomatoes, quartered
- 398 ml black beans, rinsed & drained
- 5 green onions, chopped
- 1/4 cup fresh cilantro, chopped, optional
- 2 Tbsp sliced ripe olives, drained
- sliced jalapeno peppers, optional
- 60 grams Mexican cheese blend, shredded
- 1 avocado, sliced for topping, optional
|
Votes: 1
Rating: 5
You:
Rate this recipe!
|
Instructions
Tortilla Bowls
Preheat oven to 425 F. Warm tortillas slightly until pliable. Spray or butter both sides of tortilla lightly, then drape over oven proof bowls, pinching sides to form bowl shape. Bake 5-7 minutes, watching carefully as not to burn. Remove from oven & cool on wire rack.
Beef Taco Meat
In a skillet, heat oil over medium-high heat. Add onion & cook until softened, about 5 minutes.Stir in chili powder & garlic & cook until fragrant, about 30 seconds. Add ground beef & cook, breaking up meat with a wooden spoon, until almost cooked through but still slightly pink, about 2 minutes. Stir in tomato sauce, broth, vinegar & sugar; simmer until slightly thickened but still saucy, about 5 minutes. Remove from heat & season with salt & pepper.
Chicken Taco Meat
Place chicken breasts between 2 sheets of plastic wrap & pound to flatten to uniform thickness, about 1/2-inch. In a small dish, combine spices. Sprinkle over chicken breasts. In a skillet, heat oil over medium-high heat. Add chicken breasts to pan & cook until juices run clear & the center is no longer pink. Remove from pan & allow to rest 5 minutes. Slice into bite size strips.
Salad Dressing
In a small bowl, whisk dressing ingredients.
To assemble salads: In a large bowl, combine romaine, beans, green onions, cilantro, olives, jalapeno peppers. Toss with salad dressing. Place tortilla bowls on serving plates. Divide salad among bowls. Top with taco meat choice; sprinkle with tomatoes & cheese. Top with avocado slices if desired.
Recipe Notes
- Sour cream & salsa are also nice as extra condiments or in place of the salad dressing.
- If you prefer a Vegetarian Taco Salad, just eliminate the meat part, equally as good.
- Be adventurous, customize to your preference so you get the most enjoyment out of 'your' salad.
I have always enjoyed incorporating different varieties of cheese into my cooking. Like the saying goes ‘cheese makes it better’. One of the few kinds both Brion and I are not fond of though, is Blue Cheese. Never being able to get past that real strong smell and flavor, it came as a surprise to me when I tasted Gorgonzola and loved it.
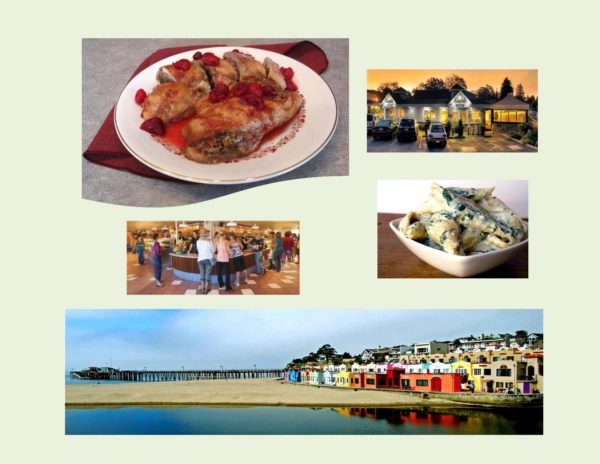
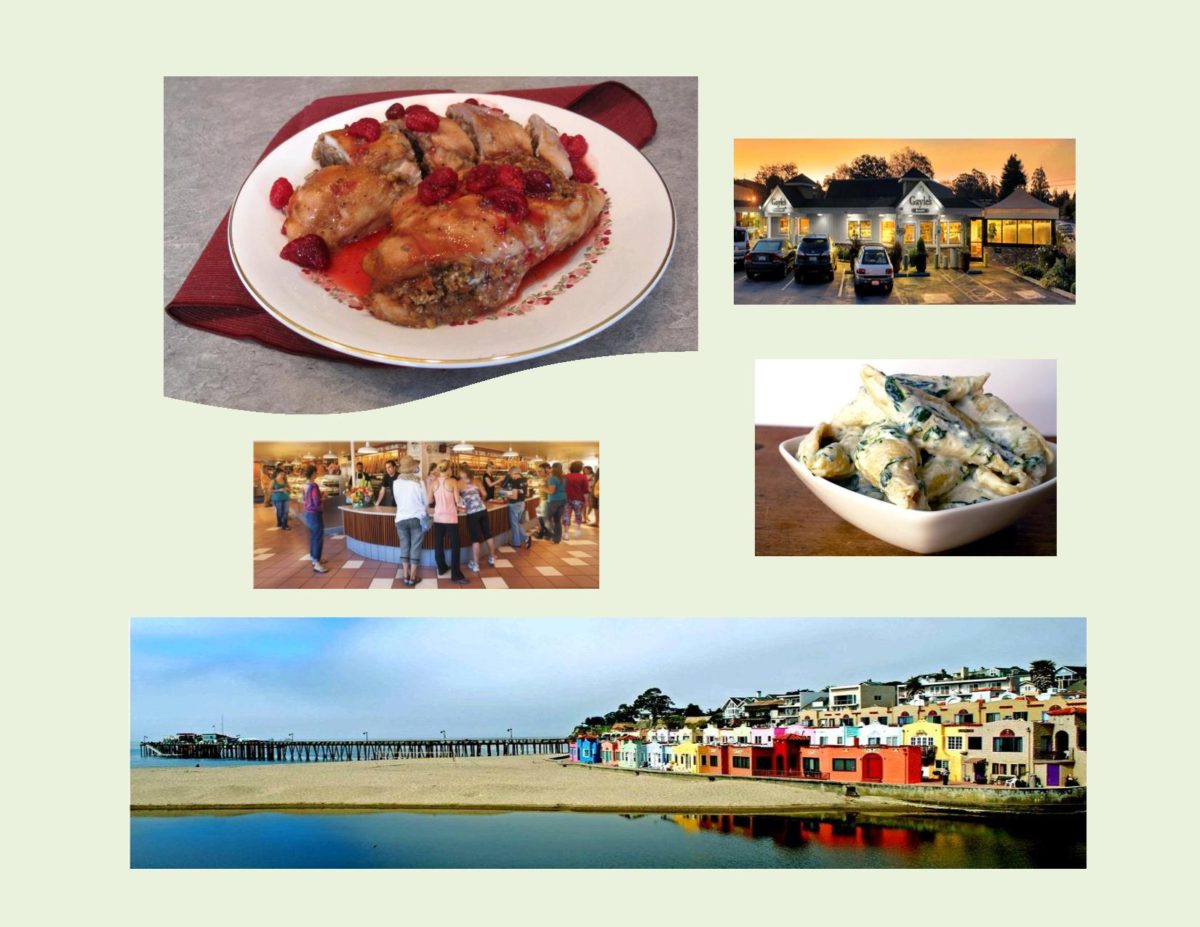
During some vacation time we spent on the Monterey Peninsula in California, I noticed in a brochure, an advertisement for a place called Gayle’s Bakery & Rosticceria. It was in a small beach town called Capitola, about 64 km (40 miles) north of the Monterey Peninsula. We thought we should check it out as it would give us a nice day trip up the coast. The trip turned out to be more than what we expected.
We arrived at Gayle’s right around noon. The place was bustling with business. It had a massive rotisserie and deli case packed with roasted chicken, slow barbecued ribs, hot entrees, salads and sandwiches. In the bakery cases were desserts that could give any French bakery some pretty stiff competition. I stood there trying to make a lunch choice and decided on a very ordinary looking spinach-Gorgonzola pasta. Wow! It was so good, I wouldn’t dream of ordering anything else in future visits. My love affair with Gorgonzola continues.
That afternoon we explored Capitola with its beautiful beaches and historic and colorful architecture, very reminiscent of a Mediterranean village.
I have seen numerous recipes using Figs & Gorgonzola so I thought I would try a little experimenting and see what I could come up with. Achieving just the right balance of sweet and savory can be tricky sometimes. Here is my adaption of Fig & Gorgonzola Chicken Breasts with Raspberry Glaze.
Print Recipe
Fig & Gorgonzola Chicken Breast with Raspberry Glaze
Chicken breasts go from ordinary to extraordinary!
Votes: 1
Rating: 5
You:
Rate this recipe!
|
|
Votes: 1
Rating: 5
You:
Rate this recipe!
|
Instructions
Raspberry Glaze
In a small bowl, combine glaze ingredients & set aside.
Chicken
Flatten chicken breasts to an even thickness. In a large, resealable plastic bag, place Fig Balsamic dressing with flattened chicken breasts. Gently massage bag to distribute dressing on all of the breasts. Marinate in the refrigerator for several hours.
In a medium bowl, combine cheese, figs, walnuts, bread crumbs, & spices. Cover & set in fridge until ready to stuff chicken breasts.
At baking time, preheat oven to 350 F. Grease a sheet of foil large enough for chicken breasts. Lay breasts on a piece of plastic wrap; divide Gorgonzola filling mixture evenly between them. Gently press filling down slightly. Fold one half of each breast over forming a pocket; secure with a toothpick. With a spatula, place breasts on greased foil in baking pan tucking in any extra filling that might have fallen out. Use any leftover fig marinade to brush over breasts.
Bake, uncovered for 35-40 minutes or until meat thermometer reads 170 F. Place chicken breasts on serving platter. Discard toothpicks. Slightly warm Raspberry Glaze in microwave & drizzle over chicken.
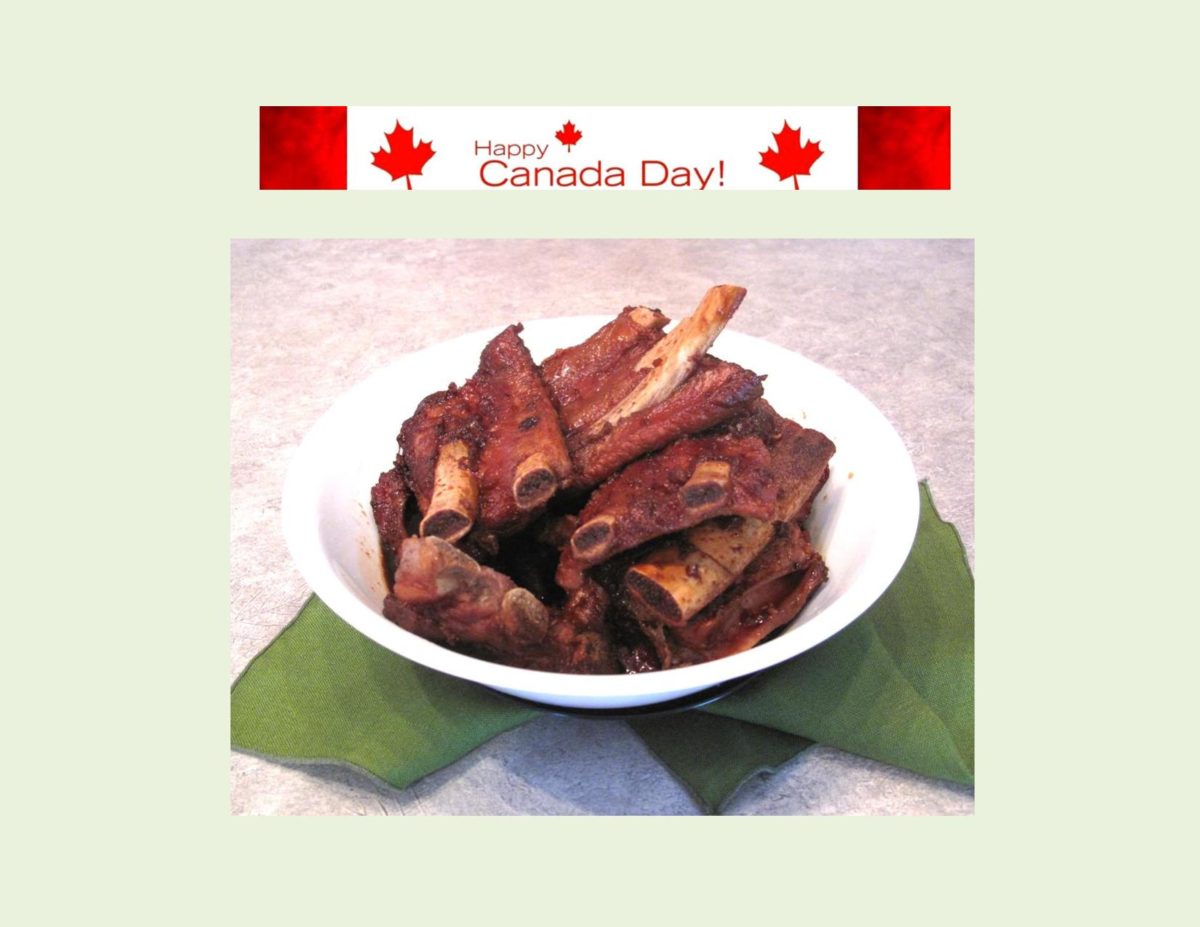
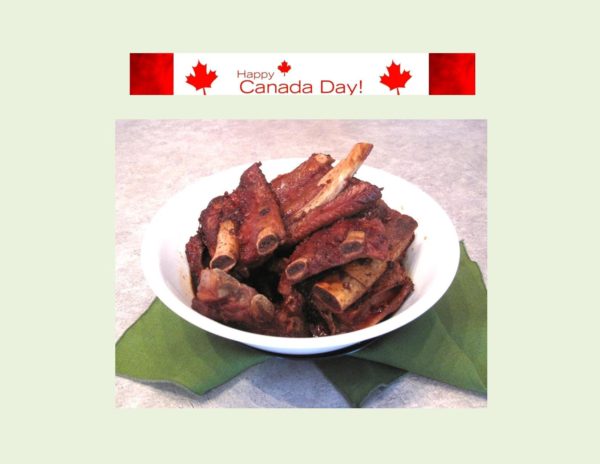
HAPPY BIRTHDAY, CANADA!
Can you believe it, July 1 has rolled around already. Where does the time go? Anyway it’s Canada’s 149th birthday so let the celebrations begin. Summer entertaining is all about laid-back get-together’s with family and friends and of course, great food.
Along with the parades, concerts, carnivals, festivals and firework displays, food is always a big part of it all. I’m sure there will be a great number of succulent ribs being served. Brion and I don’t eat a ton of ribs but we do really enjoy them when we do. For my own little ‘rib fest’ today I decided to do some ‘Honey-Garlic Glazed Ribs’.
Of course, there are many trains of thought when it comes to what makes the best and most tender ribs. Some folks like to par boil or bake somewhat prior to barbecuing, others use a dry rub or marinate and some just choose to barbecue using their favorite sauce glaze. Whatever works for you is what counts.
In this recipe you can either simmer for 45 minutes on top the stove or bake slowly (at 250 F. for 2-3 hrs.) in the oven first. I find either way it gets rid of a lot of the fat content as well as helping to make them tender. After that the ribs are coated with the sauce (which contains baking soda as a tenderizer). At this point you can either bake the ribs at 350 F. or wrap them in foil and place on the barbecue. However you choose to make them, I think you will find them sticky but good!
Print Recipe
Honey-Garlic Glazed Ribs
Cooking method saves on barbecuing time without sacrificing tenderness.
Votes: 1
Rating: 5
You:
Rate this recipe!
|
|
Votes: 1
Rating: 5
You:
Rate this recipe!
|
Instructions
Remove silver lining from the back of the slab of ribs. Cut across the bones to form 'riblets, then into 3-4 ribs per portion.
Place ribs in a large stockpot & cover with water. Bring to a rolling boil, cover & SIMMER for 45 minutes to an hour. Drain.
Meanwhile, in a LARGE bowl, combine honey, soy sauce, vinegar, minced garlic & brown sugar. Stir until honey & sugar are completely dissolved, then stir in baking soda. The mixture will begin to foam. Transfer ribs to the bowl & turn to coat.
Preheat oven to 350 F. On a large piece of foil, arrange the ribs meaty side up; pour excess sauce over all & sprinkle with garlic powder. Fold the sides of the foil over the ribs & seal tightly on all sides. Place ribs on a baking sheet & bake for 30 minutes or until ribs are very tender.
Recipe Notes
- Ribs can be par boiled or baked the day before & refrigerated until ready to bake or barbecue.
