Mandarin Orange Tarts

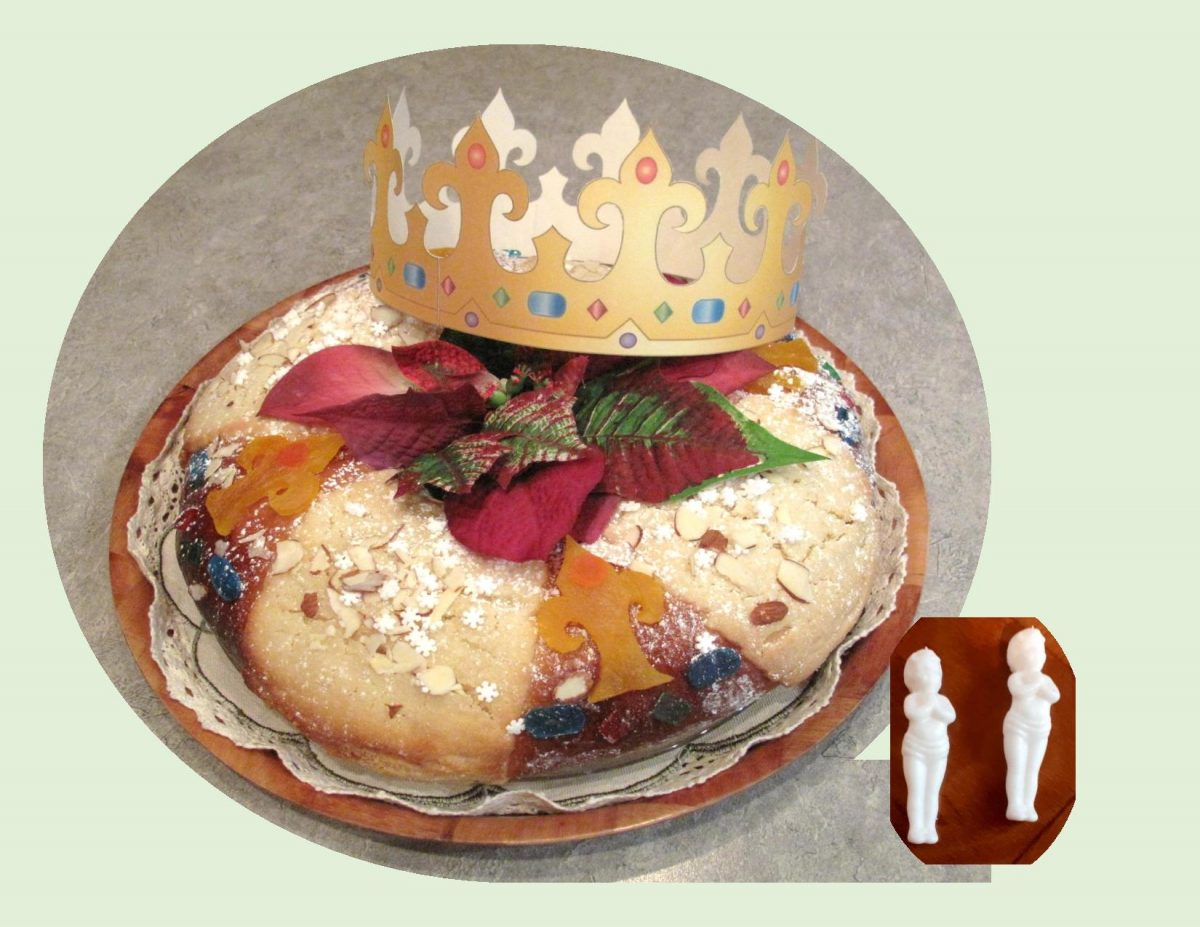
Although mandarin oranges are a traditional holiday food, they sure make a wonderful bit of sunshine for us still in the colder part of our year.

Very often when I go to make something and the recipe calls for orange or lemon zest, its not something I have on hand. I guess its all about thinking ahead and drying the citrus peels when I do have them. There is no magic secret … just time and patience. Wash and dry the fruit, lightly grate off only the top layer of peel. Transfer to a flat dish to dry then store the zest in a glass jar. When it comes time to use, crush some between your fingers before adding it to other ingredients. This will release the citrus essence and flavor.

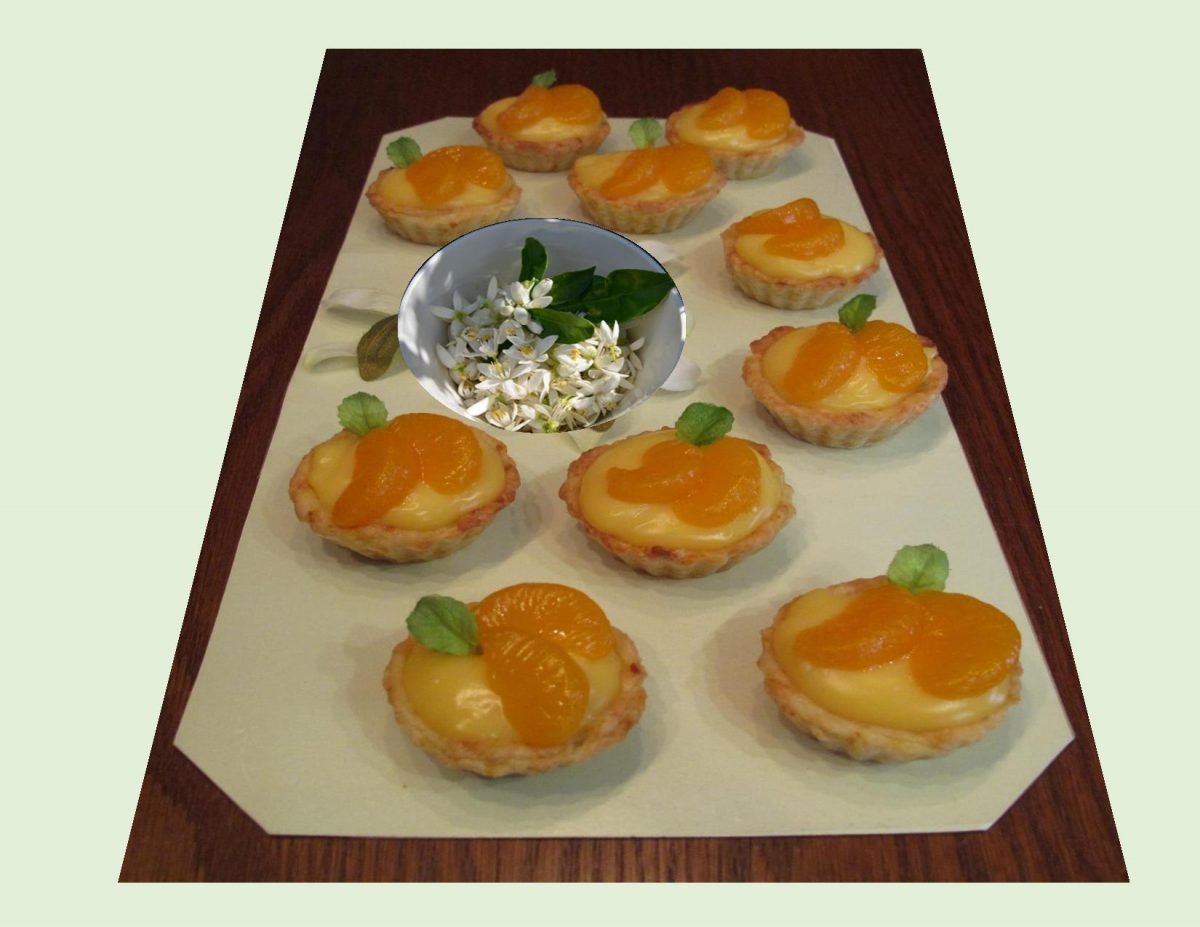
There is no comparison between artificial flavors and real citrus zest in baked goods. These little mandarin tarts not only use it in the filling but the pastry as well.

There are various other uses for citrus zest such as in poultry marinades, baked into breads or for a splash of flavor in tea. These tarts made such a simple little refreshing dessert.

Print Recipe
Mandarin Orange Tarts
Votes: 4
Rating: 3.75
You:
Rate this recipe!
Course Brunch, dessert
Cuisine American, Asia, French
Servings
Ingredients
Orange Pastry
Mandarin Orange Pastry Cream
Course Brunch, dessert
Cuisine American, Asia, French
Servings
Ingredients
Orange Pastry
Mandarin Orange Pastry Cream
Votes: 4
Rating: 3.75
You:
Rate this recipe!
Instructions
Orange Pastry
  1. Preheat oven to 350 F.
  2. In a bowl, whisk flour, sugar & zest. Add butter & blend with pastry blender until mixture resembles coarse meal. Gradually add the orange juice, using enough to form a dough that cleans the sides of the bowl.
  3. Roll out dough on a lightly floured work surface. Using a 2 1/2-inch cutter, make 12 circles & fit into tart pan cups. Line the pastry with foil & add pastry weights. Bake about 10-15 minutes. Remove weights & foil & bake 10 minutes longer until pastry is golden.
Mandarin Orange Pastry Cream
  1. In a bowl, whisk together egg yolks, sugar & cornstarch until it turns pale yellow.
  2. In a saucepan, combine milk & orange zest; bring to a boil. Remove from heat, slowly add a egg mixture a little at a time, whisking well until fully incorporated.
  3. Return mixture to heat & keep whisking over medium heat until it thickens. Stir in orange juice. Transfer to a bowl & cover with plastic wrap, making sure the wrap touches the surface of the pastry cream. When it comes to room temperature, refrigerate.
  4. When cooled & you are ready to use the pastry cream, whisk with an electric mixer for 15-20 seconds to a smooth & spreadable texture. Spoon filling into baked tart shells. Top each with a couple of mandarin orange slices. Brush oranges with a bit of apricot jelly.
Recipe Notes
  • If pastry weights are not available, reverse you tart pan & place pastry rounds over the bottoms of tart cups to bake.
  • If you use canned mandarins for decoration, drain & blot on paper towel to remove excess liquid.

Banana Ice Cream Sandwich Cake

Homemade ice cream …the ultimate old fashioned treat has a very worldly history that stretches around the globe.

When I was growing up on the farm, we had one of those ice cream makers with a hand crank that featured an inner canister and churn. The canister and churn held the ice cream custard, which was placed in a bucket that salt and ice or snow could be added to. My siblings and I would take turns churning until the custard magically transformed into the heavenly frozen dessert.

Ice cream is the perfect treat for any season. In the summer you can cool off by enjoying a scoop of ice cream and in the winter you can pair it with a warm dessert. Let’s face it, if you are an ice cream lover, the possibilities are endless.

The first ice cream sandwich was basic: cold, creamy with a little crunch on either side. The purpose was to make the ice cream better than if it stood alone. My original idea for today’s blog dessert was to replicate the flavors of the classic ‘Bananas Foster’ dessert of the 50’s. The ingredients in it were very simple, such as butter, cinnamon, brown sugar, vanilla & rum. The end result today became a combo of caramelized bananas & banana cake turned ice cream sandwich!

My inherited love for ice cream has never left me to this day and I might add, Brion has the same ‘affliction’ (which doesn’t help).

Print Recipe
Banana Ice Cream Sandwich Cake
Votes: 1
Rating: 5
You:
Rate this recipe!
Course dessert
Cuisine American, Ecuador
Servings
Ingredients
Caramelized Bananas
Banana Cake
Course dessert
Cuisine American, Ecuador
Servings
Ingredients
Caramelized Bananas
Banana Cake
Votes: 1
Rating: 5
You:
Rate this recipe!
Instructions
Caramelized Bananas
  1. In a microwave safe bowl, melt butter then stir in brown sugar. Divide evenly between 6 custard cups; slice the 3 ripe bananas & place over sugar/butter mixture. Set on a baking sheet.
Banana Cake
  1. Preheat oven to 350 F. In a bowl, whisk together flour, baking powder, baking soda, cinnamon & salt. In a separate large bowl, cream together butter & sugar; add eggs, Greek yogurt, mashed bananas & extracts & combine. Slowly add dry ingredient mixture to wet batter & mix only until combined.
  2. Pour the batter over the caramelized bananas in the custard cups. Bake for 30 minutes until a toothpick inserted comes out clean.
  3. Let cakelets cool in custard cups slightly, then invert on a plate. You may have to gently coax the caramelized bananas to loosen with a spatula. Slice each cake half so you can add a layer of vanilla ice cream to the bottom halves. Top each with the other half of the banana cake.

Pumpkin Cream Cheese Pancake Bake

Today, February 25th is Shrove Tuesday. The date can be anytime between February 3rd & March 9th. It is exactly 47 days before Easter Sunday, based on the cycles of the moon.

For centuries, the consumption of pancakes has widely been regarded as a popular way to celebrate Shrove Tuesday, which takes place the day before Ash Wednesday in preparation for Lent. However, the day is celebrated in a variety of ways around the world with many different foods.

Today’s recipe idea comes from the bettycrocker.com website. I printed this pancake recipe out a very long time ago but never got around to trying it. So today’s the day … You notice it uses General Foods Bisquick mix. I don’t use a huge amount of this baking mix but its handy once in a while.

I was curious (as usual) about the history of the product. It seems a salesperson for General Foods, was on a train to San Francisco late one evening in the 1930‘s. Since the dining car was already closed and he was quite hungry, he asked the chef if he could make him something quickly, nothing fancy and not too much fuss. He was served a plate full of piping hot biscuits. When asked how this was possible so fast, the chef said he had a pre-mixed blend of lard, baking powder, flour and salt that he stored in an ice chest. This became the inspiration for a product that is still convenient more than 80+ years later. Today, Bisquick’s product line has grown to include flavored biscuit mixes, easy shake ‘n pour pancake mix and even gluten-free Bisquick. Interesting!

This turned out to be real good, but of course you have to like pumpkin to enjoy it and we do.

Print Recipe
Pumpkin Cream Cheese Pancake Bake
Votes: 2
Rating: 5
You:
Rate this recipe!
Course Brunch, Lunch
Cuisine American
Servings
Ingredients
Filling
Topping
Course Brunch, Lunch
Cuisine American
Servings
Ingredients
Filling
Topping
Votes: 2
Rating: 5
You:
Rate this recipe!
Instructions
Pancakes
  1. In a large bowl, combine Bisquick mix, & 1 tsp pumpkin pie spice. In a medium bowl, whisk together 2/3 cup milk, 2 eggs, pumpkin & 1 tsp vanilla. Add dry ingredients to wet, mixing ONLY until just combined.
  2. Heat griddle to about 325 F. Pour batter by 1/3 cupfuls onto griddle. Cook until edges appear dry, about 2 minutes, then turn & cook 1 minute. Repeat with remaining batter; let pancakes cool completely.
  3. Lightly butter a 13 X 9-inch baking dish. Spread each cooled pancake with cream cheese, then cut in half & place cut side down into baking dish.
Filling
  1. In a large bowl, beat 6 eggs, 1 1/2 cups milk, cream, sugar & 1 Tbsp vanilla. Pour over pancakes. Cover with plastic wrap; refrigerate at least 2 hours but no longer than 8 hours.
Topping
  1. When ready to bake, preheat oven to 350 F. Remove baking dish from refrigerator. In a small bowl, mix flour, brown sugar & 1/2 tsp pumpkin pie spice. Cut in butter with a pastry blender or finger tips until the size of small peas. Sprinkle on top of pancakes in baking dish.
  2. Bake about 1 hour or until topping is golden & filling is set. If topping browns to quickly, cover with foil. Allow to stand 15 minutes before serving.

Cauliflower, Bratwurst & Potato Casserole

Cauliflower used to be a boring vegetable. That reputation couldn’t be more different today. The cauliflower craze has managed to last longer then anyone would have expected. It seems to have checked all the boxes … healthy, versatile and ‘tasteless’. Not only can you turn it into rice, steak, pizza crust, gnocchi etc., but you can use any sauce, seasoning and/or flavoring on it as well. It’s entirely a blank canvas for all your cooking needs.

This casserole pairs cauliflower with some tasty bratwurst. The spices used to flavor traditional German bratwurst typically include salt, pepper, nutmeg and marjoram. Other seasonings like coriander, cardamom, ginger, caraway and garlic are sometimes used depending on the region and personal preference. The name is derived from old high German.Brat‘ which means finely ground meat and ‘wurst’ which means sausage. The fine grind of the meat gives the sausage a lighter texture.

There are many ways to make bratwurst so don’t hesitate to put your on personal touch on it. This combination of the cauliflower, bratwurst and potatoes in a cheese sauce is so good. If you would prefer, don’t hesitate to just pick up a package of ‘brats’ at the store and make it even quicker to prepare.

Print Recipe
Cauliflower, Bratwurst & Potato Casserole
Votes: 1
Rating: 5
You:
Rate this recipe!
Course Main Dish
Servings
Course Main Dish
Servings
Votes: 1
Rating: 5
You:
Rate this recipe!
Instructions
Bratwurst
  1. In a bowl, combine all ingredients & mix well. Form into small meatballs. In a saucepan, fry meatballs until just cooked & drain on paper towel. Spread out on bottom of a 9 X 9-inch casserole dish.
Casserole
  1. Peel potatoes & cut into small cubes. Cook in salted, boiling water for about 5 minutes. With a slotted spoon, remove & distribute potato cubes evenly with bratwurst in casserole dish.
  2. Break cauliflower into florets; add to potato water & boil for 5 minutes. With a slotted spoon, remove & add to other casserole dish ingredients.
  3. Preheat oven to 375 F. In a saucepan, heat butter & stir in flour. Cook until slightly browning then whisk in milk & 1/2 cup reserved potato/cauliflower water. Bring to a boil, while continuing to whisk add salt & pepper to taste. Cook for a few minutes more.
  4. Pour sauce over other casserole ingredients, sprinkle with the cheese & bake for about 20 minutes.

Bailey’s Strawberries & Cream Fudge Pudding Parfaits

HAPPY VALENTINES DAY!

One thing for sure, Valentine desserts most often center around chocolate and strawberries. To celebrate the occasion, Brion came home with a bottle of Bailey’s Strawberries & Cream liqueur. This is the companies second seasonal flavor following their Pumpkin Spice liqueur. To put it in their words, ‘ the drink combines Bailey’s Original Irish Cream with delightful ripe strawberry flavor and delicious vanilla’.

After we had enjoyed it as a drink it got me thinking about how I could incorporate it into a ‘special’ dessert as well. Do you recall those classic Hot Fudge Pudding Cakes from the 60’s? They were the ultimate comfort food, fancy enough for a parfait and homey enough to be a spur of the moment indulgence. I could see nothing wrong in swapping out the milk in the original recipe for some strawberries & cream liqueur!

Speaking of pudding cake, its really kind of a culinary miracle, how pouring hot water over a thick batter can create this warm, fudgy concoction that lies precisely at the intersection of cake and pudding.

OK, on with my dessert … I had some strawberries in the freezer so they became a nice strawberry sauce to compliment the liqueur in the pudding. Serving this dessert parfait style with some ice cream or whipped topping adds a bit of elegance and I’m sure you will love the taste.

Print Recipe
Bailey's Strawberries & Cream Fudge Pudding Parfaits
Votes: 1
Rating: 5
You:
Rate this recipe!
Course dessert
Cuisine American
Servings
Course dessert
Cuisine American
Servings
Votes: 1
Rating: 5
You:
Rate this recipe!
Instructions
Cake
  1. Preheat oven to 350 F. In an 8 X 8-inch baking dish, combine first 5 ingredients. Add liqueur, margarine & walnuts, combine well. Batter will be very stiff (if you find it easier to mix the cake in a small bowl instead, do so). Spread batter evenly in the baking dish.
  2. In a small dish, combine brown sugar & 1/4 cup cocoa powder & sprinkle over batter. Pour boiling water over all & bake for about 40 minutes or until batter rises to the top & is baked through.
Strawberry Sauce
  1. In a small saucepan, combine cornstarch, sugar & salt. Mix well. Add water & sliced strawberries. Cook until sauce is clear & bubbly. Remove from heat & cool.
Assembly
  1. Place some strawberry sauce in the bottom of each parfait glass. Spoon fudge pudding over sauce & top with ice cream or whipped topping. Serve with a glass of liqueur!

Kiwi Walnut Mini Cakes w/ Strawberry Coulis

Not only does kiwi look and taste like no other fruit, its also available when some of the other fresh fruits aren’t. The month of February is a good time for this favorite duo. Ever since the 80’s, when the world first fell in love with the kiwi/strawberry flavor, the combo is in everything. I guess its because they are the perfect complement to each other’s flavor profile.

Since there are just the two of us at our house, I always like the idea of making individual desserts. Upside down cakes are so versatile, quick and uncomplicated. You can make them plain , fancy, sweet, savory, large, small …. your choice!

Today, my plan is to make some kiwi/walnut cakes with a strawberry coulis. A fruit coulis (pronounced koo-Lee) is a thick sauce made from pureed and strained fruit. They may also be made from fruit jams or preserves that are strained and diluted with water, liquor or simple syrup. Additional seasonings such as spices may be used as well as acids like lemon juice, but they are typically kept simple to avoid ‘muddying’ the flavor with too many ingredients. Coulis originally referred to the juices from cooked meats and may also be made with cooked vegetables.

Coulis can be used in many different ways such as plate decoration or just for a burst of complimentary flavor. My strawberry coulis certainly worked its magic on these little kiwi cakes.

Print Recipe
Kiwi Walnut Mini Cakes w/ Strawberry Coulis
Votes: 1
Rating: 5
You:
Rate this recipe!
Course dessert
Cuisine American, French
Servings
Ingredients
Cake
Strawberry Coulis
Course dessert
Cuisine American, French
Servings
Ingredients
Cake
Strawberry Coulis
Votes: 1
Rating: 5
You:
Rate this recipe!
Instructions
Topping
  1. Preheat oven to 350 F. lightly butter 6 custard baking cups. From parchment paper, cut circles to lay on the bottom of each. Divide melted butter between the 6 cups. Sprinkle with the brown sugar & walnuts. top with kiwi fruit slices.
Cake
  1. In a small bowl, beat together eggs & sugar until thick; gradually beat in oil. In a small dish, combine flour, baking powder, spices & salt. Stir flour mixture into egg/sugar mixture, then add orange juice & vanilla. Stir ONLY until combined.
  2. Pour the batter over fruit in custard cups, dividing it evenly between them. Bake 15-20 minutes or until they test done with a toothpick. Allow cakes to cool for about 5 minutes, then invert onto a rack to finish cooling.
Strawberry Coulis
  1. In a medium saucepan, combine strawberries, sugar & lemon juice. Bring to a boil over medium-high heat. Remove from heat & cool for a few minutes. Transfer to blender; puree until smooth, strain & set aside until ready to serve.
Assembly
  1. Place some coulis on individual dessert plates & top with a kiwi cake. Store any leftover coulis in a sealed container in the refrigerator for up to a week.

Stuffed Onion Rings w/ Guacamole & Cheese

Before I get off the topic of Merida, Mexico adventures, I thought our readers would find this interesting.

Last year when we arrived in Merida, it became clear to Brion that a cap would not suffice in the 33 degree temperature. Our goal was to find a traditional ‘Jipijapa’ Panama hat. This is a soft, pliable hat made from the fibers of the jipijapa palm in several towns south of Merida.

Jipijapa requires a fair amount of water to grow to about 5-8 ft (1.5 – 2.5 m) tall. This evergreen is not a true palm. Each plant is a cluster of about 1-inch thick stalks topped by a dark umbrella-like leaf nearly 3 feet wide. Young leaves and shoot tips are edible and said to taste like asparagus. The plants need 2-3 years to mature before its youngest and most delicate light colored leaves can be harvested to make the famous white/cream hats. Older, tougher parts of the plants can be used to make brooms, mats, purses, baskets, small ornaments or earrings, ie. things that do not need the flexibility of hats.

Jilipapa is a Mexican version of the Ecuadorian ‘treasure’ called the panama hat. About the same time the hats were made famous in Ecuador, a priest introduced a wide variety of Guatemala palms to Becal, a village that is the center of the panama hat trade in Mexico.

The Mayas of the area quickly started weaving hats, the main difference was they were working in a much drier environment and had to devise a way to keep the fibers moist and cool. They started working in caves in their backyards. The cave environment allows the weavers to interlace the pattern more tightly without fear of tearing or cracking the ‘straw’. It also prevents sweat from the weavers’ hands to stain the fiber.

Hats can take anywhere from a couple of days to six months to make. To begin with, there is the picker of the young unopened palm leaves. The best strips are boiled, dried and whitened with a sulfur in a special ‘oven’. Next the brim’s edge is made by back weaving the straw. This prevents the hat from unraveling. It is then tightened. For some hats that takes 3 full circles around the hat, or finer work, 5 circles. This prevents the brim from puckering. The hat is then washed and bleached, then beaten with a special mallet or shell to soften its fibers. Now it is trimmed of any excess, ironed and blocked. The blocking process can take up to 2 weeks. Finally, a sweat band is stitched inside the hat and a decorative band applied on the outside.

Like most popular wardrobe staples, the demand for these hats has led to the industrialization of the hat making process. The process of hand weaving is a dying art that is worth appreciation. In 2012, it was added to the UNESCO Intangible Cultural Heritage List.

Although the price was a bit steep, you get what you pay for. After being worn on 2 holidays and packed in a suitcase to travel back and forth to Mexico, Brion’s hat still looks great.

I realize I got quite far removed from the food aspect of the blog. Who knew there was so much to know about the Jipijapa hat! These onion rings really kick up the basic burger a notch. Well worth a try!

Print Recipe
Stuffed Onion Rings w/ Guacamole & Cheese
Votes: 1
Rating: 5
You:
Rate this recipe!
Course Lunch, Main Dish
Cuisine American, Mexican
Servings
Votes: 1
Rating: 5
You:
Rate this recipe!
Instructions
Guacamole
  1. In a large bowl, mash avocados into a chunky paste. Add red onion, tomato, lime juice & cilantro; stir until well combined. Set aside.
Onion Rings
  1. Cut large onions into 1-inch thick slices, pull out 15 - 20 rings & place onto a flat tray lined with parchment paper. Fill the inside of each onion ring using about 3 Tbsp of guacamole. Insert a cube of cheese into each ring & freeze for at least 30 minutes, or until solid.
  2. In a shallow dish, whisk together flour & spices. In another shallow dish, whisk eggs & in a third dish combine breadcrumbs & crushed tortilla chips. Preheat oven to 400 F. Lightly oil a baking sheet.
  3. One at a time, dip frozen onion rings into flour, then eggs & finally breadcrumb mixture. Spread onion rings in an even layer on the prepared baking sheet. Coat with a baking spray or drizzle with olive oil.
  4. Place into oven & bake until golden brown & crispy, about 15 - 20 minutes. Serve with lime wedges & a dipping sauce or do what we did & put inside of burgers for a full meal deal!

Marquesitas

Yucatan food is markedly different from Mexican food as most of us know it. One reason is, of course, the pronounced Mayan influence, but numerous other cultures have left their mark on the cuisine as well. From the British and Spanish to the Lebanese and even the Dutch with their Edam cheese. No one knows for sure how the Dutch cheese got to this part of Mexico … some attribute it to Caribbean trade routes, others claim wealthy Yucatan hacienda owners who grew ‘henequen’, (a fiber used to make rope), brought it back from their European travels.

Like many desserts and culinary traditions around the world, the invention of ‘marquesitas’ has its own unique story. Legend has it that the marquesita was invented in the city of Merida, Mexico. During one cold (??) winter when ice cream sales were down, an ice cream vendor started experimenting with ideas to use the waffle cone in a different way. It was then that the marquesita began to take shape.

Marquesitas are like crunchy crepes: a batter is poured into what looks like a waffle maker, sweet or savory add-ins are tossed in, then the whole thing is rolled up once its crispy. The crepe itself tastes like a waffle cone with hints of vanilla and almond … but its all about what sweet and savory fillings you choose. Traditionally, Dutch Edam cheese was shaved right into the crepe.

Print Recipe
Marquesitas
Votes: 1
Rating: 5
You:
Rate this recipe!
Course dessert, Lunch
Cuisine American, Mexican
Servings
Ingredients
Course dessert, Lunch
Cuisine American, Mexican
Servings
Ingredients
Votes: 1
Rating: 5
You:
Rate this recipe!
Instructions
  1. In a blender, place all ingredients EXCEPT cheese & puree until smooth. Set aside for 10 minutes or cover & refrigerate up to 12 hours. Stir before using.
  2. If a marquesita iron is not available a 10-inch crepe pan or even just a flat bottomed non-stick skillet will do just fine. Heat skillet over medium-high heat. Once hot, pour about 1/4 cup batter out in a 10-inch circular shape. You want to create a very thin layer. Once the bottom begins to become toasted & golden , loosen the edges with a spatula & flip to toast the other side.
  3. Sprinkle the marquesita with some grated cheese while it is still pliable. Roll up into a big, wide roll. Finish with some gated cheese on top. You can add whatever filling you choose ... sweet or savory!

Swedish Meatball & Potato Casserole

No doubt, since we have just finished the 2019 Christmas season, you enjoyed some Swedish meatball hors de ouvers. Personally, I love the little morsels so I thought it would be interesting to turn them into a main course casserole.

I have heard the question asked as to what the difference between Italian and Swedish meatballs is. First of all, the meat blend of ground beef, veal and pork are the main players in both styles. The difference comes in the ratio of each meat being used. While both varieties include ingredients such as minced onion and milk soaked bread or crumbs, the seasoning in these two iconic meatballs differs greatly. Swedish meatballs traditionally use spices such as allspice, nutmeg, white pepper and ginger while Italian calls for grated Parmesan, garlic, parsley, fennel seed and oregano.

Another ingredient that is most always used in Swedish meatballs is mashed potatoes. Size is important … Italian meatballs (other than in soup) are quite large whereas Swedish are generally like a hearty teaspoon full.

When it comes to sauce, this is a big part of the flavoring component that sets them apart. Swedish meatballs are cooked in a cream gravy made with beef broth whereas Italian meatballs are served in a tangy, bright red tomato sauce.

All that being said, it brings me back to my casserole. It combines all the ingredients of the Swedish meatballs put uniquely together in a casserole and topped with a mozzarella cheese. Perfect January meal!

Print Recipe
Swedish Meatball & Potato Casserole
Votes: 2
Rating: 5
You:
Rate this recipe!
Course Main Dish
Cuisine American, European
Servings
Ingredients
White Sauce
Potatoes
Course Main Dish
Cuisine American, European
Servings
Ingredients
White Sauce
Potatoes
Votes: 2
Rating: 5
You:
Rate this recipe!
Instructions
White Sauce
  1. In a saucepan, cook margarine & flour until bubbly then slowly add broth & cream. Gently boil for a few minutes; add soya sauce, salt & pepper. Remove from heat & set aside.
Potatoes
  1. Boil potatoes in salted water until tender but not overcooked; cut into 1/2-inch slices. Arrange them on the bottom & sides of a 8-inch round baking dish.
Meatballs
  1. Preheat oven to 375 F. In a bowl, combine all meatball ingredients & form into balls. Arrange them over the slices of the potatoes on the bottom of baking dish. Use the remaining potato slices to create 'walls' between each meatball.
  2. Pour white sauce into each meatball 'pocket'. Sprinkle entire dish with grated mozzarella cheese. Bake 45 minutes or until meatballs are cooked & cheese is golden.
Recipe Notes
  • You can definitely use whatever ratio of meat combo you prefer or just use one one type, your choice.

Rosca de Reyes

The tradition of a New Year’s Cake is one that spans countless cultures and is meant to symbolize wealth, prosperity, health and good luck for the coming year. The cake or bread usually contains symbolic items baked inside which is believed to give good luck to the receiver.

Most of the cakes are consumed at midnight on new year’s eve … though some cultures cut their cake on Christmas or the Epiphany on January 6th.

In January of 2019, Brion and I spent some vacation time in Merida, Mexico. We stayed at a wonderful boutique hotel called Hotel Del Peregrino. On the morning of January 6th we were served some Rosca de Reyes (cake/bread) at breakfast. This was the first time either of us had tasted this traditional bread. It was absolutely delicious and yes, you might have known, I would not only have to make some, but learn the history behind it.

January the 6th is a special day in Mexico, known as ‘Three Kings Day’, which represents the height of the Christmas season. This date marks the culmination of the 12 days of Christmas and commemorates the three wise men who traveled from afar, bearing gifts for the infant baby Jesus. The day when the wise men found the baby Jesus is known as Epiphany which is the event represented by the Rosca de Reyes.

The circular form of the rosca represents God’s eternal love which has no beginning or end. The dried candied fruits that adorn the bread symbolize the King’s crown, while the traditional figurines placed inside the bread represent the baby Jesus. Whoever finds this token is obligated to host an upcoming party on the occasion of ‘Candlemas Day’, a Christian holiday which occurs each year on February 2nd. The traditional menu for this event would be tamales and hot chocolate.

In researching the internet for a traditional recipe for the cake/bread it seems orange and vanilla were usually in the actual dough but as for the decorations, there were a lot of fruit and nut choices. Apart from the circular shape it looked like personal preference dictated your decoration design. Here’s my best interpretation of Rosca de Reyes!

Print Recipe
Rosca de Reyes
Instructions
Bread Dough
  1. In a small bowl, combine lukewarm water, yeast & a pinch of sugar; stir with a fork until dissolved. Allow to stand for 5-10 minutes in a warm place until frothy.
  2. In a large bowl, whisk flour, sugar, salt, anise seed & cinnamon. Make a well in the center of the flour & add eggs, yolk, cooled butter, orange zest & vanilla. Whisk to form a slurry, pulling in a little flour from the sides of the bowl. Pour the yeast mixture over the egg slurry; using a wooden spoon, mix until a shaggy dough that is difficult to mix forms.
  3. Place on a lightly floured work surface & start kneading until you have a smooth dough. It will take about 10 minutes to get good results. Be careful not to add to much flour to your work area, the texture should be soft, smooth & holds a ball shape.
  4. Place in an buttered bowl, cover with plastic wrap. Allow dough to proof in a warm place until doubled in volume, about 1 1/2 -2 hours.
Bread Decoration
  1. In a bowl, cream butter with sugar; add egg yolk & mix until combined. Add flour & continue to mix until a soft dough forms. Refrigerate if your not quite ready to use it yet.
Assembly
  1. Line a baking sheet with parchment paper. When dough has doubled in size, turn onto a lightly floured surface & knead a few times. Shape the dough into a large ring & place it on the prepared baking sheet. Seal the ends to close the ring. Loosely cover with buttered plastic wrap & allow to rise in a warm place for 45 minutes or more until almost doubled in volume.
  2. Preheat oven to 350 F. In a small dish, whisk together egg wash. Divide the 'decoration dough' into 4-6 equal sections. Roll each with your hands until you get a strip long enough to decorate the ring. Brush dough with egg wash.
  3. Place the 'decoration dough' strips around the ring, try to place them facing one another, then decorate the ring with candied or dry fruit such as mango, pineapple, cherries, figs, citron, orange or lemon peel or quince paste strips or any personal choice you wish. Once the ring is decorated, sprinkle it with sugar & sliced almonds.
  4. Bake the bread for 20 minutes or until the bread is a nice golden brown color. Ovens vary so it may take a bit longer. Transfer bread to a wire rack to cool. After bread has cooled insert the plastic baby dolls from the bottom of bread. Some times the plastic dolls are inserted into the bread before baking, personally I think inserting them afterwards works just fine.