
As I was preparing this meal today, the same question that I’ve pondered many times, came back to me. Why do we serve (garlic) bread with a pasta meal? It makes no sense! Pasta and bread are both starches so why do we eat them together?
After a lot of research on this subject, I now think I have the answer. When the first wave of Italian immigrants arrived in America from Southern Italy in the late 19th and early 20th centuries, they couldn’t get good quality olive oil, the right produce or arborio rice, but were instead able to afford ample quantities of cheese and meat. They pioneered a culture of ‘abbondanza’ (meaning in abundance), building on traditional recipes and creating new ones; always sure to use as much of a good ingredient as possible. The result … a hearty, delicious cuisine that has never seen the light of day in the land that inspired it. ‘Italian garlic bread’, as found in North American restaurants and grocery stores, does not exist in real Italian cuisine. It is an Italian-American creation that nobody in Italy would recognize.
Ok, so now I have the answer and you’ve probably noticed, I made Garlic Knots to go with our pasta!
Print Recipe
Veggie Shrimp Pasta w/ Garlic Knots
Votes: 1
Rating: 5
You:
Rate this recipe!
Ingredients
Veggie Shrimp Pasta
- 2 cups (190 gm) dry pasta such as penne or bows
- 1 Tbsp canola or olive oil
- 1 zucchini, julienned
- 1 medium red pepper, diced
- 8 large mushrooms, sliced
- 3 cloves garlic, minced
- 3/4 tsp Paprika
- 1 tsp salt
- 1/4 tsp EACH dried thyme, oregano, garlic & onion powder & pepper
- 300 gm Wild, large raw shrimp, peeled & deveined
- 284 ml cream of mushroom soup
- 3/4 cup milk
- 60 gm shredded, Parmesan cheese, DIVIDED
|
Votes: 1
Rating: 5
You:
Rate this recipe!
|
Instructions
Garlic Knots
Preheat oven to 375 F. Line a baking sheet with parchment paper.
In a large bowl, combine flour, baking powder & salt; whisk well. Add yogurt, mixing with a fork until incorporated. On a lightly floured surface, knead dough about 15 times. Divide the dough into 8 equal pieces & roll into strips about 9-inches long. Tie each strip into a 'knot-like' ball; place on baking sheet. Bake about 18 minutes or until golden then allow to cool 5 minutes.
In a saucepan, melt butter, add garlic & cook until golden about 2 minutes. Brush the knots with the garlic butter & sprinkle with Parmesan cheese.
Veggie Shrimp Pasta
In a large pot of boiling water, cook pasta until tender but firm; drain & set aside.
Heat oil in a large skillet over medium-high heat. Add zucchini, peppers & mushrooms; cook for 5 minutes or until tender-crisp, stirring occasionally. Add garlic, spices & shrimp; stirring for another 3 minutes or until shrimp is opaque.
In pasta pot, place soup & milk; when hot add half of the Parmesan cheese, pasta & shrimp/veg mixture. If necessary, cook a few more minutes just to make sure everything is hot. Sprinkle with remaining cheese before serving.

This is a spring version of summertime fresh blueberry tarts. Even though we are a long way from blueberry season, nothing wrong with using some frozen ones. At our house we use a lot of lemons which means there are always lemon peels available. Candied lemon peel is an excellent way of using up the flavorful but not as tasty peel.
Candied or crystallized fruit, has been around since the 14th century as a method of food preservation. It seems to have started out in the Arab culture, being served at banquets. Candied fruit as a whole, would reach the west where they became the key part of some of the most well known cakes and breads of European tradition, such as Italian Panettone and German Stollen.
Candied lemon peels are a very versatile ingredient. Chopped up, they can be used in baked goods for a lemony flavor boost, whereas whole strips can be dipped in chocolate and used as an edible gift.
For my blueberry tarts, I thought some candied lemon curls would make a pretty garnish not to mention the additional flavor they give.
Print Recipe
Blueberry Custard Tarts w/ Candied Lemon Curls
Votes: 1
Rating: 5
You:
Rate this recipe!
Ingredients
Candied Lemon Curls (MAKE ONE DAY EARLIER)
Ingredients
Candied Lemon Curls (MAKE ONE DAY EARLIER)
|
Votes: 1
Rating: 5
You:
Rate this recipe!
|
Instructions
Custard
In a small saucepan, bring milk to a simmer. In a bowl, whisk sugar, eggs, yolks, & cornstarch together until smooth. When milk is simmering, whisk half of it into the egg mixture then gradually add the egg/milk mixture to the rest of the milk.
Return saucepan to the heat & cook, whisking constantly until very thick. Whisk in the butter & vanilla. Cover with plastic wrap & refrigerate. Be sure the plastic is touching the top of the custard to prevent it from forming a film over it. When custard is cooled & you are ready to use it, whip with an electric mixer for a couple of minutes.
Shortbread Crust
Preheat oven to 350 F. In a large bowl, combine butter & sugar; cream well. Add vanilla & combine. In a small bowl, combine dry ingredients; gradually add to creamed mixture. Blend well. Divide dough into 8 portions. Press each portion into a 4 X 3/4-inch mini tart pan. Using a fork, poke some holes in the bottom of each shell. Bake about 10 minutes or until golden brown. Remove from oven & cool before filling.
Blueberries
In a saucepan, whisk all ingredients together & cook over medium-high heat until thickened.
Candied Lemon Curls
Cut the ends off of the lemon. Carefully cut down ONE side of the lemon. Continue the same cut through the FRUIT of the lemon, stopping at the peel. Do NOT cut through the peel.
Carefully open up the lemon & make more cuts through the FRUIT so that it will lay flat; remove the fruit from the peel. Turn the peel over & trim the edges & carefully remove all of the white pith from the inside of the peel. Cut the peel into strips about 1/8-inch wide.
In a small saucepan, add sugar & water & bring to a simmer. Add peels & gently simmer for 10 minutes. After 10 minutes, lay peels on a cooling rack. Allow to cool slightly, then toss in a bit of granulated sugar. They will slightly curl as they cool.
Assembly
Divide custard between tart shells, top with blueberries & garnish with candied lemon curls.
Recipe Notes
- I find this recipe works the best if everything is made a day earlier than needed. That way each component has a chance to cool well before you assemble & serve.

When I think about Easter, one of the first foods that comes to mind are hot cross buns. I’m sure you think I’m going to have a nostalgic memory of my mother’s hot cross buns, but strangely enough, I don’t. The memory I do have from that time in my life is of some very yellow, cylinder shaped loaves. They were soft, sweet and yellow from the many eggs used in the dough. My mother just called it ‘Easter Bread’. It didn’t have icing, candied fruit and nuts or extra spices, it was just plain and gloriously good.
Each year, at Easter time, I really enjoy to make some version of Easter bread or buns (of course, trying to make it just a bit better than the year past). This year I’m going to make a hot cross bun ‘loaf’.
While hot cross buns are now sold and enjoyed throughout the year, they were once reserved for Good Friday alone. There is no one clear explanation … some theories rest in Christian symbolism while there are also more than a few stories that indicate hot cross buns were baked on Good Friday for superstitious reasons.
No matter what the reason, Brion & I have always loved these soft, spicy little buns. No doubt, this ‘loaf’ will probably make some good french toast for an Easter brunch.
Print Recipe
Hot Cross Bun Loaf
Votes: 1
Rating: 5
You:
Rate this recipe!
|
|
Votes: 1
Rating: 5
You:
Rate this recipe!
|
Instructions
Dough
In a large bowl, whisk together milk, oil, eggs & sugar. Sprinkle yeast over mixture. Allow to sit for 10 minutes.
In a bowl, combine 4 cups flour with 3/4 tsp cinnamon. Add to yeast mixture & combine. Mixture will be very sticky. Cover bowl with a tea towel & let rise in a warm place for 1 hour.
In a small dish, combine 1/4 cup sugar with cardamom & ginger; set aside. In another small dish, combine paste ingredients for crosses, stirring until smooth. Transfer to a piping bag with a small opening; set aside.
In a small bowl, combine remaining 1/2 cup flour with baking powder, baking soda & salt. When dough has risen, add this mixture & combine. Move dough to a lightly floured surface. Press to slightly flatten dough.
Sprinkle 2 Tbsp spiced sugar & a third of the fruit mixture over the dough. Fold dough over on itself & flatten again. Repeat the process two more times, ending by folding the dough in on itself. Divide the dough into 12 pieces. With floured hands, quickly roll the pieces into balls.
In a buttered, OVERSIZE loaf pan, place 6 rolls then top with remaining 6 rolls. Pipe whatever cross design you prefer on loaf. Cover & allow to rise for about 10 minutes.
Preheat oven to 350 F. Bake for 30-40 minutes. If the loaf is browning too fast, place a sheet of foil over it to prevent this.
Glaze
Combine sugar & lemon juice. When loaf is baked, warm glaze for a few seconds in microwave then brush over loaf.
-
Recipe Notes
- If you do not have an oversized loaf pan, a bundt pan will work just fine.

The quintessential Mexican ‘Conchas’ are a type of sweet roll topped with a cookie crust, shaped for it’s namesake, a seashell. Though its precise origin is not known, all conchas are made from an enriched, yeasted dough similar to brioche or challah. What isn’t really clear, is the point at which a baker decided to cover a small round of sweet dough with a thin layer of cookie dough and then bake it.
Traditionally, the bread roll itself is not flavored, but the cookie dough topping has either a vanilla or chocolate flavor. This topping is an essential element on the sweet roll but the color or the way it is scored or decorated can be done in many different ways. Sometimes, brown or white sugar or even colorful sprinkles are dusted over the topping.
Conchas are sometimes split in half horizontally and filled with anything from whipped cream, custard or even refried beans. Some bakeries have been experimenting with new concha flavors. Cinnamon, walnut, agave nectar with golden raisins and pecan flavor are some that have been introduced.
It seems that conchas are at their best when eaten fresh which makes good sense being made from a yeast dough. It’s going to be interesting to see if I can create some of these little conchas with such a mysterious past.
Print Recipe
Mexican Sweet Buns or 'Conchas'
Votes: 1
Rating: 5
You:
Rate this recipe!
|
|
Votes: 1
Rating: 5
You:
Rate this recipe!
|
Instructions
Sweet Dough
In a dish, add yeast to lukewarm WATER & allow to sit for 5 minutes so yeast can activate. In a large bowl, whisk together lukewarm MILK, sugar, butter, salt & egg. Add yeast mixture & stir to combine. Add flour, about a 1/3 at a time, combining after each addition. Once all the flour has been added, knead on a lightly floured surface for about 2 minutes. The dough should be elastic & slightly sticky but easy to handle.
Place dough in a large greased bowl & turn the dough over to coat. Cover with plastic wrap & allow to rise in a warm place until doubled, about 1 1/2 hours.
Topping
In a bowl, beat the sugar, margarine & vanilla together until light & fluffy. Stir in flour & mix until a thick dough forms. Add additional flour if needed. Divide dough into 3 or 4 even pieces & tint each with food color. If the dough becomes sticky from the food color, add more flour. Cover pieces with plastic wrap until ready to use.
Assembly
When dough is ready, turn out on a lightly floured surface. Divide the dough into 16 even pieces ( press dough into a 14 x 14-inch rectangle; with a sharp knife cut into 4 strips in each direction). Shape each dough piece into a ball by tucking the corners under ( don't roll between your palms, this will just deflate the dough & make it tough). Place dough buns on a large baking sheet that has been lined with parchment paper.
Roll out the topping pieces on a lightly floured surface. Cut into 2 1/2-inch rounds with a cookie cutter or pastry ring. Use the pastry ring to score lines into the dough to resemble the ridges on a seashell (concha).
Transfer the scored topping dough rounds to the buns using an offset spatula. If the topping doesn't adhere naturally, use a pastry brush to apply a few dots of water on the underside before applying to the buns.
Allow the buns to rise for about 40 minutes. Before its time to bake, preheat oven to 375 F. Bake buns for 18-20 minutes or until they are just lightly browned on the bottom.
Recipe Notes
- The topping is made with margarine as it will yield a crunchy & flaky texture.

Quiche has always been an incomparable, one dish meal in my opinion. It’s kind of a whole food with protein, vegetables, dairy and carbohydrates. Quiche’s convenience wins hands down. After mixing the basics … eggs, milk or cream … any ingredients will work from leftovers to freshly cooked. You can use just about anything that you have in the refrigerator.
While some recipes are crust-free, most quiches have some kind of foundation. Potatoes, rice, cauliflower all make nice ‘crust’ options. Quiche makes a great choice for breakfast, lunch or dinner. To keep it interesting, I’m always trying to find ways to tweak the ingredients to make it taste just a bit different each time.
Two of Brion’s favorite foods are broccoli and rice. I decided to make a rice/cheese crust, which I pre-baked so it would get a little crispy. Then, when it bakes with the filling, it holds together quite nicely. The seasoning plays a crucial part in the quiche.
Print Recipe
Shrimp Quiche Casserole
Votes: 1
Rating: 5
You:
Rate this recipe!
|
|
Votes: 1
Rating: 5
You:
Rate this recipe!
|
Instructions
Rice Crust
Preheat oven to 350 F. Blend crust ingredients. Using the back of a large spoon, press into a greased 8-inch round baking dish & bake for 15-20 minutes.
Filling
In a skillet, melt 1 Tbsp butter; saute garlic & mushrooms, stirring for about 5 minutes. Stir in onions, cook for another 2 minutes. Transfer to a large bowl.
Pour 2 cups water into skillet & bring to a simmer. Cook shrimp for about 1 minute or JUST until pink. Reserving 1 cup of the liquid, rinse shrimp under cold running water. Shell & devein shrimp; arrange over rice in baking dish.
Preheat oven to 325 F. (If you have turned it off after pre-baking crust). In a heavy saucepan, melt remaining butter & stir in flour. Cook, stirring, for about 2 minutes, without browning; gradually whisk in reserved liquid & milk. Cook, stirring, for about 20 minutes or until thickened.
Remove from heat; stir in 1/2 cup of the cheese, lemon zest & spices until cheese is melted. Stir into vegetable mixture & pour over shrimp in rice crust.
In a small bowl, stir together remaining 1/4 cup cheese & bread crumbs. Sprinkle evenly over 'quiche'.
Bake for about 40 minutes or until quiche is 'set'. Cut into wedges & serve.

Today, March 28th is the birth date of my mother. Her imprint on my life was huge and I will forever miss her. I read an article recently which I would like to share with you today. It read:
‘I’ve met two kinds of strong women. The first kind is snippy, closed off and only too happy to point out when something isn’t up to their standards. The second kind is like a majestic tree with roots firmly planted and arms open wide. They plant and nurture the seeds of the future and parts of them are passed on through the generations’. My mother was definitely the second type of woman.
When I was thinking about what I wanted to post today, my mind drifted to the recipe archive that lives in my head, eventually making its way to the yeast breads. This is an area my mother had mastered down to a science.
Bread is such a staple food in the diet of most populations and will have featured heavily in most people’s childhoods. This explains why it is one of those smells that evokes such strong memories, particularly of family, childhood and comfort.
I love yeast breads that have spices and dried fruits in them. I recall a combination I had used in another way sometime back so I decided to see if I could make it work in my bread today.
WONDERFUL MEMORIES OF OUR BEAUTIFUL MOTHER!
Print Recipe
Moroccan Spiced Fruit Bread
Votes: 1
Rating: 5
You:
Rate this recipe!
|
|
Votes: 1
Rating: 5
You:
Rate this recipe!
|
Instructions
Fruit
In a small bowl, combine fruit, juice & spices. Set aside to marinate.
Sweet Dough
In a small dish, heat milk to lukewarm. Add yeast & 1 tsp sugar; let sit for 5 minutes to allow yeast to activate. In a large bowl, whisk together remaining 1/4 cup sugar, 1/3 cup melted butter, sour cream & egg. Add yeast mixture & stir to combine.
In another bowl, whisk together flour & salt. Add flour mixture to yeast mixture 1 cup at a time, combining after each addition. Once all flour has been added, knead on a lightly floured surface for about 2 minutes.
Lightly grease the large bowl, place dough in it & cover with plastic wrap & a tea towel. Allow to rest for at least one hour, in a draft-free place until doubled in volume.
Punch dough down & place on a lightly floured surface. With your hand, pat & shape the dough into a rectangle 14 X 12-inches in size & about 1/2-inch thick. Using a ruler & a pastry wheel or sharp knife, cut the rectangle into 5 strips. Cut each strip into diamonds about 2-inches long. With a pastry brush, lightly butter tops of 'diamonds' as well as the bottom & sides of a bundt pan with the melted butter.
Assembly
Arrange a layer of diamonds side by side in a ring on the bottom of the bundt pan. Divide fruit mixture in half & sprinkle half over diamonds in pan. Repeat with another layer of buttered diamonds & sprinkle with remaining fruit. Top with last buttered diamonds, arranging each successive layer so that it fits over the spaces left in the previous ring.
Don't concern that the diamonds do not fill all the available space; as they rise & bake they will expand. Cover bundt pan with plastic wrap & a tea towel & allow to rise in a draft-free place until doubled in volume.
Preheat oven to 350 F. Bake bread for 30-35 minutes, or until golden brown. To test for doneness, turn bread out & rap the bottom sharply with your knuckles. The bread should sound hollow; if it doesn't, return it to the pan & bake for 5-10 minutes longer. When baked, turn out on a wire rack to cool slightly.
Drizzle
In a small bowl, beat together drizzle ingredients until smooth, adding only enough milk to make preferred drizzle consistency. Spread or drizzle over warm fruit bread & sprinkle with reserved orange zest.
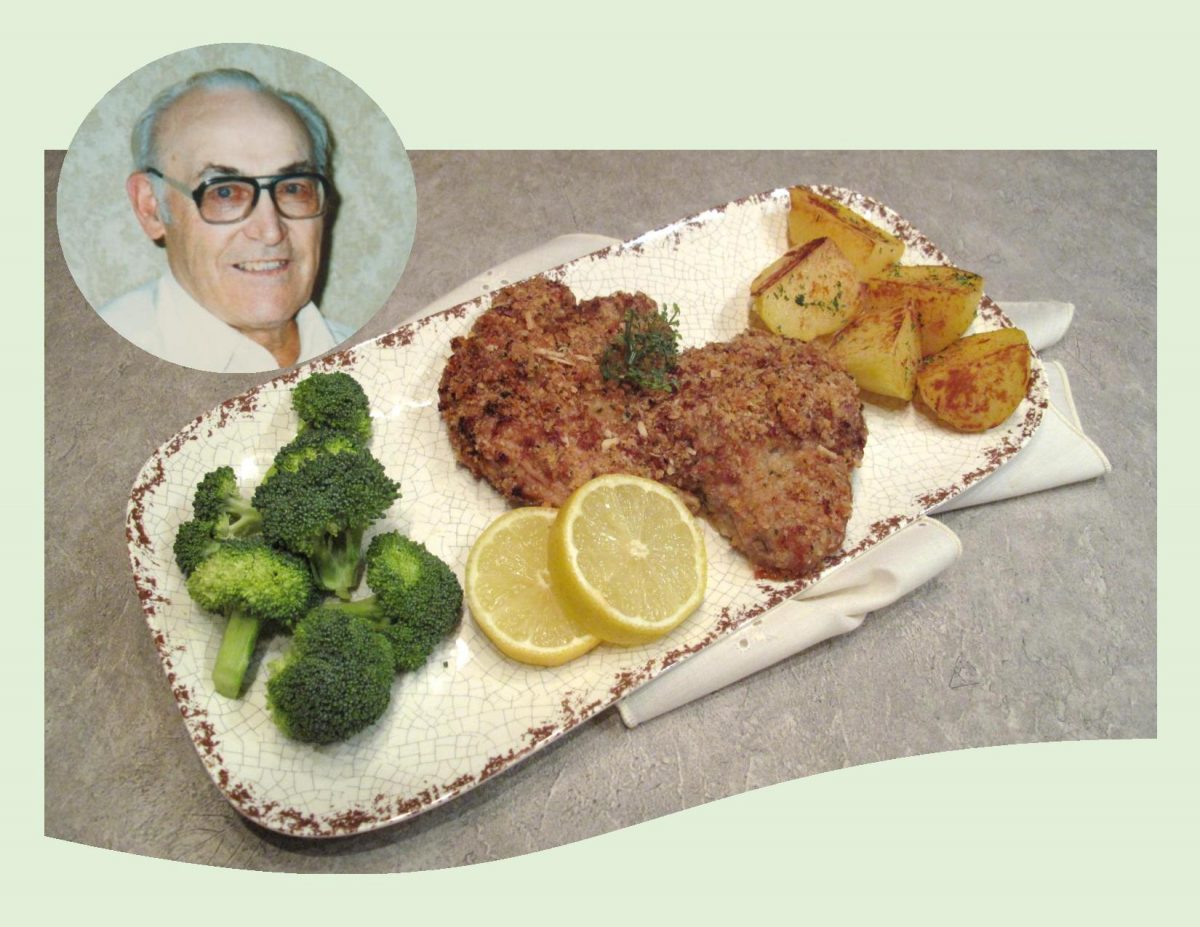
Today, March 21st, our family honors the memory of my father on his birth date. Being of German decent, my dad always enjoyed having meals he recalled from his childhood. My mother excelled at cooking, so I can only imagine that she got the ‘taste of his memory’ perfect. A meal that dad enjoyed but was not one that came up very often at our house, was ‘wiener schnitzel’.
‘Wiener schnitzel’ is actually a geographically protected term in Germany and Austria and can only be made with veal. In researching this subject, I came across at least eleven more versions of schnitzel which still followed the preparation techniques of the original wiener schnitzel. In addition to different types of meat used, a schnitzel can be served with a topping or a filling.
As usual, I’m doing an oven-fried version instead of pan frying in oil or butter. It would be so nice if Brion and I could be sharing this meal with my Mom & Dad today.
Time slips by and life goes on,
But from our hearts your never gone,
We think about you always, we talk about you too,
WE HAVE SO MANY MEMORIES BUT WE WISH WE STILL HAD YOU.
Print Recipe
Wiener Schnitzel
Votes: 1
Rating: 5
You:
Rate this recipe!
|
|
Votes: 1
Rating: 5
You:
Rate this recipe!
|
Instructions
Preheat oven to 425 F. Lightly oil a wire rack & place over a baking sheet.
Place each cutlet between two pieces of plastic wrap & pound with a meat mallet until about 1/4-inch thick.
In a bowl, whisk together Parmesan cheese, eggs, parsley, garlic powder, salt, pepper & milk. Place the flour in a plastic bag & buttered bread crumbs on a plate.
Place one cutlet at a time in the bag with flour; shake to coat. Then dip in egg mixture; covering each. Finally, dip in buttered bread crumbs, coating each side well. Place breaded cutlets onto the prepared rack.
Bake for 15 minutes; flip & bake for another 5 minutes. Check to be sure they are cooked. Serve with lemon slices & your choice of veggies.
Recipe Notes
- Boneless pork chops can be substituted for veal & taste excellent.
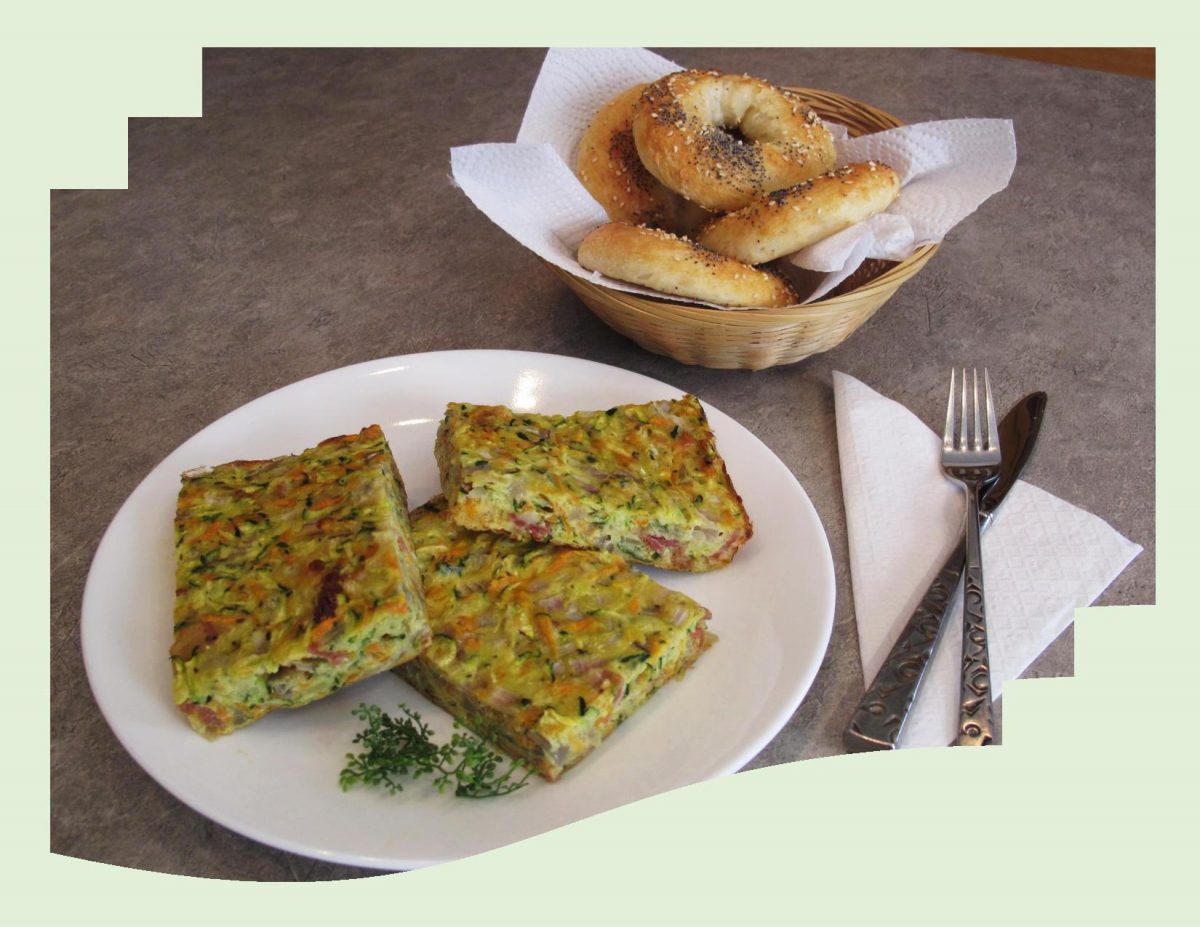
I guess if I were trying to classify this meal, I would put it somewhere between a crustless quiche and a frittata. Sometimes you just put together ingredients you like and it tastes amazing. There’s no incredible back story or cooking revelation, its just turns out to be a great meal.
Quiche and frittata are both egg dishes but they’re not just for breakfast anymore. The difference is the quiche, crustless or not, is made by adding ingredients to a custard base of eggs and heavy cream, milk or half & half that is poured into a baking dish and baked. With frittatas, eggs dominate and little or no cream or milk is used.
Usually they are first cooked in a pan on the top of the stove and then finished in the oven. These vegetable-bacon squares need only to be baked in the oven. For a nice compliment to this meal, I made some quick 5-ingredient bagels … no yeast or boiling required.
Print Recipe
Vegetable-Bacon Squares w/ Baked Bagels
Votes: 1
Rating: 5
You:
Rate this recipe!
|
|
Votes: 1
Rating: 5
You:
Rate this recipe!
|
Instructions
Veg-Bacon Squares
Preheat oven to 325 F. Butter a 9 X 9-inch baking dish; set aside.
In a large bowl, beat eggs until a little bit frothy. Sift in the flour & beat until well combined then whisk in oil. Add zucchini, carrot, onion, bacon & cheese; gently mix to combine.
Pour into prepared baking dish, smooth the top & bake for about 30-35 minutes or until 'set'. Allow to cool slightly before cutting into serving pieces.
Baked Bagels
Preheat oven to 375 F. Place parchment over a wire rack on a baking sheet.
In a bowl, whisk flour, baking powder & salt. Add yogurt & mix with a fork until combined. It should resemble small crumbles. Lightly flour work surface & knead dough a few times until tacky but not sticky. Dough should not stick to your hands at this point.
Divide into 4 equal balls. Roll each ball into 3/4-inch thick ropes & join the ends to form bagels. Top with egg wash & sprinkle with a topping of your choice or just leave plain. Bake on the top rack of the oven for 25 minutes. Let cool at least 15 minutes before cutting.
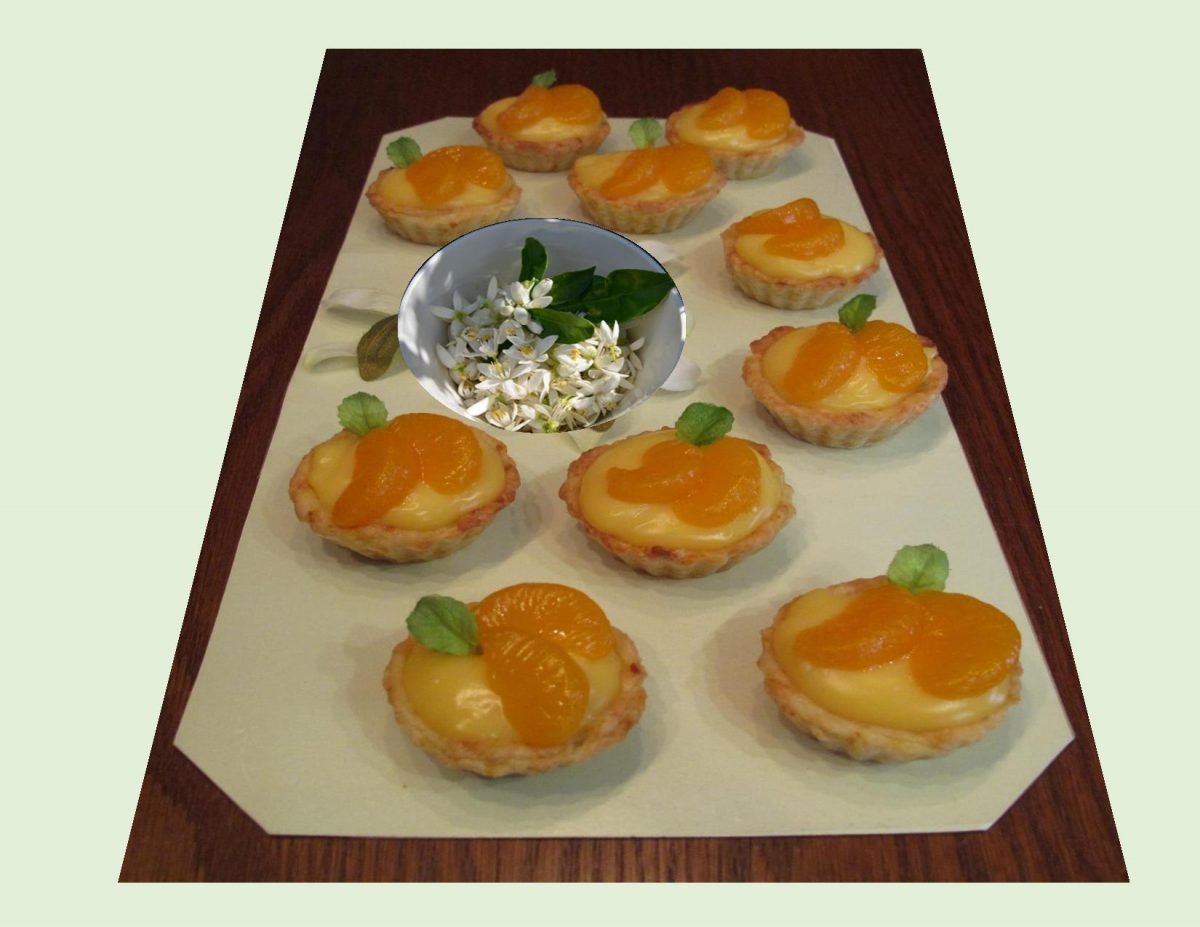
Although mandarin oranges are a traditional holiday food, they sure make a wonderful bit of sunshine for us still in the colder part of our year.
Very often when I go to make something and the recipe calls for orange or lemon zest, its not something I have on hand. I guess its all about thinking ahead and drying the citrus peels when I do have them. There is no magic secret … just time and patience. Wash and dry the fruit, lightly grate off only the top layer of peel. Transfer to a flat dish to dry then store the zest in a glass jar. When it comes time to use, crush some between your fingers before adding it to other ingredients. This will release the citrus essence and flavor.
There is no comparison between artificial flavors and real citrus zest in baked goods. These little mandarin tarts not only use it in the filling but the pastry as well.
There are various other uses for citrus zest such as in poultry marinades, baked into breads or for a splash of flavor in tea. These tarts made such a simple little refreshing dessert.
Print Recipe
Mandarin Orange Tarts
Votes: 4
Rating: 3.75
You:
Rate this recipe!
Ingredients
Mandarin Orange Pastry Cream
Ingredients
Mandarin Orange Pastry Cream
|
Votes: 4
Rating: 3.75
You:
Rate this recipe!
|
Instructions
Orange Pastry
-
In a bowl, whisk flour, sugar & zest. Add butter & blend with pastry blender until mixture resembles coarse meal. Gradually add the orange juice, using enough to form a dough that cleans the sides of the bowl.
Roll out dough on a lightly floured work surface. Using a 2 1/2-inch cutter, make 12 circles & fit into tart pan cups. Line the pastry with foil & add pastry weights. Bake about 10-15 minutes. Remove weights & foil & bake 10 minutes longer until pastry is golden.
Mandarin Orange Pastry Cream
In a bowl, whisk together egg yolks, sugar & cornstarch until it turns pale yellow.
In a saucepan, combine milk & orange zest; bring to a boil. Remove from heat, slowly add a egg mixture a little at a time, whisking well until fully incorporated.
Return mixture to heat & keep whisking over medium heat until it thickens. Stir in orange juice. Transfer to a bowl & cover with plastic wrap, making sure the wrap touches the surface of the pastry cream. When it comes to room temperature, refrigerate.
When cooled & you are ready to use the pastry cream, whisk with an electric mixer for 15-20 seconds to a smooth & spreadable texture. Spoon filling into baked tart shells. Top each with a couple of mandarin orange slices. Brush oranges with a bit of apricot jelly.
Recipe Notes
- If pastry weights are not available, reverse you tart pan & place pastry rounds over the bottoms of tart cups to bake.
- If you use canned mandarins for decoration, drain & blot on paper towel to remove excess liquid.

Homemade ice cream …the ultimate old fashioned treat has a very worldly history that stretches around the globe.
When I was growing up on the farm, we had one of those ice cream makers with a hand crank that featured an inner canister and churn. The canister and churn held the ice cream custard, which was placed in a bucket that salt and ice or snow could be added to. My siblings and I would take turns churning until the custard magically transformed into the heavenly frozen dessert.
Ice cream is the perfect treat for any season. In the summer you can cool off by enjoying a scoop of ice cream and in the winter you can pair it with a warm dessert. Let’s face it, if you are an ice cream lover, the possibilities are endless.
The first ice cream sandwich was basic: cold, creamy with a little crunch on either side. The purpose was to make the ice cream better than if it stood alone. My original idea for today’s blog dessert was to replicate the flavors of the classic ‘Bananas Foster’ dessert of the 50’s. The ingredients in it were very simple, such as butter, cinnamon, brown sugar, vanilla & rum. The end result today became a combo of caramelized bananas & banana cake turned ice cream sandwich!
My inherited love for ice cream has never left me to this day and I might add, Brion has the same ‘affliction’ (which doesn’t help).
Print Recipe
Banana Ice Cream Sandwich Cake
Votes: 1
Rating: 5
You:
Rate this recipe!
|
|
Votes: 1
Rating: 5
You:
Rate this recipe!
|
Instructions
Caramelized Bananas
In a microwave safe bowl, melt butter then stir in brown sugar. Divide evenly between 6 custard cups; slice the 3 ripe bananas & place over sugar/butter mixture. Set on a baking sheet.
Banana Cake
Preheat oven to 350 F. In a bowl, whisk together flour, baking powder, baking soda, cinnamon & salt. In a separate large bowl, cream together butter & sugar; add eggs, Greek yogurt, mashed bananas & extracts & combine. Slowly add dry ingredient mixture to wet batter & mix only until combined.
Pour the batter over the caramelized bananas in the custard cups. Bake for 30 minutes until a toothpick inserted comes out clean.
Let cakelets cool in custard cups slightly, then invert on a plate. You may have to gently coax the caramelized bananas to loosen with a spatula. Slice each cake half so you can add a layer of vanilla ice cream to the bottom halves. Top each with the other half of the banana cake.
-


