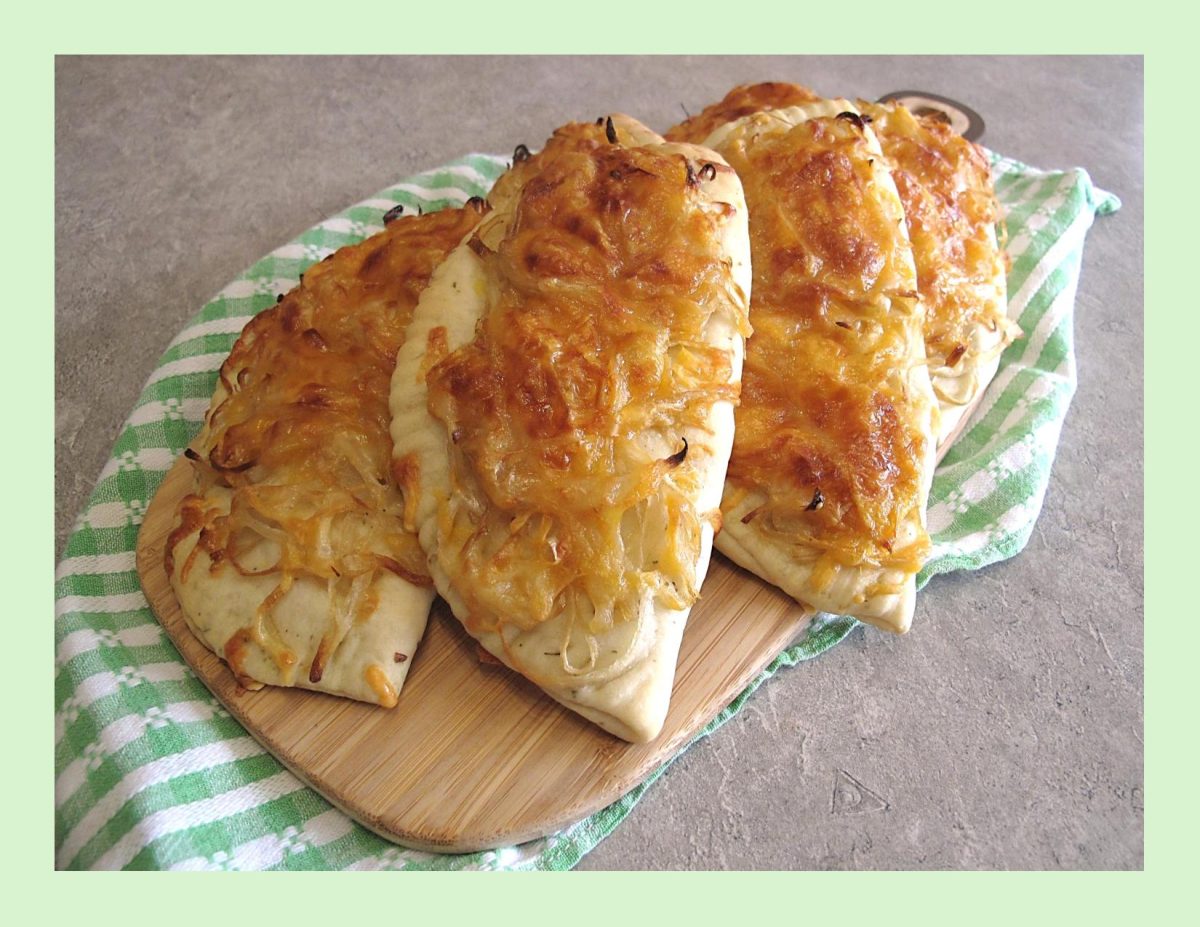
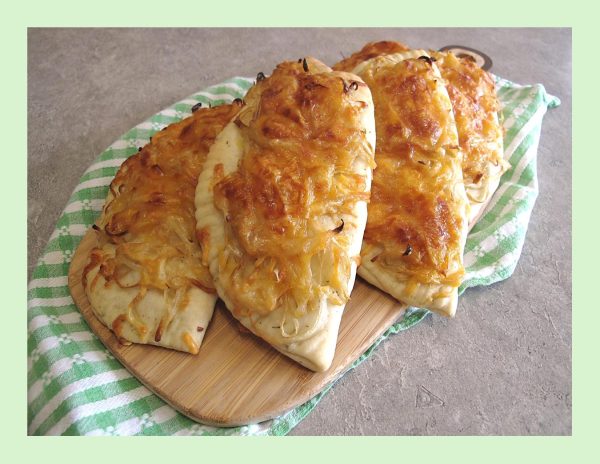
Cheesy Onion & Chicken Turnovers

Turnovers are a tasty handheld pastry stuffed with a variety of sweet or savory fillings. Depending on where you are in the world, you might know turnovers by another name. It’s a calzone in Italy, an empanada in Latin America, a pasty in England, a patty in Jamaica and a hand pie in North America.

Whether they’re made with pastry or yeast dough, these tasty morsels get their name from the folding technique used to enclose the fillings. They can be fried or baked, and the result is a convenient self-contained meal or snack.

While store-bought turnovers are readily available, there’s something uniquely special about crafting your own savory ‘pies’ at home. The aroma that fills the kitchen as the turnovers bake in the oven, the satisfaction of creating a perfectly flaky crust, and the freedom to customize the fillings to suit your taste – these are the joys that make them truly special.

During the summer months I like to have a big variety of savory turnovers in the freezer (already baked). There are so many times when you are too busy to make lunch and there they are — ready to heat and eat!

These cheesy onion and chicken turnovers were inspired by some Boursin cheese with cranberries & pepper I had waiting to be used. The total result has made them keepers!
Print Recipe
Cheesy Onion & Chicken Turnovers
Votes: 1
Rating: 5
You:
Rate this recipe!
Servings
TURNOVERS
Ingredients
Servings
TURNOVERS
Ingredients
Votes: 1
Rating: 5
You:
Rate this recipe!
Instructions
Dough
  1. Cook potato, peel & mash. In a bowl, combine yeast with lukewarm water. Allow to stand for about 3 minutes until foamy; add butter, salt, Italian seasoning, sour cream & potato & mix well.
  2. Stir in flour, one cup at a time. When dough is completely blended, turn onto a lightly floured work surface. Knead dough about 10 minutes, until smooth & elastic.
  3. Place dough in a greased bowl, cover with plastic wrap & allow to rise in a draft free place until doubled in bulk, about 1 hour.
Topping & Fillings
  1. In a skillet, heat 1 Tbsp oil. Sauté onion until caramelized & tender. In a bowl, combine shredded chicken with 1/2 of the Boursin cheese. Grate cheddar cheese.
Assembly
  1. Divide dough into 6 equal pieces & shape each piece into a round ball. On a lightly oiled surface, flatten each ball with a rolling pin to a 6-inch diameter. Spread each piece of dough with some of the remaining Boursin cheese.
  2. Divide chicken/Boursin mixture between the 6 turnovers, laying it to one side leaving a half inch border. Fold each one in half to form turnovers.
  3. Line a baking sheet with parchment paper. Place turnovers on baking sheet giving them space to rise a bit. Top each one with some caramelized onions & cheese. Cover turnovers with a tea towel & place in a draft free place to rise for about 15 minutes.
  4. Preheat oven to 350 F.
  5. Bake turnovers until a nice golden brown color. Remove from oven & allow to cool on a wire rack.

Chocolate Sour Cherry Donuts w/ Amaretto Glaze

Fall is that time of year that we can enjoy some more of those wonderful cherries from our own little tree. The fact that we live in the northern part of Alberta, Canada and can eat cherries fresh from our tree is such a bonus.

Cherries are not native to North America, in fact both the sweet and sour varieties were brought to Canada and the U.S. in the 1600s by French and English settlers. The plants, especially the sour varieties, adapted well to our climate.
Sour cherries are a hardier plant than the sweet variety and are well-suited to growing in slightly cooler climates.
Even though these cherries are classed as a semi-sweet variety, there are still endless ways to enjoy them.

Unlike many fruits, which are at their best uncooked, sour cherries need a bit of sweetness and heat to reach their peak. Tart as vinegar, with a faint perfume of fresh fruit when raw, they need just a touch of sugar, then start them cooking and watch the tartness blossom. The aroma doesn’t fade, as one would expect; rather, the longer they cook the more it gains body and roundness, until the cherry fragrance becomes overwhelming, the fruit flavor more pronounced and the overall results unforgettable.

Most commercially produced cherry varieties, such as Bing do not cook well. These ‘sweet cherries’ may be wonderful eaten out of hand or tossed in a fruit salad, but they make bland preserves and flat, watery pies.

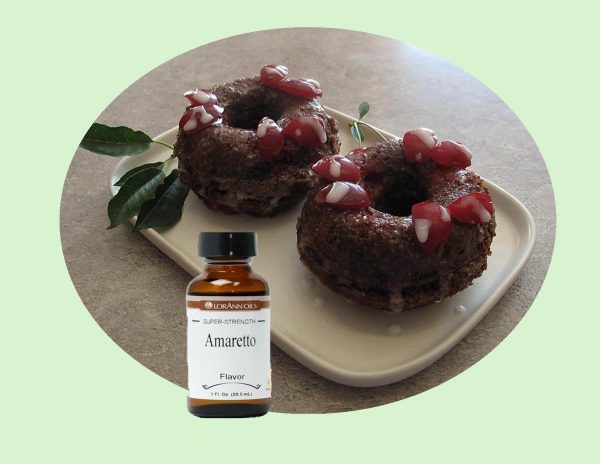
The tart bite of a sour cherry is glorified when transformed into any type of sweet preserve and can be used to good advantage in savory sauces where tartness is desirable. Chocolate and cherries are a classic marriage, so don’t hesitate to toss sour cherries into your favorite chocolate cake or brownie recipe as I did here.

Print Recipe
Chocolate Sour Cherry Donuts w/ Amaretto Glaze
Votes: 1
Rating: 5
You:
Rate this recipe!
Servings
Ingredients
Amaretto Glaze
Servings
Ingredients
Amaretto Glaze
Votes: 1
Rating: 5
You:
Rate this recipe!
Instructions
Donuts
  1. Preheat oven to 350 F. Spray a 6 cup donut pan with baking spray. Set aside
  2. In a large bowl, whisk the egg & sugars until well incorporated. Add in the milk, sour cream, melted butter & vanilla extract. Whisk until well combined.
  3. Using a sieve, sift in the flour, cocoa powder, baking soda & salt. Gently fold the dry ingredients into the wet mixture. The donut batter will be pretty thick at this point.
  4. Transfer the donut batter into a piping bag. Fill the donut cavities with chocolate cake batter about 1/4 full then top each with some cherries. Continue to pipe remaining cake batter on top of cherries on each donut. When baked, the donuts will have a cherry center.
  5. Bake the donuts for 17-20 minutes or until a toothpick inserted in the middle comes out clean. Let the baked donuts cool in the baking pan for 10 minutes then transfer them to a cooling rack. Let them cool completely before glazing.
Amaretto Glaze
  1. Whisk together glaze ingredients until smooth & pourable. Drizzle over cooled donuts & top with a few more cherry pieces if you wish.
Recipe Notes
  • Lor Ann  AMARETTO FLAVOR is sweet, with a slight cherry taste and a hint of almond that adds an extra layer of flavor to the donuts.


Scallop & Zucchini Quiche

While there’s still time to enjoy summer, it’s definitely prime time for eating some satisfying summer squash.

Zucchini, also known as courgetti, belongs to the same family as pumpkin. The most widely known version is green, though golden varieties exist too, which are yellow or orange.

While zucchini is treated as a vegetable in the culinary sphere, it’s technically the fruit of the zucchini flower (which can also be consumed).

Scallops are buttery, delicious, and easily likeable. This special kind of seafood has won our hearts in the casual and fine dining setting. We continue to ask ourselves how we can enhance the flavor of this seafood treat even more. Since scallops are briny and sweet with a relatively subtle flavor profile, they’ll complement everything from crunchy sweet corn to zippy citrus salads and summer or winter squash.

They’re one of the more sustainably sourced seafood because they are typically harvested from places, they are endemic to. This means that scallops don’t feed off other marine life unnaturally and they’re not placed in areas foreign to them.

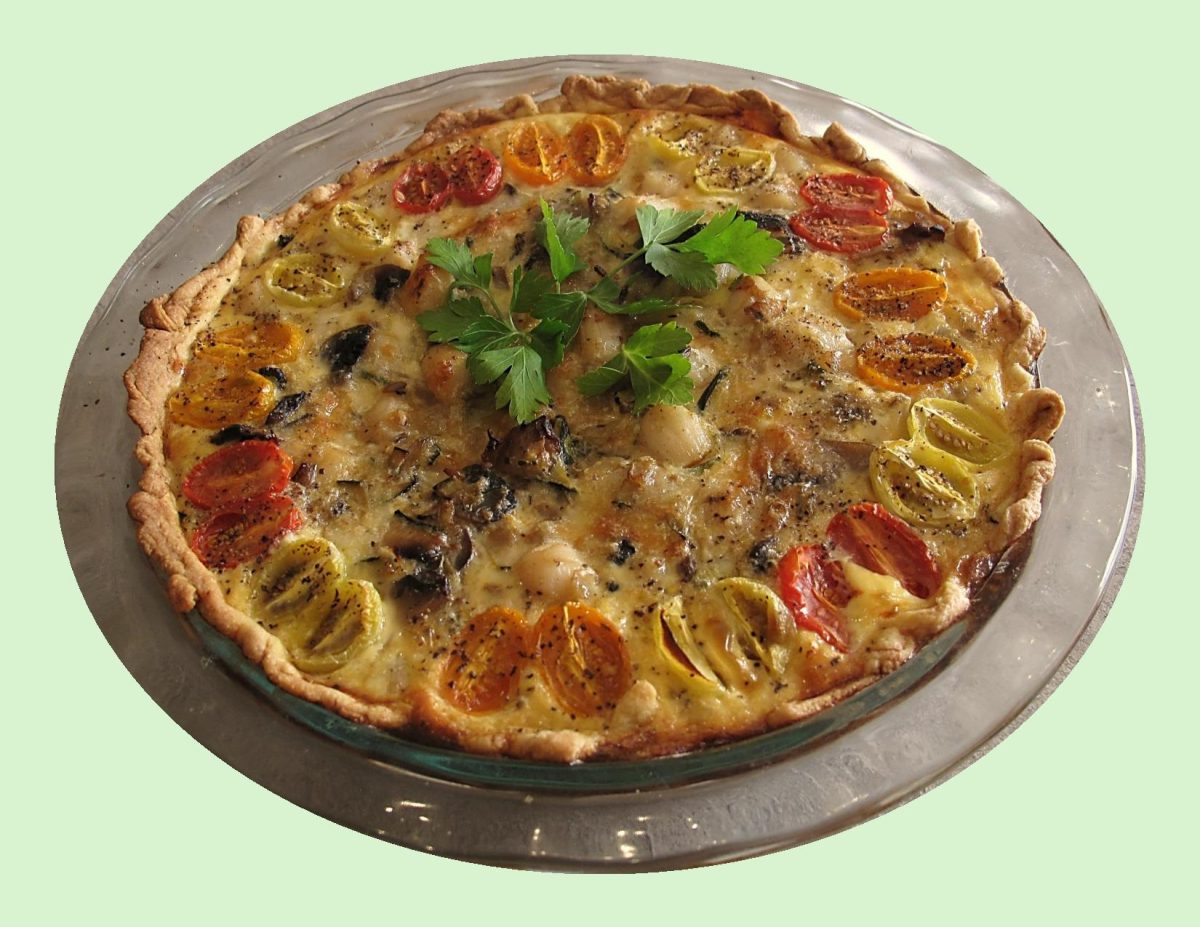
I think you will find this scallop and zucchini quiche is nice served as a hot or cold summer entrée.

Print Recipe
Scallop & Zucchini Quiche
Votes: 1
Rating: 5
You:
Rate this recipe!
Servings
Ingredients
Cornmeal Pastry
Servings
Ingredients
Cornmeal Pastry
Votes: 1
Rating: 5
You:
Rate this recipe!
Instructions
Pastry
  1. In a small bowl, combine sour cream & ice water; set aside. In a large bowl, whisk together flour, cornmeal, sugar & salt. Using a pastry blender or fingertips, cut in butter until mixture resembles both coarse crumbs & small peas. Sprinkle the cold sour cream mixture over dough, 1 Tbsp at a time, tossing with a fork to evenly distribute it.
  2. After you have added all the sour cream mixture, dough should be moist enough to stick together when pressed; if not add additional cold water, 1 tsp at a time. DO NOT overwork dough. Press dough into a disk & wrap in plastic wrap. Refrigerate for at least 2 hours.
Filling
  1. In a saucepan, fry bacon until cooked but not real crisp. Remove bacon & place on paper towel to drain. In the same saucepan, sauté onions, zucchini mushrooms & garlic in remaining bacon drippings until tender but not over cooked. Add scallops during the last few minutes of sautéing. Remove from pan & combine with bacon; cool slightly.
  2. Preheat oven to 350 F.
  3. Grate cheese. Whisk together eggs, milk, Old Bay seasoning, salt & pepper. Halve the cherry tomatoes.
  4. Roll out pastry to fit a 9-inche quiche pan. Line the crust with parchment paper and fill with uncooked beans or rice. Bake for 10 minutes, then remove from the oven, remove the beans (or rice) & paper. Sprinkle half of the grated cheddar on the quiche shell. Place filling mixture on top; form a ring of tomato halves around the outside edge. Sprinkle with remaining cheese then pour milk mixture over the quiche.
  5. Sprinkle half of the grated cheddar on the quiche shell. Place filling mixture on top; form a ring of tomato halves around the outside edge. Sprinkle with remaining cheese then pour milk mixture over the quiche.
  6. Bake for about 45 minutes or until set.

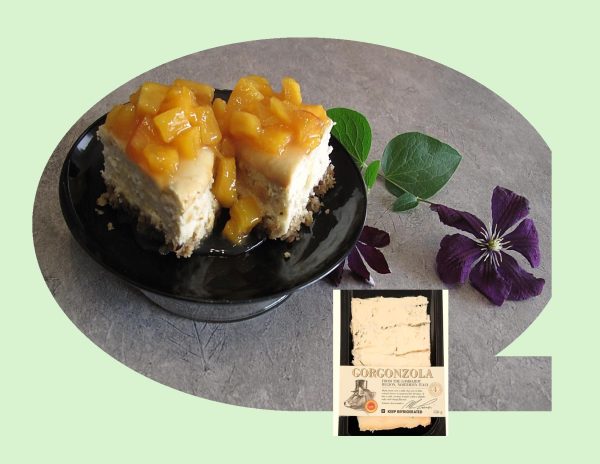
Savory Gorgonzola Cheesecake w/ Peaches & Hemp Heart Granola Crust

Cheese might not be the first thing that comes to mind if you’re looking for a satisfying, easy, elegant way to end your meal, but it makes for a fabulous dessert. Europeans have long served dessert cheese, either after the salad or after the main course.

While a sweet cheesecake can be a thing of great joy and incredibly versatile; there are various regional styles, easy no-bake versions for when you don’t want to turn on the oven, and many ways to make it suited to all seasons by switching up the flavor. But there’s a whole other avenue to explore too: savory cheesecakes, a great appetizer option for any party, or even weekday dinner for your family. If it sounds a little weird, think of it like a cheesier, less eggy version of quiche.

As with sweet cheesecakes, there are both baked and no-bake versions of savory cheesecake, some with crusts and some without, but crusted and baked seems to be the most prevalent sort, and the vast majority of those follow a similar formula.

Brion & I have never been much for ‘blue cheese’ but when it comes to Gorgonzola, that’s a whole different story. Gorgonzola is a type of blue cheese produced in Northern Italy. It’s creamy and crumbly and has streaks of blue mold that give it a strong, piquant flavor. This savory Gorgonzola cheesecake could be served as a cheese or dessert course with fresh fruit to end a nice summer evening meal.  A simple recipe with a taste that lingers long in the memory.

Print Recipe
Savory Gorgonzola Cheesecake w/ Peaches & Hemp Heart Granola Crust
Votes: 1
Rating: 5
You:
Rate this recipe!
Servings
Ingredients
Servings
Ingredients
Votes: 1
Rating: 5
You:
Rate this recipe!
Instructions
Base
  1. Line 2 - 5-inch springform pans with parchment paper. Place granola in a food processor; process until fine crumbs form.
  2. In a bowl, mix crumbs & melted butter until well combined. Divide crumb mixture between the two lined pans; press into the bottom to form the crust. Set aside.
Peach Topping
  1. Add peaches to a medium saucepan over medium-high heat; stir in lemon juice, water & cornstarch. Bring mixture to a rolling boil. Stir in sugar. Return to a gentle boil for 1-2 minutes, stirring frequently, until peaches thicken slightly. Remove from heat & cool completely. This can be prepared after you bake the cheesecake if you wish.
Cheesecake
  1. Preheat oven to 300 F.
  2. Using an electric mixer, beat cream cheese & Gorgonzola in a bowl until light & fluffy, about 5 minutes. Add sour cream, honey, salt & pepper; beat until blended. Add eggs one at a time, mixing well after each addition. Divide cheesecake batter, pouring over the granola base in each of the springform pans.
  3. Bake for 1 hour & 20 minutes or until set & lightly browned.
  4. Remove cheesecake from oven & cool to room temperature. Cover with plastic wrap & refrigerate for 4 hours or overnight. Spoon peach topping over cheesecake, slice & serve.
Recipe Notes
  • If you wish to make one 9-inch cheesecake, double ingredients but only use 3 large eggs. You should have enough peach topping for a 9-inch without having to double that recipe.
  • For this recipe I chose not to prebake the hemp heart base but If you wish to do so there is no problem in with that.

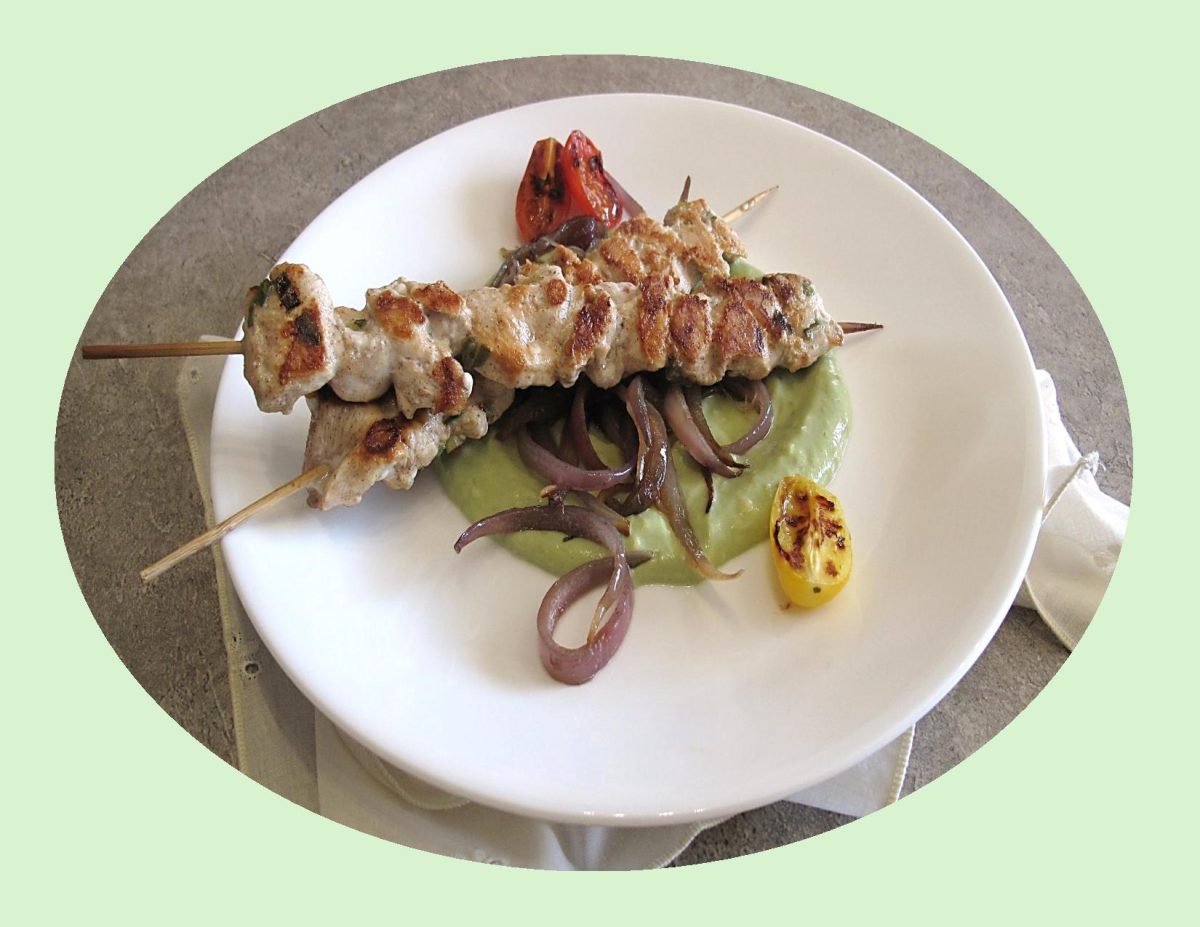
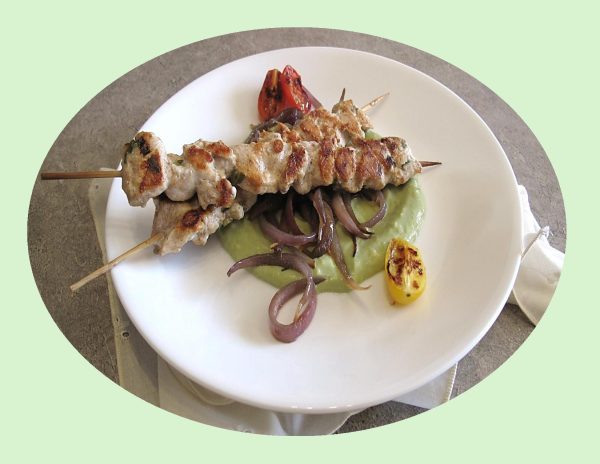
Spiced Chicken Skewers on Avocado Puree

If you’re a meat lover, chances are that you are partial to the taste of good skewers every now and then.  Of course, people enjoy numerous types of food served on sticks due to the convenience and ease of eating. However, meat skewers are the type of skewered food that started this trend and continue to be a popular way of enjoying a delicious cut of meat in a unique way. After all, they’re economical, versatile, infinitely customizable, and quick cooking, making them ideal for not only summer BBQ but frugal winter grillers who want to limit their exposure to frigid weather and high prices.

In modern times, skewers are used in variety of ways: for candies and other sweet products, to garnish cocktails, and many other types of street-food that are sold ‘on a stick’.

Materials from which modern skewers are made, range from the traditional wood and bamboo to the glass, metal and other decorative materials.

These chicken skewers are not too spicy and have a variety of vibrant flavors going on like coriander, ginger and mustard. If you like avocado as much as we do then you’ll love the puree that goes alongside the chicken. Yum!

Print Recipe
Spiced Chicken Skewers on Avocado Puree
Instructions
Marinade
  1. In a skillet, gently heat the spices for 1 minute or until lightly browned. Transfer to a large bowl. Add the remaining ingredients & stir to combine.
Skewers
  1. Add the chicken to the marinade & coat well. Thread the chicken onto 12 skewers & place in a dish. Cover & refrigerate for 1 hour. Preheat the grill, setting the burners on high. Oil the grate.
Avocado Puree
  1. In a small food processor, purée the avocado with the sour cream & lime juice until smooth. Season with salt & pepper. Set aside in a bowl & cover with plastic wrap directly on the surface.
  2. Grill the skewers for 5 minutes on each side or until the chicken is no longer pink.
Serving
  1. In the center of each serving plate, spread a dollop of the avocado purée. Top with some caramelized red onions & roasted tomatoes. Finish with 2 chicken skewers.

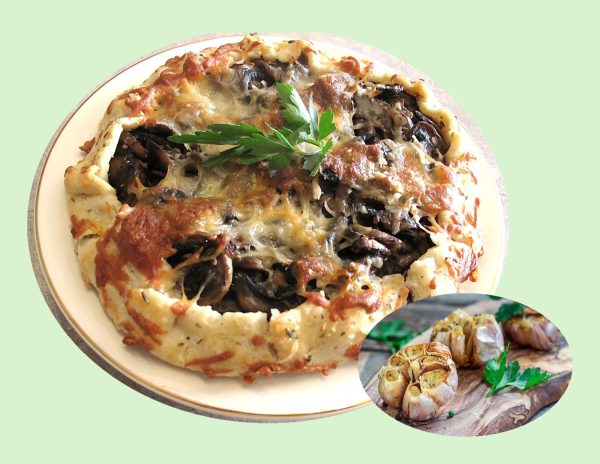
Mushroom Galette w/ Roasted Garlic & Thyme

Roasted garlic is the secret weapon to so many great dishes. Whole heads of garlic, roasted in olive oil and a bit of water until they’re as tender as warm butter, became enormously popular in the 1980s. Before long, roasted garlic began appearing in all sorts of foods, from spaghetti and meatballs to pizza.

As far as near-magical transformations go, roasted garlic should get a standing ovation. Through the simple alchemy of hot oven heat, garlic starts off raw and crunchy and astringent, and it emerges soft and caramelized with a gentler flavor that borders on sweetness. It’s like night and day.

Roasting processed ‘naked’ garlic cloves doesn’t work as well because they have no skin to protect them and so they can become quite tough.  The creamy consistency produced by this roasted garlic recipe relies on the skin acting like baking paper.

This galette is amazing as roasted mushrooms always produce great flavor and even more so when you squeeze and smash roasted garlic into the mix.

Print Recipe
Mushroom Galette w/ Roasted Garlic & Thyme
Votes: 1
Rating: 5
You:
Rate this recipe!
Servings
SERVINGS
Ingredients
Cornmeal Pastry
Servings
SERVINGS
Ingredients
Cornmeal Pastry
Votes: 1
Rating: 5
You:
Rate this recipe!
Instructions
Pastry
  1. In a small bowl, combine sour cream & ice water; set aside. In a large bowl, whisk together flour, cornmeal, sugar & salt. Using a pastry blender or fingertips, cut in butter until mixture resembles both coarse crumbs & small peas. Sprinkle the cold sour cream mixture over dough, 1 Tbsp at a time, tossing with a fork to evenly distribute it.
  2. After you have added all the sour cream mixture, dough should be moist enough to stick together when pressed; if not add additional cold water, 1 tsp at a time. DO NOT overwork dough. Press dough into 2 disks & wrap in plastic wrap. Refrigerate for at least 2 hours.
Filling
  1. Preheat oven to 350 F.
  2. Pre-roast your garlic ahead of time by cutting off the top portion of a whole bulb, placing it in tin foil & liberally covering it with olive oil, some salt & pepper & a couple of thyme sprigs. Wrap it up and place in the oven for around 30- 40 minutes or until golden & soft.
  3. Raise oven temperature to 400 F.
  4. Place mushrooms on a baking sheet. Sprinkle with thyme leaves & drizzle with oil. Pre-roast mushrooms until all the moisture is out and they start to caramelize. When mushrooms are done & while the baking sheet is still hot, squeeze & smash in the whole bulb of roasted garlic, tossing gently until incorporated, season with salt & pepper to taste.
  5. On a piece of parchment that will fit a baking sheet, roll out your pastry to around 12 inches, then place the whole thing onto a rimmed baking sheet. Sprinkle the cheese mixture on the bottom of the pastry leaving an inch and a half border all around, reserve 2 tablespoons of the cheese mixture to dot on top of galette.
  6. Spread the mushrooms all around the top of the cheese mixture, covering it completely. Fold up the edges of the dough all around the filling. Put reserved tablespoons of cheese on top of mushrooms dotting it in sections.
  7. Whisk egg then brush the folded up edge with it. Sprinkle some thyme on the crust edge along with grated parmesan and black pepper. Bake galette for around 30 to 40 minutes or until deep golden on bottom and crust.
  8. Serve warm or at room temperature.

Salmon Wellington

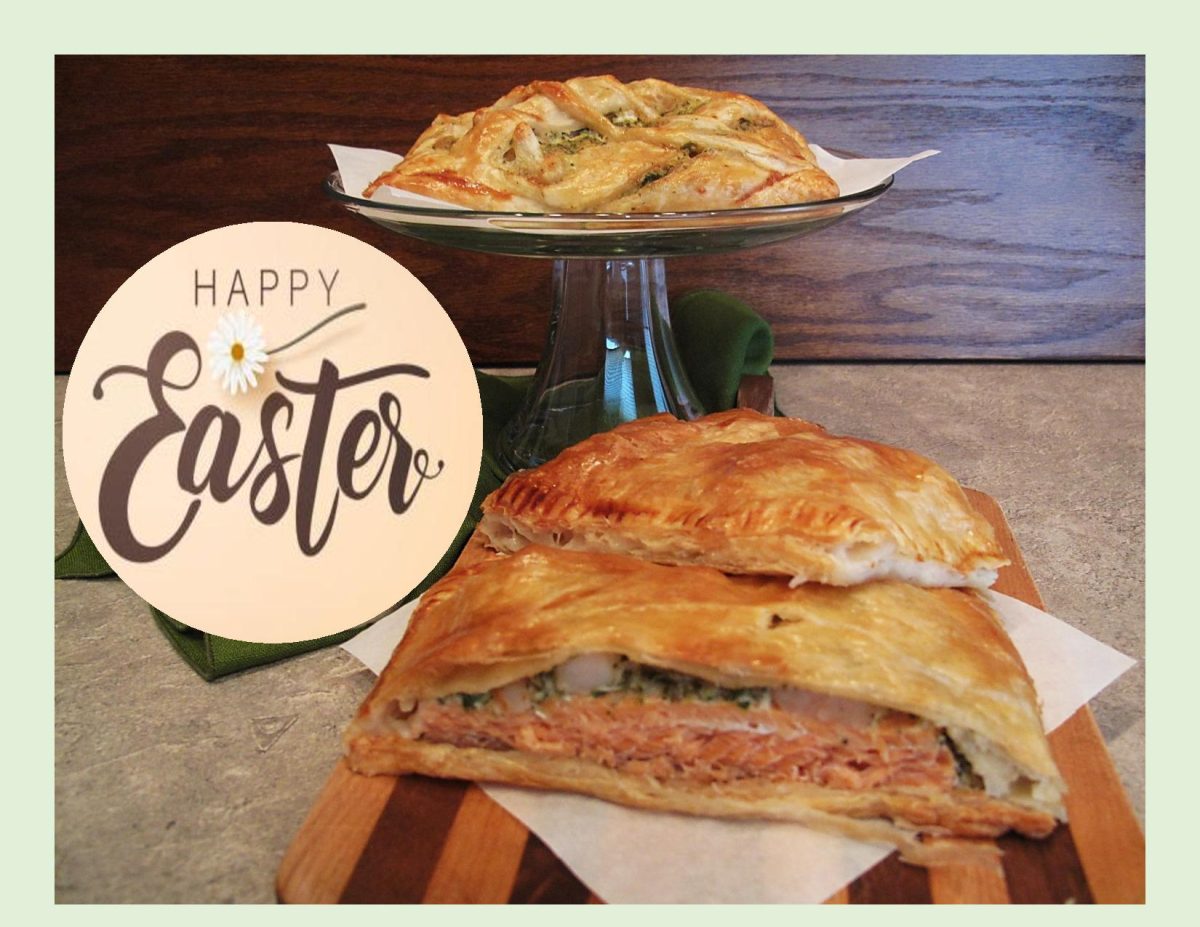
HAPPY EASTER!

Easter is here and Salmon Wellington is the perfect holiday meal! The richness of the mushroom duxelles, pairs perfectly with the hearty salmon fish fillet and scallops and the buttery puff pastry just takes this dish to the next level.

Mushroom duxelles is an intensely flavored combination of finely chopped mushrooms, shallots, and fresh herbs such as thyme or parsley that are slowly cooked to a paste-like consistency. French in origin and named after the marquis d’Uxelles, this mushroom condiment is traditionally used in the preparation of beef Wellington, but it can also be used to flavor soups and sauces as well as to fill omelets and ravioli. 

Wellington fillet as we know it today was first made famous by the American chef and star Julia Child, who introduced the filet de bśuf en croûte, the French crust beef fillet, as ‘Filet of Wellington Beef’ during her TV show ‘The French Chef’, on the 1965 New Year’s Eve episode. From that day on, the recipe began to appear in various recreational circles in North America, as well as being taken up in the most important cookbooks.

A Salmon Wellington is a copycat version of the popular English ‘Beef Wellington’. Because puff pastry takes about 20 minutes to bake (salmon takes 12-15 minutes), keep the salmon refrigerated until you’re ready to assemble. Starting with cold salmon ensures it doesn’t overcook. To prevent the bottom from getting soggy, pat dry the salmon thoroughly before assembling. Also, make sure to cut slits on the puff pastry once assembled to allow the steam to escape. Don’t open the oven until ready since puff pastry needs full consistent heat to bake into flaky layers.

You’ll be so impressed when it’s time to take it out of the oven because it just looks amazing. However, you’ll be more impressed with how it tastes. Just like an elegant and flavorful fish pie!

Print Recipe
Salmon Wellington
Votes: 1
Rating: 5
You:
Rate this recipe!
Course Main Dish
Cuisine French
Servings
SERVINGS
Votes: 1
Rating: 5
You:
Rate this recipe!
Instructions
Mushroom Duxelles
  1. In a food processor, pulse the mushrooms to a roughly diced consistency,15-20 seconds. In a saucepan, melt 2 Tbsp butter over medium-high heat. Add mushrooms, a heavy pinch of salt & pepper, shallots, garlic, rosemary & thyme. Sauté until moisture from the mushrooms has evaporated, about 15 minutes. Transfer to a bowl & set aside.
Scallop Filling
  1. In a small bowl, combine the scallops (or shrimp), cream, onions, parsley, dill, garlic, pesto, salt & pepper. In another small bowl, beat egg white on medium speed until soft peaks form; fold into scallop mixture.
Assembly
  1. Preheat oven to 400 F. Line a 15 x 10 x 1-inch baking sheet with parchment paper.
  2. On a lightly floured surface, roll each pastry sheet into a 12 x 10-inch rectangle. Cut each sheet into FOUR- 6 x 5-inch rectangles. Divide mushroom mixture evenly & spread over 4 pieces of pastry leaving a 1/2-inch border.
  3. Center the salmon pieces on top. Next, top each salmon piece with a quarter of the scallop filling.
  4. Top each with a pastry rectangle & crimp to seal. With a sharp knife, cut several slits in the top to let steam escape. Place on the baking sheet & brush with egg wash. Bake for 20-25 minutes or until a thermometer reads 160 F.
Dill Cream Sauce
  1. While salmon is baking, mix all sauce ingredients & refrigerate until serving time.

Banana Cream Pie Cookie Cups

It’s hard to pin down the origin of banana cream pie, but it seems adding bananas to the pie happened around the end of the 19th century, when bananas went from exotic to commonplace. Until then, most North Americans have never seen, never mind eaten, a banana.

The turning point in the banana business came with technological advances in transportation and refrigeration. Steamships and railroad cars brought the fruit to market faster, and refrigeration slowed the ripening process. The combination was a bonanza for the industry.

One of the earliest known published recipes for banana cream pie called for sliced bananas and powdered sugar placed in a pre-baked pie shell. The ‘Woman’s Exchange Cook Book’ from 1901 advises cooks to then put the filled pie in the oven for a few minutes and then remove it once the bananas have been softened. After the pie is removed from the oven, the cookbook instructs the cook to cover the filling with whipped cream and to flavor it with lemon juice.

A recipe published just five years later in ‘The Blue-Ribbon Cookbook’ provided a banana and custard filling, but the two were not blended together into today’s familiar, creamy banana filling. Instead, sliced bananas lined the bottom of the crust, and the custard was poured over it. By 1950 we get a version covered with whipped cream and toasted coconut.

An old fashioned dessert , but one of the most comforting treats, banana cream pie offers a rich, sweet and velvety filling. If you like bananas like I do, it’s one of those desserts where you put a spoonful in your mouth and can’t help but lean back and close your eyes as you savor the buttery crust and creamy filling.

Print Recipe
Banana Cream Pie Cookie Cups
Votes: 1
Rating: 5
You:
Rate this recipe!
Servings
Ingredients
Banana Cream Mousse Filling
Servings
Ingredients
Banana Cream Mousse Filling
Votes: 1
Rating: 5
You:
Rate this recipe!
Instructions
Base
  1. Preheat oven to 350° F. Line 12 muffin tins with paper cups.
  2. Use a food processor to grind gingersnap cookies into a fine crumb. Melt butter in a microwave-safe bowl until melted. Combine melted butter with cookie crumbs and stir until there are no dry crumbs left. Divide ginger snap crumbs between the 12 muffin cups. Press down with a spoon or tart shaper.
Banana Cream Mousse Filling
  1. While the cookie cups are cooling, prepare the banana cream mousse filling. Whisk together the box of dry pudding mix and the milk. Add in the whipped topping and stir GENTLY until combined. Transfer to a pastry bag or a zip lock bag and store in the fridge until the cookies are fully cool.
  2. Take cookie cups out of muffin tin. Pipe banana cream mousse into each cup and top with a slice of banana. Sprinkle with a small amount of gingersnap cookie crumbles.
  3. Store in the refrigerator.

Adzuki Sweet Red Bean Scones

I have made all sorts of scones in my life. On the blog I have posted at least twenty different kinds using various fruits, flours and spices. Just recently, I became interested in the sweetened adzuki red bean paste.

Red bean paste, also known as ‘Anko’ in Japanese, is a popular ingredient used in many traditional Asian dishes. It is made from adzuki red beans that have been boiled, mashed, and sweetened with sugar and smoothed by oil, butter or shortening. The texture of red bean paste can range from thick and smooth to slightly chunky. Commercial ready-to-use red bean paste is available in most Asian stores and is super convenient. If you have the time and prefer to make your own, look for canned, ready-to-eat adzuki beans which allow you to skip the lengthy process of cooking the beans and go straight to the last step of mashing the paste. A wonderful time saver.

There are two most common types of red bean paste:

  • Tsubuan – the paste has a chunky texture with bean shapes still intact.
  • Koshian – the paste has a fine, smooth texture.

With my scones today, I divided the scone batter in half, topped it with red bean paste then added the rest of the batter creating a ‘sandwich’ look. It’s the perfect blend of a classic North American pastry and the most popular Korean red bean filling.

Print Recipe
Adzuki Sweet Red Bean Scones
Votes: 1
Rating: 5
You:
Rate this recipe!
Course dessert
Cuisine Asia
Servings
Ingredients
Course dessert
Cuisine Asia
Servings
Ingredients
Votes: 1
Rating: 5
You:
Rate this recipe!
Instructions
  1. Preheat oven to 375 F. Line an 8-inch round pan with parchment paper.
  2. In a large bowl, combine sugar, flour, ginger, baking powder & salt.
  3. Cut in cold butter with a pastry cutter until the dough resembles coarse crumbs. Set aside.
  4. Whisk together eggs, sour cream & vanilla. Mix the wet ingredients with the dry ingredients, mixing until just combined.
  5. Spoon half of the dough into prepared baking pan. With a fork slightly pat evenly over pan. Top with spoonful's of red bean paste then distribute it evenly over dough. Place the remaining dough on top of beans & distribute evenly. Sprinkle with black sesame seeds.
  6. Bake for 25 -30 minutes or until golden & tests done with a wooden pick. Remove from oven & cool on a wire rack. Slice in wedges & serve.

Sour Cream Rice Pancakes

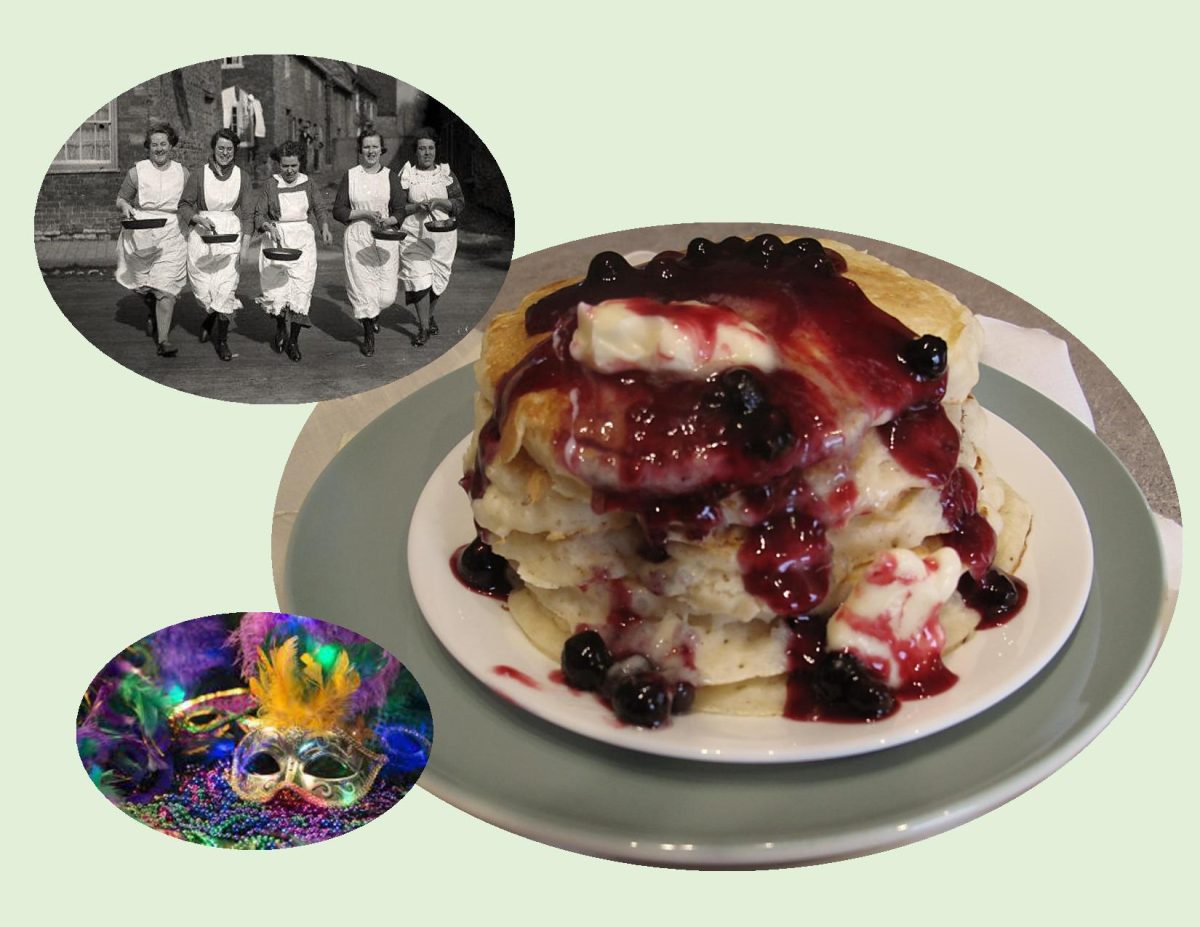
ENJOYING SHROVE TUESDAY!

Whether you call it Shrove Tuesday, Mardi Gras, or Pancake Day, Tuesday is the day of feasting and celebration before 40 days of fasting known as Lent. Celebrated by Anglo-Saxon Christians, participants would attend confession in order to be ‘shriven’ (forgiven for their sins). A bell rang to call everyone to church. This bell came to be known as the Pancake Bell and is still rung today.

Shrove Tuesday was the last day to use up eggs, sugar and fats before the fast, and making pancakes was the perfect way to do it! The ingredients of pancakes also symbolize four pillars of the Christian Faith. Flour for sustenance, eggs for creation, salt for wholesomeness, and milk for purity.

While other countries celebrate Shrove Tuesday, or Mardi Gras, with extravagant and exotic parades, in England, people race around towns and villages wielding frying pans that hold pancakes. The tradition was created in 1445 when a woman of Olney, Buckinghamshire was making pancakes when she heard the bell summoning her to church. In a rush to get to church, she ran, still in her apron and holding her frying pan. The Olney Pancake Race is now the most popular pancake race in the world. Participants must be local housewives and they must wear an apron. The goal of the race is to run while carrying a frying pan with a cooked pancake inside flipping it as you run. In order to win, the woman must successfully toss the pancake three times throughout the race, reach the church and serve the pancake to the bell ringer. Hundreds of people gather every year to participate in this fun tradition!

Mardi Gras, which translates to Fat Tuesday in French, is largely celebrated in the city of New Orleans, Louisiana. Parades, parties, and feasts dazzled in colors of green, gold, and purple fill the city for two weeks leading up to Fat Tuesday.

Personally, I have always liked pancakes, so in keeping with the Shrove Tuesday tradition Brion & I will be enjoying some today. Although I can’t quite picture myself running in a pancake race, I’m making some sour cream rice pancakes … if you like rice pudding as well as pancakes, these are for you!

Print Recipe
Sour Cream Rice Pancakes
Votes: 1
Rating: 5
You:
Rate this recipe!
Course Main Dish
Cuisine American
Servings
Ingredients
Pancakes
Blueberry Sauce
Course Main Dish
Cuisine American
Servings
Ingredients
Pancakes
Blueberry Sauce
Votes: 1
Rating: 5
You:
Rate this recipe!
Instructions
Pancakes
  1. In a large bowl, whisk together eggs, sugar, milk, sour cream, butter & vanilla.
  2. In a separate bowl, combine flour, cooked rice, baking powder, baking soda & salt.
  3. Add the flour mixture to the liquid mixture & whisk together. Let batter sit for 15 minutes.
  4. Heat a nonstick griddle to medium-low heat. Spray with oil. Using a 1/4 cup measure, portion out batter on griddle. Cook for about 2 minutes per side.
  5. Serve immediately garnished with blueberry sauce or your choice of topping.
Blueberry Sauce
  1. In a small saucepan, combine cornstarch, sugar & salt. Add water & blueberries & cook until 'clear' & bubbling. Remove from heat & stir in butter & lemon juice. Serve warm over pancakes.