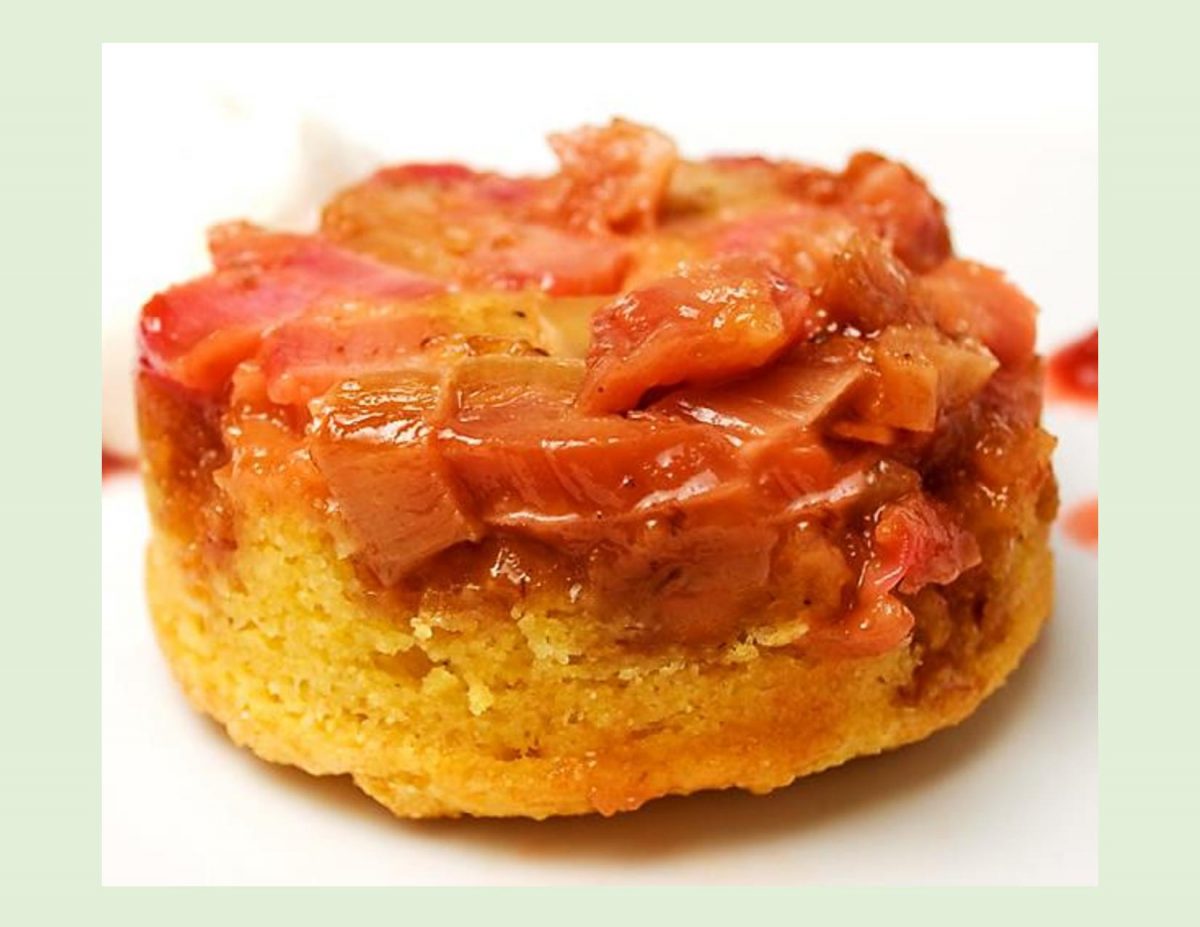
Switching up the way we cook rhubarb makes us fall in love with it all over again. Quite often rhubarb is stewed to use in various recipes. A good alternative is to roast it in the oven with a little orange juice & brown sugar. The roasting helps the rhubarb to keep its beautiful color, intensifies the flavor and it will retain its shape rather than turning to mush. Once you have roasted the rhubarb use as you would in any recipe using stewed rhubarb.
Cornbread is one of those culinary creations that pairs well with almost anything. Some dishes that include cornbread are well known and fairly common pairings, while others are still relatively new.
This particular recipe was adapted from the 1932 edition of The Guide to Good Cooking, published by Five Roses Flour. In the book, the basic recipe is for cornmeal muffins with a slight adaptation for fruit-topped Johnny Cake.
If these scones appeal to you, nothing says you can’t swap out the rhubarb for other fruits such as strawberries, raspberries, peaches or apples. Yum!
Print Recipe
Roasted Rhubarb Cornbread Scones
Votes: 1
Rating: 5
You:
Rate this recipe!
|
|
Votes: 1
Rating: 5
You:
Rate this recipe!
|
Instructions
Roasted Rhubarb
Preheat oven to 350 F. Line a baking sheet with parchment paper. Wash & dice rhubarb; spread over parchment paper. Drizzle with orange juice & sprinkle with sugar. The rhubarb will lose about half the volume during roasting. You will end up with about 4 cups. Roast about 45 minutes to an hour. Remove from oven to cool until needed. Refrigerate any leftover rhubarb.
Cornbread Scones
Coat 8 ramekins with baking spray & evenly distribute roasted rhubarb between them. Place on an edged baking sheet & set aside.
In a food processor, pulse oatmeal for a few seconds then add flour, cornmeal, salt, baking powder, baking soda, sugar, cardamom & anise powder. Pulse for a few more seconds to evenly mix. Add cold butter & pulse just slightly to cut in; do not over mix. Place in a bowl, add egg, orange zest, buttermilk & vanilla; combine ONLY until just mixed.
Place equal amounts of scone batter into each ramekin, filling no more than 3/4 full. Using an offset spatula, level the batter in each ramekin.
Bake for about 25 minutes or until batter has risen & tests baked. Remove scones from oven; allow to sit for 5 minutes, then invert each onto a serving tray.
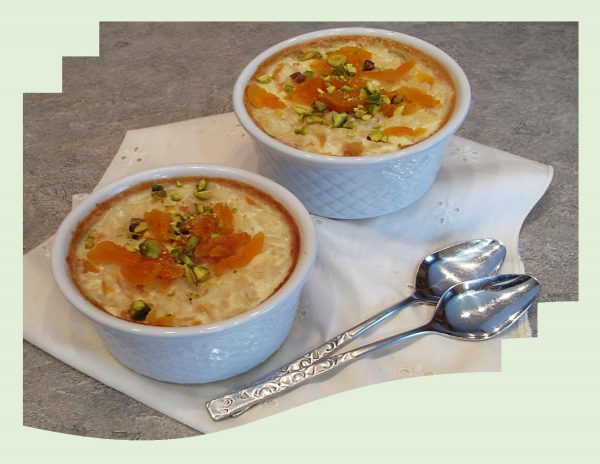
Chances are good, you’ve tried rice pudding at least once. That’s because humans have been eating the dish for thousands of years across the world.
Today, rice pudding is considered a humble dessert …. a simple mixture of rice with milk, sugar and spices. But for centuries, rice pudding held a place of distinction in the royal courts of Europe. Because rice did not grew well in the European continent, it had to be imported from Asia along the Silk Road or by water. The extensive trade routes made rice an expensive commodity that only the rich could afford. As the world seemingly grew smaller through the effects of globalization, the import of rice became affordable and common.
Many early rice puddings did not resemble the sweet dessert we think of today. This sweetened version didn’t arrive until the 15th century. Usually rice pudding is sweetened with white or brown sugar, honey or dried fruit, but you can also use maple syrup, jam, date sugar or fruit juice concentrate.
Different varieties of rice lend their own tastes and aromas. I opt for Arborio, which makes the pudding creamy even when I use low fat milk or non-fat milk. Fruit, whether fresh, dried or candied is the puddings perfect partner. Today, rice pudding is considered an easy and versatile dessert which many of us associate with our childhood.
Print Recipe
Baked Apricot Rice Pudding
Votes: 1
Rating: 5
You:
Rate this recipe!
|
|
Votes: 1
Rating: 5
You:
Rate this recipe!
|
Instructions
-
In a bowl, combine egg whites, egg, milk, sugar & vanilla. Beat until combined but not foamy. Stir in cooked rice, snipped apricots, cardamom & orange zest.
Place 4 custard cups in a rectangular baking dish. Divide rice mixture among dishes, Place baking dish on an oven rack. Pour boiling water into the baking dish around custard cups to a depth of 1-inch.
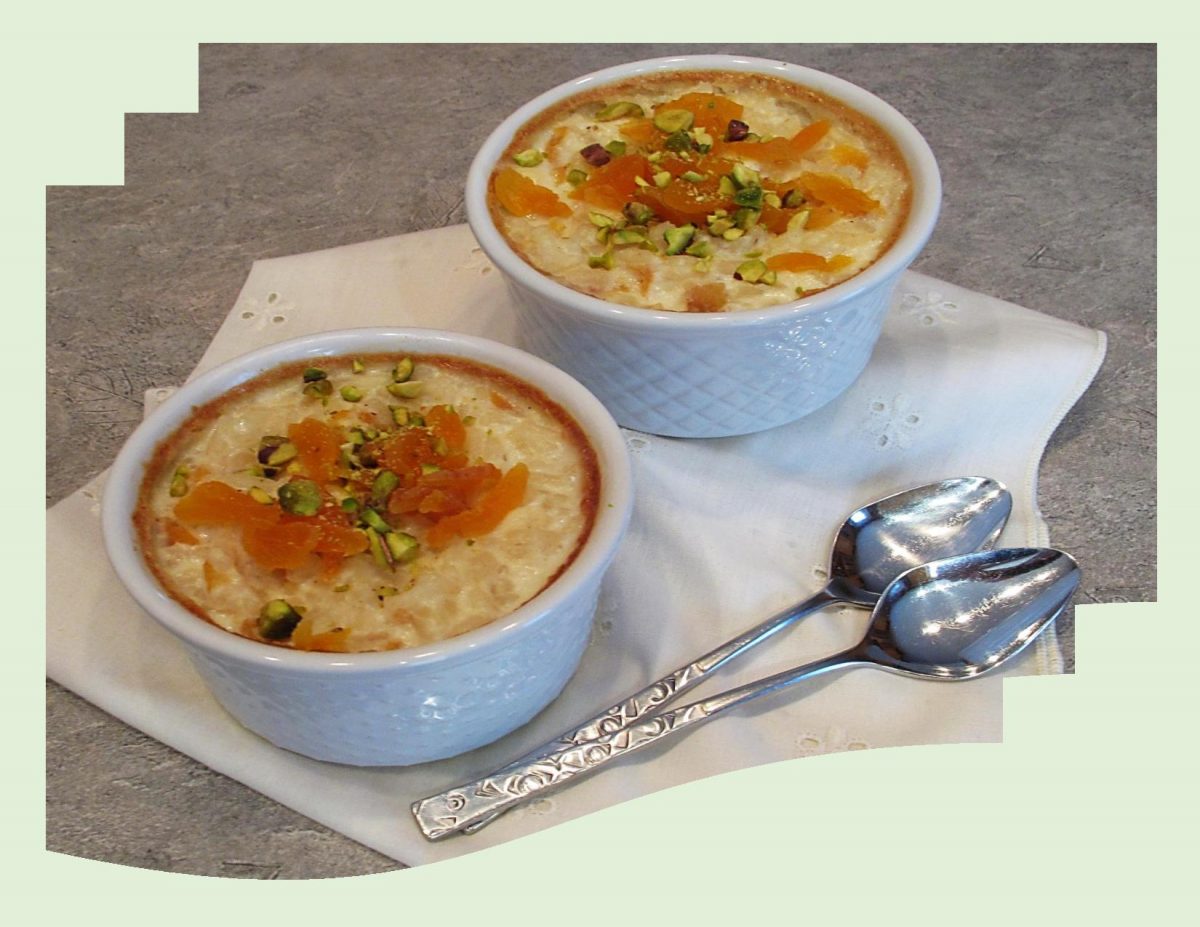
Bake, uncovered, for 40 minutes or until just set, stirring after 20 minutes. Serve warm or chilled. Garnish with slivered apricots & pistachios.

Among the world’s many artisan breads and cakes, the breakfast bread ‘gibassier’ is one of the most popular in the French tradition. This buttery, textured bread is somewhat like an Italian panettone. What makes gibassier unique, is the use of orange blossom water which gives the bread a distinct flavor that is difficult to replicate with any substitute.
The recipe appears to have originated in the rocky, southeast of France, in Lourmarin Village, Provence. Many believe that this generations-old treat is named after the mountain called Le Gibas, which forms part of the village’s horizon.
Gibassier can be shaped and made as one big round loaf or larger or smaller single serve breads. Whatever size they come in, they are slashed or snipped decoratively before they are baked to give the fleur de lis or snowflake appearance.
It is difficult to say whether gibassier is a biscuit, a pastry, doughnut or a cookie. One thing is for sure …. its taste is unique. Traditionally served at breakfast and is dipped into honey butter while it is still warm.
Each Christmas I enjoy to try making a Christmas bread from another culture. Of course, that means as an extra bonus, researching the food history behind it.
Print Recipe
French Christmas Bread/ Gibassier
Votes: 1
Rating: 5
You:
Rate this recipe!
|
|
Votes: 1
Rating: 5
You:
Rate this recipe!
|
Instructions
In a small bowl, combine water, yeast & 2 Tbsp sugar. Allow to sit until foamy, about 10 minutes.
In a large bowl, whisk together flour, salt, 1/4 cup sugar & aniseed. Make a well in the center of the flour mixture & add eggs, butter, orange blossom water, orange zest & candied orange peel. Whisk to form a slurry, pulling in a little flour from the sides of the bowl.
Pour the yeast mixture over the egg slurry. Mix to make a 'shaggy' dough. Turn out on a floured surface & knead until a smooth, elastic dough forms, about 10 minutes.
Place the dough into a lightly buttered bowl, cover with a tea towel & allow to rise in a draft-free place until doubled in size, about 1 1/2 - 2 hours.
Punch down the risen dough & turn out onto a lightly floured surface. Divide into two equal pieces & shape each one into a ball. Line two baking sheets with parchment. Flatten each ball of dough into a disc about 1.5 cm thick & place each one on one of the baking sheets. Cut the disc into 6 sections, leaving them connected at the center.
Make a cut through the center of each section without cutting all the way through to the edge. Best to use something you can press straight down as opposed to dragging a knife through the dough. Pull the sections outward to separate & elongate them a little. Using your fingers, open out the slits & form a V-shape in the top of each section.
Cover each loaf loosely with buttered plastic wrap. Set aside to rise in a draft-free place for 45 minutes to 1 hour.
-
Brush each loaf with a little egg wash. Bake for 20-25 minutes until golden & baked through. Slide the loaves onto a wire rack & brush with honey butter while still warm or dust with sugar.
Its like a mix between carrot cake and apple pie. Vegetables and fruit in a pie …. this recipe never fails to be fantastic even if you don’t like zucchini.
The oral history of pie predates its written record. Many cooks stand by family secrets scrawled on stained index cards. It seems, pie is eaten for breakfast, with lunch and for dessert after dinner. In many ways, pie is more prized because it takes time and effort, a slice carries more importance than a cookie, but is less fussy than cake.
The perfect pie (or galette), is built on two things …. a well made crust with a flaky texture and golden color and a fresh, well set, flavorful filling.
The combination of carrots, apple and zucchini is something special. The carrots and zucchini are really interchangeable, so if you’d like to use more of one than the other, no problem.
When baked, zucchini has a similar texture to an apple; it gets soft but retains some texture. Add the same warm, fragrant spices as in an apple pie, lemon juice, a bit of extra sugar to compensate and you got it!
This recipe has been one of my fall favorites for many years and we still enjoy its wonderful flavor.
Print Recipe
Spicy Harvest Galette
Votes: 1
Rating: 5
You:
Rate this recipe!
|
|
Votes: 1
Rating: 5
You:
Rate this recipe!
|
Instructions
Prepare pastry & either use 6 mini flan pans or one 9"deep pie pan. Preheat oven to 425 F.
In a large bowl, combine apples, zucchini, carrots, nuts & flour; toss to coat.
In a medium bowl, cream together brown sugar & butter; add cinnamon, cardamom, salt, lemon juice, vanilla, orange zest & 2 eggs. Blend well. Add apple mixture & combine well.
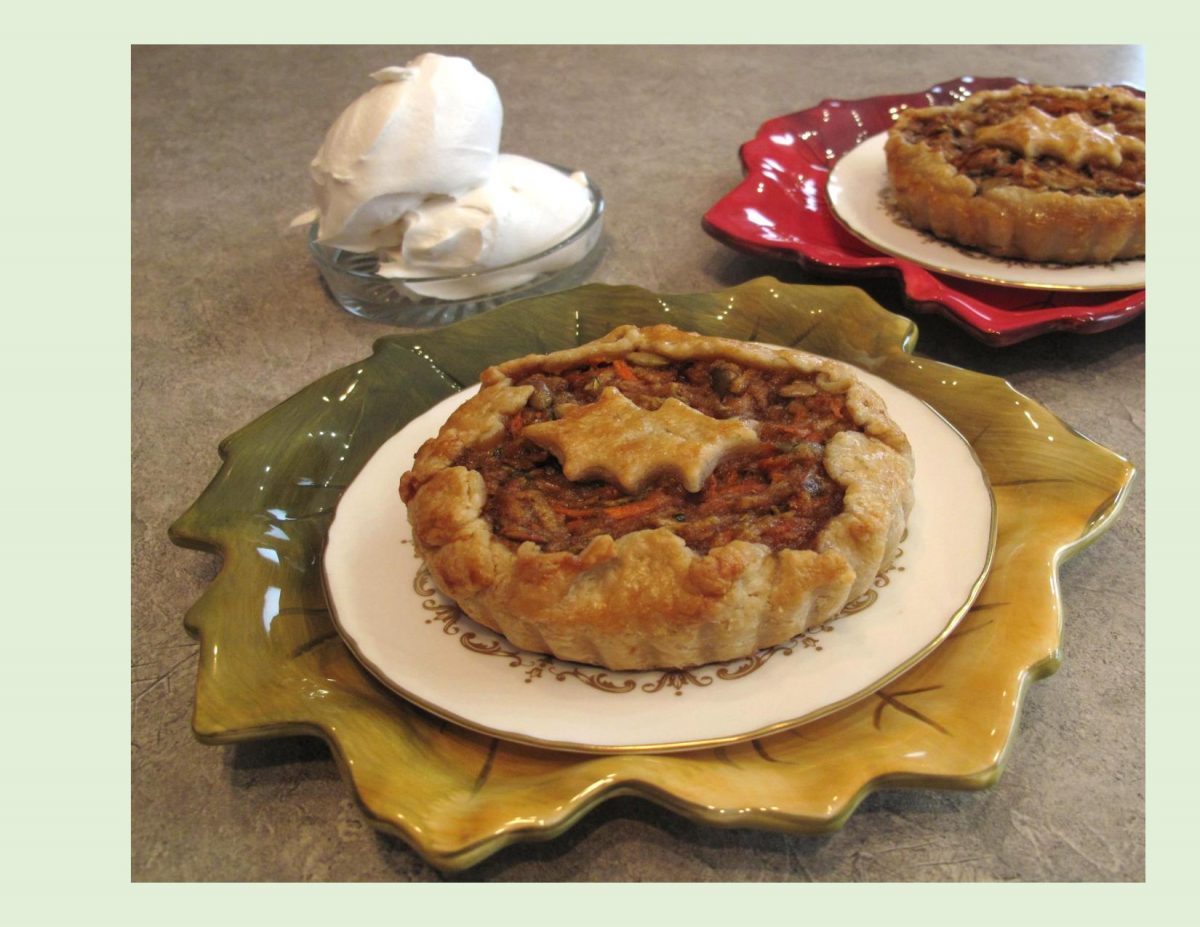
Roll out pastry larger than your pans. Line pans leaving the jagged edge to fold over filling. Make a few pastry designs for the tops if you wish. Spoon filling into a pastry lined, mini pans. Flip rough edges over filling. Top with pastry in a fall leaf pattern. In a small dish, blend egg wash & brush over crust.
Bake for 40-50 minutes or until deep golden brown. If necessary, cover pies loosely with foil during last 15 minutes of baking to prevent excessive browning.
Serve warm with whipped cream. Store any 'leftovers' in refrigerator.
-
Recipe Notes
- I laid the grated zucchini on paper towel & placed the grated apple in a strainer while I prepared the rest of the ingredients. In both cases, I did NOT hand squeeze them as you still need some of that moisture to prevent having a dry filling when baked.
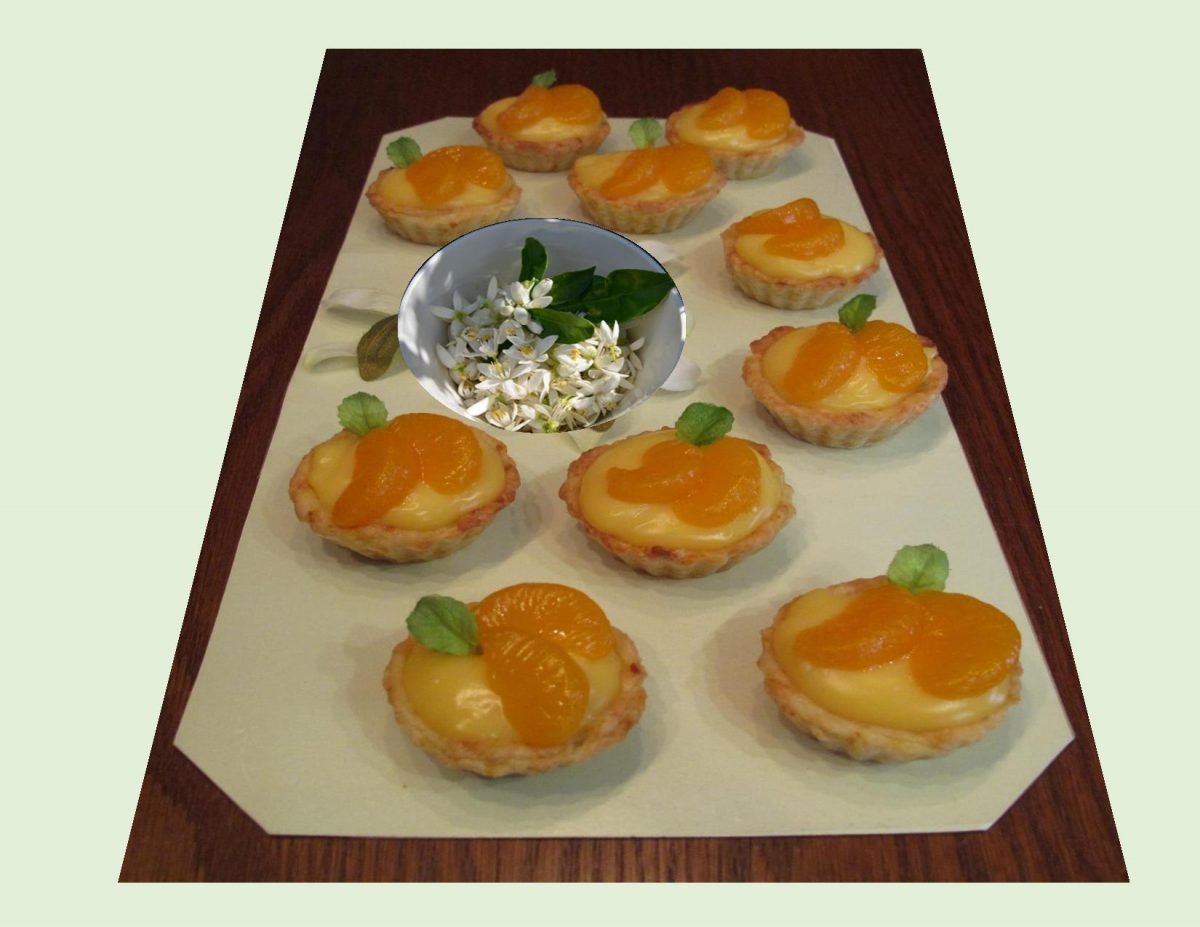
Although mandarin oranges are a traditional holiday food, they sure make a wonderful bit of sunshine for us still in the colder part of our year.
Very often when I go to make something and the recipe calls for orange or lemon zest, its not something I have on hand. I guess its all about thinking ahead and drying the citrus peels when I do have them. There is no magic secret … just time and patience. Wash and dry the fruit, lightly grate off only the top layer of peel. Transfer to a flat dish to dry then store the zest in a glass jar. When it comes time to use, crush some between your fingers before adding it to other ingredients. This will release the citrus essence and flavor.
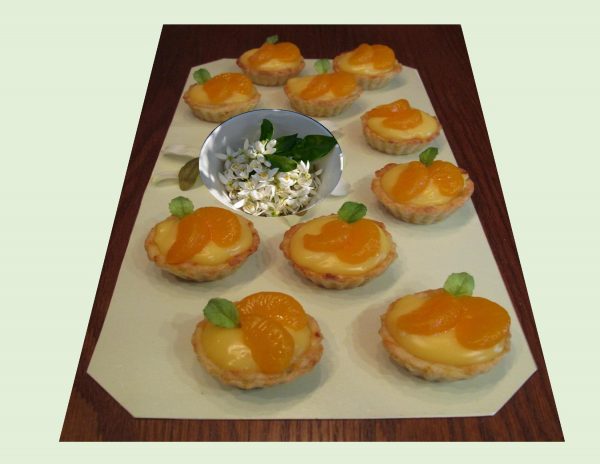
There is no comparison between artificial flavors and real citrus zest in baked goods. These little mandarin tarts not only use it in the filling but the pastry as well.
There are various other uses for citrus zest such as in poultry marinades, baked into breads or for a splash of flavor in tea. These tarts made such a simple little refreshing dessert.
Print Recipe
Mandarin Orange Tarts
Votes: 5
Rating: 3.8
You:
Rate this recipe!
Ingredients
Mandarin Orange Pastry Cream
Ingredients
Mandarin Orange Pastry Cream
|
Votes: 5
Rating: 3.8
You:
Rate this recipe!
|
Instructions
Orange Pastry
-
In a bowl, whisk flour, sugar & zest. Add butter & blend with pastry blender until mixture resembles coarse meal. Gradually add the orange juice, using enough to form a dough that cleans the sides of the bowl.
Roll out dough on a lightly floured work surface. Using a 2 1/2-inch cutter, make 12 circles & fit into tart pan cups. Line the pastry with foil & add pastry weights. Bake about 10-15 minutes. Remove weights & foil & bake 10 minutes longer until pastry is golden.
Mandarin Orange Pastry Cream
In a bowl, whisk together egg yolks, sugar & cornstarch until it turns pale yellow.
In a saucepan, combine milk & orange zest; bring to a boil. Remove from heat, slowly add a egg mixture a little at a time, whisking well until fully incorporated.
Return mixture to heat & keep whisking over medium heat until it thickens. Stir in orange juice. Transfer to a bowl & cover with plastic wrap, making sure the wrap touches the surface of the pastry cream. When it comes to room temperature, refrigerate.
When cooled & you are ready to use the pastry cream, whisk with an electric mixer for 15-20 seconds to a smooth & spreadable texture. Spoon filling into baked tart shells. Top each with a couple of mandarin orange slices. Brush oranges with a bit of apricot jelly.
Recipe Notes
- If pastry weights are not available, reverse you tart pan & place pastry rounds over the bottoms of tart cups to bake.
- If you use canned mandarins for decoration, drain & blot on paper towel to remove excess liquid.
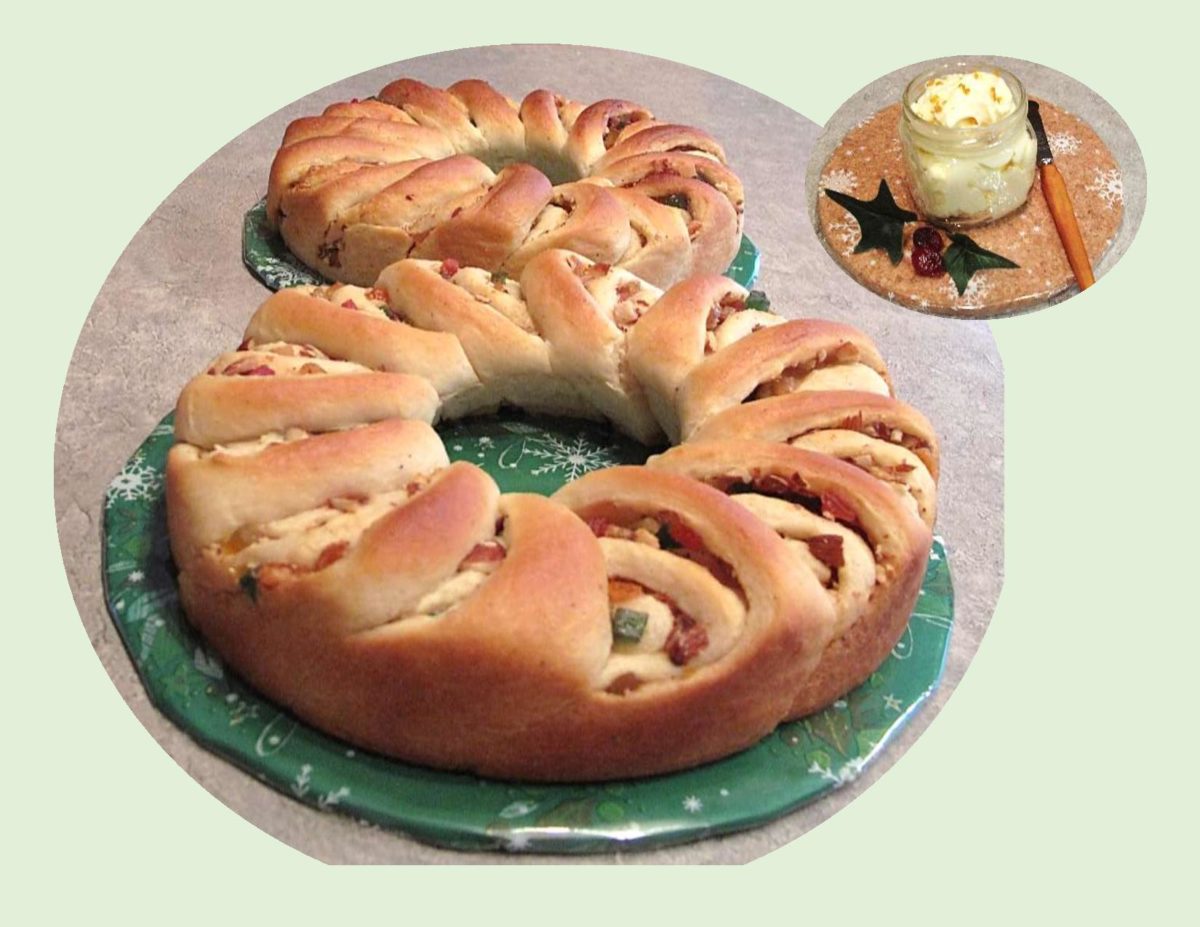
Believe it or not, we are at the eve of Christmas 2019. I’m sure I’m not the only one who is wondering how we got here so fast. This year I thought it would be nice to make some Swedish Tea Rings for gifting.
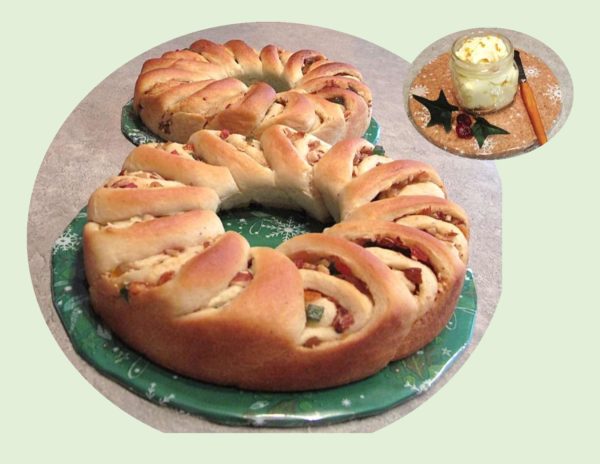
These sweet bread rings are slashed at the sides to expose the colorful fruit and nut filling. There are different variations of this bread, some do not have any fruit in them at all, just cinnamon sugar.
Swedish tea rings have been around for a very long time and while not much is known about their origin, their roots are definitely Swedish. It is believed that the bread essentially started as Christmas preparation and was a part of the grand Swedish Christmas feast.
It seems, the authentic Swedish tea rings are similar to a cinnamon roll in the shape of a ring or wreath. I have also concluded that cardamom ( one of my favorite spices) is to Scandinavians like vanilla is to us in America …. the backdrop to anything sweet. With that, I decided to go with a fruit bread that brought both cardamom and cinnamon together. Sweet!
Print Recipe
Fruity Swedish Tea Rings w/ Orange Butter
Votes: 2
Rating: 5
You:
Rate this recipe!
|
|
Votes: 2
Rating: 5
You:
Rate this recipe!
|
Instructions
Sweet Roll Dough
In a small dish, heat milk to lukewarm. Add yeast & 1 1/2 tsp sugar; let stand for 5 minutes to allow yeast to activate. In a large bowl, whisk together remaining 6 Tbsp sugar, melted butter, sour cream & eggs. Add yeast mixture & stir to combine.
In another bowl, whisk together flour, cardamom, cinnamon & salt. Add flour mixture to yeast mixture, 1 cup at a time, combining well after each addition. Once all flour has been added, knead on a lightly floured surface for about 2 minutes.
Lightly grease the large bowl, place dough in it & cover with plastic wrap & a tea towel. Allow to rest for at least one hour, in a draft free place until dough has doubled in volume.
Filling
In a small bowl, combine butter, sugar, extract & orange zest; set aside. Toss the fruit & almonds with flour; set aside.
Assembly
Punch dough down. Turn onto a lightly floured surface, divide in half. Roll each into an 18 x 12-inch rectangle. Spread half of the (butter) filling over each rectangle to within 1/2-inch of edges; sprinkle each with half of the fruit mixture. Roll up jelly-roll style, starting with a long side, pinch seams to seal.
Place seam side down on a parchment lined baking sheets. Pinch ends together to form wreaths. With sharp scissors, cut from outside edge to 2/3 of the way toward center of ring at 1-inch intervals.
Separate the cut pieces slightly, twisting each individually to allow filling to show,overlapping with the previous piece. Cover & let rise in a warm place until doubled in size, about an hour.
Preheat oven to 325 F. Bake for 25-30 minutes or until golden brown. Remove from pan to a wire rack to cool. In a small bowl, combine orange butter ingredients. Serve with fruit bread. Refrigerate any leftover orange butter.

Autumn is in full swing with all its fabulous foliage and Thanksgiving is right around the corner. The second Monday of October has been the day Canada has celebrated Thanksgiving since 1957. For Canadians, this holiday is linked to the tradition of harvest festivals. A common image seen at this time of year is a cornucopia or horn filled with seasonal fruit and vegetables. The cornucopia, which means ‘horn of plenty’ in Latin, was a symbol of bounty and plenty in ancient Greece. Pumpkins, turkeys, ears of corn and large displays of food are used to symbolize Thanksgiving Day.
The ‘flavor of fall’ always brings pumpkin to mind (or butternut squash) for me. Since there are only two days left before our Thanksgiving day, when we will stir, boil, grate & grease our way to a table filled with wonderful food. While everyone has their own traditions and ‘must eat’ dishes, these pumpkin yeast buns are a perfect compliment to this autumn feast.
Lightly sweet and beautifully light and fluffy, this recipe can be made in two ways. One as a dinner bun to have with the main course and two as a cream cheese filled sweet roll for breakfast.
Print Recipe
Pumpkin Dinner Buns
Votes: 1
Rating: 5
You:
Rate this recipe!
Ingredients
Cream Cheese Filling (optional)
Ingredients
Cream Cheese Filling (optional)
|
Votes: 1
Rating: 5
You:
Rate this recipe!
|
Instructions
Pumpkin Dough
In a small bowl, place yeast, lukewarm milk & 1 tsp sugar. Allow to rise for about 10 minutes until frothy.
In a large bowl, combine yeast mixture, brown sugar, butter, salt, spices, eggs & pumpkin puree. Mix well. Add flour, one cup at a time, until well combined. Knead dough for about 8-10 minutes or until smooth & soft. Place dough in a greased bowl, cover it with a tea towel & allow to rise for about 1 hour or until doubled in size.
Line a baking tray with parchment paper. Turn dough out onto a floured surface, knead for about 2-3 minutes. Divide into 16 equal pieces, shaping into balls. For 16 buns you will need about 16-90 cm pieces of kitchen thread. Tie thread around the dough ball in a way that the ball is divided into 8 parts. Do not tie the ball too tightly as it will continue to rise a lot more during the second proofing & baking. Cover the pumpkin shaped dough balls with a tea towel & set aside to proof until buns have doubled in size.
Preheat oven to 350 F. Brush each roll with egg wash. Bake for 20-25 minutes. Brush rolls with melted butter. Allow buns to cool completely before cutting thread to remove it. Insert pecan pieces to mimic a pumpkin stem.
For FILLED Buns
In a small bowl, beat together filling ingredients. Follow directions above. At the point where you have divided the dough into 16 pieces, fill each one with some cream cheese filling ( I had divided my filling into 16 portions to make it easy). Gather the corners together to form a ball. Follow tying directions in above instructions to form the pumpkin effect. Cover & allow to rise until doubled in size.
Preheat oven to 350 F. Brush each roll with egg wash. Bake for 20-25 minutes. Brush rolls with melted butter. Allow buns to cool completely before cutting thread to remove it. Insert pecan pieces to mimic a pumpkin stem.
Recipe Notes
- If you don't have the time to do all this tying, place the dough balls onto the lined baking tray about 3-4 cm apart. Gently flatten the balls a little. Dip the tip of a scissors into oil. Cut the dough into 'petals' to form the pumpkin look. After they are baked, insert a piece of pecan or even use pumpkin seeds to make the stems.

I remember the first time I heard of sour cream being used in making a rhubarb pie. I could hardly imagine it but once I tried it there was no going back! If you look through some of the older recipe books, there are at least eight or nine different pies made using sour cream. These nostalgic desserts certainly take you back to a simpler time.
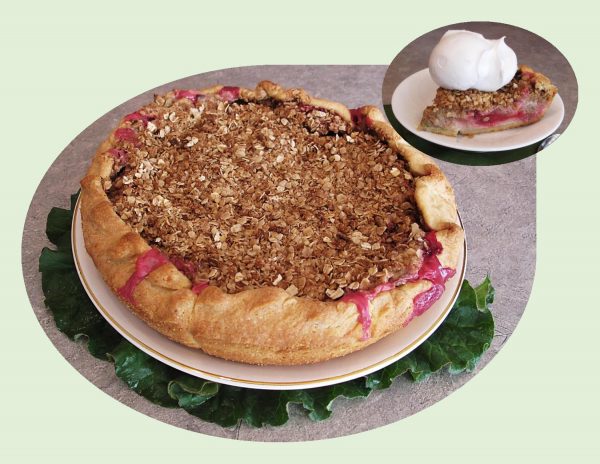
Basically this is your classic rhubarb pie except with a sweet/sour cream, custard filling. The sour cream is not assertive; its presence simply provides a rich, creamy background for the rhubarb.
I’m not sure why, but I never get tired of cooking (or eating) rhubarb. Every season, I can’t wait until its ready to use. Last year, Brion and I found another spot for three new plants to grow in our yard, so hopefully they do well. I realize its not for everyone but it is certainly versatile in its uses.
For this rhubarb crostada, I’m using an spiced-oat streusal topping which almost mimics a baked fruit crumble taste. Serving this dessert chilled brings it to its full potential. Of course, when you add a scoop of ice cream!
Print Recipe
Sour Cream Rhubarb Crostada
Votes: 1
Rating: 5
You:
Rate this recipe!
Ingredients
Cornmeal Pastry (OR use purchased refrigerated pastry if you wish)
Ingredients
Cornmeal Pastry (OR use purchased refrigerated pastry if you wish)
|
Votes: 1
Rating: 5
You:
Rate this recipe!
|
Instructions
Cornmeal Pastry
In a small bowl, combine sour cream & ice water; set aside. In a large bowl, whisk together flour, cornmeal, sugar & salt. Using your fingertips, cut in the butter until mixture resembles BOTH coarse crumbs & small peas. Sprinkle the cold sour cream mixture over dough, 1 Tbsp at a time, tossing with a fork to evenly distribute it. After you have added all the liquid mixture, dough should be moist enough to stick together when pressed. Do NOT over work pastry. Press dough into a disk shape; wrap in plastic wrap & refrigerate until ready to use.
Spiced-Oat Topping
In a bowl, combine all topping ingredients with fingertips until crumbly; set aside.
Filling
Preheat oven to 375 F. In a bowl, Mix 1 cup sugar, 3 Tbsp flour, 1 tsp cardamom & orange zest. Stir in slightly beaten eggs & sour cream, add rhubarb; toss gently.
Remove pastry from fridge. Preheat oven to 375 F. On a large sheet of parchment paper, roll out pastry into a 12-inch circle. Place pastry in a 9-inch pie pan, leaving parchment paper underneath it. Pour filling into crostada; gently fold the 1/2-inch of pastry remaining above pie pan rim over edge of crostada. Sprinkle spiced-oat topping over filling. Brush pastry edge with egg wash.
Bake 50-60 minutes until edge is puffed, filling is slightly jiggly & topping is golden. Cover loosely with foil if topping begins to brown too much. Cool at least 3 hours before serving. Slice & serve with a dollop of whipped cream or a scoop of ice cream.

Anyone following my blog is well aware of my love for rhubarb. I think I’ve tried to use it in every capacity possible. Well, get ready for my next adventure — rhubarb Turkish delight! I refrain from eating a lot of chocolate bars, not that I don’t enjoy them, but seriously –. In Canada, the Nestle company sells a chocolate bar called ‘Big Turk’ for which Turkish delight forms the basic foundation. Of course, I love it!
Just a bit of food history background on the subject first. The Turkish name for the sweet comes from the Arabic rahat-ul hulkum which means ‘soothe or heal the throat’. This was abbreviated to rahat lokum and then lokum. The name ‘Turkish Delight’ was coined in the 18th century to make it easier to pronounce. As an improvement on the original recipe of honey or molasses, a mixture of water, flour, cornstarch and refined beet sugar were used to make a firm, chewy jelly.
Little has changed in the last 240 years. Although there are more than 24 different flavors, the biggest seller that still remains is a plain jelly studded with pistachios. Traditional Middle Eastern flavors include rose-pistachio, orange-blossom walnut, mint and rose-lemon.
Back to the rhubarb. Somewhere in my travels, I came across a recipe for rhubarb truffles that peeked my interest. After more research, I decided why not go right out on a limb and test my skills at making some rhubarb/rose Turkish delight. Actually, the end result was not bad. I have acquired a taste for the use of floral water in baking, Brion, not so much. It has to be used very sparingly or it becomes overpowering. I made three versions: Turkish delight plain or covered in white chocolate and a rhubarb truffle. A bit time consuming but a very unique flavor.
Print Recipe
Rhubarb/Rose Turkish Delights & Chocolates
Votes: 1
Rating: 5
You:
Rate this recipe!
Ingredients
Rhubarb/Rose Turkish Delight
Rhubarb Cream Cheese Truffles
Ingredients
Rhubarb/Rose Turkish Delight
Rhubarb Cream Cheese Truffles
|
Votes: 1
Rating: 5
You:
Rate this recipe!
|
Instructions
Rhubarb/Rose Turkish Delight
-
In a saucepan, put 1 1/4 cups water with sugar, rhubarb & lemon juice. Cook over low heat , stirring until sugar has dissolved, then increase the heat a little; simmer 5 minutes. Remove from heat; leave the rhubarb to infuse for 10 minutes, then pass through a sieve, reserving the juice & pulp separately (the pulp can be used in the truffles that follow).
-
Line a baking dish with cling film (the size will depend on how thick you want your candy) & set aside. In a small dish, blend cornstarch with remaining 1/4 cup water until smooth. In a saucepan, add rhubarb juice, gelatin powder, dissolved cornstarch & heat gently, stirring until gelatin has dissolved, then bring to a rolling boil.
-
Keep mixture at a steady rolling boil, stirring constantly, for about 12-14 minutes or until syrup reaches a soft ball stage. Cool slightly & then pour mixture into lined baking dish. Allow to cool at room temperature for about 12 hours or until the mixture is set; do not refrigerate.
-
Once the jelly is set, cut into pieces. Combine 1 Tbsp cornstarch with 2 Tbsp powdered sugar in a bowl, then roll the jellies in this mixture to coat them. Keep jellies in an airtight container in a cool place for up to 3 days; do not refrigerate. If you want to dip some of your jellies as I did, I found using a mini ice cube tray as a mold was helpful. I just set the piece of jelly in each cup & poured the white chocolate over & around it. Can be frozen until needed.
Rhubarb Cream Cheese Truffles
-
In a double boiler over medium heat, melt 55 grams of white chocolate chunks. Transfer to a bowl; add remaining ingredients EXCEPT milk chocolate & beat with an electric hand mixer until smooth. Cover & chill until solid enough to roll or scoop into balls.
-
Line a baking sheet with parchment paper. Melt milk chocolate. drop balls of rhubarb/cream cheese mixture, one at a time, into milk chocolate to coat. Carefully remove onto parchment paper & allow to harden. Can be frozen as well until needed.
-
Recipe Notes
- I also tried freezing the plain jellies without putting cornstarch/sugar mixture on them and it worked fine. They were actually nice tasting right out of the freezer.
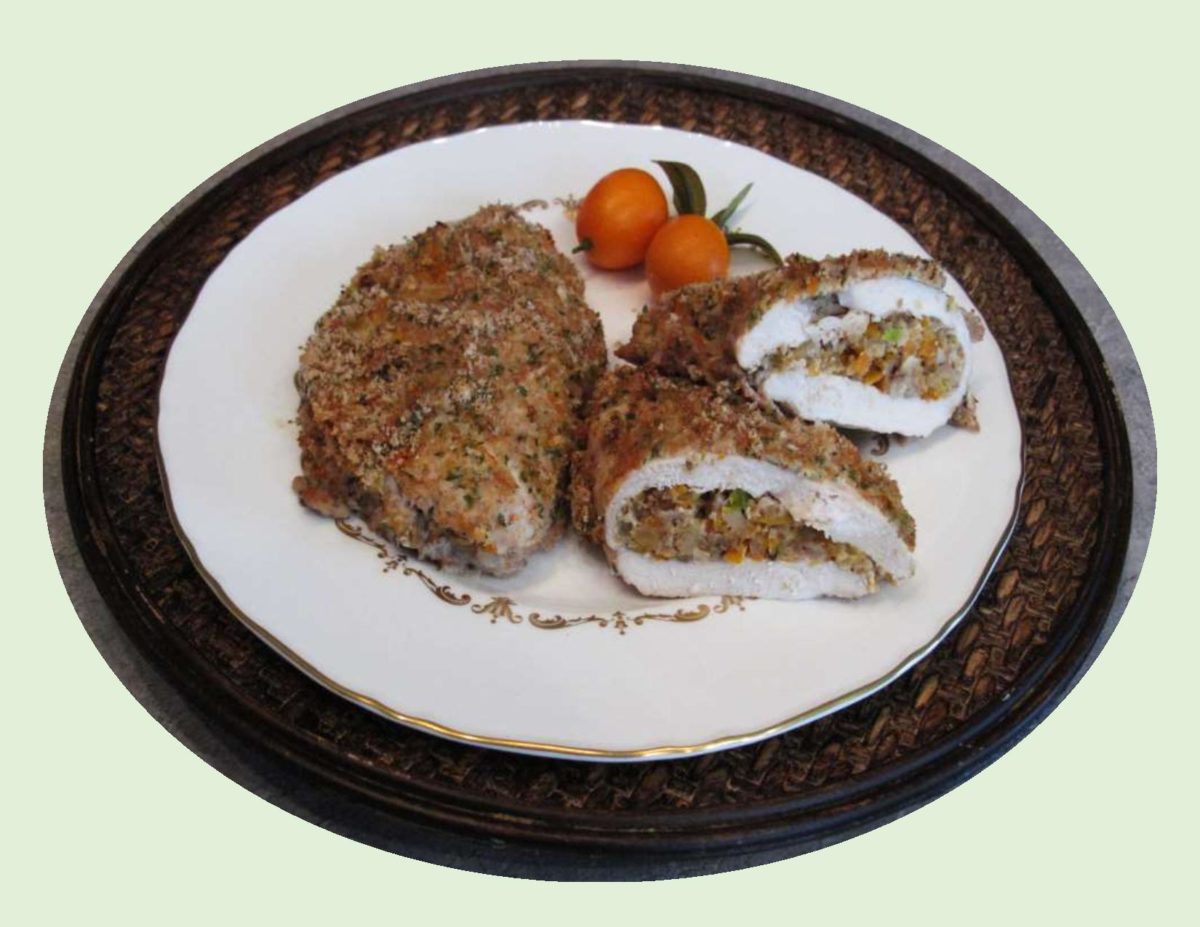
Kumquats are believed to have originated in China with their earliest historical mention being around the 12th century. Orange in color, this small bite-sized fruit can be eaten skin and all. The peel is the sweetest part of the fruit and the sourness comes from the pulp, seeds and juice.
Unlike it’s citrus kin, kumquats are able to withstand low temperatures and frost. A small evergreen shrub that can also be hydrophytic, which means they can grow in aquatic environments, and the fruits will drift towards the shore during harvest season. Kumquats are in season January thru April.
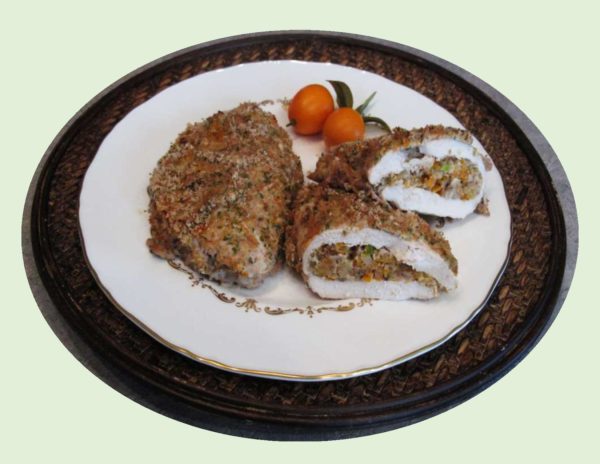
Commonly cultivated in Asia, the Middle East, parts of Europe and the southern United States. They can be used in every imaginable combination including pies, cookies, smoothies, ice cream, marmalade, marinades, salsa and vinaigrette. My choice today is in a stuffing for chicken breast. The combination of kumquats and orange tastes very unique.
Print Recipe
Kumquat & Walnut Stuffed Chicken Breast
Votes: 1
Rating: 5
You:
Rate this recipe!
|
|
Votes: 1
Rating: 5
You:
Rate this recipe!
|
Instructions
Wash & chop kumquats (do not peel). In a small bowl, combine with walnuts, onion & pepper.
Between two pieces of plastic wrap, pound chicken breasts to an even thickness. Spoon half of the filling on each breast. Fold over to encase filling; secure with picks if necessary. Preheat oven to 350 F.
Set out 3 shallow dishes. In one combine bread crumbs, orange zest & parsley; fill another with orange juice & in third beat the egg with water. Dip each stuffed breast carefully in orange juice, then in bread crumb mixture to coat, then in beaten egg & again in bread crumbs. Place coated breasts, seam side down, on a lightly buttered baking pan. Drizzle with melted butter.
Bake, covered, 30 minutes. Uncover & bake 10 more minutes or until chicken is cooked through.


