Persimmons are definitely a fruit that’s underrated. If you haven’t used them before, now is a good time to give them a try. Where we are, here in Canada, you start seeing them in the grocery stores around October. A bit pricey at first but they get better as the winter rolls along. Persimmons are in season between November and February. Mildly sweet and juicy with a slight crunch reminiscent of a cross between a peach and a pear. Since there is only a short window in which you can enjoy this exotic fruit, persimmons make up for it by working well in both sweet and savory recipes. Treat them like you would an apple and turn them into jams, puree, tarts and cakes. Paired with pork adds a nice fruity and caramelizing sweetness.
The persimmon is Japan’s national fruit. The most commonly found varieties are the ‘Hachiya’, round with a slightly elongated, pointed base and the ‘Fuyu’, smaller and more tomato shaped. When ripe, both have a red-orange skin and flesh, creamy texture and a tangy-sweet, vanilla like flavor. Persimmons are usually sold unripe, so leave them on the counter for a day or two until the skin deepens to a rich sunset orange.
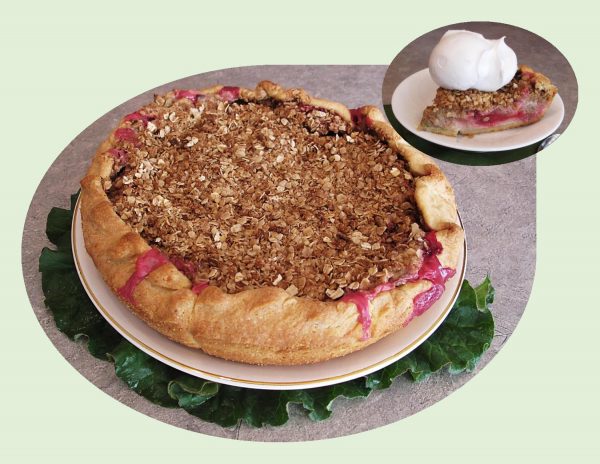
Classic apple pie gets a seasonal, honey sweet twist when mixed with fresh persimmons and a crunchy topping in this apple persimmon crumble pie.

| Servings |
|
- 3 large Granny Smith apples, cored, peeled & sliced 1/8-1/4-inch thickness
- 4 small-medium persimmons, peeled & sliced 1/8-1/4-inch thickness
- 1/2 cup sugar
- 1/2 cup brown sugar, lightly packed
- 1 1/2 Tbsp lemon juice
- 2 tsp cinnamon
- 1/4 tsp EACH cardamom & nutmeg
- 1/2 cup flour
- 6 Tbsp cold butter
- 1/3 cup sugar
- 1/3 cup brown sugar, lightly packed
- 1/2 cup oatmeal
- 1/2 cup sliced almonds
- 1/2 tsp cinnamon
- 1/2 tsp salt
- 250 gm sour cream
- 3 pkg (9 gm each) vanilla sugar
- 1 egg + 1 Tbsp water, beaten
- 1-2 tsp coarse sugar
Ingredients
Filling
Crumble Topping
Cream Topping
Finishing
|
|
- Remove the dough disk from refrigerator & roll out onto a lightly floured surface into a 12" round about ⅛" thick. Gently transfer the rolled dough into a deep dish 9" pie pan, leaving a 1-2" overhang all the way around.
- Tuck the edge underneath itself to form a ring around the edge of the pie plate. Flute the edges by pinching the dough between your thumb & pointer finger on one hand & your pointer finger knuckle on the other. Place the pie shell in the freezer to keep chilled while you prepare the filling.
- Peel & core the apples & persimmons, then cut into ⅛"- ¼" slices. Place in a large mixing bowl & toss with the lemon juice, sugars, & spices. Set aside for at least 15 minutes so the juices begin to release from the fruit.
- Preheat oven to 400 F.
- Combine the cold butter cubes, flour, sugars, oats, almonds, salt & cinnamon together in a large bowl. Use your hands to work the butter into the other ingredients until coarse crumbles the size of peas form.
- Pour the apple filling into the bottom shell, forming a mound that is taller in the center of the pie.
- Whisk the egg & water until blended. Gently brush the exposed, fluted edges of the pie with the egg wash. Sprinkle the crust with coarse sugar. Top pie evenly with crumble topping.
- Bake at 400 F. for 20 minutes, then lower the temperature to 375 F. & bake for another 30-40 minutes, rotating the pan halfway through. Bake until the filling is bubbly and the crumble topping turns a deep golden color, you may need to cover the edges and or/tent the pie to keep from over-browning. The fruit should be just soft when poked with a toothpick. Allow to cool on a rack for at least 1-3 hours before serving.
- Whip together sour cream & vanilla sugar.
- Serve with your choice of 'cream topping', vanilla ice cream or whipped topping.