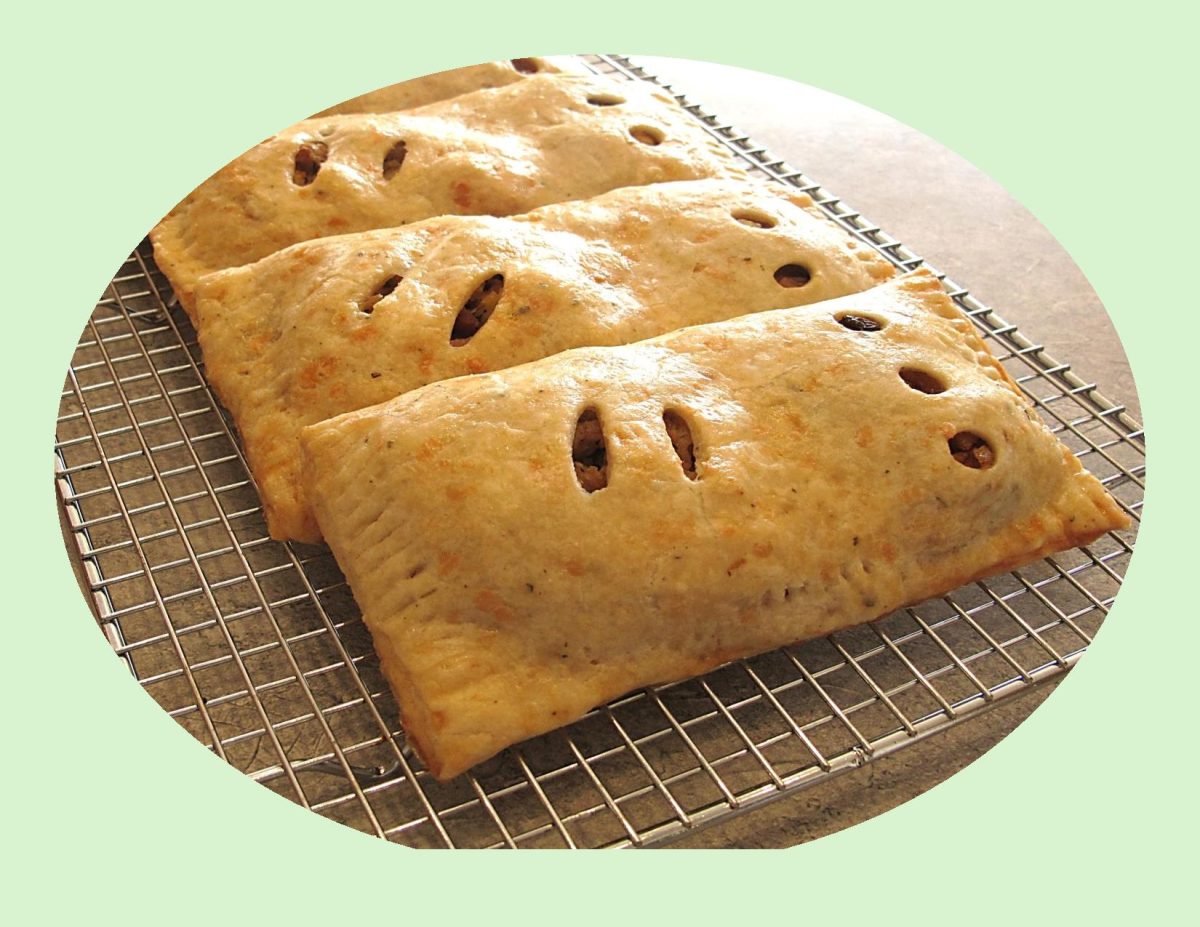
The Bedfordshire Clanger is a very unique and little-known meat pie recipe from England, specifically (not surprisingly) from the county of Bedfordshire, a small, low-lying and predominantly agricultural county nestled in the east of England.
In centuries past many of the working husbands of the area used to toil in the fields there. Their wives, knowing their husbands would need lots of protein and carbohydrate sustenance, came up with the brilliant idea of a doubled, loaf-shaped pie. One end contained a savory filling that used the famed pork of the area while the other end was filled with stewed apples (made from the famed local apples) as dessert. So, the two fillings didn’t combine, there was a ‘pastry wall’ in between blocking any flavors from mixing. A ‘secret code’ denoted which end was meat and which was dessert: two knife slits on one end of the pastry top means meat, three small holes on the other shows the sweet. This was brilliant, an entire meal for the hard-working man – handheld, portable and delicious
I guess you could say, the Bedfordshire clanger is not only a tasty treat but also a piece of culinary history that has stood the test of time!
Print Recipe
Pork & Apple Bedfordshire Clanger w/ Cheddar-Sage Pastry
Votes: 1
Rating: 5
You:
Rate this recipe!
|
|
Votes: 1
Rating: 5
You:
Rate this recipe!
|
Instructions
Pastry
In a medium bowl, whisk together the flour, sage & salt. Sprinkle the butter cubes over the flour mixture & use your fingers to work them in. Alternately you could use a pastry cutter to do this.
When the mixture resembles cornmeal with pea-sized bits of butter remaining, stir in cheese with a fork until evenly distributed. Sprinkle 6 Tbsp ice water over mixture & stir with a fork until dough begins to come together. If needed, add an additional Tbsp or two of ice water.
Turn the dough out onto a lightly floured surface & knead for about three times. Gather the dough into a disk & wrap in plastic wrap. refrigerate for at least 30 minutes or overnight.
Pork Filling
Bake potato in microwave, peel & cut into small cubes. Set aside.
Heat oil in a skillet & sauté celery, onion, garlic & bacon together on medium heat until veggies are soft & bacon is cooked. Add ground pork, breaking it up well. Stir in dried herbs & spices. Cover & simmer for about 10 minutes.
Remove from heat & stir in cooked potato & cheese. Set aside to cool.
Apple Filling
In a small saucepan, combine butter, water, cinnamon & brown sugar. Bring to a simmer then add diced apples, raisins, lemon zest & juice. Gently simmer for 5 minutes. Remove from heat & allow to cool.
Assembly/Baking
Divide pastry into 5 equal pieces. On a lightly floured surface (or dry wax paper) roll out each piece of pastry into 7 x 7 1/2-inches. The excess trimmed from the sides will be used for little pastry ‘walls’ dividing the sweet & savory fillings. Roll the excess into a 3-inch length.
From the top of each piece, LIGHTLY make a line across your pastry 4-inches from outside edge. This will help to place your fillings properly.
On the 3-inch wide section of the pastry, place savory filling to cover 2/3 of the area. Place one of the rolled strips after that then place sweet filling on the remaining 1/3 to complete the 'clanger'. The little rolled piece of pastry divides the savory & sweet filling.
On the sweet side make 3 holes for vents & on the savory side make 2 slashes. This is the 'code' to let the person eating the clanger which was savory or sweet.
-
Brush the edges of each pastry with egg wash. Lift the pastry from the opposite side over the fillings & seal the edges with a fork.
Brush clangers with remaining egg wash & bake for about 30-35 minutes or until golden.

The other day I came across a recipe for meatloaf that certainly seemed like something ‘special’. Years ago, every family had a meatloaf recipe that was so dearly loved, it achieved iconic status. Today, I’m not so sure that is the case anymore. Nevertheless, this recipe was called ‘1770 House Meatloaf’ which made me curious as to what the history was behind it. Most every review raved about it being pure comfort food and much more than just meatloaf.
From my research on this meatloaf I found that the 1770 House is an East Hampton Inn and Restaurant famous for this dish. East Hampton Village on Long Island, New York is a beautiful village. It’s been that way for years with a glorious pond right as you come into town where swans swim in summer and skaters take to the ice in winter.
The 1770 House has welcomed guests with hospitality and comfort, a tradition that continues to attract guests from around the world to the intimate Inn, steps from the heart of East Hampton Village. The venerable home, today a boutique hotel and restaurant, seamlessly integrates historic elegance with luxurious, modern amenities and first-class dining.
This glorious colonial house has two restaurants—a more formal fine dining room on the ground level and, down a flight of stairs, a cozy ‘tavern’ with its roaring fireplace and comfort food menu. And always, on this seasonally changing menu, there is Chef Kevin Penner’s remarkable meatloaf with its even more remarkable garlic sauce.
This familiar dish is simple enough that it can be prepared as a weekday meal, but that has been elevated by adding a few key ingredients. The celery and thyme infuse the mix with intense flavor, and the garlic sauce works perfectly. The outcome is a delicious dish with moist texture: not your average meatloaf.
So there you have it …. meatloaf with first-class dining status!
Print Recipe
1770 House Meatloaf w/ Garlic Sauce
Votes: 1
Rating: 5
You:
Rate this recipe!
|
|
Votes: 1
Rating: 5
You:
Rate this recipe!
|
Instructions
Meatloaf
Preheat the oven to 350 F.
Heat the olive oil in a large (12-inch) sauté pan over medium heat. Add the onion & celery and cook for 5 to 7 minutes, stirring occasionally, until the onion is translucent but not browned. Set aside to cool slightly.
Place the beef, veal, pork, parsley, thyme, chives, eggs, milk, salt & pepper in a large mixing bowl. Put the panko in a food processor fitted with the steel blade and process until the panko is finely ground.
Add the onion mixture & the panko to the meat mixture. With clean hands, gently toss the mixture together, making sure it's combined but not compacted.
Place a piece of parchment paper on a sheet pan. Pat the meat into a flat rectangle and then press the sides in until it forms a cylinder down the middle of the pan (this will ensure no air pockets). Bake for 40 to 50 minutes, until a thermometer inserted in the middle reads 155 F. to 160 F. Remove from the oven and allow to rest for 10 minutes. Slice and serve hot with the Garlic Sauce.
Garlic Sauce
Combine the oil & garlic in a small saucepan & bring to a boil. Lower the heat & simmer for 10 -15 minutes, until lightly browned. Be careful not to burn the garlic or it will be bitter. Remove the garlic from the oil and set aside.
Combine the chicken stock, butter & cooked garlic in a medium saucepan and bring to a boil. Lower the heat & cook at a full boil for 35 - 40 minutes, until slightly thickened. Mash the garlic with a fork, whisk in 1/2 teaspoon salt and 1/4 teaspoon pepper & taste for seasonings. Spoon the warm sauce over the meatloaf.
Recipe Notes
- Since there are just two of us, I made the full recipe then divided the mixture into 3 portions. I baked all 3 & used one for our supper meal today, froze the second one for a future meal & with the third, I sliced it for 'meatloaf' sandwiches. Doesn't get better than that!

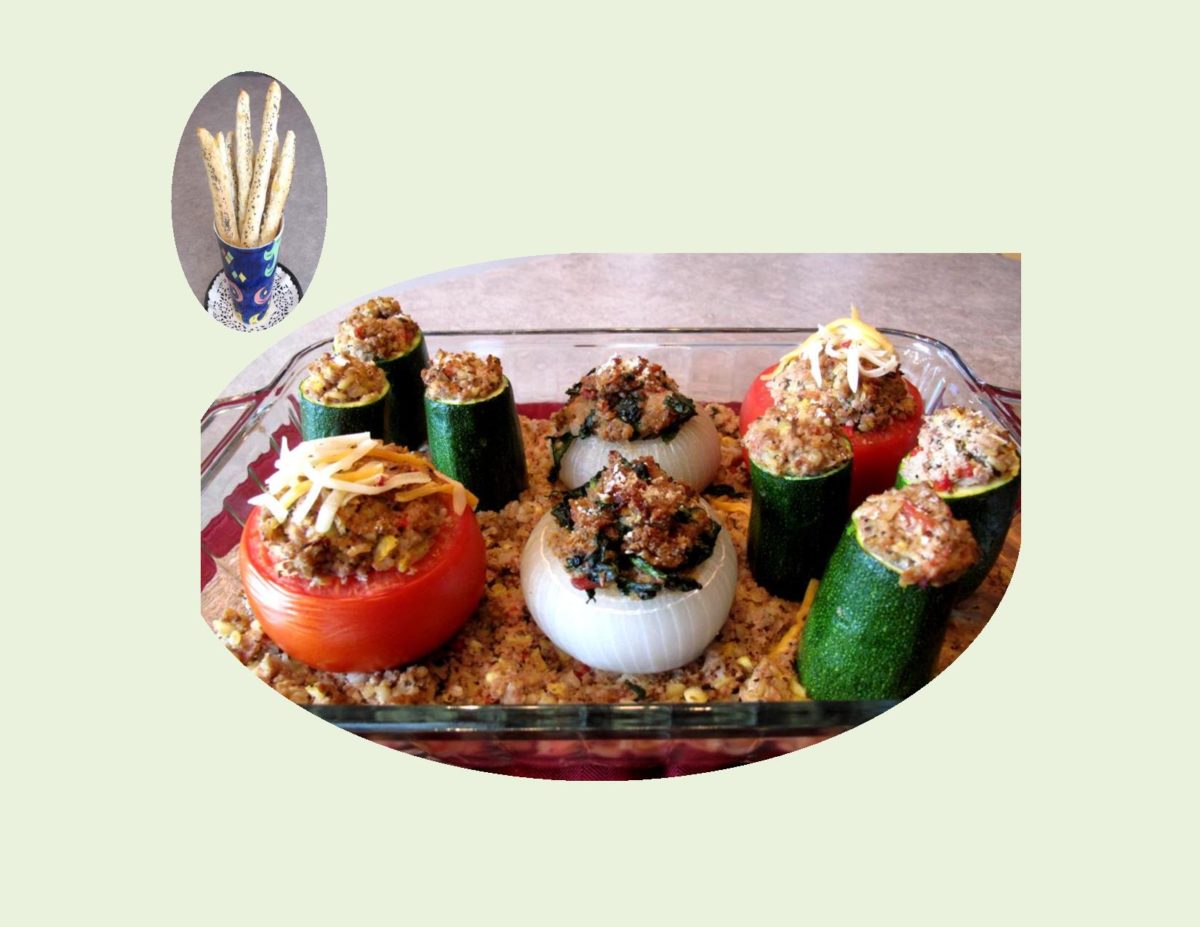
Anyone growing a vegetable garden will now be reaping the benefits of all your hard work. Have you ever stopped and thought about how many summer vegetables are fantastic for hollowing out and stuffing? Any vegetable with a fairly sturdy shape can become an edible vessel for dinner. All we need to do is scoop out the middle and fill the inside with a stuffing of our choice. A little time in the oven until everything is heated through and dinner is ready!
When my siblings and I were growing up, my mother had many unique ways of teaching us how to take responsibility. On one side of her huge farm vegetable garden, she designated a ‘strip’ each for the three of us older siblings. The strips were each about 4 feet (1.22 m) wide and the length of her garden. The deal was that we could grow whatever we choose to, but it was ours to weed and care for all summer. At the end of the season, it was fun to see who had the most success. One of my sisters absolutely loved to grow pumpkins as they grew fast and large. I can’t really remember my mother stuffing a lot of vegetables but the idea of stuffing ‘things’ always appeals to me. The blended flavors make for some pretty tasty meals.
I couldn’t resist making a few kinds even if I’m not a vegetable gardener. These blog recipes have been adapted from tasteofhome.com which just happens to be one of my favorite recipe companies.
Print Recipe
Stuffed Onions, Tomatoes & Zucchini with Herb / Cheese Bread Sticks
If your a vegetable lover, this meal is for you.
Votes: 1
Rating: 5
You:
Rate this recipe!
Ingredients
Tomato & Zucchini Filling
Ingredients
Tomato & Zucchini Filling
|
Votes: 1
Rating: 5
You:
Rate this recipe!
|
Instructions
Stuffed Onions
-
Cut a 1/2" thick slice from tops; discard. Trim just enough off bottom for onions to stand upright. Scoop out all but outer 2 or 3 layers from each onion. Chop scooped out onion reserving 2/3 of it for tomato/zucchini filling.
-
Cook bacon until crisp; transfer to a paper towel, reserving fat in skillet. Add onion, celery, salt & pepper to skillet; saute, stirring until vegetables are softened, about 5 minutes. Add garlic & saute, stirring about 1 minute. Transfer mixture to a bowl & stir in spinach, bread crumbs, margarine, chicken broth & bacon; cool.
-
Preheat oven to 425 F. Arrange onion shells, open sides up, in a small baking pan. Add 1/2 cup water & cover tightly with foil. Roast onions until JUST tender. Do not over bake! Remove from oven. Lift carefully to work surface & fill with stuffing. Set aside until tomatoes & zucchini are prepared.
Stuffed Tomatoes & Zucchini
-
Cut a thin slice off the top of each tomato; remove core, discard. Using a melon baller, scoop out pulp, leaving a 1/2" shell. Reserve pulp. Invert tomatoes onto paper towels to drain. Slice each zucchini into thirds. Using melon baller, scoop out centers, leaving one end of each piece in tact to hold filling.
-
In nonstick skillet, cook turkey & reserved, chopped onion until meat is no longer pink; drain. Stir in basil, salt, pepper & reserved tomato & zucchini pulp; bring to a boil. Reduce heat; simmer, uncovered, for 10-12 minutes. Stir in rice, cheese & pesto; heat through. Cool slightly; spoon into tomato & zucchini shells.
-
Preheat oven to 350 F. Place any remaining filling in the bottom of a 9 x 13-inch baking pan. Place stuffed onions, tomatoes & zucchini on top. Bake, uncovered, for about 20-25 minutes. Do not over bake as it is best when vegetables still have a bit of crispness rather than being completely soft or mushy.
Herb / Cheese Bread Sticks
-
In a large bowl, combine the first 8 ingredients. Cut in butter until mixture resembles fine crumbs. In a small dish, beat egg & divide. In another dish, whisk yogurt with 1/2 beaten egg. Stir into dry ingredients until mixture forms a ball.
-
Preheat oven to 400 F. Divide into 12 pieces & roll each into an 8" length. Lay on a parchment lined baking sheet. Brush with remaining beaten egg & sprinkle with poppy seeds. Bake for about 20 minutes or until golden. Cool on wire rack.
Recipe Notes
- Don't hesitate to add some tomato sauce to your tomato/zucchini filling if you think it needs a little more flavor.


