HAPPY CANADA DAY !
We are celebrating our country’s 150th ‘birthday’ this year. July 1st marks the historical event in which Canada gained its independence from Great Britain in 1867. This important holiday celebrates the birth of Canada as an independent nation.
Our July 1st holiday is comparable to the July 4th, ‘Independence Day’ holiday celebrated by the United States. Along with numerous parades, concerts, carnivals, festivals and firework displays, Parks Canada entrance fees are being waived in 2017 to mark this occasion.
Food and drink are almost as synonymous with Canada Day as the colors of red and white. Barbecues are definitely the preferred choice of food event for the day.
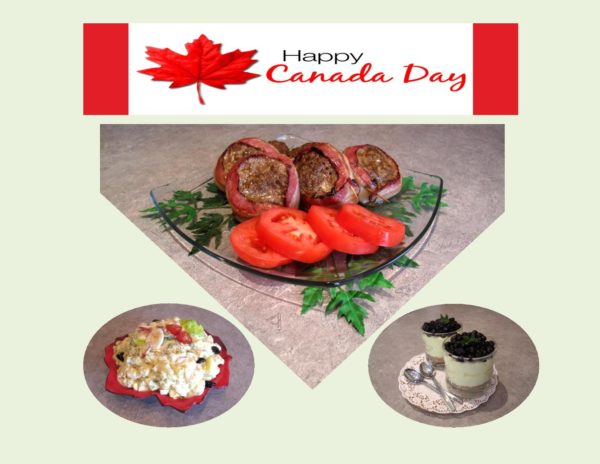
For ‘our’ barbecue, I am going with some BACON-WRAPPED BURGERS, POTATO SALAD with BLUEBERRY-LEMON CHEESECAKE CUPS. Yum!
Print Recipe
Bacon Wrapped Burgers/ Potato Salad/ Blueberry Cheesecake Cups
Votes: 1
Rating: 5
You:
Rate this recipe!
Ingredients
Blueberry-Lemon Cheesecake Cups
Ingredients
Blueberry-Lemon Cheesecake Cups
|
Votes: 1
Rating: 5
You:
Rate this recipe!
|
Instructions
Bacon-Wrapped Burgers
In a large bowl, combine the first seven ingredients & 2 Tbsp barbecue sauce. Crumble beef over mixture & mix well. Form into 12 thick patties. Wrap a bacon slice around the sides of each patty & secure with a toothpick.
Barbecue at 350 F. until meat is no longer pink. Baste frequently with remaining barbecue sauce during latter part of cooking.
Blueberry-Lemon Cheesecake Cups
Add boiling water to jelly powder; stir 2 minutes until dissolved. Refrigerate 45 minutes or until slightly thickened.
Preheat oven to 325 F. Mix graham crumbs & butter; press about 3 Tbsp onto bottom of each of 8 -125 ml, pyrex custard cups. Place on rimmed baking sheet; bake 6 minutes. Cool.
Beat cream cheese & sugar with mixer until blended. Gradually beat in half & half; Stir in jell-o. Spoon into cups; top with fresh blueberries.
-
Recipe Notes
- You can find the potato salad recipe in the June 2016 blogs.
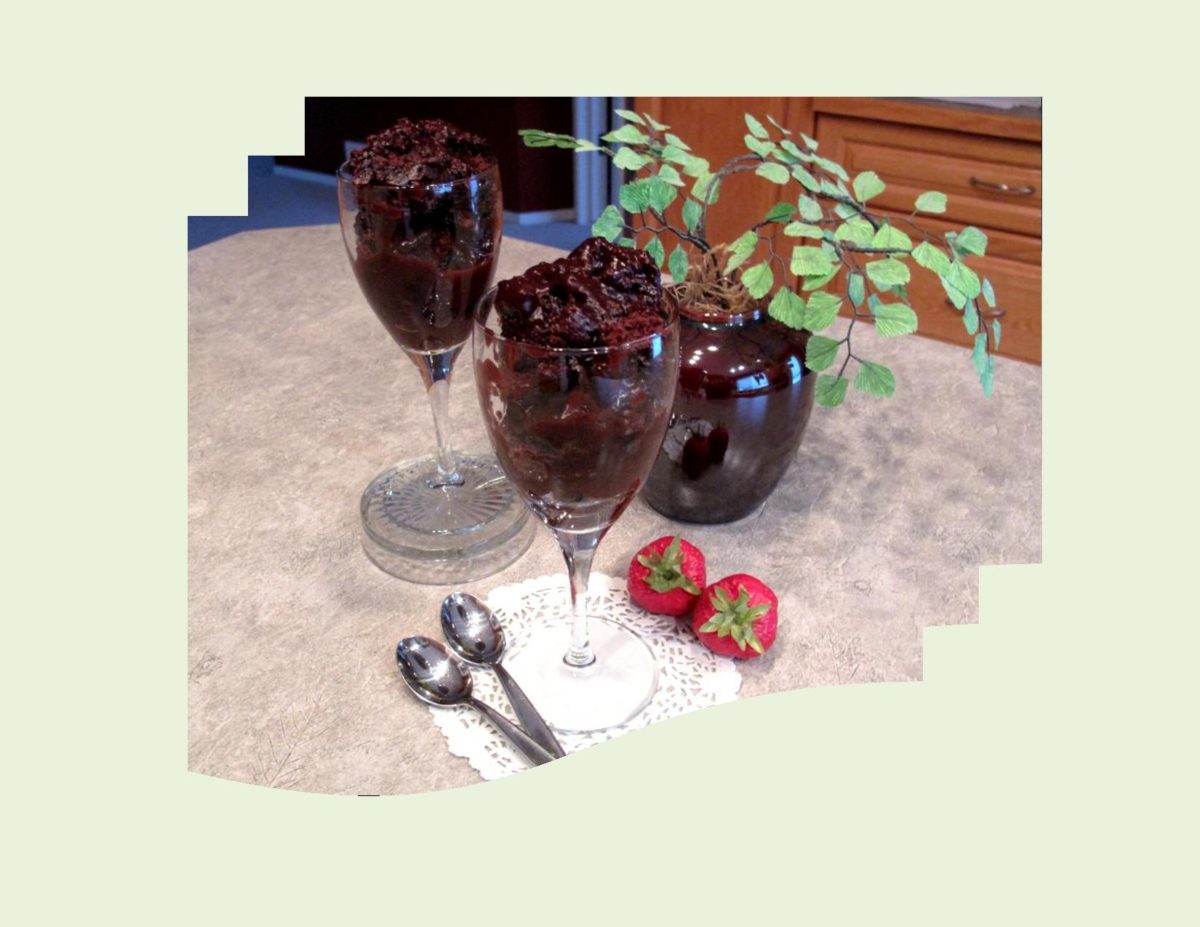
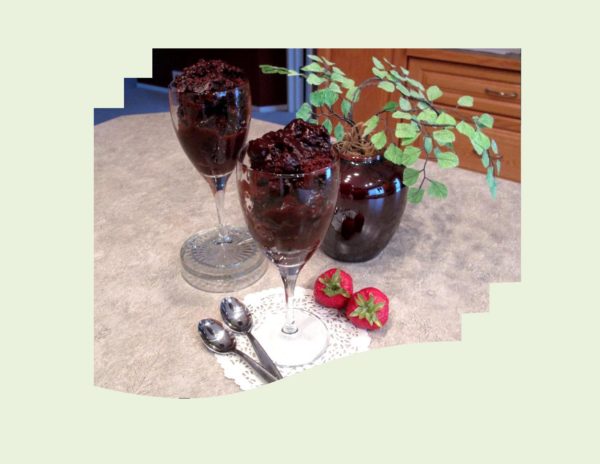
If you grew up in the 60’s, you probably remember ‘brownie fudge pudding’. Those wonderful pudding cakes every homemaker was making. The ultimate time saver because it could be mixed and baked all in the same dish.
Pudding cakes offer two treats in one. While baking, the cake portion rises to the top and a creamy pudding-like sauce forms on the bottom. They can also come in a variety of flavors and can even be made with fresh fruit. Adding fruit, such as blueberries or cherries, makes a pudding cake even better than a regular fruit cobbler in that it develops a thicker, richer sauce around the fruit than most cobblers would.
This dessert is relatively low in fat and it really isn’t necessary to add an extra topping, although ice cream or whipped cream are good. At the time my mother was making this dessert, it was only the chocolate version. It’s definitely one of those classic recipes that has never been forgotten.
Print Recipe
Brownie Fudge Pudding
Serving it parfait style adds a bit of elegance to this ordinary little pudding.
Votes: 1
Rating: 5
You:
Rate this recipe!
|
|
Votes: 1
Rating: 5
You:
Rate this recipe!
|
Instructions
Preheat oven to 350 F. In an 8 x 8 inch baking dish, combine first 5 ingredients. Add milk, margarine & walnuts; combine. Spread batter evenly in dish (batter will be stiff). Sprinkle brown sugar & 1/2 cup cocoa over batter.
Pour boiling water over all & bake for about 40 minutes or until batter rises to the top & is baked through.

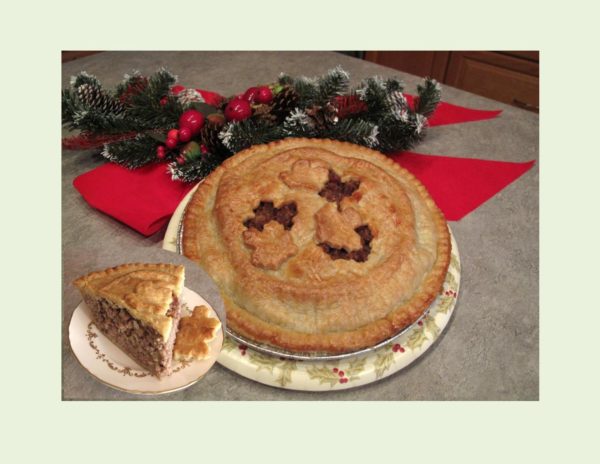
New Years Eve and Christmas are the traditional occasions to serve tourtiere. This classic French Canadian meat pie originated in the province of Quebec, Canada as early as 1600. While it may seem foreign to some, tourtiere is as Canadian as maple syrup or hockey. It is one of Canada’s better contributions to the culinary world being enjoyed throughout Canada as well as the upper mid west and eastern United States.
Fundamentally, tourtiere is a pie that contains meat and spices baked in a flaky crust. The meat is generally diced or ground, including any or all of pork, veal, beef or wild game. Other less common varieties include salmon or poultry. No matter what the meats used, or the presence or absence of potato, bold seasoning is the rule for all varieties. The four original spices used in the classic tourtiere are cinnamon, cloves, allspice and nutmeg. Like so many of these recipes that have been ‘handed down’ over generations, each family alters it to suit their taste.
Something sweet and sour or something with a ‘kick’ pairs well with the spiced meat and flaky crust of tourtiere. Some choices might be cranberry sauce, pickled beets, chili sauce, green tomato relish, olives, spicy fruit chutney or salsa.
Even in today’s increasingly fast-paced world, these time consuming dishes are still being prepared. Just to clarify – Brion and I are not French Canadian but like many Canadians , we enjoy our seasonal ‘fix’ of this classic.
Apart from making tourtiere in the traditional form, try it as tourtiere meatballs, phyllo rolls, burgers, turnovers or chicken tourtiere tartlets. The recipe I’m posting today comes from a tiny little pamphlet I probably have had for 30 years from a meat packing company. It has been one that I have worked with the spices to suit our taste. Spices listed as ‘optional’, lets you do the same.
HAPPY NEW YEARS TO EVERYONE READING MY BLOGS
BEST WISHES FOR 2017 !!
Print Recipe
Tourtiere - Cooking with a French Accent
Votes: 1
Rating: 5
You:
Rate this recipe!
|
|
Votes: 1
Rating: 5
You:
Rate this recipe!
|
Instructions
Cut bacon into small pieces & fry over moderate heat until cooked but not crisp. Add pork, veal & onion; cook until meat is lightly browned. Add water & spices; reduce heat to simmer; cover pan & cook 45 minutes more. Combine meat with mashed potatoes; cool slightly.
Preheat oven to 450 F. Meanwhile, line a 9" pie pan with pastry; fill with meat mixture. Place top crust in position; seal & flute edges, slash several times for air vents. If preferred, cut 'leaves' from pastry & place on top of pie. An egg wash can be brushed over pastry before placing in oven. Bake for 10-12 minutes; reduce heat to 350 F. & continue to bake 30 minutes longer.
-
Recipe Notes
- I have a great pastry recipe on my Thanksgiving blog in October 2016 if you choose to make your own.

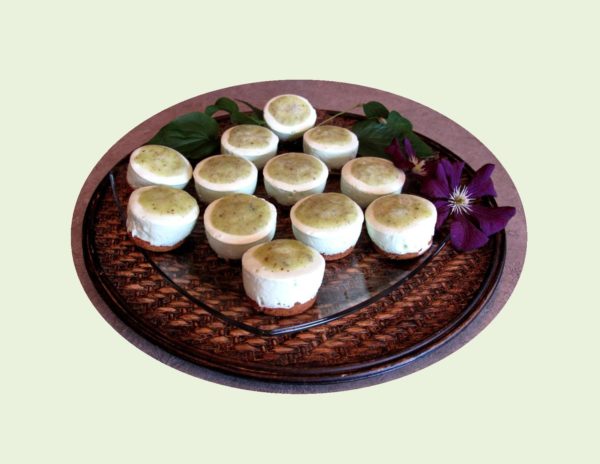
With summer heat upon us, the idea of ‘no baking required’ seems just right. Over the years I have never really made use of limes to any extent. Kiwi, on the other hand, seems to always add so much eye appeal it finds it’s way into many recipes. The thought that comes to mind when you pair them up is a refreshing, sweet-sour flavor.
This brings me to my little mini cheesecakes. I thought I would do my favorite thing, which is to give preparation options. The fact that they freeze so well makes them great for those times when you need a little dessert but have no time to make it. Enjoy!
Print Recipe
No-Bake Kiwi Lime Cheesecake Minis
Cheesecake with options!
Votes: 1
Rating: 5
You:
Rate this recipe!
Ingredients
Cheesecake using Whipped Cream
Cheesecake using Dream Whip OR Half & Half Cream
Cheesecake using Cool Whip
Ingredients
Cheesecake using Whipped Cream
Cheesecake using Dream Whip OR Half & Half Cream
Cheesecake using Cool Whip
|
Votes: 1
Rating: 5
You:
Rate this recipe!
|
Instructions
Crust
In a small bowl, combine graham crumbs, sugar & margarine. Divide evenly into mini cheesecake pan & press down firmly. At this point you can either bake them for 5-7 minutes at 325 F. or leave as is. Either way works.
Cheesecake using Whipped Cream
In a medium bowl, beat whipping cream until soft peaks form. In large bowl, with electric mixer, beat cream cheese until smooth. Add vanilla, lime juice & zest; mix to combine. Sprinkle jell-o powder onto cream cheese mixture & mix until thoroughly combined. Using a rubber spatula, fold in whipped cream until well blended & no streaks remain. Evenly divide among the 12 mini cheesecake pan cups. Cover with plastic wrap & refrigerate for at least 2-3 hours before topping with glaze.
Cheesecake using Dream Whip OR Half & Half Cream
In a medium bowl, combine boiling water, lime jell-o powder & lime juice; mix & let partially set. In a large bowl, cream cheese & sugar together; set aside. Using package directions, make Dream Whip (place in fridge until ready to use). Once jell-o is partially set, pour into cream cheese/sugar mixture (if using 1/2 & 1/2 cream add at this point) & beat to combine. If using Dream Whip, with a rubber spatula, fold into jell-o, cream cheese/sugar mixture. Evenly divide among the 12 mini cheesecake pan cups. Cover with plastic wrap & refrigerate for at least 2-3 hours before topping with glaze.
Cheesecake using Cool Whip
In a small bowl, dissolve lime jell-o powder with boiling water; set aside to cool. In a large bowl, with an electric mixer, beat cream cheese, sugar, lime juice & zest until smooth. Add cooled, partially set jell-o & mix well. With a rubber spatula, fold in Cool Whip. Evenly divide among the 12 mini cheesecake pan cups. Cover with plastic wrap & refrigerate for at least 2-3 hours before topping with glaze.
Kiwi Glaze
In a small saucepan, cook sugar & chopped kiwi for a couple of minutes. Using a blender, blend to a smooth consistency; allow to cool slightly. Add 1 1/2 tsp RESERVED lime jell-o powder & mixing until glaze thickens. Cool slightly then using a spoon, divide evenly among the mini cheesecakes. Chill until set.
Recipe Notes
- If you prefer, you can double your crumb & glaze ingredients & make one large cheesecake in a 9-inch spring form pan.
- If you don't have a mini cheesecake pan just use a mini muffin pan with paper liners. It will work just as well.
- After I made these, I froze them completely. When I wanted to serve them, I set however many I needed out about 30 minutes ahead. There was never any difference in the quality of these cheesecakes in doing that.
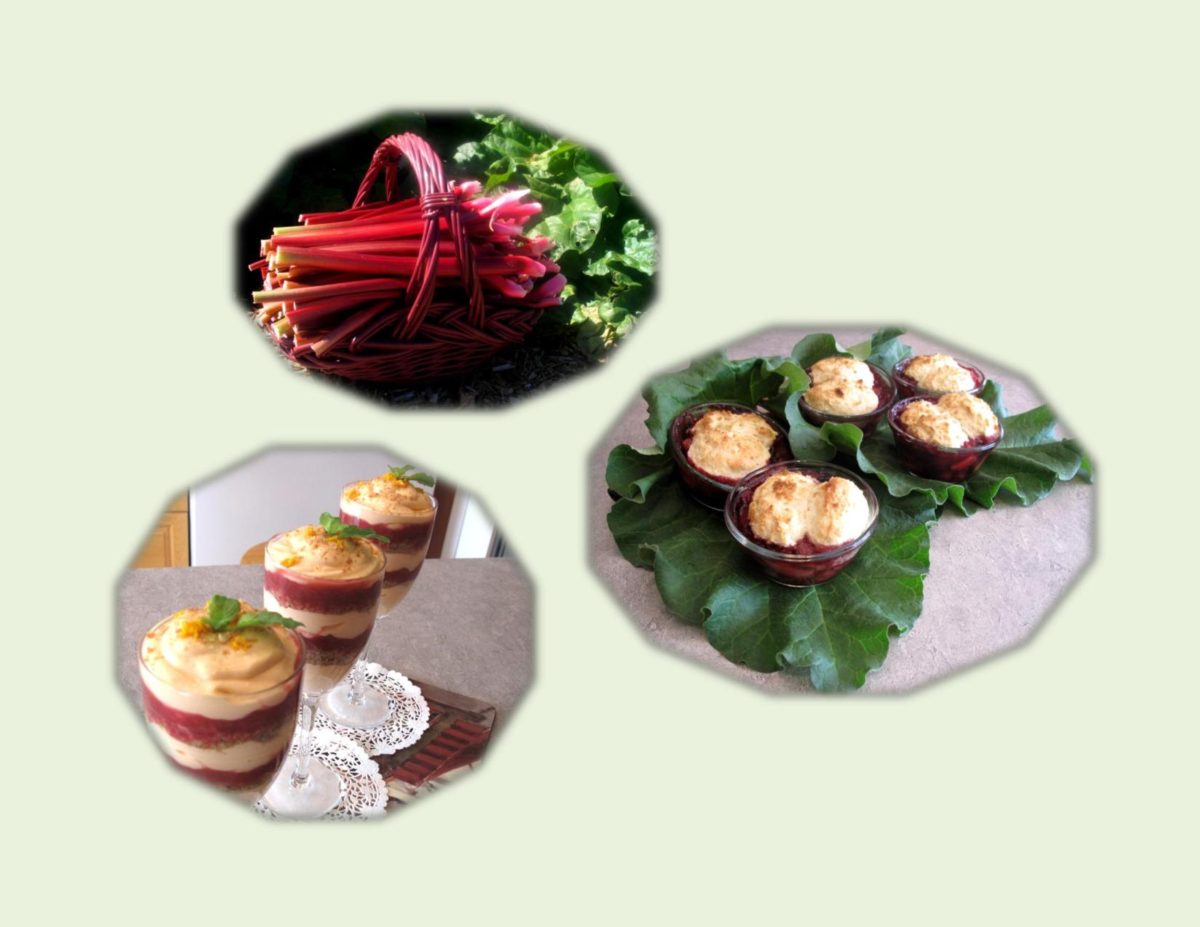
I can not remember ever being able to pick fresh rhubarb in the middle of May here in northern Alberta, Canada. We are definitely seeing some serious changes in the weather.
I love everything about the plant — how good it tastes, the beautiful huge foliage in the garden and how it can keep on producing all season long. The uses of rhubarb are endless. For most part, I think it is usually thought of as a dessert ingredient. I tried making it into a spicy chutney with pork tenderloin for supper one night and it was real nice.
Bordering one side of my mother’s large country garden grew six or eight rhubarb plants. I can’t even imagine how much they would produce. I recall that special taste of her Saskatoon-Rhubarb Pie. Saskatoon berries grew wild in the foothills of the Rocky Mountains. This was a good reason for our family to pack a picnic lunch and make the drive on a Sunday afternoon to pick saskatoon berries. Not only did it make for quality family time but those fresh berries were soooo– good!.
Here are a couple of dessert recipes I made with some of my first rhubarb stalks of this season. One is Rhubarb-Blueberry Cobbler, an old fashioned baked dessert with a tender biscuit crust sprinkled with sugar. The other one is Rhubarb-Orange Cheesecake Parfait. If a rhubarb plant isn’t growing somewhere in your back yard you can usually locate some at a neighborhood Farmer’s Market throughout the summer.
Print Recipe
Rhubarb Desserts
Enjoy a little rhubarb nostalgia in two different presentations.
Votes: 1
Rating: 5
You:
Rate this recipe!
Ingredients
Rhubarb-Blueberry Cobbler
Rhubarb-Orange Cheesecake Parfaits
Ingredients
Rhubarb-Blueberry Cobbler
Rhubarb-Orange Cheesecake Parfaits
|
Votes: 1
Rating: 5
You:
Rate this recipe!
|
Instructions
Rhubarb-Blueberry Cobbler
-
Mix chopped rhubarb & blueberries together in a large saucepan. Blend sugar & cornstarch together & stir into the fruit mixture. Stir in 1/4 cup cold water.
Place on medium heat & bring to a boil, then reduce heat to low & cook until juices flow & fruit is soft. Pour into an 8-cup casserole dish.
In a large bowl, combine flour, baking powder, 1 Tbsp sugar & salt. Blend well. Cut in margarine with a pastry cutter until mixture is a coarse texture. In another bowl blend milk & egg.
Make a well in center of flour mixture; add milk/egg mixture & stir until flour is moistened. Drop dough by spoonfuls onto the fruit mixture. Sprinkle with brown sugar evenly. Bake about 25-30 minutes. Serve plain or with a dollop of yogurt or whipped cream.
Rhubarb-Orange Cheesecake Parfaits
In a plastic bag, coarsely crush gingersnap cookies; set aside.
Chop rhubarb stalks & place in saucepan with water. Cook over low heat until soft. Remove rhubarb from heat. Add sugar, Cointreau & cornstarch; mix well. Return to heat & stir until thickened; cool completely.
In a large glass bowl, dissolve jelly powder & boiling water, making sure it is completely dissolved before adding to cream cheese. Blend in cream cheese with a hand mixer on low speed. Whisk in juice & zest of orange as well as the Cool Whip.
In parfait glasses, spoon a layer of cream cheese mixture; sprinkle lightly with gingersnap crumbs then add a layer of rhubarb sauce. Repeat layers one more time making sure to divide cheesecake, rhubarb sauce & crumbs evenly between parfaits ending with cheesecake mixture.
Refrigerate about 4 hours; garnish a bit more orange zest & a fresh mint leaf if desired.
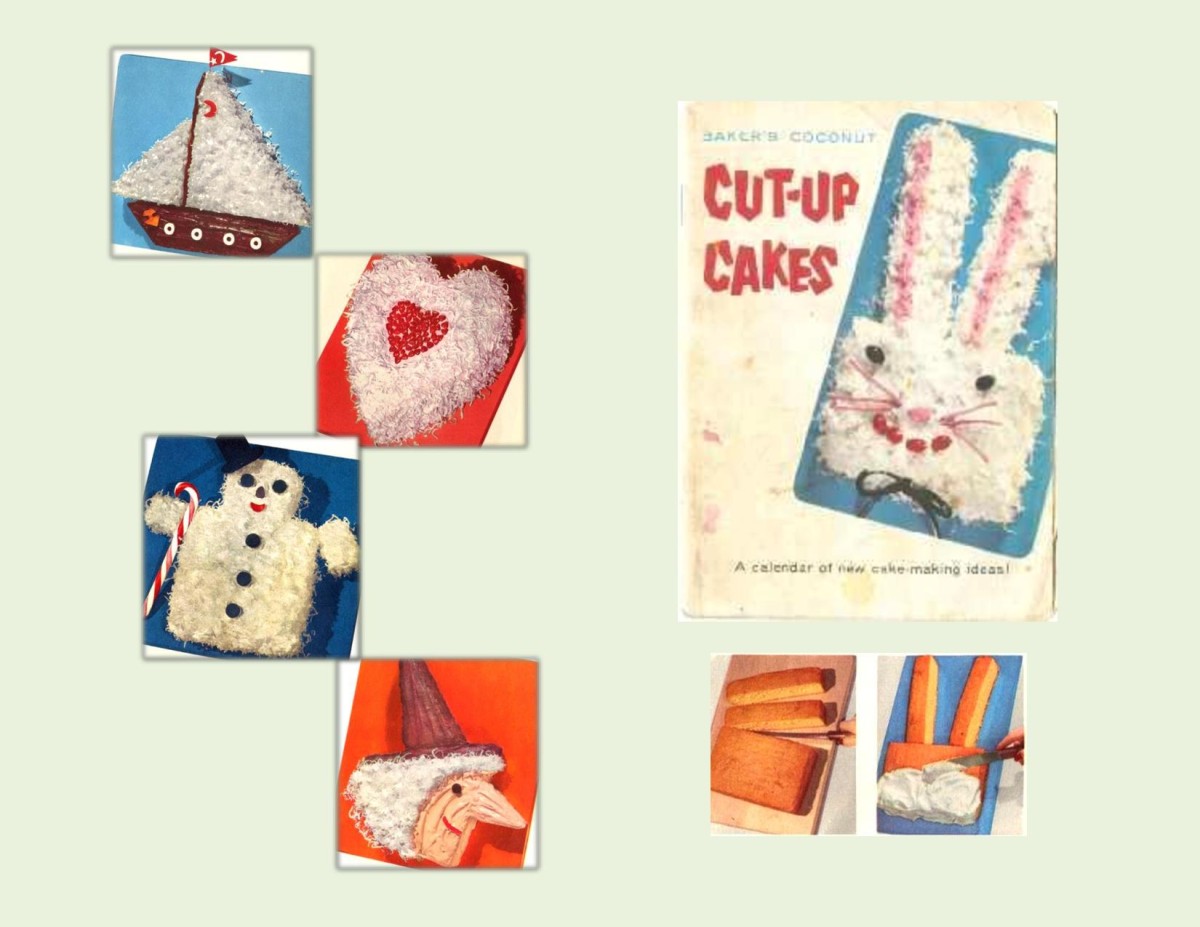
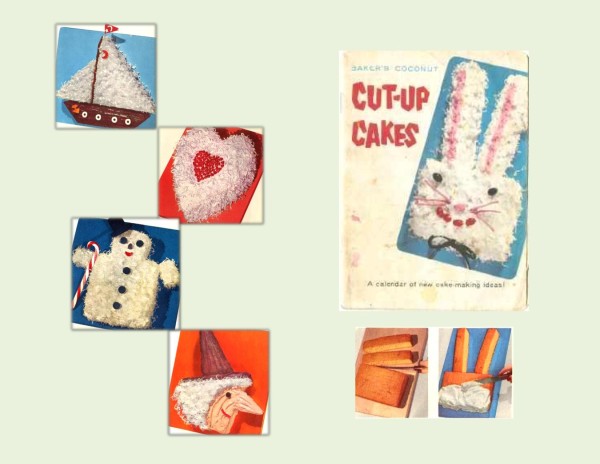
In about 1956, Baker’s Angel Flake Coconut (General Mills) came up with the idea of ‘cut-up cakes’. My mother always had a love for cake decorating and this idea just added a whole new dimension. The company printed a little booklet with a year’s worth of cut-up cake directions.
The cakes were popular because no special tools or pans were needed. Cakes were baked from your own recipe or from cake mixes, usually in either a 13 x 9″ pan or two 8 or 9″ layers. After the cake was cooled, you followed a pattern given in the recipe booklet and cut the cake as directed with a knife, then put the pieces together to form the desired shape. The cake pieces were then covered with frosting, making it appear as one solid cake.
Most of the designs usually incorporated coconut into the decoration. It looked great and of course we loved it. This was the forerunner to the baking industry developing ‘character’ cake pans in shapes of anything imaginable.
Although this old fashioned oatmeal cake came from that time period, it was not used for one of these cut-up cakes. I just thought it would be nice to include it in this blog since it had that wonderful tasting broiled topping made with the well known ‘Angel Flake‘ coconut. This cake was so good but one minute too long under that broiler could destroy it!
Print Recipe
Oatmeal Spice Cake with Broiled Topping
A dense, moist, classic oatmeal cake that has stood the test of time.
Votes: 2
Rating: 4.5
You:
Rate this recipe!
|
|
Votes: 2
Rating: 4.5
You:
Rate this recipe!
|
Instructions
In a small bowl, pour boiling water over oatmeal & margarine; let stand for 10 minutes.
Preheat oven to 350 F. Grease a 9 x 9" baking dish.
In a large bowl, beat eggs with sugar until fluffy. Add vanilla & oat mixture, blend well.
Sift together flour, baking powder, salt, nutmeg & cinnamon.
Combine flour mixture to creamed mixture, blending carefully.
Pour into prepared baking pan; bake 35 minutes or until tests done. Cool for 10 minutes. Do not remove from pan.
For Frosting: Combine all ingredients. Spread evenly over cake. Broil until frosting becomes bubbly. WATCH CAREFULLY!
Let cake cool enough for the topping to be absorbed into the cake.
Survival in the occupation of farming took huge commitment and determination. My parents worked extremely hard as a couple, pursuing this lifestyle.
Many times when we arrived home from school, my mother would be outside working with my dad. On the kitchen table would be her porcelain mixing bowl. Inside would be a recipe for a dessert item she would like me to make for supper and school lunches for the next day. Beside the bowl would be the dry ingredients and utensils etc. needed. All would be covered with a tea towel. Another little note, asking my older sister to start doing some of the outside chores that needed to be done.
Without us being aware of it, we were learning those precious ‘life skills’ of responsibility.
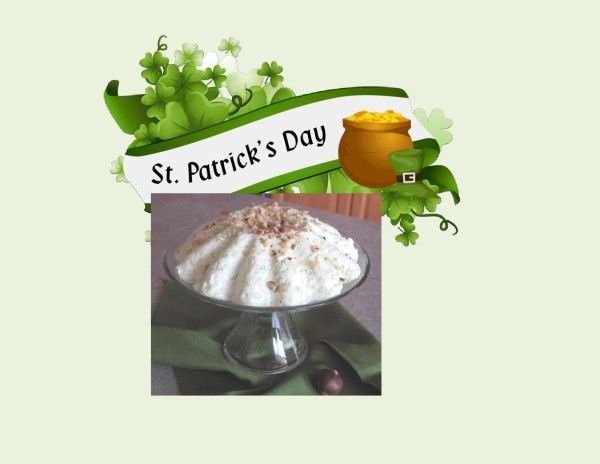
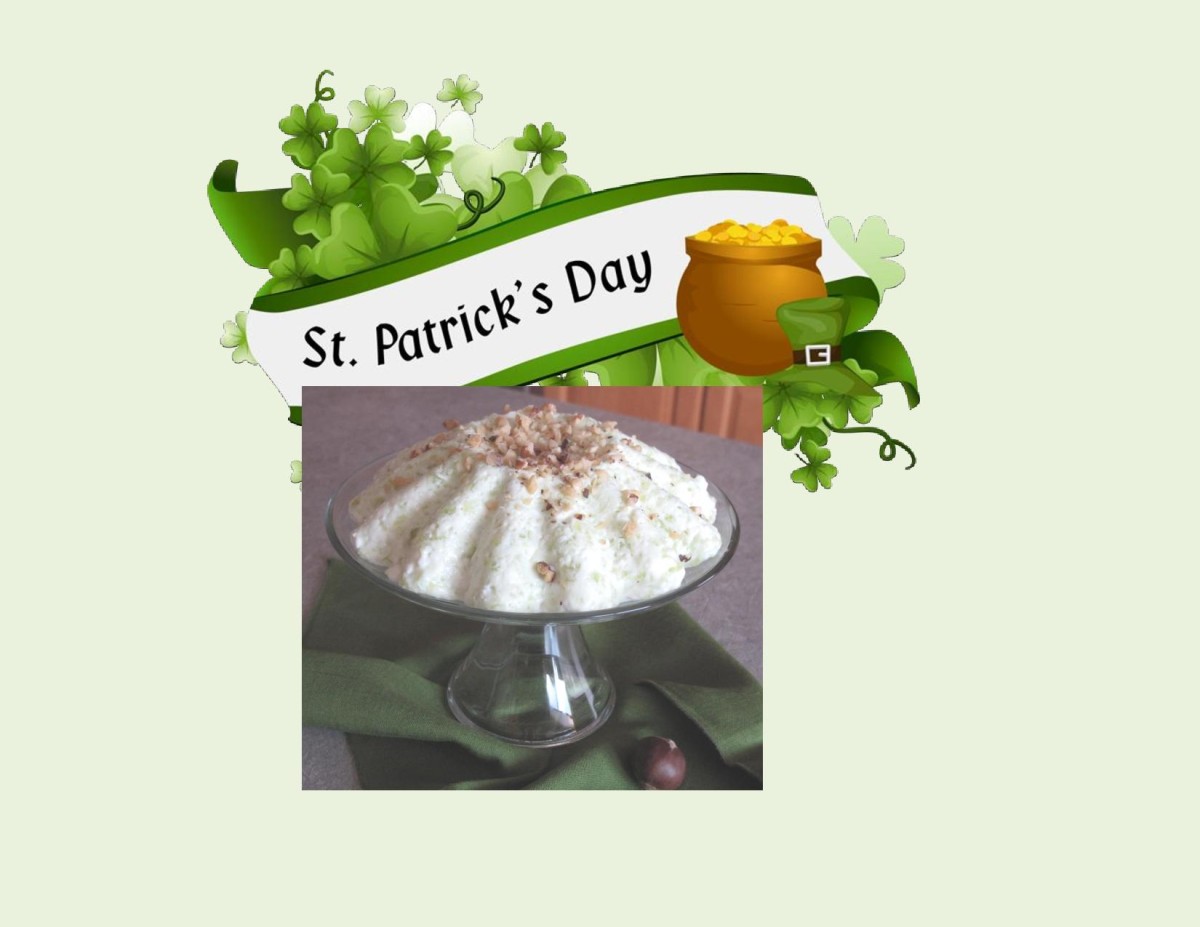
Today’s recipe is a well known salad but when we were growing up this salad was always made to compliment our Christmas dinner. One year, family friends that had been invited to dinner, asked if this salad had something to do with our German heritage because it always appeared on special occasions. To me this salad was like having a little dish of ice cream as it tasted so good. I thought it would be especially nice to serve on St. Patrick’s Day being green and all!
Print Recipe
'St. Patrick's Day' Salad
creamy lime jello salad
Votes: 1
Rating: 5
You:
Rate this recipe!
|
|
Votes: 1
Rating: 5
You:
Rate this recipe!
|
Instructions
In a small sauce pan, dissolve Jell-0 powder in boiling water; add pineapple and marshmallows. Simmer until all marshmallows are dissolved.
Remove from heat and chill until slightly thick.
Whip with mixer until foamy; fold in cottage cheese and un-whipped cream.
Line Jell-0 mold with plastic wrap sprinkle nuts on bottom.
Pour salad into mold and cover with plastic wrap.
Allow to set before serving
Un-mold onto serving plate.


