Oven Barbecued Chicken

Its only March, so BBQ season is till a few months away. Some would claim that good ‘barbecued’ food can only come from the grill, not the oven. But what about during our winter months or times when you just don’t feel like firing up the grill or you’re out of propane? Let’s face it, nothing can replace a good outdoor barbecue, but..

The key to oven BBQ chicken is to start with bone-in pieces. Chicken leg quarters are fairly fatty in comparison to chicken breast so it takes a lot to dry a chicken leg out. Which brings me to a recipe I clipped from a newspaper back in 1970 for OVEN BARBECUED CHICKEN. The ingredient list is rather lengthy but all pretty common place items. Brion likes this meal served with roasted potatoes.

In the month of March our family celebrates three birthdays. Today, March 21st would have been my Dad’s. He passed away at the age of 92, 12 years ago. Our Dad was a man of discipline; love was closely associated with duty and commitment for him. He was confident in who he was and didn’t demonstrate any need to conform to what we might have wanted him to do. Everything he undertook was driven by his commitment to honor and provide for the family that he loved.

                   IT IS WITH MUCH LOVE OUR FAMILY IS HONORING THIS DAY                                                 IN THE MEMORY OF OUR WONDERFUL DAD


Print Recipe
Oven Barbecued Chicken
Just right for one of those 'meat & potatoes' kind of meals.
Votes: 1
Rating: 5
You:
Rate this recipe!
Course Main Dish
Cuisine American
Servings
Ingredients
BBQ Sauce
Course Main Dish
Cuisine American
Servings
Ingredients
BBQ Sauce
Votes: 1
Rating: 5
You:
Rate this recipe!
Instructions
  1. Preheat oven to 375 F. Have available a large baking dish that will hold chicken in a single layer. Combine flour, 1 tsp salt, paprika & 1/4 tsp pepper in a heavy plastic bag. Place chicken in bag & shake to coat evenly. In a heavy, large skillet, heat margarine & oil.
  2. Add chicken & brown slowly on all sides; place in baking dish. Add onion & garlic to pan; cook gently for 3 minutes. Add all remaining ingredients, cover & simmer 10 minutes.
  3. Pour this mixture over chicken, cover the pan & bake 15 minutes. Turn chicken legs, cover again & bake about 15 minutes more. Remove cover & continue baking until legs are tender, basting often with sauce, about 20 minutes.

Pizza Memories

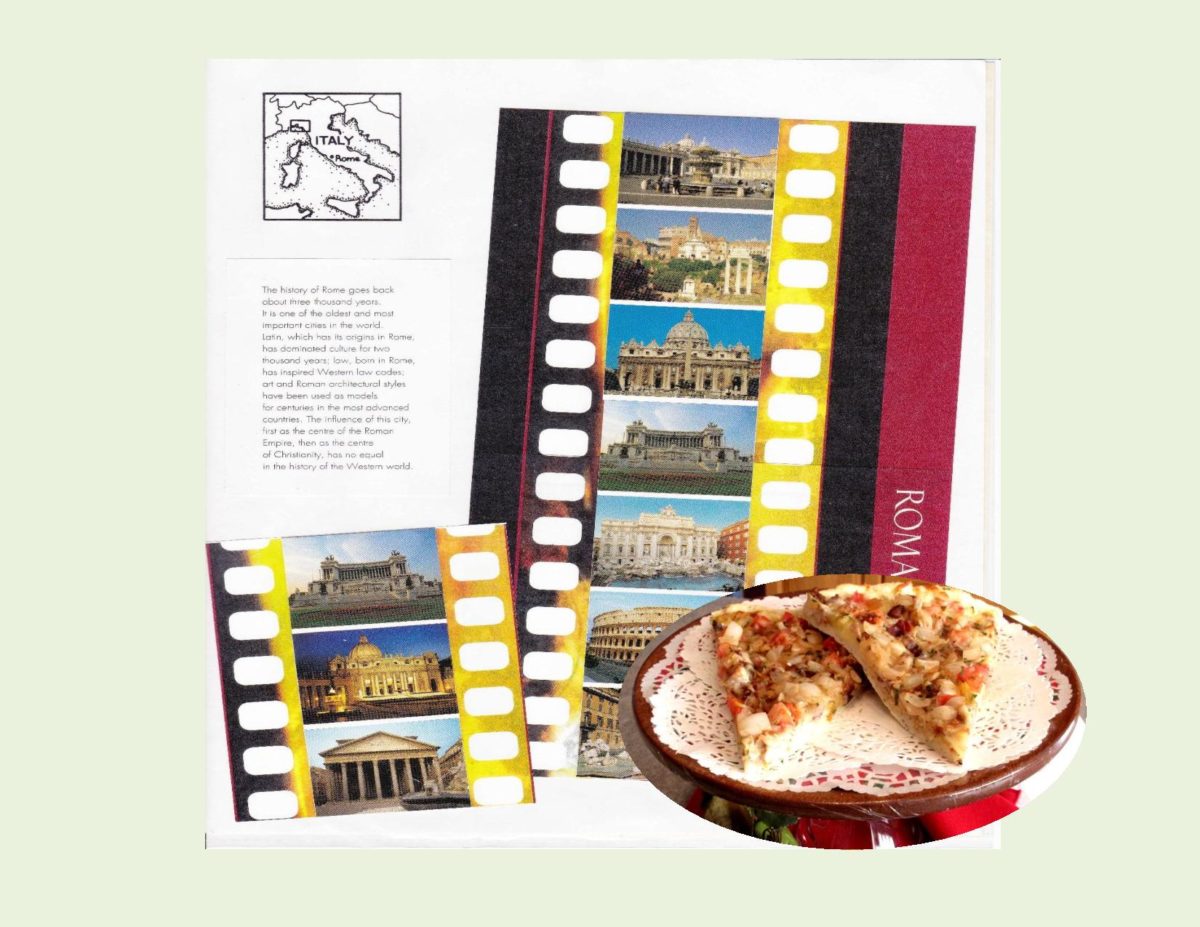
A number of years back, Brion and I decided we would like to seriously explore Rome ‘on foot‘. We rented a furnished apartment up in the hills of the northwest part of the city, by the Embassy residences. Each morning we would set out to travel the cobbled streets of Rome, checking out the art of Michelangelo, the sculptures of Bernini or wander through the ancient Roman ruins. In no other city can you see so much in a short space of time and yet merely scratch the surface. 

Rome is the real thing! So many of its legendary sites are the original article that to see them is to fulfill a lifelong dream. It’s this that raises the ‘goose pimples’; that feeling that the city really is as old as its seven hills, that in Rome, time and beauty are measured on an altogether grander scale.

We found it easy and relatively fast to get around the city by using the public transit system. We paid 18 euros for a 7-day pass which could be used as many times as you wished. Rome’s buses struggle to cope with the daily demand that is already well over its operating limits; battling their way through traffic and streets made impenetrable by cars double parked. To rent a car to see the sights of Rome would be an exercise in frustration or to say the least, taking your life in your hands. Best to spend a day and learn the ‘system’ and you’re set!

Rome is a city that bathes in a warm Mediterranean climate. During the month we spent there we experienced some great weather — 20-23 C with only one day of rain.

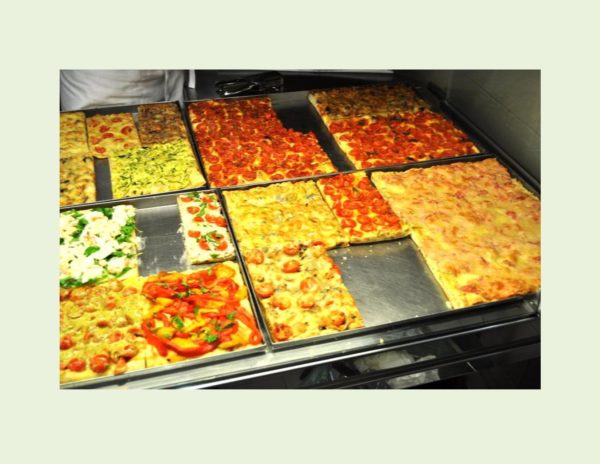
Of course when in Italy it would be unthinkable not to eat pizza during your stay. We discovered a small little pizza place close to our apartment. Once or twice a week we made a point of enjoying some ‘authentic pizza’. The two options generally available in the pizzerias are Roman  pizza (the paper thin, almost charred version) and Neapolitan  with the thicker crust. As for the toppings, there are unlimited choices. 

The pizza recipe I’d like to share today is one that is probably one that is more American/Canadian  then Roman  but nevertheless real good. I had adapted it from Pillsbury.com quite a few years ago.


Print Recipe
Ranch Chicken & Bacon Pizza
Votes: 1
Rating: 5
You:
Rate this recipe!
Cuisine American, European
Servings
Ingredients
Cuisine American, European
Servings
Ingredients
Votes: 1
Rating: 5
You:
Rate this recipe!
Instructions
Pizza Crust
  1. In a medium bowl, measure dry ingredients for pizza crust. Make a well in center & add milk. Stir until dough leaves the sides of the bowl. With buttered hands, gently knead 5-6 times. Spray or butter a 14-inch pizza pan; press dough evenly over bottom & up sides.
Pizza Toppings
  1. In microwave, bake the potato & slice thinly; slightly cook chopped onion. Crisply fry bacon & coarsely chop. Seed Roma tomato & chop along with cooked chicken.
  2. Preheat oven to 375 F. Spread ranch dressing evenly over dough. Combine chesses; sprinkle half of the cheese over crust. Top with thinly sliced potato then remaining ingredients; ending with cheese.
  3. Bake 13 - 16 minutes or until crust is golden & cheese is melted.
Recipe Notes
  • If you are pressed for time, no worries, just use a purchased pizza crust to speed up the process.

‘Retro’ Tuna/Salmon Pasta Bake

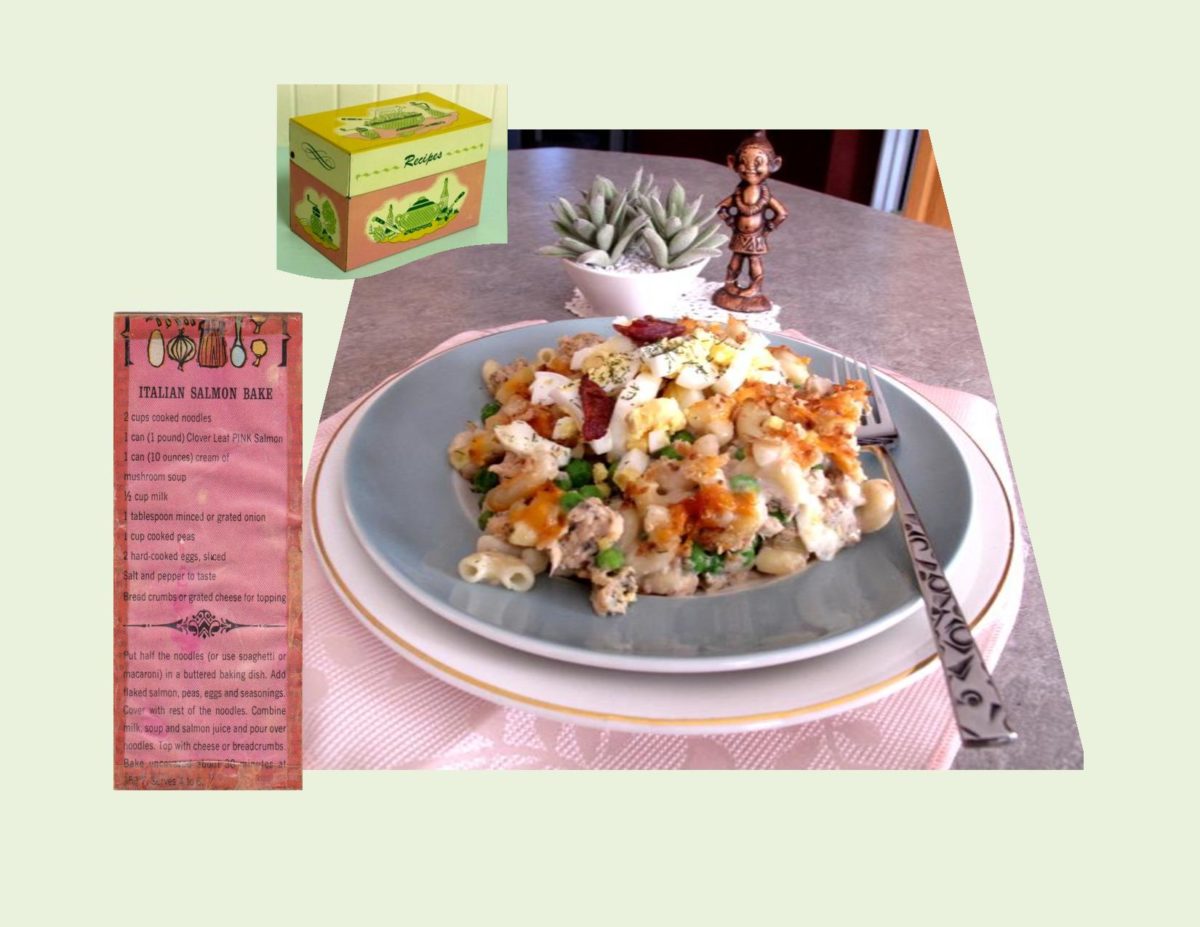
The 1950’s became the decade of casseroles. ‘One Pot’ meals have been around since mankind first invented cooking utensils but were rediscovered in the 1930’s.

Culinary habits of the 1950’s were practically defined by casseroles. The legendary ‘Tuna Noodle’ and ‘Green Bean’ casseroles, were the two that have endured the test of time and are still around today. Most others have faded away, largely because they simply weren’t that good.

One day when I was going through my mother’s little recipe file boxes, I happened to come across one such recipe. It appeared to be from the ‘Clover Leaf’ company. I vaguely recall her making it but decided to try it. I’m sure at that time, it was probably made with either tuna or salmon. I added a few extra spices just to ‘kick’ it up a notch and we really enjoyed it. As Brion put it, ‘great little comfort food meal’.

Print Recipe
'Retro' Tuna/Salmon Pasta Bake
Comfort food of yesteryear.
Instructions
  1. Preheat oven to 350 F. Boil macaroni. Place half of the macaroni in a buttered 9 x 9-inch baking pan. Add drained, flaked salmon (or tuna), peas, eggs & seasonings; cover with the rest of the macaroni.
  2. Combine soup, milk & salmon juice; pour over all. Top with cheese or breadcrumbs or a combo of both. Bake uncovered about 30 minutes.

Moroccan Style Chicken Breasts

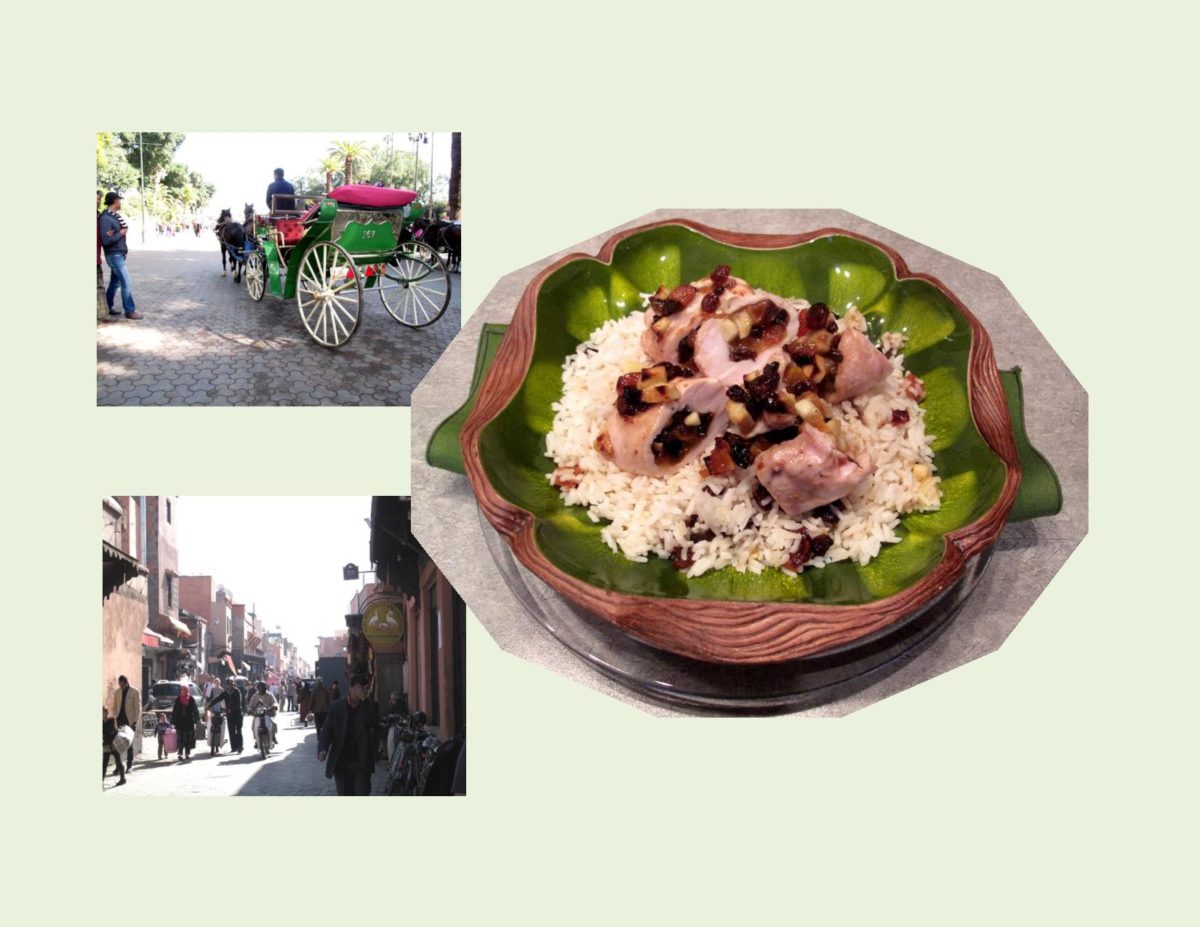
Chicken is incredibly versatile and none more so than chicken breast that can be stuffed with endless filling choices. In 2014, Brion and I spent a brief part of our vacation in Morocco. At that point I became aware of some of  the wonderful ‘flavors of Morocco’. Since then I have incorporated them into numerous recipes.

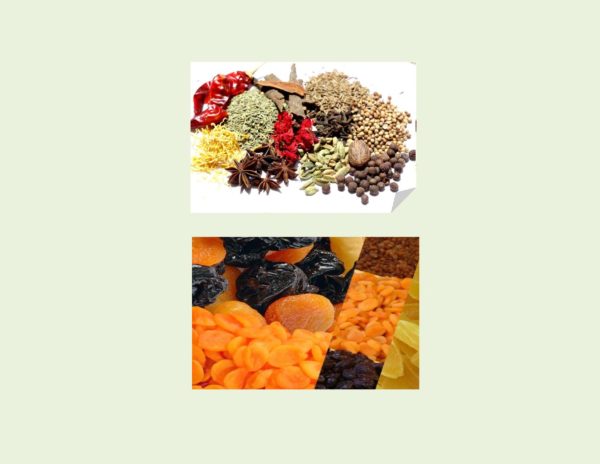
Moroccan cuisine has been influenced by Morocco’s interactions and exchanges with other cultures and nations over the centuries. Typically a mix of Mediterranean, Arabic, Andalusian and most importantly Berber. Morocco produces a large range of Mediterranean fruits and vegetables and even some tropical ones. Spices are used extensively – some of which are imported and others are home-grown.

The dishes that likely inspired the stuffed chicken breast idea were Chicken Cordon Bleu and Chicken Kiev. They appeared in the United States in the early 1960’s. Considered trendy dishes at the time, thus being served in fashionable, high class restaurants.

Recipes are not invented but rather evolve over time. Culinary evidence confirms roulades or roll ups of meat composed of veal or chicken were favored in centuries past by several cultures and cuisines. Mostly notably – Germany, Austria, Switzerland, France and Italy.

Today’s MOROCCAN STYLE CHICKEN BREAST  is a meal we always seem to enjoy and it certainly doesn’t require a lot fuss to prepare. 

Print Recipe
Moroccan Style Chicken Breast
A spicy sweet and sour blend of chicken, fruit & Moroccan spices.
Votes: 1
Rating: 5
You:
Rate this recipe!
Course Main Dish
Cuisine Moroccan
Servings
Ingredients
Course Main Dish
Cuisine Moroccan
Servings
Ingredients
Votes: 1
Rating: 5
You:
Rate this recipe!
Instructions
  1. Preheat oven to 350 F. Combine dates, apricots, raisins, apple & orange juice in a small bowl. Season with spices; mix well.
  2. Place chicken breasts in a heavy freezer bag. Pound breasts gently until about 1/4" thick. Mound some of the fruit filling on flattened breasts & fold over, tucking in the ends. Place a small amount of filling on the bottom of the baking dish & lay breasts on top. Any extra filling can be placed around & on top of chicken as well.
  3. Cover with foil, bake 15 minutes. Remove foil; continue to bake another 15 minutes or until chicken tests done.

‘Kartoffelpuffer’ – German Potato Pancakes

Today is Shrove Tuesday or Pancake Day. The date can be any time between February 3rd and March 9th. It is exactly 47 days before Easter Sunday, based on the cycles of the moon. The expression ‘Shrove Tuesday’ comes from the word shrive, meaning ‘absolve’. This day is observed by many Christians who make a special point of self-examination of considering what wrongs they need to repent and what amendments of life or areas of spiritual  growth they especially need to ask God’s help in dealing with.

Shrove Tuesday precedes Ash Wednesday or the first day of Lent. Popular practices, such as indulging in food that one sacrifices before commencing the fasting and religious obligations associated with Lent.

FASTNACHT, (or Shrove Tuesday) is celebrated throughout Germany with masquerades, carnival processions and ceremonials that vary in character according to locality and folk custom. Fasching is Germany’s version of Mardi Gras, a French term for ‘Fat Tuesday’. This carnival climaxes on the night before the fast. It’s roots go way back to ancient Roman times.

Fastnachts are yeasted doughnuts that are eaten in Germany instead of pancakes. Typically they have no hole or filling and are dusted with powdered sugar. The rich treats presented a way to use up all of the butter, sugar and fat in the house prior to the self-denying diets of Lent.

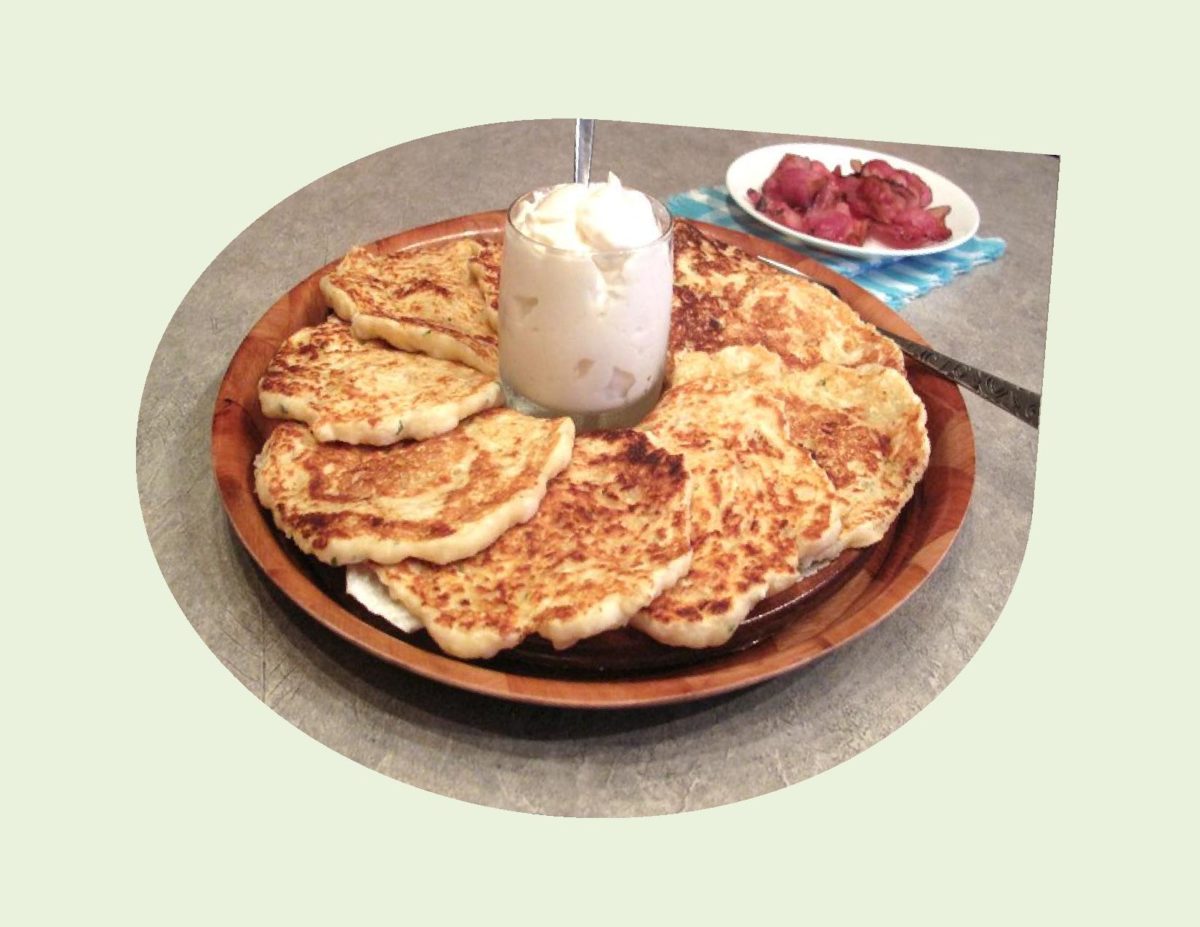
GERMAN POTATO PANCAKES  are my Shrove Tuesday meal. I definitely grew up enjoying pancakes and with the many flavor options of today how could you not like them! 

Print Recipe
Kartoffelpuffer - German Potato Pancakes
Sour cream or applesauce make great compliments to this meal.
Votes: 1
Rating: 5
You:
Rate this recipe!
Cuisine American, German
Servings
pancakes
Ingredients
Cuisine American, German
Servings
pancakes
Ingredients
Votes: 1
Rating: 5
You:
Rate this recipe!
Instructions
  1. Par boil potatoes; cool slightly so you can peel & grate them. In a small bowl, combine next 6 ingredients. In a separate dish, whisk together melted margarine, buttermilk & eggs. Carefully combine wet & dry ingredients, stirring only until just blended.
  2. Heat a non-stick griddle to 350 F. Fold potatoes into batter. Using a 1/4 cup measure, place batter on grill, spreading slightly. Brown lightly on both sides.

Oyster Stuffed Glazed Pork Tenderloin

Most of our vacations over the years have been reasonably structured with a focus on a specific country, it’s people and the geographical treasures within. With the world in such disarray lately, we have been keeping a fairly low profile in our travels. Needing a little ‘sea, sun & sand’ it seemed logical that the Dominican Republic would fit the bill. Of course, you first have to go through all the flying trials and tribulations. To simplify things, Brion had us booked on a direct flight so that helped. Nevertheless, after 6 or 7 hours of flying your always happy to land. A couple of years ago we had spent 12 days in the DR so we new what to expect for most part.

For the next 10 days we settled into holiday mode — eat, sleep and walk on those beautiful pristine white sandy beaches. Being in a resort you have endless choices when it comes to food and drink. Brion and I have a shared love of seafood so we took full advantage of that.

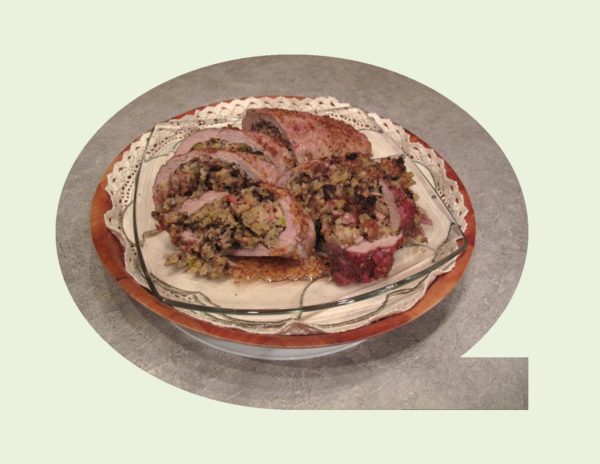
For today’s blog it seems fitting to prepare a meal that would combine seafood and pork– both used extensively in the DR. Oysters accented with bacon, maple and apples give this recipe a very unique character.

Print Recipe
Oyster Stuffed Glazed Pork Tenderloin
Pork tenderloin makes a wonderful option for smaller dinner parties.
Votes: 1
Rating: 5
You:
Rate this recipe!
Course Main Dish
Cuisine American
Servings
Ingredients
Course Main Dish
Cuisine American
Servings
Ingredients
Votes: 1
Rating: 5
You:
Rate this recipe!
Instructions
Oyster Stuffing
  1. In a large non-stick skillet saute bacon, onion, apple, garlic & thyme leaves. Cook, stirring often for 7 minutes or until bacon is crisp. Add chicken broth & oysters; cook for 1 minute or until moisture is evaporated. Add bread & toss to coat with cooked mixture; cool to room temperature.
Tenderloin
  1. Preheat oven to 400 F. Slice along the length of each tenderloin almost through to the center, so it opens like a book. Sprinkle evenly with salt & pepper. Spread the stuffing mixture down the length of one tenderloin & top with the remaining tenderloin. Secure the layers with kitchen twine tied at equal intervals. Place the roast on a rack set over a foil-lined, rimmed baking sheet. Stir the maple syrup with the mustard until well combined.
  2. Roast for 30-35 minutes or until it registers 165 F. on meat thermometer when inserted into thickest part of meat & stuffing. Baste the meat with the maple mixture twice during roasting. Broil on the center rack for 5 minutes or until glossy. Let roast rest 5 minutes before slicing.

German Schupfnudeln – Potato Finger Noodles

I treasure these old recipes, such precious pieces of German history that have been passed down for generations. Researching food history is a subject I will probably never stop enjoying.

In the 17th century when the potato first came to Europe and Germany, people started developing the recipe for these potato finger noodles with the use of a ‘potato ricer’. The name schupfnudeln  combines the cooking technique with their appearance. Traditionally, given their distinctive ovoid shape through hand rolling. The noodles are a nice alternative to pasta, rice or regular potatoes. There is no universal recipe for this dish, as there are many different regional versions on how to prepare them. The dough is kneaded then rolled into a long, thin cylinder. This roll is cut into pieces about half an inch in width then rolled into the typical shape. Afterwards they are cooked in salted boiling water and lightly pan fried.

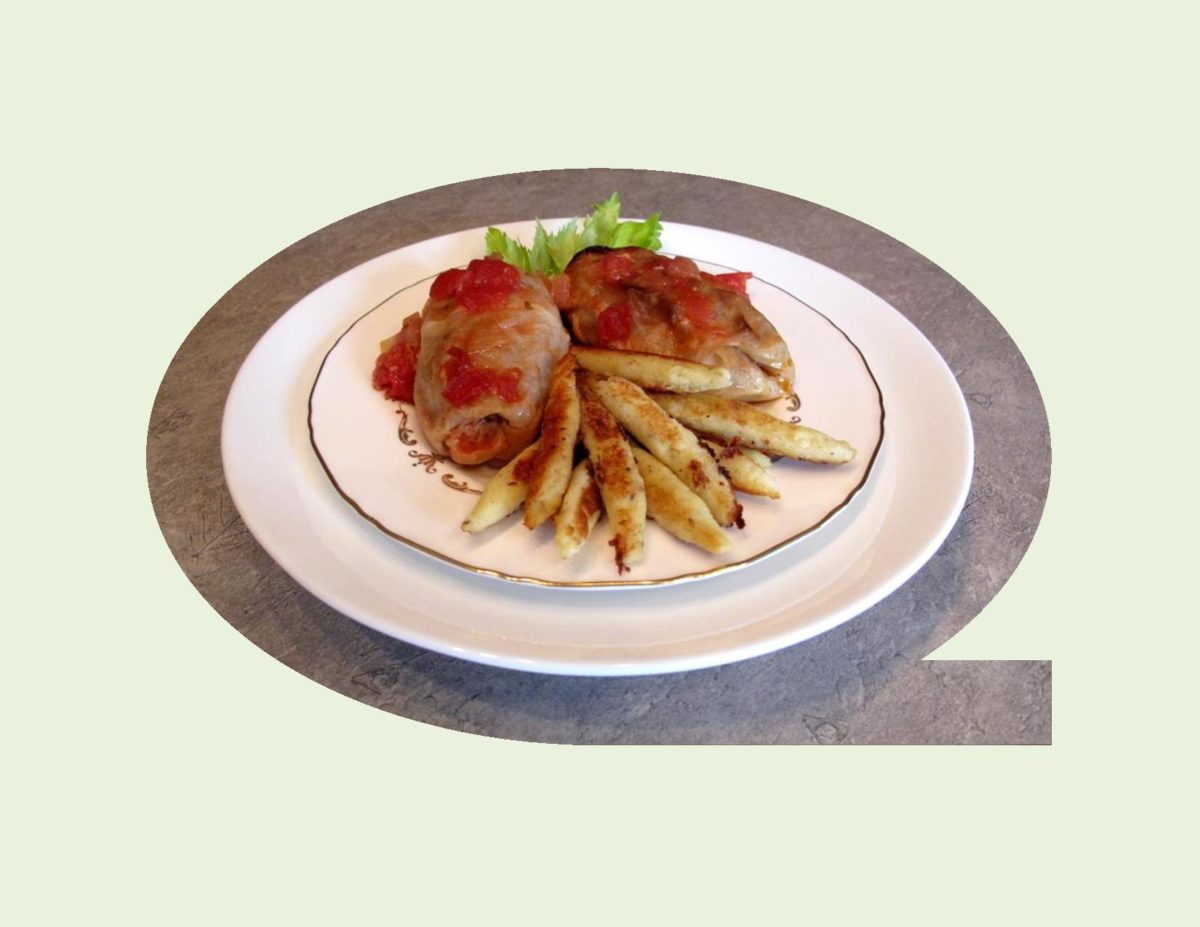
Schupfnudeln are made and eaten all over southern Germany. As well as being served in restaurants, you will find them in the Christmas markets and at beer festivals. Whether served sweet or savory, it is necessary that the comparatively flavorless noodles incorporate the flavor of other ingredients. I find them a great compliment to German cabbage rolls or kohlrouladen.

Print Recipe
German Schupfnudeln - Potato Finger Noodles
Votes: 0
Rating: 0
You:
Rate this recipe!
Course Lunch, Main Dish
Cuisine German
Servings
noodles
Ingredients
Course Lunch, Main Dish
Cuisine German
Servings
noodles
Ingredients
Votes: 0
Rating: 0
You:
Rate this recipe!
Instructions
  1. Previous Day - boil potatoes with skins on in salted water until tender, 35 - 40 minutes. Peel potatoes & either pass through a ricer or grate on a fine grater. Your end result should yield 3 1/2 cups of mashed potatoes. Refrigerate overnight.
  2. In a small bowl, whisk egg together with onion; stir into potatoes. Sprinkle in the flour, salt & pepper, mixing to form a dough. Turn dough onto floured surface & knead for about a minute. Dough should be fairly soft. Roll dough into a long noodle. Divide into 5 even pieces, cut each piece into eights, then pinch each piece in half giving you 80 noodles.
  3. With floured hands, roll each piece into a 4-inch noodle with the middle a little thicker than the ends. Boil noodles for a few minutes before frying. In a large, heavy saucepan over medium heat, melt butter. Add noodles in batches so they are not crowded & saute until all sides are nicely browned. Transfer the noodles to a paper-lined plate to drain off any excess butter.

Mushroom Stuffed Shrimp

HAPPY VALENTINES DAY!

A day when ‘love is in the air’ — roses to be purchased, chocolates and valentine cards to be shared and dining over that special, very intimate supper meal. If only our world would focus more on this emotion all year around instead of just for one day. As I get older, the idea of cherishing each day and the people you care about the most has become so important.

Today is also important to me as it is now one year since I started publishing my blog. With the help of my husband Brion, we have posted 85 blog articles. These stories and recipes are being shared on Facebook and pinterest as well as our website. I have enjoyed the wonderful feedback I’m getting from many different countries as well as friends and family here at home. Thanks to all of you who have followed my blog and I hope you will continue to find it interesting.

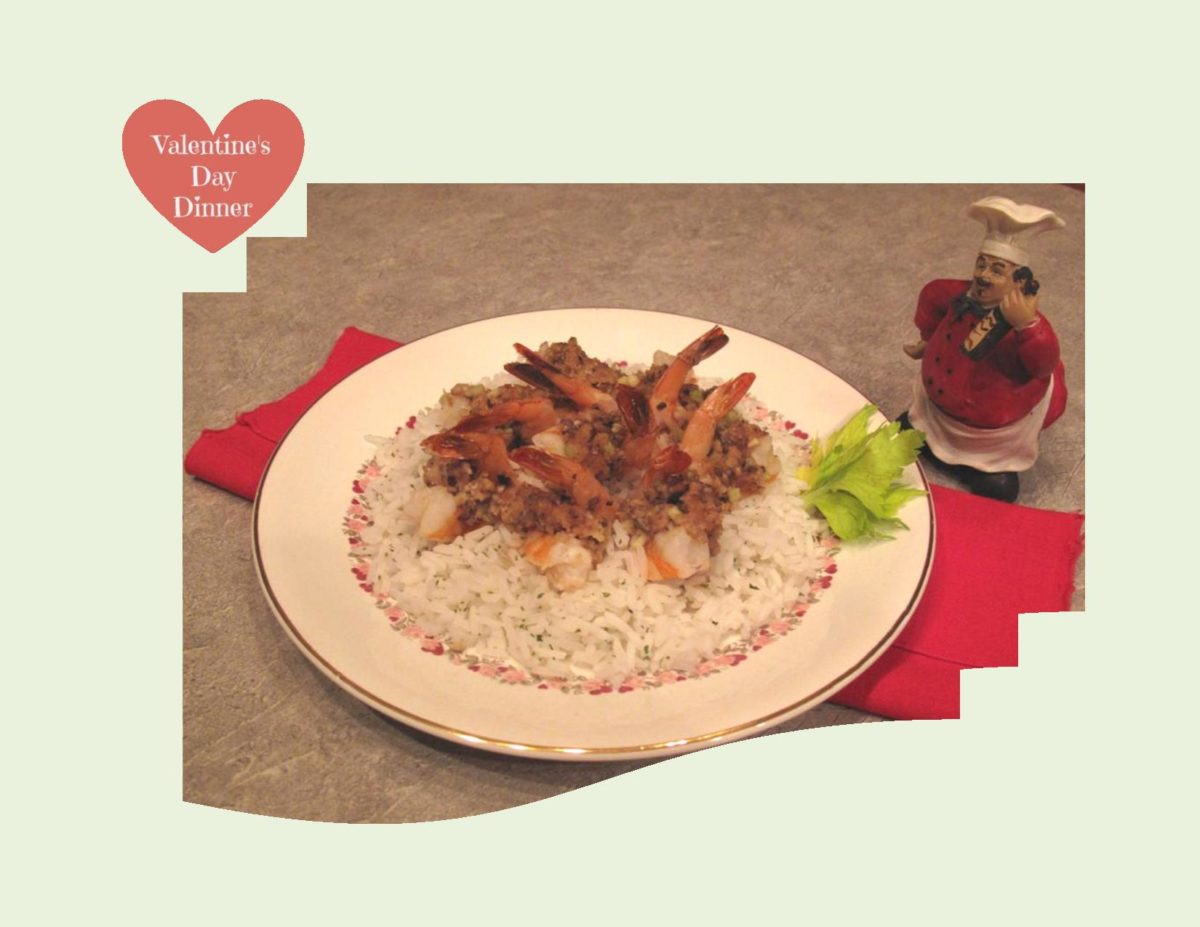
Brion and I share a love of seafood so my Valentine supper is Mushroom Stuffed Shrimp. This meal lends itself to being an appetizer as well as a main course dish. Not a lot of fuss and muss, just a nice little elegant meal for the two of you to enjoy.

Print Recipe
Mushroom Stuffed Shrimp
Votes: 1
Rating: 5
You:
Rate this recipe!
Servings
Votes: 1
Rating: 5
You:
Rate this recipe!
Instructions
Jumbo Shrimp
  1. Peel & de-vein shrimp, leaving tails on. Butterfly each shrimp along the outside curve. In a small bowl, whisk together soy sauce, honey, water, ginger & garlic powder. Add raw shrimp & marinate for at least 30 minutes.
Stuffing
  1. In a small bowl, dissolve bouillon in hot water. Stir in remaining stuffing ingredients. When marinated, remove shrimp from marinate & open shrimp flat & place with tails up in a buttered 9 x 13-inch baking pan. Spoon about 1 teaspoon of stuffing onto each shrimp.
  2. Bake at 375 F. for 5-8 minutes or until shrimp turns pink. Serve over rice as a main course.

Chili Con Carne with Cornbread

At this time of year, this hearty, easy to prepare meal seems to fit in nicely. Here in northern Alberta, Canada we are still in the midst of those cold winter temperatures.

Since the first recorded recipe, chili has been reinvented to include different spices and ingredients changing basic things like beef to chicken, chili peppers to jalapeno peppers and tomato sauce to chicken broth. The fact remains, it’s a great meal no matter what recipe you use or what the weather conditions are. 

Chili con carne, which is Spanish for ‘chili with meat’,  is a spicy ‘stew’ containing meat (usually beef) chili peppers or spice, tomatoes, garlic, onions and beans. Geographic and personal tastes involve different types of meat and ingredients. There has been much discussion and dispute that the word ‘chili’ applies only to the basic dish, without beans and tomatoes.

When Brion and I spent three months in Ecuador, we had rented a furnished apartment. The kitchen was very basic, but I could still enjoy preparing our meals. Being in Ecuador, one would have thought something as common place as ‘chili powder’ would be no problem to buy. After much searching, we finally gave up and I concocted my own version using black pepper, garlic powder, cayenne powder, onion powder, dried oregano and cumin. It actually tasted quite good. Cooking in Ecuador was a real learning curve. Due to the fact that even though you could buy similar ingredients to home, they tasted somewhat different.

Thinking back to my mother’s cooking, I don’t recall much about her chili but the cornbread she served with it was ‘to die for’. Once again, I’m sure so much of it was time and place.

Cornbread is a generic name for any number of quick breads containing cornmeal and are leavened with baking powder. The quintessential late 20th to early 21st century recipe contains baking powder for convenience, sugar for sweetness and flour and eggs for lightness. Cornbread is an interesting recipe to track through the past few centuries. It is such a prolific crop, grown in America, that it was consumed across class, race and regional lines. Corn lends itself to change very easily, giving way to variations of cornbread recipes. Although traditional cornbread was not sweet at all, regional preferences for sweetness in the recipe have developed.

In order to bake some cornbread in Ecuador, we purchased a package of yellow corn meal. Although it seemed to be very finely ground, I was able to make it work and we really enjoyed it. One day, while we were out walking we came upon a street vendor selling something called ‘Humitas’. We purchased a couple to take back to the apartment to try. Humitas are made of ground young corn, seasoned with egg, butter and possibly cheese wrapped in a corn husk and steamed. These had a bit of anise flavor which gave them a real unique flavor. Humitas are one of the most traditional of Ecuadorian recipes. The ingredients can vary by region, town or even in family recipes and can be sweet or salty. They differ from corn tamales in that they are steamed rather then boiled or baked. The corn used in making them is called ‘choclo’, also known as Peruvian or Cusco corn (named for the capital city of the Incas). This Andean corn has extra large, bulbous kernels almost five times larger than North American corn with a creamy texture. Every so often during our stay in Ecuador, we made a point of treating ourselves to some.

My story has got a little ‘long winded’ today, but I hope you have enjoyed it. I am posting my ‘tried and true’ recipes for Chili & Cornbread.  Hope you give them a try and enjoy!

Print Recipe
Chili Con Carne with Cornbread
One of those 'stick to your ribs', comfort food meals!
Votes: 1
Rating: 5
You:
Rate this recipe!
Course Lunch, Main Dish
Cuisine American
Servings
Course Lunch, Main Dish
Cuisine American
Servings
Votes: 1
Rating: 5
You:
Rate this recipe!
Instructions
Chili
  1. In a large skillet, brown beef, onions, green pepper & spices until meat is thoroughly cooked & any liquid has evaporated. Stir in tomatoes, tomato sauce, beans & water. Cook over medium - high heat until bubbly. Reduce heat to medium; simmer, covered for 30 minutes, stirring occasionally.
Cornbread
  1. Preheat oven to 350 F. Line an 8-inch round baking pan with parchment paper or a mini loaf pan. In a food processor or blender, pulse first 5 ingredients for a few seconds. Place in a large mixing bowl. In a small bowl, whisk together melted margarine, milk & egg. Combine wet & dry ingredients, mixing only until moistened; batter should be lumpy. Pour into baking pan(s) & bake for 20 minutes or until test done. Serves 8

Kase Knepfla – Cheese Buttons

Childhood memories particularly play a role in how we regard food. Foods from our formative years and special occasions can become a very emotional experience, bringing us ‘back home’ to one’s beginnings.

Kase Knepfla  is one of those foods for me. The name translates as ‘cheese buttons’ (kase = cheese, knopf = buttons). I have read somewhere, they were probably a version of the Ukrainian ‘vareniki’  that German immigrants developed to suit their own tastes.

To make them you need dry curd cottage cheese. I recall my mother making her own cottage cheese on the back ‘burner’ of our old wood/coal burning stove. Of course, this not being to interesting to a ‘kid’, I really never gave it any thought. It seemed that the milk was put in a certain place on the stove so it wouldn’t get too hot or it would become stringy as it turned to ‘cheese’.

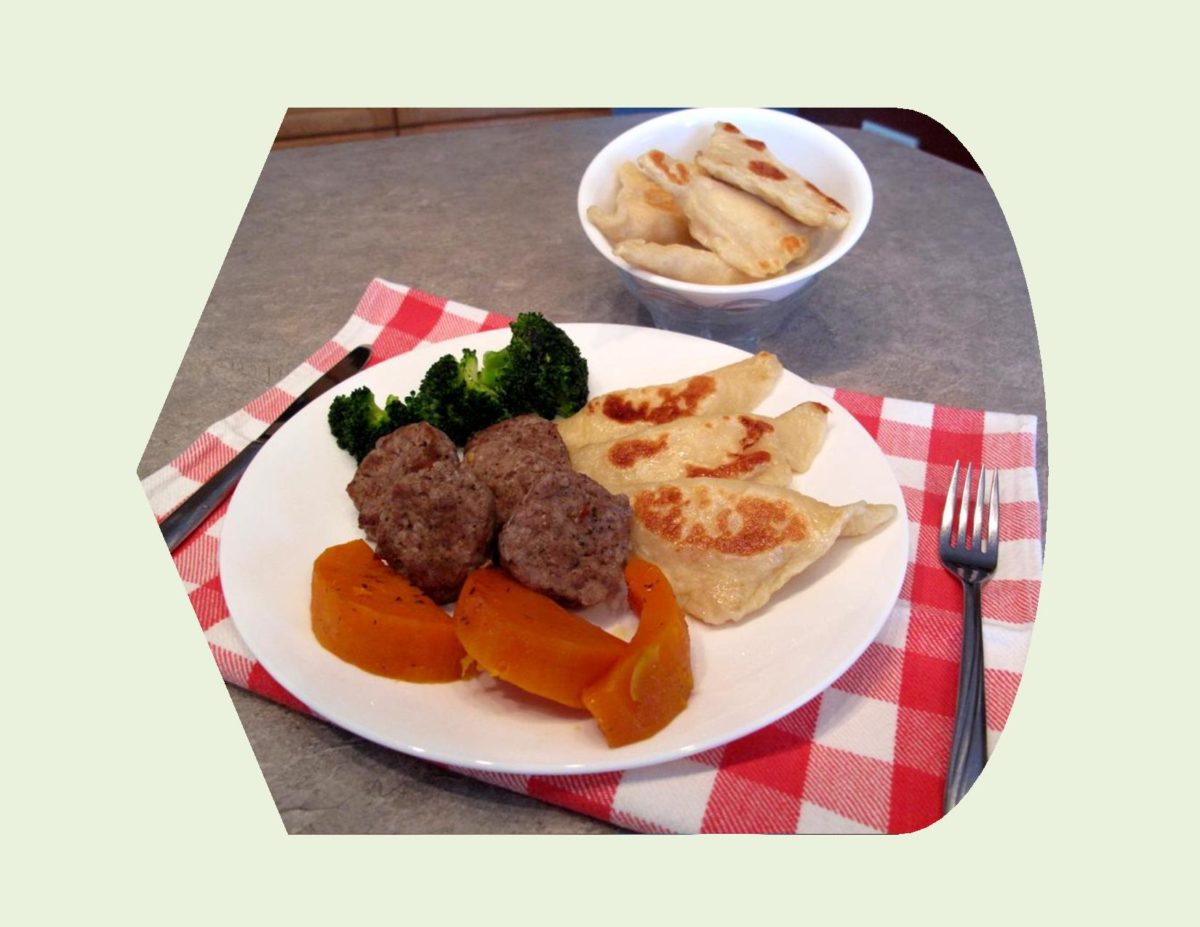
Similar to a perogy, cheese buttons are made of a tender noodle dough. The dough is rolled out thinly and either cut into squares or circles, filled with a cottage cheese mixture, boiled then briefly browned in butter. I have noticed, in looking at numerous kase knepfla recipes, the cottage cheese filling is made with onions, salt and pepper. The only kind that I can remember my mother making was slightly sweet with a touch of cinnamon. No doubt, this was a version my parents grew up with themselves. Nevertheless, I am trying to preserve history one post at a time’….

Traditionally kase knepfla was served with summer sausage and beet pickles. For our meal, I paired them with some homemade pork sausage medallions, squash and fresh broccoli. We loved it!

Print Recipe
Kase Knepfla - Cheese Buttons
Votes: 2
Rating: 5
You:
Rate this recipe!
Course Lunch, Main Dish
Cuisine German
Servings
Ingredients
Kase Knepfla Dough
Filling
Course Lunch, Main Dish
Cuisine German
Servings
Ingredients
Kase Knepfla Dough
Filling
Votes: 2
Rating: 5
You:
Rate this recipe!
Instructions
Dough
  1. In a bowl, mix ingredients into a smooth dough, cover and place in refrigerator for at least 1 hour.
Filling
  1. In a bowl, combine dry cottage cheese, egg, sugar, cinnamon & salt. Filling should be thick enough to hold its shape in a spoon.
To make Kase Knepfla
  1. Roll dough quite thin on a floured surface. Using a small scoop, place balls of filling along one end of dough about 2 inches up from outside edge. Fold dough over filling; using a small round cutter ( or small glass) cut out kase knepfla. If edges aren't sealed, just pinch as needed.
  2. Continue until all the filling & dough are used. Bring a large pot of salted water to a boil. Drop 'buttons' carefully into water & boil slowly for about 5 minutes. Kase knepfla should float when cooked. Drain. I a large saucepan, melt some butter; add buttons, making sure to have only one layer. Brown lightly on both sides.