Italian cuisine is renowned for its delicious and aromatic flavors, and one of the most essential ingredients that contribute to this is a blend of herbs and spices that add a distinct flavor to various dishes.
While these herbs are readily available in Italy, they were not always easy to find in America. As a result, early Italian immigrants needed a way to add their preferred flavors to dishes. ‘Italian seasoning’ provided exactly that. Its origins are a bit mysterious, with some people believing it originated in Italy and others insisting it is an American invention. However, the most common understanding is that the Greeks and Romans developed Italian seasoning somewhere in the Mediterranean during ancient times.
Italian seasoning is a mix of dried herbs with an earthy, piney flavor that’s subtly sweet and peppery. This kitchen staple includes dried basil, dried oregano, dried rosemary, dried thyme and dried marjoram, but there are several variations that also feature additions like dried sage, fennel seeds or even spices like garlic powder or crushed red-pepper flakes. Traditionally, though, it is just those five core herbs.
It has become a staple in North American kitchens and can be used to flavor just about anything, but some of our favorite uses are in classic Italian American dishes like meatballs, pizza or chicken Parmesan. It adds extra interest to olive oil for dipping bread or vinaigrette for salads. Or stir it into marinades to infuse your meat with woodsy, herbal flavor.
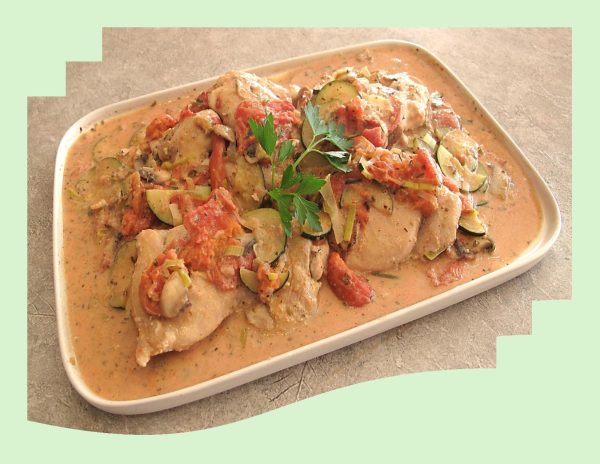
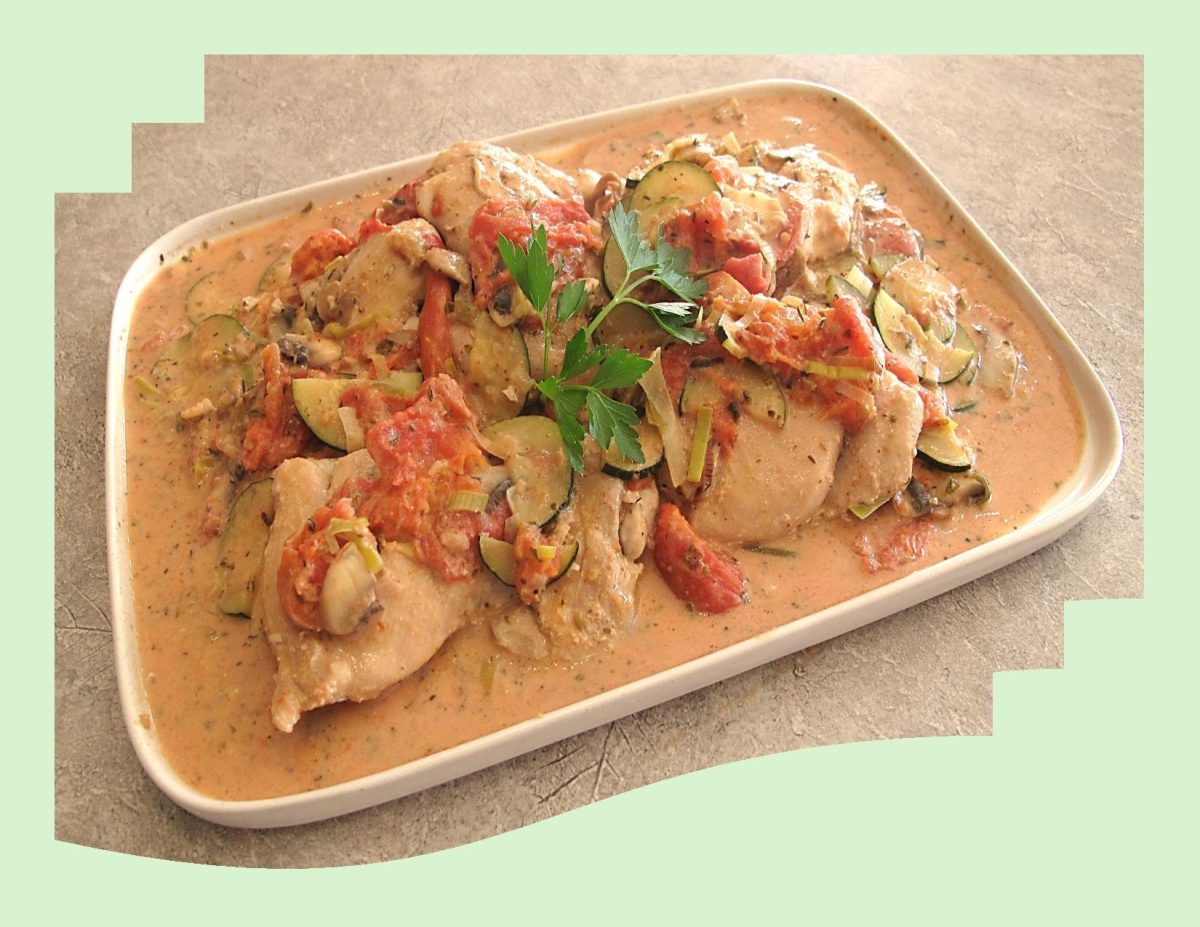
These chicken cutlets cook quickly and are highlighted with a creamy sauce made with tomatoes, zucchini and Italian seasoning. Nice served with roasted mashed cauliflower, brown or Basmati rice or orzo pasta.
Print Recipe
Creamy Chicken Skillet w/ Italian Seasoning
Votes: 1
Rating: 5
You:
Rate this recipe!
|
|
Votes: 1
Rating: 5
You:
Rate this recipe!
|
Instructions
Chicken
In a small dish, combine all chicken seasonings & sprinkle on both sides of chicken cutlets. Heat 1 tablespoon oil in a large skillet over medium heat. Add the chicken & cook, turning once, until browned & cooked through. Transfer to a plate.
Sauce
Add the remaining 1 tablespoon oil, zucchini, mushrooms & onions to the pan. Cook, stirring, until starting to soften, about 2 minutes. Cook, scraping up any browned bits, until the liquid has mostly evaporated, about 2 minutes. Add tomatoes, cream cheese & Italian seasoning. Bring to a simmer and cook, stirring to melt the cream cheese, for 5 minutes. Return the chicken to the pan and turn to coat with the sauce. Serve topped with basil or Italian parsley if desired.
Nice to serve with roasted mashed cauliflower, brown rice, orzo or basmati rice.
HAPPY NEW YEAR’S EVE!
‘The new year stands before us, like a chapter in a book, waiting to be written. Hope smiles from the threshold of the year to come, whispering, ‘It will be happier.’ The best way to predict the future is to create it. There are two mistakes one can make along the road to truth…not going all the way, and not starting’.
You do not find the happy life. You make it. Brion & I have strived hard to do that very thing. We are so grateful for the happiness we have shared in our lives and look for to continuing to ‘live our best lives’.
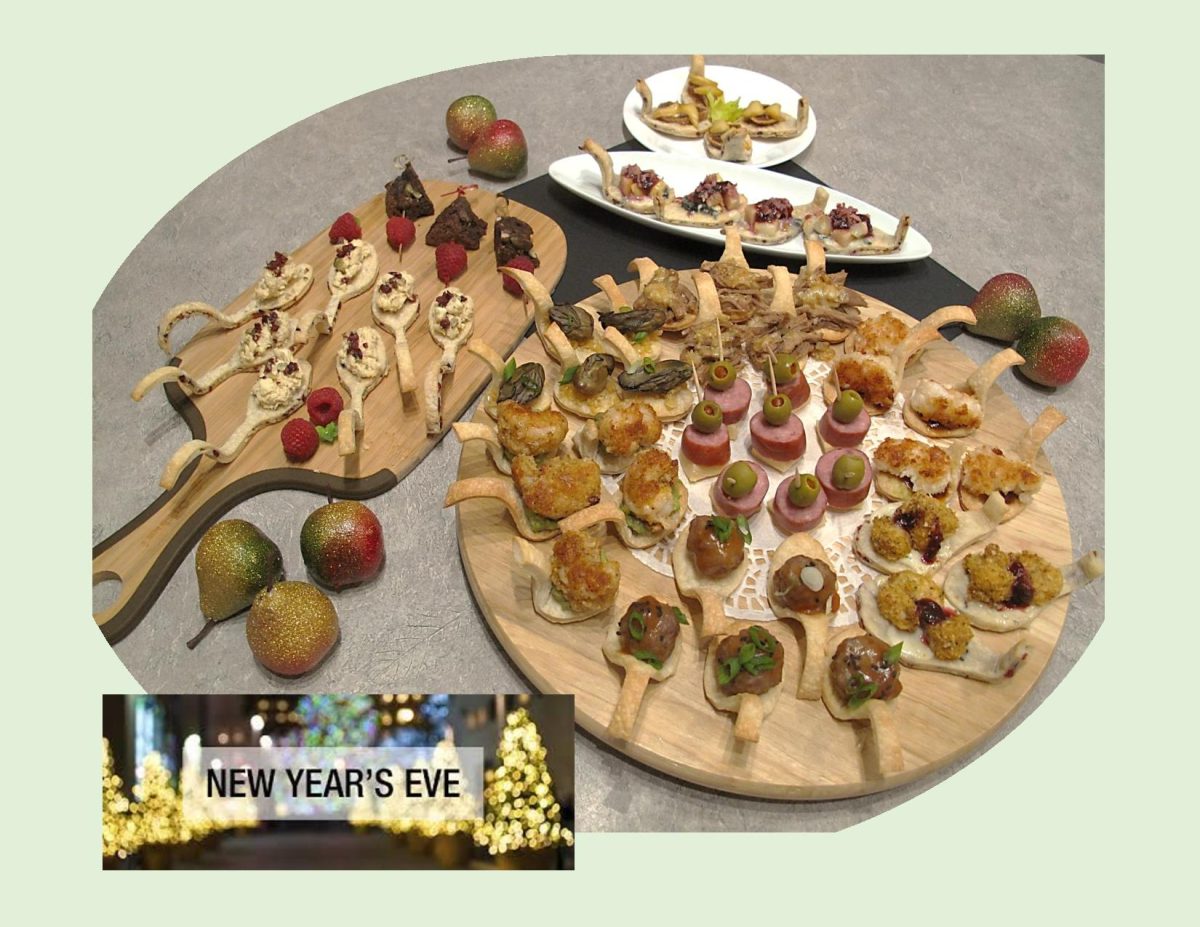
For some New Year’s treats this year I’ve made some ‘edible spoon’ hors d’oeuvres. Researchers have revealed that approximately 40 billion plastic cutleries are used by North Americans each year! That’s daunting, keeping in mind the ill-effects plastic causes to the environment and our planet at large. So, to further take a step toward preserving the environment, think edible spoons- the new wing of cutlery.
These spoons go with everything from smoked salmon with Boursin cheese to hummus with olives. Simple or sophisticated, these spoons can work like a charm for each of your parties.
Made from corn, parmesan, wasabi, wheat, rice, chocolate, etc., edible spoons work as a great alternative to the plastic or wood-laden spoons. They can be served as part of appetizers, main courses and desserts.
WISHING EVERYONE THE BEST IN THE COMING YEAR & THANKS FOR YOUR INTEREST IN FOLLOWING OUR BLOG!
Print Recipe
Edible Spoon Crackers
Votes: 1
Rating: 5
You:
Rate this recipe!
Ingredients
Cranberry Pepita Edible Spoons
Ingredients
Cranberry Pepita Edible Spoons
|
Votes: 1
Rating: 5
You:
Rate this recipe!
|
Instructions
Plain Spoons
Preheat oven to 425 F. Line a baking sheet with parchment paper.
Unroll each piecrust & either cut around a spoon or use a spoon shaped cookie cutter. Place on parchment lined baking sheet. If you want your handles to have a curve in them, use a cardboard cylinder from the center of a foil paper roll. Leave the cylinder covered with foil & lay the spoon handles over it so they bake with a curve.
Bake about 8-10 minutes or until lightly golden. I made some with long & short handles just for variety in looks.
Cranberry Pepita Spoons
Preheat oven to 425 F. Line a baking sheet with parchment paper.
Unroll each piecrust. Sprinkle one piecrust with pepitas (or pecans) & cranberries; top with remaining piecrust.
Roll into a 14-inch circle, sealing the piecrusts together. Cut into spoon shapes with a spoon cookie cutter or by tracing the outline of a spoon.
Place pastry spoons on the baking sheet. Reroll any leftover scrapes of dough & repeat the procedure.
Bake for 8-10 minutes or until lightly golden.
Assembly
Top each of the two types of edible crackers with fillings of your choice. What ever you would serve on a cracker works!
Recipe Notes
- Some of my fillings were:
- Asian Meatballs
- Pulled Pork
- Cranberry Pepper Boursin
- Smoked Oysters & Cheese
- Figs & Smoked Gouda
- Stewed Pears w/ Cranberries & Gorgonzola
- Sausage, Cheese & Olives
- Coconut Shrimp & Hot Pepper Jelly
- Spicy Shrimp w/ Guacamole
- Parmesan Chicken w/ Ranch
- Chocolate Cake w/ Raspberries
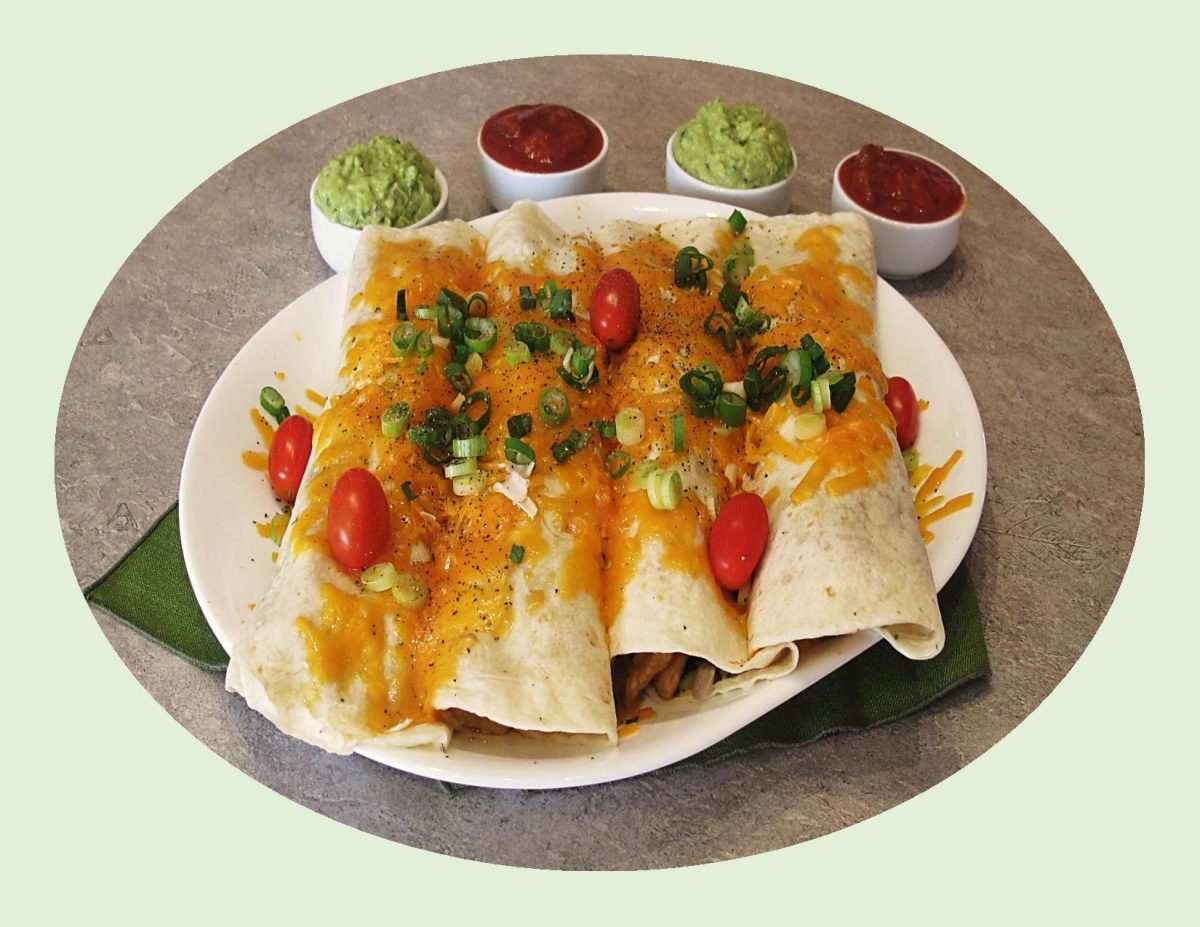
People in Mexico, the Mediterranean, and South Asia have been eating wraps since around the 1900’s. The wrap in its Western form probably comes from California, as a generalization of the Mexican/Tex-Mex burrito and became popular in the 1990’s.
Wraps have become a popular option in sandwich shops and restaurants, and for good reason. Like all sandwiches, wraps are an outlet for culinary creativity. A wrap can be anything you want it to be – breakfast, lunch, dinner, even a snack!
Wraps offer the same flexibility and creative options as a sandwich, but in a more convenient format all rolled up in a tasty tortilla or flatbread. The usual flatbreads are wheat tortillas, lavash or pita; the filling may include cold sliced meat, poultry, or fish, shredded lettuce, diced tomato, guacamole, sautéed mushrooms, bacon, grilled onions, cheese, and a sauce, such as Ranch dressing or honey mustard.
They are the perfect on-the-go meal. Most wraps can be eaten one-handed, leaving the rest of you free to continue about your day. They’re the perfect meal solution for a busy schedule.
It is remarkably easy to create your own personalized wrap: choose a bread, pick your condiments, layer your fillings, decide whether you want to grill it or not and enjoy. Does it get any better than that!
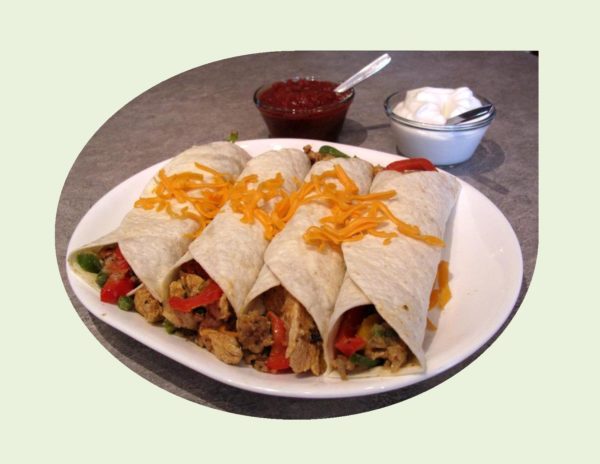
I have to admit, I absolutely love wraps so I like to fit them in to our meals whenever I can. These zesty chicken wraps are so good !
Print Recipe
Zesty Chicken Wraps
Votes: 1
Rating: 5
You:
Rate this recipe!
|
|
Votes: 1
Rating: 5
You:
Rate this recipe!
|
Instructions
Chicken
In a large bowl, combine 2 Tbsp oil, lemon juice & seasonings; add chicken & turn to coat. Cover & refrigerate for 1-4 hours.
Filling
In a heavy skillet, heat 2 Tbsp oil & sauté zucchini & onions until tender crisp. Remove & keep warm. Drain marinade from chicken & cook in the same skillet until no longer pink, about 5-6 minutes. Return zucchini/onion to pan, heat through.
Assembly
Lightly spread 4 tortillas with a bit of guacamole or sour cream. Spoon filling down the center of tortillas. Add toppings saving a good bit of the cheese for sprinkling over them after they are rolled.
Roll up & place on a microwave safe dish. Sprinkle with remaining cheese & microwave only until cheese is melted. Top with sliced green onions & tiny grape tomatoes. Serve extra toppings on the side if you like.
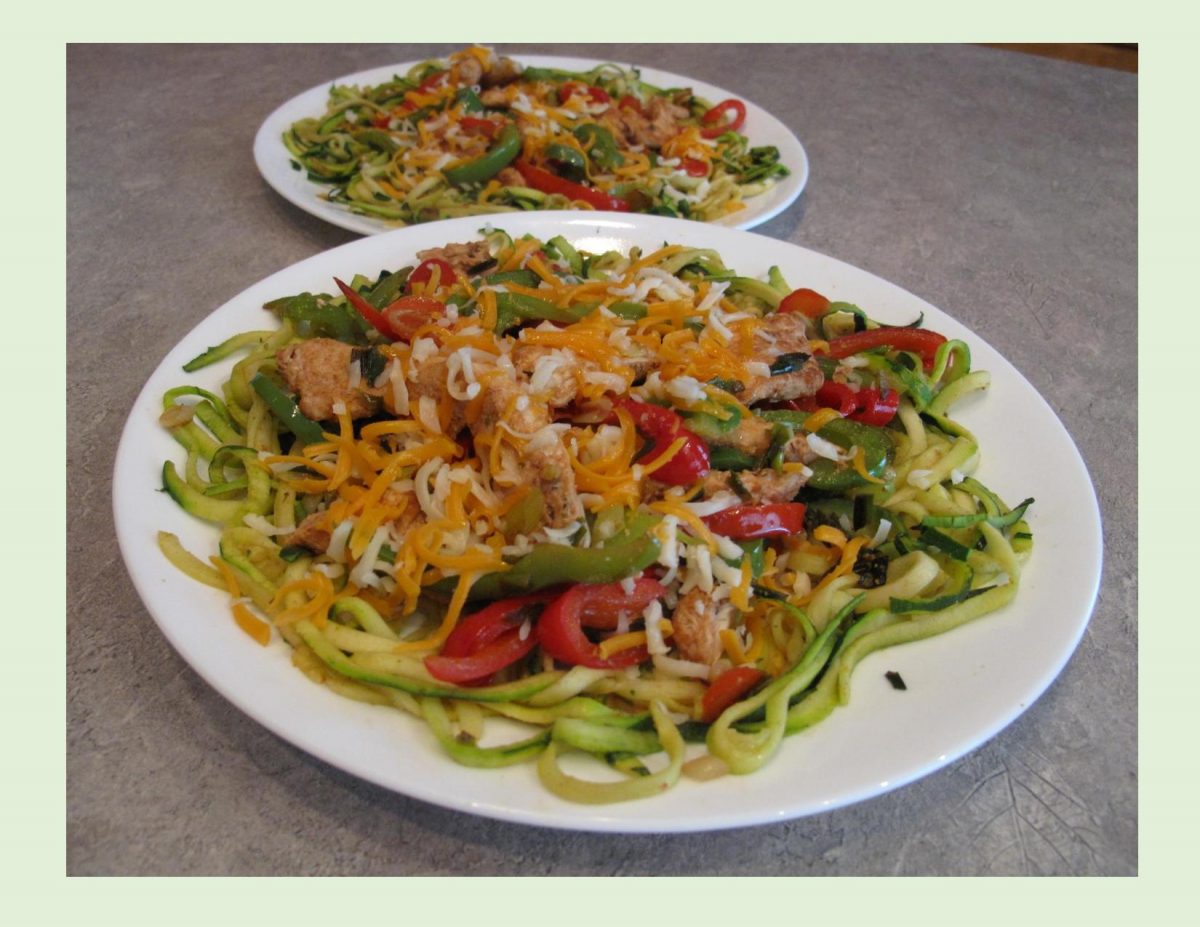
Despite having a fairly short history, Mexican fajitas are one of the most popular dishes in the world today. Apart from the fact that fajitas are incredibly tasty, they are actually very healthy not to mention the ease in cooking and assembling them.
As with many foods, time has changed the contents of the fajita and has evolved slightly from the original simplicity of the ranch worker’s dish, with different cuts of meat being chosen such as chicken or seafood. The vegetables have not changed as much as the meat, with peppers, onions & chilies still being predominant ingredients in the dish.
Probably, the most important thing when making fajitas is the marinade. It not only makes the ingredients incredibly tender but very flavorful.
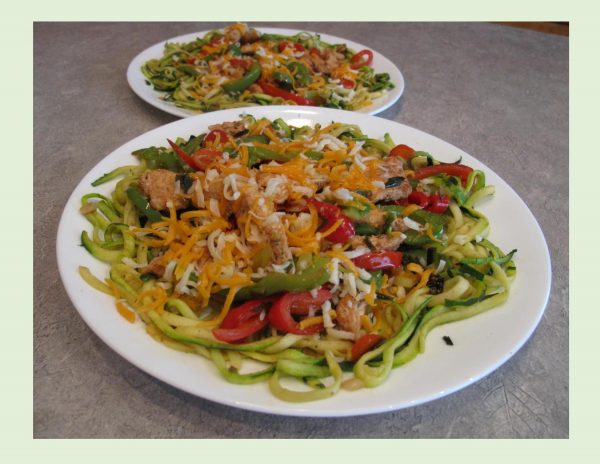
Fajitas usually require some tortillas. While they are wonderful tasting, using zucchini noodles (or zoodles) as a base for the fajita chicken gives this meal an amazing flavor. Zucchini is perhaps the most popular choice for vegetable noodles. It’s long, thin shape makes it easy to spiralize and its neutral flavor allows it to pair well with almost any sauce or topping. This meal has such eye appeal along with a great taste.
Print Recipe
Fajita Chicken w/ Zucchini Noodles
Votes: 1
Rating: 5
You:
Rate this recipe!
|
|
Votes: 1
Rating: 5
You:
Rate this recipe!
|
Instructions
In a large resealable plastic bag, combine oil, lemon juice & seasonings (RESERVE a small bit of seasoning for zucchini noodles); add chicken, seal & turn to coat. Refrigerate for at least an hour.
Wash zucchini & trim off ends. Using a spiralizer, cut zucchini into 'noodles'. Set aside. Prepare peppers & green onion.
When chicken has finished marinating, Add 1 Tbsp oil to a griddle & saute peppers & onion until just tender crisp. set aside & keep warm. Add another Tbsp oil to griddle. Saute zucchini noodles for 2-3 minutes. Remove from heat, sprinkle with reserved seasoning & keep warm.
Grill marinated chicken strips until cooked through. Divide zucchini between serving plates. Top with peppers, onions & grilled chicken. Sprinkle with grated cheese.
Even if we are not quite at the peak of zucchini season, is no reason to forget about it. I love zucchini and because its such a mild flavored vegetable, you can find it in recipes from appetizers to dessert. Its versatility lets you steam, poach, saute and fry it but it also makes great cakes, bread, relish and sauce. In Canada, we use it extensively for just about anything you can imagine.
In Mexico, they prefer the flower to the zucchini bulb in soups and quesadillas.
In Italy, it is served in many ways, especially breaded and fried.
In France, it is the key ingredient in ratatouille or stuffed with meat, tomatoes and bell peppers.
In Turkey, zucchini is the main ingredient in pancakes or stuffed with ground meat, rice and herbs.
In Greece, there are numerous uses for zucchini such as fried, boiled, stuffed, hors d’oeuvers and main dishes. Sometimes the flowers are stuffed with white cheese or a mixture of rice, herbs and occasionally ground meat.
In Egypt, zucchini are cooked with tomato sauce, garlic and onions and the list goes on and on—
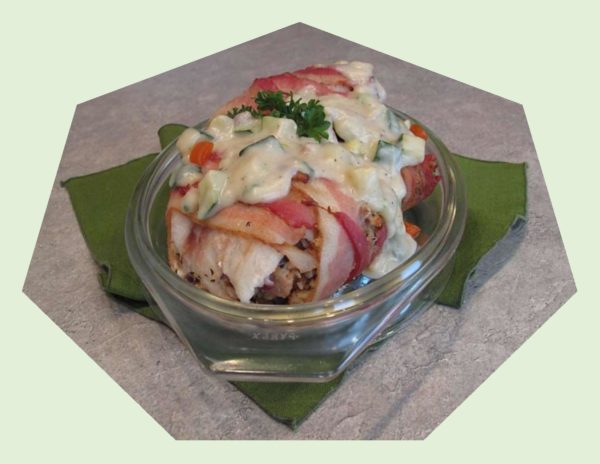
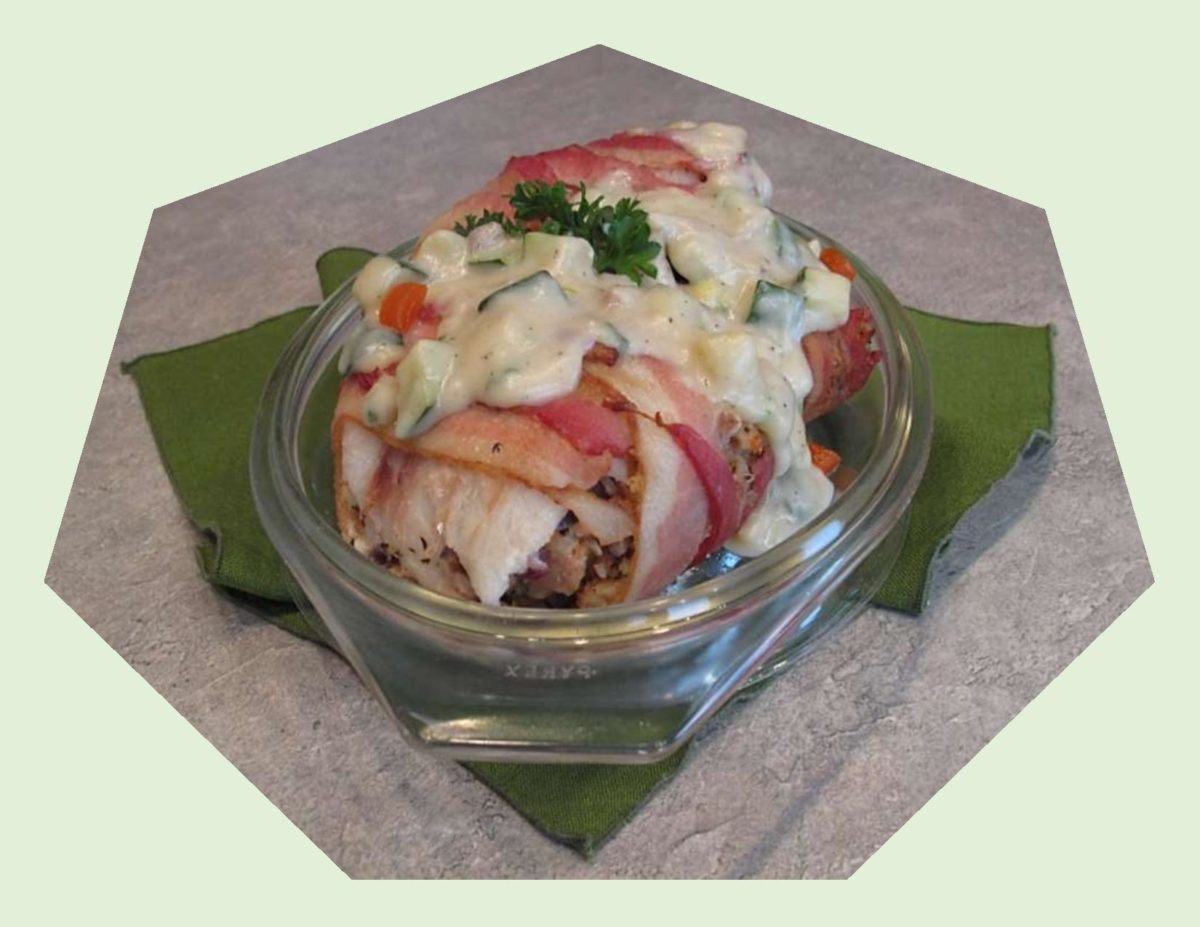
Today’s blog recipe uses a fresh zucchini sauce to compliment the cod fillets which have an herb and sunflower seed stuffing.
Print Recipe
Stuffed Cod Rolls with Fresh Zucchini Sauce
Votes: 1
Rating: 5
You:
Rate this recipe!
|
|
Votes: 1
Rating: 5
You:
Rate this recipe!
|
Instructions
Saute the garlic & onion in olive oil until softened but not browned. Remove from heat & toss together with the remaining stuffing ingredients. Prepare 6 fish portions in roughly 5 X 7-inch size rectangles. Overlap slightly if using two pieces of fish to prepare the portion.
Squeeze handfuls of the stuffing into sausage shaped portions the width of the fish fillet and place at one end, roll the fillet rectangle all the way around the stuffing.
Preheat oven to 400 F. Lay out bacon slices in 6 portions; place the prepared cod & stuffing at one end. Roll bacon tightly around the cod & place in a lightly oiled shallow baking dish. Do not crowd the portions; allow at least an inch or two between the portions for good air circulation in the oven.
Bake stuffed cod for about 25 minutes. Remove from oven & serve with warm fresh zucchini sauce.
Fresh Zucchini Sauce
In a skillet, saute zucchini, onion & mushrooms until tender crisp. Remove from heat; add flour & spices mixing well. Return to heat & slowly add milk & chicken broth. Cook until thickened & bubbly, stirring constantly. Remove from heat & serve over stuffed cod rolls.
I guess its my German heritage that gives that love for anything that resembles a dumpling. Whether sweet or savory doesn’t seem to matter, filling between two thin layers of pasta or dough is just plain good to me.
Around the world, Italian ravioli has many culinary ‘sisters’ in other cultures. Kreplach, in Jewish cuisine, is a pocket of meat filling covered with pasta. In India, the dish Gujiya, has a sweet filling, rather than savory. There are many similarities between Italian ravioli and certain Chinese dumplings as well.
Although ravioli can come in many shapes, including circular and semi-circular, the traditional form is a square. The word ‘ravioli’ comes from the Italian riavvolgere, which means ‘to wrap’.
Not being someone who enjoys to eat ‘out’, its a rare occasion (when we do), for me to be really happy with my meal. I think it has a lot to do with the fact that I cooked a lot of ‘commercial’ meals in the food service industry years back. I guess I just got ‘burn out’ to that kind of cooking you might say.
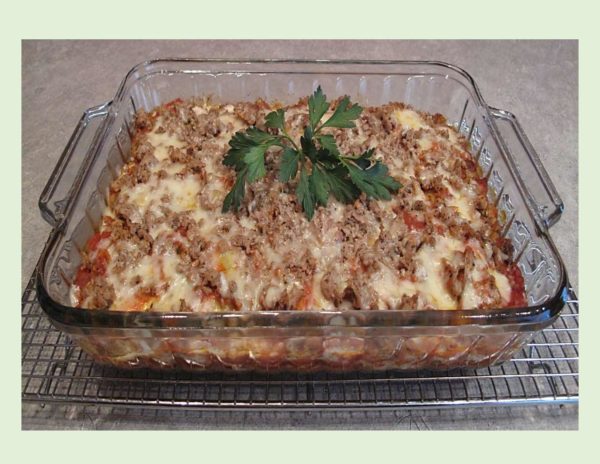
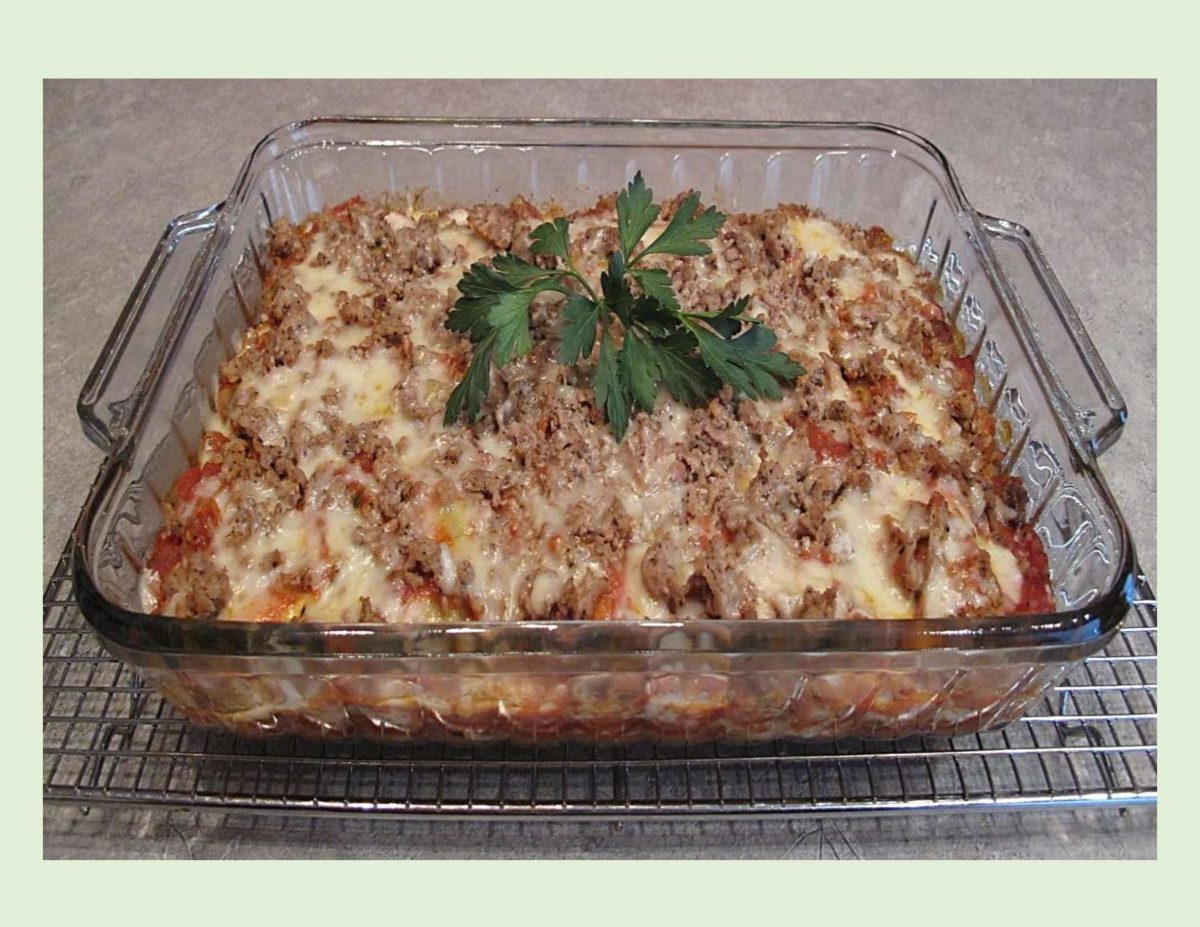
Nevertheless, whenever we have chosen to go to the Olive Garden Restaurant, there is a meal I really do enjoy. It’s called ‘Ravioli di Portobello’. Today, I am re-creating those flavors in a casserole and adding some ground chicken to make it a little more interesting from Brion’s perspective.
Print Recipe
Ravioli di Portobello Casserole
Votes: 1
Rating: 5
You:
Rate this recipe!
Ingredients
Portobello Mushroom Filling
Ingredients
Portobello Mushroom Filling
|
Votes: 1
Rating: 5
You:
Rate this recipe!
|
Instructions
Ravioli Filling
In a saucepan, melt butter over medium heat. Saute onion until soft. Add mushrooms & saute for two minutes. Reduce heat & let simmer for 5 minutes or until liquid has evaporated & the mushrooms are fully cooked. Add seasonings. Set aside.
Ravioli Dough
In a bowl, combine dry ingredients with eggs. Add water a little at a time, while stirring, until it forms a soft dough. Dough should be soft but not sticky. Roll out the dough, on a floured surface, into a rectangle that is 1/4-inch thickness. Place 1 teaspoon of filling about an inch apart in even columns & rows to cover half of your dough rectangle.
Before adding the top layer of pasta to the ravioli, moisten the dough around the filling dollops. Carefully fold the dough (without any filling on it) over the half with the filling dollops. Using the side of your hand, press the dough together between the dollops, accentuating the pockets of filling in each ravioli. This is very important step to ensure your ravioli will not leak while cooking.
Using a pastry cutter (or a pizza cutter), cut straight lines through the pressed down sections between the filling dollops. In a large kettle of boiling water, drop ravioli in a few at a time, being careful that they do do touch the kettle. When the raviolis float to the top, boil for one minute & then remove them with a slotted spoon. Keep warm in a covered dish, drizzling a tiny bit of butter or oil over them to prevent sticking until you are ready for them.
Sun-Dried Tomato Sauce
In a skillet, melt butter & saute garlic, seasonings, sun-dried tomatoes for a few minutes. Add chicken broth & half & half; bring to a boil & continue to stir until thickened & creamy about 5-7 minutes. Remove from heat, set aside until ready to use in casserole.
Assemble Casserole
In a skillet, brown ground chicken until no longer pink; drain & place in a bowl. Add salt, garlic powder & pepper. In the skillet, melt butter, add onion & zucchini; saute until tender crisp. Stir in sun-dried tomato sauce.
Preheat oven to 350 F. In a buttered 9 X 13-inch baking dish, spread 1/4 of sauce, layer 1/2 of the ravioli, another 1/4 of the sauce, half of the chicken & half of the cheese.
Repeat again except OMIT cheese. Cover & bake for 35 minutes. Uncover & sprinkle with remaining cheese. Let stand 10 minutes before serving. If you wish to garnish, chopped green onion & diced tomato are nice.
-
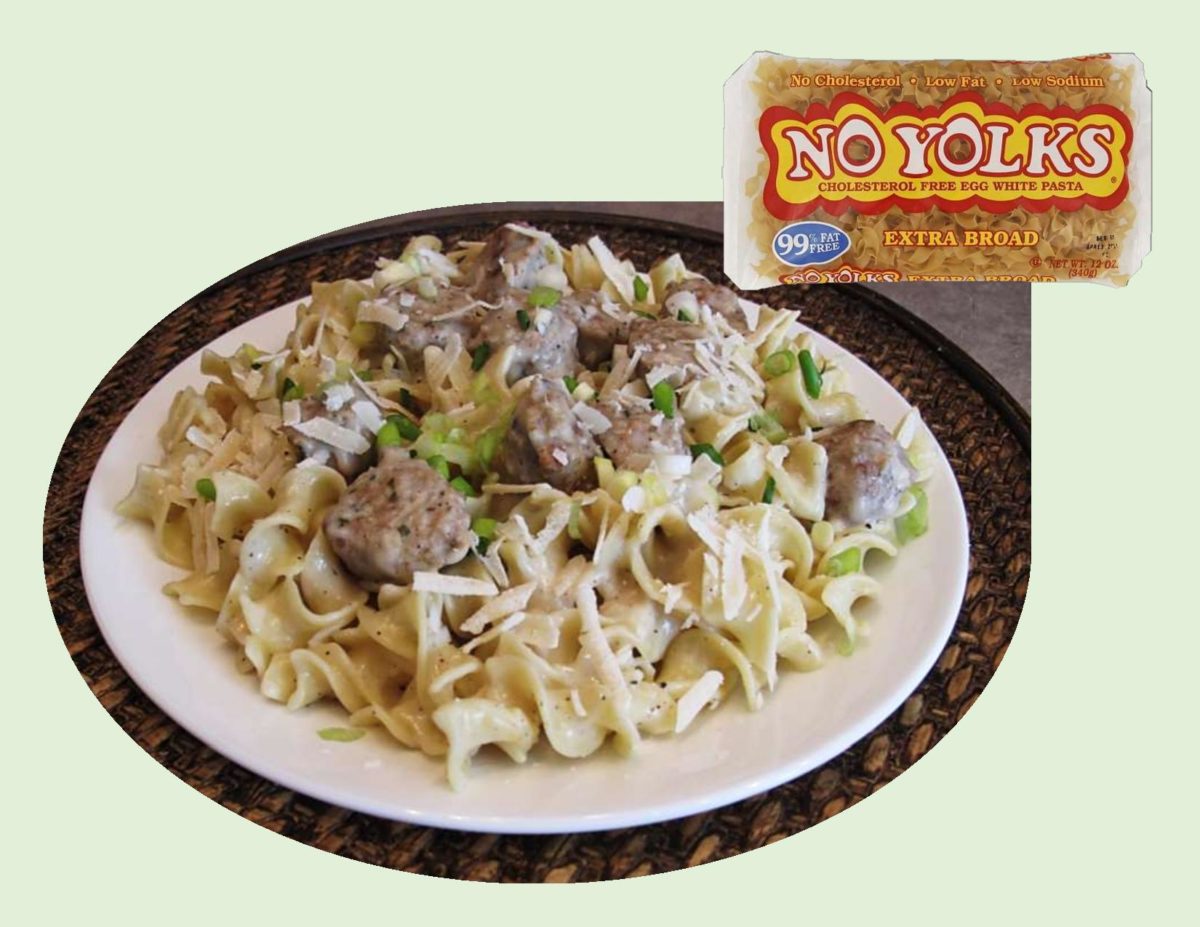
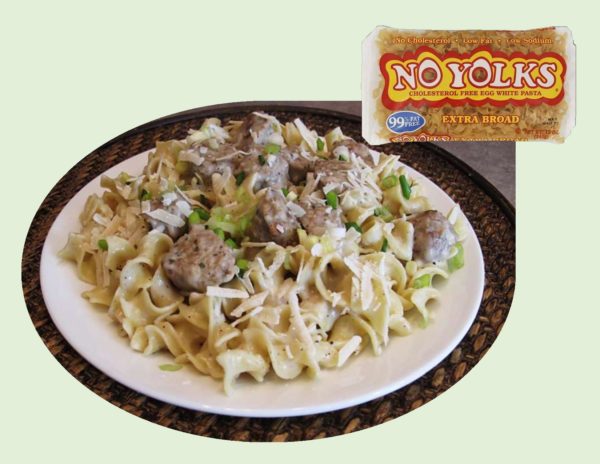
Although rice takes top priority at our house, noodles (pasta) are always a staple nevertheless. Some years ago, we started using the ‘no yolks’ version of egg noodles.
Like many old world pasta products, there is a history. In 1976, Robert Strom created NO YOLKS. They would become the world’s first no-cholesterol egg noodle. They are made with Durum wheat semolina, corn flour, egg whites and have no problem cooking up firm and fluffy.
In Canada, they are the top selling noodle and come in a wide variety of shapes and sizes. In this recipe, I have paired them with my favorite Chia Chicken Meatballs. Does it get more healthy than that?!
Print Recipe
No-Yolk Noodles with Chia Chicken Meatballs
Votes: 1
Rating: 5
You:
Rate this recipe!
|
|
Votes: 1
Rating: 5
You:
Rate this recipe!
|
Instructions
Meatballs
-
In a small bowl, mix together chia seeds & water; let stand for about 20 minutes. In a large bowl, combine remaining meatball ingredients. When chia gel is ready, add to meat mixture. Using your hands, combine ingredients well. Preheat oven to 375 F. Line a baking sheet with foil & lightly coat with baking spray. Scoop into 50 meatballs; place on baking sheet & bake 10-12 minutes. Remove from oven, cool completely if you are choosing to freeze half for a later meal. Set aside the amount you are using for this meal.
Sauce / Noodles
-
In a saucepan, melt margarine; saute zucchini & green onion until tender. Sprinkle with flour & seasonings. Add milk/broth & cook, stirring until slightly thickened. Meanwhile, cook no-yolk noodles as directed on package in salted boiling water to which 1 Tbsp of olive oil has been added. Drain.
Assembly
-
In the pot you cooked the noodles, combine noodles with sauce & meatballs. Fold together & serve topped with some parmigano-reggiano if you wish.

Today, December 21st, ‘our’ precious little Amigo is having his 14th birthday. Technically he belongs to my sister Loretta, who adopted him when he was only two months old. If you are a dog lover and have ever been in the presence of a Dachshund, you will understand how easily they can ‘velcro’ themselves onto your heart. Brion and I are accepted by him as if we were his aunt and uncle, so I guess you could call us part of his ‘pack’.
The antics of a Dachshund are priceless. During visits to our house he could come up with all kinds of games. One such game was to put his ball in a chosen spot then sit, out of sight, patiently waiting and watching to see how long it would take you to find it.
To be loved by a Dachshund is truly a privilege of a lifetime never to be taken lightly.
For today’s blog recipe, I thought it would be nice to have roasted chicken breast with a savory-sweet stuffing of apricot and brie, accompanied with small roasted potatoes.
HAPPY BIRTHDAY TO AMIGO!
Print Recipe
Apricot & Brie Stuffed Chicken Breasts
Votes: 1
Rating: 5
You:
Rate this recipe!
|
|
Votes: 1
Rating: 5
You:
Rate this recipe!
|
Instructions
Potatoes
Preheat oven to 400 F. In a plastic bag, combine potatoes, olive oil, seasoned salt, pepper, garlic & lemon zest; toss well. Place on a foil lined large baking sheet & roast for 10 minutes.
Chicken Breast/Stuffing
Place walnuts, 1 cup fresh basil & garlic in food processor; slowly add 1 Tbsp olive oil until mixture becomes paste-like. Next add brie, cream cheese & egg to the food processor & pulse until mixed well. Season with salt, pepper & pepper flakes.
Place chicken breasts between 2 sheets of plastic wrap & carefully flatten with a meat mallet. Divide stuffing between the 4 breasts. Roll up or fold over, enclosing filling well. In a small bowl, combine apricot preserves, balsamic vinegar & remaining Tbsp olive oil.
Remove potatoes from oven & slide them around a bit to make room for the chicken. Place the chicken on the pan; brush apricot mixture all over breasts. Place the pan back in the oven & roast for 30-40 minutes or until the chicken is cooked through & potatoes are golden. Garnish with fresh basil if preferred.
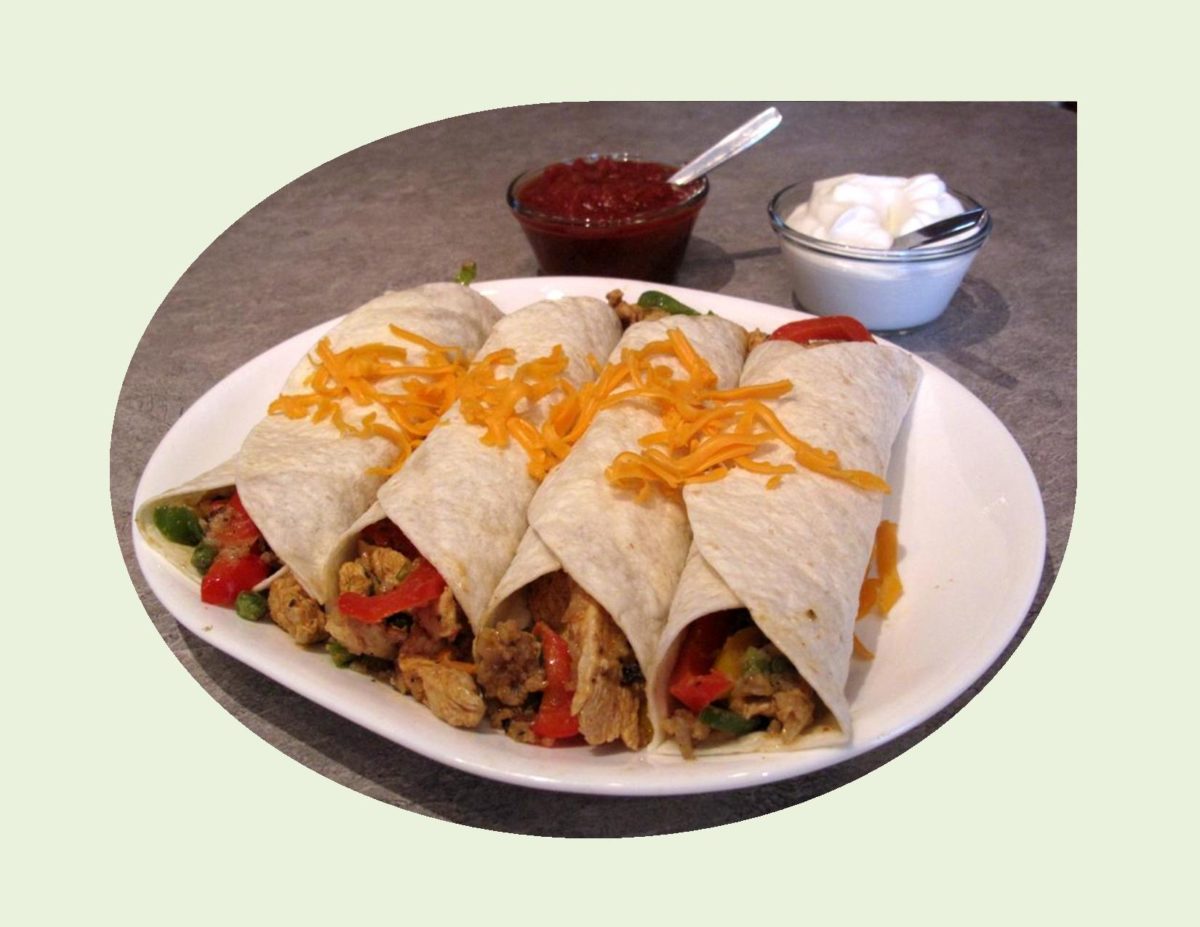
When I’m working in the yard, summer always tempts me to spend less time in the kitchen. As much as I love to cook, I find the ‘gardener’ in me takes over. I can’t simply just go out and do a bit of looking. The first thing I know, there’s a little weed that needs to be picked or a plant to prune and that does it — I’m hooked for hours. Nevertheless, one thing for sure and that is the fresh air and exercise builds an appetite which brings me to a fast-to-fix meal.
Today, I’m thinking some chicken fajitas for our evening meal. Before I even go outside, I’ll do a bit of quick prep work, that way it will be a ‘no brainer’ later when I’m tired.
Technically, only beef was used in fajitas, but the term has become ‘blurred’ and describes just about anything that is cooked and served rolled up in a soft flour tortilla. The origin of the fajita goes back to Mexican ranch workers living in West Texas (along the Rio Grande on the Texas-Mexican border) in the late 1930’s or early 1940’s. When a steer was butchered, the workers were given the least desirable parts to eat for partial payment of their wages. Because of this, the workers learned to make good use of a tough cut of beef known as shirt steak. The first print mention of the word fajitas anywhere in the world didn’t occur until the 1970’s.
The chicken breast I’m using in this recipe is marinated for a number of hours making it nice and spicy as well as tender. This is a great little, quick and easy hand held meal.
Print Recipe
Chicken Fajitas
Votes: 1
Rating: 5
You:
Rate this recipe!
Ingredients
- 4 Tbsp vegetable oil, divided
- 2 Tbsp lemon juice
- 1 1/2 tsp seasoned salt
- 1 1/2 tsp dried oregano
- 1 1/2 tsp cumin
- 1 tsp garlic powder
- 1/2 tsp chili powder
- 1/2 tsp Paprika
- 1/2 tsp crushed red pepper flakes, optional
- 680 grams chicken breasts, B/S, cut into thin strips
- 1/2 medium sweet red pepper, julienned
- 1/2 medium green pepper, julienned
- 4 green onions, thinly sliced
- 1/2 cup onion, chopped
- 6 - 8" flour tortillas, warmed
- cheddar cheese, shredded
- taco sauce OR salsa
- guacamole OR sour cream
|
Votes: 1
Rating: 5
You:
Rate this recipe!
|
Instructions
In a large resealable plastic bag, combine 2 Tbsp oil, lemon juice & seasonings. Add chicken. Seal & turn to coat; refrigerate for 1-4 hours.
In a large skillet, saute peppers & onions in remaining oil until crisp-tender. Remove & keep warm. In the same skillet, cook chicken over medium-high heat for 5-6 minutes or until no longer pink. Return pepper mixture to pan; heat through. Spoon filling down the center of the tortillas; fold in half. Serve with cheese & choice of other toppings.
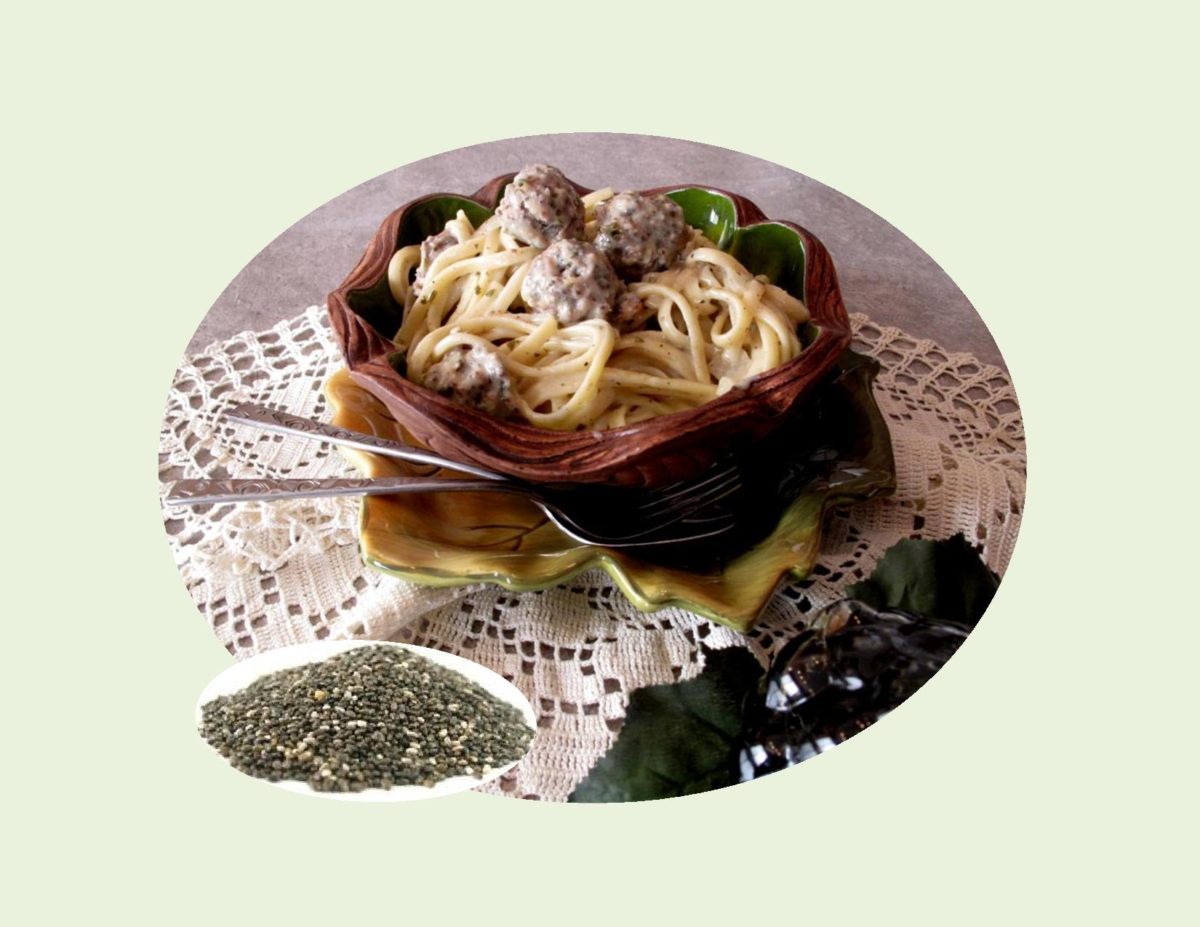
Chia — the little seed with the huge nutritional profile. Known as a great source of healthy omega-3 fats and fiber as well as positive health effects such as boosting energy, stabilizing blood sugar, aiding digestion and lowering cholesterol.
In the early eighties, when the terracotta ‘Chia Pet’ figurines were first marketed, I really didn’t pay much attention to them. I just thought they were a cute way to grow a ‘houseplant’ never checking out their true potential.
Chia seeds have a fascinating and long history of use in several cultures. The word chia means ‘strength’ in the Mayan language. The Aztecs, Mayans and Incas, supposedly all used chia as a staple of their diets as well as an energy food.
There seem to be endless ways to use these naturally gluten free little seeds. Just to name a few would be, as an egg substitute, in puddings, as a thickener in soups and gravy, in meatballs, sprouted in salads or for breading fish or chicken.
One of the recipes I have featured in my ebook is Chia Chicken Meatballs served with a fresh zucchini sauce over linguine pasta.
My husband, Brion is all about anything that promotes good health so this meal works for him. The chia seeds definitely give these little chicken meatballs some extra ‘pizzazz’. Hope you enjoy.
Print Recipe
Chia Chicken Meatballs with Linguine
Votes: 1
Rating: 5
You:
Rate this recipe!
|
|
Votes: 1
Rating: 5
You:
Rate this recipe!
|
Instructions
Chia-Chicken Meatballs
In a small bowl, combine chia seeds with water; let stand for about 20 minutes.
In a large bowl, use your hands to evenly combine the chia gel with the remaining meatball ingredients. Preheat oven to 375 F. Line a baking sheet with foil; coat lightly with baking spray. Scoop meatball mixture into 50 servings onto baking sheet. Bake 10-12 minutes; remove from oven. Cool half of the meatballs & freeze for another meal.
Fresh Zucchini Sauce
In a saucepan, melt margarine; saute zucchini & green onion until tender. Sprinkle with flour & seasonings. Add milk/broth & cook, stirring until slightly thickened. Fold in baked chicken balls.
Linguine
Cook linguine about 14 minutes in salted boiling water to which 1 Tbsp of olive oil has been added. Drain & combine with meatball/sauce mixture.
