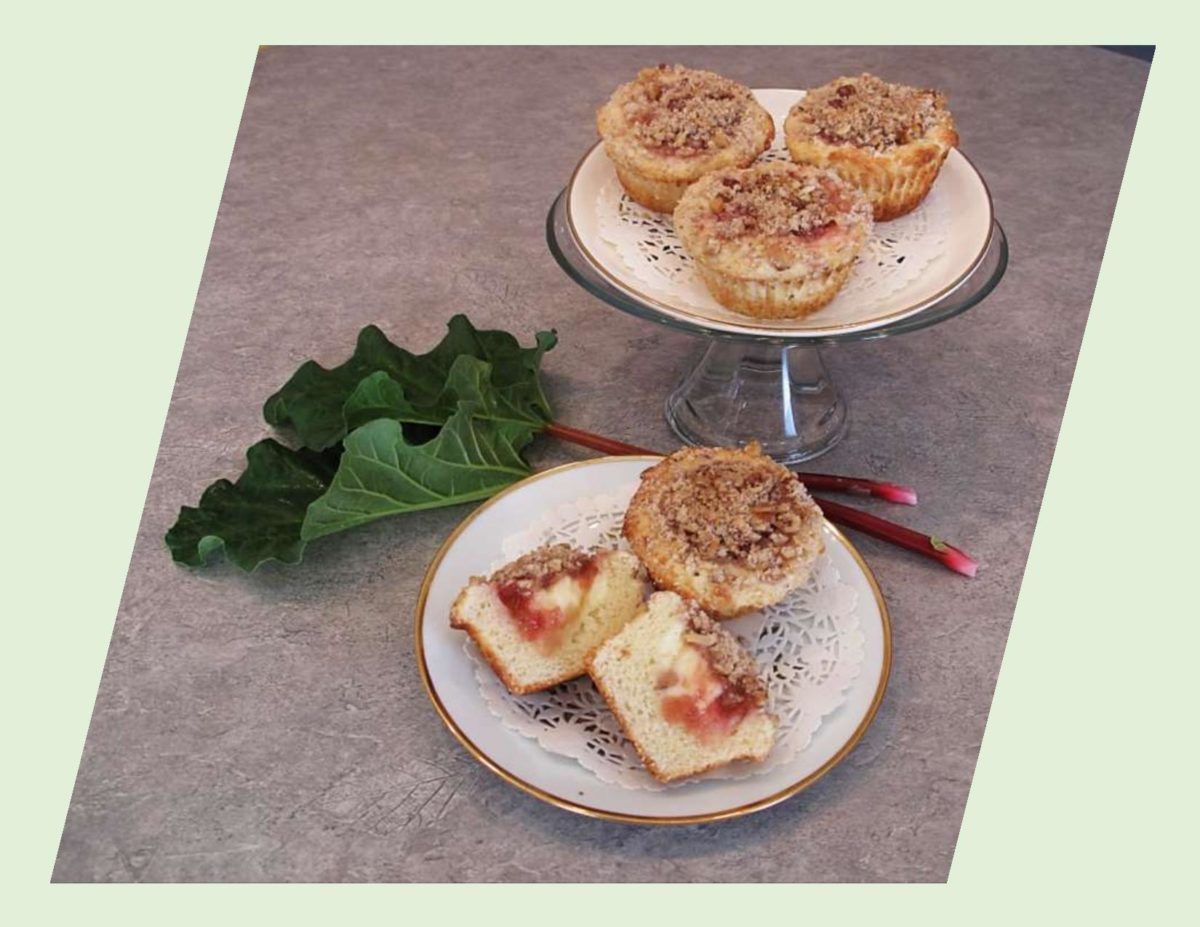
As usual, I can’t get enough of using rhubarb throughout its growing season. This year we started three new plants as our older ones are producing less and less. I think they are probably just becoming to shaded so we put the new ones in a great little spot on the south side of the garage.
Rhubarb’s awkward positioning between fruit and vegetable, sweet and tart, is a topic that’s constantly debated. It resembles sticks of celery dressed in their best pink Sunday attire, blushing from the first few washes of early sun peaking through its dense foliage after winter hibernation underground.
Pie remains the most common use for rhubarb, so much that older cookbooks called it the ‘pie plant’. While it generally is treated as a fruit, it has also been used as a savory ingredient, frequently paired with meats, cheese, stuffings, sauces and much more.
This is one of my favorite ‘sweet’ recipes from quite a few years ago. It has it all — rhubarb, cream cheese & streusal!
Print Recipe
Rhubarb Cheesecake Muffins
Votes: 3
Rating: 4.33
You:
Rate this recipe!
|
|
Votes: 3
Rating: 4.33
You:
Rate this recipe!
|
Instructions
Stewed Rhubarb
In a small saucepan, combine rhubarb, sugar & lemon slice. Bring to a boil, stirring until sugar melts. Reduce heat & simmer about 10-12 minutes or until thickened & reduced to about 1/2 cup. Allow to cool.
Batter
In a large bowl, combine flour & sugar. with a pastry blender, cut in butter to resemble coarse crumbs. In a small dish, measure 1 cup of the flour mixture & add walnuts & cinnamon. Set aside. To remaining flour mixture add baking powder, baking soda & salt. Set aside. In a third bowl, combine sour cream, vanilla & beaten egg.
Cream Cheese Filling
In a small bowl, beat together cream cheese, 1/4 sugar, egg & lemon zest. Fold in stewed rhubarb.
Assembly
Preheat oven to 350 F. Line a 12-cup muffin pan with paper cups. Stir SOUR CREAM mixture into FLOUR/BAKING POWDER mixture until just blended. Do not over mix! Spread this batter evenly over bottom & up the sides of each paper cup. Place a spoonful of FILLING MIXTURE in center of each, then top with WALNUT MIXTURE & bake 12-15 minutes or until muffins test done when a toothpick inserted comes out clean.

Not a pie at all, traditional whoopie pies are two thin chocolate cakes sandwiched around a white frosting. The origin of the whoopie pie is somewhat controversial. Some people say they were invented in Medieval Germany and brought to the USA by immigrants. Women would bake cakes and use leftover batter and icing to make these special treats. The little cake sandwiches were placed in children’s lunch boxes, where upon discovering them, cries of ‘whoopie’ were shouted. From the basic chocolate and vanilla formula of the past, a whole host of varieties have since taken the stage.
I love the pastel shades of Spring and try to incorporate them into anything I can. When I was shopping the other day, I happened to see some little colorful French Macaron cookies in a bakery window. As great as they look, I personally have never cared for the ‘meringue’ type cookie. Nevertheless, it gave me some inspiration for some ‘spring’ whoopie pies. Adding a few new flavors to the chocolate and vanilla batters along with some flavored Mascarpone fillings takes whoopie pies (cookies) to a whole new level.
Print Recipe
'Spring" Whoopie Pies with Mascarpone Filling
Votes: 1
Rating: 5
You:
Rate this recipe!
Ingredients
Basic Vanilla Cookie Batter
MASCARPONE FILLINGS - Raspberry, Blueberry, Apricot & Strawberry Preserve
Ingredients
Basic Vanilla Cookie Batter
MASCARPONE FILLINGS - Raspberry, Blueberry, Apricot & Strawberry Preserve
|
Votes: 1
Rating: 5
You:
Rate this recipe!
|
Instructions
Preheat oven 350 F. Line baking sheets with parchment paper. In a large bowl, using an electric mixer, beat butter, sugar & vanilla until light & fluffy. Beat in egg. In another bowl, whisk together flour, baking soda & salt. Add flour mixture to butter mixture alternately with buttermilk.
In separate small bowls, divide vanilla batter into 4 equal portions. Leave one plain, to the second dish add pistachio nuts & a tiny bit of green food color gel. To the third dish add 2-3 Tbsp Chambord liqueur & red food coloring. To the fourth add lemon zest & yellow food color.
FOR CHOCOLATE BATTER: Follow directions in the first paragraph, adding cocoa along with flour mixture. Using a small scoop or heaped tablespoon, spoon mixtures onto baking sheet. Allow room for spreading. Bake for 10-12 minutes. DO NOT OVER BAKE. Remove from oven & transfer to wire rack.
While whoopies are baking prepare Mascarpone fillings. For every 60 grams of Mascarpone use 2-3 Tbsp of one of the preserve flavors.
When the whoopies are cold, match each with whoopie half with its closest partner size. Spread with a knife or use a piping bag to cover the flat side of one whoopie half of each pair generously with filling. Top each with its matching half, flat side down & gently press together.
Recipe Notes
- Another flavor you might enjoy is lemon curd which can be purchased in the preserve section of the grocery store.
- For chocolate filling, add a little cocoa powder & powdered sugar to some Mascarpone.
- For some of the vanilla whoopies, I made a Rosewater flavored filling with 1 tsp margarine, 60 gm Mascarpone, 3 Tbsp powdered sugar & 3/4 tsp rosewater.

This week we celebrate my husband, Brion’s birthday. Family birthdays forever bring me back to my childhood days. My mother always made the birthday person’s favorite meal on their day along with a cake. Although she excelled at cooking in general, her creative talent was put to good use when she decorated our birthday cakes.
Brion has always loved pineapple pie. I’m not sure where it came from but could possibly have been from time spent in the Cook Islands years ago.
In 1950, the Pillsbury company (General Mills) came out with a pie crust mix. Their promotion read that ‘the quality was assured by the finest ingredients, scientifically blended and perfectly balanced’. All you had to do was add water and mix. To further promote their product they included a recipe for Pineapple Pie supposedly having been written by ‘Ann Pillsbury’. This was a fictitious home economist created for marketing purposes. She essentially represented the members of the Pillsbury Home Service department. Unlike Betty Crocker, Ann Pillsbury did not catch on and was replaced in 1965 by the Pillsbury Doughboy who we still see in their current advertising.
My blog recipe is a bit different from the vintage one but is one of Brion’s favorites. Over the last six months, Brion’s love and support have helped me recover from shoulder replacement surgery for which I’m very grateful.
BIRTHDAY WISHES WITH LOVE!
Print Recipe
Vintage Pineapple Pie
Votes: 2
Rating: 3.5
You:
Rate this recipe!
|
|
Votes: 2
Rating: 3.5
You:
Rate this recipe!
|
Instructions
Pineapple Filling
In a saucepan, combine cornstarch & sugar. Gradually stir in water until mixture is smooth. Add lemon zest & undrained crushed pineapple. Stir constantly over medium heat until mixture starts to boils; reduce heat slightly & continue to boil 2 minutes. Remove from heat; quickly stir in butter & beaten egg yolks, mixing well. Allow mixture to cool to room temperature.
Crumb Crust
In a food processor or with a rolling pin, crush biscuits finely & evenly. Melt butter; add to crumbs, mixing well with fork. Press evenly over bottom & up sides of a 9-inch flan or pie pan. Refrigerate crust while filling is cooling.
Meringue Topping
Preheat oven to 375 F. In a small bowl, beat egg whites until soft peaks form, gradually add sugar. Beat until sugar is dissolved. Spread filling evenly into crust; top with meringue making sure to spread it to the edge of crust to form a seal.
Bake for about 5-10 minutes or until surface of meringue is evenly golden brown.
-

Today, July 25th, is my sister Loretta’s birthday. As I think of her with fondness on her day, I wanted to feature a special meal that I’m sure she would enjoy. I would much rather be making it for her but distance makes that impossible.
The entree I am preparing is WILD SALMON ROULADE stuffed with SHRIMP & SCALLOPS and served with DILL SAUCE.
Roulades have been around since the 18th century. The things that have made them so popular are that they are simple — once prepared they need little attention while cooking. They are versatile — any meat or fish that can be thinly sliced lengthwise will work. There are many options when it comes to the filling — anything that cooks faster than the outside is suitable. Elegant for entertaining — on the outside a delicate fillet of fish or meat; on the inside a hidden second flavor.
In this recipe, the salmon roulade is stuffed with shrimp and scallops and served with a delicate sauce.
Loretta is a few years older than I am so she has always been in my life. I have lots of wonderful memories from our ‘adventures’ while growing up on the farm together. Thank you, Loretta, for those beautiful moments in life that can never be brought back but I will treasure them in memories forever.
OUR FAMILY CELEBRATES YOU WITH LOVE ON YOUR SPECIAL DAY!
Print Recipe
Seafood Salmon Roulade
Votes: 2
Rating: 4
You:
Rate this recipe!
|
|
Votes: 2
Rating: 4
You:
Rate this recipe!
|
Instructions
Seafood Stuffing
In a bowl, whisk egg white until frothy; set aside. Finely chop shrimp; cut scallops into 1/2-inch cubes. Add seafood to egg white. Add bread crumbs, chives, parsley, lemon rind, tarragon, salt & pepper; toss to combine. Refrigerate.
Salmon
Butterfly (skinned) salmon fillet; sprinkle with salt & pepper. Spread stuffing over salmon leaving a border at edges. Starting at long side , roll salmon, tying with kitchen string at 1-inch intervals. Place on a parchment-lined, rimmed baking sheet. Sprinkle with salt & pepper.
Preheat oven to 375 F. Roast about 50 minutes or when thermometer inserted into the thickest part reaches 160 F. Transfer to cutting board; tent with foil & let rest for 10 minutes.
Dill Sauce
In a small bowl, mix dill sauce ingredients together. Adjust consistency with milk & tartness with lemon juice. Set aside for 10-20 minutes You could use Greek yogurt instead of sour cream. It is slightly more tangy & low fat tends to be less creamy but does reduce the calories.
Recipe Notes
- You can prepare the salmon roulade up to 2 hours ahead, just cover & refrigerate.
Crisp or crumble, call it what you like, its just simply good to me. I think, over the years, I have made fruit crumble in just about every flavor and shape possible.
Crumbles became popular in Britain during WWII when crumble topping was an economical alternative to pie due to shortages of pastry ingredients. Other ingredients such as breadcrumbs or oatmeal helped further reduce the use of rationed flour, fat and sugar.
Crumble cakes can be made either sweet or savory. The sweet variety usually will contain fruit topped with a crumbly mixture of butter, flour and sugar. With the savory version, meat, vegetables and a sauce make up the the filling with cheese replacing the sugar in the crumble mix. The crumble is then baked until the topping is crisp. Generally the sweet dessert is served with custard or ice cream and the savory variety with accompanying vegetables.
Fruits that are commonly used in making crumble include apples, blueberries, peaches, rhubarb and plums or a combination of two or more. Due to its simplicity, this dish has remained popular over the years.
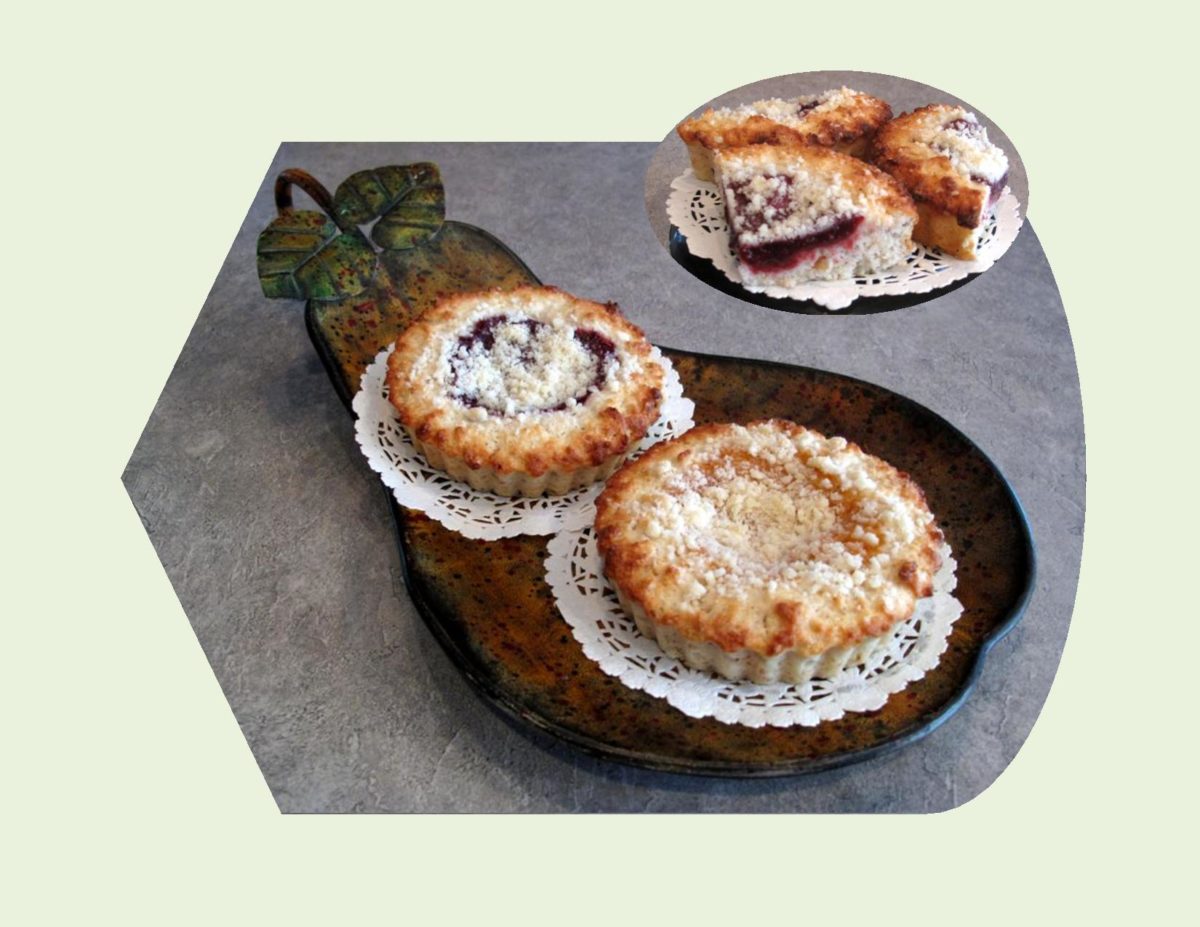
The MINI FRUIT CRUMBLE CAKES I made for today’s blog were made with various kinds of preserves but you can prepare your own fruit for the filling or simply use canned pie filling — your choice!
Print Recipe
Mini Fruit Crumble Cakes
Votes: 1
Rating: 5
You:
Rate this recipe!
|
|
Votes: 1
Rating: 5
You:
Rate this recipe!
|
Instructions
-
In a large bowl, combine flour & sugar. Cut in butter until mixture is crumbly; set aside 1/2 cup of the mixture. To remainder add baking powder, baking soda & nuts.
Beat egg slightly in a small bowl. Stir in yogurt & lemon zest. Add to dry ingredients; stir just until moistened. Spread 2/3 of batter over bottom & part way up sides of 8 - 4" x 3/4" mini tart pans. Spoon pie filling over batter. Drop remaining batter by spoonfuls over filling.
Sprinkle with reserved crumb mixture; place tart pans on baking sheet. Bake 25-30 minutes, or until done. Serve warm or cold.
The aroma of Easter bread baking certainly brings back precious childhood memories. What I recall about my mother’s Easter bread, was that it was a dense, mildly sweet & a very egg rich bread. It was always baked in round ‘cans’ and the taste was unforgettable.
Nearly every country around the world has a traditional Easter bread. Each one is different in some way, a mix of symbolism and satisfying taste. They represent a continuity of traditions from centuries past, including much earlier pre-Christian times. Often these rich, yeasted breads are made in symbolic shapes and are elaborately decorated.
Germany and Austria make several shapes such as : Osterzopf – Easter braid, Osterkranz – Easter wreath or crown, Osternester – Easter nests, Eierimnest – Easter egg nest, Striezel – stacked braided bread.
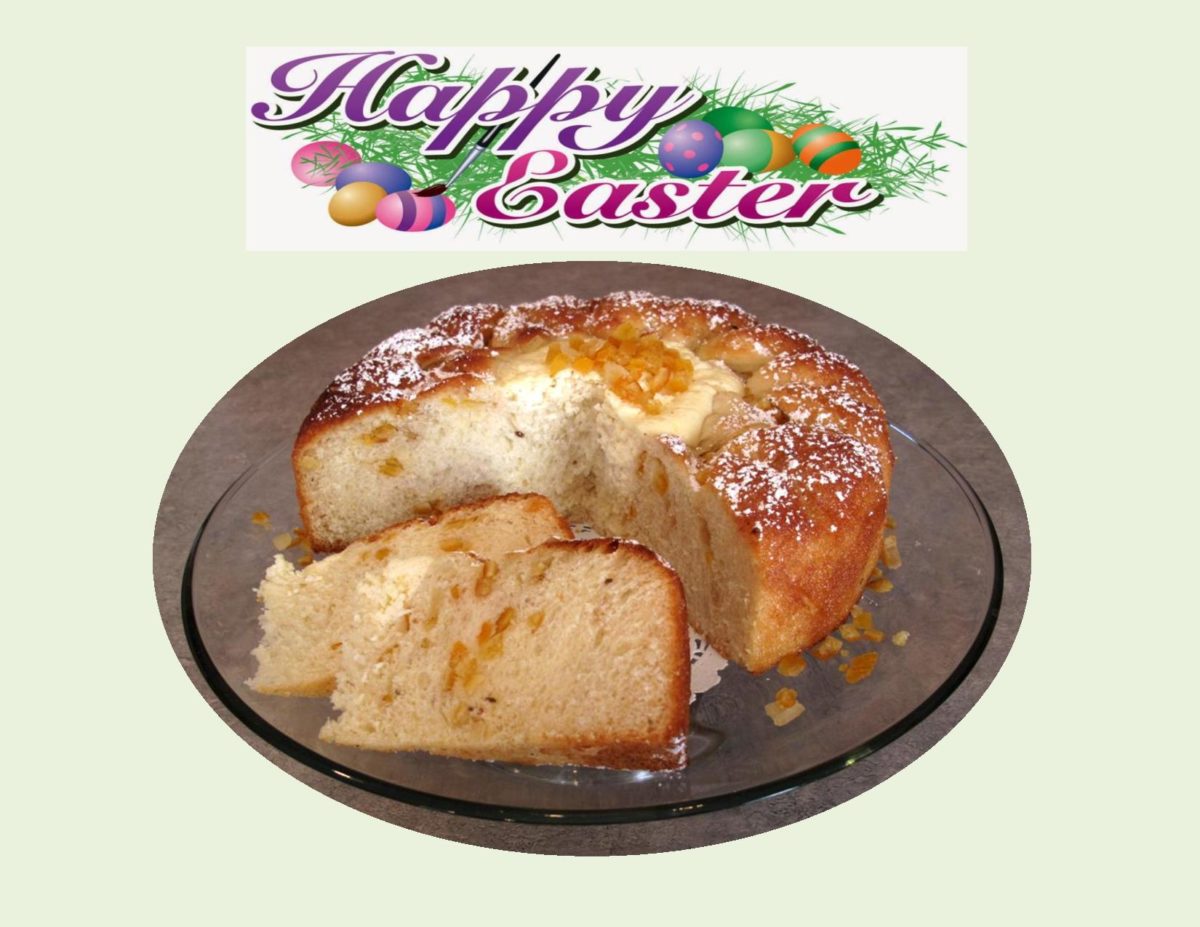
That being said, I couldn’t resist doing a little ‘version’ of my own. I started with my favorite sweet yeast bread, added some anise flavor and a cream cheese filling. So now you have German osterkranz, Italian panettone and Romanian pasca all in one beautiful EUROPEAN EASTER BREAD.
Print Recipe
European Easter Bread
A heavenly creation!
Votes: 1
Rating: 5
You:
Rate this recipe!
|
|
Votes: 1
Rating: 5
You:
Rate this recipe!
|
Instructions
In a large bowl, whisk yeast & sugar into lukewarm water; let stand about 10 minutes. With an electric mixer, beat together 3/4 cup sugar, eggs, oil, anise extract, lemon zest, lemon extract, salt & anise seed. Combine egg mixture, melted butter & milk with yeast mixture.
Add 4 CUPS flour, 1 cup at a time to wet mixture. Stir well after each addition. Turn dough out onto a floured surface & knead until smooth & elastic, about 5-6 minutes, adding remaining 1/2 cup flour if necessary.
Coat a large bowl with oil. Place dough in bowl & turn to coat. Cover with plastic wrap & set in a warm place to rise until it doubles in bulk. Meanwhile, cut a piece of parchment paper big enough to cover the bottom & go up the sides of a 10" spring form pan. When dough has risen enough, cut into four pieces.
On the parchment paper, press one piece of the dough into a circle measuring about 10" in diameter. Sprinkle with 1/3 of the mixed peel, leaving a gap at the edge. Press out second piece of the dough on a lightly floured piece of wax paper, place it on top of the first layer & sprinkle with another 1/3 of mixed peel. Repeat with the third & fourth pieces of dough but do not sprinkle mixed peel on the final layer.
Place a glass tumbler on top of the center of the dough circles. Cut dough into 16 segments, starting a the edge of the glass. Lift & twist them away from each other through 180 degrees. Lift & twist through 90 degrees so that the ends are vertical. Press the edges together firmly. Repeat this process with all pairs of segments. Leave glass sitting on top at the center of the circle to form an indentation for the cheese filling. Cover with plastic wrap & set in a warm place to rise for about 1/2 an hour.
Preheat oven to to 325 F. In a bowl, place cream cheese, eggs, sugar & vanilla; mix well. When bread has risen, remove glass & fill indentation with cheese mixture. Bake for about 40-45 minutes. Allow to cool. Brush with honey/water glaze. Sprinkle with powdered sugar.
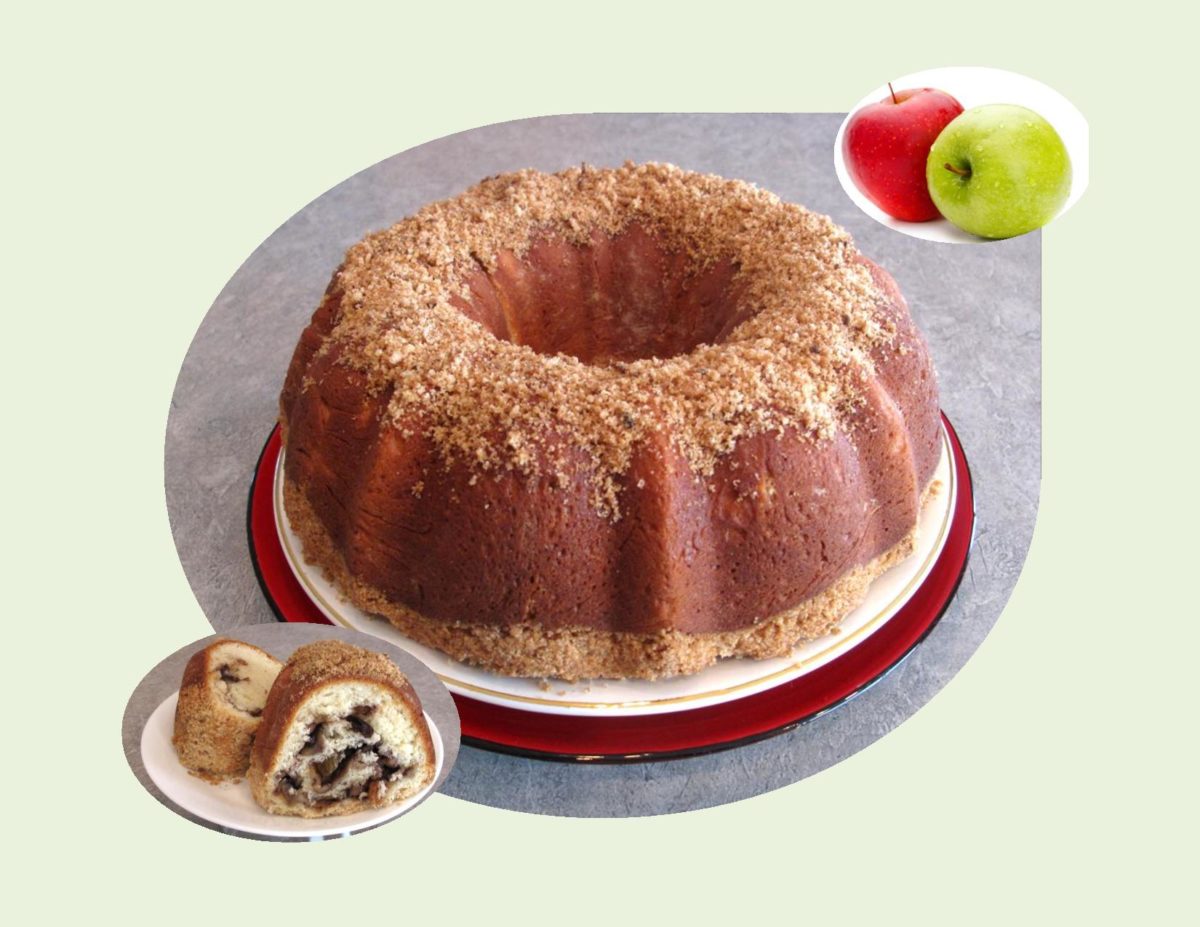
German-inspired yeasted coffee cake is a very popular type of cake all over Germany and Austria. It is very different from the typical butter cake associated with streusel coffee cake in North America. Whereas a butter cake is rich, sweet and fine grained, kuchen is light and slightly porous with a complexity of flavor that can only be found in yeast leavened baked goods. Of course, there are many different variations, but the important part is the streusel or crumbled topping, which consists of a combination of flour, sugar, butter and spices.
In the past, most German towns and cities had orchards planted all around them, on land that belonged to the community. Cows or sheep grazed underneath the trees and people were free to pick the fruits when they became ripe. Today most of those common lands have been turned into suburbs and the trees are gone. Destruction of the remnants of ancient orchards is ongoing, contributing to the loss of heirloom varieties. Even though the diversity of choice is decreasing, the apple is still by far the most popular fruit in Germany.
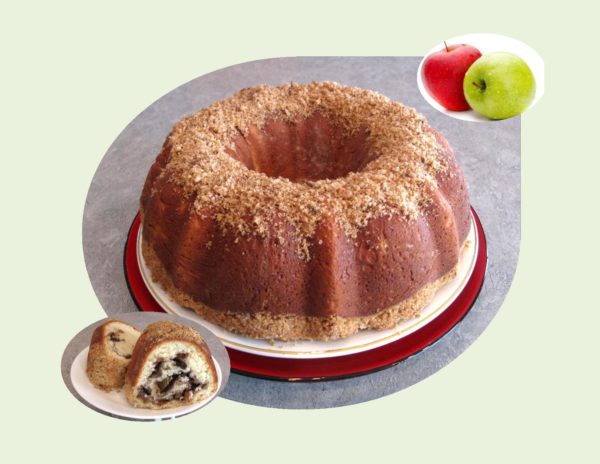
Here is my best adaptation of an APPLE STREUSEL COFFEE CAKE that I think you might enjoy to try.
Print Recipe
Apfel-Streuselkuchen - German Apple Coffee Cake
Votes: 2
Rating: 4.5
You:
Rate this recipe!
|
|
Votes: 2
Rating: 4.5
You:
Rate this recipe!
|
Instructions
Coffee cake
In a large bowl, combine yeast, 1/8 cup sugar & lukewarm water; allow to dissolve. Stir in remaining 1/8 cup of sugar, salt, milk, sour cream, lemon juice & vanilla; mix well. Add egg & blend.
With fingertips, rapidly work the butter into 2 1/2 cups of the flour until coarse, meal-like consistency. Add to the yeast mixture & knead in bowl, adding more flour if necessary to make a smooth, elastic dough. Shape into a ball & place in a lightly buttered bowl. Cover tightly and let rise in a draft-free place until doubled in bulk.
Apple Filling
Peel & slice apples. In a small saucepan, combine all filling ingredients except pecans. Cook over medium heat, stirring constantly until apples are tender, & juice has evaporated. Stir in pecans; set aside to cool.
Streusel Topping
In a small bowl, combine flour, sugar, salt, cinnamon & lemon zest. With fingertips, rub in butter until mixture is coarse & crumbly. Set aside.
When dough has doubled in size, turn out on a lightly floured piece of wax paper. Press out gently into a rectangle about 10 x 14-inches in size. Spread apple filling to within 1/4-inch of edges & very gently press into dough. Roll up from the wide end, jelly-roll fashion.
Preheat oven to 375 F. Butter a 9-inch tube or bundt pan. Sprinkle half of the streusel in pan. Carefully, (dough will be very soft) with the help of the wax paper, fit the roll into the pan so that the ends of the dough join. Pinch ends of together. Sprinkle cake with remaining streusel. Bake for 30 minutes. Remove from oven & allow cake to cool before slicing.
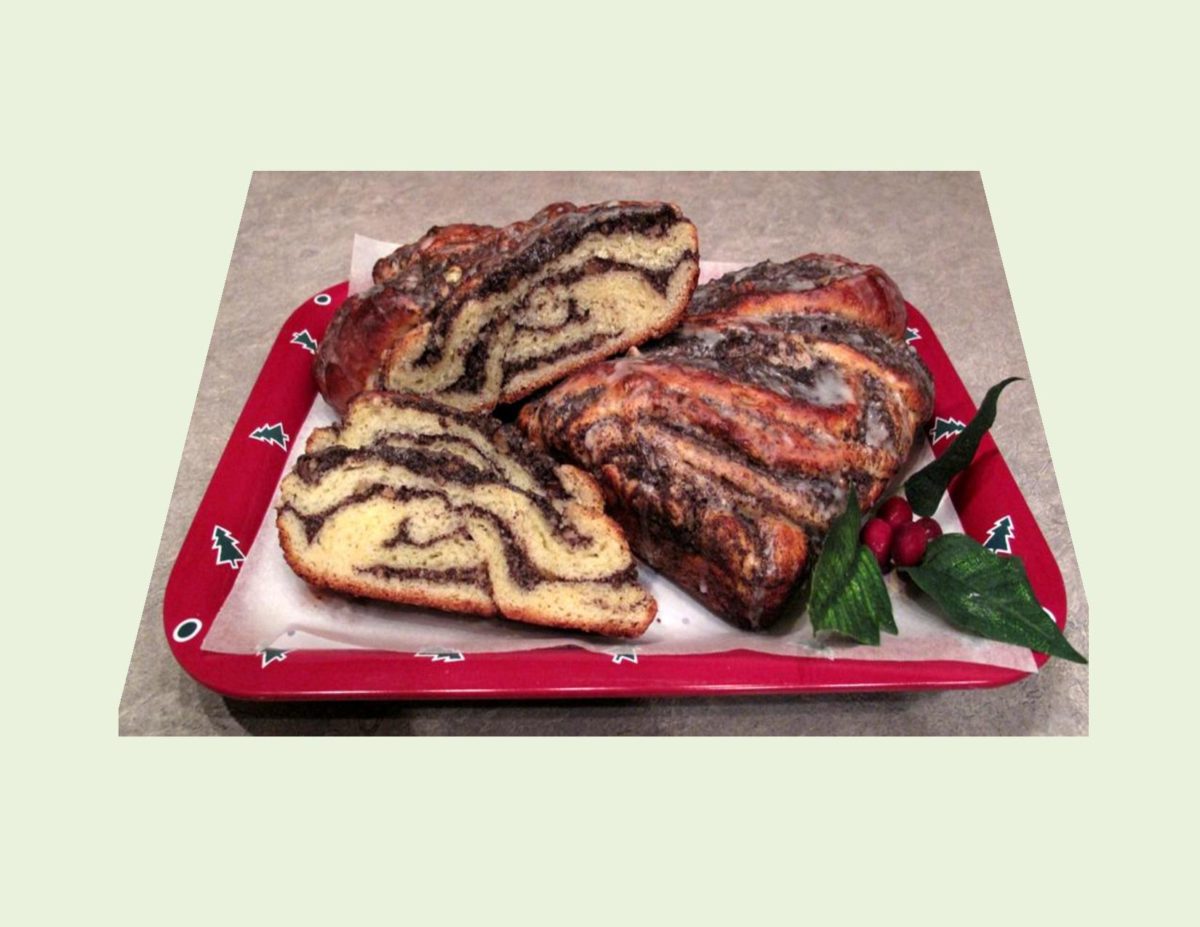
Germany’s love of poppy seed is no secret, you can find it in everything from sweet to savory foods. For many German and central eastern Europeans, poppy seeds are a symbol of wealth, the tiny seeds representing coins. They figure prominently at Christmas and New Year’s, expressing hoped-for prosperity in the coming year.
Poppy seed cultivation dates back to 1400 BC. Early Egyptians pressed the seed into cooking oil whereas the the ancient Romans mixed them with wine and honey for Olympic athletes or home use. It should be made clear though, that this spice is not narcotic because opium is found in the pod and not in the seed itself. The dried pod loses any of it’s opiate properties long before the seeds are harvested.
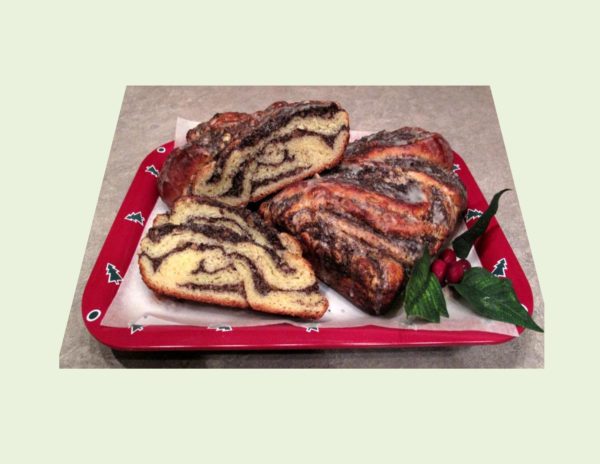
‘Mohn Kaffee Rolle’ is considered a nostalgic German Christmas pastry much like Stollen is. One thing for certain, in keeping with true European tradition, poppy seed is added in such large quantities that the dough sometimes looks black.
When I recall my mother’s poppy seed roll, it was never dry. It seemed like a vanilla custard with ‘wall to wall’ poppy seeds in it. There were numerous recipes in her file — cake, roll, twists, cookies, strudel, pudding — everything and anything poppy seed! This recipe seems unique in that it uses a ‘Zwillingsteig’ (zwilling=twin, teig=dough) dough, a rich, moist dough used in the past when making cakes with fresh fruit. The dough is a combination of yeasted and shortcrust dough kneaded together. It seems a little involved but is well worth it in the end. One more special ‘taste of a memory’ before the holiday season is to far behind us.
Print Recipe
'Mohn Kaffee Rolle' - Poppy Seed Coffee Roll
A unique, very tender pastry, slightly sweet with loads of poppy seeds!
Votes: 1
Rating: 5
You:
Rate this recipe!
|
|
Votes: 1
Rating: 5
You:
Rate this recipe!
|
Instructions
Shortcrust Dough
In a bowl, place all shortcrust ingredients & quickly knead together until well combined. Shape into a disk & set aside. Dough can be made a day ahead, wrapped in plastic wrap & refrigerated. Bring to room temperature before combining with yeast dough.
Yeast Dough
In a small dish, sprinkle yeast over lukewarm water, add 1 tsp sugar stirring until dissolved. Let stand 5 minutes. Sift flour with 3 Tbsp sugar & salt. Cut in butter with pastry blender. Add lukewarm milk, egg & vanilla to yeast mixture, then gradually add to flour mixture & blend.
Press dough out to about 1 inch thickness & lay disk of shortcrust on top. Knead together by hand until fully combined, about 2 minutes. Shape into a ball & place in a greased bowl. Cover with a tea towel, let raise in a warm, draft free spot for about an hour or until doubled in size.
Poppy Seed Filling
Grind poppy seeds. In a small saucepan, combine poppy seeds, sugar, semolina & salt. Add butter & milk. Place over medium high heat; stirring constantly, bring to a boil. Remove from heat immediately & set aside to cool. When mixture is lukewarm, stir in egg, vanilla, rum & walnuts. Set aside.
Line a baking sheet with parchment paper. When dough has risen, punch down & roll out on a lightly floured surface about 1/4 - 1/2 inch thickness.
Spread with cooled poppy seed filling leaving a 1 inch border on each of the shorter ends. Brush shorter ends with egg wash. Starting from shorter end, roll dough, jelly-roll style, into a tight log. Cut into 2 loaf pan lengths.
With a sharp knife, cut each log of dough in half lengthwise. Carefully twist the two pieces of dough together & place into prepared pans. Brush dough with egg wash, cover with greased plastic wrap & let rise in a warm place for about 30 minutes.
Preheat oven to 325 F. When dough has risen, brush again with egg wash & bake about 40 minutes or until golden brown. When loaves have fully cooled, whisk together powdered sugar, water & lemon zest until smooth. Brush glaze over loaves & allow to set before slicing.
Recipe Notes
- Unless you can find freshly ground poppy seeds, it is best to buy the whole seeds, store them in the freezer and grind them right before using. Because of their high oil content, the seeds easily turn rancid.
- Good poppy seeds smell slightly 'musty' and have a nutty flavor - not bitter or harsh.
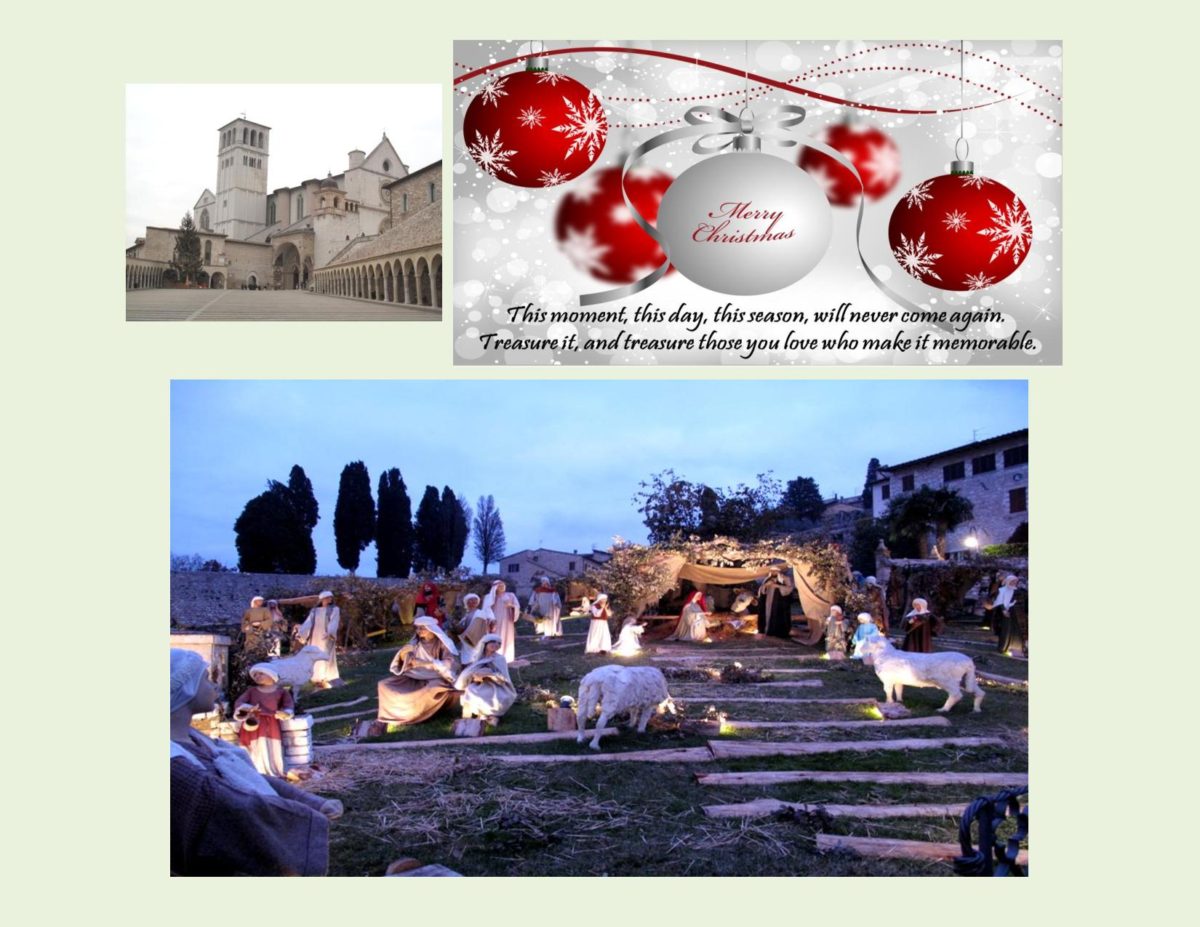
The Christmas season makes us reflect on many different things; to live life a little more grateful, more hopeful and a little more peaceful. It is a time to connect with friends and loved ones to enjoy the traditions we grew up with.
Today, December 25th, our family celebrates my sister Rita’s birthday as well as Christmas. I have fond memories of her Christmas Eve family birthday ‘parties’. On the eve of Christmas, our family would go to church. After returning home, we were joined by some family friends to have birthday cake and homemade rootbeer. My parents wanted my sister to always have this special time to honor her birthday apart from the Christmas festivities.
As I write about this memory, something else comes to mind. Our church at that time, was a small, old building. For the choir it had a small loft. As long as I can remember, the same lady played the organ as well as directing the choir members in song. She in turn, had a teenage daughter gifted with an unbelievable voice. One of the highlights of the Christmas service was to hear her sing a solo version of ‘Oh Holy Night’. You could hear a pin drop, it was breathtaking how angelic and beautiful her voice was. I get emotional even now remembering it.
Brion and I have spent many Christmas seasons in other parts of the world. One of the many ‘scenes’ that has left a lasting memory was in Italy, in the town of Assisi. We arrived in late afternoon with the Trafalgar group. The town sits atop one of the rolling hills in the region. The Basilica is a massive structure that dates back to the 13th century. By the time we finished visiting the Basilica the sun was setting. Brion and I stepped outside and in the meadow of the church stood a huge nativity scene with human size, terracotta figures. It was just an amazing sight to see and especially right at that time of day.
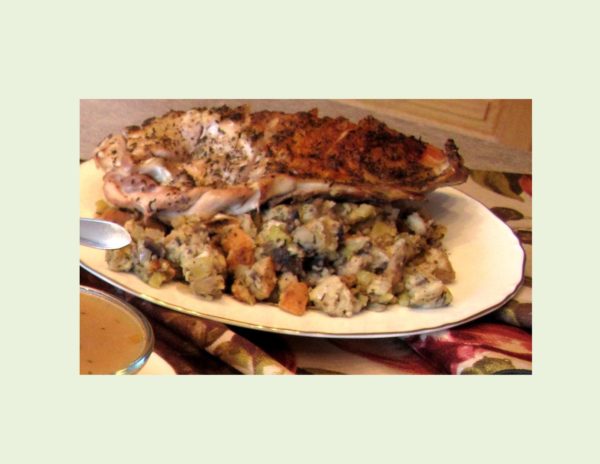
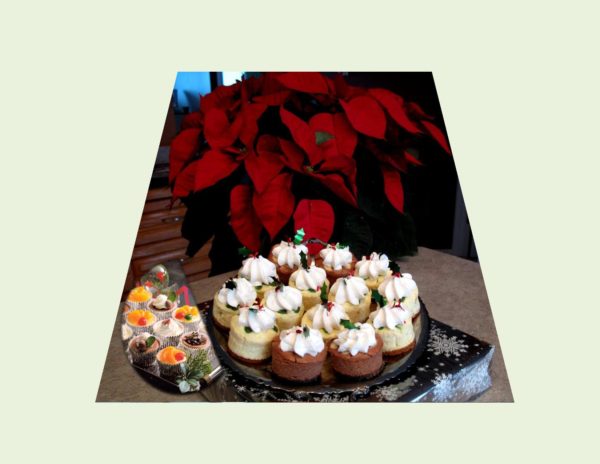
As much as I love to look at and appreciate the beauty of seasonal decorations, I’ve never been one who gets to involved with that aspect of the season. Food preparation has always been my calling and probably always will be. I hope you have enjoyed my pre-Christmas blogs as well as found them useful. I’m keeping it simple today with just two recipes. One is SAVORY STUFFING for your bird. This recipe is my best effort at a ‘taste of a memory’ from my mother’s stuffing. The second recipe is for MINI CHEESECAKES. These are my virtual ‘birthday cakes’ for you Rita. HAPPY BIRTHDAY –we love you — enjoy your day!
SEASON’S GREETINGS to anyone reading my blog.
THE SPIRIT OF CHRISTMAS IS FOUND ANYTIME SOMEONE’S
DREAM BECOMES REAL BY THE KINDNESS ANOTHER EXTENDS!
Print Recipe
Savory Stuffing / Mini Cheesecakes
Votes: 1
Rating: 5
You:
Rate this recipe!
Ingredients
Base for 3 dozen Mini Cheesecake Cups
Lemon Cheesecake (1 Dozen Minis)
Chocolate Cheesecake (1 Dozen Minis)
Orange Cheesecake (1 Dozen Minis)
Ingredients
Base for 3 dozen Mini Cheesecake Cups
Lemon Cheesecake (1 Dozen Minis)
Chocolate Cheesecake (1 Dozen Minis)
Orange Cheesecake (1 Dozen Minis)
|
Votes: 1
Rating: 5
You:
Rate this recipe!
|
Instructions
Savory Stuffing
In a saucepan, boil potatoes; drain & mash. Set aside. Saute onion, celery, garlic, mushrooms & seasonings in margarine. Remove from heat. Combine with bread cubes, mashed potatoes & broth. ADD ONLY ENOUGH BROTH TO MAKE A PROPER STUFFING CONSISTENCY. You may not need the full amount of broth. This will make sufficient stuffing for a 4 - 4.5 kg (9 - 10 lb) turkey.
Base for Mini Cheesecakes
Combine crumbs, sugar & margarine. In each of 36 paper-lined, mini tart pans (2 1/4" dia.), press 1 Tbsp of crumb mixture. Bake at 325 F. for 5 minutes.
With an electric mixer on medium speed, combine cream cheese, sugar, zest, juice & vanilla until well blended. Beat in egg; fill cups. Bake for about 25 minutes. Cool before removing from pan. Chill. Garnish as desired before serving. For the chocolate cheesecakes, blend beaten egg & vanilla with cooled chocolate before beating in cream cheese & sugar so the chocolate does not harden into lumps.


