Wine is not just a beverage with dinner, but can also be a key ingredient in dinner. Madeira wines are known for their versatility. Madeira perfectly complements all sorts of ingredients because of its vast range of wines. It not only adds flavors, but also dimension to the dishes. From soups to stews to desserts, it packs quite a punch and has an intense impact on the final product.
Madeira wine evolved on the island of the same name on the coast of Portugal. It presents different characteristics to all other types of fortified wine due to its specific winemaking process, since it is obtained by intentional heating, and characterized by a distinct ‘baked’ bouquet.
Madeira is classified according to several designations, including vintage, grapes used, and sweetness. There are a few variations on the production method, but Madeira must be oxidized and heated (a process called “maderization,” named after the wine). This makes for a fortified wine that can last for centuries.
Madeira has several taste profiles, but most will have flavors of caramel, walnut oil, peach, hazelnut, orange peel, and burnt sugar.
The first thing to check before cooking a Madeira based dish is what kind of wine does the dish require? It is always safe to use an average blended Madeira. Choose the safest- Finest or Rainwater type. These are packed with flavors and aromas and are typically inexpensive.
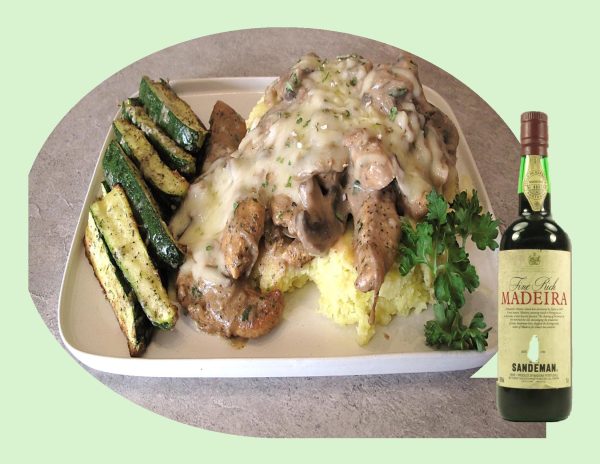
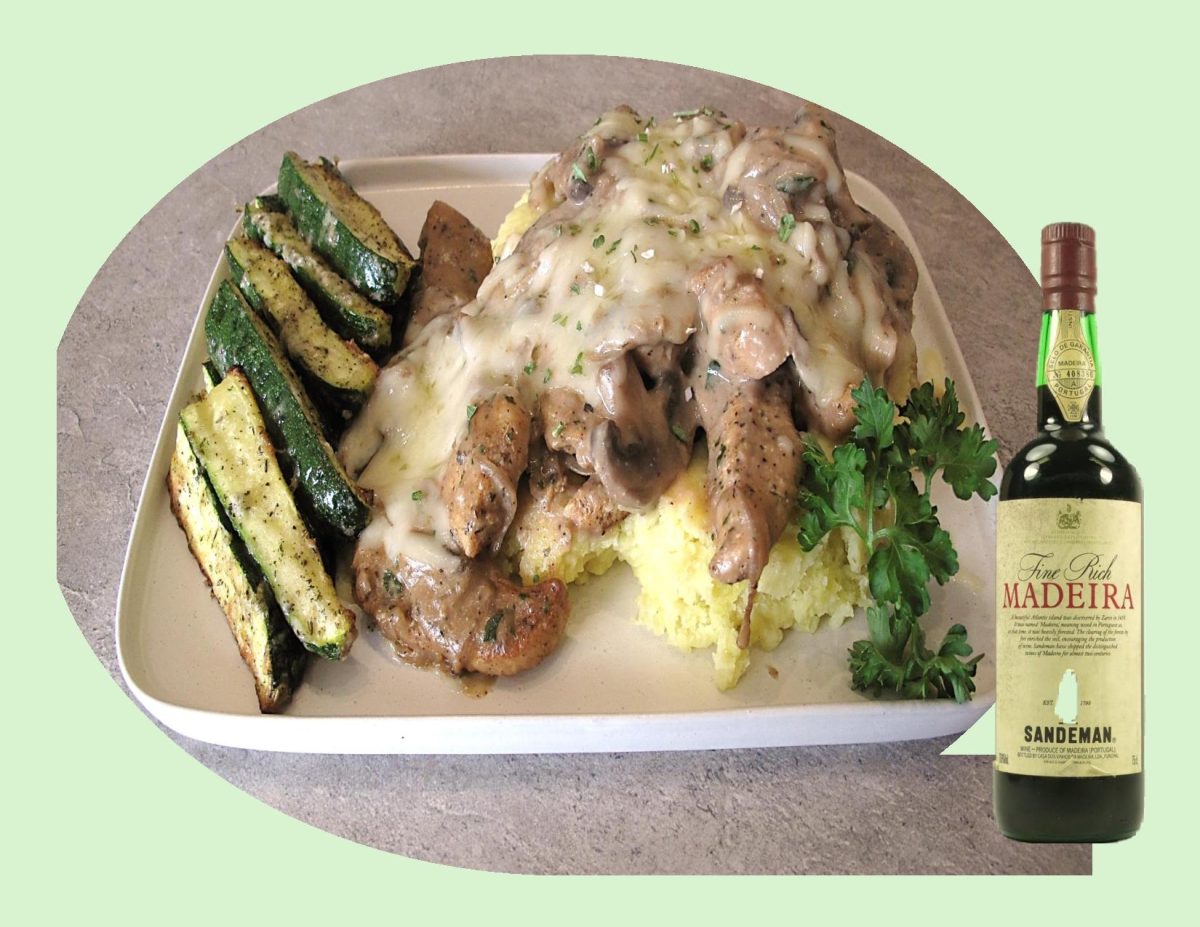
A good example is Sandeman Madeira Rainwater. It is light in body but full of flavor. It has a light amber color with golden highlights, as well as clean, nutty aromas. Its flavor is nutty and lightly complex, with a clean finish. This Madeira makes a wonderful accompaniment to a variety of foods and is also a fabulous cooking wine that can be used in various traditional dishes. ‘Rainwater Madeira’ was so named in the 18th century because it is as soft as rainwater and the color of straw, glistening after a shower of rain.
Print Recipe
Chicken Madeira
Votes: 1
Rating: 5
You:
Rate this recipe!
|
|
Votes: 1
Rating: 5
You:
Rate this recipe!
|
Instructions
In a large saucepan melt 2 tablespoons of butter. Add 1 tablespoon of oil then add the mushrooms to the pan. Cook the mushrooms for about 5 minutes until they become soft.
Add the onions to the pan & cook them along with the mushrooms for about 2-3 minutes. Add garlic & parsley to the pan & sauté them for a minute or two. Then, transfer this mixture to a plate.
Slice the chicken breast in lengthwise strips. Season with garlic powder, Italian seasonings, paprika, salt & pepper.
In the saucepan, melt a tablespoon of butter. Add a tablespoon of oil as well & let the butter foam. Add the chicken breast to the pan & cook it on both sides for 3-4 minutes each until golden brown. When it is cooked, transfer it to the plate with the mushrooms.
In the same pan, pour in the Madeira wine & bring it to a boil. When it has reduced to almost half its volume, add the beef stock & boil it for about 10 minutes until only ¼ of the original volume remains.
Add the heavy cream to the pan & simmer it for 2-3 minutes until it thickens. Sprinkle a pinch of salt & pepper into the pan to add flavor & stir.
Return the cooked chicken to the pan along with the mushrooms. Top it with the shredded mozzarella cheese. Place the pan in the oven broiler and broil it for 2-3 minutes until the cheese has completely melted.
Remove the pan from the oven. Place chicken on a serving platter & garnish with some parsley. Nice served with mashed potatoes.

There’s something fundamentally satisfying about the textural contrast of biting through a crisp savory shell into a juicy turkey burger. It’s not like burgers needed to be reinvented, but I’m all about trying new things to see if there’s something novel and delicious to be discovered.
Breakfast can be many things to many people. Hash browns come in many shapes and sizes. They can be prepared in various ways. Some consider it the ultimate breakfast food that needs to be served with eggs.
Brion has always enjoyed hashbrowns, not the diced, fried to a crisp in a deep fryer kind, but the nice shredded, golden kind. My inventions for new culinary techniques that revolutionize the way we eat usually happen in the middle of the night during a bout of insomnia. But all it takes is a quick Internet search to reveal that I’m far from the first person to have invented the cookery method, and hundreds of recipes already exist. Nevertheless, this idea for an interesting breakfast is a good example of that.
I crusted the turkey burgers with some shredded potatoes, so when they cook and get crispy, they act as a barrier that locks in all the juices. The roasted tomatoes add a nice little garnish to the burgers. I topped the burgers with poached eggs, because when you cut into it, the velvety, creamy yolk pours out onto the burger and acts as a sauce…and what goes better with potatoes than eggs, right? So, there you have it …. crispy, golden hashbrowns, meat, eggs & tomatoes …. what a breakfast!
Print Recipe
Breakfast Turkey Hashbrown Burgers
Votes: 1
Rating: 5
You:
Rate this recipe!
|
|
Votes: 1
Rating: 5
You:
Rate this recipe!
|
Instructions
Hashbrowns
Thaw shredded hashbrowns on paper towel. In a bowl, place the flour, cheese, egg, onion, garlic, coriander, smoked paprika, salt & pepper. Add 'dried' shredded hashbrowns. Using a fork, mix everything until combined being careful not to break up the hashbrowns. Set aside until burgers are ready to be coated with the mixture.
Turkey Burgers
In a bowl, combine burger ingredients & divide into 4 equal portions. Form into burger patties. Coat burgers with hashbrown mixture, gently pressing coating down to make sure it adheres well.
Roasted Cherry Tomatoes
In a small bowl, place cherry tomatoes & add some Italian dressing to coat. Place on a foil lined baking dish.
Cooking
-
In a skillet, heat 1 Tbsp EACH butter & olive oil. Carefully place hashbrown burgers in skillet & cook burgers on each side only until they are a golden brown. Remove to a baking pan & place in the oven to continue the cooking process until the meat is fully cooked. Roast the cherry tomatoes at the same time.
While the burgers are in the oven, prepare the poached eggs. Heat a small pot of water until it is almost at a boil. Add 1 Tbsp vinegar to help the eggs to congeal. Crack the eggs gently right above the surface of the water. Turn off the heat & cover the pot for about 3-4 minutes or until the whites of the eggs are fully cooked but the yolks are still runny. Remove the eggs with a slotted spoon.
When the burgers & tomatoes are cooked, remove them from the oven. Place them on serving plates & top each burger with a poached egg. Garnish with sprigs of fresh thyme if you wish.
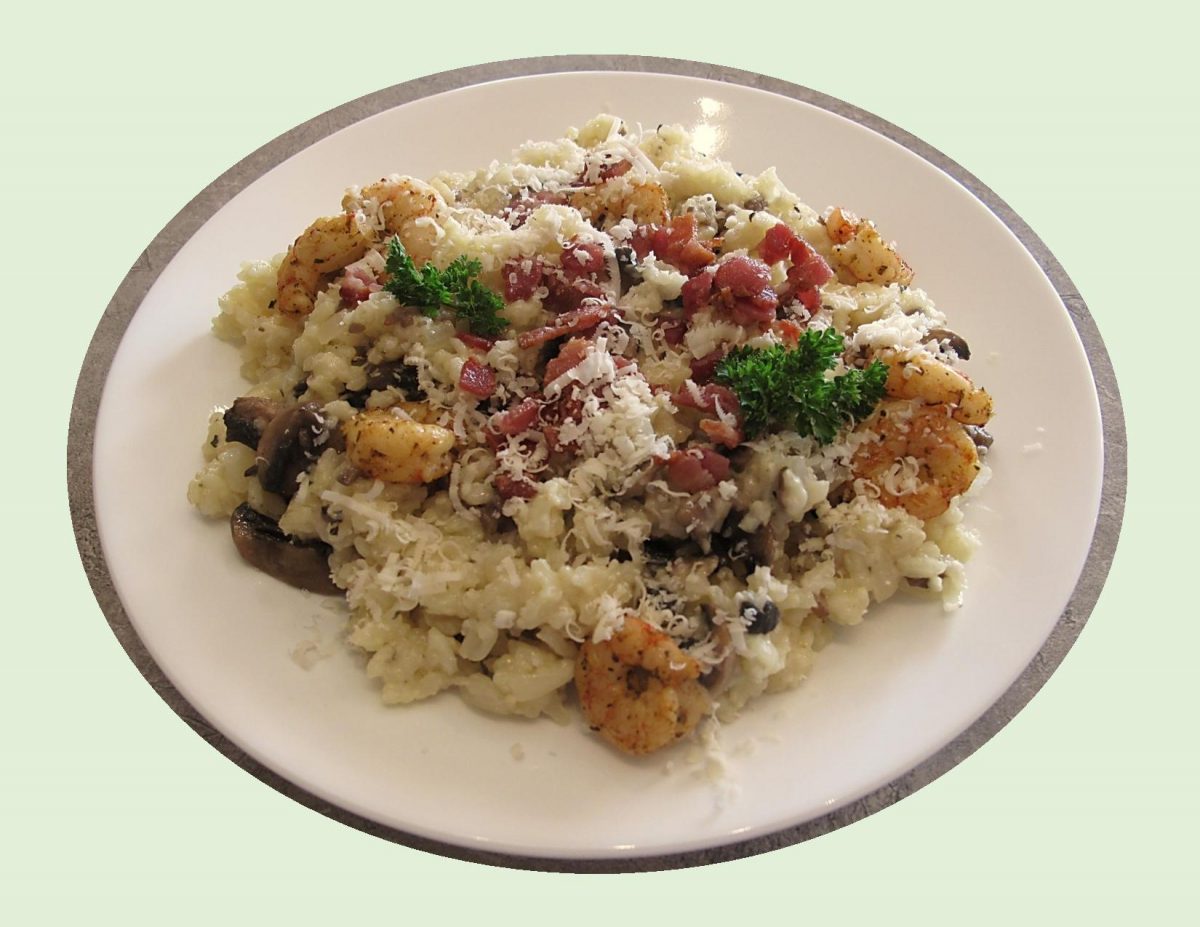
Risotto is one of those dishes that’s purely Italian in nature. Most traditionally made with Parmesan cheese, which is stirred in right at the very end of cooking to not only boost the rice’s creaminess but also lend its signature salty, nutty flavor to the dish. Don’t get caught up in tradition though, because risotto is one of the most flexible meals you can make.
While there is nothing wrong with Parmesan, the cheese possibilities for risotto are nearly endless and you quickly discover that the world of this comfort-food staple really has no boundaries.
Risotto is one of those gourmet meals that is really not difficult to make, and it doesn’t take long either. You can have it on the table in 30 minutes or less. It takes some work stirring — not the kind of stirring where you must stand at the stove and stir constantly. You can step away for brief moments, but you do want to do lots and lots of stirring. It’s the stirring that breaks up the starches in the rice and makes the risotto so incredibly wonderfully amazingly creamy.
This rich and creamy risotto with tender shrimp, uses Asiago over Parmesan cheese for a semisweet touch, plus tarragon and flat leaf parsley to give the dish some freshness.
Asiago is a whole milk cheese that originated in Northern Italy, around the Po River Valley where Italy borders Austria. Coming from the mountains, Asiago is similar to other mountain cheeses, such as Switzerland’s Gruyere or France’s Beaufort. Asiago is made in large wheels designed for long-term aging to get through tough winters. Dense and flavorful, Asiago’s flavor profile changes as time polishes the wheels over the course of several months or years. Taken from the milk of cows grazing on the grasses and wildflowers of the mountains, Asiago can have a fresh, fruity flavor or a savory, zesty taste on the palate.
Print Recipe
Asiago Shrimp Risotto
Votes: 1
Rating: 5
You:
Rate this recipe!
|
|
Votes: 1
Rating: 5
You:
Rate this recipe!
|
Instructions
Risotto
Heat 1 tsp oil in a LARGE POT or DEEP SKILLET over high heat. Add bacon & cook until fairly crisp. Blot on paper towel & crumble. Transfer to a small microwave-proof bowl. Leave about 1 Tbsp bacon drippings in pot & discard the rest. Add mushrooms & cook until browned. Remove to a dish, set aside.
Turn heat down to medium & return pot to the stove. Add butter & melt; then add garlic & onion. Sauté for 3 minutes or until softened. Turn up heat, add rice & stir until grains become partially translucent, about 1 minute (do NOT overcook).
Add wine & cook, scraping the bottom of the pot to get any brown bits, about 2 minutes. Turn down heat to medium-low; add about 3 cups of chicken stock. Leave, uncovered, stirring just once or twice, until most of the liquid has been absorbed.
Check firmness of rice & add 1/2 cup of broth at a time, stirring in between until absorbed & rice is cooked to YOUR taste.
Spicy Shrimp
While the risotto is cooking, combine spice mix in a plastic bag. Add shrimp & shake to coat well. In a skillet, heat butter & olive oil; add shrimp & sauté for 2-3 minutes, just until cooked. Keep warm.
Add the mushrooms back into the risotto towards the end, just to heat through. Right at the end when the risotto is ready, add a 'splash' more chicken broth to make the risotto slightly soupy, then take it off the stove.
Add butter & Asiago cheese, then stir vigorously (this will activate the starch & make it super creamy). Add shrimp & gently stir to incorporate them into the risotto.
Serve immediately. Garnish with reheated bacon & extra Asiago if you wish.
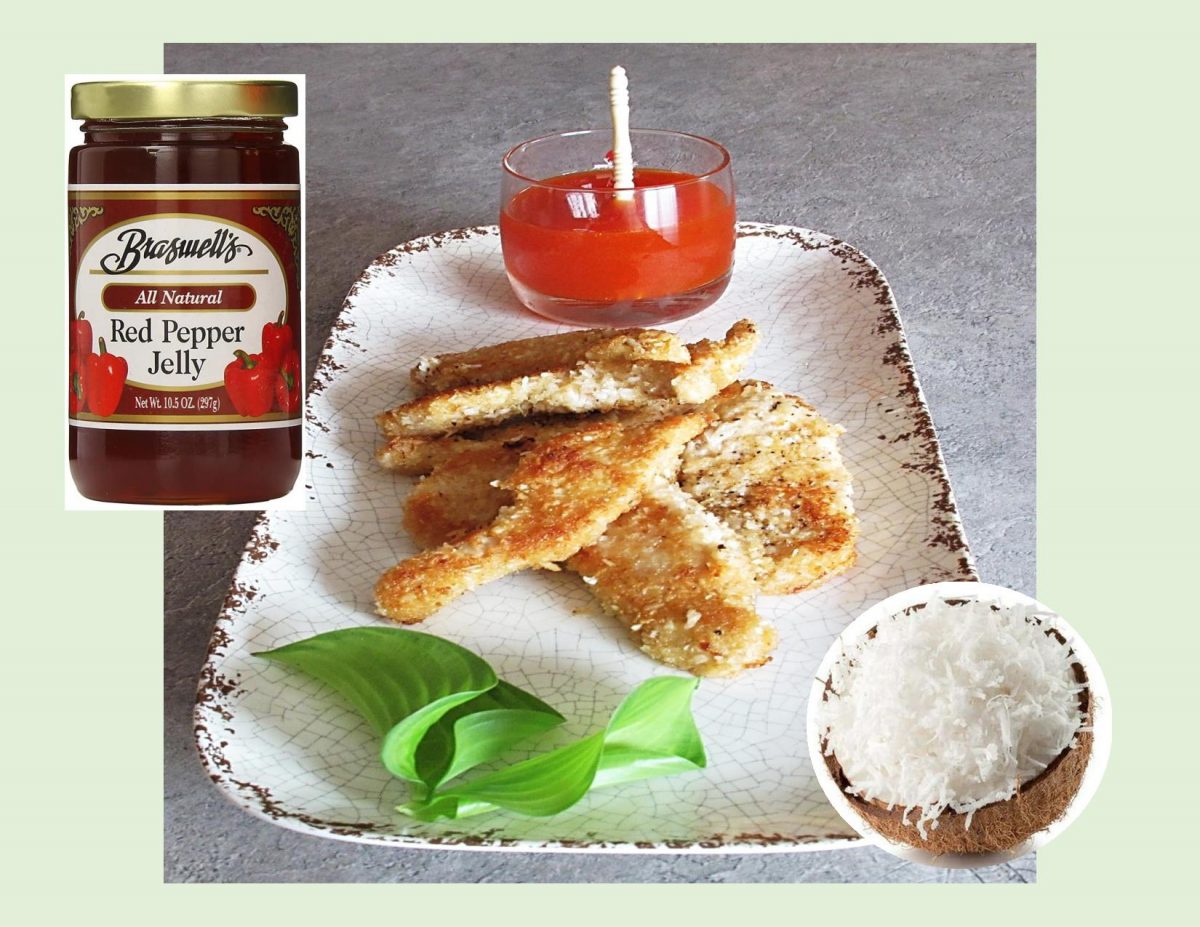
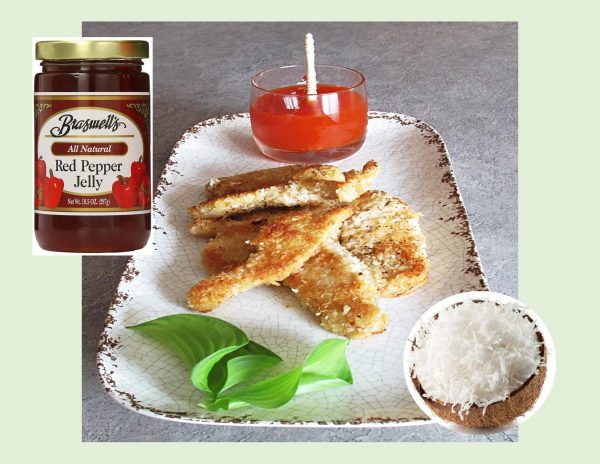
In late August (2020), I had posted a recipe for coconut shrimp. It has become one of our favorite meals so I thought there was no reason not to try the same recipe using chicken breast.
It uses Panko bread crumbs to give a light crispy texture to the coconut breading. Panko was invented during WWII by the Japanese. The word panko is derived from ‘pan‘, giving us the word for bread in Japanese (derived from the Portuguese word ‘pão’ for bread), and ‘ko’, indicating flour, coating, crumb, or powder.
Panko crumbs are made from grinding yeast-risen bread, which is baked using an electric current, which goes through the dough. This type of bread has no crust, instead, the entire loaf consists of the soft and airy bread center. Panko adds crispiness but being neutral in flavor, it does not over power the item it is coating.
This unique oriental product caught the attention of North America in the 21st century due to its interesting texture, subtle flavor and striking visual appeal.
Print Recipe
Coconut Chicken w/ Sweet Spicy Sauce
Votes: 1
Rating: 5
You:
Rate this recipe!
|
|
Votes: 1
Rating: 5
You:
Rate this recipe!
|
Instructions
Sauce
In a food processor, puree ingredients for sauce & set aside.
Coconut Chicken
Using 3 separate bowls, place flour in the first, egg in the second & panko & coconut in the third.
Slice the chicken breast & dust pieces in the flour then dip in the egg & lastly coat with panko/coconut mixture.
Preheat a skillet over medium heat. Melt butter, then add oil. Once the combo is heated, place the chicken tenders in the skillet & cook 3-4 minutes on each side or until golden & cooked through.
I prefer to place cooked chicken on a plate lined with paper towel to drain any excess oil from it before serving. Serve with spicy sauce on the side. This meal is real good with some steamed rice.
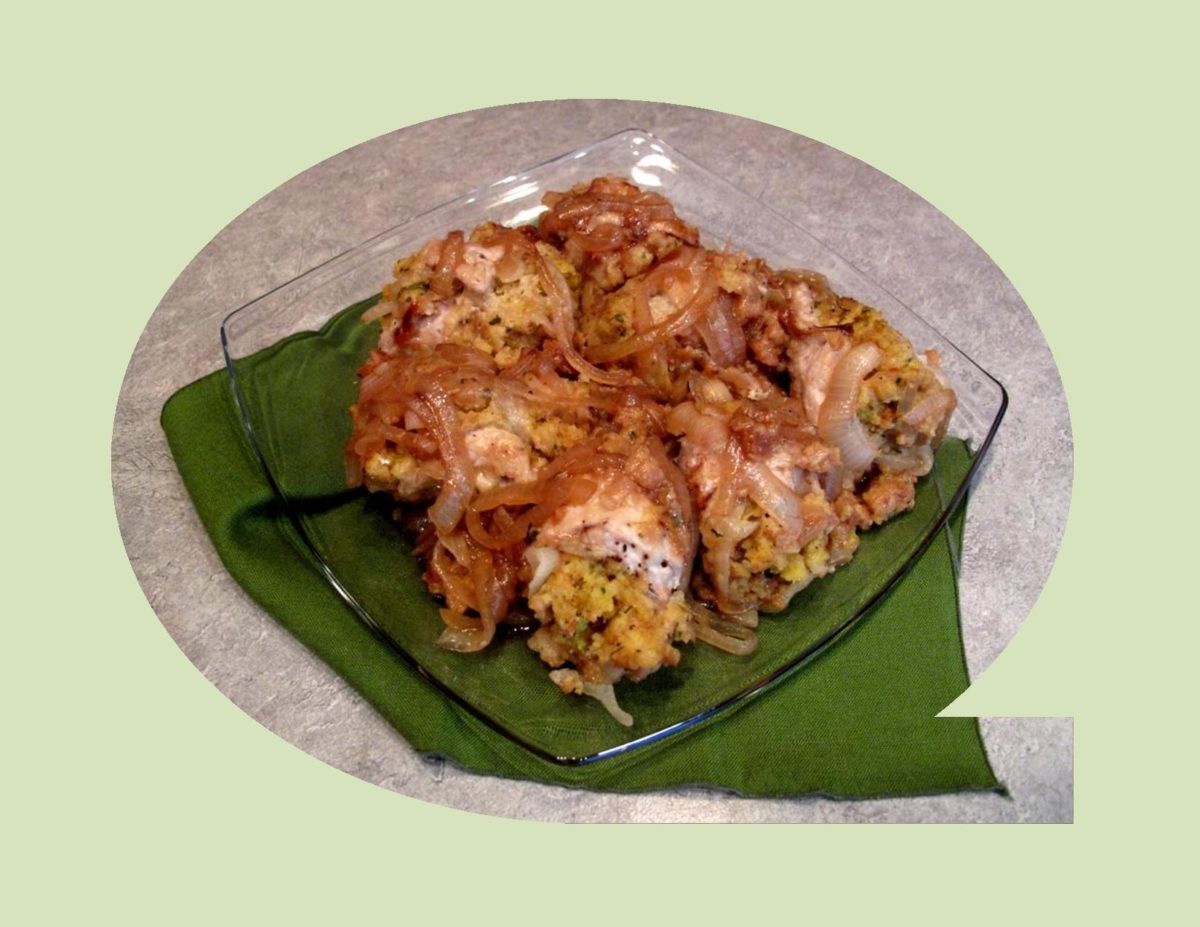
Pork tenderloin can be stuffed with anything, imagination is the limit. What’s not to like — easy to prepare, boneless and fork tender. The pairing of pork with cornbread seems perfect, add caramelized onions and you got it!
Cornbread is one of those nostalgic foods for me. It always brings me back to my mother’s kitchen. I remember very clearly that wonderful smell of fresh cornbread coming out of the oven and that small Pyrex, rectangle baking pan she always baked it in. Those special memories came to mind today as I was trying to come up with a supper ‘idea’.
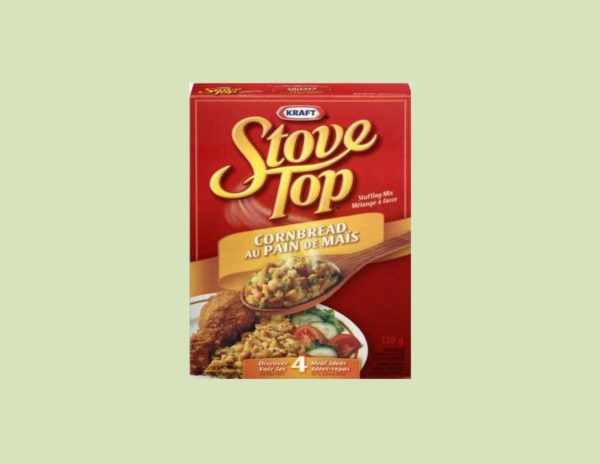
I love stuffing or dressing, whatever you prefer to call it. Of course, my ultimate favorite is the one I grew up with. On the other hand when you just need a very small amount, I see nothing wrong with using a box of ‘Stovetop Stuffing’. Of course I can’t resist telling you just a bit of the history about the product itself —
In 1972, General Foods which is now known as Kraft Foods introduced ‘Stovetop Stuffing’. It was quick, convenient, tasty and therefore was an instant hit.
The secret lies in the crumb size. If the dried crumb is too small, adding water to it makes a soggy mass; too large, and the result is gravel. The nature of the cell structure and overall texture of the dried bread crumb used in this invention is of great importance if a stuffing which will hydrate in a matter of minutes to the proper texture and mouthfeel is to be prepared.
Ruth Siems, a home economist that spent more than three decades on the staff of General Foods was instrumental in arriving at the precise crumb dimensions — about the size of a pencil eraser.
That being said, here is my idea for this great little combination. We really enjoyed it!
Print Recipe
Stuffed Pork Rolls with Cornbread & Caramelized Onions
Votes: 1
Rating: 5
You:
Rate this recipe!
|
|
Votes: 1
Rating: 5
You:
Rate this recipe!
|
Instructions
Caramelized Onions
-
In a large skillet, heat oil. Add onion & sprinkle with salt. Cook & stir about 15 minutes or until moisture is evaporated & onion is soft. Reduce heat; sprinkle with cider vinegar. Cook & stir until golden. Sprinkle with brown sugar; cook & stir until caramel brown color.
Cornbread Stuffing
-
Prepare as directed on package.
Pork
-
Slice tenderloin into 4 pieces. Using a meat mallet, pound into thin slices. Divide caramelized onions between them and spread over meat. Top with a layer of prepared cornmeal stuffing. Roll tightly encasing the filling inside & tie with kitchen twine. Roll pork rolls in the 1/4 cup flour that has been seasoned with salt & pepper to coat lightly.
-
In a large skillet, heat butter & oil; brown pork rolls well on each side. Remove rolls to a platter,
Red Wine Gravy
-
Stir 'brown bits' remaining from frying rolls, with garlic, thyme & red wine. Simmer about 5 minutes. In a small dish, combine cornstarch with chicken broth; add to wine mixture, season to taste. Return pork rolls to the pan. Cover, simmer gently for another 8-10 minutes.
-
Place pork rolls on serving platter & stir fresh parsley into gravy. Spoon gravy over pork rolls & serve immediately.
