Over the years, Brion and I have made a couple of trips to Italy. On one such occasion our travels took us through the region known as Tuscany, where the past and present seem to merge in pleasant harmony. Famous for it’s bean production, cannellini (white kidney beans) are the most popular and are simply referred to as ‘fagioli’. Of course, white beans are cultivated in other areas of the country, but Tuscany seems to be their rightful home.
These large, creamy white beans have spread from the kitchens of Tuscany to become a favorite among the Italian people. Mild in flavor, they have a relatively thin skin and a traditional kidney shape. The beans are difficult to harvest when ripe, therefore are harvested in the fall when the pod is completely dry. As a result, they are rarely eaten fresh. Cannellini beans are available both dried and in canned form.
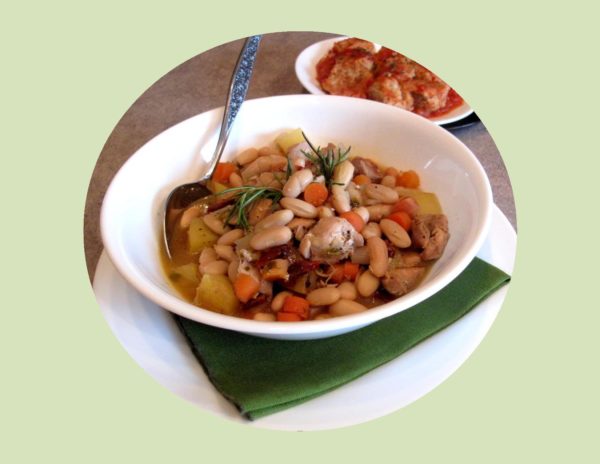
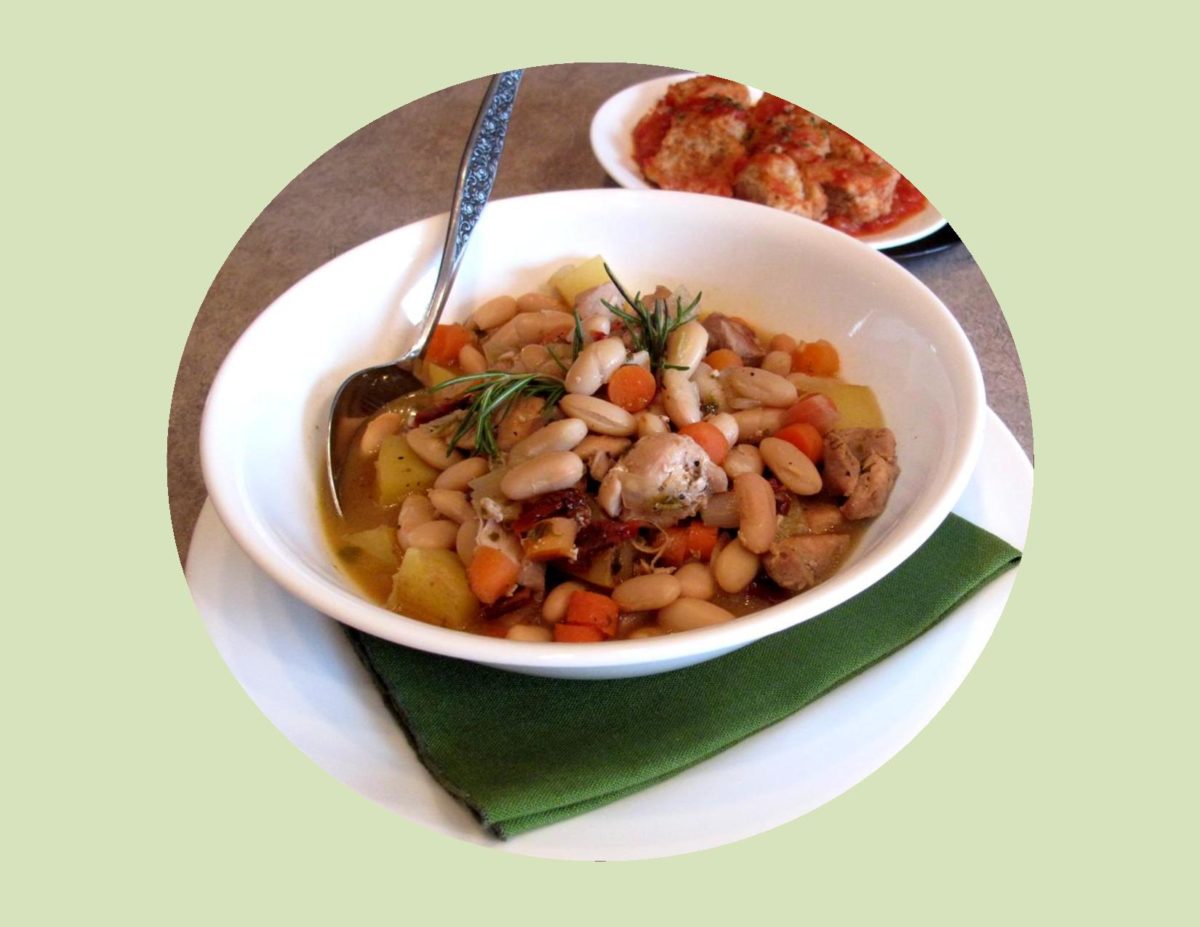
I started making this recipe for CHICKEN FAGIOLI STEW one winter and it’s continued to remain a favorite of ours.
While in the Tuscany region we visited the historic city of Florence. Being the home of renaissance art, perfect Italian gardens and magnificent sights, we came home with a lot of wonderful photos and memories. I hope you enjoy seeing some of them included in this post.
Print Recipe
Chicken Fagioli Stew
Votes: 1
Rating: 5
You:
Rate this recipe!
|
|
Votes: 1
Rating: 5
You:
Rate this recipe!
|
Instructions
Cut chicken thighs into quarters; combine with dressing in a small bowl. Marinate while preparing vegetables.
In a medium skillet, saute onion & garlic for 2 minutes. Add chicken with dressing; saute another 5 minutes.
Add celery, carrot, potato, broth, basil & tomato. Reduce heat; simmer, covered for 25-30 minutes until vegetables are tender. Stir in drained cannellini beans & simmer gently until beans are heated. Serve
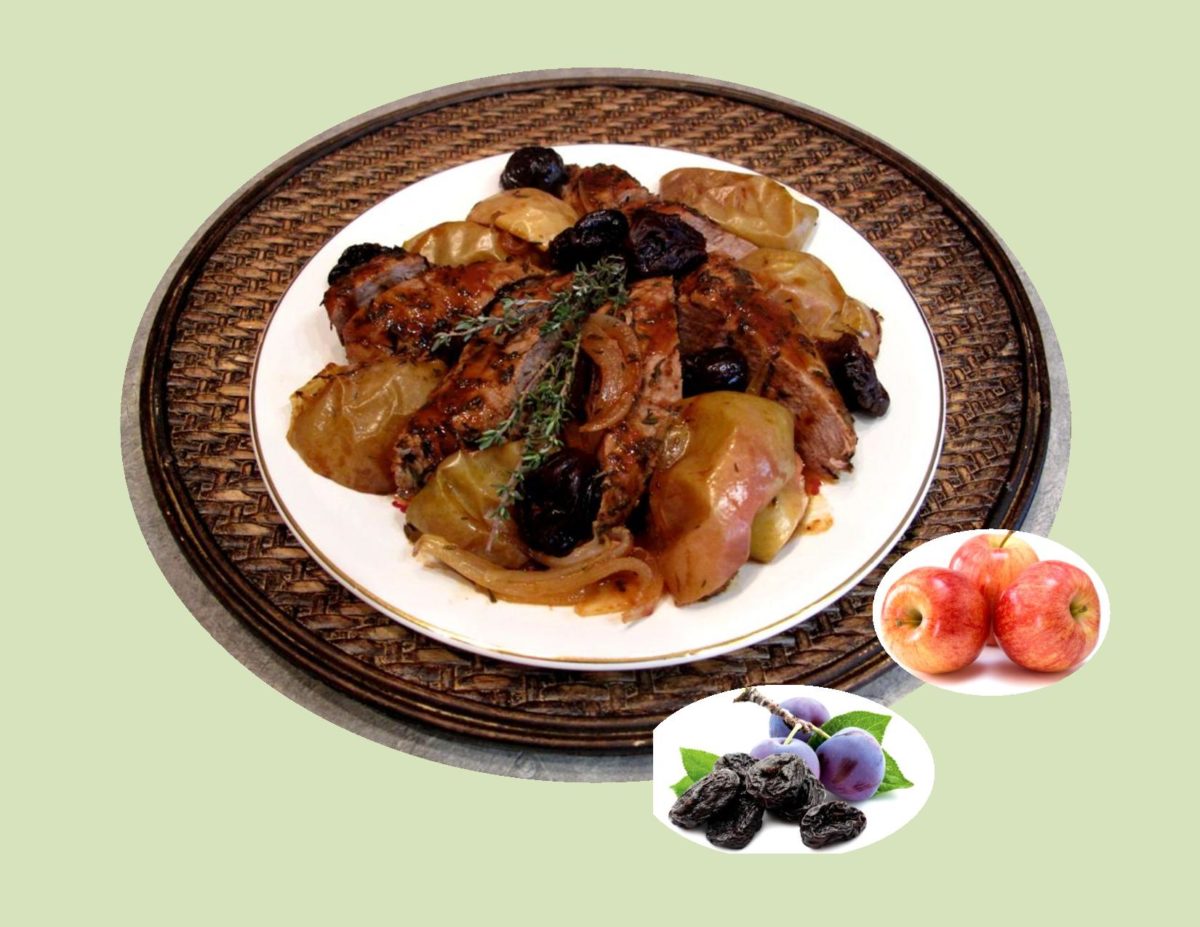
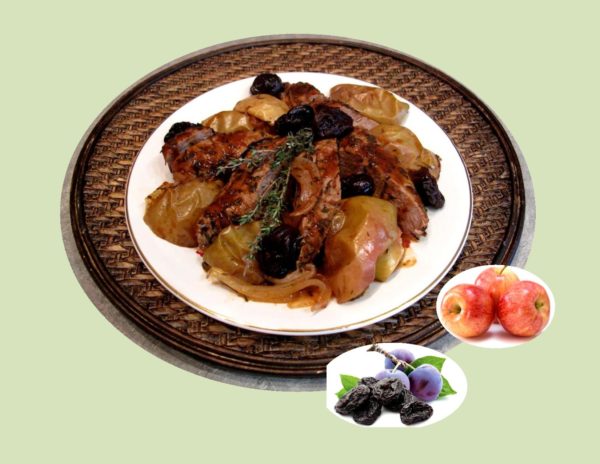
Although prunes sometimes get a bad rap, the salty nature of pork and the sweetness of apples and prunes combined is excellent.
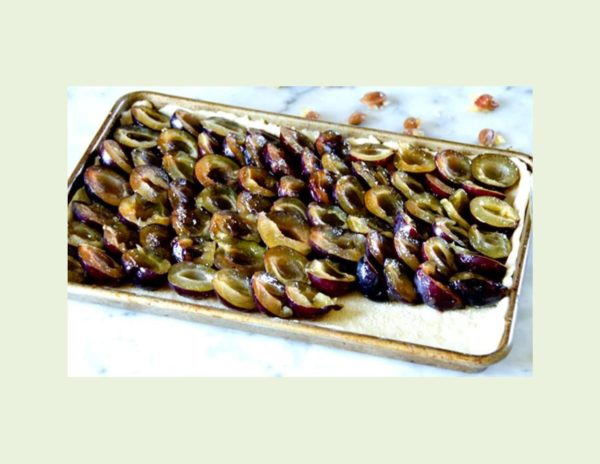
The Italian Prune Plum also known as European Plums are free stone and most readily grown for prune production. Their ability to create a high concentration of fermentable sugars not only makes them the ideal candidate for drying but also for making preserves, wine and brandy.
Native to the Mediterranean coastal regions of Italy, Italian prune plums thrive in arid climates. Even though plums adapt to a wide variety of growing regions, they require minimal humidity and rainfall to prevent disease and encourage fruit development during their growing season.
Oddly enough, all prunes are plums but not all plums are prunes. Prune plum varieties have a very high sugar content which enables them to be dried without fermenting while still containing their pits.
This is a nice meal to serve over quinoa along with roasted acorn squash and brussel sprouts.
Print Recipe
Roast Pork with Apples & Prunes
Votes: 1
Rating: 5
You:
Rate this recipe!
|
|
Votes: 1
Rating: 5
You:
Rate this recipe!
|
Instructions
Preheat oven to 350 F. In a saucepan, brown onions & tenderloin in hot oil for about 3 minutes. Transfer to a 9 x 13-inch baking dish. Combine BBQ sauce, apple juice & thyme; pour over meat & onions. Simmer gently for 10 minutes.
Bake for about 30 minutes. Add apples & prunes & bake for an additional 10-15 minutes. or until pork & apples are tender.
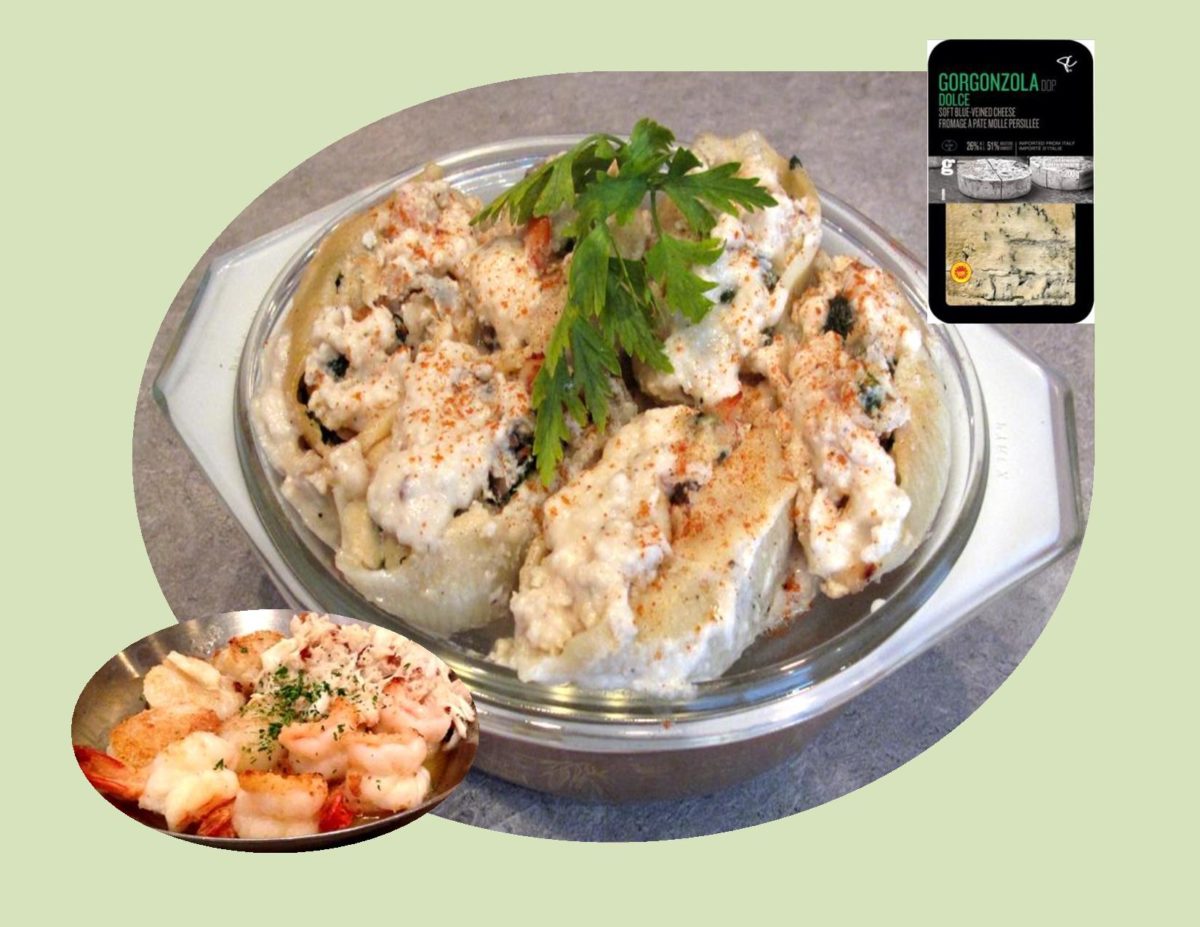
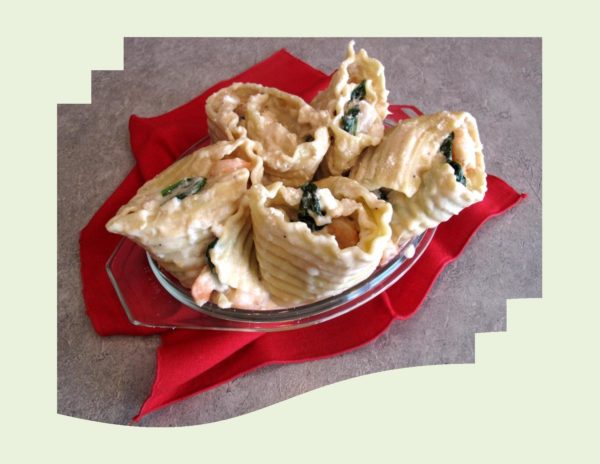
One of my all time favorite pasta dishes to make are jumbo stuffed pasta shells. They are easy to prepare and are perfectly portioned for individuals and groups alike.The best part is the multitude of different fillings you can make them with.
Some years ago, Brion and I had the pleasure of eating lunch at Gayles Bakery & Rosticceria in the little seaside town of Capitola, California (see my blog article from July 2016 for Fig & Gorgonzola Chicken Breast). It was there I tasted Spinach-Gorgonzola Pasta. Until then I had never even tasted this kind of cheese. With a strong dislike for Blue Cheese, it looked suspiciously similar. Long story short, it seemed everyone was ordering this pasta so I decided to try it. It was just incredible! The combination of Gorgonzola, ricotta and parmesan make this dish especially decadent and delicious.
Info I found on Gorgonzola Dolce reads like this — Imported from Italy, this sweet or ‘dolce’ Gorgonzola has the characteristically creamy texture and nutty aroma Gorgonzola is known for, yet is milder due to a shorter aging period. A great option for those who normally shy away from blue cheese.
The fact that Brion and I are both seafood lovers, I decided to incorporate this kind of pasta with a little seafood medley. The end result did not disappoint, bringing back that ‘taste of a memory’ once again.
Print Recipe
Seafood-Gorgonzola Pasta Shells
Votes: 2
Rating: 3
You:
Rate this recipe!
|
|
Votes: 2
Rating: 3
You:
Rate this recipe!
|
Instructions
Bechamel Sauce
In a heavy saucepan over medium heat, heat milk until hot but not boiling. Meanwhile, combine flour & butter in another heavy saucepan. Stir over medium heat with a wooden spoon or whisk until the mixture has gently bubbled for 2 minutes, being careful not to brown flour.
Begin to add the hot milk to the flour mixture a little at a time while whisking vigorously. Continue to add the milk until it is fully incorporated. Bring the mixture to a boil, reduce heat to low; simmer, stirring constantly, until the mixture thickens, about 6-8 minutes. It should resemble heavy cream. Crumble the cheese & add to hot bechamel sauce, whisking continuously until smooth. Add nutmeg & pepper & stir. Remove from heat to cool.
Pasta & Filling
Cook the pasta shells in salted boiling water to which a small amount of oil has been added for 8-10 minutes. Drain & set aside.
In a large skillet, melt butter. Saute spinach & mushrooms until spinach is wilted. Remove to paper towels. Add shrimp & scallops to skillet; saute for 3-4 minutes until opaque & just barley cooked; set aside. Preheat oven to 350 F.
In a large bowl, combine spinach, shrimp, scallops, crab meat, ricotta cheese, garlic & salt & pepper. Fill pasta shells. Spread some sauce in the bottom of a 9 x 13-inch baking pan. Lay filled shells single file in pan. Pour remaining sauce over all & top with a sprinkling of parmesan. Bake 20-30 minutes, until the cheese becomes a little brown.
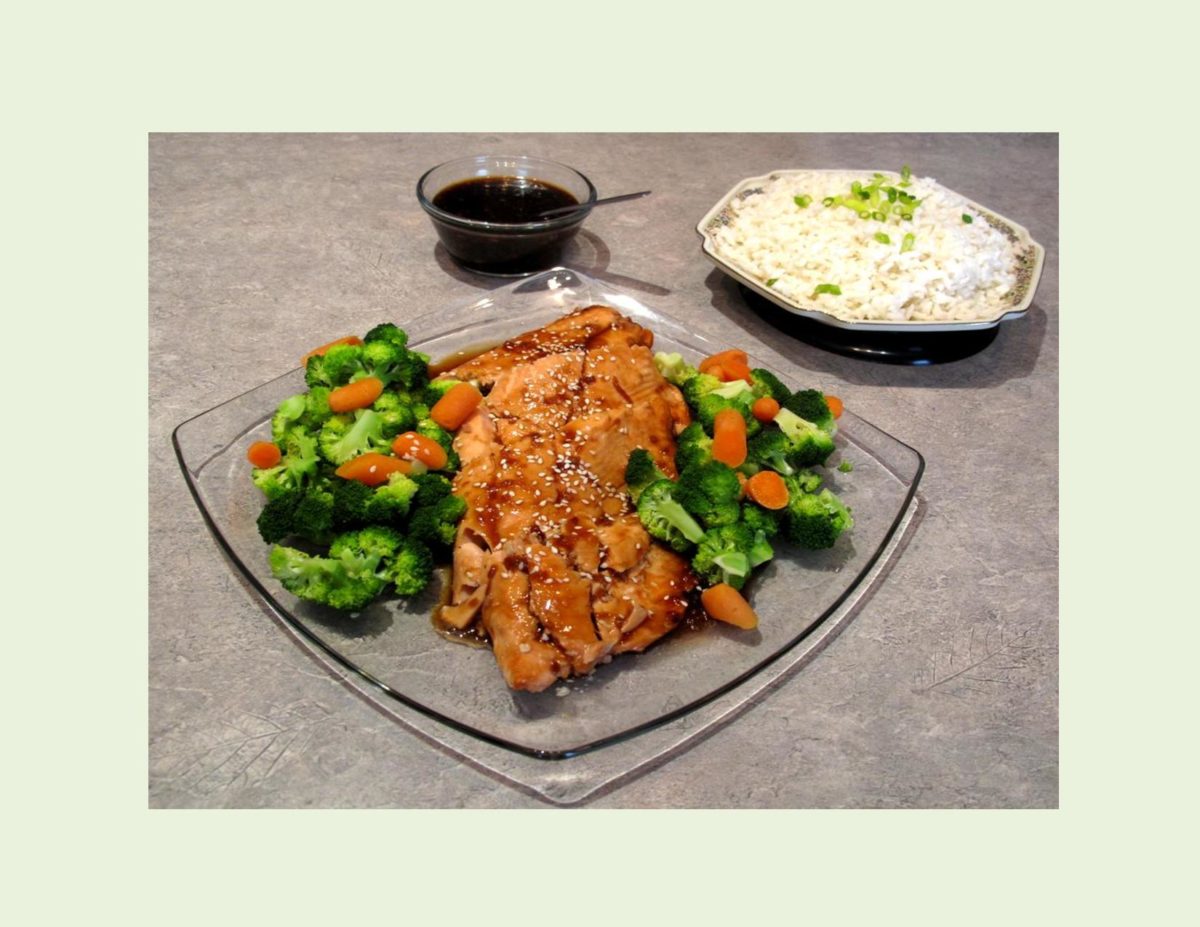
I’m sure you use or are probably aware of the technique of cooking in parchment paper. The French call it ‘en papillote, the Italians ‘al cartoccio but we Canadians just call it cooking in parchment. This simple, yet elegant culinary tradition infuses the meats, vegetables and herbs together to create unbelievable flavor. Not only does this enclosed packet keep delicate foods like fish moist and intact but cuts down on your clean-up time. It is a super easy way to cook for one and not have lots of leftovers.
Since fall is upon us and we are back to more of those oven meals, HONEY TERIYAKI SALMON is the perfect, no-fuss Sunday meal.
Print Recipe
Honey Teriyaki Salmon
Votes: 2
Rating: 4.5
You:
Rate this recipe!
|
|
Votes: 2
Rating: 4.5
You:
Rate this recipe!
|
Instructions
Honey Teriyaki Sauce
In a small saucepan, whisk together soy sauce, 3 Tbsp water, honey, rice vinegar, garlic, ginger & sesame oil. Bring to a boil over medium heat. In a small bowl, whisk together cornstarch with remaining 2 Tbsp water until well combined. Pour into sauce mixture; boil for 1 minute, stirring constantly. Remove from heat & allow to cool slightly about 5-10 minutes.
Salmon & Veggies
Toss broccoli & carrots in olive oil; season with salt & pepper. Cut 4 sheets of 14-inch lengths of parchment paper. Divide broccoli & carrot mixture among sheets layering in center in an even layer. Set aside 1/4 cup of the sauce mixture then brush bottom sides of salmon fillets with a scant tablespoon of the sauce then rotate the salmon over veggies.
Preheat oven to 400 F. Brush tops of salmon with another scant tablespoon of the sauce mixture. Pull sides of parchment inward & seal then roll edges up, leaving a little room for heat to circulate, not wrapping to tightly. Place packets on a baking sheet. Bake until salmon is cooked through, about 25 minutes. Serve with white or brown rice if desired & remaining sauce. Sprinkle with green onions.
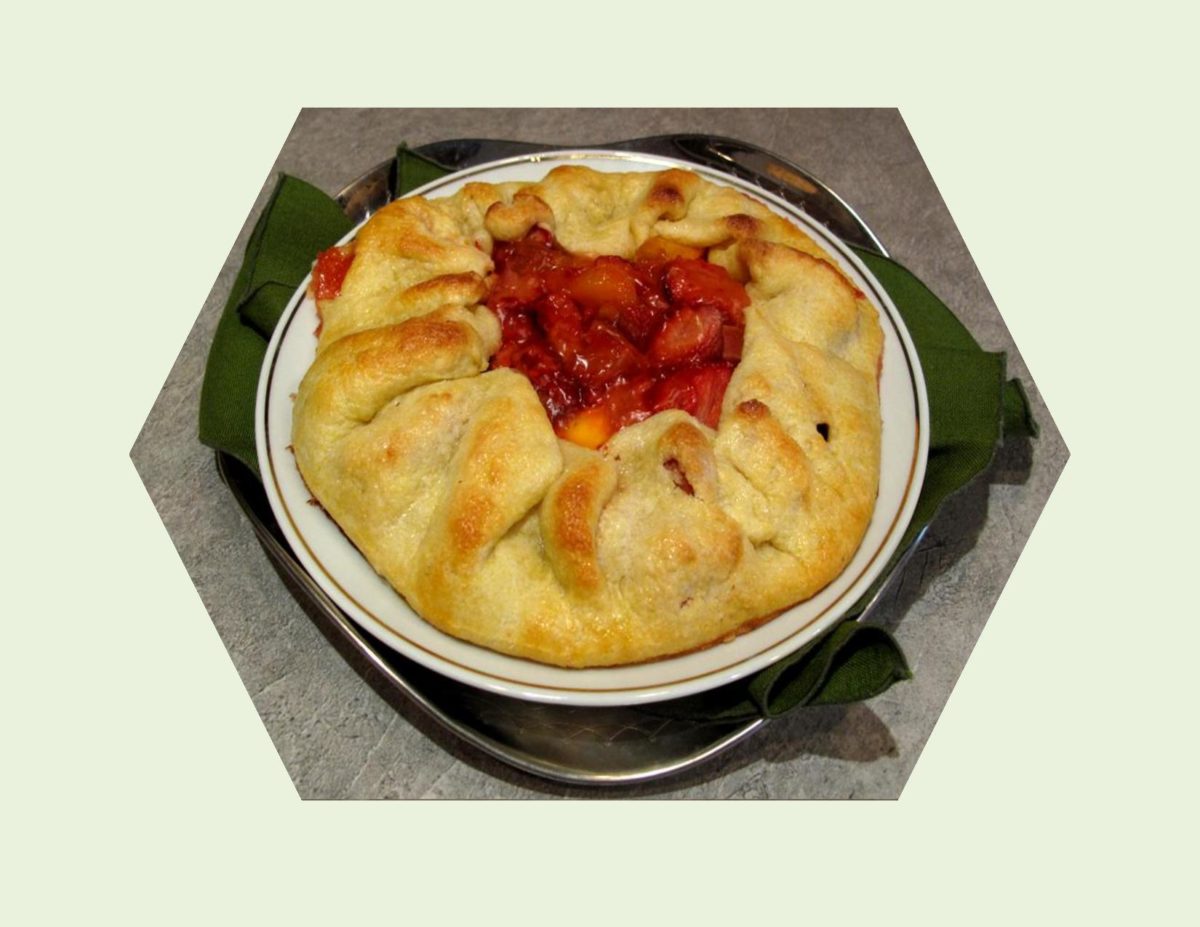
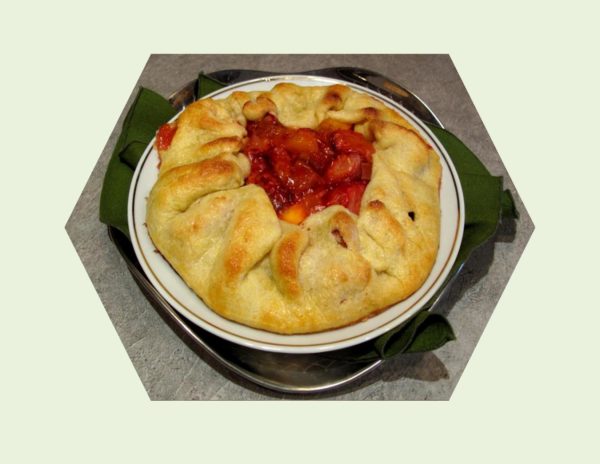
A ‘galette’ (French) or ‘crostata’ (Italian) was an early way to form a pie crust in the absence of pie pans. The dough was rolled flat, the filling placed in the middle with the edges turned up to contain the filling.
The origin of the pie (pye) has been traced to Egypt where savory fillings were baked, using woven reeds as the baking vessel. The concept was brought to Greece and then to Rome. It is believed the ancient Greeks created pie pastry and the trade of ‘pastry chef’ was then distinguished from that of a baker. The use of lard and butter in northern Europe led to a dough that could be rolled out and molded into what has become our modern pie crust. Before the emergence of tin or ceramic pie pans, the ancient practice of using the bottom of the oven or fireplace was used to bake this rustic tart.
Galettes can be made in any size, as well as sweet or savory, using only a simple baking sheet. No technique to create an even, fluted crust is necessary. Rusticity is its charm! No worries about tearing the dough or if the final result is perfectly round or rectangular.
The crust of this galette is made with the addition of a small amount of cornmeal to give it a bit of crunch and is equally as good with a sweet or savory filling.
Print Recipe
Rustic Fruit Galette
Votes: 1
Rating: 5
You:
Rate this recipe!
|
|
Votes: 1
Rating: 5
You:
Rate this recipe!
|
Instructions
Galette Dough
In a small bowl, combine sour cream & ice water; set aside. In a large bowl, whisk together flour, cornmeal, sugar & salt. Using a pastry blender or finger tips, cut in butter until mixture resembles BOTH coarse crumbs & small peas. Sprinkle the cold sour cream mixture over the dough, 1 Tbsp at a time, tossing with a fork to evenly distribute it. After you have added all the sour cream, dough should be moist enough to stick together when pressed; if not, add additional cold water, 1 tsp at a time. Do not overwork dough.
Press dough into a disk shape & wrap in plastic wrap. Refrigerate for at least 2 hours. The dough can be kept in the refrigerator for a day or two or it can be wrapped airtight & frozen for a month. Thaw, still wrapped in refrigerator.
Fruit Filling
In a bowl, toss together the fruit, all but 1 Tbsp of the sugar, salt, lemon juice & zest & cornstarch.
Preheat oven to 375 F. Line a baking sheet with parchment paper. On a lightly floured work surface, roll out the chilled dough into a circle & set on baking sheet. Place the fruit filling in the middle, leaving a border of 1 1/2 to 2-inches. Gently fold pastry over the fruit, pleating to hold it in. Brush pastry with egg wash. Sprinkle the reserved 1 Tbsp sugar over the crust.
Bake 35-45 minutes until the filling bubbles up & crust is golden. Cool for at least 20 minutes on a wire rack before serving. Best served warm or at room temperature.
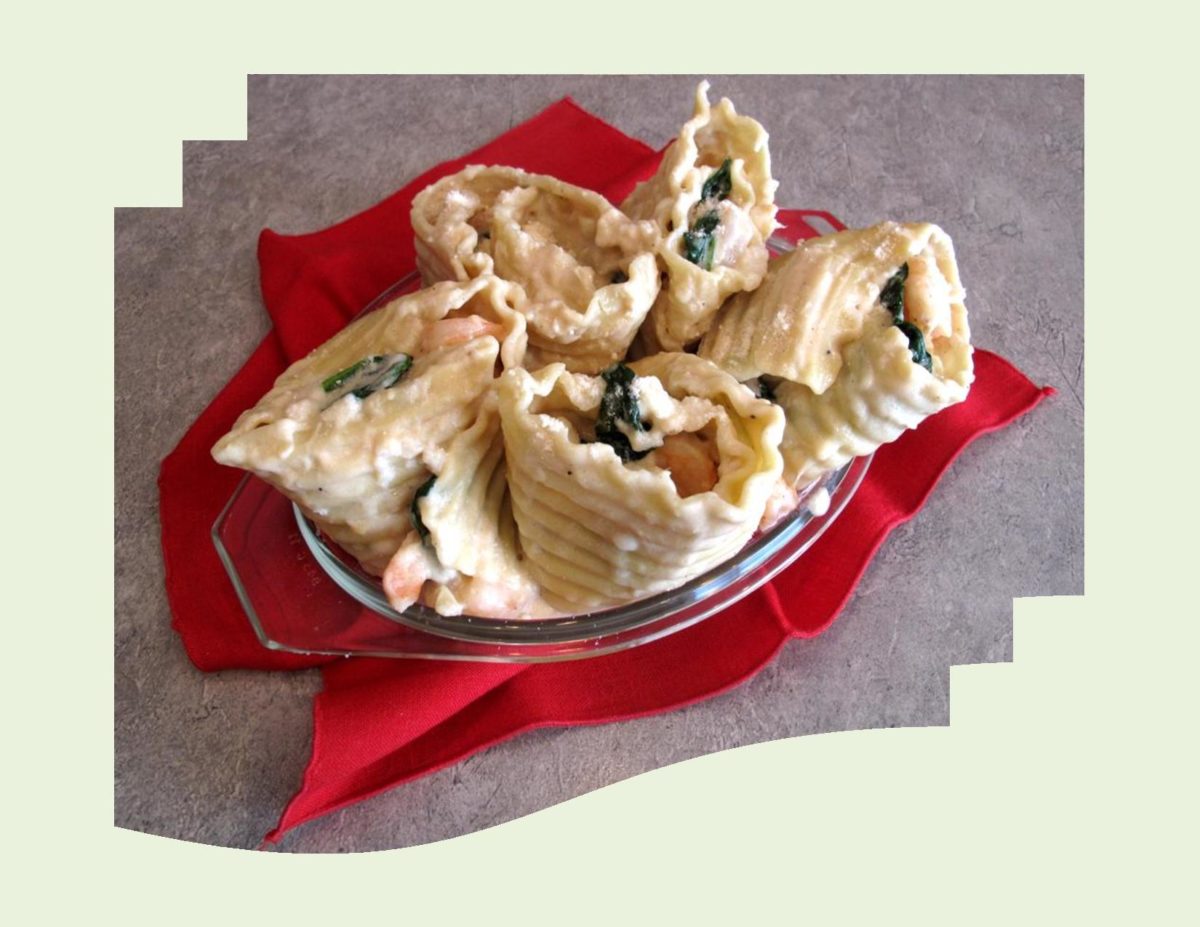
Lasagna has a rich history as a comfort food. Originally it resembled layered macaroni and cheese rather than its present form. The origin is a little unclear but none involve Italy. However, Italians have been credited with its name of ‘lasagna’.
Present day lasagna has become very versatile with recipes such as vegetarian and seafood which use either red or white sauce. Although, lasagna has been a favorite meal of many people, it also comes with a high fat and calorie count. That being said, there are numerous ways to change that. In traditional lasagna, substitute ground turkey or use extra lean ground beef. In the case of a white sauce, substitute fat free plain yogurt for sour cream and use skim or 1% milk to reduce the fat content. Using low fat or non fat ricotta cheese, fat free cottage cheese or part skim mozzarella cheese helps to boost the calcium and protein contents without adding a lot of fat.
In any case, lasagna is just too good to not enjoy it. These SEAFOOD LASAGNA ROLL-UPS can be made with a light version of either homemade or purchased Alfredo sauce. We absolutely loved this meal!
Print Recipe
Seafood Lasagna Roll-Ups
Votes: 1
Rating: 5
You:
Rate this recipe!
|
|
Votes: 1
Rating: 5
You:
Rate this recipe!
|
Instructions
Prepare lasagna noodles according to package directions. Rinse under cool water; reserve. In a large skillet melt butter. Saute spinach until wilted. Remove to paper towels. Add shrimp & scallops to skillet; saute for 3-4 minutes until opaque & just barely cooked; reserve. Grate mozzarella cheese.
Preheat oven to 350 F. Butter a small casserole dish. On a large piece of wax paper, line up lasagna noodles in a row. Spoon about 1/4 cup of Alfredo sauce onto each noodle & spread.
Alternately top with shrimp & scallops, cooked spinach, shrimp/scallops, spinach & crab meat. Sprinkle noodles with grated cheese. Roll each noodle & stand or lay in casserole dish. Spoon remaining Alfredo sauce over rolls.
Place a pan with a small amount of water in it, under the casserole dish & place in the oven. This will help the noodles from becoming dry during baking time. Very loosely, cover with foil, just to keep the noodles from drying on top. Bake for 30 minutes or until slightly bubbly. Sprinkle with Parmesan cheese; allow to sit 5-10 minutes before serving.
Recipe Notes
- If you prefer to make your own sauce, I had noticed the tasteofhome.com website has a very similar recipe making the sauce from scratch. It looks real good if you have the time.
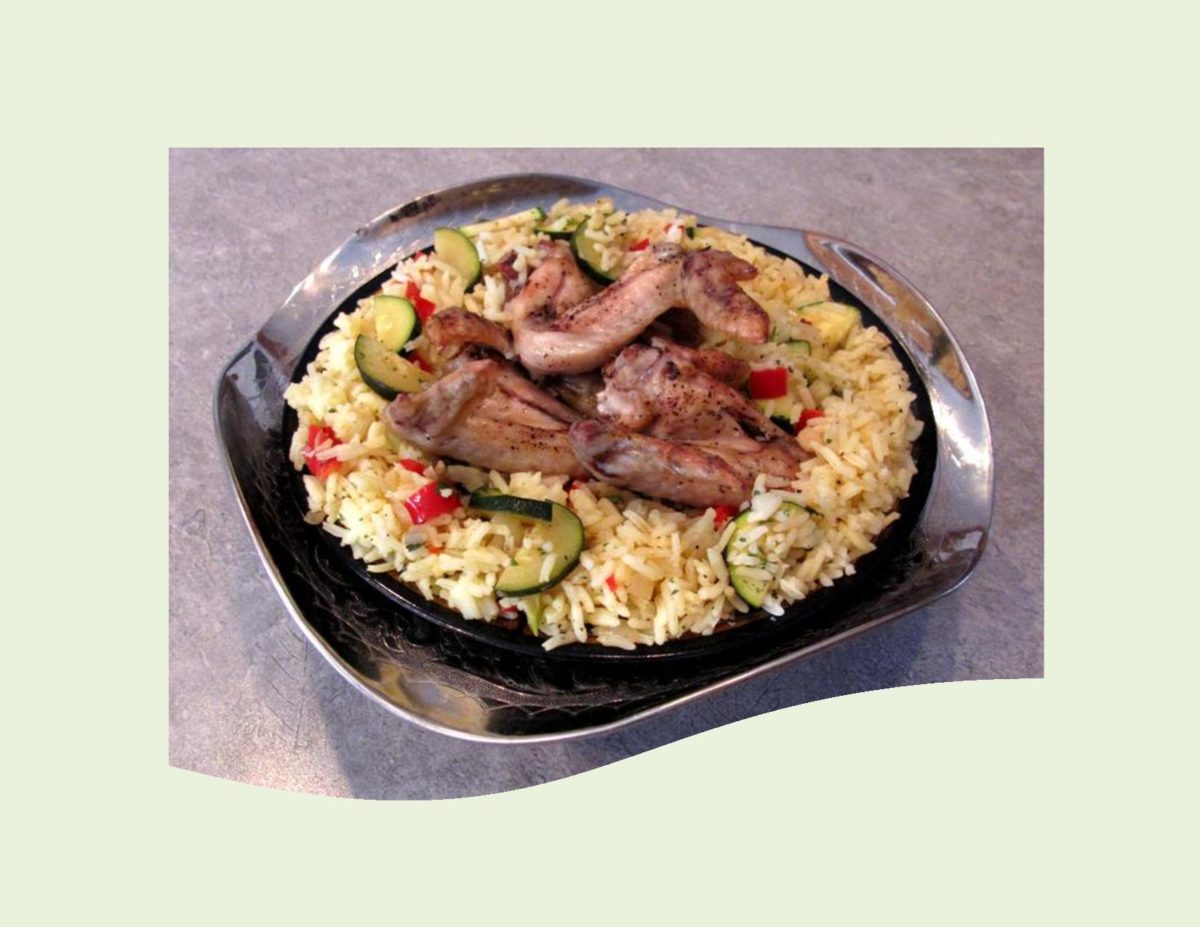
A popular and versatile dish, risotto is served extensively in the kitchens and restaurants of the world. The history of risotto is naturally tied to the history of rice in Italy. Rice was first introduced to Italy and Spain by the Arabs during the middle ages. The humidity of the Mediterranean was perfect for growing shorter-grained rices.
A hearty rice dish, risotto is rich with the flavors of the stock used in its making, as well as saffron, and any of the hundreds of ingredients that pair so perfectly with it.
The key components of this simple but elegant dish are: rice, stock (usually chicken), onions, butter, wine, parmesan and saffron. It can be served by itself or as an accompaniment to other dishes. The starchy component of the dry grain mixed with the stock creates a thick, creamy sauce.
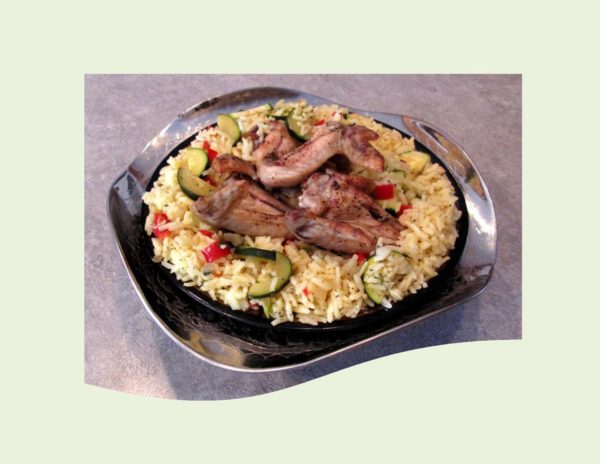
Brion is a ‘wing’ man. He LOVES chicken wings and rice so it seems quite fitting to make a CHICKEN WING RISOTTO.
Print Recipe
Chicken Wings Risotto
Votes: 1
Rating: 5
You:
Rate this recipe!
|
|
Votes: 1
Rating: 5
You:
Rate this recipe!
|
Instructions
In a large skillet, heat butter & oil; add wings, cook until golden brown on both sides; Remove from skillet to paper towels & drain skillet.
In skillet, melt extra butter; add onion & garlic; cook until tender. Add pepper, shallots, zucchini, celery & saffron, cook another minute. Add wine, rice, water, chicken bouillon cube & chicken wings, bring to a boil, cover, reduce heat & simmer for 20-25 minutes or until all the liquid is absorbed. Remove from heat, stir in parsley.
Recipe Notes
- Saffron is extremely expensive to buy in our part of the country. A good trade off would be turmeric or just use the spices that appeal to you.

The aroma of Easter bread baking certainly brings back precious childhood memories. What I recall about my mother’s Easter bread, was that it was a dense, mildly sweet & a very egg rich bread. It was always baked in round ‘cans’ and the taste was unforgettable.
Nearly every country around the world has a traditional Easter bread. Each one is different in some way, a mix of symbolism and satisfying taste. They represent a continuity of traditions from centuries past, including much earlier pre-Christian times. Often these rich, yeasted breads are made in symbolic shapes and are elaborately decorated.
Germany and Austria make several shapes such as : Osterzopf – Easter braid, Osterkranz – Easter wreath or crown, Osternester – Easter nests, Eierimnest – Easter egg nest, Striezel – stacked braided bread.
That being said, I couldn’t resist doing a little ‘version’ of my own. I started with my favorite sweet yeast bread, added some anise flavor and a cream cheese filling. So now you have German osterkranz, Italian panettone and Romanian pasca all in one beautiful EUROPEAN EASTER BREAD.
Print Recipe
European Easter Bread
A heavenly creation!
Votes: 1
Rating: 5
You:
Rate this recipe!
|
|
Votes: 1
Rating: 5
You:
Rate this recipe!
|
Instructions
In a large bowl, whisk yeast & sugar into lukewarm water; let stand about 10 minutes. With an electric mixer, beat together 3/4 cup sugar, eggs, oil, anise extract, lemon zest, lemon extract, salt & anise seed. Combine egg mixture, melted butter & milk with yeast mixture.
Add 4 CUPS flour, 1 cup at a time to wet mixture. Stir well after each addition. Turn dough out onto a floured surface & knead until smooth & elastic, about 5-6 minutes, adding remaining 1/2 cup flour if necessary.
Coat a large bowl with oil. Place dough in bowl & turn to coat. Cover with plastic wrap & set in a warm place to rise until it doubles in bulk. Meanwhile, cut a piece of parchment paper big enough to cover the bottom & go up the sides of a 10" spring form pan. When dough has risen enough, cut into four pieces.
On the parchment paper, press one piece of the dough into a circle measuring about 10" in diameter. Sprinkle with 1/3 of the mixed peel, leaving a gap at the edge. Press out second piece of the dough on a lightly floured piece of wax paper, place it on top of the first layer & sprinkle with another 1/3 of mixed peel. Repeat with the third & fourth pieces of dough but do not sprinkle mixed peel on the final layer.
Place a glass tumbler on top of the center of the dough circles. Cut dough into 16 segments, starting a the edge of the glass. Lift & twist them away from each other through 180 degrees. Lift & twist through 90 degrees so that the ends are vertical. Press the edges together firmly. Repeat this process with all pairs of segments. Leave glass sitting on top at the center of the circle to form an indentation for the cheese filling. Cover with plastic wrap & set in a warm place to rise for about 1/2 an hour.
Preheat oven to to 325 F. In a bowl, place cream cheese, eggs, sugar & vanilla; mix well. When bread has risen, remove glass & fill indentation with cheese mixture. Bake for about 40-45 minutes. Allow to cool. Brush with honey/water glaze. Sprinkle with powdered sugar.
