Shrimp Boil Foil Packs

CELEBRATING MAY LONG WEEKEND!

Wherever you live across Canada, this May long weekend – typically marks the start of grilling season. It’s time to get outside in the sunshine, fire up the BBQ, and enjoy savory grilled food with family and friends. This distinctly Canadian holiday serves as the official marker to end winter. For Canadians, this is the first long weekend since Easter and a good excuse to celebrate the beginning of the summer season.

Seafood boils likely began with the Acadian Exile, which displaced thousands of Acadians from Canada’s Maritime provinces in the 1700’s to various regions of the U.S.A. Many settled in South Louisiana, where they became known as ‘Cajuns,’ and shared their tradition of boiling shellfish with seasonings and vegetables.

A shrimp boil is a dish that displays a medley of seafood, sausage, and vegetables, ultimately revolving around shrimp seasoned and cooked to perfection. Shrimp boil foil packet meals are everything great about a quintessential seafood boil neatly wrapped in individual packets without the mess.

Foil packets are the ultimate summer BBQ or camping meal! These shrimp boil foil packets are easy to make and quick to cook on the grill or over a fire but can also be made in the oven. There are lots of things to love about foil packet dinners. They can be made in advance (the day before or morning of), they travel well, and they require virtually no clean-up. There’s just something about the ingredients cooking and steaming all together over the fire, whether you’re camping or just in your own backyard (or cooking them in the oven), that makes these so good. Just assemble your ingredients, seal them inside using aluminum foil and parchment paper, and place them over your heat source.

This is an amazing recipe that’s full of flavor, perfect for the May long weekend.

Print Recipe
Shrimp Boil Foil Packs
Instructions
  1. Preheat the oven to 400 F. or the grill to medium-high (about 400 F). If using frozen shrimp place the package under cold water for 10 minutes to thaw.
  2. Bring 2 quarts of water to a boil and add the potatoes and corn. Reduce the heat & bring to a simmer. Cook for 10 minutes on simmer then drain into a colander. Set aside.
  3. While the potatoes & corn are cooking, prepare 4 sets of 12-inch by 24-inch long aluminum foil sheets. Fold each in half, forming a square. If using industrial aluminum foil simply prepare sheets measuring 12-inches square. Slightly fold up the edges of the sheets.
  4. In a large bowl, combine the drained potatoes & corn, sausage, thawed shrimp, onion, and garlic. Drizzle with the 4 tablespoons of melted butter, season with salt, pepper (if using), & Old Bay seasoning. Mix very well to coat all of the ingredients.
  5. Divide the shrimp boil ingredients between the four aluminum foil sheets. Neatly fold into packets, ensuring a good seal.
  6. Place them onto a baking sheet & bake for 15 minutes. If grilling, place the packets directly onto the grill surface & cook for 15 minutes, flipping once after about 8 minutes.
  7. Serve the packets slightly opened up, garnished with chopped parsley, a pinch of Old Bay seasoning, and a few lemon wedges. Serve the melted butter on the side for optional drizzling over the shrimp boil or for dipping.
Recipe Notes
  • For our meal, I did not add any salt or pepper. We found the Old Bay seasoning was enough for our liking. Just personal preference!

Artichoke & Garlic Chicken Rissoles

Rissole is an interesting group of dishes with an intriguing history. The original French rissoles were prepared by enclosing the main ingredients in pastry dough and frying them, but over time the original recipe has evolved and changed.

Many nations have created their own version of the rissole. This food is commonly on offer in street stalls as a casual snack food, or in fast-food restaurants. Some fancy restaurants also serve rissole dishes, although they may use fancier ingredients and dress things up with complex sauces to make their rissoles more interesting. Today, rissoles can be found in numerous European countries, but also in Australia, New Zealand, and even Indonesia and Brazil.

Some cooks refrain from using any sort of coating for a rissole, preferring to make a blend of meat, potatoes, eggs, and breadcrumbs which can be molded into a firm patty. Ingredients such as onions may be added to rissoles as well, along with various spices, especially in nations with a culinary tradition of heavily spiced food. They can be made with ground or cut meat, seafood, or vegetables, and the sweet varieties are usually made with fruit. Most of them, including both sweet and savory rissoles, are usually served with a sauce on the side. Primarily, rissoles were deep-fried, but today the name also encompasses the varieties that are baked in an oven or fried in shallow oil.

Today, I’m making artichoke & garlic chicken rissoles. The sauce gives the rissoles a nice punch of flavor and pairs so well with creamy mashed potatoes & roasted green beans.

Print Recipe
Artichoke & Garlic Chicken Rissoles
Votes: 1
Rating: 5
You:
Rate this recipe!
Servings
Ingredients
Artichoke & Garlic Sauce
Chicken Rissoles
Servings
Ingredients
Artichoke & Garlic Sauce
Chicken Rissoles
Votes: 1
Rating: 5
You:
Rate this recipe!
Instructions
Sauce
  1. Place all ingredients except oil in a food processor. With motor running, add olive oil in a slow stream to make an emulsion. Continue processing while adding the cream to make a fairly smooth consistency. Remove from food processor & set aside.
Chicken Rissoles
  1. Place chicken, panko crumbs, salt, egg, garlic & soup mix in a bowl. Combine well. Divide into 6 portions. Form each portion into a patty shape.
  2. Heat oil in a large saucepan, Cook rissoles for 2-3 minutes. Turn & cook for a further 1-2 minutes or until golden. Transfer to a plate a wipe out saucepan.
  3. Return rissoles back in saucepan & add sauce. Simmer for 10 minutes until rissoles are cooked through. Nice to serve with creamy mashed potatoes & roasted green beans.

Pearl Couscous w/ Chicken Thighs

Often, when we think of chicken meals, rice comes to mind as an accompaniment. Couscous can be used as a fluffy grain alternative to rice and, because the flavors of each are subtle, swapping them won’t throw your entire recipe off course. Both rice and couscous take on the flavors of the seasonings you add, and neither needs much to shine.

While rice is a grain and couscous are a type of pasta, you can buy whole-grain versions of both. Couscous’s flexibility has made it a favorite ingredient in kitchens worldwide. This tiny pasta can be used as a side dish, as a part of an entrée, or added to soups and salads to boost texture. Its mild flavor makes it ideal for combining with seasonings ranging from sweet to spicy, and it can be used to recreate dishes from any cuisine.

Couscous is a pale, delicate grain that North Africans have served for centuries with a meat or vegetable stew on top.

Although it is made from wheat, couscous is the North African equivalent of rice, and it could be called a second cousin of German spaetzle, although it does not contain egg and the granules are much smaller.

Steamed in a manner similar to rice, couscous takes about 10 minutes to prepare. Delicious when served hot, it is equally good at room temperature.

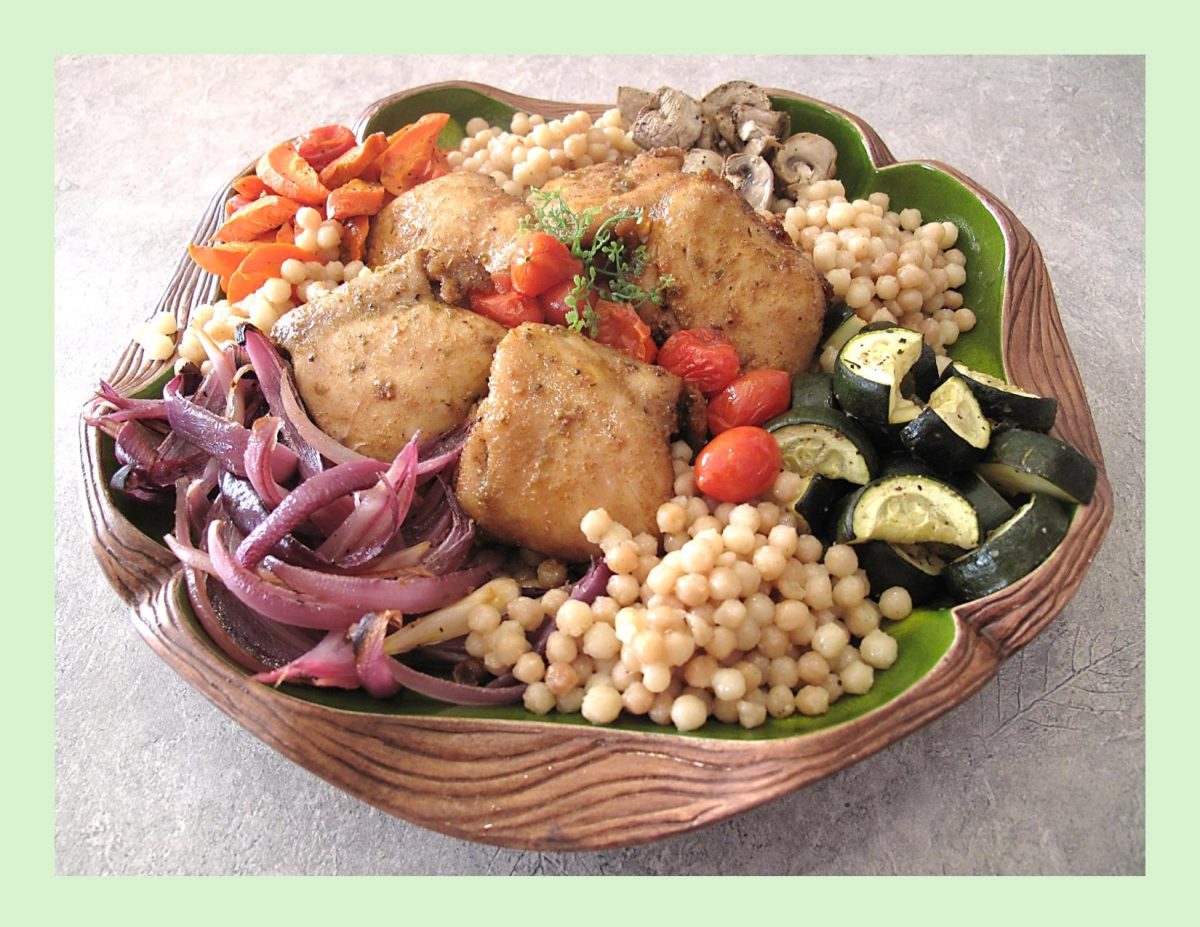
Today, I’m preparing a sheet pan meal with roast veggies and chicken thighs and serving them with a couscous accompaniment. Should be good!

Print Recipe
Pearl Couscous w/ Chicken Thighs
Votes: 1
Rating: 5
You:
Rate this recipe!
Servings
Votes: 1
Rating: 5
You:
Rate this recipe!
Instructions
Vegetables
  1. Preheat oven to 400 F.
  2. In a plastic bag place Italian dressing. Add carrots, onions, zucchini, mushrooms & garlic. Shake well to marinate (do them separately if you wish). Place on a foil lined baking sheet & roast until tender. Marinate cherry tomatoes in a bit of dressing & add to the pan for the last 10 minutes of baking.
Chicken Thighs
  1. In a small dish combine all chicken seasonings. In a plastic bag, place chicken & 2 Tbsp olive oil. Shake well to cover thighs with oil then add spice mixture & shake well again.
  2. Line a baking sheet with foil. Add chicken thighs & roast in oven at the same time as veggies are cooking.
Couscous
  1. In a medium saucepan, heat oil over medium-high until just shimmering. Add the pearl couscous & toss around to toast until golden brown.
  2. Boil water & add it to the toasted pearl couscous. Season with salt. Bring to a boil, then turn the heat to low. Cover & cook for about 14 minutes or until couscous is tender. Remove from heat.
Serving
  1. On a serving plate, place the couscous & vegetables. Top with chicken thighs & drizzle juice from roast chicken over all. Serve.

Broccoli Soup w/ Boursin Cheese & Bacon Chips

Comfort food is many things to many people. One of the things that I think of as comfort food is a warm bowl of cream of broccoli soup. Its creamy texture and subtle flavors have the power to soothe your taste buds as well as your soul. But this soup is more than just a comforting dish; it’s a culinary gem with a fascinating history and impressive nutritional benefits. This velvety delight has its roots in the traditional French soup known as Potage Saint-Germain. Originating from the Saint-Germain-en-Laye region in France, this soup was originally crafted with peas. However, as culinary creativity knows no bounds, innovative cooks began swapping peas for broccoli, giving birth to Cream of Broccoli Soup.

Cream of Broccoli Soup has the incredible ability to cater to a wide range of palates and dietary preferences. Whether it’s a casual family dinner, a gathering with friends, or a formal occasion, this soup fits the bill perfectly.

In 1990, the Campbell Soup Company debuted a commercial variety of cream of broccoli soup. They devised it to be used as a soup and as an ingredient to be used in other dishes. During that time, the Campbell Soup Company published a booklet of broccoli dishes that are prepared using their canned cream of broccoli soup, which was offered free to consumers through the provision of a stamped, self-addressed envelope to the company. Some of the dishes in the booklet included ‘Easy Broccoli Bake’ and ‘Two-Step Chicken Broccoli Divan’. After the original soup’s debut, the company devised and marketed additional cream of broccoli-style soups, such as broccoli cheese soup, chunky chicken broccoli cheese soup and cream of chicken and broccoli soup.

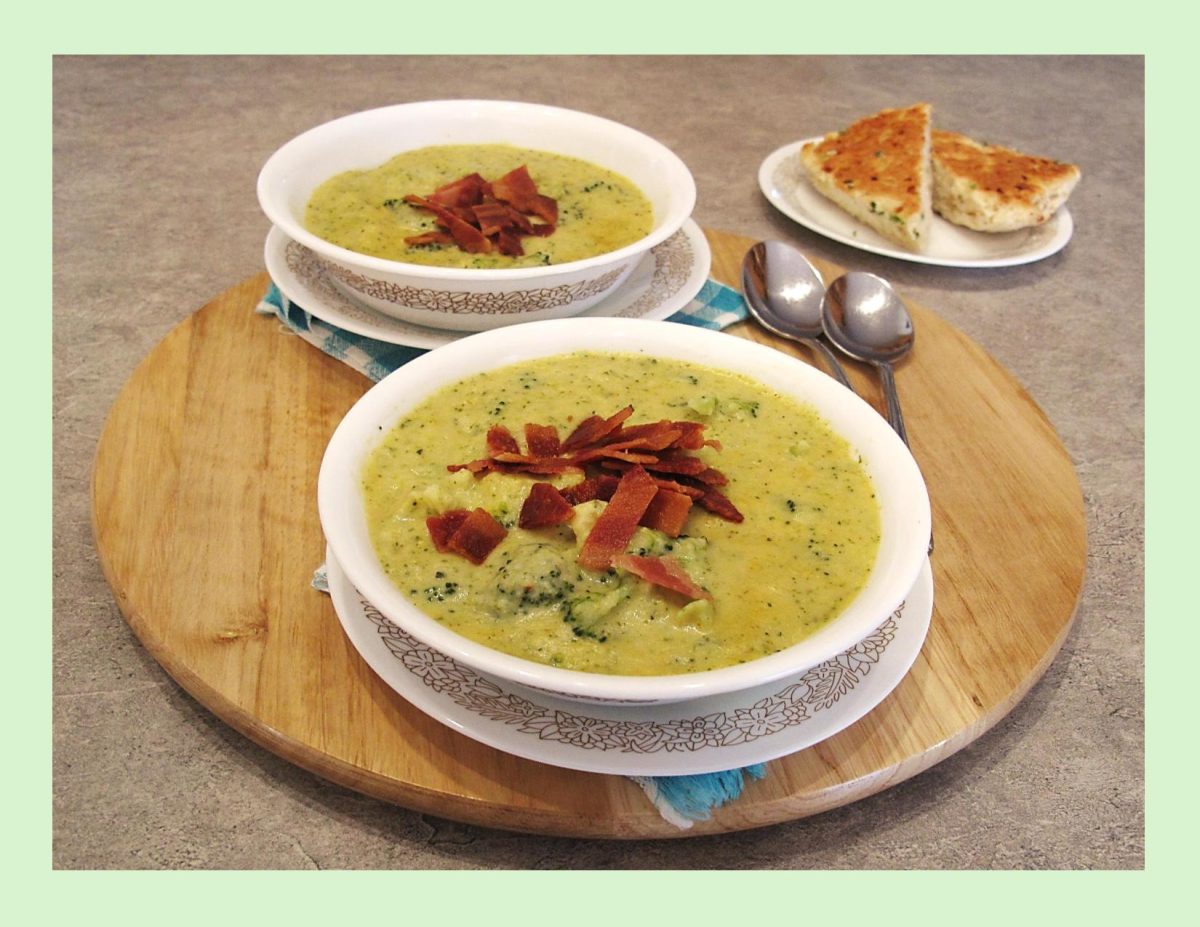
Today, I decided to make our broccoli soup using Boursin cheese instead of cheddar. The garlic and herbs in the Boursin give some added depth to the flavor. Plus, it melts into the soup so smoothly and provides extra creaminess. Another nice thing about this recipe is it’s super creamy without the use of heavy cream. Such great comfort food!

Print Recipe
Broccoli Soup w/ Boursin Cheese & Bacon Chips
Votes: 1
Rating: 5
You:
Rate this recipe!
Servings
Servings
Votes: 1
Rating: 5
You:
Rate this recipe!
Instructions
  1. Peel & slice onion & garlic. Cut broccoli into pieces. Peel & dice potato into pieces. In a saucepan sauté onion for a few minutes, add the garlic & broccoli & potato pieces.
  2. Cover with water, add chicken or vegetable stock powder & simmer for 25-30 minutes until veggies are tender. Meanwhile, grill bacon & slice for garnish.
  3. With a slotted spoon, remove some of the broccoli florets if you wish to keep whole & set aside. In a food processor, puree remaining veg/broth mixture.
  4. Add the Boursin & seasoning, puree again to obtain a homogeneous preparation. Fold in reserved broccoli florets. Serve hot topped with bacon bits.

Potato Lefse

From a traditional homemade staple to a quick on-the-go snack from a gas station to ferries or even a fancy dish at a wedding, the story of lefse is intertwined with Norwegian history.

The first lefse didn’t contain potatoes, they were made from flour. Women would travel from house to house, village to village to make lefse to last the winter months. The flour lefse would cook up like a cracker and be able to last through the season. Many households stored their lefse is wooden boxes covered in cloth or just stacked on shelves. When you were ready to enjoy some lefse it was dipped in water and soaked between damp cloth until softened.

Then came the introduction of potatoes, abundant and easy to grow. The potato was incorporated into many Norwegian foods. Like Ireland, Norway suffered from the effects of the potato famine in the mid-1800’s, which is about the time that many Norwegians came to North America. They brought their knowledge and rolling pins. The result is a Norwegian ‘potato bread’ delicacy that is part of a special tradition replicated in many Norwegian-American homes for more than 150 years.

In Norway, the lefse is sweet or savory, thick or thin, can be made from wheat or potatoes, and can be served with a wide variety of accompaniments. Recipes and even names vary considerably across Norway. 

In many parts of western, eastern and central Norway, lefse are used as an alternative to bread. They are eaten with savory, salty foods or with sweet foods.

Common savory fillings include cured ham and cheese. They can also be served as wraps, with fillings such as smoked salmon and cream cheese. Common sweet fillings are sugar and cinnamon. These are often served folded or rolled into tubes. As with waffles, the combination of brown cheese (or ‘brunost’ is a tan-colored ‘whey cheese’ with a distinctive caramel flavor) and jam is another sweet option.

There is no one best lefse recipe. You can choose to make thick, sweet lefse, or thin ones for savory wraps, with potato or without. There are so many options, not to mention the countless ‘secret’ family recipes handed down through generations.

I recall the first time I ever had the opportunity to try Norwegian lefse. I was in grade school and my friend asked me to come to her house for lunch. At the time, I wasn’t really sure what to make of it, but I remember it tasted good … just like a thin potato pancake!

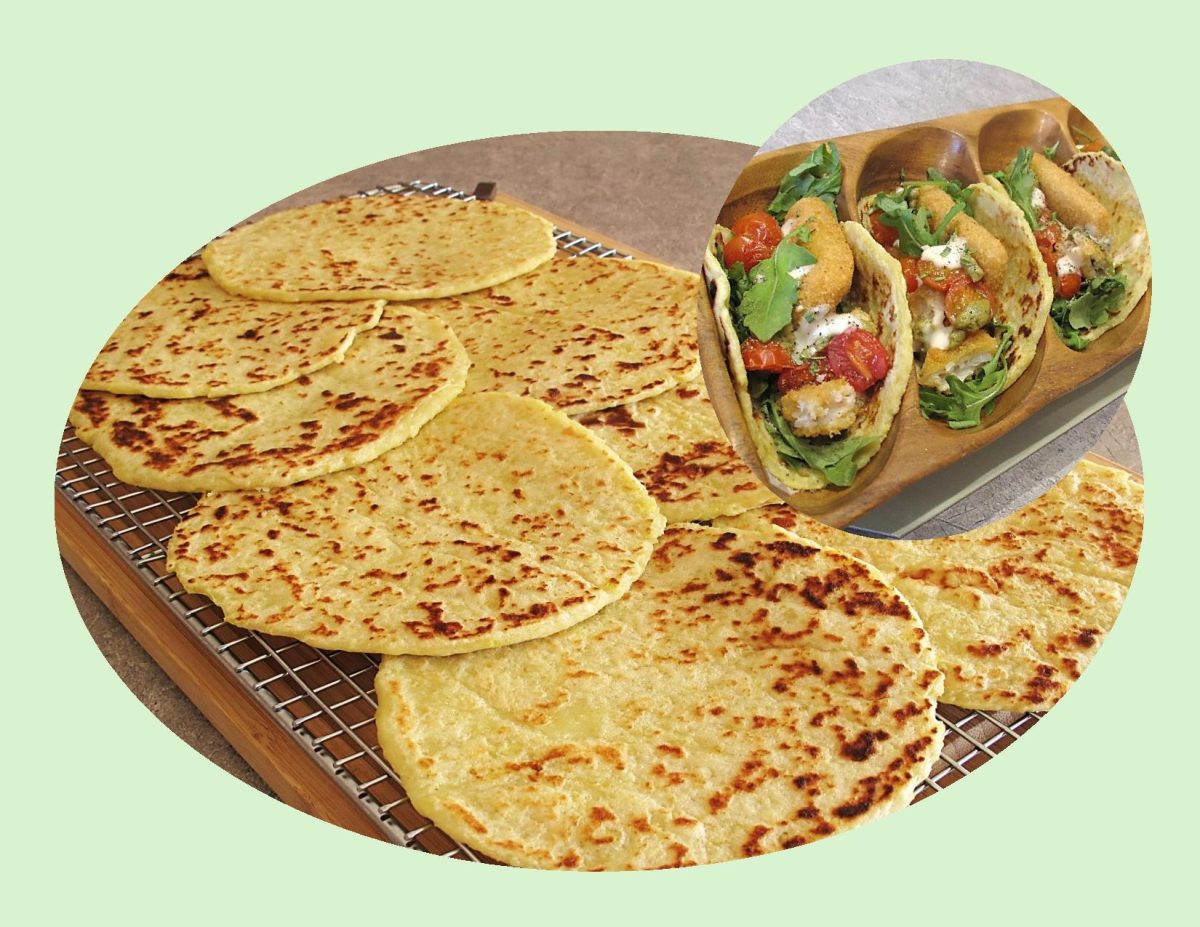
Brion & I decided to use our lefsa as a wrap and make fish ‘tacos’ out of them. It turned out to be a great choice!

Print Recipe
Potato Lefse
Votes: 1
Rating: 5
You:
Rate this recipe!
Course Main Dish
Cuisine Norwegian
Keyword potato lefse
Servings
Ingredients
Course Main Dish
Cuisine Norwegian
Keyword potato lefse
Servings
Ingredients
Votes: 1
Rating: 5
You:
Rate this recipe!
Instructions
  1. In a pot, place potatoes & cover with cold water. Put a lid on the pot & bring to a boil. Reduce heat to a simmer & cook until soft. Drain & put potatoes through a ricer (or grate fine) while still hot. Combine with butter & refrigerate until cool.
  2. Combine potatoes with the rest of the ingredients. Mix just until blended. Add milk only if needed to combine dough. Cover & chill thoroughly.
  3. Divide dough into 8 equal pieces & roll into balls. Between 2 sheets of dry waxed paper roll each ball to a 6-inch diameter.
  4. Heat a flat griddle to 400 F.
  5. Grill lefsa, flipping mid-way through, about 60 seconds on each side, or until freckled.
  6. Serve warm or at room temperature as is or with topping or 'filling' of choice.
Recipe Notes
  • The yield will vary depending on how much dough you use for each one.
  • SOME FILLING SUGGESTIONS:
  • Spread with butter & a sprinkle of brown sugar
  • Spread with mustard & wrap around sausage, brats or hot dogs
  • Spread with butter or cream cheese & wrap around leftover chicken, turkey, pot roast or your favorite deli meat. Eat hot or cold.
  • Use as a wrap for salads such as egg, tuna, chicken & salmon.
  • Spread with cranberry sauce, applesauce or Nutella.
  • Wrap around warm meatballs.
  • Wrap around scrambled eggs with or without crumbled sausage or bacon.

Shrimp Pizza w/ Artichoke & Garlic Sauce

It’s hard to get bored of pizza, but sometimes you want to change things up a bit. In addition to trying new toppings and cheeses, consider using an alternative to tomato sauce on pizza.

Pizza night is a cherished tradition in many households, but sometimes, it’s good to break away from the routine and experiment with new flavors. One of the easiest ways to do this is by trying out different alternative pizza sauces.

The other day Brion & I were in a Winners/Homesense store. Of course, my favorite spot is always the area where they have all the cookware and specialty food items. I saw bottled sauce made with artichokes and garlic. Immediately my thoughts were as to how I could use it. It was quite pricey, so I opted to try and make a copycat version at home.

While tomato sauce has long been associated with traditional pizza, there is a whole new world of flavors waiting to be discovered by breaking from tradition. Tradition of course has its place—there’s a reason classic tomato-topped pizza has been a staple for generations. But there is more to pizza sauce than regular tomato. There are exciting flavors, interesting textures, sweet things, spicy things, cheesy things, even exotic things!

Here are some ideas for making pizza without tomato sauce:

  • White pizza – Make a white sauce with olive oil, garlic, parsley, and a dash of salt and pepper. Spread it on the pizza dough instead of tomato sauce. Top with cheeses like mozzarella, ricotta, or feta, and veggies.
  • Pesto pizza – Spread pesto sauce on the dough instead of tomato sauce. Top with veggies and cheeses.
  • BBQ chicken pizza – Use BBQ sauce as the base instead of tomato sauce. Top with chicken, red onion, cheddar cheese, etc.
  • Mediterranean pizza – Make a tahini sauce base. Top with artichoke hearts, kalamata olives, feta, red onion, etc.
  • Breakfast pizza – Scramble eggs with veggies and meats. Spread it on the dough. Sprinkle with cheeses.
  • Buffalo chicken pizza – Spread buffalo wing sauce on the dough. Top with chicken, blue cheese, mozzarella, celery, onion.
  • Thai pizza – Make a spicy peanut sauce base. Top with chicken, carrot, onion, cilantro, mozzarella.
  • Carbonara pizza – Spread an alfredo sauce base. Top with bacon, onion, Parmesan, egg, parsley.

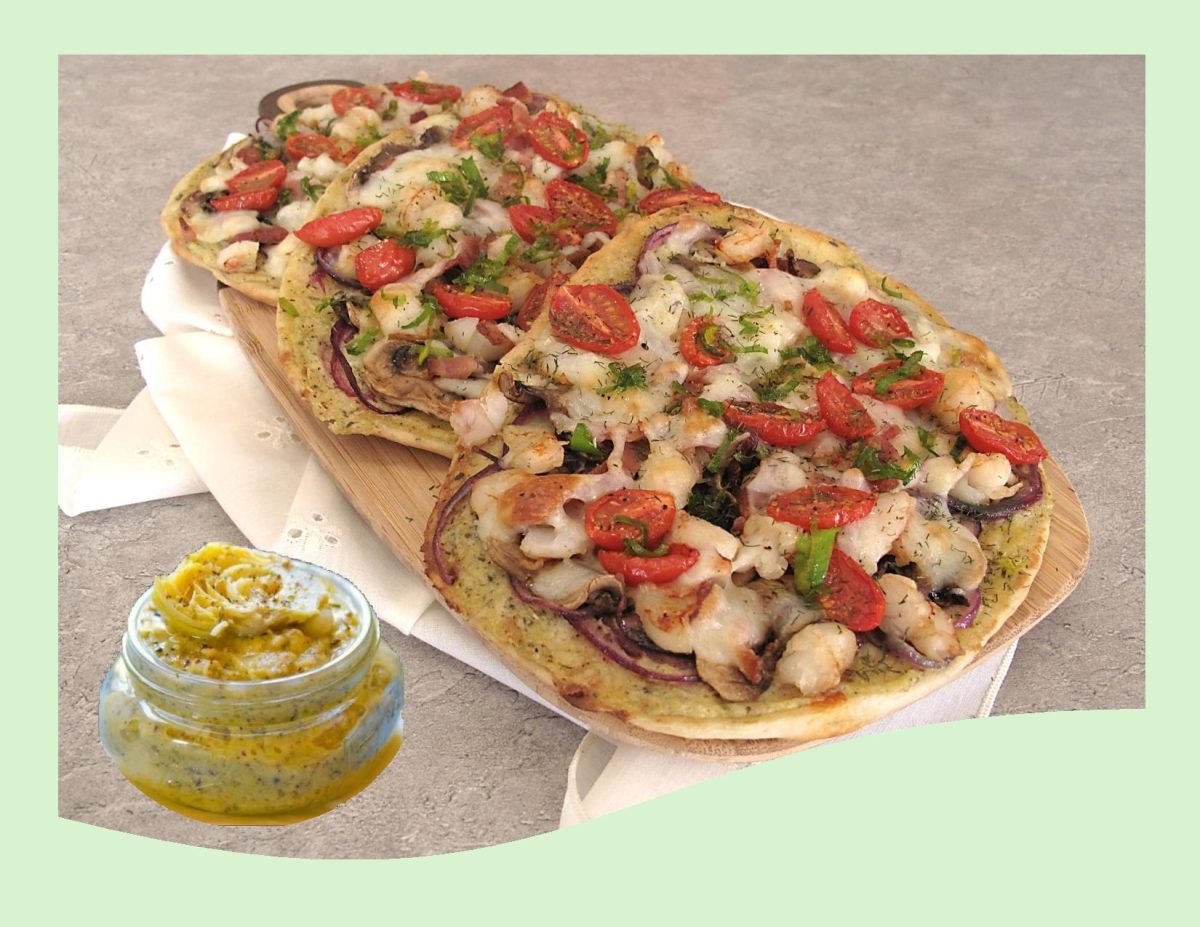
The best thing about pizza is that there are endless ways to enjoy it. So here you have it … shrimp pizza with artichoke & garlic sauce. Yum!

Print Recipe
Shrimp Pizza w/ Artichoke & Garlic Sauce
Votes: 1
Rating: 5
You:
Rate this recipe!
Servings
Votes: 1
Rating: 5
You:
Rate this recipe!
Instructions
Sauce
  1. Place all ingredients except oil in food processor. With motor running, Add olive oil in a slow stream to make an emulsion. Place in a dish & set aside.
Pizza Toppings
  1. Fry bacon until done but not crisp. Drain on a paper towel then chop into bite-sized pieces. In the same skillet, sauté shrimp until just cooked & remove it from skillet.
  2. Sauté sliced mushrooms & sliced onions until just cooked.
  3. Slice cherry tomatoes in halves & prepare fresh herbs.
  4. Shred mozzarella cheese.
Assembly
  1. Preheat oven to 350 F.
  2. Spread each naan bread with artichoke & garlic sauce.
  3. Top pizzas with onions, mushrooms, shrimp & bacon. Sprinkle shredded cheese over all then dot with halved cherry tomatoes & herbs.
  4. Bake 10-15 minutes or until cheese is bubbly & tomatoes are roasted. Serve.
Recipe Notes
  • You will no doubt have extra artichoke & garlic sauce. Store it in an air-tight container for up to one week. Enjoy it on toasted bread or swirl into cooked pasta.

Onion Scones

You might imagine scones as a food that is only served with jam and cream, but there are many variations on this classic tea cake. This flaky treat can also come in a savory scone version with add-ins like cheese and chopped bacon or sun-dried tomato & basil etc.  A scone is closer to a pastry than it is to bread mainly because it doesn’t include any yeast and has almost identical ingredients to a short crust with different fat to flour ratios.

So why not onion scones?? Because onions really form the foundation of our cooking, they are often the first thing that goes in the pan, and they are the flavor base for everything from chicken soup to a quick skillet pasta. Cooked onions give dishes a rich savory flavor and a subtle sweetness — you don’t always know onions are there once the dish has been spiced and sauced, but you’d definitely miss them if they weren’t.

Scone ingredients prefer to be cold. All your starting components need to be kept as cool as possible – this will help to guarantee the soft, light and well-risen qualities of your next batch of scones.

North American or British scones – what’s the difference? British scones are served with butter/cream whereas North American scones or ‘biscuits’ are far butterier and are typically served alongside meat and veg style savory dishes.

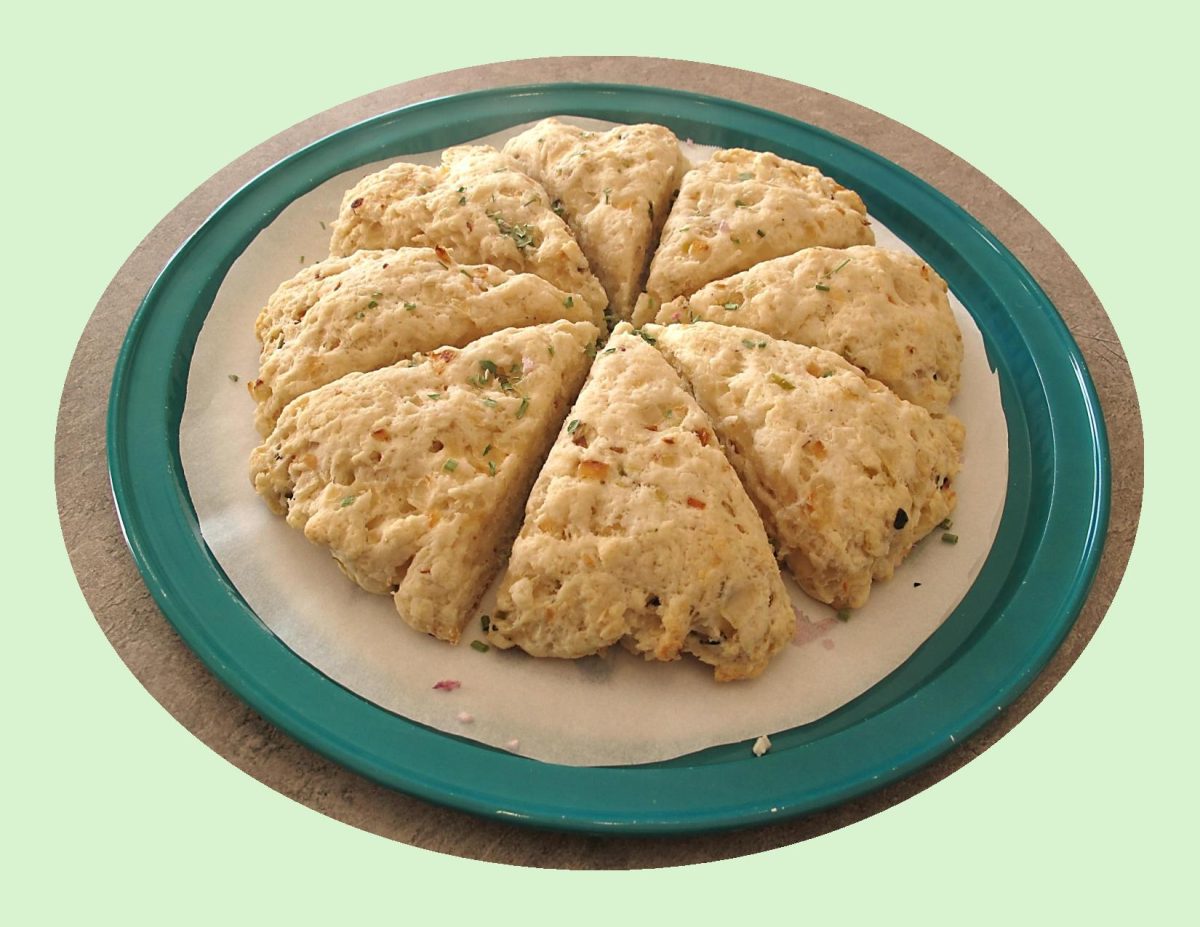
These onion scones make such a nice addition to a beef stew meal.

Print Recipe
Onion Scones
Votes: 1
Rating: 5
You:
Rate this recipe!
Course Main Dish
Keyword onion scones
Servings
Course Main Dish
Keyword onion scones
Servings
Votes: 1
Rating: 5
You:
Rate this recipe!
Instructions
  1. Preheat oven to 375 F.
  2. In a microwave-safe bowl, combine the yellow onion, green onions, garlic & butter. Microwave on high for 2 minutes, then stir. Microwave for another 1-2 minutes or until the vegetables are tender. Remove bowl from microwave & let the vegetables cool for 10 minutes.
  3. In a large bowl, combine the flour, cheese, sugar, baking powder, pepper & salt.
  4. Add the sautéed onion mixture to the flour mixture along with the light cream & egg. Stir JUST until combined.
  5. Gently press the dough together with your hands to form a ball.
  6. On an ungreased baking sheet, press the dough into an 8-inch circle. Cut the circle into 8 wedges. Separate the wedges slightly.
  7. Bake for 12-15 minutes or until scones are lightly browned. Brush with more melted butter & serve immediately.

Salmon Wellington

HAPPY EASTER!

Easter is here and Salmon Wellington is the perfect holiday meal! The richness of the mushroom duxelles, pairs perfectly with the hearty salmon fish fillet and scallops and the buttery puff pastry just takes this dish to the next level.

Mushroom duxelles is an intensely flavored combination of finely chopped mushrooms, shallots, and fresh herbs such as thyme or parsley that are slowly cooked to a paste-like consistency. French in origin and named after the marquis d’Uxelles, this mushroom condiment is traditionally used in the preparation of beef Wellington, but it can also be used to flavor soups and sauces as well as to fill omelets and ravioli. 

Wellington fillet as we know it today was first made famous by the American chef and star Julia Child, who introduced the filet de bśuf en croûte, the French crust beef fillet, as ‘Filet of Wellington Beef’ during her TV show ‘The French Chef’, on the 1965 New Year’s Eve episode. From that day on, the recipe began to appear in various recreational circles in North America, as well as being taken up in the most important cookbooks.

A Salmon Wellington is a copycat version of the popular English ‘Beef Wellington’. Because puff pastry takes about 20 minutes to bake (salmon takes 12-15 minutes), keep the salmon refrigerated until you’re ready to assemble. Starting with cold salmon ensures it doesn’t overcook. To prevent the bottom from getting soggy, pat dry the salmon thoroughly before assembling. Also, make sure to cut slits on the puff pastry once assembled to allow the steam to escape. Don’t open the oven until ready since puff pastry needs full consistent heat to bake into flaky layers.

You’ll be so impressed when it’s time to take it out of the oven because it just looks amazing. However, you’ll be more impressed with how it tastes. Just like an elegant and flavorful fish pie!

Print Recipe
Salmon Wellington
Votes: 1
Rating: 5
You:
Rate this recipe!
Course Main Dish
Cuisine French
Servings
SERVINGS
Votes: 1
Rating: 5
You:
Rate this recipe!
Instructions
Mushroom Duxelles
  1. In a food processor, pulse the mushrooms to a roughly diced consistency,15-20 seconds. In a saucepan, melt 2 Tbsp butter over medium-high heat. Add mushrooms, a heavy pinch of salt & pepper, shallots, garlic, rosemary & thyme. Sauté until moisture from the mushrooms has evaporated, about 15 minutes. Transfer to a bowl & set aside.
Scallop Filling
  1. In a small bowl, combine the scallops (or shrimp), cream, onions, parsley, dill, garlic, pesto, salt & pepper. In another small bowl, beat egg white on medium speed until soft peaks form; fold into scallop mixture.
Assembly
  1. Preheat oven to 400 F. Line a 15 x 10 x 1-inch baking sheet with parchment paper.
  2. On a lightly floured surface, roll each pastry sheet into a 12 x 10-inch rectangle. Cut each sheet into FOUR- 6 x 5-inch rectangles. Divide mushroom mixture evenly & spread over 4 pieces of pastry leaving a 1/2-inch border.
  3. Center the salmon pieces on top. Next, top each salmon piece with a quarter of the scallop filling.
  4. Top each with a pastry rectangle & crimp to seal. With a sharp knife, cut several slits in the top to let steam escape. Place on the baking sheet & brush with egg wash. Bake for 20-25 minutes or until a thermometer reads 160 F.
Dill Cream Sauce
  1. While salmon is baking, mix all sauce ingredients & refrigerate until serving time.

Hoisin Beef & Rice Roulade

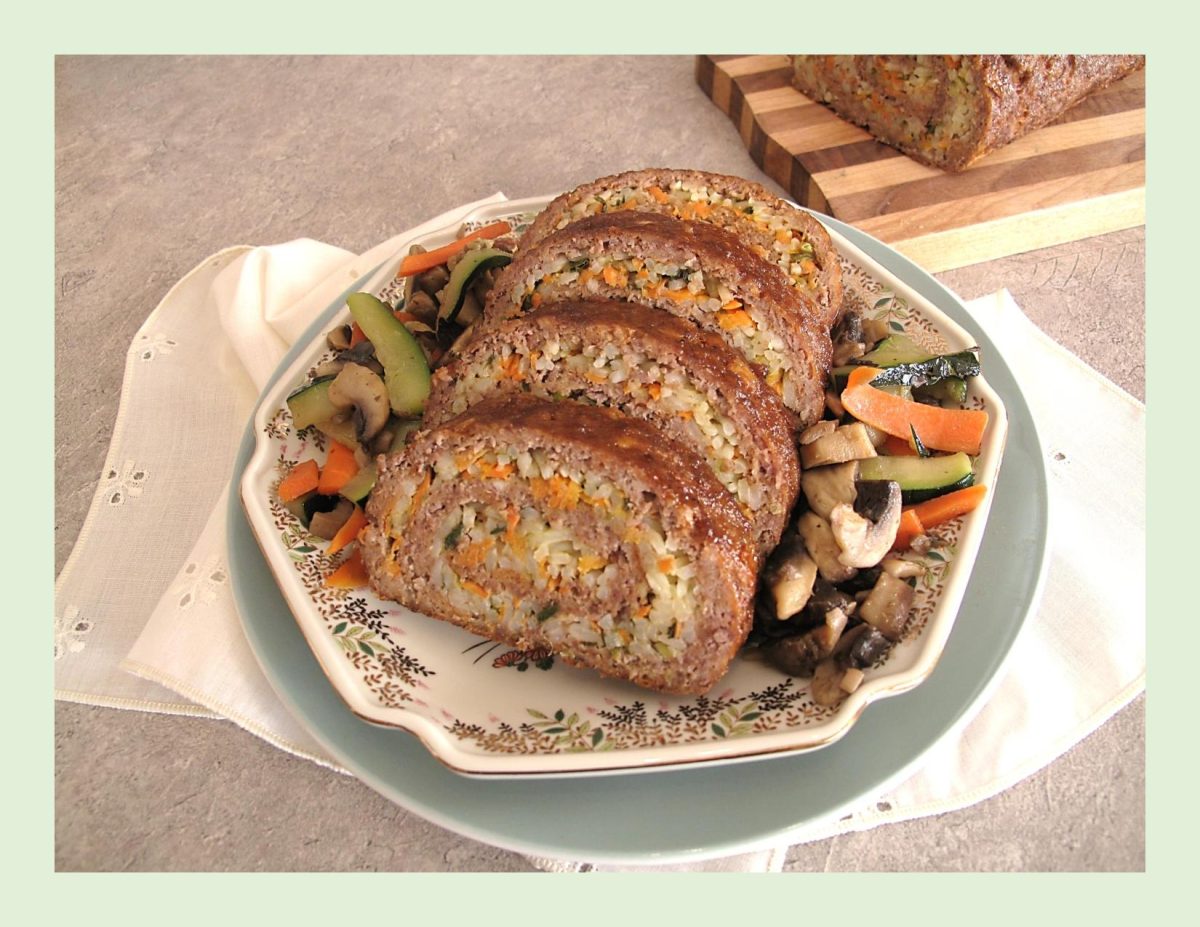
Hoisin is not a sauce I use regularly but in this case I found it puts a nice Asian twist on a traditional meatloaf. Impressive enough to serve to guests but easy enough to prepare on a weeknight.

The history of hoisin sauce is as rich and complex as its flavor. The name ‘hoisin’ comes from the Chinese phrase meaning ‘seafood sauce’ due to its seafood-like flavor but ironically, the sauce doesn’t contain any seafood. It’s believed to have originated in southern China, and its use has evolved over centuries. Once a luxury only the wealthy could afford, it has become a staple in Chinese households and restaurants worldwide. An intriguing tale associated with hoisin sauce is its role during the mid-Autumn festival in China, where it’s used in preparing traditional mooncakes, symbolizing unity and completeness.

Traditionally, hoisin sauce was made from fermented soybeans, rice wine, sugar, spices, and other ingredients. Today, hoisin sauce is widely used in many Chinese dishes including Peking duck, dim sum, barbecued pork, and spring rolls. It has also become a popular ingredient in other Asian cuisines such as Japanese and Vietnamese.

Hoisin sauce is a culinary chameleon, seamlessly blending into a wide array of dishes. Some of the many roles of hoisin sauce are as a

  • Dipping sauce for spring rolls, dumplings, and other appetizers. Its sweet and savory notes perfectly balance the flavors of these bite-sized delights.
  • As marinade and glaze hoisin sauce works wonders with meats like chicken, pork, and beef. The sugars in the sauce caramelize beautifully when grilled, creating a rich and flavorful exterior.
  • Adding hoisin sauce to stir-fried vegetables and proteins introduces a delectable dimension to your dishes. Its thick consistency helps create a glossy coating that clings to the ingredients, delivering an irresistible taste in every bite.
  • From noodle stir-fries to fried rice, hoisin sauce can elevate these dishes with its unique blend of flavors. Just a drizzle can transform a simple plate of noodles into a gourmet delight.
Print Recipe
Hoisin Beef & Rice Roulade
Votes: 1
Rating: 5
You:
Rate this recipe!
Course Main Dish
Cuisine Asia
Servings
Votes: 1
Rating: 5
You:
Rate this recipe!
Instructions
  1. Prepare rice according to package directions. Cool slightly. Stir cooked rice with carrot, red pepper, green onion & cilantro. Reserve.
  2. Preheat oven to 350 F. In a medium sized bowl, stir breadcrumbs with milk, eggs, ginger, Worcestershire sauce, garlic, salt & pepper. Let stand for 5 minutes.
  3. Line a rimmed baking sheet with foil. Grease foil well; top with a second sheet of foil (to use as a guide when rolling the beef). Crumble beef into bread crumb mixture; mix gently until combined. Press the beef into a 1/3-inch thick, rectangular layer on the prepared baking sheet.
  4. Spread rice mixture evenly over the beef, leaving a 1-inch border around the edge. Roll beef, jellyroll-style, using the top layer of foil to guide & shape the beef into a compact log. Discard extra foil. Smooth the surface using fingers to fill in any gaps. Pinch ends closed. Bake for 45 minutes.
  5. Meanwhile, stir hoisin sauce with lime juice, ketchup, honey & sesame oil; brush evenly over roulade. Bake roulade for an additional 15 minutes.

Boursin French Bread w/ Pork & Shrimp Stuffing

Today, March 21, our family celebrates the birth date of my father. Although he left this earth many years ago, I have so many memories of the wonderful childhood I enjoyed due to the parents I had. As my life unfolds, I realize more each day the impact having had a strong role model has made on my life. The word ‘thank you’ is so inadequate.

In the early 1950’s, my father was able to purchase another piece of land about 4 miles from our home place. Between the two farms it became the equivalent of a ‘section’. Before this time, the cattle had to be moved to a community pasture in the foothills where they would have enough grass to graze on over the summer. At that time to transport them, you had no choice but to herd them down the road allowance for approximately 20-30 miles on foot. To say the least it was a long grueling event for both the cattle and family members.

The ‘other farm’, as we referred to it, had originally been a slaughter house for the town meat market. It consisted of one large building, corals and a few other buildings. There was a slough on the land which dad had converted to a ‘dug out’ where the cattle could go and drink freely. The land was used for grain crops where in turn the cattle could be pastured on.

One of my fondest memories about the other farm was our picnic lunches. In the summer when dad would be working on the land, instead of my mother just packing a lunch for him that he could take in the morning, she would fix a wonderful ‘picnic lunch’. At about 11:30 in the morning, mom would pack up the lunch she had prepared, complete with plates, silverware, a tablecloth, etc., and we would drive to the ‘other farm’. There was just the right amount of space between two grain buildings to set up a make-shift table and stools. We would put the table cloth down and spread out our little picnic ‘feast’. Dad would be so surprised and we would all enjoy our lunch immensely. Mom always knew how to make the most simple things fun for us.

Lunch was always different from the usual lunch box meal and my mother never seemed to be short on tasty ideas. Today’s stuffed French bread meal is definitely a more elevated version of a picnic meal but it did bring me back to those wonderful cherished memories from childhood.

This meal seems so fitting to have today in honor of my father’s birthday. He loved bread, pork & seafood so I’ve got it covered.

Print Recipe
Boursin French Bread w/ Pork & Shrimp Stuffing
Votes: 1
Rating: 5
You:
Rate this recipe!
Servings
Servings
Votes: 1
Rating: 5
You:
Rate this recipe!
Instructions
Shrimp Stuffing
  1. In a saucepan, cook rice & barley in vegetable broth until tender. Drain (you can use this broth elsewhere) & transfer to a large bowl.
  2. Sauté celery, onion & mushrooms in 2 Tbsp butter until tender-crisp. Combine sautéed vegetables with rice/barley mixture. Stir in shrimp & seasonings & cook for a few more minutes until shrimp is just cooked. Remove from saucepan & set aside.
Boursin Cheese Sauce
  1. In a saucepan, melt the butter over low heat. Stir in the spices. Add the milk & adjust heat to steaming -- do not simmer or boil. Add Boursin to the milk mixture, break it up into pieces with the side of a large spoon & stir until Boursin has melted into the mixture. Remove from heat & cool.
Tenderloin
  1. Remove silver skin & butterfly tenderloin. Using a meat mallet, pound out the tenderloin to about 3/4-inch thickness. Heat a griddle & sear meat on both sides. Set aside.
Assembly /Baking
  1. Preheat oven to 375 F.
  2. Cut the French bread in half lengthwise & scoop out the soft insides. Remove only just enough to be able to fit the tenderloin in the cavity. Spread the hollowed out cavity with the Boursin cheese sauce (save some for inside the butterflied tenderloin). Cover bottom & sides completely.
  3. Spread remaining cheese sauce over inside of butterflied tenderloin. Close the tenderloin so you can fit it inside the bread cavity. Once you have it in there, open it as much as possible & fill it with the shrimp stuffing. It will be slightly mounded.
  4. Using a large piece of foil paper, place the bread 'boat' in the center & pull the foil up around it. Lightly cover the top just to keep the stuffing from drying out until the rest is cooked.
  5. Bake for 1 1/2 hours in a baking pan with a wire rack in the bottom to prevent the bottom of the bread from burning.
  6. Remove from oven & allow to sit for about 5 minutes then remove foil & place on cutting board & slice.