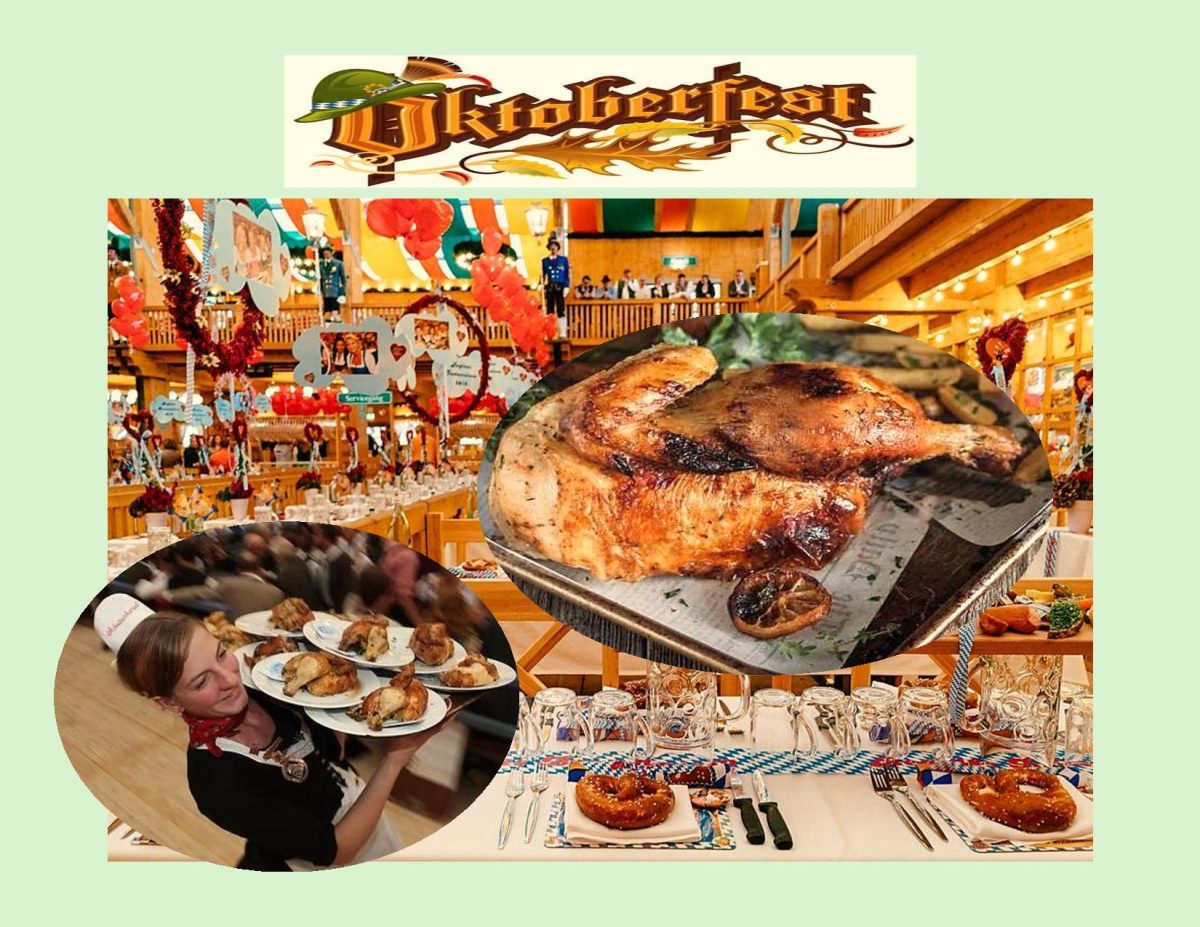
Oktoberfest Roasted Half Chicken – Wiesn Hendl

CELEBRATING OKTOBERFEST (SEPT 21-OCT 6 /2024)

The first Oktoberfest took place in 1810 as part of the celebrations of the wedding between Crown Prince Ludwig, the later King Ludwig I. of Bavaria, and Therese of Sachsen-Hildburghausen.

On October 17 the five-day celebrations ended with a public horse race at a meadow between Munich and Sendling.

Due to the great success of this great conclusion of the ‘October Fest’ the formerly nameless meadow below the Sendling hill became the name ‘Theresens Wiese’ (Therese’s Meadow) in honor of the bride.

After 1815 this name was simplified as ‘Theresienwiese’. As it initially only served the Oktoberfest, besides some agricultural cultivation, the name of the event and its location merged.

As people from Munich like merging syllables just as they like to merge names, sometime later, they would simply go to ‘Wiesn’. Hence, in Munich you literally say, ‘I’m going out to the meadow’ (naus auf d’Wiesn), when you visit the Oktoberfest.

To many Munich locals the focus of the world-famous Oktoberfest isn’t the beer at all, but rather the huge number of rides, rollercoasters, ghost trains, and other funfair attractions that line the festival’s many avenues.

Certainly, of equal importance to the beer is the food, and most beloved of all is the recipe for the famous Oktoberfest Chicken.

Wiesnhendl’ means Wiesn chicken which is not a breed in itself. The name actually only indicates the ultimate fate of the chicken – for example to be eaten at the Wiesn.

Not every chicken can be a Wiesn chicken, as it must be born in the second week of August in order to reach the necessary weight for butchering. Only chickens whose star sign is Leo end up at Oktoberfest!  I understand, it’s reasonable to estimate that around 700,000 chickens will meet their golden-brown fate at the Wiesn.

The chicken makes a good choice: it’s easy to prepare in large quantities, can be served in seconds (chicken on the plate, moist towelette on the side) and the diner generally eats it with their fingers, saving on loads of washing up.

The chicken also contains a fairly generous proportion of fat, which helps to extend diners’ beer consumption time by slowing down the absorption of alcohol by the body. Another trick the hosts have is brushing the chicken skin with a salty brine solution to make the skin extra-crisp – as well as making guests extra-thirsty. So, everyone wins.

‘Hendl’, the Bavarian word for chicken, is non-gendered so can refer to a rooster or a hen. The right size and weight to feed two hungry people should be around 1300 grams (about 2.86 lbs.).

Another thing to keep in mind is that you can’t have Oktoberfest without pretzels. Large and soft, they’re the perfect accompaniment to chicken and beer.

Print Recipe
Oktoberfest Roasted Half Chicken - Wiesn Hendl
Votes: 1
Rating: 5
You:
Rate this recipe!
Servings
Ingredients
Chicken
Spiced Butter/Oil
Servings
Ingredients
Chicken
Spiced Butter/Oil
Votes: 1
Rating: 5
You:
Rate this recipe!
Instructions
  1. Preheat oven to 375 F.
  2. Wash chicken & pat dry with a paper towel. Stuff the cavity with thyme, parsley, garlic & lemon.
  3. Melt the butter, mix in the olive oil & the spices. Place the chicken breast side up onto the rack of a roasting pan. Brush it with the spiced butter/olive oil.
  4. Place in the oven & brush with spiced butter/olive oil again in about 20 minutes. (If the chicken is browning too quickly, tent it with aluminum oil.)
  5. In 40 minutes check the temperature with a meat thermometer. Brush with more spiced butter/olive oil.
  6. Continue cooking until the internal temperature reaches 165 F. If you want crisper skin, turn the heat up or broil for the final few minutes (keep an eye on it).
  7. Place the cooked chicken onto a cutting board with a lip of a cutting board inside a baking sheet (to contain the juices). Allow to rest 5-10 minutes. Cut across lengthwise with a heavy knife, pressing down firmly. Remove the herbs and lemon and serve.

Chicken Thighs w/ Grapes & Caramelized Onions

September is the bridge between summer and fall. The beginning of the fall season is just around the corner so it’s time to transition meals between the summer and fall. Turn the oven back on to embrace the changing season. For many, this means baking, but there’s also sautéing and slow roasting, braising and boiling. 

It’s National Chicken Month which gives Canadians from coast to coast another reason to celebrate their favorite protein. It’s the time to cook and eat all sorts of chicken dishes in salute of all the hard-working Canadian farm families that raise the chicken we love.

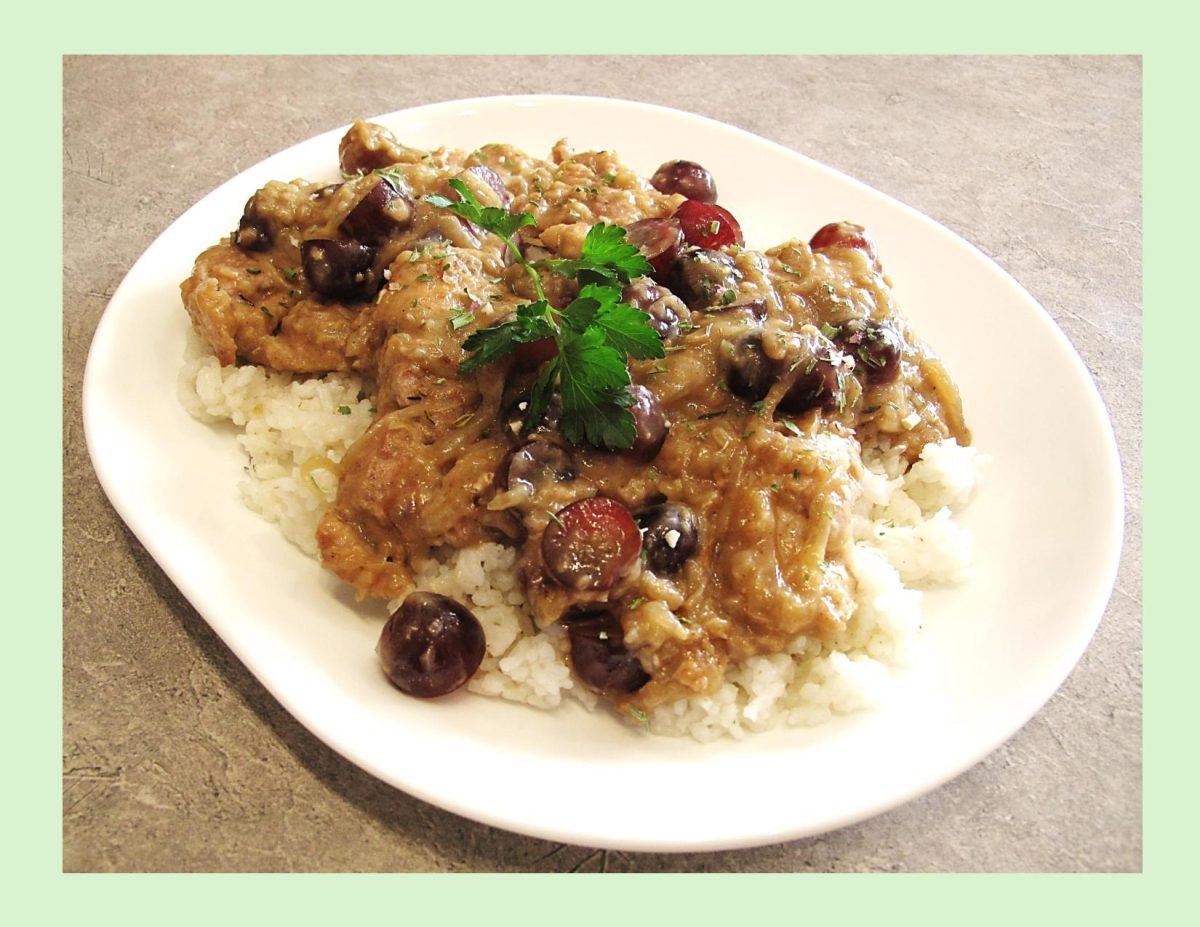
This recipe for skillet chicken with grapes and caramelized onions is an easy recipe that makes a perfect pair for a crisp green salad, quinoa, or fresh bread. Quinoa is still very much a small niche crop in Canada. The search for seed to produce quinoa varieties that can reliably flourish in Canada continues, and it is entrepreneurs as well as research scientists who are leading these efforts. Quinoa is a cool-season crop and is particularly sensitive to heat, which limits the areas of potential commercial production in Canada.

Its popularity skyrocketed in 2006/7 when restaurants began featuring this ancient grain on their menus, and it quickly won over people’s taste buds with its unique flavor and texture profile.

Serving quinoa with this chicken meal really makes it special.

Print Recipe
Skillet Chicken w/ Grapes & Caramelized Onions
Votes: 1
Rating: 5
You:
Rate this recipe!
Servings
Ingredients
Servings
Ingredients
Votes: 1
Rating: 5
You:
Rate this recipe!
Instructions
Caramelized Onions
  1. Heat butter over medium low heat in a heavy ovenproof skillet. Add the onions cook for 20 minutes or so, stirring occasionally. When the onions are a deep golden color, remove from the pan and set aside.
Chicken Thighs
  1. Preheat oven to 350 F.
  2. Combine the flour, salt, chili powder, thyme, allspice, & black pepper. Dredge each piece of chicken in the flour mixture, shaking off the excess.
  3. In the same pan as the onions, heat the oil over medium high heat. Add each piece of chicken & fry for a few minutes until golden brown; flip & cook for a few more minutes. Transfer to a plate (it will not be fully cooked at this point, just browned – it will finish cooking in the oven).
  4. Turn the heat down & let the oil cool off a little bit. Add the wine – this will definitely bubble & sizzle! Add the broth & simmer until the mixture is thickened slightly. Add the onions & chicken to the pan. Bake for about 20 minutes.
  5. Remove from the oven, add the grapes, baste with the sauce & bake for another 5-10 minutes. Garnish with parsley and serve.
Recipe Notes
  • To make without using wine:
  • Use 3/4 cup chicken broth (instead of the 1/3 cup wine & 1/4 cup broth). Add remaining flour (leftover from dredging chicken).
  • Make a roux with excess oil in skillet & dredging flour.
  • Add chicken broth & cook until a sauce forms.
  • Add the onions & chicken to the pan & bake as directed above.

Grilled Salmon w/ Mango Avocado Salsa

When it comes to favorite summer condiments, salsa is top of the list. For many North Americans, salsa is almost considered a basic food group, and not just as a nutritious dipper for corn chips. Packed with garden-fresh fruits, herbs and vegetables that are easy to get your hands on, it’s as terrific a topping for chicken, beef, or seafood as it is a colorful add-in for pasta, rice and salad. Plus, it requires virtually no cooking, making it the perfect dish to throw together when summer heat and humidity make you feel like you’re melting.

The history of salsa sauce originated with the Inca people. Salsa, which has typically been a combination of chilies, tomatoes and other spices, can be traced to the Aztecs, Mayans and Incas. In recent years, the use of different fruits combined with vegetables makes for a spicy fruit salsa.

Modern North American cooking has become a fusion of traditions, flavors and dishes from virtually every part of the globe. The tradition of eating tomato-based salsa was likely regional until the practice of eating Mexican food spread throughout the continent. Exactly how mango salsa reached North America isn’t really known, but it was likely brought from the Caribbean by travelers. Modern North American salsas are still primarily tomato based, but many people appreciate the sweet, salty, sour and spicy combinations of flavors in a well-balanced mango salsa.

Versatility and adaptability are salsa’s biggest selling point. Chunky or finely diced, spicy or mild, crafted with fruit or vegetables, and sometimes both, salsa is unlimited with possibility.

The salsa that Brion & I are having with our salmon today is an interesting mix of avocado, mango, grape tomatoes & red onion marinated in lime juice. Should be good!

Print Recipe
Grilled Salmon w/ Mango Avocado Salsa
Instructions
Salmon
  1. In a small bowl, mix melted butter & all other salmon ingredients. Rub the spice mix all over salmon in foil ( mainly on the no-skin side but getting a little on the other side as well). Leave at room temperature while the grill heats up. Preheat the grill to medium-high heat.
Salsa
  1. In a bowl, combine salsa ingredients & refrigerate until salmon is ready.
Grilling
  1. Grill the salmon wrapped in foil for about 15 minutes or to your liking. Salmon should flake easily & not be overcooked.
  2. Serve hot on a bed of rice with the mango salsa on top.

Beef Stroganoff French Bread

The original recipe of beef stroganoff did not include paprika or mushrooms, but both are a popular variation on the theme, as is the practice of serving beef stroganoff over egg noodles.

In the 50s and 60s, the famous stroganoff saw quite a bit of popularity in North America, but with the passage of time the image was marred by the availability of canned cream of mushroom soup and poor cuts or pieces of meat that were ‘slopped’ over cooked noodles or rice and is served in school cafeterias.

This dish saw so much popularity, it actually became an iconic food and cuisine. But unfortunately, it was this cafeteria version of this delicious dish that everyone in North America came to associate with the name.

As with so many dishes as time passes, every variation adds a different twist on the classic. In Australia and the UK, the recipe of beef stroganoff is quite similar to that of North America and is simply eaten with rice.

In the British restaurants, beef stroganoff is cooked to a creamy consistency and then served with a white wine while the authentic or original stroganoffs, which are similar to red stews, are generally served with scoops of sour cream.

In Portugal & Brazil, beef stroganoff is better known as ‘estrogonofe,’ and is cooked with tomato paste, beef strips or dices, with mushrooms, onions and with heavy whipped cream.

Chicken Stroganoff, made with the strips of chicken breast is also famous in Brazil, which is known as ‘fricassee,’ and it is served with crispy straws of potatoes & white rice. In Sweden, sausage stroganoff is more common.

Some other variations of beef stroganoff are also made with canned sweet corn, with ketchup and wine. This dish is also served creatively in crepe fillings or as toppings for all kinds of pizzas and with baked potatoes.

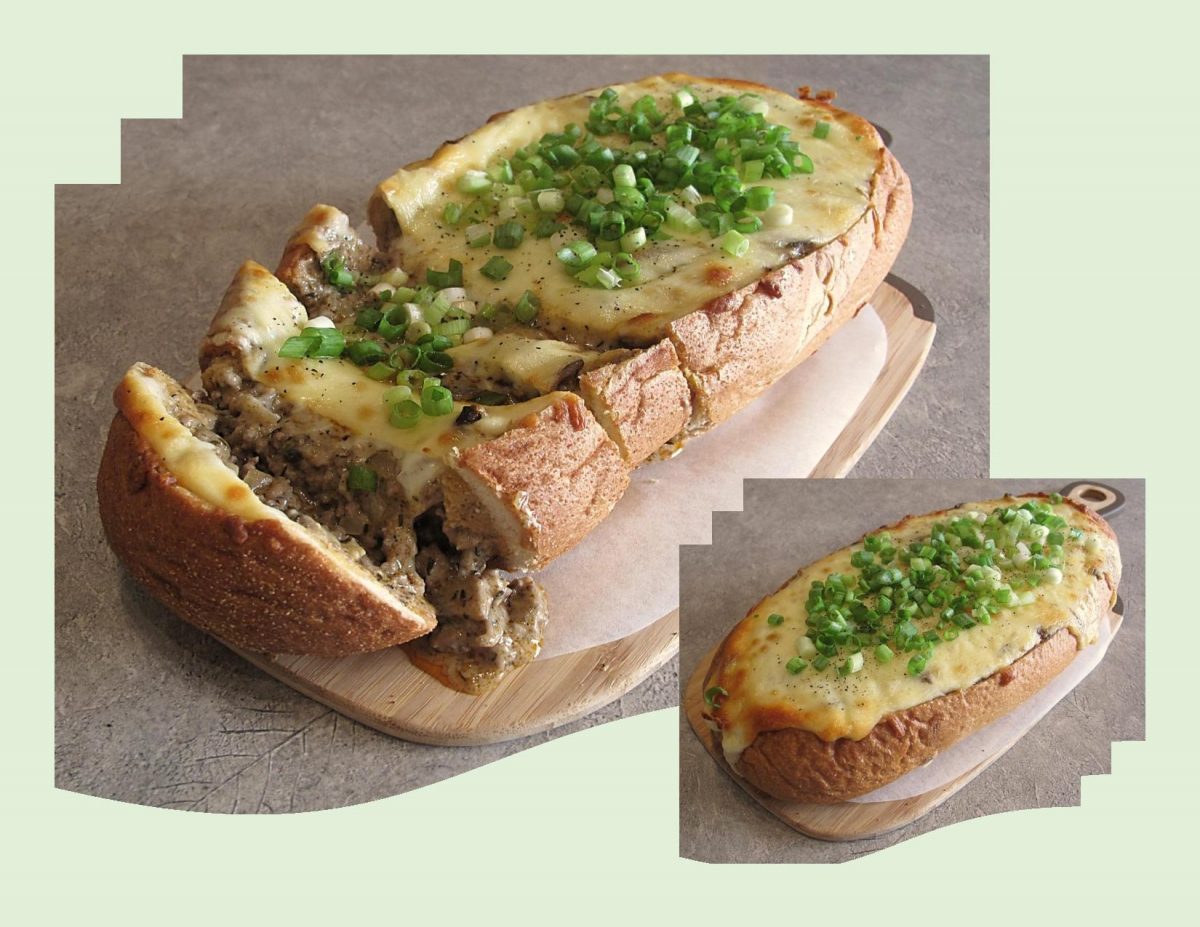
I’m making our beef stroganoff with ground beef as well as some of the classic ingredients. Instead of serving it with French bread, we are having it inside the French bread.

Print Recipe
Beef Stroganoff French Bread
Votes: 1
Rating: 5
You:
Rate this recipe!
Servings
Votes: 1
Rating: 5
You:
Rate this recipe!
Instructions
  1. In a saucepan, heat olive oil over medium heat. Sauté mushrooms with 1 tsp salt & pepper; add thyme. Cook until mushrooms are golden, approximately 4 minutes. Remove from pan & set aside.
  2. Preheat oven to 350 F.
  3. To the saucepan, add butter, onions & garlic & sauté 2 minutes. Add ground beef & cook until browned, approximately 4 minutes. Add flour, paprika & remaining 1 tsp salt. Add beef broth, sour cream & mustard; mix thoroughly & add reserved mushrooms.
  4. Fill hollowed French loaf with stroganoff & top with shredded cheese. Place on a foil lined baking sheet & bake for 20 minutes until cheese is golden & melted.
  5. Sprinkle with sliced green onions & serve immediately.

Savory Sweet Potato Toast w/ Avocado & Poached Egg

Its hard to believe its already Easter Sunday. In North America, many of us like to enjoy or host an Easter brunch. Traditional favorites very often include glazed baked ham, quiche, frittata & French toast casseroles. Of course, there are the classic hard boiled eggs that have been dyed & decorated for the occasion. Many countries make their own signature Easter breads ands buns. The one thing that I always loved about Easter was it signified the coming of ‘Spring’ in our part of the world. Plants were coming to life in the garden, the birds were singing their cheery, little tunes & the stores were filled with beautiful pastel colored Easter ‘things’.

I wanted to come up with something unique for our Easter brunch this year. French toast is always good but I was thinking more along the savory line. Sweet potatoes seem to be one of those polarizing food items, people either love or hate. For most part, I think its the memory of the overly sweet casserole most of us remember from our childhoods. But have you ever thought about using them in a savory context?

I had seen an idea using grated sweet potato patties with avocado and poached eggs. The temptation to kick it up a notch and make a savory sweet potato ‘toast’ for a base become a wonderful Easter brunch for Brion & I.

Print Recipe
Savory Sweet Potato Toast w/ Avocado & Poached Egg
Votes: 1
Rating: 5
You:
Rate this recipe!
Servings
Ingredients
Savory Sweet Potato Bread
Servings
Ingredients
Savory Sweet Potato Bread
Votes: 1
Rating: 5
You:
Rate this recipe!
Instructions
Bread
  1. Pierce sweet potato several times, and wrap in a paper towel. Microwave the wrapped potato 4 - 6 minutes, or until it is soft to the touch & cooked through. Remove from oven, cool slightly, peel & mash. Measure correct amount needed for bread & reserve the rest for another use.
  2. In a small bowl, combine water, milk, sugar & yeast . Allow to sit until yeast is frothy.
  3. In another bowl, whisk together flour & salt.
  4. In a large bowl, combine sweet potato, butter, black pepper, cumin, coriander, thyme & sage. Taste & adjust seasonings if desired. Add yeast & flour mixtures. Combine well but don't overmix.
  5. Turn dough out onto a lightly floured surface & knead until dough is smooth & elastic. Place dough in a lightly oiled bowl, cover with plastic wrap, & set in a draft free place until doubled in bulk.
  6. Turn the dough out onto a flat work surface lightly dusted with flour. Leave to rest about 10 minutes. Grease a 9 x 5-inch loaf pan. Flatten, shape into a loaf & set inside of pan. Cover loosely with plastic wrap & set aside to rise.
  7. Preheat oven to 375 F. When dough is about an inch over the top of pan, place in oven & bake about 45 minutes, rotating pan about half way through baking time. Remove from oven & allow to cool completely before slicing. It is a good idea to make bread the day before you want to serve it.
Additional Preparation
  1. Preheat oven to 350 F. Place cherry tomatoes in an oven proof dish. Drizzle with 1 Tbsp olive oil & roast for about 15 minutes.
  2. Cut avocados in half & peel off skin. Lay one half of the avocado, cut side down, & slice the avocado thinly. Fan out avocado slices so that they form a long line with the slices overlapping each other. Starting from one end, curl avocado slices toward center. Continue curling the avocado slices until you have a 'rose'. Repeat with remaining 3 halves.
  3. Heat a griddle to 350 F. Slice sweet potato bread to your desired thickness. Lightly butter bread slices on both sides. When grill is heated, grill bread on both sides. Place on serving plates, cover & keep warm.
  4. Bring some water to a boil then poach the eggs for about 2 minutes. Drain.
  5. Top grilled savory bread with avocado roses, poached eggs & roasted cherry tomatoes. Sprinkle with red pepper flakes, salt & pepper.
Recipe Notes
  • This dough is very soft so it is a bit tricky to work with. I would imagine if you prefer it to be firmer you could you less yeast. 
  • When working with it , I used a buttered spatula.

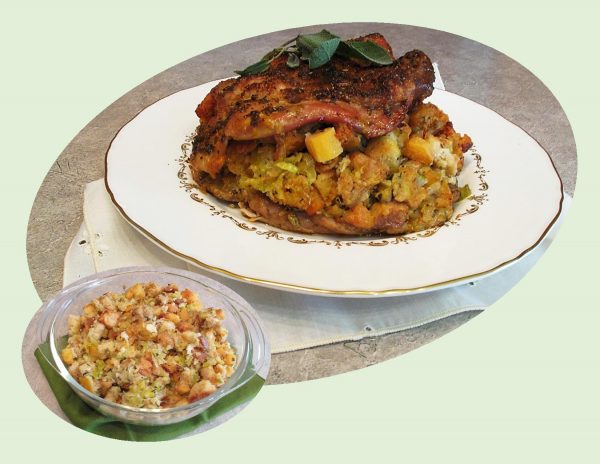
Turkey Thighs w/ Persimmon Sage Stuffing

Cooking turkey parts instead of the entire bird serves a few purposes. It not only cuts way back on the cooking time but it allows you to cook more of your favorite pieces. For dark meat lovers, roasted turkey thighs are the perfect option as the meat is succulent and flavorful without losing its moistness during the roasting time.

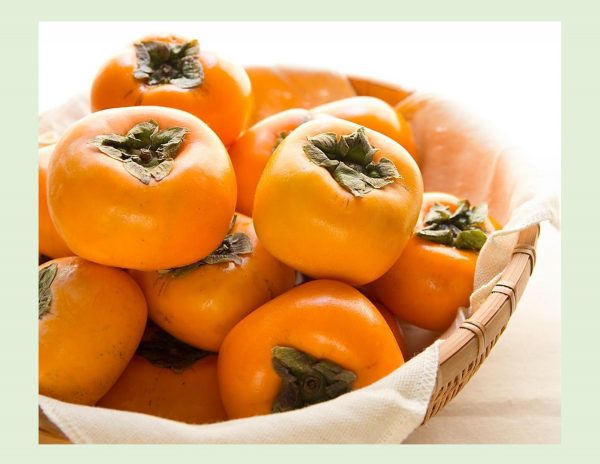
As soon as I spot persimmons in the grocery store I can’t resist them. Persimmons are in season between November and February. They are mildly sweet and juicy with a slight crunch reminiscent of a cross between a peach and a pear. Since there is only a short window in which you can enjoy this exotic fruit, persimmons make up for it by working well in both sweet and savory recipes.

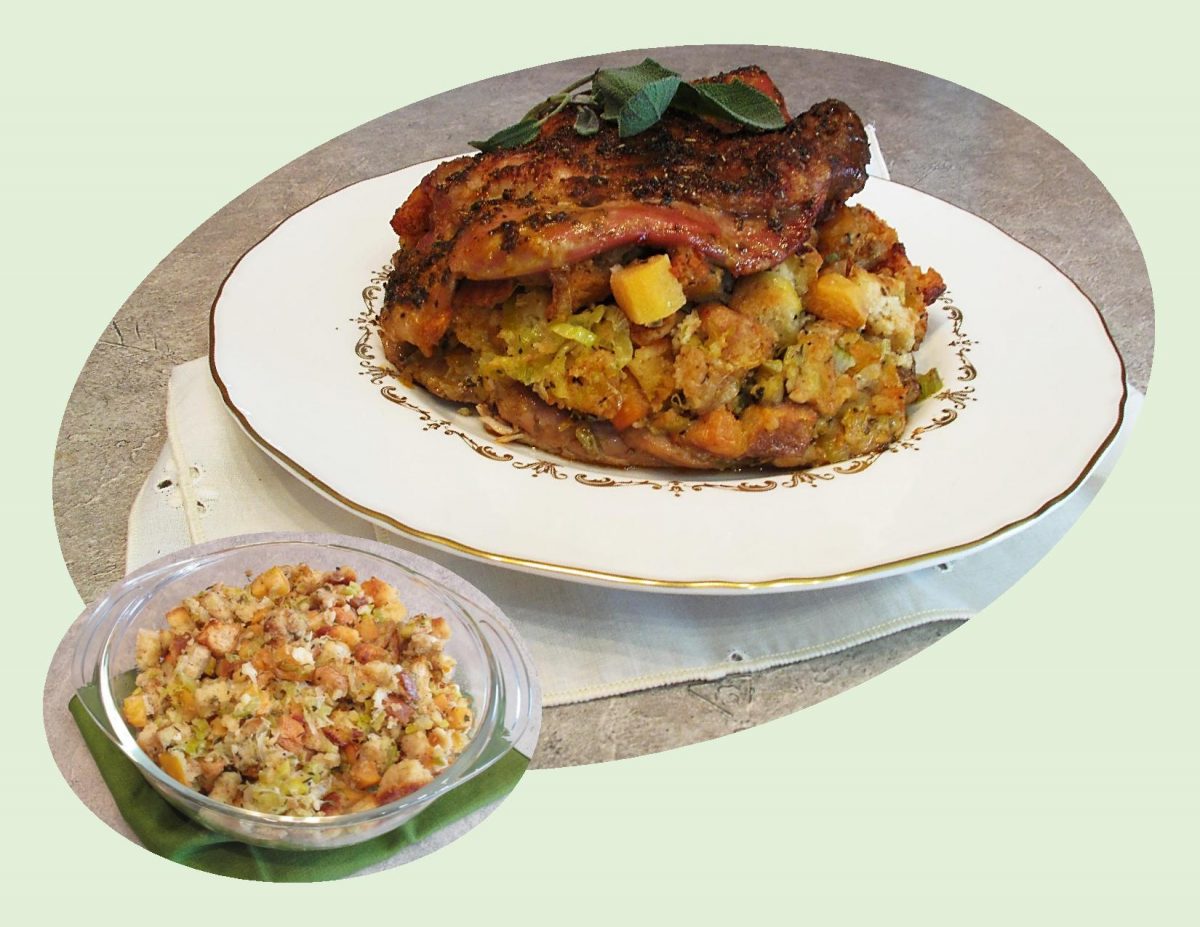
In acknowledgement to the USA Thanksgiving today (November 25th), I’m stuffing some turkey thighs with an interesting dressing containing persimmons & fresh sage. I know most people have their own traditional, go-to‘ stuffing recipes, but I’m hoping at least a few will venture from the norm and try a little persimmon in your stuffing. I can assure you, its worth it.

Print Recipe
Turkey Thighs w/ Persimmon Sage Stuffing
Instructions
Stuffing
  1. Preheat oven to 200 F. On a parchment or foil lined baking sheet, spread out the cubes of bread. Bake for about 10 minutes, until lightly toasted yet still pale in color. Set aside. Turn oven off until ready to bake ready to roast thighs if you wish.
  2. In a large saucepan or pot over medium heat, add 1 Tbsp olive oil & 1 Tbsp butter. When butter has melted, add the shallot, celery & leek. Cook until softened, about 10 minutes. Add garlic, sage, thyme & pepper; cook until mixture is fragrant, about 2 minutes.
  3. Pour in the broth and toss lightly until everything is completely mixed. Give the stuffing a taste & add salt to your personal taste. Fold in the beaten egg & cubed persimmons; toss lightly till combined.
Herb Butter
  1. In a small dish, combine all herb butter ingredients & set aside.
Assembly & Baking
  1. Arrange turkey thighs, skin side down on a work surface so they lay open & flat. Cover with plastic wrap, then pound lightly with a meat mallet to flatten to an even thickness.
  2. Preheat oven to 350 F.
  3. Discard plastic wrap; spread stuffing over 2 turkey thighs, leaving a 1/4-inch border around edge. Top each with a remaining turkey thigh. Butter a casserole dish with remaining butter & transfer any leftover stuffing to casserole dish, spreading it out evenly.
  4. Line a roasting pan with heavy duty foil paper. Grease foil on the bottom of pan & place the stuffed turkey thighs in roasting pan. Carefully spread HERB BUTTER over tops of stuffed thighs.
  5. Roast uncovered, basting occasionally, until thighs reach an internal temperature of 180 F. about 2 hours. Cover with foil if top browns too quickly. Bake the extra stuffing for about 30-40 minutes, until the top of the stuffing is golden brown.
  6. Remove turkey thighs from oven, tent with foil & allow to rest for about 5-10 minutes. Slice & serve.

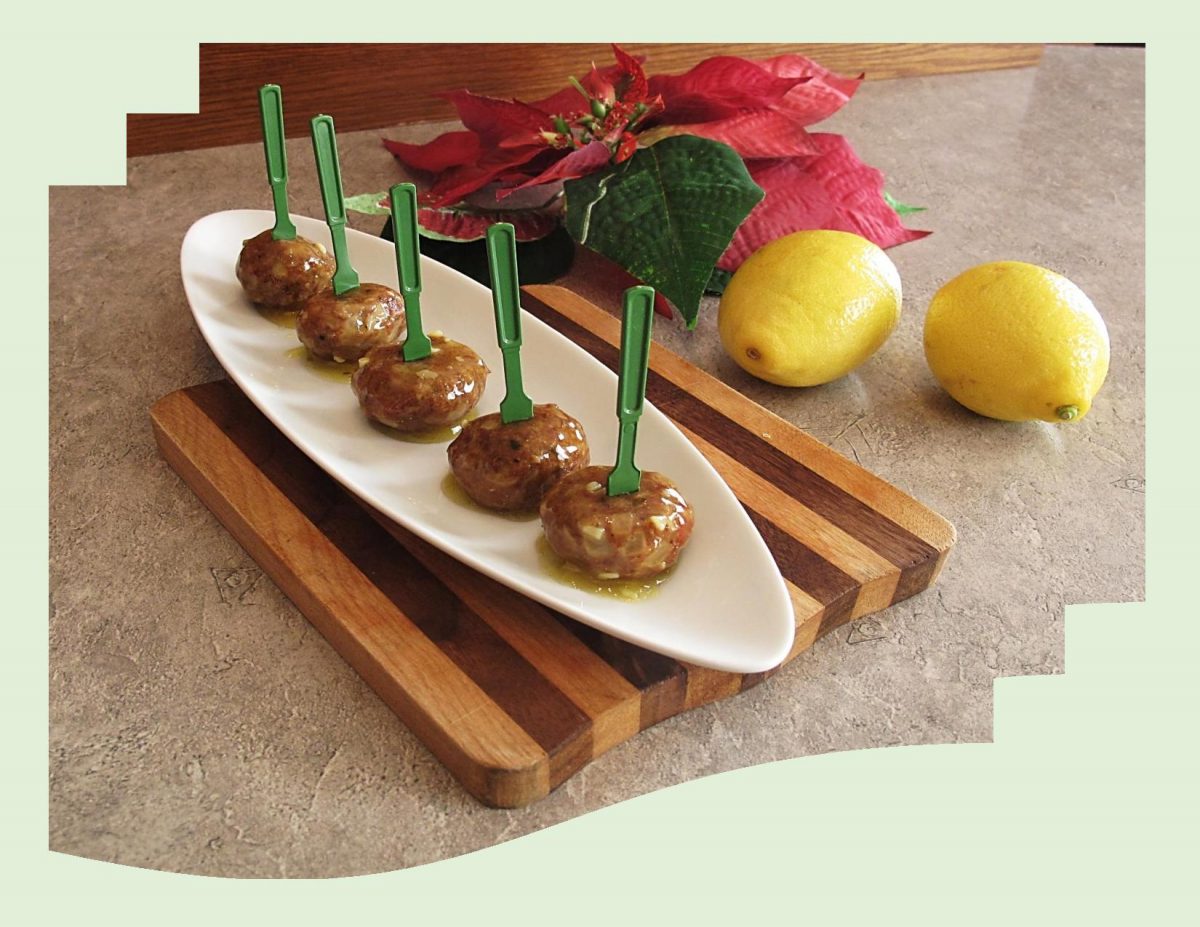
Lemon Chicken Meatballs

As I mentioned in the previous blog, new year’s eve food = finger food. I thought I’d post one other recipe for the occasion. Meatballs seem to check all the right boxes. Crispy, savory, spicy and can be eaten in a single bite. These lemon chicken meatballs are kind of an interesting blend of chicken and bacon. The lemon sauce is a bit unusual in that it uses lemon jelly powder but rounds out nicely with some garlic and ginger spice.

The idea of being able to do some of the prep work ahead of time always appeals to me. These meatballs can be made anytime and frozen raw or cooked. Just perfect when you are ready to serve them.

I’ve probably said this before, but deep fried food never appeals to me. Baking these little morsels still achieve’s a great taste. Hope you give them a try!

Print Recipe
Lemon Chicken Meatballs
Votes: 1
Rating: 5
You:
Rate this recipe!
Servings
Ingredients
Lemon Sauce
Servings
Ingredients
Lemon Sauce
Votes: 1
Rating: 5
You:
Rate this recipe!
Instructions
Meatballs
  1. Preheat oven to 350 F. Fry bacon until crisp & drain on paper towel. Crumble & set aside.
  2. To skillet, add onions & garlic. Saute & remove with a slotted spoon. In a large bowl, combine bacon, onions & garlic with remaining ingredients; mix well.
  3. Form into 1-inch size meatballs & place on a parchment lined baking sheet. Bake for 15-20 minutes.
Lemon Sauce
  1. In a small saucepan, combine dry jelly powder & cornstarch. Add broth, dressing, garlic & ginger; stir until jelly powder is dissolved.
  2. Cook over medium heat for 3 minutes or until sauce is thickened, stirring frequently. Pour over meatballs & stir to coat. Serve with picks.

Mushroom Quiche Lorraine

Are you aware that today, May 20th, the USA celebrates ‘National Quiche Lorraine Day’. It is one of their many ‘fun food holidays’. Who makes up these holidays is not clear but it gives a great excuse to enjoy this classic quiche.

In a strict sense, there are no national holidays in the United States. Each of the 50 states has jurisdiction over its own holidays. The federal government proclaimed ten holidays that most states observe on the same dates. These are called ‘legal’ or ‘public’ holidays.

Fun food holidays usually originate from and are promoted by industry groups, clubs, health organizations and occasionally individuals.

Over 50 years ago, Julia Child introduced us to French cuisine with her cooking series, The French Chef, on PBS television. Among the many dishes she introduced was the original or classic Quiche Lorraine.  

Quiche Lorraine (named for the Lorraine region of France) was originally an open pie with a filling of custard and smoked bacon. It was only later that cheese was added to this quiche. Today we have many variants to the original that include a wide variety of ingredients. Myself, I could eat quiche anytime, for any meal. This fun food holiday sure seems like a great idea. To our quiche Lorraine I am adding some mushrooms for a little extra flavor since we both enjoy them.


Print Recipe


Mushroom Quiche Lorraine

Votes: 1
Rating: 5
You:
Rate this recipe!

Course Brunch, Lunch
Cuisine American, French, German

Servings


Ingredients

Course Brunch, Lunch
Cuisine American, French, German

Servings


Ingredients

Votes: 1
Rating: 5
You:
Rate this recipe!


Instructions
  1. In a skillet, fry bacon. Remove from skillet & lay on paper towel. In bacon drippings, saute mushrooms, onions & garlic until moisture evaporates. Crumble bacon. Grate cheese.

  2. Preheat oven to 350 F. In a bowl, whisk together eggs, milk, salt, pepper & thyme. In the bottom of quiche shell place half of the grated cheese. Top with bacon, mushrooms, green onion & garlic. Carefully pour egg mixture over all. Bake for 35-45 minutes or until quiche tests done in center. Allow to sit for 5 minutes before serving.


Recipe Notes
  • If your using milk it will take a bit longer to bake but does cut down those calories.