Pasta shells, filled with a range of flavors and baked in a creamy sauce — what’s not to like? I think my love affair with stuffed pasta shells started somewhere in the 90’s. The versatility of this meal makes it king of the comfort food dinners served family style. Easy to prepare, makes everyone happy and are perfectly portioned for individuals and groups alike.
Another bonus, is that this meal can be prepared ahead of time and refrigerated. The concern with reheating pasta is always that the pasta will absorb any additional sauce or liquids as it is sitting in the fridge. In order to make this meal ahead of time, cook pasta and stuff shells but keep the sauce in a separate container. When ready to serve, microwave sauce just until its liquified, pour over pasta shells and bake until hot and bubbly.
Unbaked shells can be frozen for up to one month. To bake from the freezer, first thaw in the refrigerator, then let them stand at room temperature for 30 minutes. Cover and bake for 30 minutes, uncover; bake 10-15 minutes longer until bubbly.
The hickory smoked bacon in these pasta shells adds such a unique flavor to the turkey filling.
Print Recipe
Turkey & Hickory Bacon Stuffed Pasta Shells
Votes: 1
Rating: 5
You:
Rate this recipe!
|
|
Votes: 1
Rating: 5
You:
Rate this recipe!
|
Instructions
Sauce
In a small saucepan, melt butter; stir in flour & cook until lightly browned. Slowly whisk in chicken broth. Add mustard & cook until thickened, stirring constantly. Set aside.
Pasta & Filling
Cook pasta shells in boiling, salted water with a few drops of oil added for 10-12 minutes. Drain, rinse in cold water, drain again. Grate Gouda cheese. In a saucepan, fry bacon to a soft crisp stage, blot on paper towel & chop.
In a large bowl, combine ground turkey, onion, garlic, Parmesan, soy sauce, basil, thyme, 1/2 of chopped bacon, salt & pepper. Add a small amount of prepared sauce (to help to hold filling together).
Preheat oven to 350 F. Using a 9-inch baking dish, spread some sauce over the bottom. Divide turkey filling between shells. Place filled shells, single file in pan. Pour remaining sauce over all & top with remaining bacon. Sprinkle smoked Gouda cheese evenly over top. Cover & bake for 30-40 minutes or until filling is cooked.

It’s hard to think of Christmas without having shortbread. When I was growing up, fruitcake (or Christmas cake) and shortbread cookies were some of the staples associated with Christmas baking. Fruitcake has definitely become lost in the shuffle but it seems shortbread still remains. While the traditional shortbread consisted of three main ingredients — flour, sugar and butter, today it is flavored with any number of ingredients.
The first shortbread recipe appeared in a Scottish cookbook dated 1736. Early formulas called for yeast, but by 1850, most were utilizing only flour, sugar and butter combined in a ratio bakers still use today. Originally it started out as a twice-baked medieval bread roll that was dusted in sugar and allowed to harden. For a number of years, Scottish shortbread (biscuits) were classified as a bread by bakers so that they could avoid the tax placed on biscuits.
There are infinite variations on the classic version such as additions of nuts, alcohol, citrus zest, dried fruit, anise spice, floral water, chocolate, lemon curd, caramel or ganache.
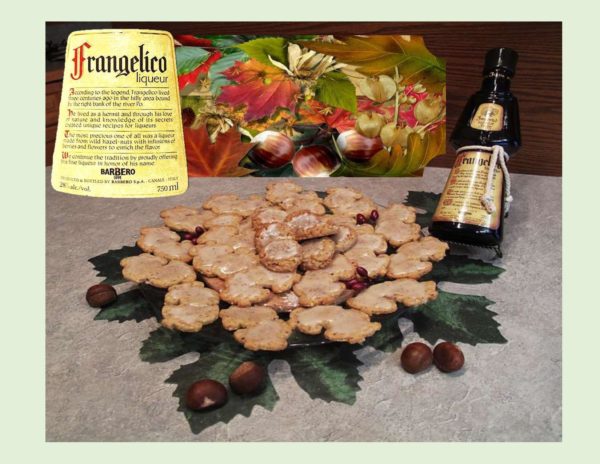
Some years ago, I started using a hazelnut liqueur in some of my Christmas baking. It adds a wonderful richness we really enjoy. My favorite is the Frangelico brand. It is distilled in the Piedmont region of northern Italy from an alcohol and water infusion of the nuts. Natural flavoring extracts such as cocoa and vanilla are added before blending with alcohol, sugar and water to meet the bottle strength. It’s origins go back over 300 years to the Christian monks who inhabited that area of Italy. The name Frangelico is derived from one of the monks, Fra. Angelico. The bottle itself, reflects this heritage, which looks like a glass monk complete with a rope belt. A bit pricey but if you are using it only for baking, the bottle lasts a long time.
This recipe was featured in a ‘Canadian Living’ magazine in December 2002. The perfect shortbread for the upcoming season.
Print Recipe
Hazelnut Liqueur Shortbread Cookies
Votes: 9
Rating: 3.67
You:
Rate this recipe!
|
|
Votes: 9
Rating: 3.67
You:
Rate this recipe!
|
Instructions
Shortbread
In a bowl, beat butter with sugar until light & fluffy followed by the liqueur & vanilla. Stir in cornstarch & salt. Next add flour, 1/3 at a time combining to make a smooth dough. Add nuts, then divide dough in half & chill until firm but not hard, about 30-60 minutes.
Roll out each disk of dough to a 1/4-inch thickness & chill again at least 30 minutes. Line a baking sheet with parchment paper. Cut into desired shapes, re-rolling scrapes. Place 1-inch apart on baking sheet; chill until firm, about 2 hours.
Preheat oven to 325 F. bake shortbread cookies for 15-20 minutes or until LIGHT golden. Remove from oven & place on cooking rack. Spread with glaze if desired.
Hazelnut Glaze
In a small bowl, whisk together powdered sugar, liqueur & 2 Tbsp water (adding more water if needed to make spreadable). Spread over shortbread cookies.
It seems we never get enough of taking just about anything we do to the next level. Case in point would be pizza dough. It started as a very thin, crispy crust and evolved into whatever thickness you wanted to make it. Enter the ‘stuffed’ crust with a ring of cheese encased in the outer edges of your pizza! Then, of course, the actual pizza fillings can be virtually anything that you choose or have available.
Bread sticks, on the other hand, aren’t something that have remained unscathed either. Probably the original simple design was ‘grissini’ (as they are known in Italy). Today’s bread sticks come in many forms from super crispy, thin ones to the larger ones often served with spaghetti and used to mop up excess sauce. Now, here’s where it gets one step better. Enter ‘homemade stuffed’ bread sticks. For inspiration all you have to do is think about all of your pizza toppings. Use them as options for either mixing into your dough or actually stuffing into a bread stick.
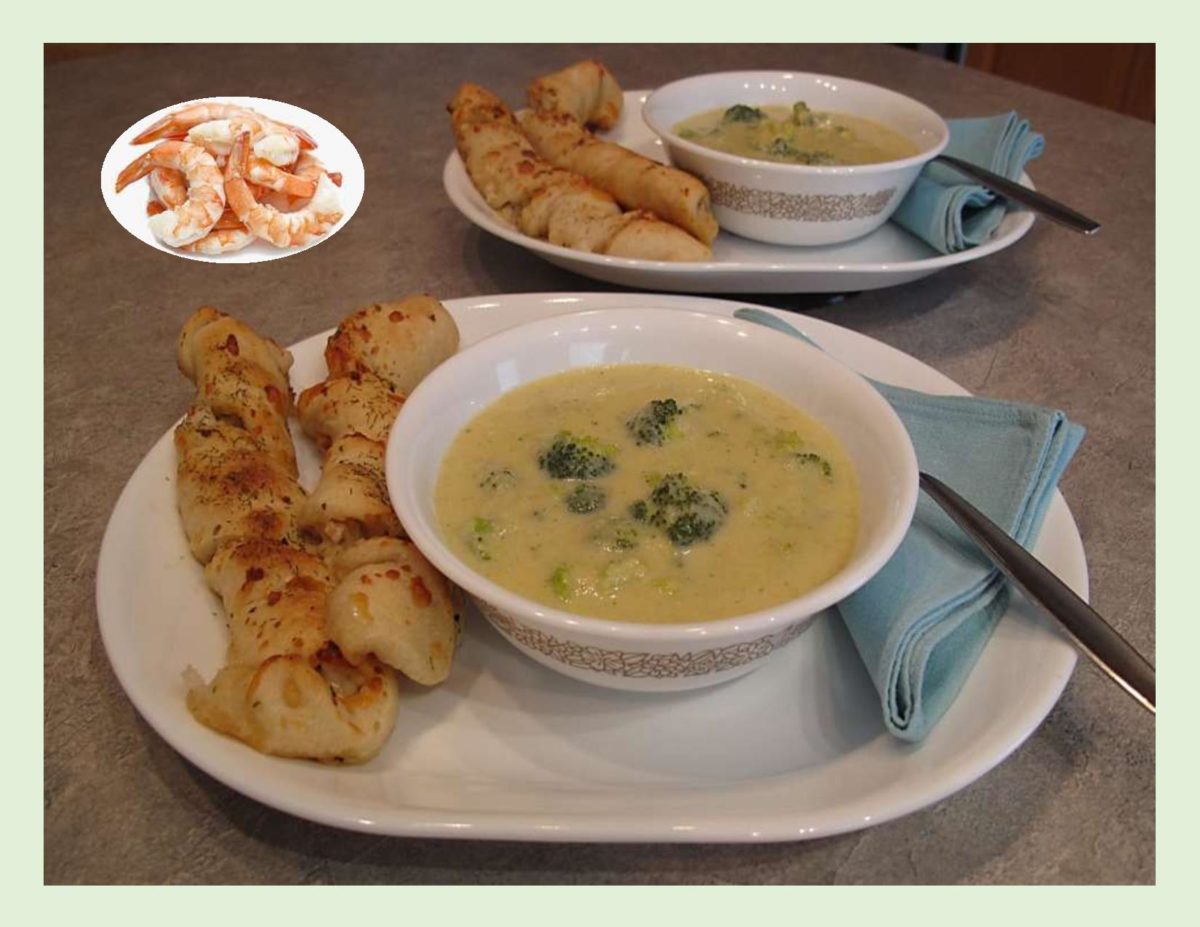
Being shrimp and Parmesan lovers, the natural thing for me to do was incorporate both into some bread sticks. The next step was to pair them with a nice light broccoli-cheddar soup. A match made in heaven even if I do say so myself.
Print Recipe
Parmesan-Shrimp Bread Sticks with Broccoli Cheddar Soup
Votes: 1
Rating: 5
You:
Rate this recipe!
Ingredients
Parmesan Shrimp Bread Sticks
Lite Broccoli Cheddar Soup
Ingredients
Parmesan Shrimp Bread Sticks
Lite Broccoli Cheddar Soup
|
Votes: 1
Rating: 5
You:
Rate this recipe!
|
Instructions
Parmesan Shrimp Bread Sticks
Combine all ingredients, in the order listed, in a bowl of a stand mixer fitted with a dough hook. Mix on medium-low until the dough comes together. Continue to mix on medium-low for 5 minutes to knead. Dough is ready when it is stretchy & smooth. Transfer the dough to an oiled bowl, cover with plastic wrap & allow to rise for about an hour or until doubled in bulk.
Bread Stick Filling
Peel, devein & slightly chop raw shrimp; place in a bowl. Grate & slightly chop fresh Parmesan cheese. Combine oil, minced garlic, spices & Parmesan cheese with chopped shrimp.
Preheat oven to 425 F. Line a baking sheet with parchment paper. Punch dough down; on a lightly floured work surface, press dough into roughly an 8 X 12-inch rectangle. Top with shrimp filling & sprinkle with dill weed. Slice lengthwise into 8 strips; fold each strip in half enclosing filling. Twist each strip slightly & lay on baking sheet. Top each bread stick with some grated mozzarella cheese (or you could put it on as soon as they come out of the oven). Bake for 7-10 minutes or until golden brown. Serve warm with soup.
Broccoli-Cheddar Soup
In a large saucepan, saute onion & garlic in olive oil until tender. Stir in flour; cook for 1 minute. Gradually whisk in broth. Bring to a boil; cook & stir for 1-2 minutes or until slightly thickened.
Add the broccoli, tarragon, thyme & pepper; return to a boil. Reduce heat; cover & simmer for 10 minutes or until broccoli is tender. Add milk; cook, uncovered 5 minutes longer. Remove from heat; cool to room temperature.
In a blender, process about half of the soup until smooth. Return to saucepan; heat through. Reduce heat. Add 100 grams of cheese; stir just until melted. Serve immediately, garnishing with remaining cheese.
Recipe Notes
- When time is of the essence and you need to speed up the process, use a tube of purchased refrigerated pizza or bread stick dough instead of making your own.

CELEBRATING OKTOBERFEST!
Even if it is a little hard to admit summer has ended and fall is officially here, Oktoberfest seems like a great little celebration to ease into the coming winter months.
Oktoberfest began as a wedding celebration more than 200 years ago in Munich, Germany, when Bavaria’s, Crown Prince Ludwig married Princess Therese of Saxony-Hildburghausen on October 12,1810. The wedding was celebrated with multiple days of drinking, feasting and horse races. Everybody had so much fun that it was resolved to repeat the celebration, which has been done, every year since.
Beer enthusiasts from all over the world flock to Munich for Oktoberfest, where they feast on everything from steins of beer to plates of sauerkraut, bratwurst, cabbage rolls, sausage and wiener schnitzel. Bavarian music fills the air to promote the fun atmosphere of Oktoberfest.
While the true celebration has to be experienced in Munich, there are actually some great Canadian events that try to duplicate the festivities without having to travel abroad. In different parts of the country this is a fun and social sampling event featuring many local craft and authentic Bavarian breweries as well as authentic food, Oktoberfest music, dancers, games, etc..
To acknowledge this holiday we are having a corned beef, cabbage & potato pizza with a rye bread crust. It seems a good mix of German-Canadian food to me ?!
Print Recipe
Corned Beef & Cabbage Pizza
Votes: 1
Rating: 5
You:
Rate this recipe!
Ingredients
Toppings
- 3 tbsp olive oil, divided
- 1 large potato, thinly sliced, spiced & baked
- 1/4 Tsp EACH paprika, crushed rosemary, garlic powder, pepper & salt
- 150 grams sauerkraut with juice
- 1 small red onion, diced small
- cornmeal
- 100 grams monterey jack cheese, grated
- 170 grams corned beef, cooked & diced
- 50 grams mozzarella cheese, grated
- 40 grams Parmigiano-Reggiano cheese, grated
- 1 cup Russian dressing
|
Votes: 1
Rating: 5
You:
Rate this recipe!
|
Instructions
Rye Pizza Crust
In a bowl, combine flours & salt. Pour 1/2 cup water into a microwave-safe bowl; heat for 30 seconds. Stir brown sugar into water until dissolved; add yeast & stir. Let mixture stand about 10 minutes, until bubbly. Pour yeast mixture into flour mixture. Pour remaining 1 cup of water into microwave-safe bowl; heat for 30 seconds.
Stir olive oil into warm water; pour over flour mixture. Knead flour mixture, adding more all-purpose flour if dough is sticky, until dough is smooth & holds together. Form dough into a ball & place in a buttered bowl. Cover with a tea towel & let rise in a warm place about an hour or until doubled in size.
Fillings
Preheat oven to 425 F. Toss thinly sliced potato with 2 Tbsp olive oil in a plastic bag. Combine paprika, rosemary, garlic powder, salt & pepper; add to potato slices & toss again. Roast in a single layer on a baking sheet about 10-15 minutes. In a skillet, add sauerkraut with juice & diced onion. Simmer for a few minutes until onion is tender. Drain well; set aside to cool slightly.
Assembly
Punch down dough. Sprinkle a 14-inch pizza pan with cornmeal & press dough out to fit pan. Top crust with monterey jack cheese, corned beef & onion/sauerkraut mixture. Lay roasted potato slices to cover pizza then sprinkle with mozzarella & Parmesan cheeses. Bake pizza for 12-15 minutes or until golden & crispy. Once pizza is done baking, drizzle with Russian dressing & slice.

Italian prune plums or sometimes called Empress plums, are different from the traditional round red and black skinned plums we see in the grocery stores. Sporting a dusky purple skin and a tart, lemony green flesh, these European fruits are ripe for harvest by the end of August to the beginning of September. This particular plum is prized throughout Germany and plays a big role in the German kitchen. Although it has a bit of a sour taste, it is very versatile in making juice, jam, cakes, dumplings as well as Slivovitz — a famous Schnapps.
I remember my mother making these plums as a stewed fruit to be served with yeast dumplings ( see my blog on German Hefekloesse from Nov. 6/2016).
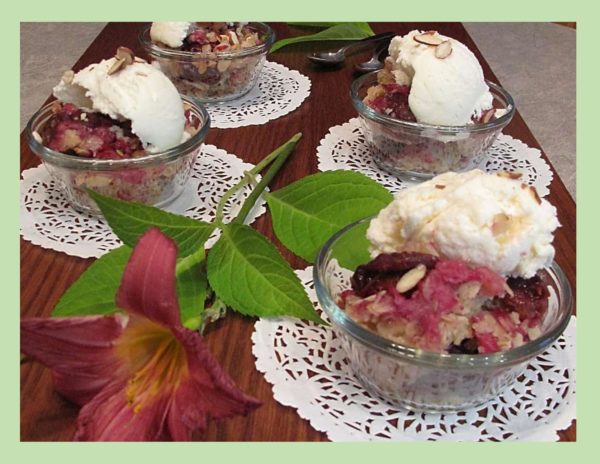
Now that the Italian plums have come into season, I’m taking this opportunity to bake some for our dessert today. Top them with a nice simple crumble mixture, bake and serve hot. Of course, what would they be without ice cream!
Print Recipe
Italian Plum Crisp
Votes: 4
Rating: 4.5
You:
Rate this recipe!
|
|
Votes: 4
Rating: 4.5
You:
Rate this recipe!
|
Instructions
-
Place plum halves, cut-side up, in a baking dish & drizzle with lemon juice. In a small bowl, combine topping ingredients, working with fingers until crumbly. Pile topping mixture into 'pit' holes. Bake about 20-30 minutes until topping is golden brown & bubbling. Serve hot with a scoop of vanilla ice cream.

Its already late August so BBQ’s and salads are in full swing. There’s just something about cooking food outdoors on the grill that we Canadians absolutely love. If your a true BBQ lover, it doesn’t matter if its a block away, you will still catch that glorious smell.
BBQ season is not only for meat eaters. Just about any vegetable as well as numerous desserts can be cooked on the grill. For me, I love seafood, fish & chicken, for Brion, I guess I would have to add a bit of pork and beef.
This meal is a nice combination of shrimp, Parmesan zucchini and pasta salad. I kept the pasta salad real simple since we already had a vegetable. To give it some extra pizzaz, I made a roasted red pepper sauce which the little orecchietti pasta cups nicely. Nothing fancy, just plain good!
Print Recipe
Shrimp Kabobs with Orecchietti Pasta Salad
Votes: 1
Rating: 5
You:
Rate this recipe!
Ingredients
Quick Roasted Red Pepper Sauce / Pasta
Ingredients
Quick Roasted Red Pepper Sauce / Pasta
|
Votes: 1
Rating: 5
You:
Rate this recipe!
|
Instructions
Red Pepper Sauce
In a food processor, blend red roasted peppers along with 2 Tbsp of liquid from the jar. Puree the peppers until smooth, adding a Tbsp or two of water if needed to help it blend ( avoid adding too much liquid from the jar as it can be very acidic). Mince the garlic & add it to a skillet with the butter. Saute for 1-2 minutes or just until garlic has softened but not brown. Pour in the pureed peppers; add basil & pepper & stir to combine.
Allow sauce to come to a simmer; turn heat to low & simmer about 10 minutes, stirring often, until mixture thickens. Add cream, stirring until smooth. Meanwhile, cook pasta in salted boiling water until al dente about 12-13 minutes. Drain & add to sauce. Serve warm or cold.
Marinated Shrimp
In a bowl, whisk together all shrimp marinade ingredients; add shrimp & marinate at least 30 minutes.
Parmesan Zucchini
Prepare zucchini. In a bowl, combine Parmesan & garlic powder. Melt butter; toss zucchini slices in butter then coat with Parmesan mixture. On wooden skewers, alternate marinated shrimp with cubes of Parmesan zucchini. Roast in oven or on BBQ until shrimp is pink & cooked being careful not to overcook. Serve with orecchiette pasta salad.
Recipe Notes
- This tomato-free sauce could also be used as an alternative to a traditional pizza sauce.

You guessed it —- more roasted fruit! It seems to be my addiction this summer. This time its not that I had fruit on hand but instead some mascarpone cheese. Who would dream of letting that go to waste?? Sometimes called Italian Cream Cheese, mascarpone is believed to have originated in the Lombardy region of Italy. Mascarpone is used in both sweet and savory dishes to enhance the flavor without overwhelming the original taste. Lombardy has a rich agricultural and dairy heritage. Farms that produce the cheese provide their cows with special grasses that include fresh herbs and flowers. This in turn gives a unique taste to the milk and a creamy texture to the cheese.
Some years ago, Brion and I visited the Lombardy region of Italy. We have great memories of the wonderful food but probably even more so the beauty of the architecture and history. We spent a bit of time in Milan. While there we visited the world renowned ‘La Scala’ opera house and museum as well as the glass roofed shopping arcade and giant cathedral, the ‘Gothic Duomo’. I’ve included some of our photos from Milan for you to enjoy.
Print Recipe
Roasted Summer Fruit with Spiced Mascarpone Cream
Votes: 1
Rating: 5
You:
Rate this recipe!
|
|
Votes: 1
Rating: 5
You:
Rate this recipe!
|
Instructions
In a skillet, toast almonds until golden, about 5 minutes. Transfer to a plate to cool.
Preheat oven to 400 F. In a small roasting pan, toss together all prepared fruit, half of the sugar, the brandy & butter. Roast, stirring occasionally, until for tender, about 15-20 minutes.
While fruit is roasting, beat together mascarpone, remaining sugar, vanilla, ginger & cardamom until smooth. In a separate bowl, whip cream; fold into mascarpone mixture along with half of the almonds.
Divide mascarpone mixture into dessert dishes forming a mound in each. Spoon fruit & pan juices over top. Sprinkle with remaining almonds.
-
Recipe Notes
- You can prepare the fruit & cream ahead. Just keep them in separate dishes; cover & refrigerate for up to 4 hours.

Definitely, roasted fruit is one of my favorite summer desserts. It becomes so intense when its been sizzling and caramelizing at a high temperature. Roasted strawberries are one fruit that can take any dish to the next level. Along with the fact that it will stain even the palest berries to a ruby red, the subtle use of aromatic ingredients like lemon, vanilla or rose water can breathe new life into your bland unripe berries. Another added bonus is that the seeds add a little crunch to the tender, supple structure of a roasted strawberry.
I wanted to make something quick and easy for dessert today. I just happened to have some strawberries on hand why not roast them. A while back I saw an idea on youtube.com with strawberries and of all things, the famous chocolate hazelnut spread, ‘Nutella’. I have to be honest, I have maybe only tasted it once or twice but what the heck! Of course, you guessed it, I would first want to read up on its history. You maybe know all this but—– It seems it all started with the same Italian family that gave us the glorious ‘Ferrero Rocher’ chocolates. Nutella was invented during WWII when the war had created a chocolate shortage.
In 1925, Italian chocolatier, Pietro Ferrero, perfected the so-called ‘pastone’ (pastry mesh) of chocolate and hazelnuts. The Piedmont region of Italy, which his family called home, is famed for its delicious and abundant hazelnuts. In 1946, he created pasta giandja (or giandujot) which was made in a small hard loaf or bar, wrapped in aluminum foil and could be sold at a cheaper price. This chocolate could be cut into slices to eat on bread which formed a big part of the diet at the time. In 1949, a spreadable version called supercrema gianduja was intoduced, which was later renamed ‘Nutella’ in 1964. The name gave the product international appeal. It said ‘nuts’ and it also said Italy — ‘ella’ being a common affectionate ending in Italian such as in mozzarella cheese, tagliatella (a form of pasta) or caramella (a sweet).
Fifty years on, the company is the number one user of hazelnuts worldwide. Interesting! OK, now on with the pastries.
Print Recipe
Roasted Strawberry & Hazelnut Pastries
Votes: 1
Rating: 5
You:
Rate this recipe!
|
|
Votes: 1
Rating: 5
You:
Rate this recipe!
|
Instructions
Roasted Strawberries
Preheat oven to 375 F. Slice off blossoms; leave small & medium berries whole, cutting largest ones in half. In a glass baking dish, toss with sugar, salt & lemon juice.
Roast, stirring once or twice, for about 30-40 minutes, long enough for the berry juices to thicken but not burn. Remove from oven; add vanilla & rose water. Set aside until ready to use.
Pastries
On parchment paper, lay out sheet of puff pastry. At one end of the pastry, spread hazelnut cream& top with cooled roasted strawberry 'jam'. Below the chocolate/strawberry mixture make 5 slices so you end up with six strips. Starting at top where the filling is, roll up pastry & join the two ends together to make a wreath.
Adjust oven to 400 F. Brush with egg wash , sprinkle with chopped hazelnuts. Lift wreath ON the parchment paper to baking sheet & bake for about 20 minutes or until golden brown.
