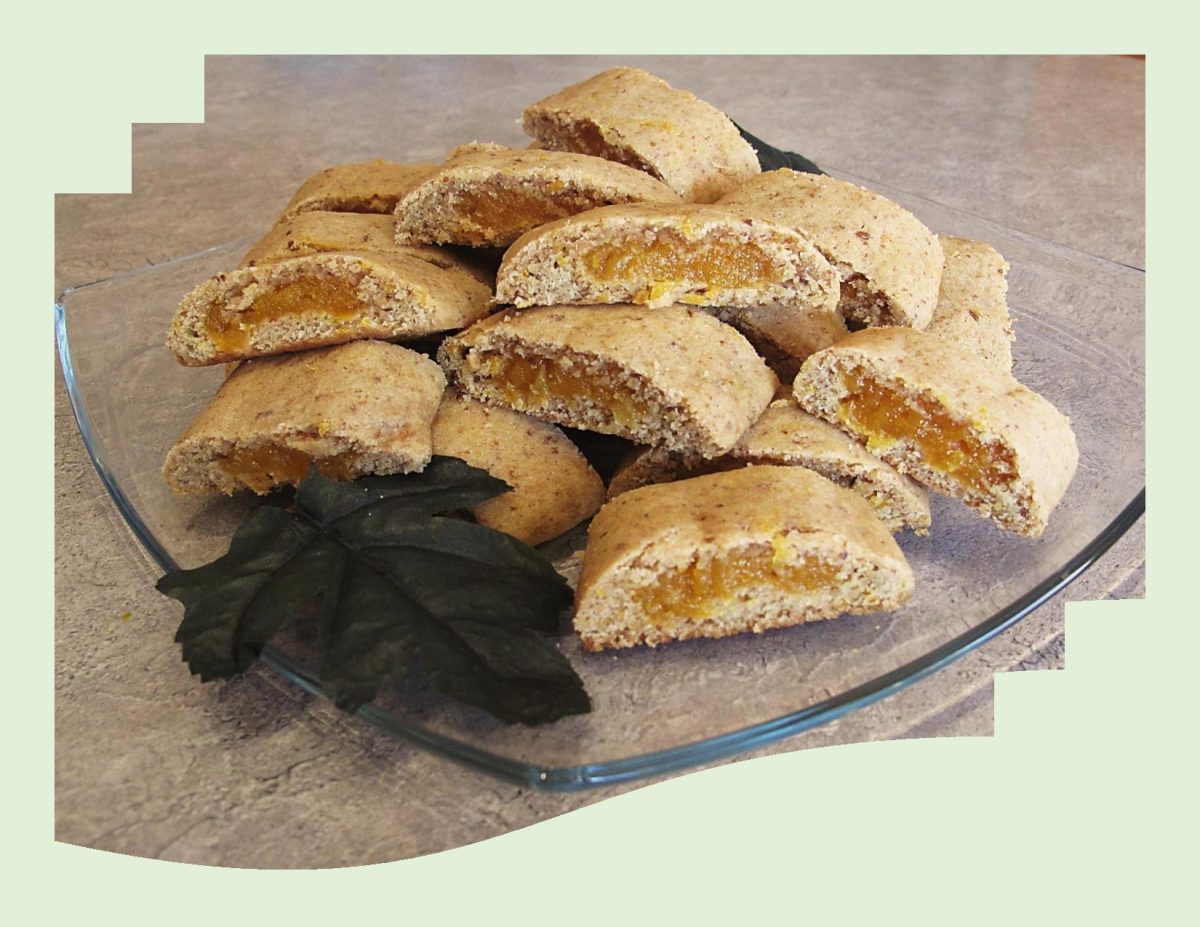
Apricot Orange Newtons

Do you recall the iconic Fig Newton? For some, fig newtons were the loser cookie – the one you would only eat out of pure desperation if there was nothing else resembling dessert in sight. What could be worse than mysterious, brown fruit ‘goo’ wrapped up in flavorless, dry ‘cake’? They felt that it was not a treat, it was a healthy breakfast disguised as a cookie.

I really don’t remember eating any amount of fig newton cookies myself, probably because my mother always baked. When I did finally taste them as an adult, I actually liked them. Maybe that had something to do with my love for figs or maybe I just like cookies…not sure!

The ‘fig newton’ was one of the earliest commercially baked products in North America. Introduced by the Kennedy Biscuit Company in 1891, fig newtons were named after the town of Newton, Massachusetts, which was near the factory that first produced the cookie commercially. Kennedy Biscuit eventually merged with several other bakeries to form the National Biscuit Company, now known as Nabisco.

The recipe for the fig filling was the brainchild of Charles M. Roser, a cookie maker born in Ohio, USA. Roser worked for a bakery in Philadelphia who sold his recipe to the Kennedy Biscuit company.

The manufacture of fig newtons was made possible by the creation of Florida inventor James Henry Mitchell, who revolutionized the packaged cookie business by building an apparatus that could make a hollow cookie crust and fill it with fruit preserves. His machine worked like funnel within a funnel; the inside funnel supplied jam, while the outside funnel pumped out the dough. This produced an endless length of filled cookie, which could then be cut into smaller pieces. 

Original fig newtons were the only variety available until the 1980s and as of 2012, Nabisco now makes several varieties of the ‘newton’, which, in addition to the original fig filling, include versions filled with apple cinnamon, strawberry, raspberry, blueberry and mixed berry.

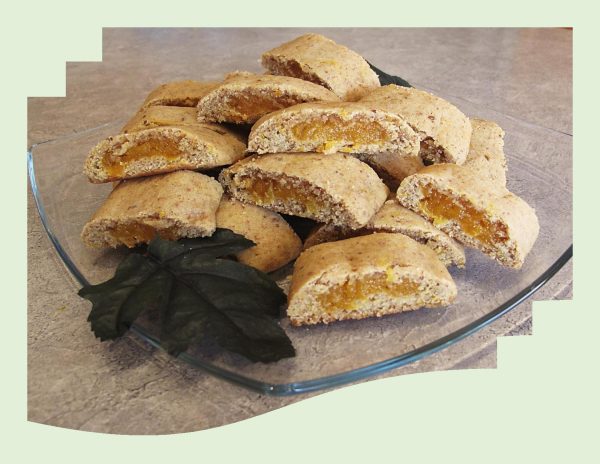
As Nabisco likes to remind us, ‘newtons aren’t just cookies’, they’re fruit and cake. Bringing me to the idea of apricot newtons. There seems to be numerous versions of them around so we shall see how these one turn out.
Print Recipe
Apricot Orange Newtons
Votes: 1
Rating: 5
You:
Rate this recipe!
Course dessert
Cuisine American
Servings
Ingredients
Dough
Filling
Course dessert
Cuisine American
Servings
Ingredients
Dough
Filling
Votes: 1
Rating: 5
You:
Rate this recipe!
Instructions
Dough
  1. Whisk the flours, baking powder, cardamom & salt together in a medium bowl.
  2. Beat the butter & brown sugar in the bowl of a stand mixer fitted with the paddle attachment on medium speed until light & fluffy, about 3 minutes. Stop the mixer & add the egg & vanilla. Finely grate the zest of the orange into the bowl (save the zested orange for the filling). Beat on medium speed until incorporated. Stop the mixer & scrape down the sides of the bowl & the paddle with a rubber spatula.
  3. Return the mixer to low speed, gradually add the flour; mix until just combined (the dough will be very soft and sticky). Scrape the dough onto a sheet of plastic wrap & press into a disk about 1-inch thick. Wrap the disk tightly in the plastic wrap & refrigerate until firm, but still pliable, about 2 hours. Meanwhile, make the filling.
Filling
  1. Place the apricots in the bowl of a food processor fitted with the blade attachment & process until finely chopped, about 30 seconds. Transfer the mixture to a small saucepan. (No need to wash out the food processor; you will use it again.)
  2. Juice the zested orange and add 2 tablespoons of the juice to the pan. Add the water & honey. Heat the mixture over medium heat, stirring occasionally, until the apricots plump up and all the liquid is absorbed, about 4 minutes.
  3. Transfer the mixture back to the food processor and process into a smooth paste, about 1 minute. Let the mixture cool completely.
Assembly
  1. Line a baking sheet with parchment paper & set aside. Transfer the cooled apricot mixture to a piping bag or resealable plastic bag.
  2. Dust a work surface generously with flour. Unwrap the disk of dough and cut it into 3 equal pieces (about 6 1/2 oz (185 gm) each). Place one piece on the work surface, rewrap the other 2 pieces back in plastic wrap; refrigerate those 2 pieces.
  3. Reshape the remaining piece of dough into a log about 2 inches wide and 4 inches long. Place the log with the short side facing you, generously dust the top with flour, and roll into a 1/2-inch-thick rectangle about 4 inches wide and 12 inches long.
  4. Using kitchen shears, snip off a bottom corner of the plastic bag or piping bag. Pipe enough filling down the center of the piece of dough so that it is 1-inch wide and 1/4-inch thick.
  5. Using a bench scraper, scrape up the right side of the dough & gently fold it over the center so it reaches the middle of the filling. Repeat with the left side of the dough. Gently pat the top of the dough down with your hands, pinching it together as needed, so that it completely covers the filling and flattens slightly. (It should now be in a Fig Newton shape.)
  6. Cut the filled dough in half crosswise. Using the bench scraper, carefully flip each piece over & transfer to the baking sheet so that it is seam-side down. Repeat with the rolling & filling of the remaining 2 pieces of dough, using flour as needed to prevent the dough from sticking. You will end up with 6 filled & shaped pieces of dough on the baking sheet, so space them in 2 rows of 3 each, about 2 inches apart.
  7. Chill the logs for at least 30 minutes or up to 1 hour. Meanwhile, arrange a rack in the middle of the oven and heat to 350 F.
  8. Bake until just lightly browned around the edges, 15 to 17 minutes. Cut each bar crosswise into 5 pieces and let cool completely. Store in an airtight container for up to 5 days.
Poinsettia Cookie Wreath

There are certain plants that play important and often mysterious roles in holiday traditions and celebrations all over the world. From the Egyptians who decorated trees during the winter solstice, to the Pagans and Druids who used mistletoe in their winter customs, stories of ritualized plant use span continents and history and have become infused into the mythologies that span generations. I’ve always wondered how poinsettias and Christmas became intertwined. After a bit of research this is what I found.

It seems the story behind poinsettias is rich in history and lore. The vibrant plants are native to the rocky canyons of Guatemala and Mexico. Poinsettias were cultivated by the Mayans and Aztecs, who valued the red bracts as a colorful, reddish-purple fabric dye, and the sap for its many medicinal qualities.  The poinsettia was first associated with Christmas in southern Mexico in the 1600s, when Franciscan priests used the colorful leaves and bracts to adorn extravagant nativity scenes.

There is an old Mexican legend about how Poinsettias and Christmas come together, it goes like this:

There was once a poor Mexican girl called Pepita who had no present to give the baby Jesus at the Christmas Eve services. As Pepita walked to the chapel, sadly, her cousin Pedro tried to cheer her up.
‘Pepita’, he said, ‘I’m sure that even the smallest gift, given by someone who loves him will make Jesus happy.’

Pepita didn’t know what she could give, so she picked a small handful of weeds from the roadside and made them into a small bouquet. She felt embarrassed because she could only give this small present to Jesus. As she walked through the chapel to the altar, she remembered what Pedro had said. She began to feel better, knelt down and put the bouquet at the bottom of the nativity scene. Suddenly, the bouquet of weeds burst into bright red flowers, and everyone who saw them were sure they had seen a miracle. From that day on, the bright red flowers were known as the ‘Flores de Noche Buena’, or ‘Flowers of the Holy Night’.

The shape of the poinsettia flower and leaves are sometimes thought as a symbol of the Star of Bethlehem which led the Wise Men to Jesus. The red colored leaves symbolize the blood of Christ. The white leaves represent his purity.

Although it doesn’t pre-date Christianity like its Christmas counterparts, the holiday season wouldn’t be the same without the reds and greens of the poinsettia.

Print Recipe
Poinsettia Cookie Wreath
Instructions
Poinsettia Cookies
  1. In a large bowl, beat the cream cheese, butter, sugar & flavorings with an electric mixer on medium-high speed until light and fluffy, about 2 minutes, scraping down the bowl with a rubber spatula as needed.
  2. Reduce the mixer speed to low and beat in the flour & salt until combined. Divide the dough between 2 large pieces of plastic wrap. Flatten each into a 1/2-inch-thick disk and wrap. Refrigerate until firm, at least 1 hour or overnight.
  3. Line two baking sheets with parchment.
  4. Roll out 1 disk of dough between 2 heavy sheets of plastic wrap into a square about 1/8 inch thick. You should be able to cut (9) 3-inch squares from it as well as have some edges left for making about 18 leaves. Re-wrap & refrigerate dough scraps while you shape the poinsettias.
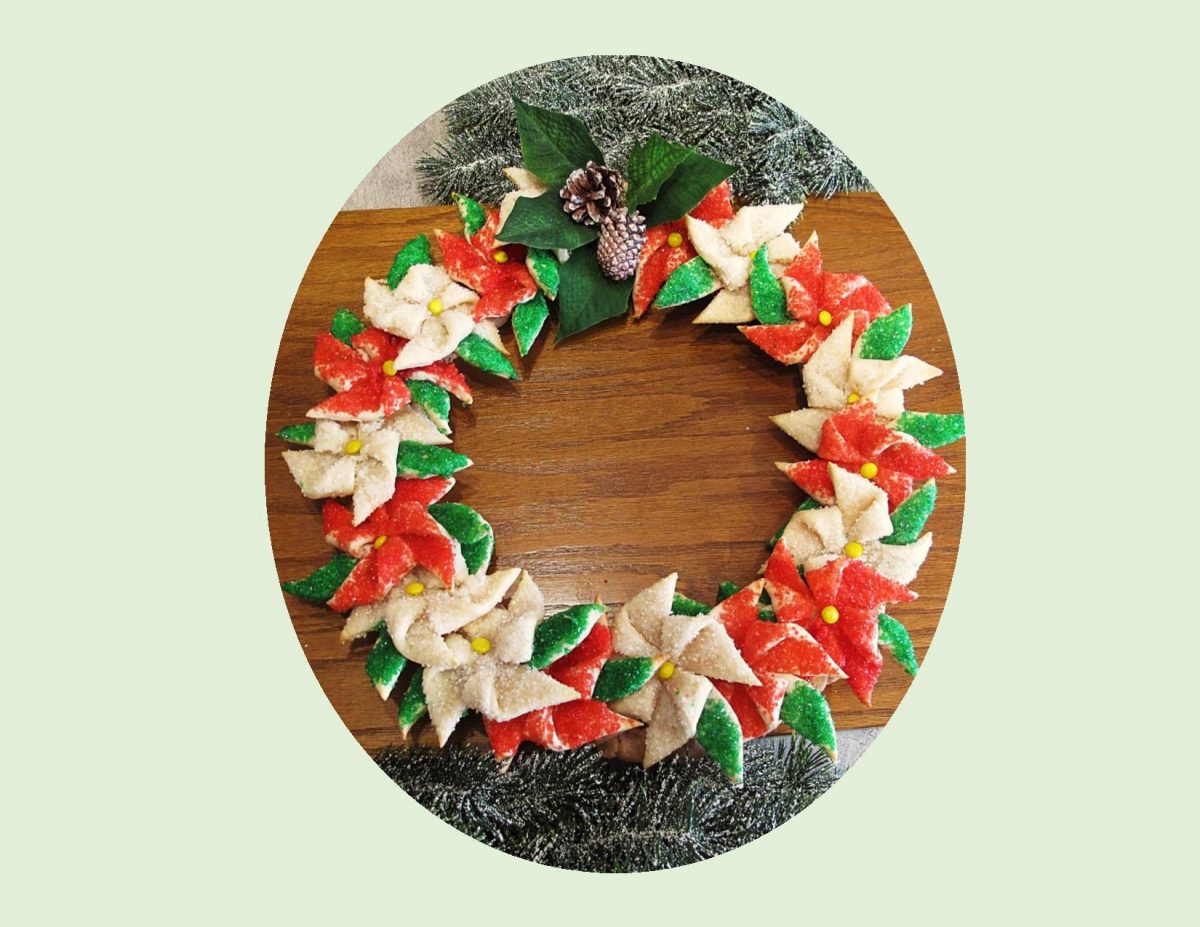
  5. Cut a 1 1/2-inch slit in all four corners of each dough square to form 8 points. Fold over every other point, moisten tip with egg white & press into the center of the square. Arrange cookies on prepared cookie sheet. Refrigerate while you repeat the same procedure with the other disk of dough. 
  6. Cut enough leaves out of the scraps using a sharp knife or a leaf-shaped cutter, making 2 leaves for each poinsettia. Arrange the leaves on plate & lightly brush with egg white, then sprinkle with green sanding sugar. Set aside in the refrigerator.
  7. Preheat the oven to 350 F.
  8. Lightly brush the poinsettias with egg white & sprinkle half with red sanding sugar & half with white sanding sugar. Brush the ends of 2 leaves & tuck underneath each poinsettia on opposite sides. (No need to press the dough; it will meld together as it bakes.) 
  9. Bake, rotating the baking sheet halfway through, until the cookies are puffed and the edges are golden, 20 to 25 minutes. Immediately press a yellow (chocolate) candy in the center of each warm cookie. Let cool 5 minutes, then transfer the cookies to a wire rack to cool completely.
Assembly
  1. Using a bit of gel paste from a purchased tube, anchor each cookie in place on top of wreath base to form 'poinsettia wreath'. Finish with adding a ribbon or some holly leaves & pinecones or personalize to your own taste.
Recipe Notes
  • I like to save the heavy plastic wrap from frozen puff pastry for recipes like this. When you roll the dough between two sheets of plastic wrap as opposed to using flour on your board, it really keeps the dough from becoming so dry.
  • I found if I took the poinsettia cookies out of the oven about 5 minutes before they were finished baking & pressed the candy center in then returned them to the oven, the candies stuck to the cookies better.

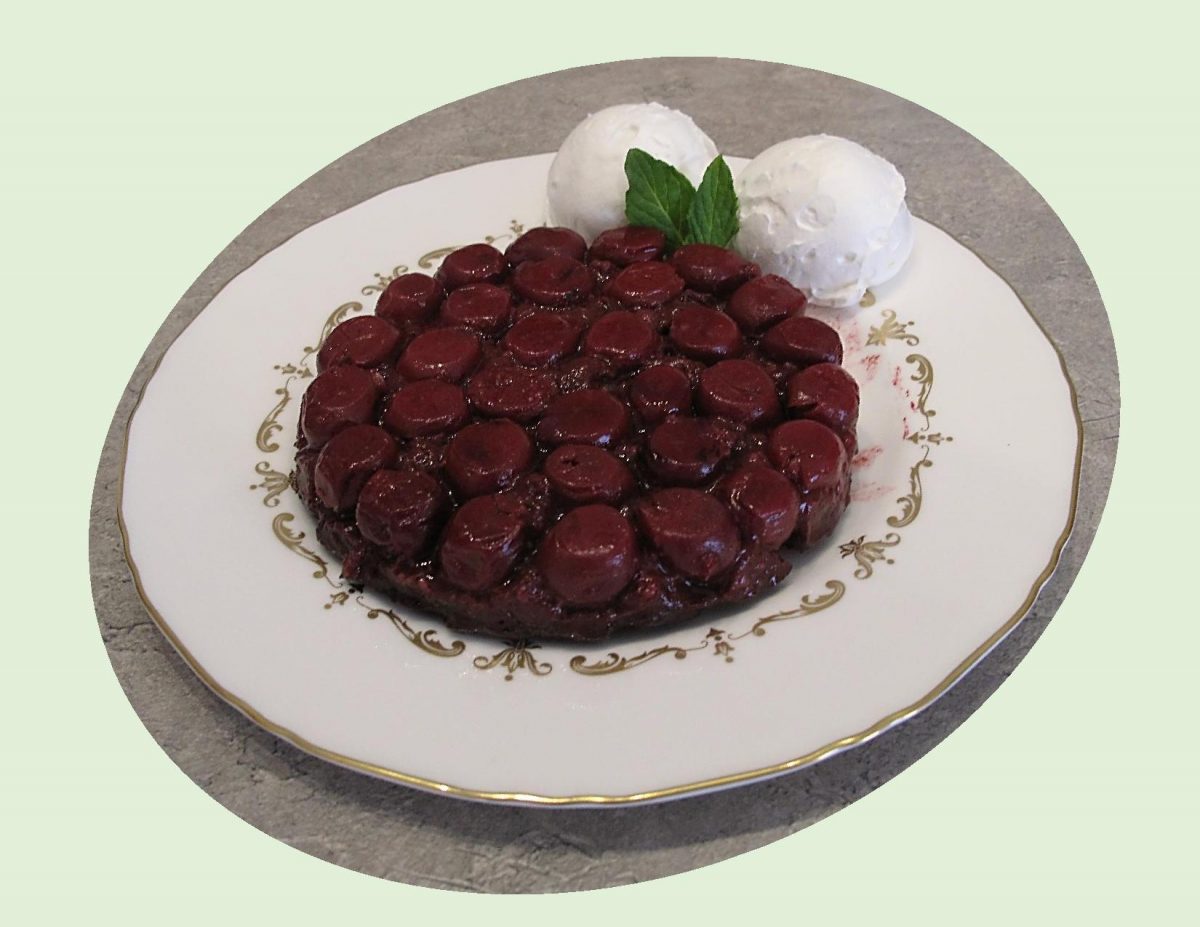
Black Forest Desserts

While the origins of the black forest cake aren’t all that clear, some historians believe that its origins can be traced back to the Black Forest Region of Germany. This part of Germany is well known for its sour cherries and ‘Kirschwasser‘ … a clear cherry brandy.

This iconic creation is a layered confection of a liqueur ‘soaked’ chocolate cake with rich whipped cream and sour cherries between its layers. The liqueur and cherries give the cake an intense and unique fruity flavor. It’s these sour cherries which gave it its German name: Schwarzwald Kirsch Kuchen or Black Forest Cherry Cake.

There are many origin stories about the cake. Some sources claim that the name of the cake is inspired by the traditional custom of the women of the Black Forest region, with a characteristic hat with big red pom-poms on top called a ‘Bollenhut’. The earliest published written record of black forest cake was in 1934, by a German confectioner. Today, the cake is well known worldwide and probably one of the most popular cakes in Germany.

Since we just happen to have a nice little sour cherry tree growing in our garden, why not put some of them to good use in these cakes?!

Print Recipe
Black Forest Desserts
Votes: 1
Rating: 5
You:
Rate this recipe!
Course dessert
Cuisine German
Servings
Ingredients
Course dessert
Cuisine German
Servings
Ingredients
Votes: 1
Rating: 5
You:
Rate this recipe!
Instructions
  1. Preheat oven to 350 degrees.
  2. Place 1 tablespoon butter, 1 tablespoon brown sugar, and 1/2 teaspoon cherry juice in the bottom of each of two 8-ounce ramekins. Microwave ramekins until butter and brown sugar are melted and bubbling, about 1 minute. Arrange cherries in a tightly packed layer in the bottom of each ramekin.
  3. In a small bowl, whisk together flour, cocoa, baking powder, and salt. In another small bowl, stir together 2 tablespoons butter and 1/3 cup brown sugar with a wooden spoon until light and fluffy, about 3 minutes. Stir in egg yolk, then flour mixture and milk. Divide batter between ramekins.
  4. Place ramekins on a rimmed baking sheet. Bake until a toothpick inserted in center of a cake comes out with only a few crumbs attached, about 30 minutes. Let cool on a wire rack, 20 minutes.
  5. In a small bowl, beat cream, 1 tablespoon brown sugar, and cherry brandy until soft peaks form. Run a paring knife around edge of each cake and invert onto a plate. Serve cakes with brandy whipped cream.
Recipe Notes
  • Kirschwasser is German for 'Cherry Water', and while it may be as clear as water, it packs quite a punch.  This double distilled brandy made from the sour Morello cherries is, more often than not, simply referred to a Kirsch. This 'not too sweet with a subtle cherry/almond flavored' liqueur is a vitally necessary ingredient to make a traditional Black Forest Cake; for that is where both the cake and Kirschwasser hail from...  The Black Forest, or Schwarzwald, in southwestern Germany.  

Lemon Cardamom Crinkle Cookies

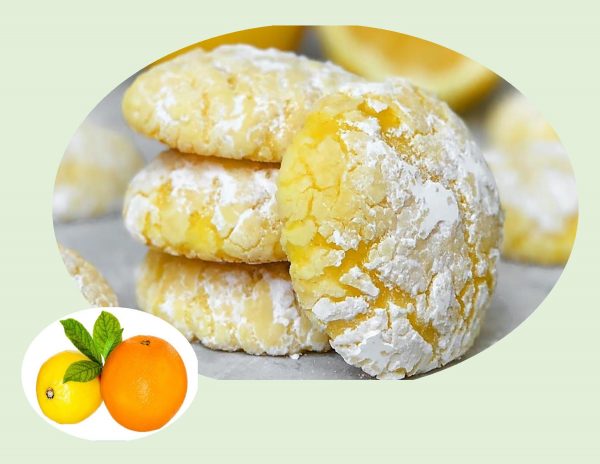
The flavor of lemon always seems to give such a refreshing taste to everything its used in. I think these lemon crinkle cookies are just perfect for celebrating spring.

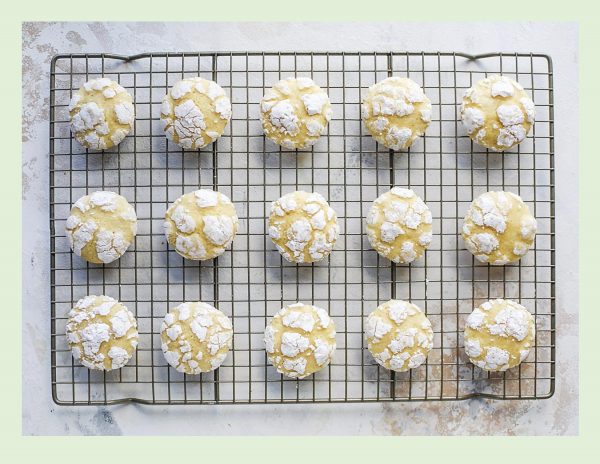
Many of us recall the original chocolate crinkle cookies from the 1960’s ….fudgy & sweet with such a unique look. Most cookies have top crusts that remain relatively soft and flexible as the cookies set during baking. However, if the top surface dries out before the cookie is finished spreading and rising, it hardens, cracks and pulls apart, producing an attractive crinkly, cracked exterior.

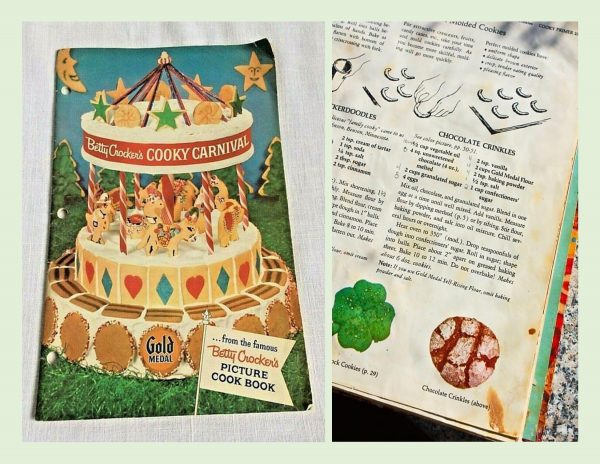
Historically these were a wintertime or Christmas holiday cookie. A women by the name of Helen Fredell of St. Paul, Minnesota, USA is believed to have created the first actual crinkle cookie. The original recipe contained molasses and spices such as cloves, cinnamon and ginger. The recipe was later published in Betty Crocker’s ‘Cooky Carnival Cookbook’. I have also seen a reference to the crinkle cookie having originated in the Philippines.

Whatever the origin, they have definitely evolved over the years. Once you’ve got the hang of the basic recipe your flavor options are endless. For example, a few suggestions are Kahlua, pumpkin, ginger, mocha, peppermint, sesame, cinnamon, peanut butter, matcha, orange, red velvet, egg nog & purple ube etc. etc. Amazing!!

Print Recipe
Lemon Cardamom Crinkle Cookies
Votes: 2
Rating: 5
You:
Rate this recipe!
Servings
COOKIES
Servings
COOKIES
Votes: 2
Rating: 5
You:
Rate this recipe!
Instructions
  1. Preheat oven to 350 F. Line 2 baking sheets with parchment paper.
  2. In a large bowl, whisk together flour, cardamom, baking powder, 1/2 tsp salt, lemon & orange zest; set aside. Sift powdered sugar into another dish to ensure there are no lumps; set aside.
  3. In another bowl, cream together butter & granulated sugar on medium speed for about 2 minutes. Scrape down the bowl with a spatula, add the eggs one at a time until incorporated. Add vanilla & beat until blended. With a spatula, fold in flour mixture.
  4. Divide batter into 24 pieces (about 1 1/2 Tbsp each), then roll the portioned dough into balls. Roll the balls in the sifted powdered sugar & place on baking pan at least 2-inches apart.
  5. Bake 12-14 minutes, until the surface of the cookies has cracked & puffed up. The cookies will not be browned. Cool on a wire rack.
Recipe Notes
  • Creaming the butter & sugar together is such an important step because you are cutting little holes in the butter with the abrasive sugar. Those little holes will expand from the leavening properties of the baking powder during baking ensuring that the cakey, tender texture characteristic of this cookie is achieved.

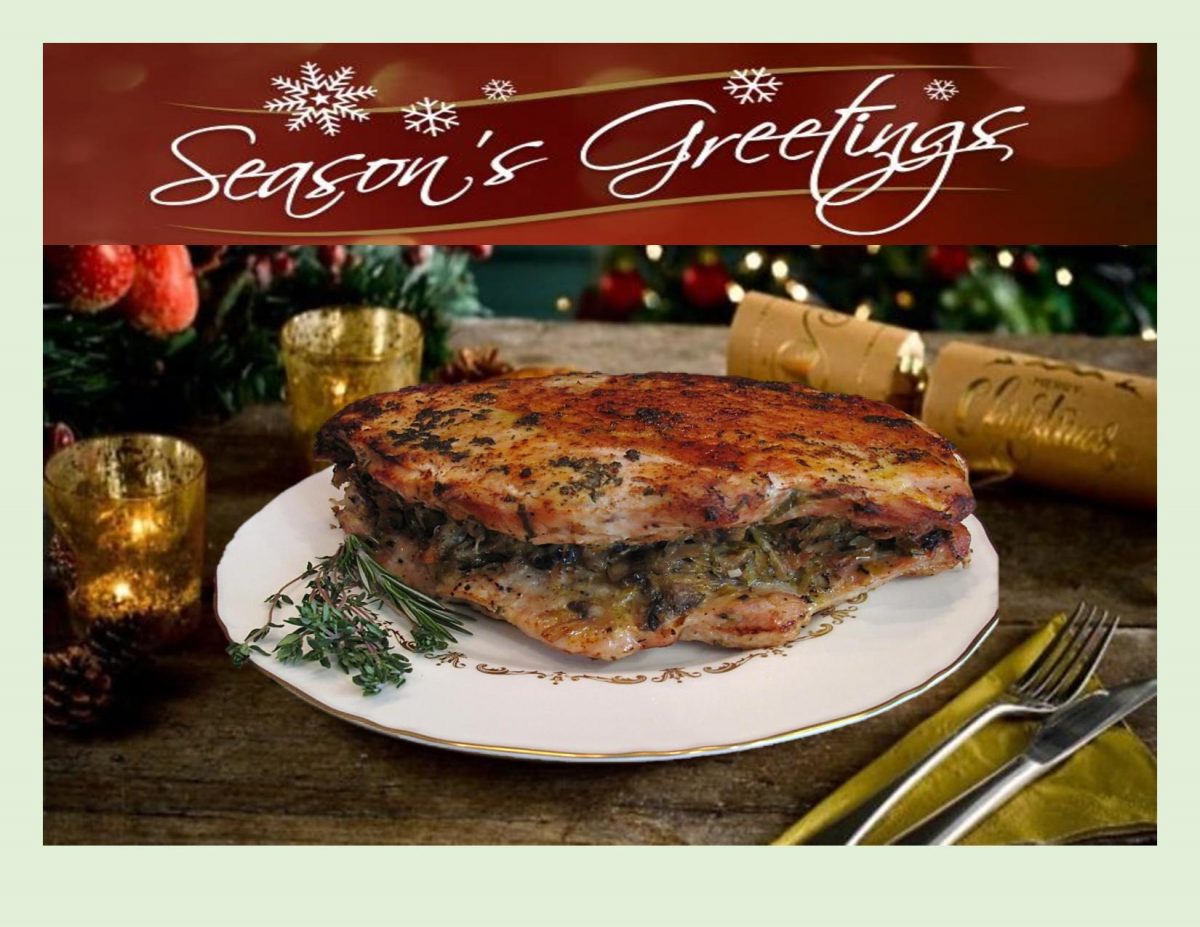
Herb-Crusted Turkey Breast w/ Mushroom Leek Stuffing

SEASON’S GREETINGS TO EVERYONE!

If this year has taught us anything, its that you can’t plan ahead at this moment. The coronavirus pandemic that has shuttered much of the world economy has also stole festivals, celebrations, reunions and all the related joys of a normal course of life.

Like everything else this year, Christmas 2020 looks very different to what we are used to. But, all this doesn’t mean that Christmas is cancelled. It just means you have to be a bit more creative about making it another joyful and meaningful memory for you and your loved ones.

This brings me to the special event in our family on Christmas day. December 25th just happens to be my sister Rita’s birth date. She will forever be the ‘special gift’ our family was so priviledged to receive at Christmas.

Rita, you are loved and treasured very much. Brion & I are very grateful for the fact you are able to share some of your time with our sister Loretta, especially in light of the covid crises.

With regard to our Christmas dinner being featured in this blog, the herbs added heaps of savory flavor to the stuffing and turkey rub. Rosemary, thyme and sage are quintessential winter herbs that really give that special holiday flavor …. no pears, apples, nuts are necessary. Having been cultivated for thousands of years around the world, herbs have helped shape culinary traditions that have lasted into modern times.

HAPPY BIRTHDAY RITA … WE CELEBRATE YOU WITH LOVE

ENJOY YOUR DAY!!

Print Recipe
Herb-Crusted Turkey Breast w/ Mushroom Leek Stuffing
Instructions
Stuffing
  1. In a large skillet over medium heat, melt 2 Tbsp butter. Add garlic & sauté, stirring constantly, for 10 minutes. Add leeks & cook until softened, about 5 minutes. Add mushrooms & cook until softened & liquid has evaporated, about 10 minutes.
  2. Remove from heat & stir in breadcrumbs, cheese, herbs & 1/4 tsp each salt & pepper; set aside.
Herb Butter
  1. In a small dish, combine all herb butter ingredients & set aside.
  2. Preheat oven to 350 F.
Assembly
  1. Arrange turkey breast skin side down on a work surface so that it lies open & flat. Cover with plastic wrap, then pound lightly with a meat mallet to flatten & make an even thickness all over.
  2. Discard plastic wrap & season turkey all over with remaining salt & pepper.
  3. Spread stuffing over turkey, leaving a 3/4-inch border around the edge. Close up snugly, tucking in the stuffing as you go, then tie with kitchen twine at 1-inch intervals around the entire turkey breast.
  4. Rub turkey all over with herb butter & arrange it on a rack in a roasting pan.
  5. Roast uncovered, basting occasionally, until turkey reaches an internal temperature of 180 F. about 2 hours. (Cover with foil if top browns too quickly).
  6. Remove & discard twine, slice turkey & serve.

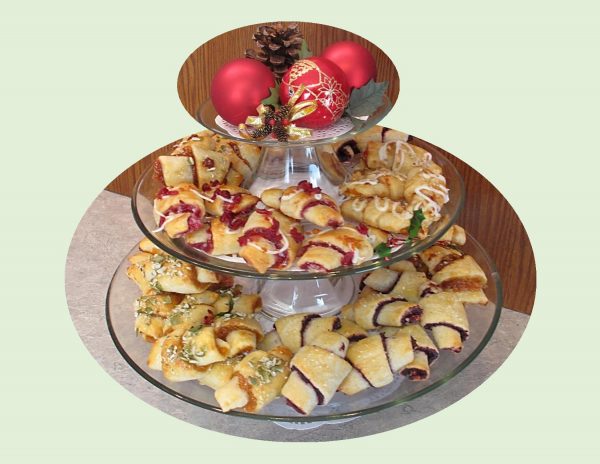
Rugelach in Six Flavors

Rugelach is an irresistible baked treat which is both delicious and versatile. So is it a pastry or a cookie? Rugelach’s unique buttery, tender dough wrapped around any variety of tasty fillings seems to straddle the line.

Traditionally, rugelach was made with yeast dough but the pastry has evolved and is now made with cream cheese which is both quicker and easier to make. The cream cheese dough was first used by North American bakers in the 1940’s, and now forms the staple of the modern rugelach we know today.

At this time of year it is a good idea to have rugelach in your entertaining ‘tool box’. Make some up when you have the time and tuck away in the freezer. At a moments notice, flick on the oven, put them on a baking sheet and bake. Fresh pastries …. just like that!

I recall my mother making endless kinds of cookies for the Christmas season. It seems, especially in the European countries, the baking of cookies for Christmas was the barometer of domestic excellence. Baking six kinds normally would generate applause, 12 kinds was regarded with such awe that it was like announcing you had just climbed Mount Everest in high heels.

I thought I’d go for six kinds …. of course when you can use the same cookie dough for 5 or 6 different fillings I suppose that is cheating a bit!

Print Recipe
Rugelach in Six Flavors
Votes: 1
Rating: 5
You:
Rate this recipe!
Course dessert
Cuisine Jewish
Keyword Rugelach
Servings
COOKIES
Course dessert
Cuisine Jewish
Keyword Rugelach
Servings
COOKIES
Votes: 1
Rating: 5
You:
Rate this recipe!
Instructions
  1. Using a food processor, add flour & salt to bowl & pulse briefly to combine. Cut in butter & cream cheese & add along with sour cream. Pulse just until dough forms chunks. You can also make the dough by hand quite easily if a processor is not available.
  2. Divide the dough into six equal portions, about 250 gm each. Press each gently into a disk. Make the disks as round as possible, smoothing their edges. Wrap the disks in plastic wrap & chill the dough about 1 hour or until firm but not hard. While the dough is chilling, assemble your choices of fillings so they are ready to use.
  3. Working with one piece of dough at a time, place it on a floured work surface. Roll it into a 10-inch circle. Spread with one of your filling choices all the way to the edges.
  4. Using a ruler or pizza cutter, divide the circle into 12 wedges. I found using the straight edge of a ruler & pressing it straight down gave me a nice clean cut.
  5. Roll each wedge up from the wide end to the narrow end. Place the rolls point-side down on parchment lined baking sheets. Repeat with the remaining 5 disks & fillings, placing prepared rugelach in the refrigerator until all 72 are made.
  6. At this point, if you wish to freeze the rugelach for later use, place them in the freezer. When the rugelach is firm, transfer to air-tight containers & label.
  7. If you wish to bake them (or some of them) at this time, preheat the oven to 350 F. Remove rugelach from refrigerator, brush carefully with egg wash.
  8. Bake for 25-30 minutes or until golden brown. Remove from oven & cool right on pan. Serve warm or at room temperature.
Recipe Notes
  • Personalize your rugelach with the filling you prepare or purchase.
  • I found that it worked the best if the filling is of a smooth consistency for cutting purposes. You can add a bit of texture with the toppings.
  • Nothing says it can't just be cream cheese sprinkled with cinnamon/sugar.

The fillings I chose to use were:

  • Saskatoon Berry w/ Lemon
  • Quince & Walnuts
  • Spiced Apricot & Mango w/ Pumpkin Seeds
  • Cranberry Orange w/ Cream Cheese
  • Apple Butter w/ Gouda & Walnuts
  • Fig & Gorgonzola w/ Nuts