German Bierocks

With my passion for food history and preparation, there is always a draw that pulls me back to my German roots. A lot of these recipes I recall my mother making but some are new to me that I just can’t resist trying.

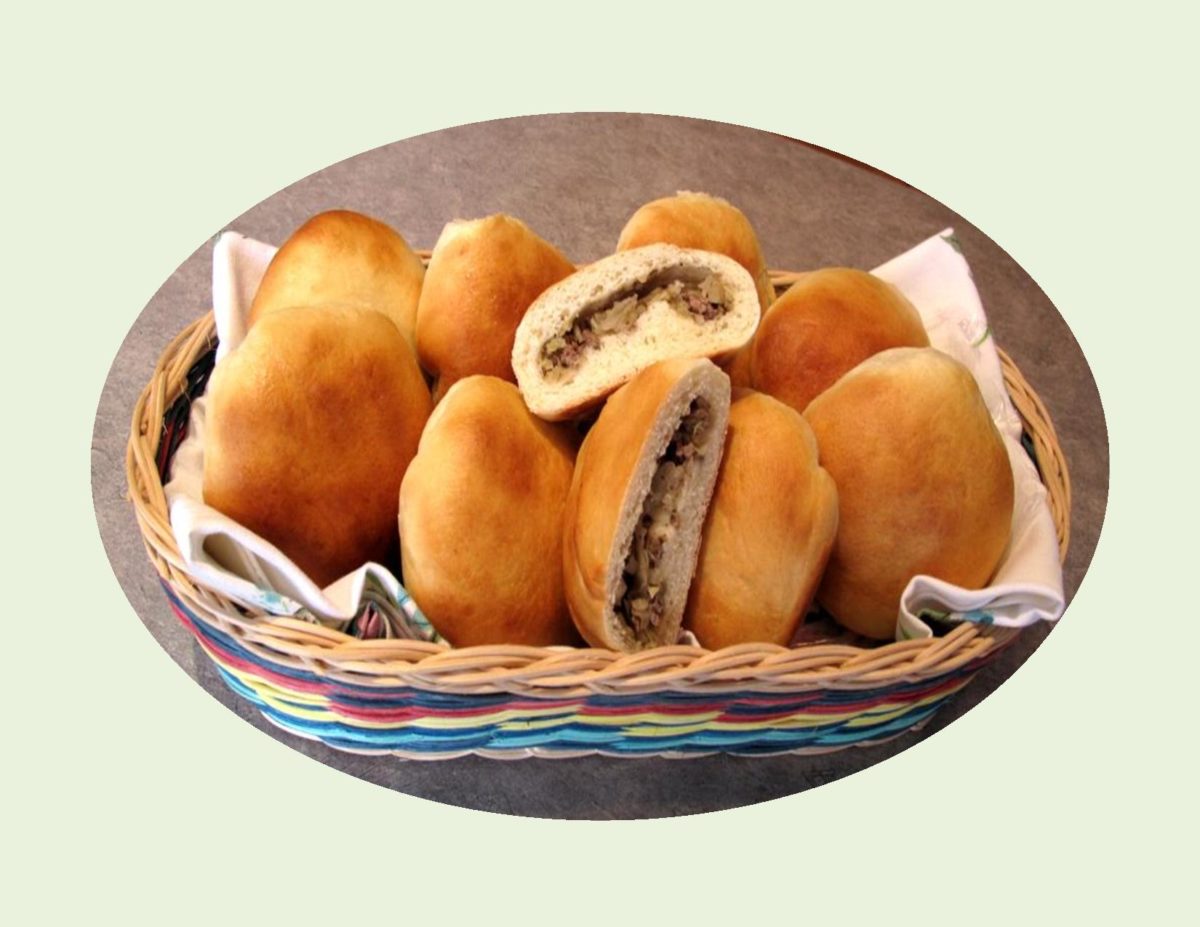
In 2016, I posted a couple of recipes ( one in April and the other in August) for Potato Bread that had a meat filling baked inside. These take sandwiches to a whole new level and are so great for picnics — the perfect meal all in one.

The hand held meat ‘pie’ has a worldwide history. The British serve Cornish pasties, while empanadas are found throughout Central and South America. Italians are drawn to calzones (which are often made without meat). That brings me to eastern Europeans with their bierocks.

A bierock is made from a yeasty dough stuffed with ground or shredded beef, cabbage and onions. They were created to be carried by miners and farmers to work so they could enjoy a hearty lunch. What began as a ‘pocketful’ of beef and cabbage eventually led to the Reuben  that we know today. The BIEROCK  is a characteristic food of Germans from Russia.

These bierocks freeze well, so making them ahead of time is no problem. Just take them out of the freezer in the morning to thaw by lunch time. You can warm them in the microwave for 1-2 minutes in 30 second increments to heat through if you wish.

Print Recipe
German Bierocks
Votes: 6
Rating: 3.5
You:
Rate this recipe!
Course Lunch, Main Dish
Cuisine European, German
Servings
Ingredients
Dough
Course Lunch, Main Dish
Cuisine European, German
Servings
Ingredients
Dough
Votes: 6
Rating: 3.5
You:
Rate this recipe!
Instructions
Dough
  1. In a large bowl, place milk & butter. Microwave for 30 seconds at a time until butter has melted. Add sugar & whisk to dissolve. Whisk mixture until it has cooled to lukewarm. Sprinkle yeast over milk mixture & allow to stand 5-10 minutes, until foamy. Whisk again, adding in 2 cups of flour, egg & salt.
  2. Stir in remaining flour, 1/4 cup at a time until dough comes together. On a floured surface knead dough 10-15 minutes until soft, smooth dough forms, adding flour as needed. Dough should be tacky but not sticking to your hands.
  3. Shape dough into a disk; place in a greased bowl, turning dough to coat. Cover loosely with plastic wrap & place in a warm, draft-free place to rise, about 1 hour or until doubled in bulk.
Filling
  1. In a large skillet, brown meat until almost cooked, 5-7 minutes. Drain grease from pan, add onions & cook 2-3 minutes or until they begin to soften. Add cabbage & cook 7-10 minutes, until cabbage is tender. Remove from heat & season with salt & pepper.
Forming Bierocks
  1. Place dough on a floured work surface, knocking it back. Divide into 8-12 balls (about 85 g each). Flatten each ball to a circle 4-5" in diameter. Spoon 2 large Tbsp of filling onto the center of each circle, leaving edges clear. Bring the edges together & pinch them to seal dough completely. Continue with rest of the filling & dough.
  2. Place the shaped 'bierocks' on a greased baking sheet & allow to rise, covered 30-45 minutes until roughly 1 1/2 times the original size. Preheat oven to 375 F. during the last 10 minutes of rising time. Brush bierocks lightly with milk & bake 20-25 minutes or until golden & hollow sounding when tapped. Remove from oven & cool on a wire rack.
Recipe Notes

Bacon-Wrapped Burgers

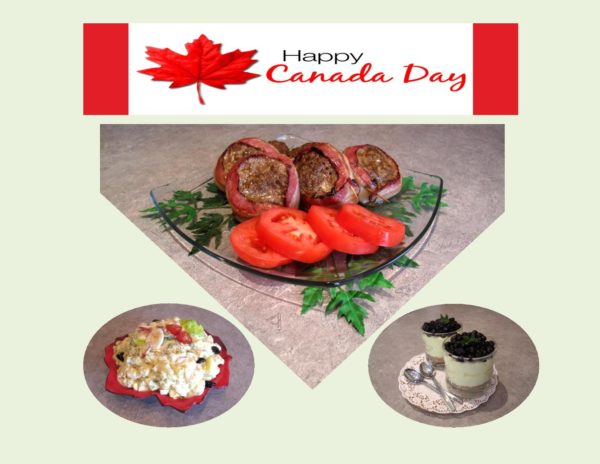
HAPPY CANADA DAY !

We are celebrating our country’s 150th ‘birthday’ this year. July 1st marks the historical event in which Canada gained its independence from Great Britain in 1867. This important holiday celebrates the birth of Canada as an independent nation.

Our July 1st holiday is comparable to the July 4th, ‘Independence Day’ holiday celebrated by the United States. Along with numerous parades, concerts, carnivals, festivals and firework displays, Parks Canada entrance fees are being waived in 2017 to mark this occasion.

Food and drink are almost as synonymous with Canada Day as the colors of red and white. Barbecues are definitely the preferred choice of food event for the day.

For ‘our’ barbecue, I am going with some BACON-WRAPPED BURGERS, POTATO SALAD  with BLUEBERRY-LEMON CHEESECAKE CUPS. Yum!

Print Recipe
Bacon Wrapped Burgers/ Potato Salad/ Blueberry Cheesecake Cups
Votes: 1
Rating: 5
You:
Rate this recipe!
Course Lunch, Main Dish
Cuisine French
Servings
Ingredients
Blueberry-Lemon Cheesecake Cups
Course Lunch, Main Dish
Cuisine French
Servings
Ingredients
Blueberry-Lemon Cheesecake Cups
Votes: 1
Rating: 5
You:
Rate this recipe!
Instructions
Bacon-Wrapped Burgers
  1. In a large bowl, combine the first seven ingredients & 2 Tbsp barbecue sauce. Crumble beef over mixture & mix well. Form into 12 thick patties. Wrap a bacon slice around the sides of each patty & secure with a toothpick.
  2. Barbecue at 350 F. until meat is no longer pink. Baste frequently with remaining barbecue sauce during latter part of cooking.
Blueberry-Lemon Cheesecake Cups
  1. Add boiling water to jelly powder; stir 2 minutes until dissolved. Refrigerate 45 minutes or until slightly thickened.
  2. Preheat oven to 325 F. Mix graham crumbs & butter; press about 3 Tbsp onto bottom of each of 8 -125 ml, pyrex custard cups. Place on rimmed baking sheet; bake 6 minutes. Cool.
  3. Beat cream cheese & sugar with mixer until blended. Gradually beat in half & half; Stir in jell-o. Spoon into cups; top with fresh blueberries.
Recipe Notes
  • You can find the potato salad recipe in the June 2016 blogs.

Chili Con Carne with Cornbread

At this time of year, this hearty, easy to prepare meal seems to fit in nicely. Here in northern Alberta, Canada we are still in the midst of those cold winter temperatures.

Since the first recorded recipe, chili has been reinvented to include different spices and ingredients changing basic things like beef to chicken, chili peppers to jalapeno peppers and tomato sauce to chicken broth. The fact remains, it’s a great meal no matter what recipe you use or what the weather conditions are. 

Chili con carne, which is Spanish for ‘chili with meat’,  is a spicy ‘stew’ containing meat (usually beef) chili peppers or spice, tomatoes, garlic, onions and beans. Geographic and personal tastes involve different types of meat and ingredients. There has been much discussion and dispute that the word ‘chili’ applies only to the basic dish, without beans and tomatoes.

When Brion and I spent three months in Ecuador, we had rented a furnished apartment. The kitchen was very basic, but I could still enjoy preparing our meals. Being in Ecuador, one would have thought something as common place as ‘chili powder’ would be no problem to buy. After much searching, we finally gave up and I concocted my own version using black pepper, garlic powder, cayenne powder, onion powder, dried oregano and cumin. It actually tasted quite good. Cooking in Ecuador was a real learning curve. Due to the fact that even though you could buy similar ingredients to home, they tasted somewhat different.

Thinking back to my mother’s cooking, I don’t recall much about her chili but the cornbread she served with it was ‘to die for’. Once again, I’m sure so much of it was time and place.

Cornbread is a generic name for any number of quick breads containing cornmeal and are leavened with baking powder. The quintessential late 20th to early 21st century recipe contains baking powder for convenience, sugar for sweetness and flour and eggs for lightness. Cornbread is an interesting recipe to track through the past few centuries. It is such a prolific crop, grown in America, that it was consumed across class, race and regional lines. Corn lends itself to change very easily, giving way to variations of cornbread recipes. Although traditional cornbread was not sweet at all, regional preferences for sweetness in the recipe have developed.

In order to bake some cornbread in Ecuador, we purchased a package of yellow corn meal. Although it seemed to be very finely ground, I was able to make it work and we really enjoyed it. One day, while we were out walking we came upon a street vendor selling something called ‘Humitas’. We purchased a couple to take back to the apartment to try. Humitas are made of ground young corn, seasoned with egg, butter and possibly cheese wrapped in a corn husk and steamed. These had a bit of anise flavor which gave them a real unique flavor. Humitas are one of the most traditional of Ecuadorian recipes. The ingredients can vary by region, town or even in family recipes and can be sweet or salty. They differ from corn tamales in that they are steamed rather then boiled or baked. The corn used in making them is called ‘choclo’, also known as Peruvian or Cusco corn (named for the capital city of the Incas). This Andean corn has extra large, bulbous kernels almost five times larger than North American corn with a creamy texture. Every so often during our stay in Ecuador, we made a point of treating ourselves to some.

My story has got a little ‘long winded’ today, but I hope you have enjoyed it. I am posting my ‘tried and true’ recipes for Chili & Cornbread.  Hope you give them a try and enjoy!

Print Recipe
Chili Con Carne with Cornbread
One of those 'stick to your ribs', comfort food meals!
Votes: 1
Rating: 5
You:
Rate this recipe!
Course Lunch, Main Dish
Cuisine American
Servings
Course Lunch, Main Dish
Cuisine American
Servings
Votes: 1
Rating: 5
You:
Rate this recipe!
Instructions
Chili
  1. In a large skillet, brown beef, onions, green pepper & spices until meat is thoroughly cooked & any liquid has evaporated. Stir in tomatoes, tomato sauce, beans & water. Cook over medium - high heat until bubbly. Reduce heat to medium; simmer, covered for 30 minutes, stirring occasionally.
Cornbread
  1. Preheat oven to 350 F. Line an 8-inch round baking pan with parchment paper or a mini loaf pan. In a food processor or blender, pulse first 5 ingredients for a few seconds. Place in a large mixing bowl. In a small bowl, whisk together melted margarine, milk & egg. Combine wet & dry ingredients, mixing only until moistened; batter should be lumpy. Pour into baking pan(s) & bake for 20 minutes or until test done. Serves 8

Taco Salad in Edible Tortilla Bowls

Summer time is salad time! Taco Salad  is the full meal deal, infinitely customizable, inviting experimentation and creativity. Being so versatile, it can be enjoyed in almost any setting.

This Texas-Mexican inspired salad was very popular in the late 1960’s. It’s name comes from the Texas-Mexican Railway. Pioneers brought Anglo influences to Texas, where the Texas-born Mexicans lived. As a result, the ingredients from their different cultures blended together.           Tex-Mex combines elements of Anglo, Spanish and Mexican.

The taco salad is unique in that it can be served in an edible tortilla bowl. I recall in the food industry, this meal had huge visual appeal for the customer. How could you resist ordering one after seeing it’s impressive presentation? The ingredients in a taco salad can vary according to preference and can be made to fit into any type of cuisine with different seasonings and modifications.

Typically the taco salad includes lettuce, beans, tomatoes, green onion, meat, cheese and sour cream. Other condiments might include guacamole, salsa, garlic and cumin.

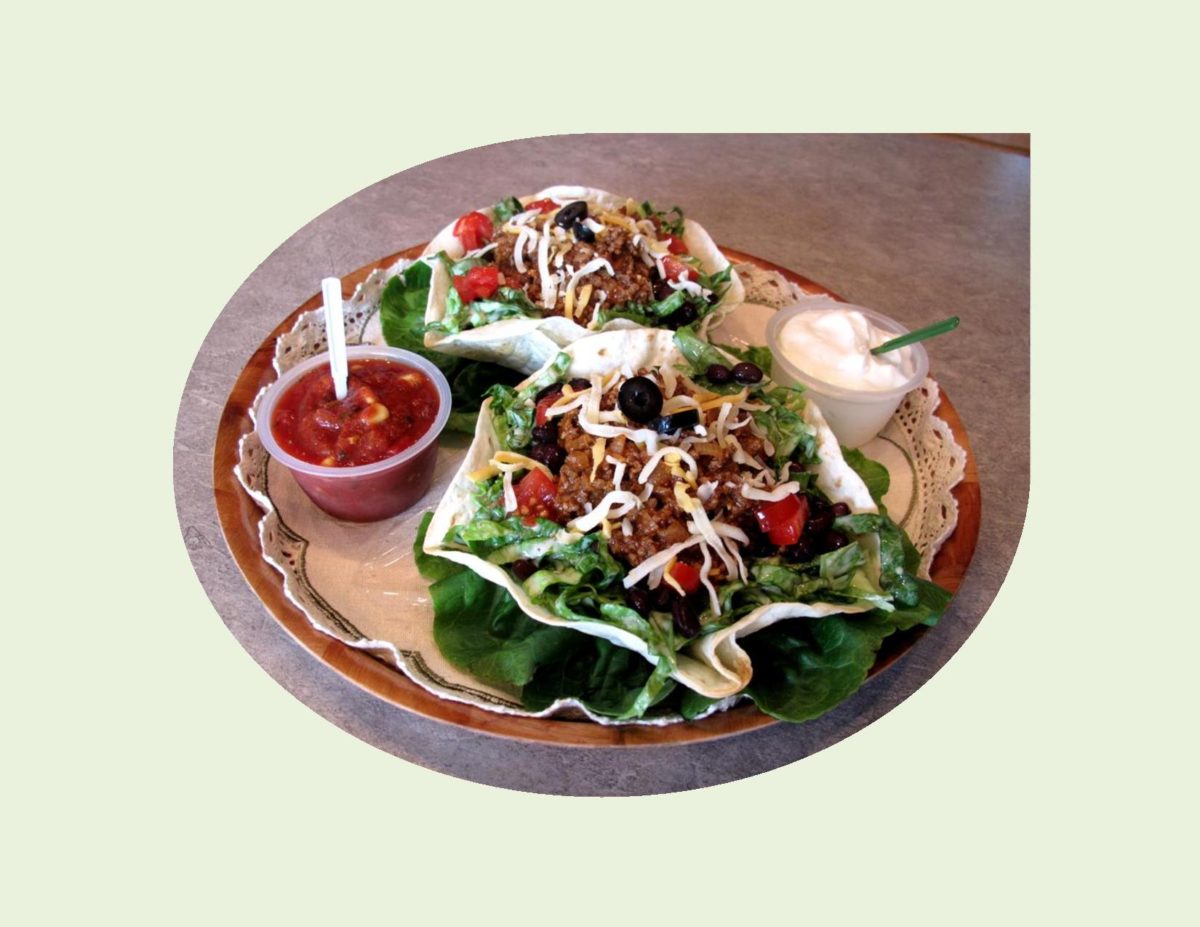
The salad featured in today’s blog picture is the beef version but I have included similar recipes for chicken and vegetarian ideas as well. Tortilla bowls are easily made by baking them in the oven. No need to add those calories by deep frying them. I love the full meal salad idea — be it a Chef’s salad, Cobb, Taco you name it! I hope you will enjoy one to this summer.


Print Recipe
Taco Salad
Taco Salad doesn't have to be 'old school' and boring --- customizing it to your personal tastes makes a huge difference.
Instructions
Tortilla Bowls
  1. Preheat oven to 425 F. Warm tortillas slightly until pliable. Spray or butter both sides of tortilla lightly, then drape over oven proof bowls, pinching sides to form bowl shape. Bake 5-7 minutes, watching carefully as not to burn. Remove from oven & cool on wire rack.
Beef Taco Meat
  1. In a skillet, heat oil over medium-high heat. Add onion & cook until softened, about 5 minutes.Stir in chili powder & garlic & cook until fragrant, about 30 seconds. Add ground beef & cook, breaking up meat with a wooden spoon, until almost cooked through but still slightly pink, about 2 minutes. Stir in tomato sauce, broth, vinegar & sugar; simmer until slightly thickened but still saucy, about 5 minutes. Remove from heat & season with salt & pepper.
Chicken Taco Meat
  1. Place chicken breasts between 2 sheets of plastic wrap & pound to flatten to uniform thickness, about 1/2-inch. In a small dish, combine spices. Sprinkle over chicken breasts. In a skillet, heat oil over medium-high heat. Add chicken breasts to pan & cook until juices run clear & the center is no longer pink. Remove from pan & allow to rest 5 minutes. Slice into bite size strips.
Salad Dressing
  1. In a small bowl, whisk dressing ingredients.
  2. To assemble salads: In a large bowl, combine romaine, beans, green onions, cilantro, olives, jalapeno peppers. Toss with salad dressing. Place tortilla bowls on serving plates. Divide salad among bowls. Top with taco meat choice; sprinkle with tomatoes & cheese. Top with avocado slices if desired.
Recipe Notes
  • Sour cream & salsa are also nice as extra condiments or in place of the salad dressing.
  • If you prefer a Vegetarian Taco Salad, just eliminate the meat part, equally as good.
  • Be adventurous, customize to your preference so you get the most enjoyment out of 'your' salad.