The customization of pizza crust has undoubtedly been one of the biggest innovations in the (pizza) industry. The crust you choose to make helps to dictate taste, texture, thickness and your selection of toppings.
Pizza has taken on many different forms since its original inception — especially when it comes to the crust. For example:
Thin Crust is characterized by its light, slightly crispy texture. This is the perfect crust for those who want an authentic Italian pizza.
Thick Crust is characterized by its buttery, pan fried taste and texture on the outside, with a soft chewy center.
Flatbread Crust – health conscious people feel less guilty about eating this pizza because it isn’t as filling as other crust types.
Focaccia is a thick, ‘bready’ dough infused with herbs and brushed with olive oil before baking, then covered with cheeses, herbs and spices and minimal toppings.
Wood Fired Crust – it’s characteristics are defined by their deep, smoky taste derived from using real wood to heat the baking oven.
There are endless ways you can create a custom crust for your pizza. Such as using pita bread, English muffins, rice cakes, tortillas, potato slices or chips. I experimented with making a yeast crust with mashed potatoes and sour cream in it. Without trying to sound boastful, it was probably the best pizza crust I had ever made to date. I think I nailed it!
Print Recipe
Potato Crusted Asiago Sausage Pizza
Votes: 1
Rating: 5
You:
Rate this recipe!
|
|
Votes: 1
Rating: 5
You:
Rate this recipe!
|
Instructions
Potato Pizza Crust
Prepare mashed potato. In a dish, combine yeast with lukewarm water; whisk until yeast is dissolved. Let stand about 3 minutes until foamy. In a large bowl, combine butter, salt, sour cream & mashed potato; mix well. Add yeast mixture & stir again.
Stir in flour, 1 cup at a time. When dough is completely blended, turn onto lightly floured surface. Knead dough about 10 minutes, until smooth & elastic. Place dough in a lightly greased bowl, cover with a tea towel & allow to rise in a warm place until doubled in size, about 1 hour.
Dijon Mustard Sauce
In a small saucepan, saute garlic in butter until tender but not brown. Stir in flour, mustard & crushed thyme. Season with salt & pepper; add broth & cook, stirring until thick & bubbly. Continue to cook 1 more minute the remove from heat & set aside to cool.
Pizza Fillings
In a skillet, saute red pepper & onion until soft; remove to a dish. In the same skillet, scramble fry sausage meat until cooked; drain on paper towel, set aside. Drain, sliced olives & grate cheese.
Assembly
Preheat oven to 375 F. Remove risen dough from bowl turning onto a large sheet of parchment paper. Press or roll dough into a 16-inch circle. Using some of the grated cheese, make a ring around the outer edge, & fold over to make a 'stuffed crust'.
Carefully spread mustard sauce over bottom of pizza, then sprinkle with another portion of grated cheese mixture. Layer with red peppers, onions, sausage meat & olives. Top with remaining cheese.
Bake for 20 minutes or until crust is golden. Remove from oven & slice.
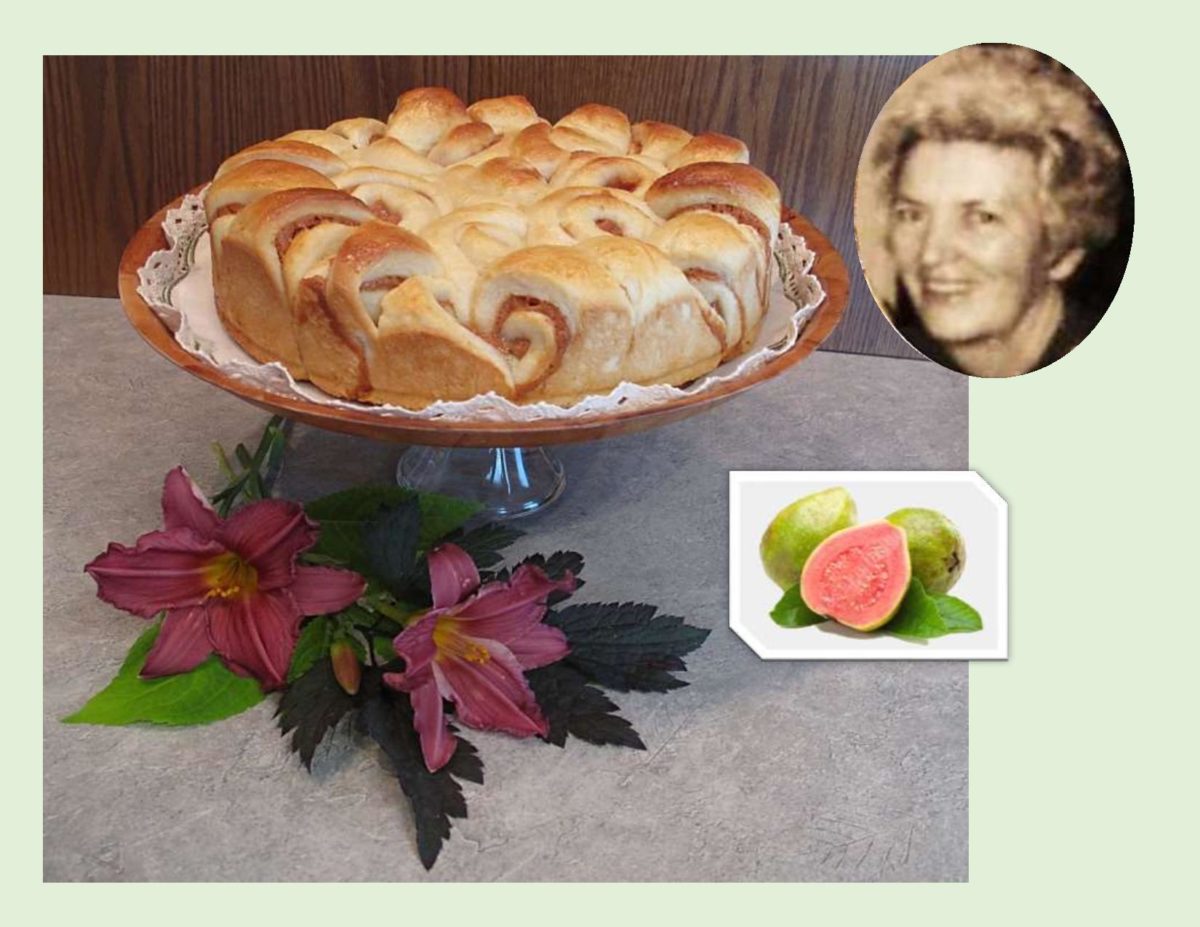
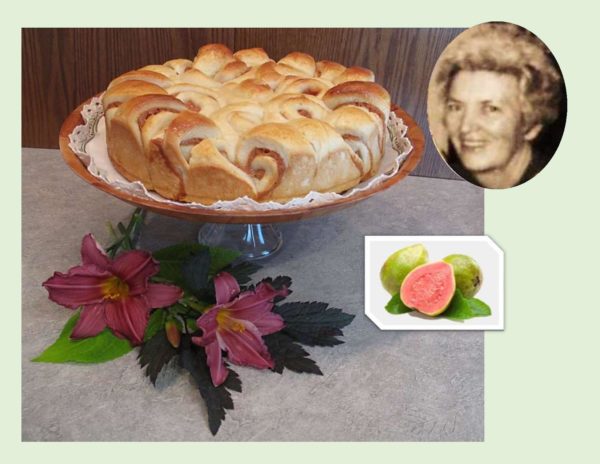
Today, March 28th, is my mother’s birth date. As we honor her beautiful memory, I’m sure each of my siblings will reflect on special times we shared with her. Forty-one years after her passing, I’m still doing many things in her likeness. Baking was a shared passion for my mother and I. We liked nothing better than to bake something together. After I moved from ‘home’ and would return for a visit, instead of having a coffee and visit we would get busy and bake something while we talked. Such great memories!
In honor of her fabulous kitchen skills, I decided to make some Guava Cream Rolls. If I have a little extra time when I grocery shop, I like to scan the import isles to see if there is something unique I can use in my baking. One of the items that caught my attention was guava paste. Also known as ‘guayabate’ or ‘goiabada’, guava paste is a very thick puree of the guava fruit cooked with sugar and often with added pectin.
Guava is very popular in Cuba, the Caribbean and Spain. This thick paste has a sweet, floral taste like a combination of pear and strawberry. It is often paired with cheese as an appetizer or in the filling of baked goods as well as in savory dishes.
For these rolls, I used a combination of sweet guava paste with savory cream cheese which gave this dessert a very distinct and tropical flavor.
Print Recipe
Guava Cream Rolls
Votes: 1
Rating: 5
You:
Rate this recipe!
|
|
Votes: 1
Rating: 5
You:
Rate this recipe!
|
Instructions
In a small bowl, dissolve yeast & 1 tsp sugar in lukewarm milk. Let stand for 5 minutes to allow yeast to activate. In a large bowl, whisk together 1/4 cup sugar, melted butter, sour cream & egg. Add yeast mixture, stirring to combine.
In another bowl, combine flour & salt. Add flour mixture, 1 cup at a time, combining with wet mixture. Once all flour has been added, knead dough for about 2 minutes until smooth & elastic consistency, Place dough in a greased bowl & cover with a towel or plastic wrap. Allow to rise in a warm place until doubled in bulk, about an hour. While the dough is rising, beat together guava paste & softened cream cheese to make filling. Line a 10-inch spring form pan with parchment paper; set aside.
Punch the risen dough down & transfer to a floured surface then divide the dough into 2 equal parts. Divide each of them again into 4 parts, so to have 8 pieces of dough altogether.
Roll each piece of dough out into a roughly rectangular shape with a thickness of 1/4-inch. Spread guava/cream cheese over each piece. Place one piece of rectangular dough over another one & start to roll a cylinder. Do the same with the rest of the dough; you will end up with 4 cylinder rolls altogether.
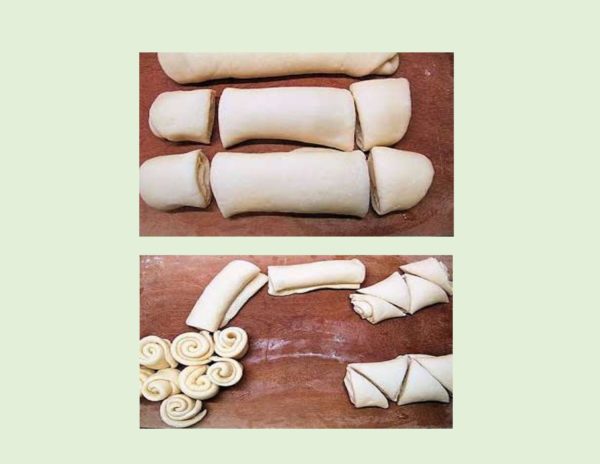
Cut each roll into three pieces. Slice both ends of the roll ( about 1 1/2-inch long piece from each end) & put these 2 pieces aside. Cut the middle part of each roll into 4 triangles. In the middle of spring form pan, arrange the cut ends of the rolls around each other to form a circle, placing the cut sides down. Arrange the cut triangles to completely surround the middle circle.
Cover pan with a tea towel & allow to rise in a warm place for about 30-40 minutes. Preheat oven to 350 F. Beat egg with water to make egg wash & carefully brush the top of rolls when they have risen enough. Bake rolls for 30-40 minutes or until baked & golden in color. Remove from oven & brush immediately with melted butter. Remove spring form pan & cool on a wire rack for 10-15 minutes before serving.
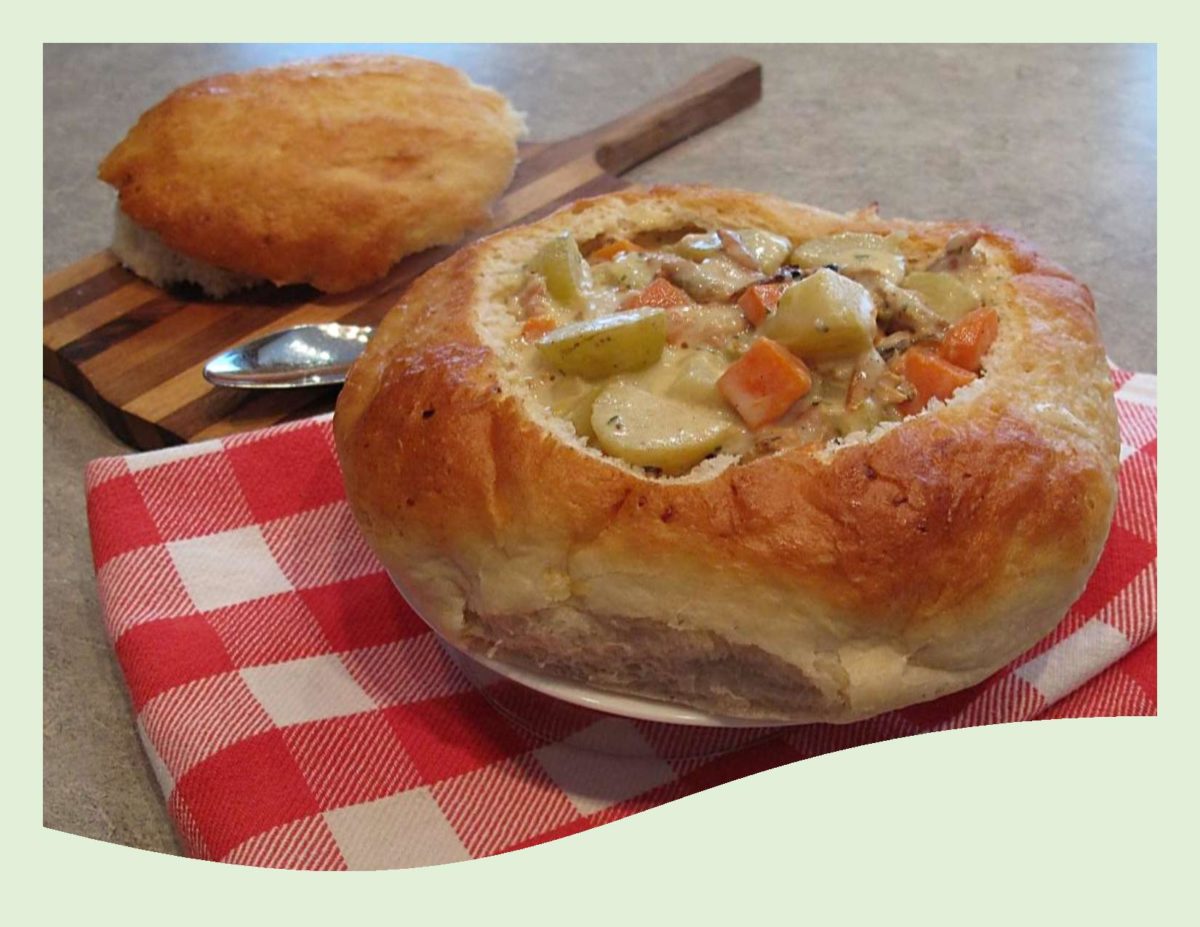
Edible bread bowls were a huge hit in the 80’s and 90’s, but the idea fizzled at the start of the 21st century. Bread has always been a main stay of any meal, from toast at breakfast to sandwiches at lunch and rolls for supper. Many restaurants used the bread bowl idea as a way to justify charging more for soup. They are an extremely versatile way to hold thick, creamy soups, spicy chili or stews as well as dips and warm melted cheese.
While its not that difficult to make a bread bowl, the kind of bread you make determines your success. Some examples would be a hearty bread like pumpernickel or a chewy, crusty sourdough. Rye, crusty white or wholewheat will work fine as well.
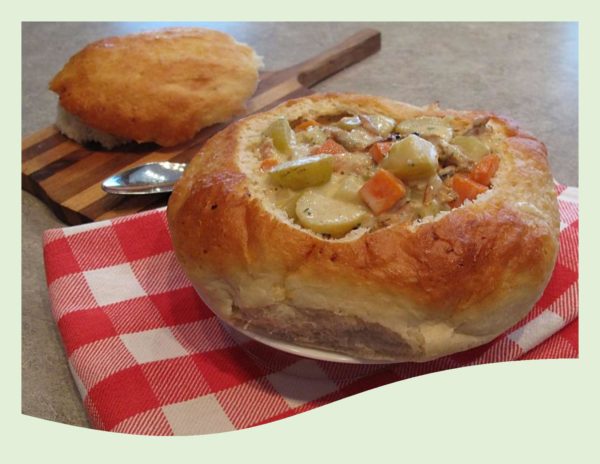
It’s always a good idea to match the flavor of your bread bowl to the filling used if possible. These roasted vegetable bread bowls were just perfect with the oyster stew.
Bread bowls will always hold a special memory for Brion and I. Over the course of probably the last sixteen years we have made many trips to the California coast. We always stayed in the Carmel/Monterey area and walked the coastline with our destination being Fisherman’s Wharf. It was a special treat having clam chowder in a sourdough bowl at a wharf restaurant.
I used roasted potatoes and parsnips in my dough today, which added an amazing flavor to these bread bowls. The stew is made with smoked oysters which adds a unique smoky flavor. The whole meal came together beautifully and was super good!
Print Recipe
Roasted Veggie Bread Bowls with Oyster Stew
Votes: 1
Rating: 5
You:
Rate this recipe!
|
|
Votes: 1
Rating: 5
You:
Rate this recipe!
|
Instructions
Roasted Veggies
Preheat oven to 400 F. Line a small baking sheet with foil or parchment paper. Peel potato & parsnip & cut in uniform pieces. Place veggies in a bowl; add olive oil, garlic powder, salt, pepper & toss to combine. Spread veggies evenly on baking sheet; bake for 45 minutes, until roasted & soft enough to mash. Remove from oven, mash & cool.
Bread Bowl Dough
In a small bowl, combine yeast with warm water; whisk until yeast is dissolved. Let stand about 3 minutes until foamy. Add butter, salt, sour cream & cooled, mashed veggies; mix well. Add bacon & chives; mix until just combined.
Stir in flour, one cup at a time. When dough is completely blended, turn onto a lightly floured surface. Knead dough about 10 minutes, until smooth & elastic. Place dough in a lightly greased bowl, cover with plastic wrap & allow to rise in a warm place until doubled in size, about 1 hour.
Line a baking sheet with parchment paper. Punch down dough & divide into 2-3 pieces. Form each piece into a ball as if you were making a large bun. Place 'buns' on baking sheet allowing enough space in between each for rising. Cover with plastic; allow to rise for about 15 minutes while preheating oven to 350 F. Brush bread bowls with egg wash; bake 25-30 minutes until golden. Remove from oven to a wire rack.
Smoked Oyster Stew
In a saucepan, fry bacon until crisp; remove to paper towel, blot off grease & crumble. Set aside. To bacon drippings, add carrot, onion, celery & potatoes. Saute, seasoning lightly with salt & pepper; add garlic, seafood seasoning & flour. Saute 1 minute more, making sure to coat everything with flour.
Add clam nectar & chicken stock, stir well to dissolve the flour & bring to a boil. Cook until veggies are cooked through. Turn heat to low & add the chopped smoked oysters, bacon & 1/2 & 1/2 cream. Stir until heated through; remove from heat.
Assembly
Using a serrated knife, carve a deep wedge out of the top of bread bowls. After the initial cut, use your fingers to pull the soft bread out to make a big enough soup bowl. Fill with oyster stew, serving the top piece on the side.
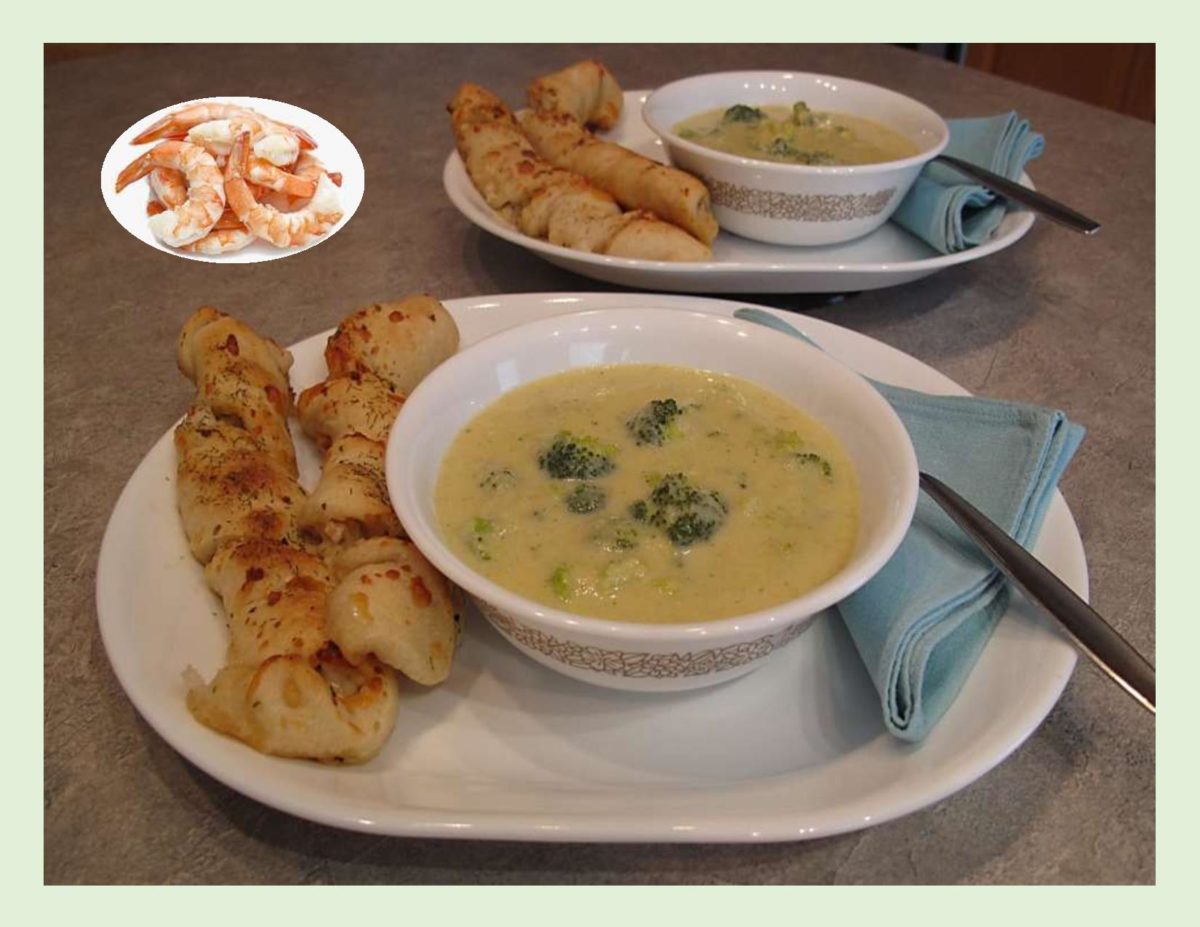
It seems we never get enough of taking just about anything we do to the next level. Case in point would be pizza dough. It started as a very thin, crispy crust and evolved into whatever thickness you wanted to make it. Enter the ‘stuffed’ crust with a ring of cheese encased in the outer edges of your pizza! Then, of course, the actual pizza fillings can be virtually anything that you choose or have available.
Bread sticks, on the other hand, aren’t something that have remained unscathed either. Probably the original simple design was ‘grissini’ (as they are known in Italy). Today’s bread sticks come in many forms from super crispy, thin ones to the larger ones often served with spaghetti and used to mop up excess sauce. Now, here’s where it gets one step better. Enter ‘homemade stuffed’ bread sticks. For inspiration all you have to do is think about all of your pizza toppings. Use them as options for either mixing into your dough or actually stuffing into a bread stick.
Being shrimp and Parmesan lovers, the natural thing for me to do was incorporate both into some bread sticks. The next step was to pair them with a nice light broccoli-cheddar soup. A match made in heaven even if I do say so myself.
Print Recipe
Parmesan-Shrimp Bread Sticks with Broccoli Cheddar Soup
Votes: 1
Rating: 5
You:
Rate this recipe!
Ingredients
Parmesan Shrimp Bread Sticks
Lite Broccoli Cheddar Soup
Ingredients
Parmesan Shrimp Bread Sticks
Lite Broccoli Cheddar Soup
|
Votes: 1
Rating: 5
You:
Rate this recipe!
|
Instructions
Parmesan Shrimp Bread Sticks
Combine all ingredients, in the order listed, in a bowl of a stand mixer fitted with a dough hook. Mix on medium-low until the dough comes together. Continue to mix on medium-low for 5 minutes to knead. Dough is ready when it is stretchy & smooth. Transfer the dough to an oiled bowl, cover with plastic wrap & allow to rise for about an hour or until doubled in bulk.
Bread Stick Filling
Peel, devein & slightly chop raw shrimp; place in a bowl. Grate & slightly chop fresh Parmesan cheese. Combine oil, minced garlic, spices & Parmesan cheese with chopped shrimp.
Preheat oven to 425 F. Line a baking sheet with parchment paper. Punch dough down; on a lightly floured work surface, press dough into roughly an 8 X 12-inch rectangle. Top with shrimp filling & sprinkle with dill weed. Slice lengthwise into 8 strips; fold each strip in half enclosing filling. Twist each strip slightly & lay on baking sheet. Top each bread stick with some grated mozzarella cheese (or you could put it on as soon as they come out of the oven). Bake for 7-10 minutes or until golden brown. Serve warm with soup.
Broccoli-Cheddar Soup
In a large saucepan, saute onion & garlic in olive oil until tender. Stir in flour; cook for 1 minute. Gradually whisk in broth. Bring to a boil; cook & stir for 1-2 minutes or until slightly thickened.
Add the broccoli, tarragon, thyme & pepper; return to a boil. Reduce heat; cover & simmer for 10 minutes or until broccoli is tender. Add milk; cook, uncovered 5 minutes longer. Remove from heat; cool to room temperature.
In a blender, process about half of the soup until smooth. Return to saucepan; heat through. Reduce heat. Add 100 grams of cheese; stir just until melted. Serve immediately, garnishing with remaining cheese.
Recipe Notes
- When time is of the essence and you need to speed up the process, use a tube of purchased refrigerated pizza or bread stick dough instead of making your own.
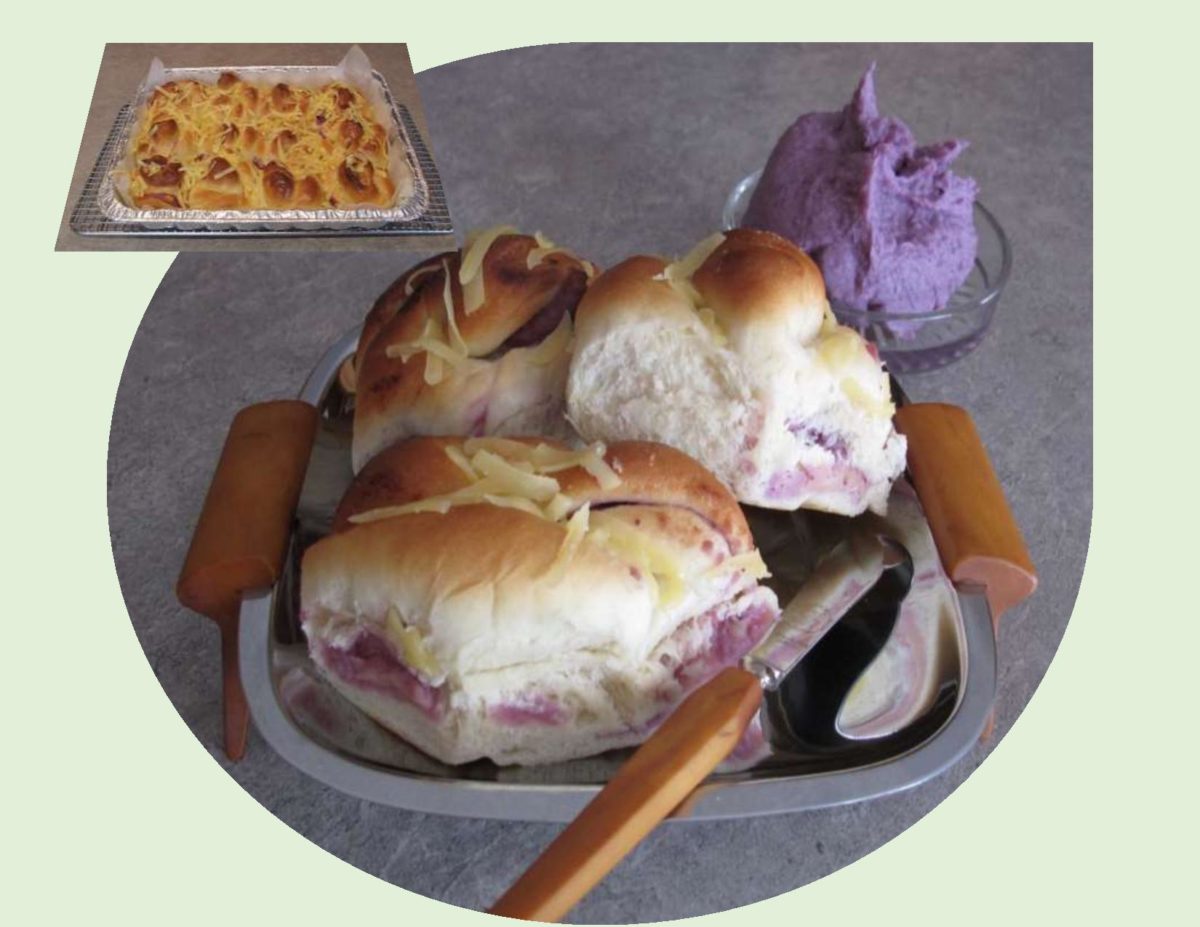
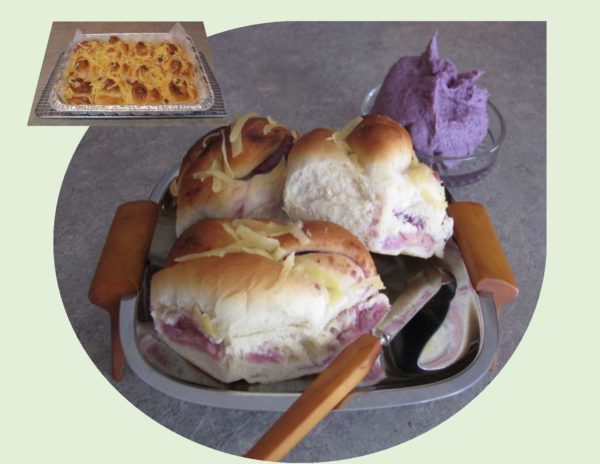
I received an email from Pinterest the other day with some interesting recipe ideas. One was to do with Filipino breads. I noticed many centered around a purple yam. A very popular tuber in the Philippines, widely used in desserts and called ube ( pronounced ooo-bae). While purple yam is a relative of the sweet potato, they are not the same tuber. It is also not the same as taro root.
Just like any other tuber, purple yams can be boiled, steamed or baked. Once cooked, they don’t actually taste like much. It’s flavors are enhanced, when combined with sweeteners and liquids such as sweetened condensed milk and coconut milk. Ube adds an earthy, nuttiness to baking and is so visually striking with its vibrant purple color.
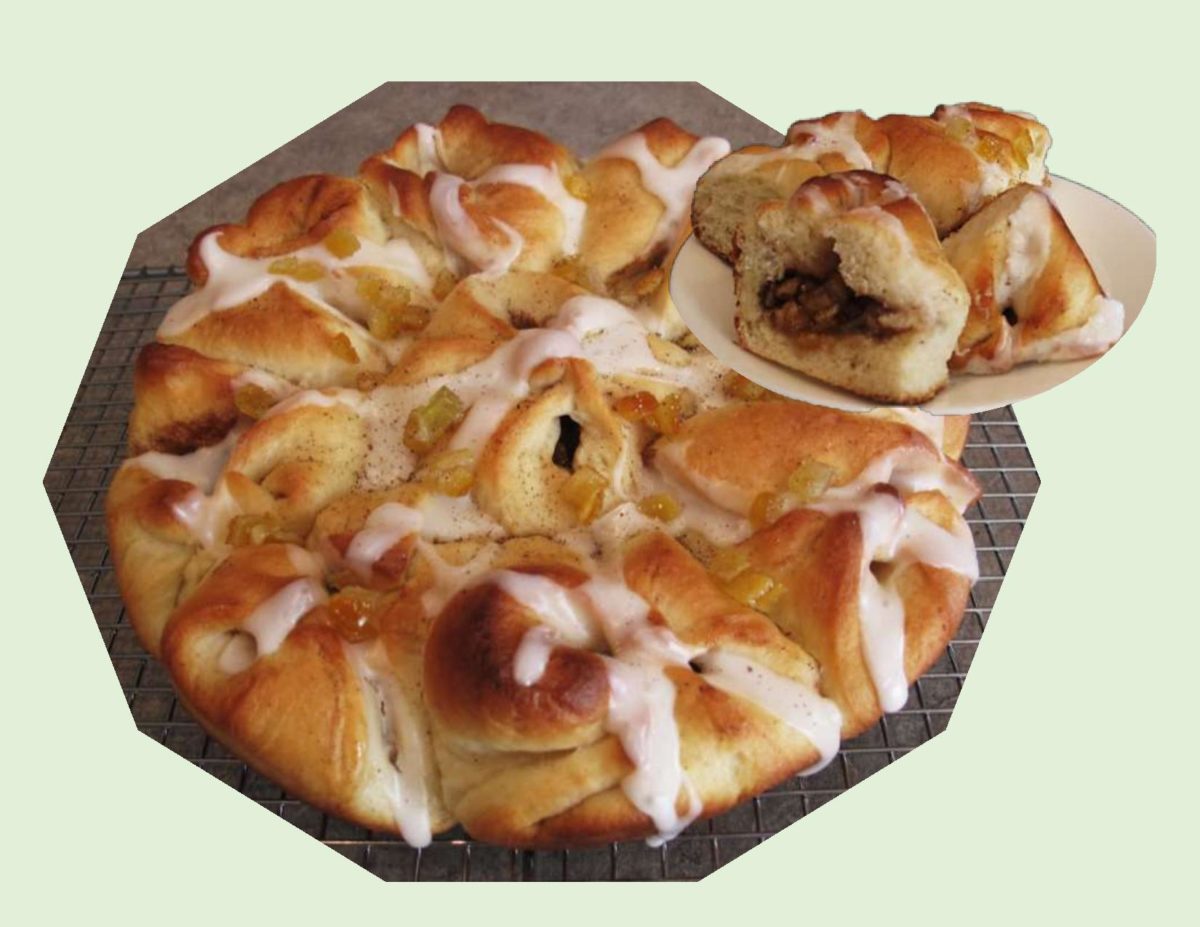
Swirl bread or rolls are made of a soft, yeasted, sweet dough filled with purple yam paste. Shredded Edam or queso de bola cheese is often sprinkled on top, giving it a sweet/salty flavor. I decided to try my luck at making some ‘ube rolls’. After scouring the usual grocery stores for purple yams with no luck, Brion and I found an Asian grocery store. They sold grated and frozen ube in 454 gram packages. Perfect! I looked at numerous recipes on the internet, then did my usual. Piece together a few different recipe ideas and ingredients that looked like it would work for me.
It just happens, Brion works with a Filipino lady by the name of Janice. I was hoping to share some of the finished product with her family to see if I had got the taste right. To my surprise, she said it was exactly how it was supposed to taste. Wow! Sometimes you get lucky.
Print Recipe
'Ube' Sweet Rolls
Votes: 21
Rating: 4.05
You:
Rate this recipe!
|
|
Votes: 21
Rating: 4.05
You:
Rate this recipe!
|
Instructions
Ube (Purple Yam) Filling
In a medium saucepan, melt butter. Add coconut & condensed milks; stir until heated. Add thawed, grated ube & stir everything together. This process takes about 40-50 minutes until the ube is cooked. The mixture will be thick & sticky. It is important to stir the mixture often during cooking to prevent it from forming a crust. Transfer the ube paste/jam to a container & set aside.
Cheese
Grate cheese & set aside in refrigerator until needed.
Sweet Roll Dough
In a small dish, heat milk to lukewarm. Add yeast & 1 tsp sugar; let sit for 5 minutes to allow yeast to activate. In a large bowl, whisk together remaining 1/4 cup sugar, melted butter, sour cream & egg. Add yeast mixture & stir to combine.
In another bowl, whisk flour & salt. Add flour mixture to yeast mixture 1 cup at a time, combining after each addition. Once all flour has been added, knead on a lightly floured surface for about 2 minutes.
Lightly grease the large bowl, place dough in it & cover with plastic wrap & a tea towel. Allow to rest for at least one hour, in a draft free place until dough has doubled in volume.
Punch dough down. Divide into 18 equal pieces. Roll each piece with a rolling pin. Spread the middle of each piece with ube filling & SOME of the grated cheese. Close up the piece over the filling like an envelope, pinch long edges together, & roll it with your fingers into a rod shape. Coil each rod into a rounded snail shape. Place in greased baking dish & cover with plastic wrap/towel. Allow to rise for an hour or until doubled in size.
Preheat oven to 350 F. Bake rolls about 20 minutes or until golden. Remove from oven; cool for just a few minutes then pat with butter. Sprinkle with sugar & more grated cheese.
-

CELEBRATING OKTOBERFEST!
Even if it is a little hard to admit summer has ended and fall is officially here, Oktoberfest seems like a great little celebration to ease into the coming winter months.
Oktoberfest began as a wedding celebration more than 200 years ago in Munich, Germany, when Bavaria’s, Crown Prince Ludwig married Princess Therese of Saxony-Hildburghausen on October 12,1810. The wedding was celebrated with multiple days of drinking, feasting and horse races. Everybody had so much fun that it was resolved to repeat the celebration, which has been done, every year since.
Beer enthusiasts from all over the world flock to Munich for Oktoberfest, where they feast on everything from steins of beer to plates of sauerkraut, bratwurst, cabbage rolls, sausage and wiener schnitzel. Bavarian music fills the air to promote the fun atmosphere of Oktoberfest.
While the true celebration has to be experienced in Munich, there are actually some great Canadian events that try to duplicate the festivities without having to travel abroad. In different parts of the country this is a fun and social sampling event featuring many local craft and authentic Bavarian breweries as well as authentic food, Oktoberfest music, dancers, games, etc..
To acknowledge this holiday we are having a corned beef, cabbage & potato pizza with a rye bread crust. It seems a good mix of German-Canadian food to me ?!
Print Recipe
Corned Beef & Cabbage Pizza
Votes: 1
Rating: 5
You:
Rate this recipe!
Ingredients
Toppings
- 3 tbsp olive oil, divided
- 1 large potato, thinly sliced, spiced & baked
- 1/4 Tsp EACH paprika, crushed rosemary, garlic powder, pepper & salt
- 150 grams sauerkraut with juice
- 1 small red onion, diced small
- cornmeal
- 100 grams monterey jack cheese, grated
- 170 grams corned beef, cooked & diced
- 50 grams mozzarella cheese, grated
- 40 grams Parmigiano-Reggiano cheese, grated
- 1 cup Russian dressing
|
Votes: 1
Rating: 5
You:
Rate this recipe!
|
Instructions
Rye Pizza Crust
In a bowl, combine flours & salt. Pour 1/2 cup water into a microwave-safe bowl; heat for 30 seconds. Stir brown sugar into water until dissolved; add yeast & stir. Let mixture stand about 10 minutes, until bubbly. Pour yeast mixture into flour mixture. Pour remaining 1 cup of water into microwave-safe bowl; heat for 30 seconds.
Stir olive oil into warm water; pour over flour mixture. Knead flour mixture, adding more all-purpose flour if dough is sticky, until dough is smooth & holds together. Form dough into a ball & place in a buttered bowl. Cover with a tea towel & let rise in a warm place about an hour or until doubled in size.
Fillings
Preheat oven to 425 F. Toss thinly sliced potato with 2 Tbsp olive oil in a plastic bag. Combine paprika, rosemary, garlic powder, salt & pepper; add to potato slices & toss again. Roast in a single layer on a baking sheet about 10-15 minutes. In a skillet, add sauerkraut with juice & diced onion. Simmer for a few minutes until onion is tender. Drain well; set aside to cool slightly.
Assembly
Punch down dough. Sprinkle a 14-inch pizza pan with cornmeal & press dough out to fit pan. Top crust with monterey jack cheese, corned beef & onion/sauerkraut mixture. Lay roasted potato slices to cover pizza then sprinkle with mozzarella & Parmesan cheeses. Bake pizza for 12-15 minutes or until golden & crispy. Once pizza is done baking, drizzle with Russian dressing & slice.
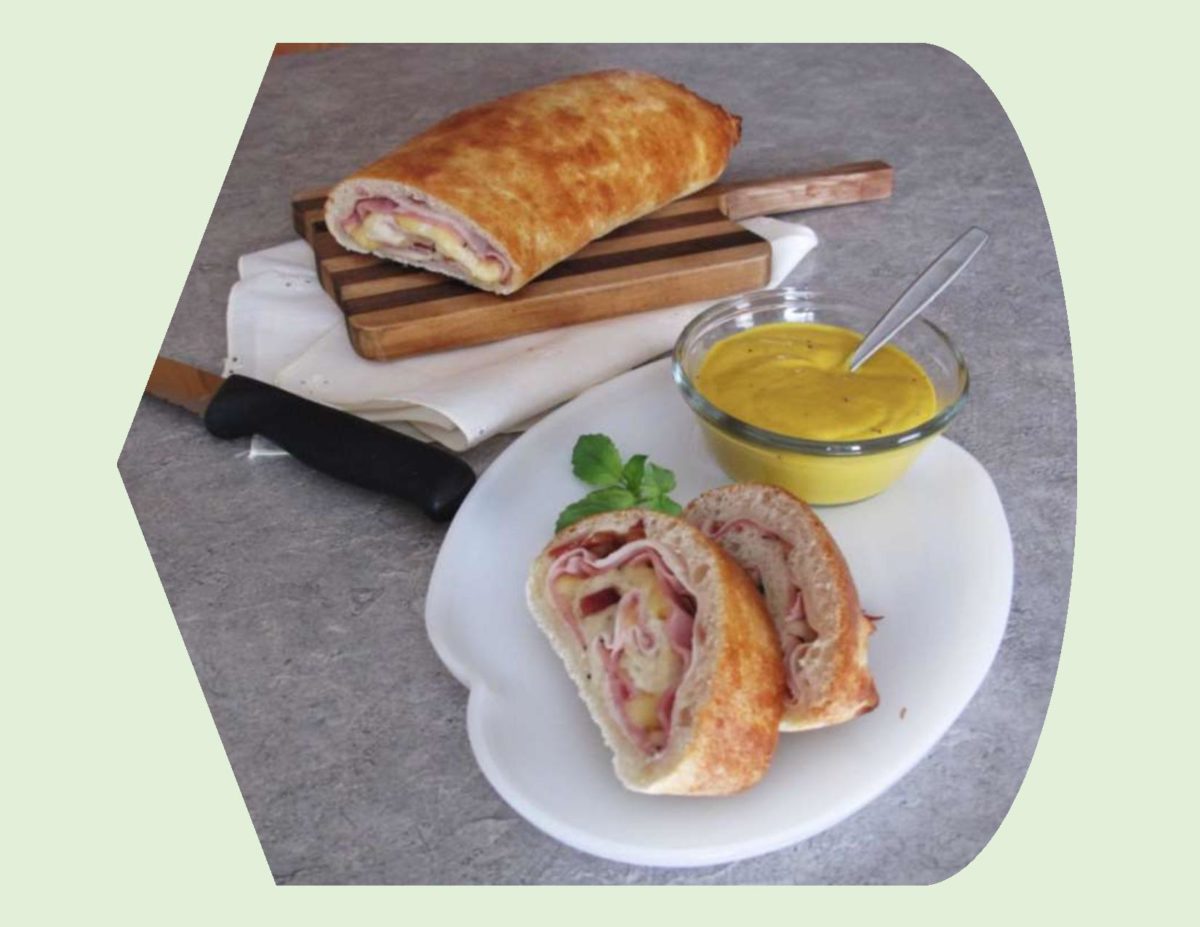
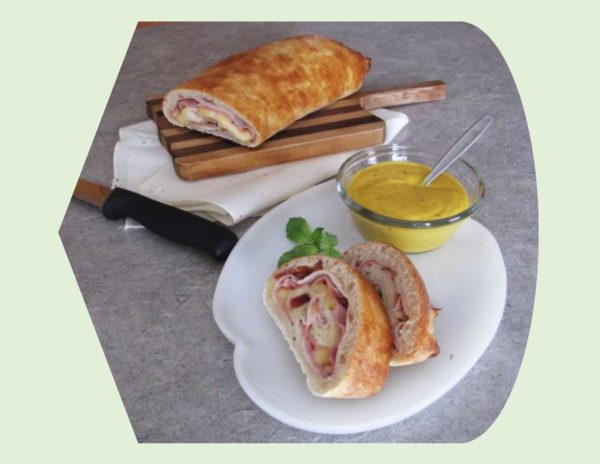
Stromboli has been around for over six decades. It all started with an ancient volcano that sits on the island of Stromboli off the coast of Sicily. Legend has it, during the filming of the movie ‘Stromboli’ in 1950, the director and a famous film star had an affair, etc. One Italian restaurant owner in Pennsylvania, USA claims to be the inventor of this much loved sandwich. But some feel that the Hollywood scandal that inspired it is much more interesting than truth.
There are many reasons why this under appreciated ‘sandwich’ is worth trying. It can be stuffed with practically anything, made to go and you can have as much variety in it as you choose. Most of the classic stromboli have either ham, turkey, chicken or steak with pepperoni, mozzerella & parmesan cheeses.
In my stromboli, I’m using bacon instead of pepperoni but use whatever combination works for you. Roll it up, bake it and you are ready to picnic!
Print Recipe
Club Sandwich Stromboli
Votes: 1
Rating: 5
You:
Rate this recipe!
|
|
Votes: 1
Rating: 5
You:
Rate this recipe!
|
Instructions
Pizza Dough
In a bowl, place lukewarm water; sprinkle with yeast & allow to sit for 5 minutes. Add flour & salt to yeast/water mixture; stir together & knead on a floured work surface for about 5 minutes. Wipe bowl with a bit of oil; place dough in it & turn to coat. Cover with a tea towel & place in a warm area. Allow to rise for about 30-45 minutes.
Assembly
Preheat oven to 425 F. On a floured surface or a large piece of parchment paper, roll pizza dough into a 10-12-inch long rectangle. Sprinkle with crumbled bacon then shingle turkey, ham & cheese slices onto pizza dough. Roll the pizza dough up into a tight cylinder & seal the ends. Place on a baking sheet; brush with egg wash & bake about 10-15 minutes, until lightly browned. Remove from oven & allow to stand about 5 minutes before cutting into slices. Serve with mustard of choice.
Recipe Notes
- If your are short on time or maybe don't really want to go through the trouble of making pizza crust just use a purchased one. It will work just fine & give you more time in the sun!


