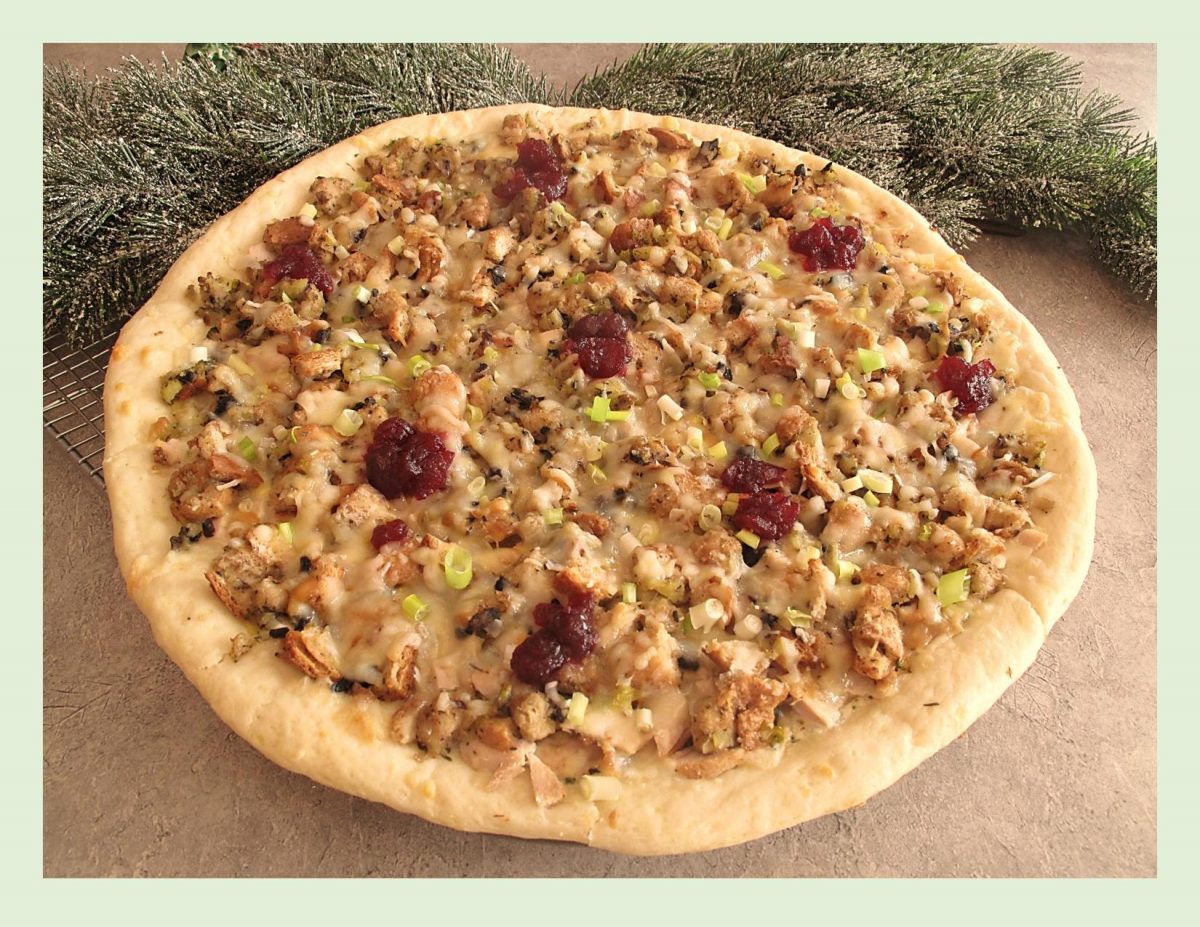
In 2019, Boston Pizza, a Canadian pizza chain created a Christmas pizza which literally consisted of a turkey dinner on top of a pizza crust.
The most notable aspect of their Christmas pizza was the ‘singing box’ it came in. The company had an advertising agency create a caroling delivery box. Using a play on ‘Carol of the Bells’, the jingle ran through the components of the holiday menu item: ‘cranberry sauce, gravy on top, turkey as well and also cheese. Why the cheese? Cause we love cheese, turkey & cheese, four kinds of cheese’.
Like those musical greeting cards that emit tinny tunes when you open them, the ‘Chorus of the Pizza’, playing box reportedly operated using a light senor device. When the box was opened, the music played, as soon as it closed, silence.
The singing box was to replicate carolers coming to your door, but it was better because they brought pizza and you didn’t have to stand awkwardly listening to people sing to you.
I’m not sure if Boston Pizza is using this kind of promotion in 2020, but based on their ad from 2019, I developed a Christmas pizza ‘copy cat’ recipe. Great taste and a nice way to use some leftover turkey.
Print Recipe
Christmas Turkey Pizza
Votes: 1
Rating: 5
You:
Rate this recipe!
|
|
Votes: 1
Rating: 5
You:
Rate this recipe!
|
Instructions
Pizza Dough
Cook potato, peel, mash & cool. In a small container, combine yeast with lukewarm water; whisk until yeast is dissolved. Let stand about 3 minutes until foamy.
In a large bowl, combine yeast/water, butter, salt, sour cream & potato; mix well.
Stir in flour, one cup at a time. When dough is completely blended, turn onto a lightly floured surface. Knead dough about 5-10 minutes, until smooth & elastic. Place dough in a lightly greased bowl, cover with plastic wrap. Allow to rise in a draft-free place until doubled in size, about an hour.
Herb Sauce
In a skillet, melt butter; add herbs & cook for 2 minutes. Pour in your choice of either heavy cream OR chicken broth. Heat until hot, about 2 minutes more. Season with salt & pepper to taste. Set aside to cool slightly.
Assembly
-
On a large sheet of parchment paper, roll or press dough into a 16-inch circle. Transfer with paper to either a 14-inch pizza pan or a flat baking sheet.
Carefully spread the 1/2 cup herb sauce over the bottom of the pizza (leaving the outside ring without sauce). Sprinkle a bit of the cheese over sauce then layer with turkey & stuffing. Drizzle with turkey gravy & top with remaining cheese. If you prefer, brush the outside edge of the pizza ring with egg wash.
Bake for 15-20 minutes or until golden brown. Remove from oven & slice.
When you are ready to serve, dot pizza with cranberry sauce or just let everyone put on their own.
Recipe Notes
- As an alternate to the herb sauce, using 1/2 cup bottled lite Alfredo sauce w/ Parmesan cheese makes a good choice.
When most people mention biscotti, they actually mean a specific type of Italian cookie called ‘cantuccini’. Italians use the term biscotti to refer to any type of crunchy cookie, round, square and otherwise as the British use the word biscuit. Here in North America, biscotti refers to a specific type of Italian cookie, derived from the ‘Tuscan cantuccini‘, which is a hard, almond flavored cookie that is baked twice and usually served with the sweet Italian dessert wine, Vino Santo. This wine is loved for its intense flavors of hazelnut and caramel. When paired with biscotti, Vino Santo is inarguably Italy’s most famous welcoming tradition. What makes this wine truly special is the natural winemaking process which gives it a unique taste.
The word biscotti derives from ‘bis’, Latin for twice, and ‘coctum’ or baked (which became ‘cotto’, or cooked).
The original biscotti was created by a bakery in Prato, Italy. Cantuccini became a staple in the Tuscan cities of Florence and Prato then spread throughout the Italian peninsula. Tuscan biscotti are flavored with almonds from the plentiful almond groves of Prato. From the original recipe it expanded to lemon flavored dough as well as other flavors and spices with additions such as raisins, dried fruits and peels to chocolate morsels and nuts.
Biscotti have been baked for centuries and its iconic texture was the perfect for for sailors who were at sea for months. In modern times, biscotti range in texture from very hard to somewhat spongy and more cake-like. First, the sticky dough is shaped into a log and baked until firm. After a short cooling period, the log is sliced into diagonal pieces and baked again to cook out the moisture and produce the crisp, dry-textured cookie with a longer shelf life. The classic recipe has no butter or oil, using only eggs to bind the ingredients together. They are typically made in a 3, 5 or 7-inch size.
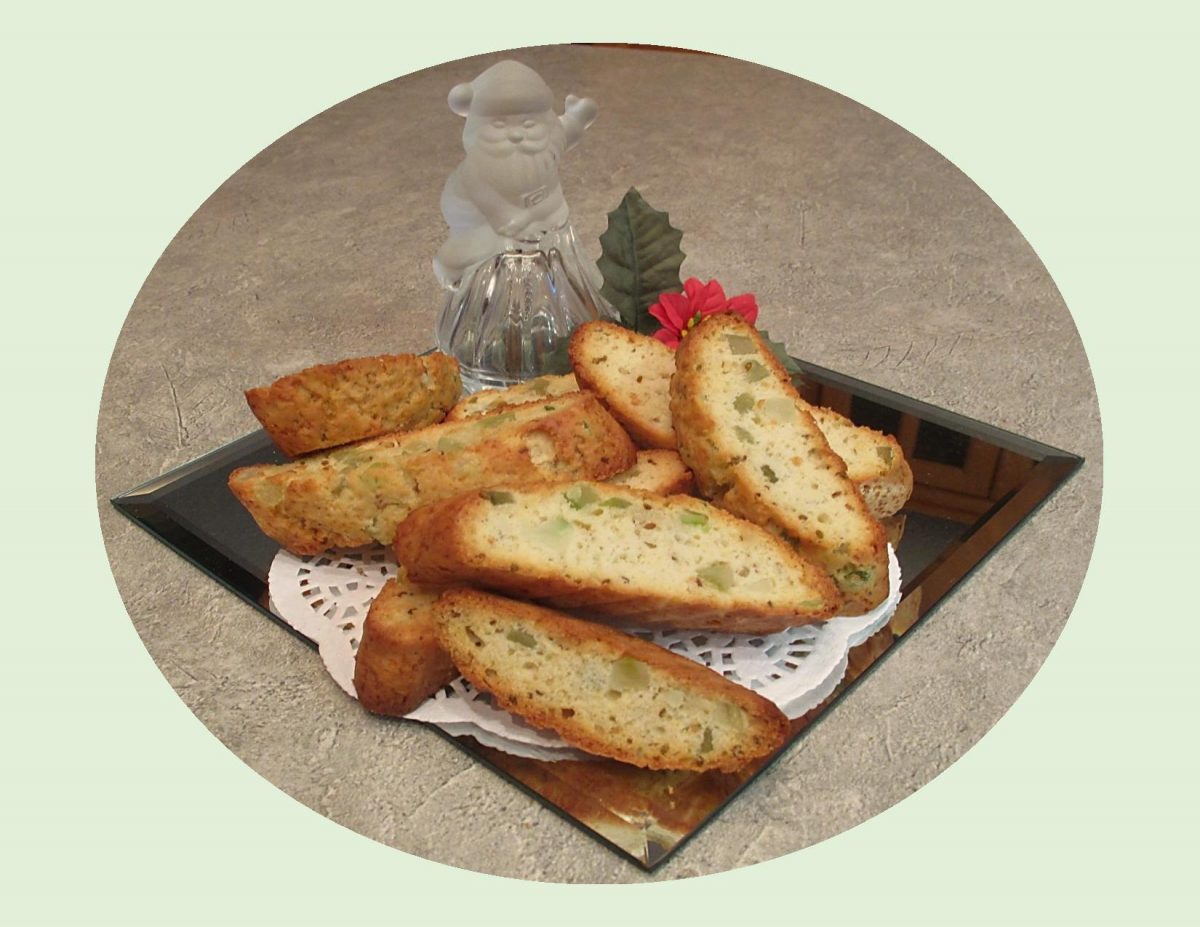
I have to be honest, biscotti has never been one of my ‘go-to’ cookie recipes. But, for something quick and easy, I decided to make a small recipe using two of my favorite ingredients …. anise seed & citron peel. Brion & I tried dipping them in wine and we realized we have been missing out on something real good!!
Print Recipe
Anise Citron Biscotti
Votes: 1
Rating: 5
You:
Rate this recipe!
|
|
Votes: 1
Rating: 5
You:
Rate this recipe!
|
Instructions
-
In a bowl, combine oil & sugar followed by vanilla & eggs.
In another bowl, combine flour, salt, baking powder & anise seed then gradually stir this mixture into the egg mixture. Lastly, fold in citron peel.
Divide dough in half & form into two logs (about 6"x 2"). Place logs on a parchment lined baking sheet.
Bake for about 30-35 minutes; remove from oven & set aside to cool for about 10 minutes. Reduce heat to 275 F.
Cut logs on the diagonal into 3/4-inch thick slices. Lay the slices on their sides on lined baking sheet.
Bake for another 20-25 minutes, turning halfway through baking time.
Cool on baking sheet for 5 minutes, then carefully transfer to a wire rack to finish cooling. Store in an airtight container.
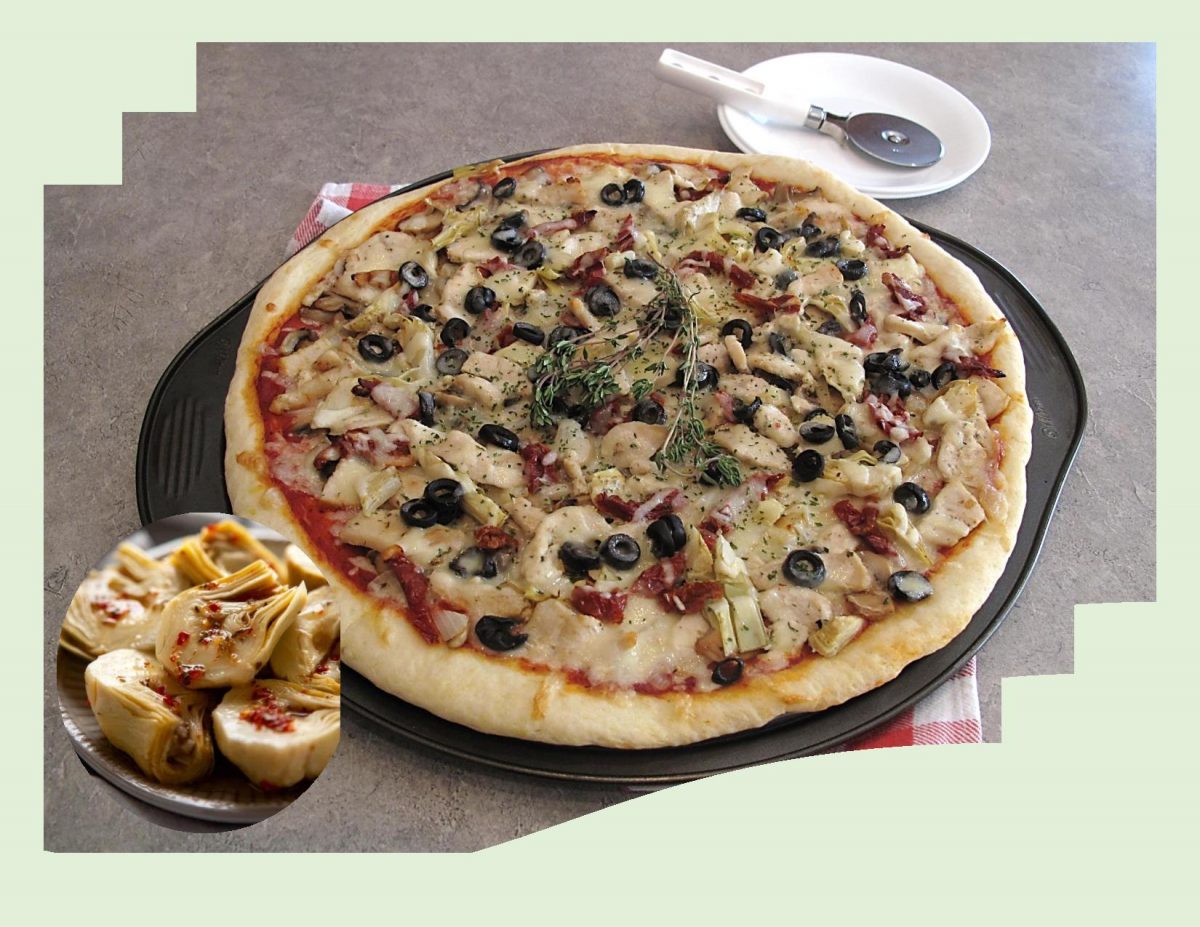
Pizza is one of the easiest meals you can make at home. I most always prefer to make my own crust but nothing wrong with a purchased one or some focaccia bread pizza crust. Once that crust part has been taken care of, its really just a matter of topping the pie with all your favorite ingredients and waiting for it to come out of the oven.
But of course, there are a number of things that can go wrong even so. You might think that there’s no such thing as too much cheese …. but there is. Cheese normally means a lot of grease, your pizza could fall apart under the weight of all that dairy.
Too many toppings can cause overly cooked crust or under-cooked toppings. Another thing I find super important, is making sure the toppings are sauteed so they are not releasing too much moisture into the crust.
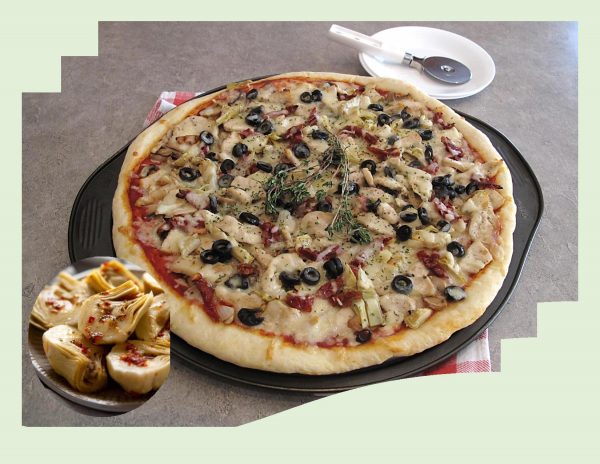
Since Brion & I are both lovers of marinated artichokes, putting them on a pizza sounds real good. Artichokes are technically the flower buds of a thistle plant that hasn’t blossomed yet. Its kind of amazing to think we can enjoy these odd little culinary treats in so many ways.
Print Recipe
Marinated Chicken & Artichoke Pizza
Votes: 1
Rating: 5
You:
Rate this recipe!
Ingredients
Pizza Toppings
- 150 grams chicken breast, cut in strips
- 2-170 ml marinated artichoke hearts, drained
- 200 grams fresh mushrooms, sliced
- 1/4 or 70 grams onion, thinly sliced
- 1 tsp butter,
- 200 grams 100% mozzarella cheese, shredded
- 1/4 tsp EACH dried oregano, Italian seasoning, garlic powder & black pepper
- dash of crushed red pepper flakes (optional)
- 30 grams (6 pieces) sun-dried tomato, chopped
- 1/3 cup black olives, drained & sliced
- 1/2 cup purchased Marinara sauce
|
Votes: 1
Rating: 5
You:
Rate this recipe!
|
Instructions
Pizza Dough
Cook potato, peel, mash & cool. Combine yeast with lukewarm water; whisk until yeast is dissolved. Let stand about 3 minutes until foamy. Add butter, salt, sour cream & potato, mix well.
Stir in flour, one cup at a time. When dough is completely blended, turn onto a lightly floured surface. Knead dough about 10 minutes, until smooth & elastic. Place dough in a lightly greased bowl, cover with plastic wrap & let rise in a warm place until doubled in size, about 1 hour.
Pizza Topping Prep
Slice chicken into strips, saute in some drained artichoke marinade until most of it evaporates. Set aside.
Saute mushrooms & onions in a teaspoon of butter until moisture evaporates. Set aside.
Shred cheese. In a small dish combine spices.
Drain sun-dried tomatoes & black olives, blot on paper towel & slice tomatoes.
Cut each piece of (drained) artichoke in half.
Assembly
-
On a large sheet of parchment paper, roll or press dough into a 16-inch circle. Transfer on paper to a baking sheet.
Carefully spread the 1/2 cup marinara sauce over the bottom of pizza. Season with spice mixture. Sprinkle with a bit of cheese then layer with mushrooms, onion, chicken, artichokes, sun-dried tomatoes, olives & remaining cheese.
Bake for 15-20 minutes or until golden brown. Remove from oven & slice. If you prefer, brush the top of the outside (dough) ring with artichoke marinade either before or after baking.
Recipe Notes
- If you like, press pizza dough into a 16 X 12-inch rectangle instead of a circular shape.

Orecchiette pasta originates in the sunny, southern province of Puglia, Italy. This pasta’s round concave shape led to its name, which means ‘little ears’ in Italian. The rigid exterior and cup-like interior captures chunky sauces and scoops up small vegetables, making orecchiette perfect to serve with sautes. I should mention that I didn’t find orecchiette on the regular supermarket shelves. We are lucky to have some real good Italian grocery stores in our area which definitely have them available.
You will notice, another ingredient I used in this meal is Italian sausage. Sausage is so common that people rarely stop and think about how and why they are made the way they are. Every country has a unique sausage tradition and puts their own twist on the classic meat.
Italian sausage is one of the more popular sausage varieties available, but its origins in Italy are actually different from what we are accustomed to in North America. The true Italian sausage or ‘salsiccia’ (sahl-SEE-tchay) is made of meats that have been seasoned heavily with chili and other hot ingredients and allowed to marinate and change the flavor of the meat overnight.
The more common Italian sausage that North Americans know, is a pork sausage with a fennel and anise mixture as a base seasoning. It is packaged as either HOT or MILD, the difference being in the amount of red pepper flakes that are used.
If you choose to try this meal, I think you will find it real tasty. We just loved it and I have to say it was actually the first time we had ever tried Italian sausage. I have always thought it would be too spicy hot for our liking. Needless to say, I went with the mild version.
Print Recipe
Creamy Mushroom & Sausage Orecchiette
Votes: 1
Rating: 5
You:
Rate this recipe!
|
|
Votes: 1
Rating: 5
You:
Rate this recipe!
|
Instructions
In a saucepan, cook sausage with a splash of olive oil, until browned & cooked through. Set aside.
Add butter to saucepan & saute onions until softened, about 3-4 minutes. Mix in garlic, cook another 2 minutes. Add mushrooms & zucchini, sauteing until tender-crisp, about 5-6 minutes. Return sausage meat to pan & keep warm.
Bring a large pot of water to a boil; add salt. Cook orecchiette pasta according to package directions. Drain pasta & return to pot. Fold in cheese, sausage/vegetable mixture, fresh parsley & pepper to taste. Slowly add chicken broth until preferred consistency is reached. Serve garnished with red pepper flakes & Parmesan cheese.
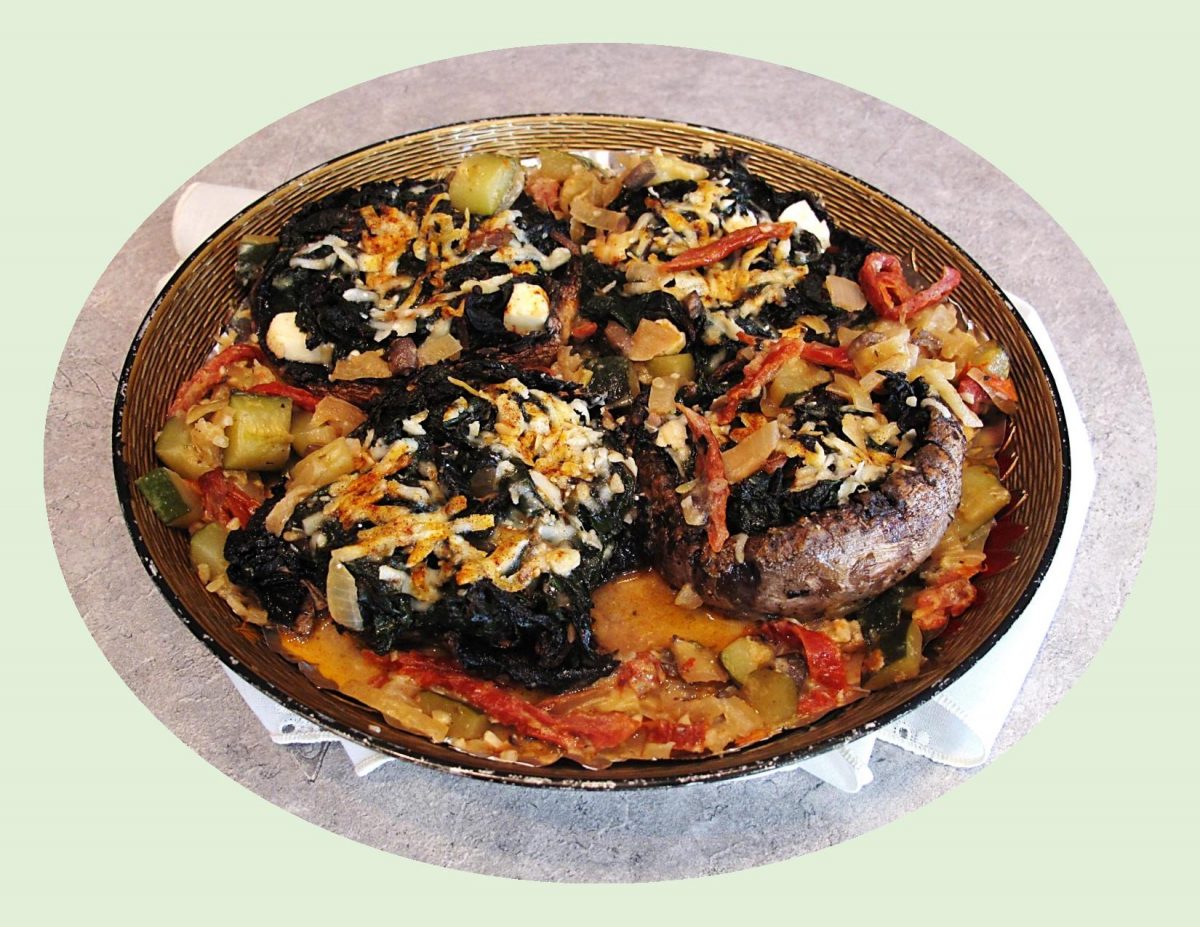
Stuffed mushrooms are one of those items that can be an appetizer as well as a main course. They are as versatile as you can get. The number of different fillings are endless and can be anything from a simple bread stuffing to seafood, veggies or any kind of meat.
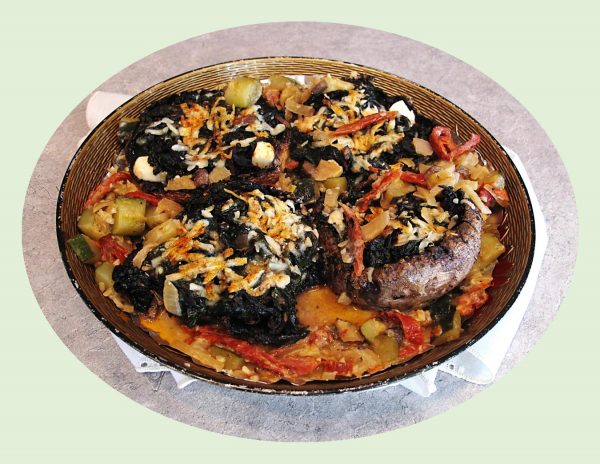
Portobello mushrooms are big, meaty and the ideal vessel for stuffing, creating a dish that is a meal unto itself. Few things can match the flavor of stuffed mushrooms.
Depending on the source, this unique dish has been around since the late 19th century or early 20th century. The fact that they resemble stuffed zucchini, it is likely that the Italians should receive credit for their creation.
Print Recipe
Stuffed Portobello Mushrooms in Sun-Dried Tomato Sauce
Votes: 1
Rating: 5
You:
Rate this recipe!
|
|
Votes: 1
Rating: 5
You:
Rate this recipe!
|
Instructions
Mushrooms
Trim stems from mushrooms & finely chop them; reserve for sauce. Whisk the egg lightly in a shallow bowl. In a separate shallow bowl, combine flour, salt, pepper, oregano, thyme, paprika & garlic salt.
In a large skillet, heat olive oil on medium-high. Dip the mushrooms in the egg then in the flour mixture. Coat the outside of the mushrooms, trying not to get too much flour inside the 'cap'.
In a skillet, fry mushrooms on both sides until lightly golden. Use a tongs to help fry the sides as well. Remove mushrooms to a plate. To the skillet, add a splash of water & Swiss chard leaves. Sprinkle with salt & pepper & saute until leaves are wilted, about 1 minute.
Divide cream cheese between the 4 mushroom caps. Top with wilted Swiss chard; sprinkle with grated Parmesan & paprika. Set aside, keeping warm.
Sauce
In a skillet , heat oil. Add onion & cook for 2 minutes until it starts to soften. Add reserved mushroom stems, garlic, oregano, paprika, sun-dried tomatoes, red peppers & zucchini. Cook for 2 minutes while stirring with a spatula. Add wine (or chicken broth) & allow to bubble for 2 minutes then add vegetable broth, salt & pepper. Bring to a boil & simmer for 5 minutes.
Stir the cream & Parmesan cheese into the sauce, then nestle the mushrooms on top. Garnish with chopped fresh parsley. Nice to serve with pasta or potatoes and/or a meat item.

Being a fig lover, I am always attracted to recipes with this tasty little fruit in them. Some years ago, I started using the Kraft Fig Balsamic Dressing and it became one of my favorites.
Salad dressings have started catering to consumer demand for thoughtfully crafted products made with natural ingredients. Fig balsamic dressing can be used in numerous ways. It has a tangy and delicately sweet, caramelized fig flavor that works as a glaze for roasted or grilled pork, sauteed chicken and baked salmon. You can brush it on in the last few minutes of cooking or add a little to the skillet, just to coat your saute.
This balsamic vinaigrette has enough flavor to dress a salad on its own or use over roasted veggies, aged & soft cheeses or in soups. For dessert try drizzling some over fruit & Greek yogurt or ice cream. It’s amazing!
This glazed salmon is an excellent meal served with rice or roasted potatoes.
Print Recipe
Honey Balsamic Glazed Salmon
Votes: 1
Rating: 5
You:
Rate this recipe!
|
|
Votes: 1
Rating: 5
You:
Rate this recipe!
|
Instructions
Heat oil in a large skillet on medium-high heat. Add vegetables; cook 2 minutes, stirring occasionally. Spoon vegetables to one side of skillet. Add salmon, flesh side down, to other side of skillet; cover. Cook on medium heat 8 minutes or until fish flakes easily with fork, turning after 4 minutes.
Transfer fish & vegetables to a plate; cover to keep warm. Add dressing & honey to skillet; cook & stir 30 seconds or until heated through.
Pour dressing mixture over fish. Top vegetables with Parmesan & fresh basil.

Rice has always been a staple at our house. I think Brion could eat rice almost everyday without problem. Although the steamed long grain would be his favorite, I can’t resist making a risotto periodically.
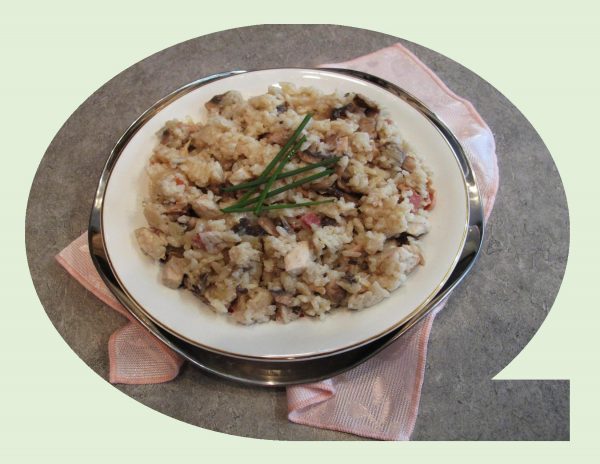
A properly cooked risotto should form a soft, creamy mound on a dinner plate. It shouldn’t run across the plate, nor should it be stiff and gluey.
Risotto’s signature tenderness is traditionally achieved by slowly adding spoonfuls of liquid while the rice cooks. This shortcut version eliminates most of the stove top stirring, but produces equally silky results.
Print Recipe
Chicken & Mushroom Risotto
Votes: 1
Rating: 5
You:
Rate this recipe!
|
|
Votes: 1
Rating: 5
You:
Rate this recipe!
|
Instructions
Heat 1 tsp oil in a LARGE POT or DEEP SKILLET over high heat. Add bacon & cook until golden. Transfer to a small microwave-proof bowl.
Leave about 1 Tbsp bacon drippings in pot & discard the rest. Add chicken & cook until browned through. Transfer to a separate bowl. Add mushrooms & cook until light golden. Add to bowl with chicken.
Turn heat down to medium & return pot to the stove. Add butter & melt; then add garlic & onion. Saute for 3 minutes or until softened. Turn up heat, add rice & stir until grains become partially translucent, about 1 minute (do NOT overcook).
Add wine & cook, scraping the bottom of the pot to get any brown bits, about 2 minutes. Turn down heat to medium-low; add about 3 cups of chicken stock. Leave, uncovered, stirring just once or twice, until most of the liquid has been absorbed.
Check firmness of rice & add 1/2 cup of broth at a time, stirring in between until absorbed & rice is cooked to YOUR taste. Add the chicken & mushrooms back into the risotto towards the end, just to heat through. Right at the end when the risotto is ready, add a 'splash' more chicken broth to make the risotto slightly soupy, then take it off the stove.
Add butter & Parmesan cheese, then stir vigorously (this will activate the starch & make it super creamy). Serve immediately. Garnish with reheated bacon & extra Parmesan if you wish.
Recipe Notes
- Risotto is best made with Arborio rice which is starchier than other types of rice, making it essential to achieve a creamy risotto.
- In order to use this 'no stir' method of cooking risotto, you MUST use a large pot or deep skillet so the rice & liquid is spread out & not too deep.

As I was preparing this meal today, the same question that I’ve pondered many times, came back to me. Why do we serve (garlic) bread with a pasta meal? It makes no sense! Pasta and bread are both starches so why do we eat them together?
After a lot of research on this subject, I now think I have the answer. When the first wave of Italian immigrants arrived in America from Southern Italy in the late 19th and early 20th centuries, they couldn’t get good quality olive oil, the right produce or arborio rice, but were instead able to afford ample quantities of cheese and meat. They pioneered a culture of ‘abbondanza’ (meaning in abundance), building on traditional recipes and creating new ones; always sure to use as much of a good ingredient as possible. The result … a hearty, delicious cuisine that has never seen the light of day in the land that inspired it. ‘Italian garlic bread’, as found in North American restaurants and grocery stores, does not exist in real Italian cuisine. It is an Italian-American creation that nobody in Italy would recognize.
Ok, so now I have the answer and you’ve probably noticed, I made Garlic Knots to go with our pasta!
Print Recipe
Veggie Shrimp Pasta w/ Garlic Knots
Votes: 1
Rating: 5
You:
Rate this recipe!
Ingredients
Veggie Shrimp Pasta
- 2 cups (190 gm) dry pasta such as penne or bows
- 1 Tbsp canola or olive oil
- 1 zucchini, julienned
- 1 medium red pepper, diced
- 8 large mushrooms, sliced
- 3 cloves garlic, minced
- 3/4 tsp Paprika
- 1 tsp salt
- 1/4 tsp EACH dried thyme, oregano, garlic & onion powder & pepper
- 300 gm Wild, large raw shrimp, peeled & deveined
- 284 ml cream of mushroom soup
- 3/4 cup milk
- 60 gm shredded, Parmesan cheese, DIVIDED
|
Votes: 1
Rating: 5
You:
Rate this recipe!
|
Instructions
Garlic Knots
Preheat oven to 375 F. Line a baking sheet with parchment paper.
In a large bowl, combine flour, baking powder & salt; whisk well. Add yogurt, mixing with a fork until incorporated. On a lightly floured surface, knead dough about 15 times. Divide the dough into 8 equal pieces & roll into strips about 9-inches long. Tie each strip into a 'knot-like' ball; place on baking sheet. Bake about 18 minutes or until golden then allow to cool 5 minutes.
In a saucepan, melt butter, add garlic & cook until golden about 2 minutes. Brush the knots with the garlic butter & sprinkle with Parmesan cheese.
Veggie Shrimp Pasta
In a large pot of boiling water, cook pasta until tender but firm; drain & set aside.
Heat oil in a large skillet over medium-high heat. Add zucchini, peppers & mushrooms; cook for 5 minutes or until tender-crisp, stirring occasionally. Add garlic, spices & shrimp; stirring for another 3 minutes or until shrimp is opaque.
In pasta pot, place soup & milk; when hot add half of the Parmesan cheese, pasta & shrimp/veg mixture. If necessary, cook a few more minutes just to make sure everything is hot. Sprinkle with remaining cheese before serving.
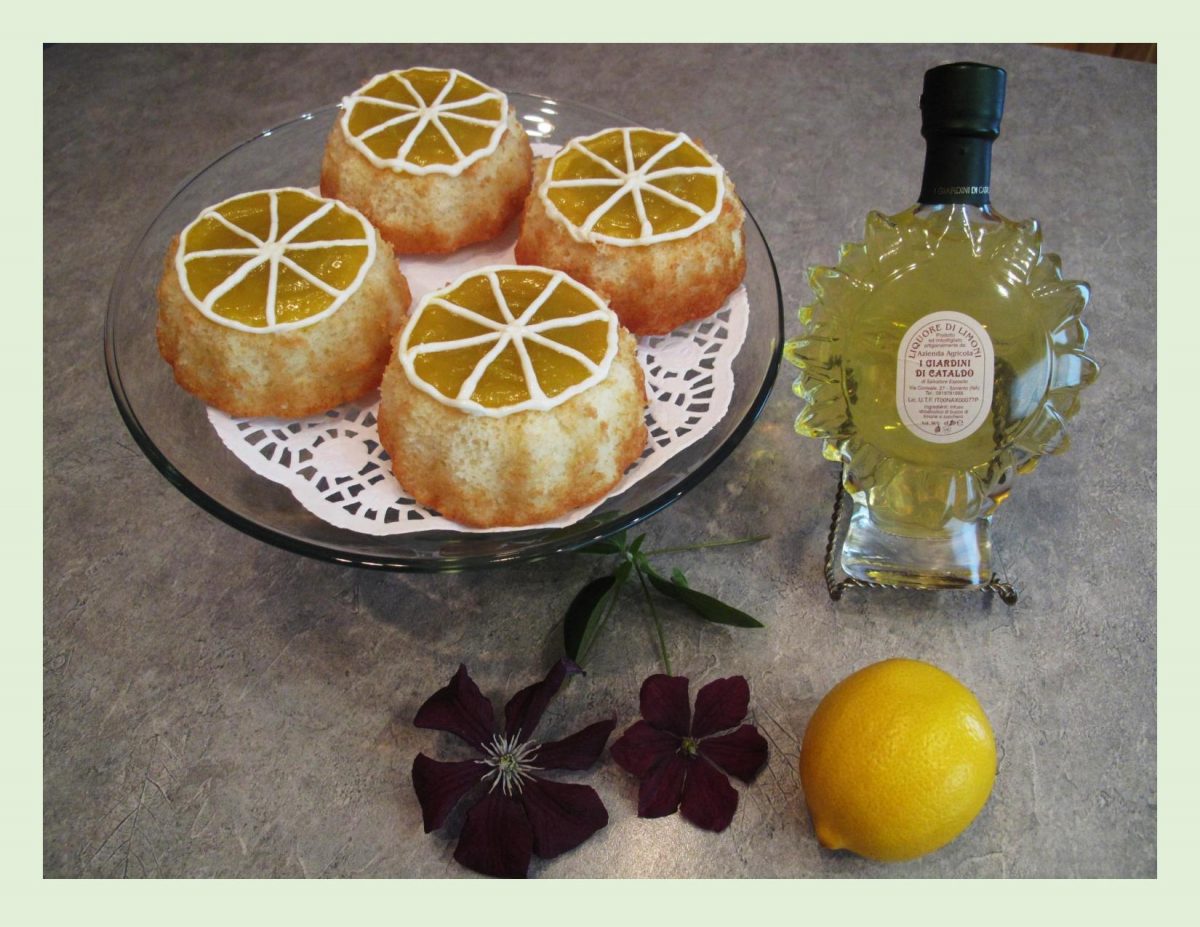
Nothing says spring more than the zesty, fresh flavor of lemons. Just to kick it up a notch, I decided to make some limoncello desserts.
Limoncello, (pronounced lee-mon-CHAY-low) the Italian lemon liqueur, is known for its refreshing sweet and tangy flavor. It is made from lemon rinds, alcohol and sugar. Although, traditionally served as an after dinner drink, it is a wonderful ingredient to use in cooking and baking.
Limoncello origins are disputed. Some say it was created by monks or nuns while others credit the wealthy Amalfi Coast families or even local townsfolk. In any case, its roots are in Southern Italy, primarily along Italy’s Amalfi Coast and the Sorrentine Peninsula known for their meticulous lemon cultivation. These lemons are considered the finest lemons for making limoncello. Prized for their yellow rinds, intense fragrance, juicy flesh and balanced acid.
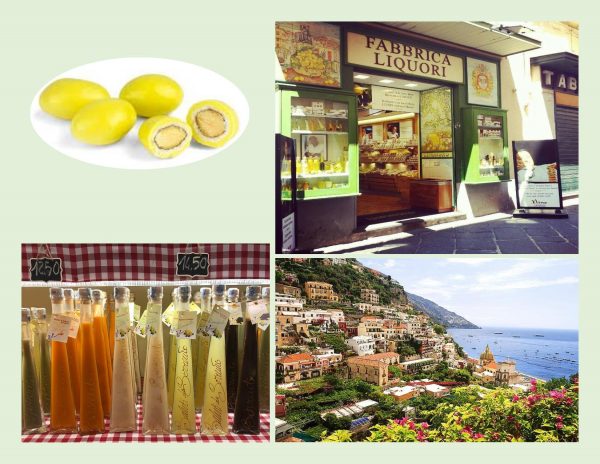
Some years ago, while travelling in Italy, Brion & I tasted athentic limoncello in the town of Sorrento. As we walked through the quaint artisan shops packed together onto a maze of medieval alleys, we came accross one that sold liqueurs & confectionery. One of the treats that they made were limoncello sugar coated almonds … to die for!
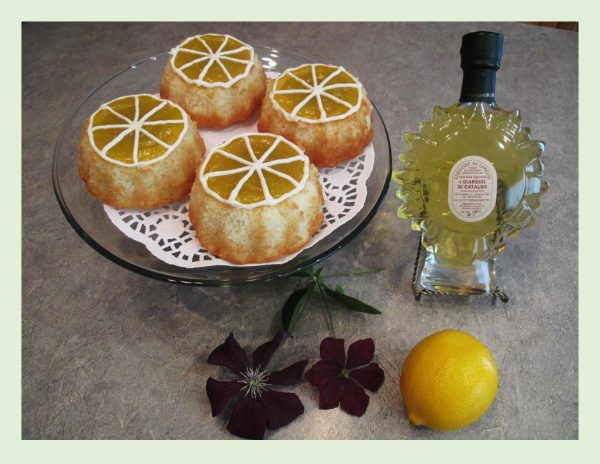
Today’s little cakes use limoncello not only in the cake but the frosting and glaze as well. Definitely gives them some spring zing!
Print Recipe
Limoncello Mini Cakes
Votes: 1
Rating: 5
You:
Rate this recipe!
|
|
Votes: 1
Rating: 5
You:
Rate this recipe!
|
Instructions
Cakes
Preheat oven to 350 F. Lightly butter & flour 4 mini bundt pans.
In a small bowl, cream butter & sugar; add egg & mix well. Fold in the flour then add milk & limoncello; beat well. Spoon mixture into the bundt pans & bake for 18 minutes or until they test done. Allow to cool.
Cream Cheese Frosting
In a small bowl, beat together butter, cream cheese & limoncello (if using). Add powdered sugar & mix until smooth.
Limoncello Glaze
In a small saucepan, whisk together sugar, lemon zest & egg. Cook until sugar dissolves & the mixture turns light in color, about 2 minutes. Stir in limoncello & cook for about 5 minutes or until mixture thinly coats the back of a spoon, stirring constantly with a whisk. Remove from heat & whisk in butter. Cover with plastic wrap & cool before using.
Assembly
Place cakes on a serving plate. Fill the center indentation from the bundt pan with glaze as well as glazing the tops. Place frosting in a piping bag with a tip that has a small hole. Pipe frosting to look like lemon slices.
-

Pasta is without a doubt, one of the most versatile ingredients to cook with. It can be prepared in so many unique ways with different sauces. Pesto sauce is one of those … a simple sauce with simple ingredients that packs a huge flavor.
Pesto sauce originated in Genoa, which is located in the northern region of Italy. The Italian word for pesto: pestare, means to pound or to crush. It was originally prepared with a marble mortar and wooden pestle. However, the translation may be a bit misleading because preparation does not consist of pounding, rather it is of grounding.
Traditionally, pesto is made of crushed garlic, fresh basil and pine nuts blended with Parmesan cheese and olive oil. There are many variations of pesto and while the most popular is a pasta sauce, it can be used for a spread or dip, salad dressing or as an accompaniment to steak, poultry or fish. Red pesto is either made from sundried tomatoes or red bell peppers.
This pasta meal comes together easily in a short space of time. Sometimes its the simplest dishes that are truly the best!
Print Recipe
Baked Shells w/ Pesto, Mozzarella & Meat Sauce
Votes: 1
Rating: 5
You:
Rate this recipe!
|
|
Votes: 1
Rating: 5
You:
Rate this recipe!
|
Instructions
-
In a saucepan over low heat, saute onion in olive oil for 5-7 minutes. Add ground pork, 2 Tbsp water, pepper, sage, red pepper flakes & ginger. Cook, stirring until no longer pink.
Add salt, dried basil & diced tomatoes; bring to a boil then lower heat & simmer for 20 minutes. Stir periodically. At the end of cooking time, stir in pesto & remove from heat.
While sauce is simmering, cook pasta shells al dente. It is important not to overcook shells as they will be further cooked in the oven. Drain pasta, add cooked sauce & gently toss.
Place half of the pasta in a baking dish & sprinkle with half of mozzarella & Parmesan. Top it up with remaining pasta & sprinkle with other half of the cheeses.
Bake for 15 minutes until cheese is golden & pasta is hot & bubbly.
Recipe Notes
- Don't hesitate to bake your pasta in individual servings.


