There is something very special about having an older sibling. For me, I just wanted to be with her and do everything and anything she could think of. For her, it was probably not quite as much fun having this ‘brat’ tagging along all the time asking questions. As Loretta and I look back over those times now, the memories are precious and endless.One such memory was that of the ‘clam race’ we invented.
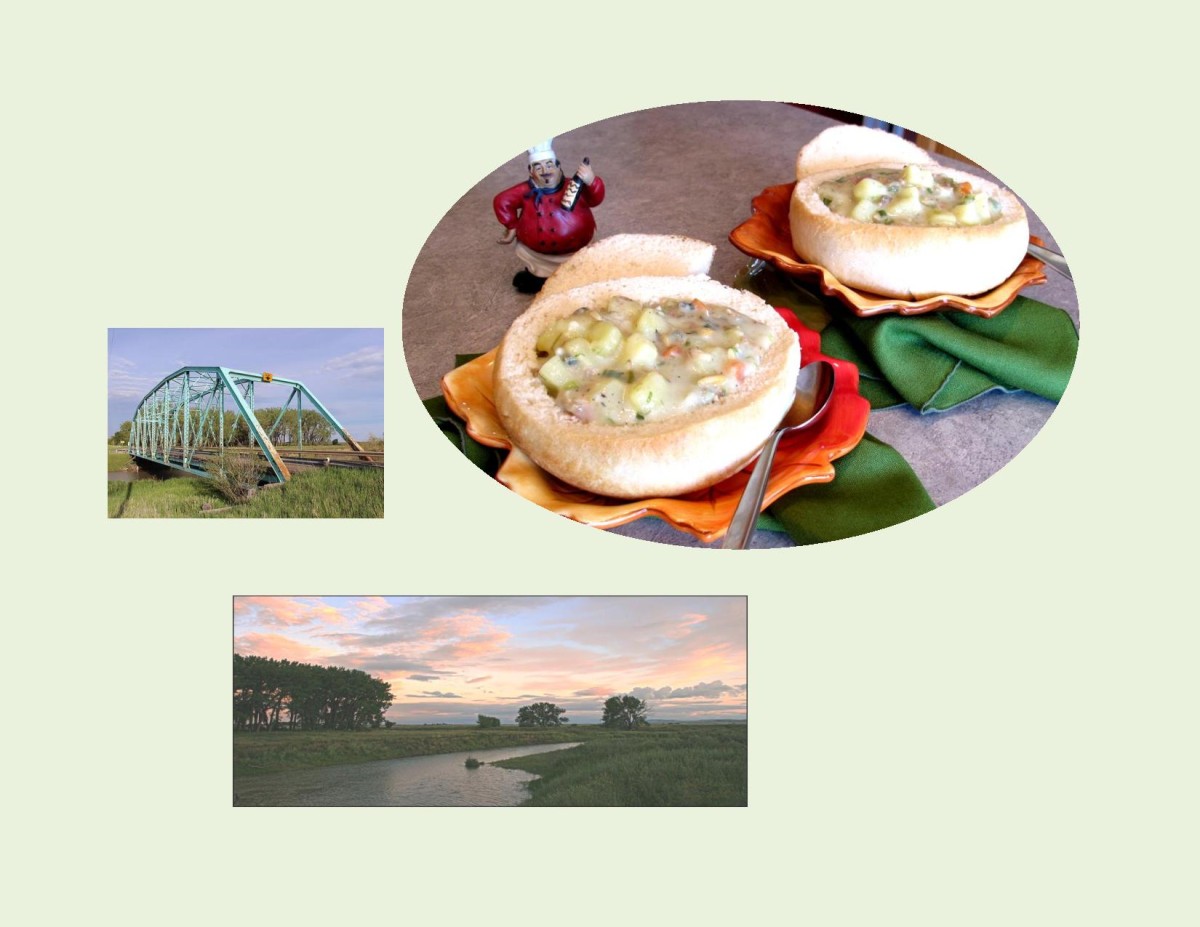
About 6 kilometers or so from our farm, the Willow Creek ran through the farmlands. Starting up at the Chain Lakes in the foothills of the Rocky Mountains, it snaked it’s way through southern Alberta eventually emptying into the Old Man river. On occasion, during summer vacation, Loretta and I would either walk or ride our bike down to the creek. This was fun because we could roll up our pant legs and walk in the water when it was so hot. We come to realize that there were some ‘clam beds’ as we explored different areas of the creek. Just for fun one day we decided to line up some of the clams across the width of the creek. On our next trip we would check to see how far they had gone.
Life in the fifties had a such a gentle rhythm to it …. what a pleasure it was to be a part of it all.
Although fresh water clams are not good for eating it seemed like a good day to post this recipe (being kind of cool and rainy). Over the years that I spent working in the commercial food industry, Boston Clam Chowder was always a favorite with customers. I would like to share with you a quick, easy version using canned whole butter clams and nectar, making it cost effective as well as tasty.
Print Recipe
Boston Clam Chowder
A very filling, creamy soup made even better when served in bread bowls.
In 2015, my husband Brion and I spent three months in Ecuador. Other than a holiday, we were wanting to check out this country as a possible ‘winter haven’, away from the cold ‘Alberta’ winters. It didn’t quite make the list but it was another adventure in our travels that is valuable in the big picture.
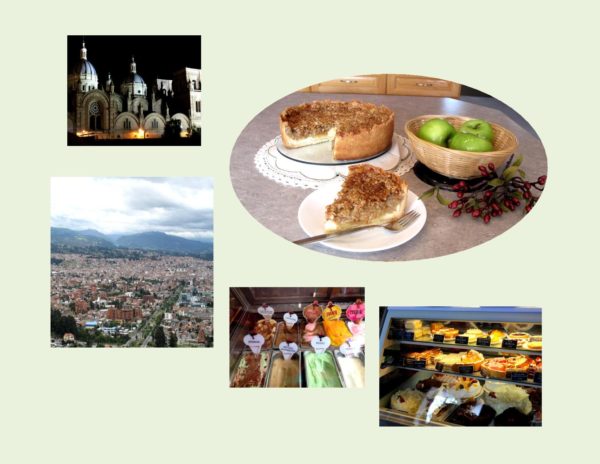
Cuenca is Ecuador’s third-largest city and the economic center of the southern sierra. The city sits on a plateau surrounded by mountains which explains the name Cuenca which means ‘basin’ in Spanish. Four rivers are found in the Cuenca basin and one, the Tomebamba, runs right through the center of the city.
An artistic mecca of southern Ecuador, artisans produce fine leather goods, custom made guitars, filigree jewelry, ceramics as well as the famous Panama hats, which originated in Ecuador not Panama.
Although near the equator, Cuenca sits high in the southern Andes at an altitude of 8300 feet and its residents enjoy year round spring-like weather. Temperatures rarely go beyond highs in the 70’s F.(21 Celsius) and lows in the 50’s F.(10 Celsius), so a sweater or light jacket is sufficient all year long. Rainfall averages around three inches per month.
Cuenca’s two ‘seasons’ are rainy and dry. The rainy season, roughly from January through May, features warm sunny mornings and frequent afternoon showers. During the middle of the dry season (June through December), you can expect long periods of chilly weather and overcast skies.
The apartment we had rented was in central Cuenca where we discovered a nice little place called ‘Tutto Freddos’. It was a unique spot where you could enjoy having a variety of things to eat such as pizza, sandwiches, ice cream treats, cakes and pastries with your coffee. It was like a bistro in appearance with its small tables as well as a mezzanine floor. While you enjoyed your coffee and treats you could watch the activity in the streets. Of course being the nature of the country, it never failed to be interesting! One of the treats we had numerous times was what seemed to me like a version of ‘Dutch Apple Pie’. I tried to find out anything I could about it in hopes of duplicating the ‘Taste of a Memory’. Here is my interpretation of this special ‘pie’.
Print Recipe
Dutch Apple Pie
Apple-cream cheese filling with a wonderful blend of 'Dutch' spices, baked in a shortbread cookie crust.
Preheat oven to 375 F. In a food processor, combine flour, powdered sugar & cornstarch. Cover & process until combined; add butter. Pulse with on/off turns until mixture forms fine crumbs. Press mixture onto the bottom & 1 1/2" up the sides of a 9" spring form pan.
Beat cream cheese & 1/4 cup sugar with mixer until well blended. Add egg & vanilla; mix well. Spread onto bottom of crust. Mix remaining sugar, 2 Tbsp flour, & spice blend. Add to apples in a large bowl; toss to coat. Spoon over cream cheese layer.
Mix remaining flour, brown sugar & rolled oats in a medium bowl. Cut in butter until mixture resembles coarse crumbs; sprinkle over apple mixture. Lay a piece of foil loosely over pie to prevent over browning. Bake in bottom third of oven for 20 minutes, uncover & continue to bake for another 30 minutes or until apples are tender.
I would like to thank all of you who downloaded my Ebook in the last week’s promo on Amazon.
Special appreciation to those of you who choose to take the time to write a review on Amazon as well as subscribing to my website. Although this was the third book I have written, it was my first Ebook to be published and good reviews definitely help me achieve better ratings in the ‘big picture’. To a ‘new’ author, this show of support is priceless and I Thank you Sincerely.
Although I can’t make today’s blog recipe for you and share it over a coffee, I think you will enjoy making it.
This was likely one of the first ‘cheesecake’ recipes. It dates back to the sixties, and probably preceded most of the baked versions. Affordable, easy to make, showy and simply delicious.
Dissolve jello powder in boiling water. Set aside to cool.
In a bowl, combine wafer crumbs & sugar; add margarine & mix well. Reserve 1/2 cup for topping. Press remainder into an 8-inch spring form pan.
Combine cream cheese, sugar & lemon extract in a mixer bowl; beat until combined. Stir in lemon jello mixture then fold in thawed whipped topping until well blended.
Pour over crust; sprinkle with reserved crumbs & refrigerate at least 4 hours or overnight.
In my opinion, no one could ever surpass my mother’s cooking. I think the only thing she ever made that I didn’t like was Cream of Wheat cereal, which really doesn’t count. Although we raised chickens, pigs and cattle, the meal we ate the most was always chicken. The reason being, whatever brought the most money when sold was raised for the family income. No matter how many times my mother served chicken it was always amazingly good.
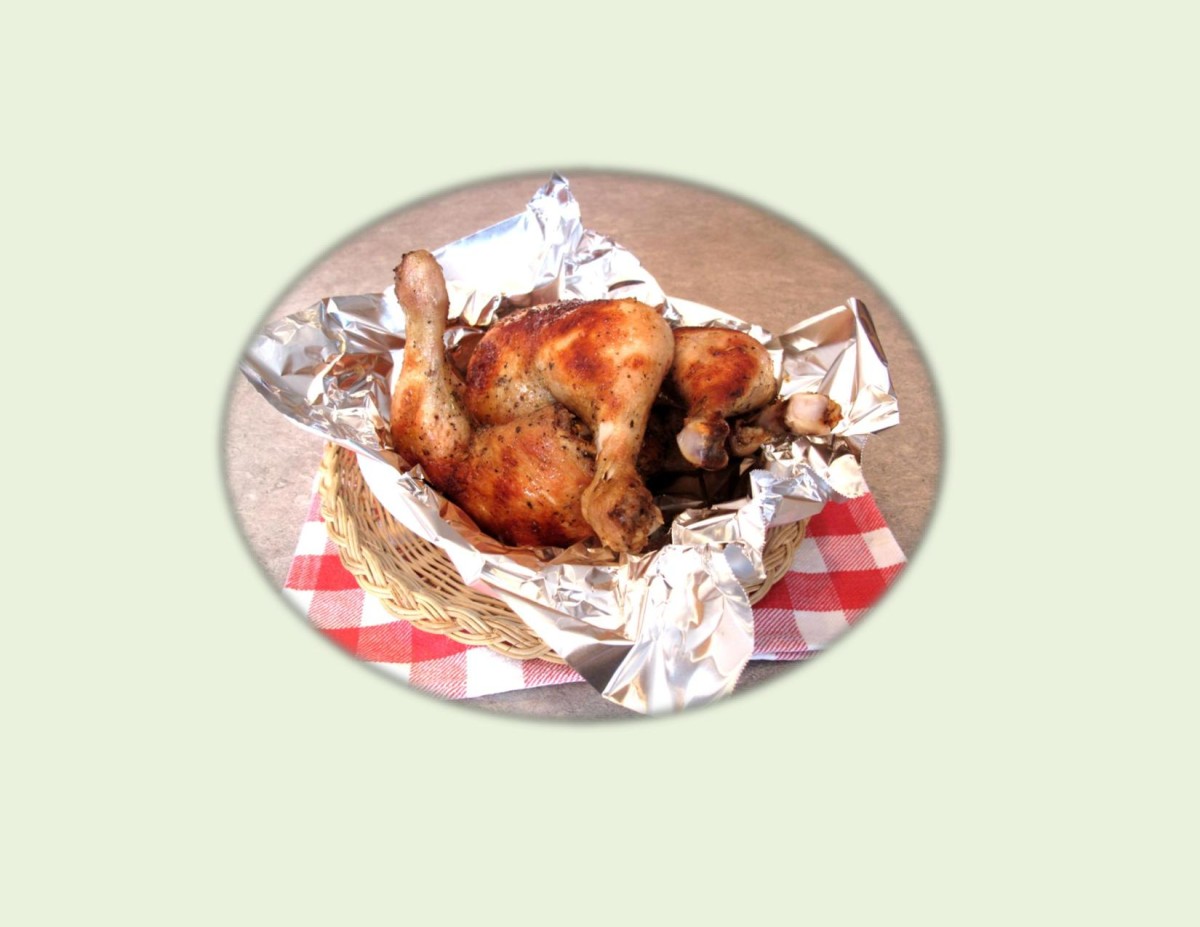
I especially remember those Sundays when our family, along with some family friends, would drive up into the foothills of the Rocky Mountains where we would just enjoy the peacefulness and great scenery. Mom would make her glorious fried chicken & potato salad. Without even realizing it, we were enjoying an experience that was truly a ‘piece of heaven’.
Print Recipe
Picnic Fried Chicken
Marinating the chicken overnight gives it a fantastic taste as well as making it extra tender.
In a small container, whisk together marinade ingredients. Place chicken in a large resealable plastic bag, turn to coat & refrigerate 3 hours or overnight.
Preheat oven to 375 F. Line a baking sheet with foil. Remove chicken from marinade; shake off any excess & discard. Transfer chicken to prepared baking sheet.
Bake, uncovered for 45-55 minutes or until no longer pink inside when tested.
In the early 1950’s, my father was able to purchase another piece of land about 4 miles from our home place. Between the two farms it became the equivalent of a ‘section’. Before this time, the cattle had to be moved to a community pasture in the foothills where they would have enough grass to graze on over the summer. At that time to transport them, you had no choice but to herd them down the road allowance for approximately 20-30 miles on foot. To say the least it was a long grueling event for both the cattle and family members.
The ‘other farm’, as we referred to it, had originally been a slaughter house for the town meat market. It consisted of one large building, corals and a few other buildings. There was a slough on the land which dad had converted to a ‘dug out’ where the cattle could go and drink freely. The land was used for grain crops where in turn the cattle could be pastured on.
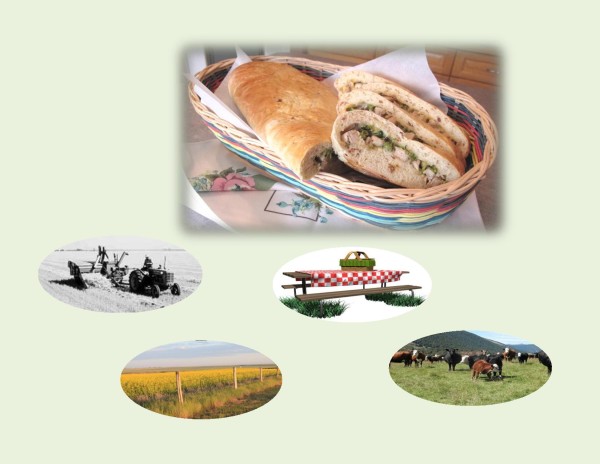
One of my fondest memories about the other farm was our picnic lunches. In the summer when dad would be working on the land, instead of my mother just packing a lunch for him that he could take in the morning, she would fix a wonderful ‘picnic lunch’. At about 11:30 in the morning, mom would pack up the lunch she had prepared, complete with plates, silverware, a tablecloth, etc., and we would drive to the ‘other farm’. There was just the right amount of space between two grain buildings to set up a make-shift table and stools. We would put the table cloth down and spread out our little picnic ‘feast’. Dad would be so surprised and we would all enjoy our lunch immensely. Mom always knew how to make the most simple things fun for us.
Lunch was always different from the your usual lunch box meal and my mother never seemed to be short on tasty ideas. I think you will enjoy trying this Spiced Chicken Stuffed Potato Loaf the next time you you have a crowd to feed.
Print Recipe
Spiced Chicken Stuffed Potato Loaf
A hearty chicken 'sandwich' rolled up and baked in a potato bread.
Butterfly chicken breasts & carefully pound to flatten. In a large resealable plastic bag, combine marinade ingredients; add chicken breast. Seal bag & turn to coat; refrigerate for 4 hours, turning occasionally. Preheat oven to 375 F. Line a 9" baking dish with foil. Place chicken on foil & bake about 45 minutes or until no longer pink inside. Remove from oven, cool & chop.
Cut broccoli into small florets & microwave for 1 minute. Boil potato, mash & cool. Fry bacon, drain & crumble. Chop chives.
In a small bowl, combine yeast with lukewarm water; whisk until yeast is dissolved. Let stand about 3 minutes until foamy. Add butter, salt, sour cream & potato; mix well. Add bacon & chives; mix until just combined. Stir in flour, one cup at a time. When dough is completely blended, turn onto a lightly floured surface (using some of the remaining 1/4 cup flour). Knead dough about 10 minutes, until smooth & elastic. Place dough in a lightly greased bowl, cover with plastic wrap & let rise in a warm place until doubled in size, about 1 hour. Remove risen dough from bowl, turn onto lightly floured surface; roll dough to about a 12" X 15" rectangle. Place a large piece of parchment on a sheet pan. Roll dough onto a rolling pin then unroll onto parchment paper. Place 1/2 of the cheese down the center of dough, top with chicken, broccoli & remaining cheese. Fold short ends in about 1". Using parchment, fold one side over filling, overlapping with opposite side. Cover with plastic; allow to rise for 15 minutes while preheating oven to 375 F. Brush with egg wash. Bake for 25-30 minutes until golden.
Recipe Notes
If you prefer less dough to filling ratio; make half of the dough into 'potato pan rolls' for another time.
If you would like to serve with a quick 'sauce', combine a can of cream of mushroom soup with 1/2 can of milk.
To simplify the process, use purchased frozen bread dough or pizza crust.
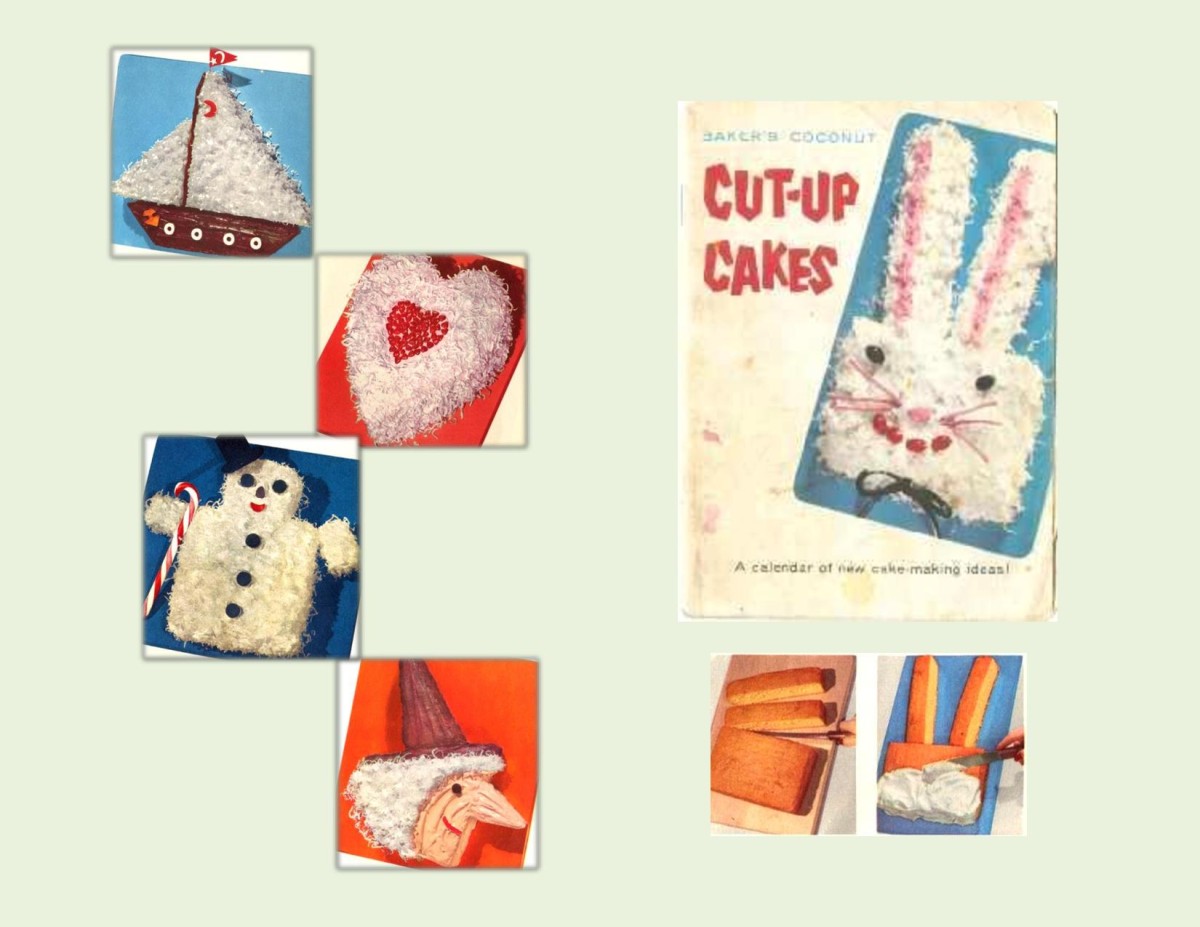
In about 1956, Baker’s Angel Flake Coconut (General Mills) came up with the idea of ‘cut-up cakes’. My mother always had a love for cake decorating and this idea just added a whole new dimension. The company printed a little booklet with a year’s worth of cut-up cake directions.
The cakes were popular because no special tools or pans were needed. Cakes were baked from your own recipe or from cake mixes, usually in either a 13 x 9″ pan or two 8 or 9″ layers. After the cake was cooled, you followed a pattern given in the recipe booklet and cut the cake as directed with a knife, then put the pieces together to form the desired shape. The cake pieces were then covered with frosting, making it appear as one solid cake.
Most of the designs usually incorporated coconut into the decoration. It looked great and of course we loved it. This was the forerunner to the baking industry developing ‘character’ cake pans in shapes of anything imaginable.
Although this old fashioned oatmeal cake came from that time period, it was not used for one of these cut-up cakes. I just thought it would be nice to include it in this blog since it had that wonderful tasting broiled topping made with the well known ‘Angel Flake‘ coconut. This cake was so good but one minute too long under that broiler could destroy it!
Print Recipe
Oatmeal Spice Cake with Broiled Topping
A dense, moist, classic oatmeal cake that has stood the test of time.
In a small bowl, pour boiling water over oatmeal & margarine; let stand for 10 minutes.
Preheat oven to 350 F. Grease a 9 x 9" baking dish.
In a large bowl, beat eggs with sugar until fluffy. Add vanilla & oat mixture, blend well.
Sift together flour, baking powder, salt, nutmeg & cinnamon.
Combine flour mixture to creamed mixture, blending carefully.
Pour into prepared baking pan; bake 35 minutes or until tests done. Cool for 10 minutes. Do not remove from pan.
For Frosting: Combine all ingredients. Spread evenly over cake. Broil until frosting becomes bubbly. WATCH CAREFULLY!
Let cake cool enough for the topping to be absorbed into the cake.
Today, March 28, was the birth date of my Mother. She passed away in 1978 at the age of sixty. Although 38 years have passed, it seems like it was only yesterday. She was truly an ‘Angel on Earth’, never to be forgotten by her family or by the people who’s lives she touched.
I have so many memories of her wonderful cooking and baking. In her honor today I decided to post a German Poppy Seed Coffee Cake.
Poppy seed has long been a popular ingredient in German and Austrian baked goods. Once again, as in the case of Easter bread, there are a great variety of versions. What always seemed to stick in my memory was that my mother’s poppy seed filling was never dry. It was almost as if the poppy seeds were in a vanilla pudding. If my memory serves me correct, she made it like a jelly roll.
Today I’m trying to re-create that ‘pudding filling’ and use it in a Bundt cake.
Print Recipe
German Poppy Seed Coffee Cake
A tender sour cream coffee cake with a custard-like poppy seed filling.
In a saucepan, over medium heat, combine pudding powder, sugar, poppy seed & lemon zest with cold milk, stirring constantly until it begins to simmer.
Simmer for 5 minutes; remove from heat.
CAKE
Preheat oven to 325 F. Grease a 12-cup Bundt pan.
Using a hand held mixer on medium speed, beat sugar, margarine & eggs, scraping bowl occasionally, for 2 minutes.
In a bowl, combine flour, baking powder, baking soda, cinnamon, salt & walnuts. Fold into wet ingredients alternately with sour cream.
Spread half of the cake batter in Bundt pan, pushing it slightly up the sides of pan.
Spoon poppy/pudding mixture over cake batter.
Gently spread remaining cake batter on top.
Bake for 45-50 minutes or until tests done. Remove from oven, place a wire cooling rack over pan. Invert & remove pan.
Serve with a dollop of Greek French Vanilla yogurt if desired or dust with icing sugar.
I can not remember anyone in our family ever having a birthday that wasn’t celebrated. Mom would make a meal that the ‘birthday person’ especially enjoyed, ending it with a gloriously decorated birthday cake.
After a family rendition of the ‘Happy Birthday’ song, you would blow out your candles on the cake. In the cake were 5 surprises mom had inserted before icing the cake.
Each item had a meaning and they went like this:
A toothpick – you will marry or be a carpenter
A button – you will become a seamstress or a tailor
A nickel – you would be middle class
A dime – you would be rich
A penny – you would be poor
Such special family memories!
Today, March 24, is the birthday of my brother, Tony. The only son in the family, it seemed quite unique that his birthday came in the middle of the same week as my parents birthdays.
‘HAPPY BIRTHDAY, TONY’! Enjoy your day as we celebrate you with love.
I would like to post a special meal today from my Ebookfor
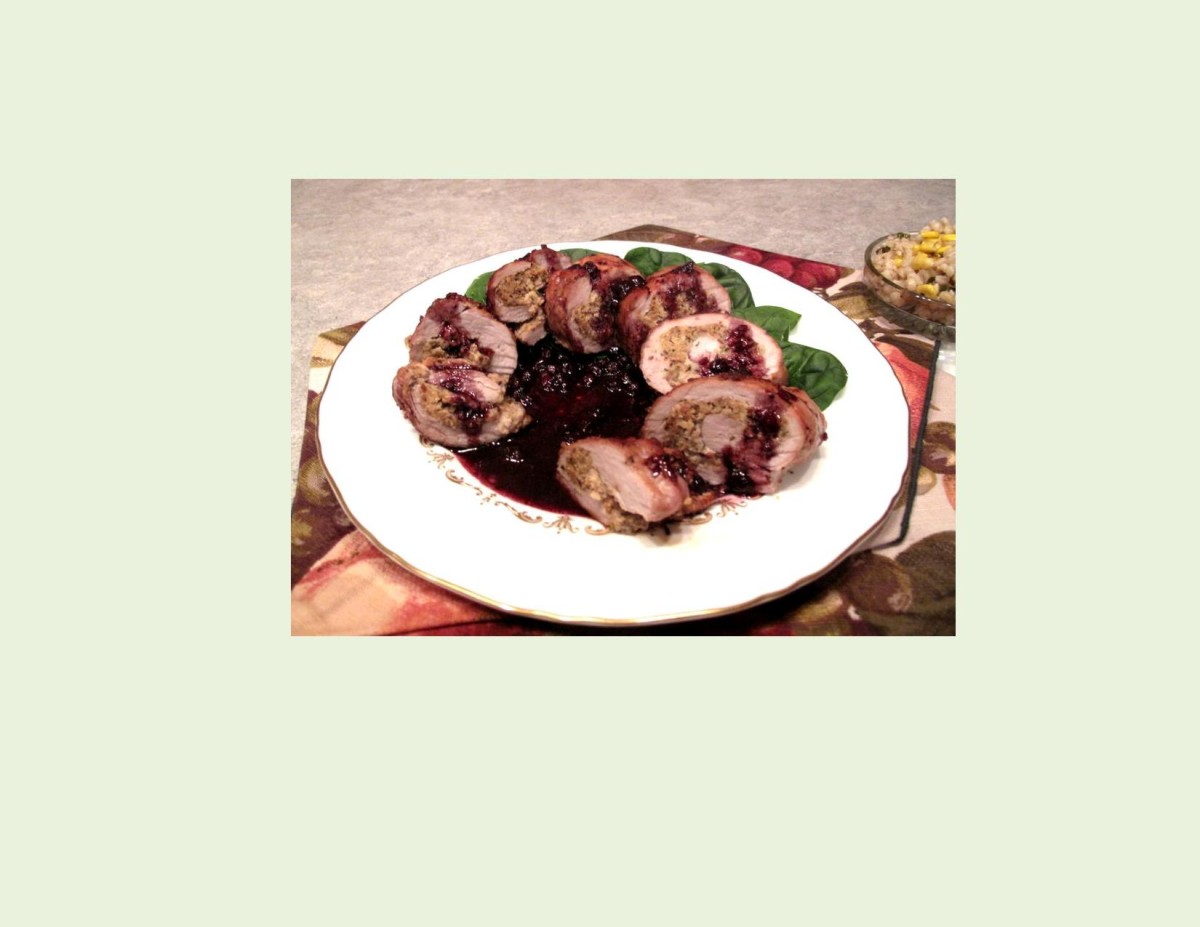
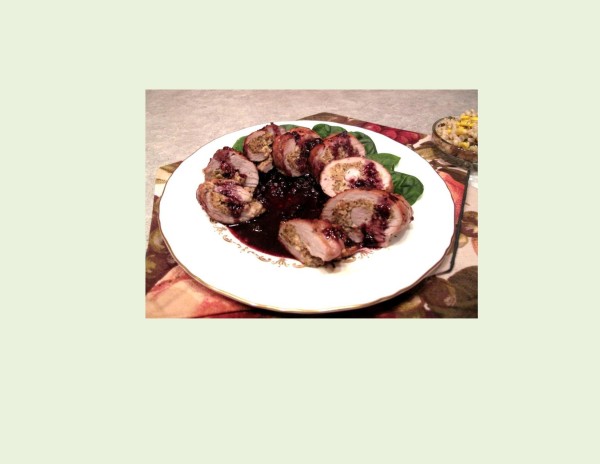
Wild Blueberry Balsamic Pork Tenderloin
Print Recipe
Wild Blueberry Balsamic Pork Tenderloin
The fruity sauce enhances the meat's flavor as well as making a beautiful presentation for a special meal.
Preheat oven to 350 F.
2. In a food processor, place bread slice & pulse slightly; add Parmesan cheese & spices. Pulse another couple of seconds.
3. 'Butterfly' tenderloin & pound making it all the same thickness. Spread mustard evenly on flattened cut side; top with crumb mixture.
4. Starting with the long side, carefully roll the tenderloin as opposed to just folding it over.
5. Place a rack in a shallow roasting pan & lay a piece of foil on top creating sides for it. Lightly oil center of foil; place tenderloin on it & brush with Fig Balsamic Olive Oil Vinaigrette or just use olive oil.
6. Roast for about 45 minutes or until meat thermometer reaches 160 F. & just a hint of pink remains. (If you prefer it to be done a little more, roast another 8-10 minutes).
7. In a small saucepan over low heat, place blueberries, garlic & honey & stir until mixture begins to boil & thicken.
8. Stir in balsamic vinegar. Bring sauce to a boil & allow to reduce slightly to become the consistency of honey.
9. Slice tenderloin about 1-inch thick. Pour some sauce onto serving platter; place sliced tenderloin medallions on sauce & drizzle with remaining sauce.
With Easter right around the corner I couldn’t pass up the chance to once again try to create ‘the taste of a memory’.
It seems that every country as well as anyone who enjoys to make bread has their own version of ‘Easter Bread’. My mother’s Easter bread was baked in coffee cans, a beautiful yellow color and slightly sweet. As the saying goes, it was ‘to die for’. Somehow my sister and I can’t remember it having fruit or special flavorings but it was almost ‘cake like’ in taste and texture.
With my Easter ‘braid’, I’ve tried to capture that same texture as well as making some additions of citrus peel and flavorings. Not quite as memorable as my mother’s but a good second. Hopefully you will enjoy trying it.
Have a wonderful Easter!
Print Recipe
Easter Bread
The pairing of anise with citrus gives this bread such a pleasant flavor.
In a large bowl, warm water in microwave to lukewarm.
Whisk in yeast & sugar; let stand about 10 minutes.
With an electric mixer, beat together 3/4 cup sugar, eggs, oil, anise extract, lemon zest, lemon extract, salt & anise seed.
Combine egg mixture, melted butter & milk with yeast mixture.
In another bowl, combine 4 cups flour with mixed peel & add 1 cup at a time to wet mixture. Stir well after each addition.
Turn dough out onto a floured surface & knead until smooth & elastic, about 5-6 minutes, adding remaining 1/2 cup flour if necessary.
Coat a large bowl with oil. Place dough in bowl & turn to coat.
Cover with plastic wrap & set in a warm place to rise until it doubles in bulk.
Line a baking sheet with parchment paper. Gently punch down dough & divide in half.
Divide each portion into 3 ropes. Braid ropes to form loaves & let rise until doubled in size.
If you prefer, you can brush with a little bit of beaten egg white.
Preheat oven to 325 F.
Bake until golden, about 40 minutes.
If you choose to ice braids, cool completely before doing so.
In the process of learning to cook & bake, I recall some less than successful attempts. One of which was when my sister Loretta and I were trying to make Lemon pie. She was the one reading the recipe and stirring and I was to measure and add ingredients to the bowl. Somehow, instead of 1 1/2 tsps of sugar in the crust we put 1 1/2 cups. Needless to say it was ‘rock hard’ and inedible! Dad was not impressed with his dessert of a dish of lemon pudding instead of pie.
In the month of March our family celebrates 3 birthdays. Today March 21st, would have been my dads. He passed away at the age of 92, 11 years ago. Although my father lost his sight to macular degeneration, he carried on in his life with courage and dignity.
To hear your voice and see your smile and just sit and talk to you would be my dearest wish today on your birthday.
With Love