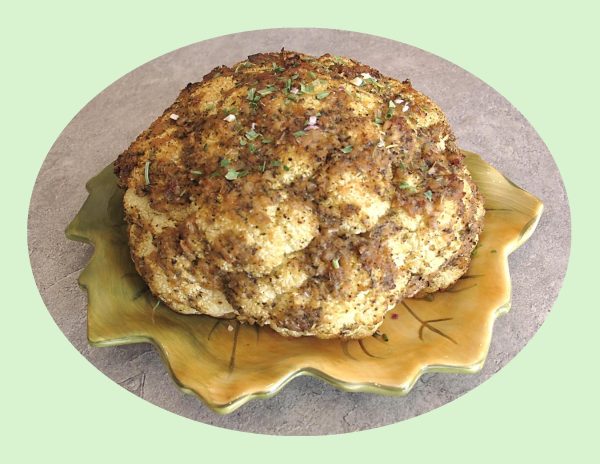
Roasting a whole cauliflower is probably nothing new. One imagines that as long as there has been cauliflower, cooks have been roasting whole heads of it in high heat.
Israeli cuisine is diverse and very vegetable forward. So, it’s no great surprise that an Israeli chef figured out a way to make cauliflower even tastier with a presentation that is equally appropriate served for lunch on Wednesday or as a main dish on a holiday or other special occasion.
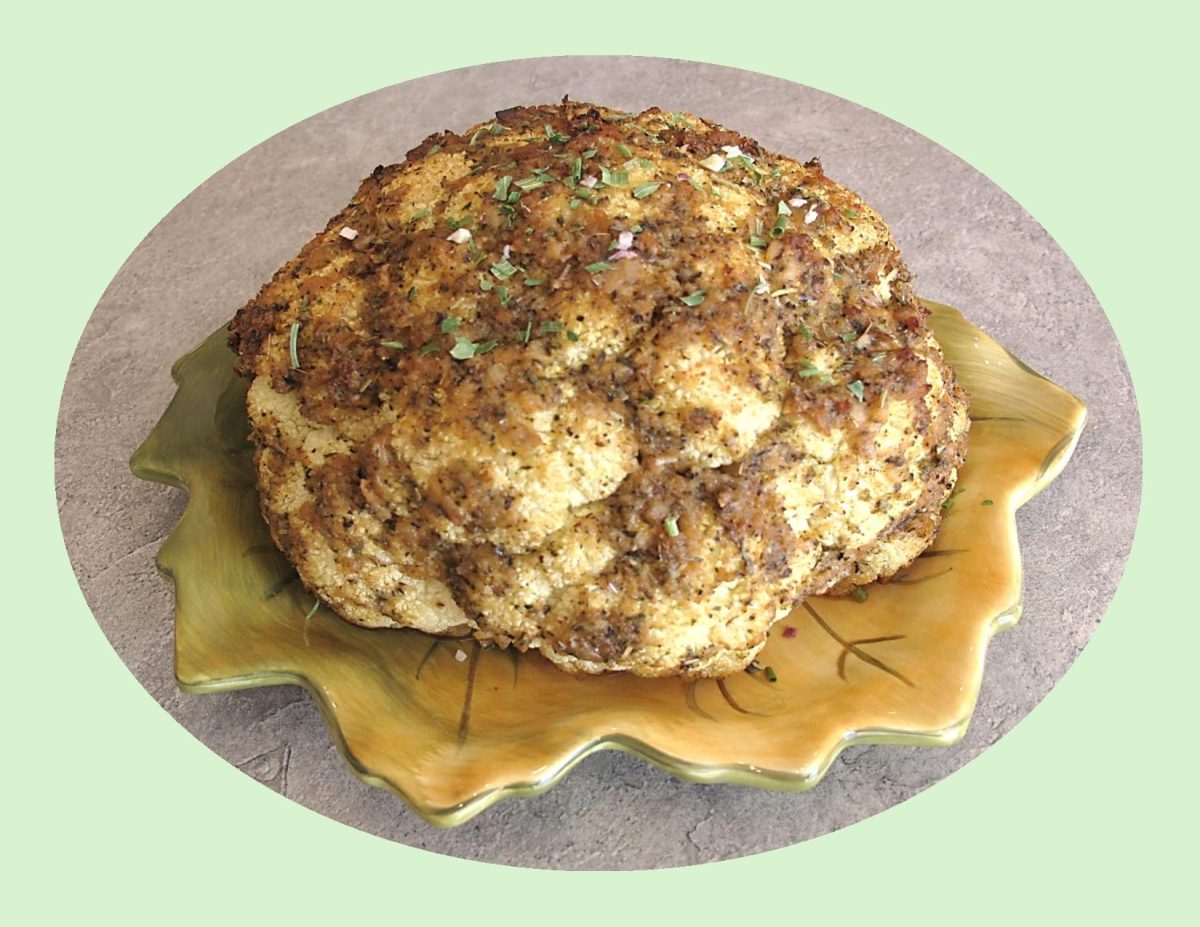
A whole roasted cauliflower will take a little more time than roasting florets, but it makes an unbeatable visual impression, and is almost absurdly easy to make.
This easy and delicious whole roasted cauliflower is spread with seasonings and grated Parmesan cheese then oven-roasted to perfection. Serve as a side dish with any number of entrees such as roasted pork loin and baked cod or enjoy as a vegetarian meal.
Print Recipe
Whole Roasted Cauliflower
Votes: 1
Rating: 5
You:
Rate this recipe!
|
|
Votes: 1
Rating: 5
You:
Rate this recipe!
|
Instructions
Preheat oven to 375 F. Lightly grease a cast iron skillet.
Remove all the outer leaves of the cauliflower & rinse it inside and out. Pat it dry & set it down onto a tea towel to drain off water from the inside, while you prepare the seasoning.
In a small bowl, combine the seasoning, olive oil, minced garlic, & parmesan cheese. Mix well to combine.
Turn the head of cauliflower upside down & carefully cut off most of the thick stem. Make sure not to cut off the area where the florets' stems attach.
Spread the seasoning mix all over the cauliflower starting with the underside. Make sure to get the seasoning on the inside, between the stems to season the inside of the cauliflower. Turn it over & cover the outside of the cauliflower head with seasoning.
Place seasoned cauliflower onto the prepared cast iron pan, stem side down & cover the pan & cauliflower with a sheet of aluminum foil tightly.
Place into the oven and let it cook about 30 minutes.
Take the aluminum foil off, raise the heat of the oven to 400 F. & place the pan with cauliflower back into the oven.
Bake uncovered for another 30 minutes. You can test if the cauliflower is done by inserting the fork and feel how easily it goes in.

CELEBRATING LABOR DAY!
Labor day week-end gives us an opportunity to enjoy family & friends before summer is officially over. Although, we have not officially reached the first day of fall (Sept. 22nd), this part of the year often begins with a tinge of melancholy. Even so, there are many ways to appreciate Canada’s most sentimental season.
Part of our country’s appeal is its four season’s: Winter, Spring, Summer & Fall. We are entering the season of the fall harvest and the leaves on the trees begin their transformation to stunning shades of orange, red and yellow.
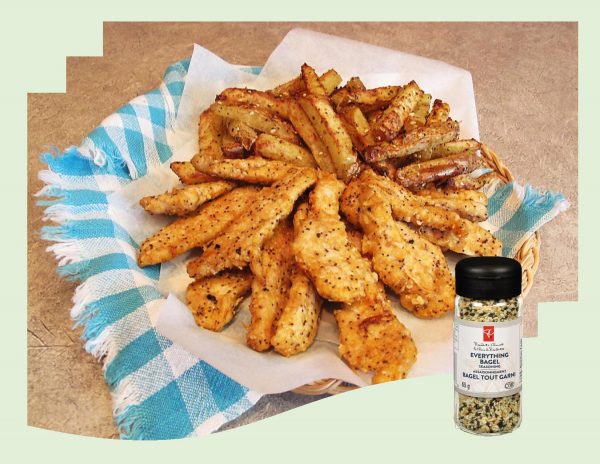
Whatever your choice of relaxation is, you know good food will play a big part in the week-end events. For some reason, ‘Chicken & Fries’ just seems like a great meal for this occasion. Ever since I started using this seasoning blend, I want to put it on everything.
Poppy seeds, sesame seeds, dried minced garlic & onion and sea salt. These five ingredients aren’t necessarily the heroes of the spice world, but together they are irresistible. Move over Colonel Sanders there’s a new spice for that chicken!!
Print Recipe
Everything Spice Chicken & Fries
Votes: 1
Rating: 5
You:
Rate this recipe!
|
|
Votes: 1
Rating: 5
You:
Rate this recipe!
|
Instructions
Chicken
Slice chicken into 'fingers'. In a plastic bag, combine all seasonings & spices along with the shredded Parmesan cheese. Drizzle chicken with oil then place in seasoning 'bag' & coat heavily with the mixture.
Line a baking sheet with foil or parchment paper. Place chicken fingers on it in a single layer. Set aside in refrigerator until fries are prepared.
Fries
-
Wash & slice potatoes to desired size for the fries. Toss in a large bowl with oil & seasoning; coat well. Line a baking sheet with foil paper & spread fries out on it.
Baking
Place prepared chicken fingers & potato fries in preheated oven. Bake the fries for 30 minutes then flip them over & bake for another 15-20 minutes or until they are crispy. Bake tray of chicken fingers until cooked through & golden brown.
Recipe Notes
- Alternately, chicken can be cooked in oil in a skillet if you wish.
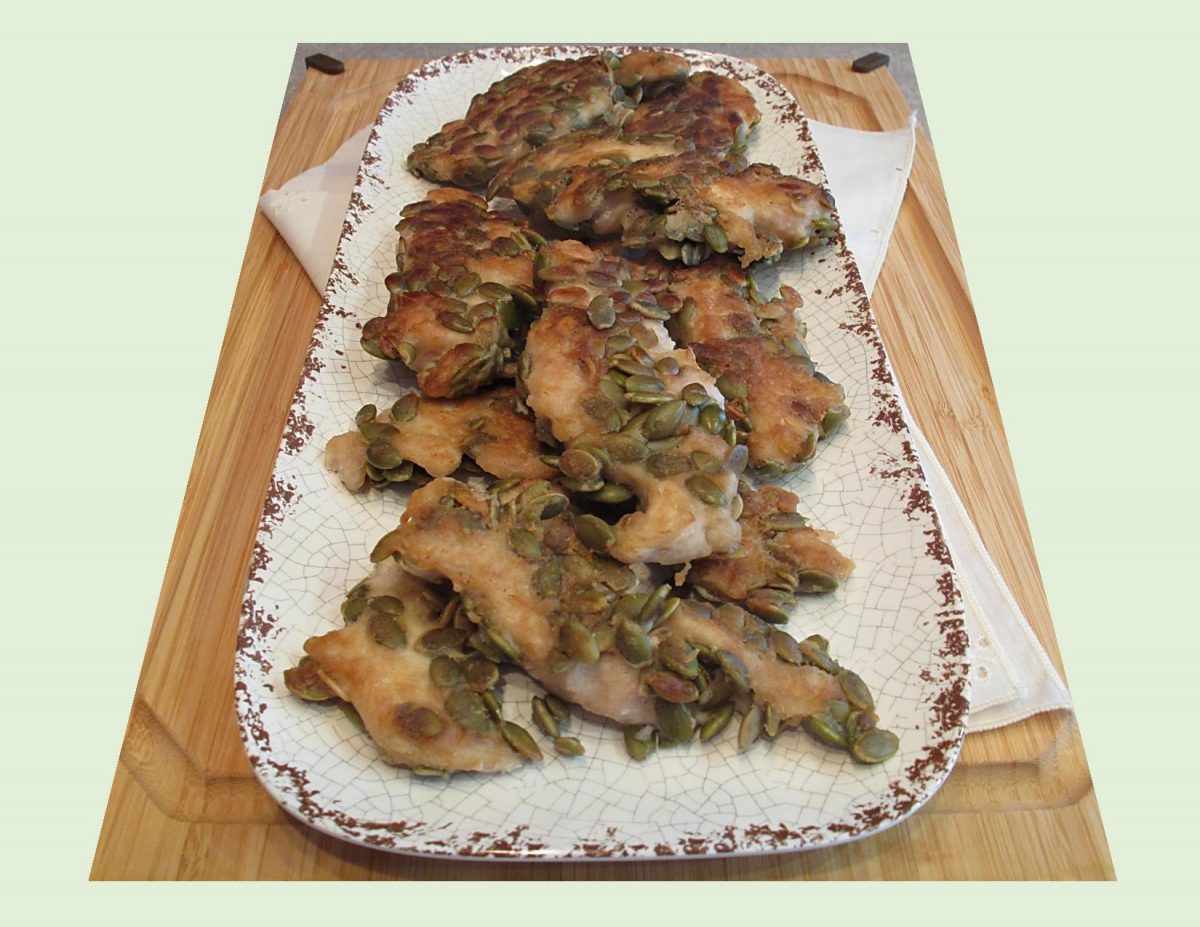
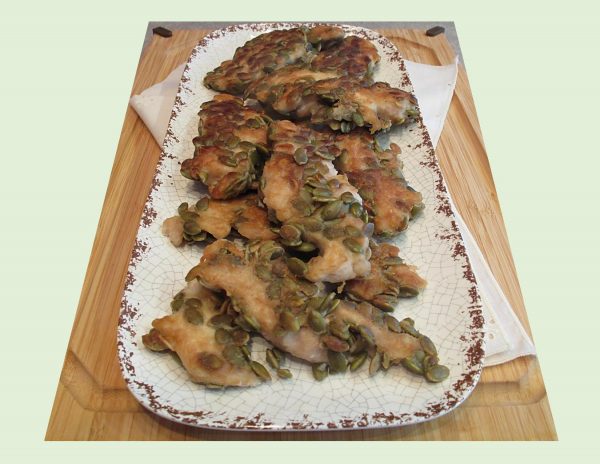
Pepita seeds might not be what you ordinarily think of as chicken coating material, but these nutty, chewy kernels are every bit as tasty and versatile as almonds or pistachios in cooking.
Many people use the words pepitas and pumpkin seeds interchangeably, but they are actually two different things. A pepita is harvested from specific hull-less pumpkin varieties, known as Styrian or Oil Seed pumpkins. Any other variety of pumpkin produces a hulled seed that’s slightly fibrous and less tender.
Pepitas are more versatile in the kitchen than traditional pumpkin seeds since they’re not as tough. Aside from using them as a garnish or a snack, pepitas make good pesto, or as a crust for meat or fish, as a topping on muffins, mixed in granola, baked in focaccia bread or made into brittle.
Crunchy pepita seeds are little powerhouses of nutrition, so using them instead of breadcrumbs along with a light, spicy ‘tempura’ batter to prepare this chicken breast, really takes it from ordinary to special. It’s the whole package …. moist, crisp with the toasty appeal of pepitas.
Print Recipe
Chicken Tenders w/ Pepita Seeds
Votes: 1
Rating: 5
You:
Rate this recipe!
|
|
Votes: 1
Rating: 5
You:
Rate this recipe!
|
Instructions
Preheat oven to 350 F. Line a baking sheet with parchment paper & set aside.
In a bowl, combine all tempura batter ingredients (except pepita seeds), whisking until smooth.
Pat chicken tenders dry & add to batter. Turn in mixture to coat evenly. Allow to stand in refrigerator for 10 minutes.
Place whole pepita seeds on a large tray or plate. Lift chicken out of batter & coat evenly with pepita seeds.
Place chicken on baking sheet & bake 15-20 minutes or until golden brown & cooked through.
Recipe Notes
- Alternately, you could cook the chicken on a griddle using a combo of oil & butter.

Tenderloin has always been one of my favorite ‘go to’ meats. Lean, tender, tastes great, so what more could you ask for?! I’m forever pairing it with another kind of stuffing or roasting it with different glazes or marinades.
Today I wanted to roast it with the classic combo of cabbage and apples. The perfect accompaniment probably because you really don’t need to add much else to the meal to make it taste great.
Cabbage isn’t glamorous. It doesn’t have a fancy name but it is common, versatile and lasts forever in the refrigerator. Even the smallest head yields enough for at least two or three meals.
When cabbage is roasted, a caramelized sweetness comes out, giving it such a nice flavor and especially when paired with apples.
Sometimes, cabbage is avoided because when cooked, the sulfur that it contains multiplies, giving off an unflattering odor. It helps to avoid using aluminum pans when preparing cabbage; aluminum reacts strongly to the sulfur present in the leaves. Stainless pots make a much better choice.
You can neutralize the odor by adding 1 teaspoon of white vinegar or lemon juice. Certain ingredients will also help absorb the odor. Try adding a bay leaf or a couple of ribs of celery to sautéed cabbage. The sulfur odor will be absorbed without changing the taste of the cabbage. Simply discard the bay leaf or celery before serving.
No doubt about it, the flavor in this meal doesn’t lack for anything.
Print Recipe
Stuffed Pork Medallions w/ Cabbage & Apples
Votes: 1
Rating: 5
You:
Rate this recipe!
|
|
Votes: 1
Rating: 5
You:
Rate this recipe!
|
Instructions
Tenderloin Stuffing
Cook rice. Place in a bowl & set aside. In a skillet, heat oil & sauté onions until tender crisp. Add garlic & mushrooms & sauté for another 3-4 minutes. Add all herbs & spices; cook another minute than transfer to bowl with rice. Add Panko crumbs & egg, stirring to combine.
Remove silver skin from tenderloins. Cut a slit all the way down the long end of your tenderloin, making sure not to cut all the way through. Open the tenderloins like a book, cover with a sheet of plastic wrap & pound with a meat mallet until they are about 1/2-inch thickness.
Divide filling mixture between the two tenderloins & spread evenly over the surface of the tenderloins, leaving 1/2-inch at the borders. Roll tightly starting with the long end & secure the ends with toothpicks. Season all over with salt & pepper.
Preheat oven to 400 F. Heat a large oven proof skillet with 2 Tbsp oil. Once oil is hot, place tenderloins in the skillet & sear about 2 minutes per side. Transfer the skillet with the tenderloins to the oven & bake for about 18-20 minutes or until thermometer reads 145-150 F. in the thickest portion of the meat. Transfer to a cutting board, brush with pan drippings. Cover loosely with foil & allow to rest 10 minutes before slicing.
Cabbage & Apples
While tenderloin is roasting, prepare cabbage/apple mixture.
In a large skillet over medium heat, cook onion in butter until soft & translucent, 3-4 minutes. Add garlic & continue cooking just until fragrant, 1 minute more.
Add the cabbage & continue cooking until wilted, 6-8 minutes. Season to taste with salt & pepper. Continue cooking until cabbage begins to caramelize, 4-5 minutes longer.
Add the cubed apple, cider, mustard & brown sugar; carefully combine. Cover & cook until any liquid has evaporated & apples are soft. Place on a serving platter. Top with sliced tenderloin medallions & serve. If you wish, you could also serve the tenderloin with some mashed potatoes & oven roasted carrots.
