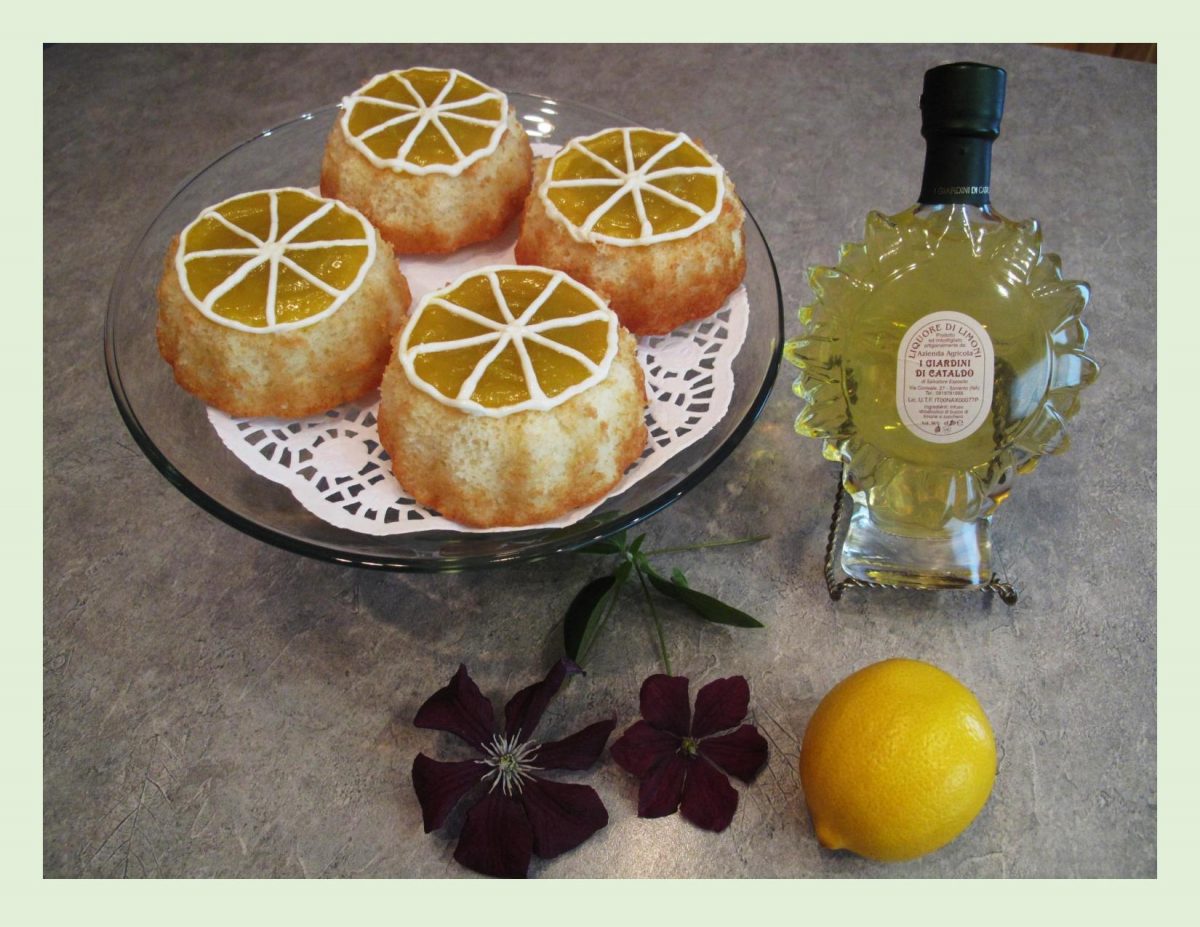
Limoncello Mini Cakes

Nothing says spring more than the zesty, fresh flavor of lemons. Just to kick it up a notch, I decided to make some limoncello desserts.

Limoncello, (pronounced lee-mon-CHAY-low) the Italian lemon liqueur, is known for its refreshing sweet and tangy flavor. It is made from lemon rinds, alcohol and sugar. Although, traditionally served as an after dinner drink, it is a wonderful ingredient to use in cooking and baking.

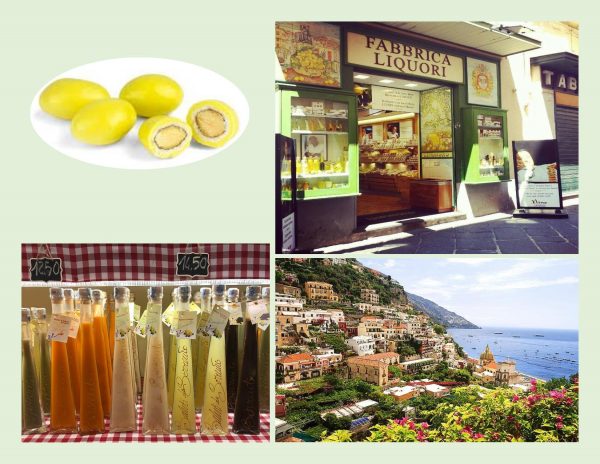
Limoncello origins are disputed. Some say it was created by monks or nuns while others credit the wealthy Amalfi Coast families or even local townsfolk. In any case, its roots are in Southern Italy, primarily along Italy’s Amalfi Coast and the Sorrentine Peninsula known for their meticulous lemon cultivation. These lemons are considered the finest lemons for making limoncello. Prized for their yellow rinds, intense fragrance, juicy flesh and balanced acid.

Some years ago, while travelling in Italy, Brion & I tasted athentic limoncello in the town of Sorrento. As we walked through the quaint artisan shops packed together onto a maze of medieval alleys, we came accross one that sold liqueurs & confectionery. One of the treats that they made were limoncello sugar coated almonds … to die for!

Today’s little cakes use limoncello not only in the cake but the frosting and glaze as well. Definitely gives them some spring zing!
Print Recipe
Limoncello Mini Cakes
Votes: 1
Rating: 5
You:
Rate this recipe!
Course dessert
Servings
mini cakes
Ingredients
Limoncello Cakes
Limoncello Glaze
Course dessert
Servings
mini cakes
Ingredients
Limoncello Cakes
Limoncello Glaze
Votes: 1
Rating: 5
You:
Rate this recipe!
Instructions
Cakes
  1. Preheat oven to 350 F. Lightly butter & flour 4 mini bundt pans.
  2. In a small bowl, cream butter & sugar; add egg & mix well. Fold in the flour then add milk & limoncello; beat well. Spoon mixture into the bundt pans & bake for 18 minutes or until they test done. Allow to cool.
Cream Cheese Frosting
  1. In a small bowl, beat together butter, cream cheese & limoncello (if using). Add powdered sugar & mix until smooth.
Limoncello Glaze
  1. In a small saucepan, whisk together sugar, lemon zest & egg. Cook until sugar dissolves & the mixture turns light in color, about 2 minutes. Stir in limoncello & cook for about 5 minutes or until mixture thinly coats the back of a spoon, stirring constantly with a whisk. Remove from heat & whisk in butter. Cover with plastic wrap & cool before using.
Assembly
  1. Place cakes on a serving plate. Fill the center indentation from the bundt pan with glaze as well as glazing the tops. Place frosting in a piping bag with a tip that has a small hole. Pipe frosting to look like lemon slices.
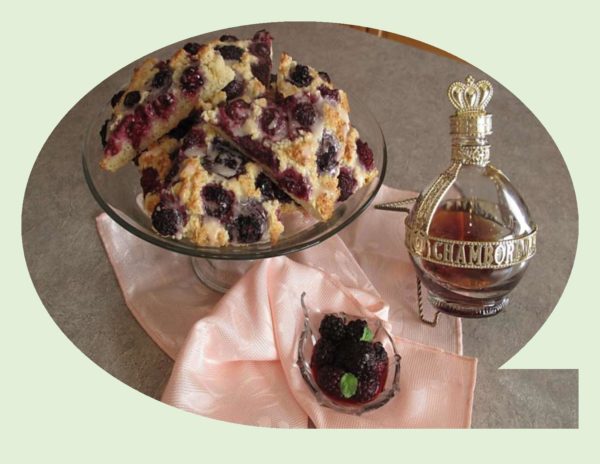
Blackberry Scones with Chambord Glaze

Blackberries seem to be my thing this summer. Its funny how every season, something peaks your interest and you want to use it in everything. Since blackberries are pretty tart and quite expensive most of the time, their not always top priority but—.

I happened to come across this scone recipe the other day. It uses self-rising flour, a staple I don’t always have on hand. The recipe seemed interesting in the way that it used buttermilk and lemon zest and not a lot of sugar with these tart berries. Mind you, they do have a bit of glaze on them.

If your not familiar with self-rising flour, it is a mixture made up of regular flour, baking powder and salt. The leavening power of the baking powder is mixed evenly throughout the flour, so you will automatically get that nice rise out of your baked goods every time.

Self-rising flour was invented in England in the 1800’s as a way for sailors to create better baked goods while on board. The idea was patented in the USA around 1849, which eventually led to the creation of mass-market baking mixes such as Bisquick, cake mixes, etc. Self-rising flour should only be used for its specific purpose as it will not work well with breads that are yeasty.

You can make your own by combining 1 cup of all-purpose flour, 1 1/2 tsp baking powder and 1/4 tsp fine salt. Keep in mind that most store-bought self-rising flours will contain a ‘softer’ or lower protein content flour than your typical all-purpose flour. This means that your end result, should you use regular all-purpose flour, will be slightly less tender (but still good).

Because of the baking powder, self-rising flour has a shorter shelf life than other flours. For that reason, it is always sold packaged in small quantities.

All that being said, these scones are amazingly tender. The glaze was truly ‘the icing on the cake’. They are sooo-– good!

Print Recipe
Blackberry Scones with Chambord Glaze
Votes: 1
Rating: 5
You:
Rate this recipe!
Course Brunch, dessert
Cuisine American, European
Servings
Course Brunch, dessert
Cuisine American, European
Servings
Votes: 1
Rating: 5
You:
Rate this recipe!
Instructions
Scones
  1. Preheat oven to 375 F. Line a baking sheet with parchment paper.
  2. In a large bowl, whisk together flour, sugar, baking soda and lemon zest. With fingertips, cut in butter until mixture resembles coarse crumbs.
  3. In a small bowl, whisk together buttermilk, egg & vanilla; add to flour mixture. Fold in just until incorporated then carefully fold in blackberries. Place dough on parchment paper lined baking sheet. With lightly floured hands, pat dough into an 8-inch circle. Score into 8 wedges. Bake 20 minutes or until golden & test done. Cover lightly with foil if over browning before baked. Remove from oven to a cooling rack. Cool before glazing.
Glaze
  1. In a small dish, combine glaze ingredients & drizzle over cooled scones.

Hazelnut Liqueur Shortbread Cookies

It’s hard to think of Christmas without having shortbread. When I was growing up, fruitcake (or Christmas cake) and shortbread cookies were some of the staples associated with Christmas baking.  Fruitcake has definitely become lost in the shuffle  but it seems shortbread still remains. While the traditional shortbread consisted of three main ingredients — flour, sugar and butter, today it is flavored with any number of ingredients.

The first shortbread recipe appeared in a Scottish cookbook dated 1736. Early formulas called for yeast, but by 1850, most were utilizing only flour,  sugar and butter combined in a ratio bakers still use today. Originally it started out as a twice-baked medieval bread roll that was dusted in sugar and allowed to harden. For a number of years, Scottish shortbread (biscuits) were classified as a bread by bakers so that they could avoid the tax placed on biscuits.

There are infinite variations on the classic version such as additions of nuts, alcohol, citrus zest, dried fruit, anise spice, floral water, chocolate, lemon curd, caramel or ganache.

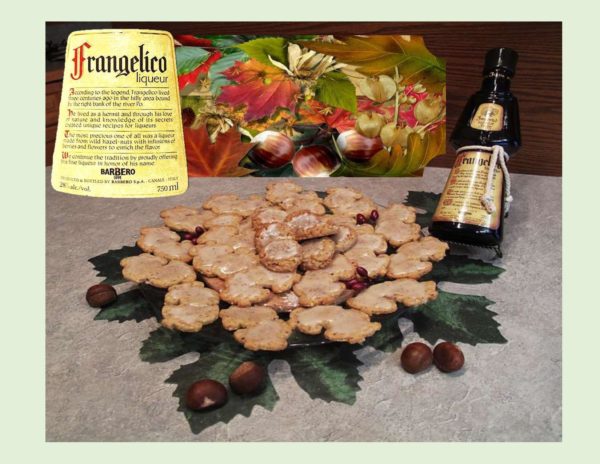
Some years ago, I started using a hazelnut liqueur in some of my Christmas baking. It adds a wonderful richness we really enjoy. My favorite is the Frangelico brand. It is distilled in the Piedmont region of northern Italy from an alcohol and water infusion of the nuts. Natural flavoring extracts such as cocoa and vanilla are added before blending with alcohol, sugar and water to meet the bottle strength. It’s origins go back over 300 years to the Christian monks who inhabited that area of Italy. The name Frangelico is derived from one of the monks, Fra. Angelico. The bottle itself, reflects this heritage, which looks like a glass monk complete with a rope belt. A bit pricey but if you are using it only for baking, the bottle lasts a long time. 

This recipe was featured in a ‘Canadian Living’ magazine in December 2002. The perfect shortbread for the upcoming season.


Print Recipe


Hazelnut Liqueur Shortbread Cookies

Votes: 9
Rating: 3.67
You:
Rate this recipe!

Servings


Ingredients
Shortbread Cookies

Hazelnut Glaze

Servings


Ingredients
Shortbread Cookies

Hazelnut Glaze

Votes: 9
Rating: 3.67
You:
Rate this recipe!


Instructions
Shortbread
  1. In a bowl, beat butter with sugar until light & fluffy followed by the liqueur & vanilla. Stir in cornstarch & salt. Next add flour, 1/3 at a time combining to make a smooth dough. Add nuts, then divide dough in half & chill until firm but not hard, about 30-60 minutes.

  2. Roll out each disk of dough to a 1/4-inch thickness & chill again at least 30 minutes. Line a baking sheet with parchment paper. Cut into desired shapes, re-rolling scrapes. Place 1-inch apart on baking sheet; chill until firm, about 2 hours.

  3. Preheat oven to 325 F. bake shortbread cookies for 15-20 minutes or until LIGHT golden. Remove from oven & place on cooking rack. Spread with glaze if desired.

Hazelnut Glaze
  1. In a small bowl, whisk together powdered sugar, liqueur & 2 Tbsp water (adding more water if needed to make spreadable). Spread over shortbread cookies.

Pumpkin Cranberry Spice Roulade

Thought of by some as old fashioned or outdated, the ‘Roulade’ cake may have been around a long time, but done right  they are moist and deliciously nostalgic.

Sweet dessert roulades are based on a whisked egg mixture and contain very little or no flour. They bake faster than most cakes and are finished with any filling you choose, from simple to elegant.

Pumpkin Roulades bring the comfort and tradition of a pumpkin pie. This particular one that I have featured in today’s blog, brings together three great flavors — pumpkin, cranberry and cream cheese.

It comes together quickly, keeps well, travels well making it perfect to take along to Thanksgiving or Christmas gatherings.


Print Recipe
Pumpkin Cranberry Spice Roll
Votes: 2
Rating: 5
You:
Rate this recipe!
Course Brunch, dessert
Servings
Ingredients
Pumpkin Spice Cake
Cranberry Jam
Cream Cheese Filling/Topping
Course Brunch, dessert
Servings
Ingredients
Pumpkin Spice Cake
Cranberry Jam
Cream Cheese Filling/Topping
Votes: 2
Rating: 5
You:
Rate this recipe!
Instructions
Cranberry Jam
  1. In a small saucepan, bring sugar, salt & water to a boil. Add cranberries, reduce heat & simmer for 15 minutes, stirring occasionally. Cool slightly then process for a few seconds in a food processor. Add orange zest; stir & set aside to cool completely.
Pumpkin Spice Roll
  1. Preheat oven to 375 F. Line a 15 x 10-inch jelly roll pan with parchment paper.
  2. In a medium bowl, combine flour, baking powder, baking soda, spices & salt. In a large bowl with an electric mixer, beat eggs, vanilla & sugar until mixture is pale yellow & fluffy. Add pumpkin puree & mix to combine. Fold in the dry ingredients. Using a rubber spatula, spread the cake batter evenly into prepared pan. Bake for about 10-13 minutes or until top of cake springs back when touched & tests done in the middle.
  3. While cake is baking, make CREAM CHEESE FILLING. In a medium bowl, beat cream cheese, powdered sugar, butter & vanilla until smooth. Refrigerate until ready to use.
  4. Remove cake immediately from the oven; invert onto a clean tea towel that has been lightly sprinkled with powdered sugar. Remove parchment paper & carefully roll cake in jelly roll fashion in tea towel.
  5. When cake has cooled completely, carefully unroll & spread with a layer of cranberry jam. Next top with a layer of cream cheese filling. Carefully re-roll cake. Wrap in plastic wrap & refrigerate at least one hour or overnight.
  6. Decorate with remaining cream cheese topping & cranberries (I saved a few whole ones from the cranberry jam). Add a few 'kiwi' leaves & you got it!