Stamped Christmas Shortbread

Christmas is just around the corner and even though there’s lots to do, there’s always time for a batch of Christmas cookies. Especially a simple cookie, like these stamped shortbread cookies, that go together quickly, taste great, and look fancy and festive. They’re great for sharing and go well with things like that afternoon coffee or tea.

Shortbread was always a cookie my mother kept in her Christmas cookie repertoire.  It seems it’s not Christmas without some of them around. This year I got interested in making some ‘stamped’ cookies to give them a special look.

The history of stamped Christmas cookies can be traced back to ancient civilizations. Women in Scandinavian countries traditionally baked cookies for special occasions using carved stamps handed down from generation to generation of family bakers. It was customary to give decorative cakes and cookies to friends during the Christmas season, weddings, christenings, and other festive occasions. Some traditions never change. As a nod to history, the Nordiska Museum  in Stockholm, Sweden has a collection of cookie stamps dating back to the 17th century in their permanent collection.

Eleanor Rycraft was the first American artist to introduce finely detailed, handmade-in-America terra cotta cookie stamps. Eleanor and her husband, Carroll, started their company, Rycraft, in 1968. Eleanor patterned her ceramic cookie stamps in the manner of the antique wooden Scandinavian stamps handed down through generations. As a potter, Rycraft saw the possibility of using clay to make these cookie stamps using the designs made in the Scandinavian tradition.

Cookie stamps were given away as gifts during the holidays. Christmas time was, and still is, a traditional occasion on which to make stamped cookies. 

Something else I did with this shortbread was I added some pure vanilla and cinnamon extract instead of the usual almond flavor. It was quite nice!

Print Recipe
Stamped Christmas Shortbread
Votes: 1
Rating: 5
You:
Rate this recipe!
Servings
Ingredients
Servings
Ingredients
Votes: 1
Rating: 5
You:
Rate this recipe!
Instructions
  1. In a food processor, pulse the cornstarch, powdered sugar & flour until combined. With the processor running, drop in the pieces of butter, one at a time. Pulse a few times until evenly distributed. Add vanilla & cinnamon extracts. Process just until the dough comes together and sticks together in a ball.
  2. Note: if you don't have a food processor, you can make the dough in a bowl, using a pastry cutter to cut the butter into the flour mixture. Then use your hands to work in the liquid until it comes together into a dough.
  3. Shape the dough into a disk, wrap in plastic, & refrigerate for 20 minutes.
  4. Divide the dough into 16 equal portions. Roll each portion between your hands to shape a ball & LIGHTLY dust each ball of dough in flour. Place the dough balls on a baking sheet lined with parchment paper.
  5. Dip a cookie stamp in flour, then tap off the excess. Center the stamp over a ball of dough, then firmly (but lightly) press down on the dough, until it flattens slightly & spreads out all the way to the edge of the stamp. Carefully pull the dough off the stamp & set onto the baking sheet. If needed, use a round or scalloped cookie cutter to trim off the uneven edges. Save scraps.
  6. Repeat pressing all the cookies, dipping the stamp in flour & tapping off the excess in between each. Gather up all the scraps from the trimmed edges, roll into a ball, dust in flour & press one more cookie, for a total of 16 cookies.
  7. Leave the cookies plain or decorate with colored non-perils. Alternately, you could roll the cookie balls in colored sugar before stamping.
  8. Place all the stamped cookies about 1 inch apart on the baking sheet. Set the baking sheet in the refrigerator & chill the pressed cookies for 1 hour. Chilling the dough prior to baking ensures that the dough maintains its shape in the oven & doesn't spread.
  9. Preheat the oven to 300 F.
  10. Bake the chilled cookies on the center oven rack for 12-15 minutes or until the edges are lightly browned.
  11. Cool the cookies ON the pan for 5 minutes, then carefully transfer them to a cooling rack.

Artichoke Cupcakes

HAPPY ST. PATRICK’S DAY!

St. Patrick’s Day is a funny thing here in Canada. It’s the one time each year that people seek out green food and drinks, everything from shamrock shakes, a green bagel, or green beer are part of our version of this holiday.

Green food has been getting more and more ‘creative’ on this particular holiday. Clean eating, green foods like spinach, avocado and broccoli for example. A walk through the grocery store produce section will provide a variety of examples of just how many green foods are available to use in meals and snacks.

In the spirit of St. Patrick’s Day, I wanted to incorporate some green food in some desserts. What better excuse could I have to make some artichoke cupcakes!

Over the years, Brion and I have vacationed many times in the Carmel / Monterey area on the Central Coast of California. As a rule, we make Pacific Grove ‘home base’ and from there do numerous day trips. About a 20-minute drive inland from Monterey Bay is the tiny agricultural town of Castroville. When you enter into the town you will see a sign that says, ‘Artichoke Center of the World’.  Where the rich, fertile soil of the Salinas Valley meets the sands of Monterey Bay, these fog-shrouded fields prove to be the ideal location for the commercial cultivation of Heirloom artichokes.

About another 20-minute drive further north you come to another agricultural town called Watsonville. Just before we reached the town, I spotted a sign advertising ‘artichoke cupcakes’ from Pezzini Farms. We have never eaten anything sweet associated with artichokes before now. This charming roadside market goes deep into the crop that made this chunk of California famous.

Now, Watsonville might not be the self-proclaimed Artichoke Center of the World like its neighbor, Castroville. But it still ranks right up there in growing this distinctive plant that’s actually an herb.

Pezzini Farms is family-owned and has been growing and selling Heirloom Green Globe artichokes since 1929. The family immigrated to the United States from Italy bringing with them their family’s artichoke root stalk. 

The market offers a great selection of fresh produce that includes artichokes sold individually or in bulk. The store also has a wide selection of artichoke products that featured jarred artichoke hearts, artichoke dip mix, and artichoke marinara sauce, among others. By the register, customers were enticed by an array of sweet pastries displayed under glass dessert domes. Among them were decadent artichoke cupcakes topped with thick frosting.

It inspired me to think of artichokes in a whole new way. Brion & I purchased a cupcake to see how it would taste. The dense cake wasn’t overly sweet, with chunks of artichoke heart adding an almost earthy quality. The frosting was velvety with a little cream cheese bounce. A good comparison would be like a zucchini bread or a carrot cake.

Of course, as soon as we came home, I couldn’t wait to try to recreate this interesting little cupcake and what a better time than today. Think artichoke green for St. Patrick’s day!

I’ve added a few pictures I hope you will enjoy.

  • Pezzini store pics x 2
  • Artichokes growing in the fields
  • Production line
  • Store cupcakes
  • Life-size signage
Print Recipe
Artichoke Cupcakes
Votes: 1
Rating: 5
You:
Rate this recipe!
Course dessert
Cuisine Canadian
Servings
LARGE CUPCAKES
Ingredients
Cupcake Batter
Cream Cheese Frosting
Course dessert
Cuisine Canadian
Servings
LARGE CUPCAKES
Ingredients
Cupcake Batter
Cream Cheese Frosting
Votes: 1
Rating: 5
You:
Rate this recipe!
Instructions
Cupcakes
  1. Preheat oven to 350 F. Line a 6-cup muffin pan with large paper liners (or 12 small paper liners).
  2. Drain artichoke hearts well & mince into very small uniform pieces. Set aside.
  3. In a large bowl, whisk together eggs, vanilla, lemon zest, lemon juice, water & oil.
  4. In another bowl, sift together flour, white & brown sugars, baking powder, baking soda, salt, cinnamon, cardamom & ginger.
  5. Combine wet ingredients with dry ingredients, then gently fold in the minced artichokes with a spatula until they are completely incorporated into the batter.
  6. Fill the prepared muffin tins with the batter & bake about 30 minutes for the large size (20-25 minutes for small size).
  7. Once the cupcakes are baked through, transfer them to a wire rack to cool completely.
Frosting
  1. With an electric mixer, beat butter & cream cheese until creamy & well combined & lump free.
  2. Add vanilla & salt, mix to combine. With mixer on low, gradually add the powdered sugar until completely combined.
  3. Frost cupcakes as desired.

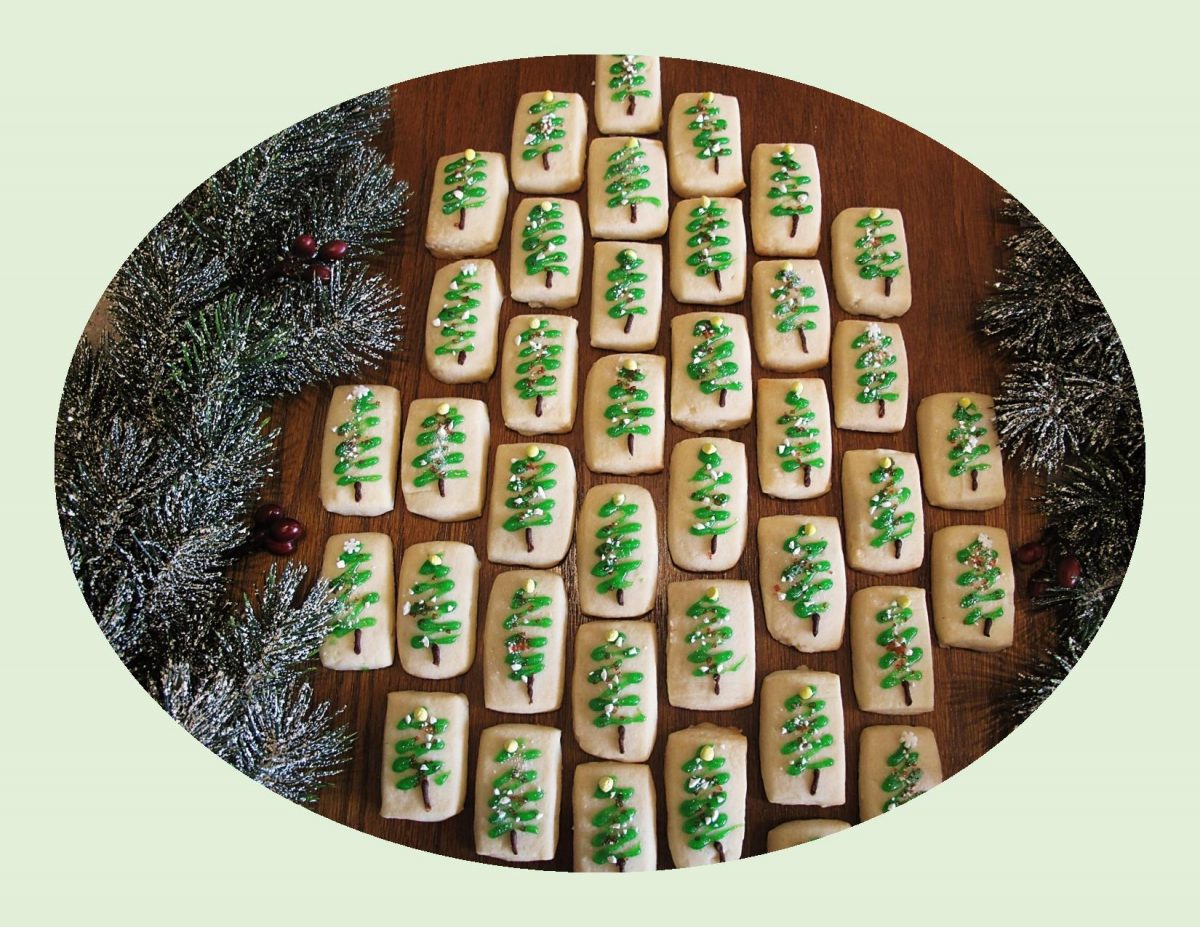
Shortbread Christmas Trees

Years and years ago, the Canada Cornstarch company printed a four-ingredient recipe for shortbread on the side of a cornstarch box and the rest is history.

Here in Canada, shortbread is in our DNA. This beloved cookie is simplicity personified. If the holidays had their own taste, I’m pretty sure it would be a shortbread cookie.

Over 40 years ago a Canadian company, by the name of Mary Macleod’s Shortbread was opened in Toronto, Canada. Mary, a homemaker and fantastic baker who took her love of this cookie and created Canada’s first shortbread-only bakery.

Her shop was an instant hit when she first opened its doors – she’d bake until midnight, and her goods would be sold out by noon the next day. Mary’s business grew and expanded, and her loyal customers followed her everywhere, but, to this day, the company crafts small-batch, all-butter shortbreads, the best butter being the key.

Mary Macleod’s Shortbread became synonymous with the Christmas season. Many people have made shortbread part of their holiday and family traditions.

Shortbread is undoubtedly one of the best cookies, but it’s without question that it all comes down to the butter. A good shortbread cookie can be transformed into the stuff of  dreams by placing freshly baked shortbread into a tin, store it in the back of your pantry, somewhere cool, and forget it  for a few months. You’ll be amazed at the flavor when it comes time to eat it.

So here we are … the famous Canada cornstarch shortbread cookies!

Print Recipe
Shortbread Christmas Trees
Votes: 1
Rating: 5
You:
Rate this recipe!
Servings
Votes: 1
Rating: 5
You:
Rate this recipe!
Instructions
  1. In a bowl, sift together cornstarch, powdered sugar & flour. Blend in butter & flavoring with a spoon, mixing until a soft, smooth dough forms. If dough is too soft to handle, cover & chill about 1 hour.
  2. Between 2 sheets of parchment paper, roll dough out into a rectangle about 12" x 7" & 1/2-inch thickness. Make 7 strips on the longest side & 6 strips on the short side. Transfer to ungreased baking sheets spacing 1 1/2-inches apart. Place baking sheets in refrigerator & chill 30 minutes. Halfway through preheat oven to 300 F.
  3. Bake for about 20 minutes or until edges are just barely browned.
  4. When shortbread is cooled, decorate with icing & sprinkles to create Christmas tree design.
Recipe Notes
  • The almond flavor is optional but I think it adds a nice touch.

Lemon Cardamom Crinkle Cookies

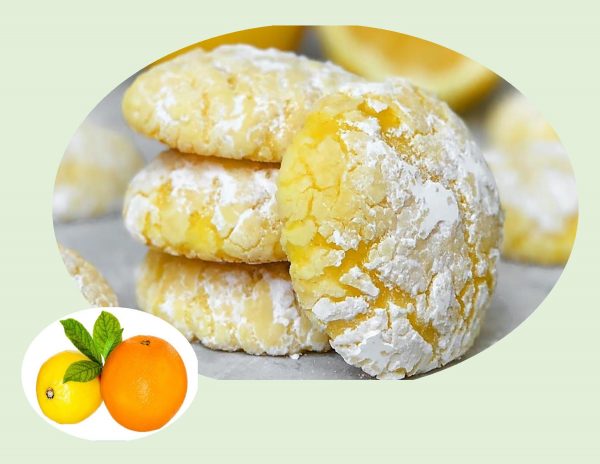
The flavor of lemon always seems to give such a refreshing taste to everything its used in. I think these lemon crinkle cookies are just perfect for celebrating spring.

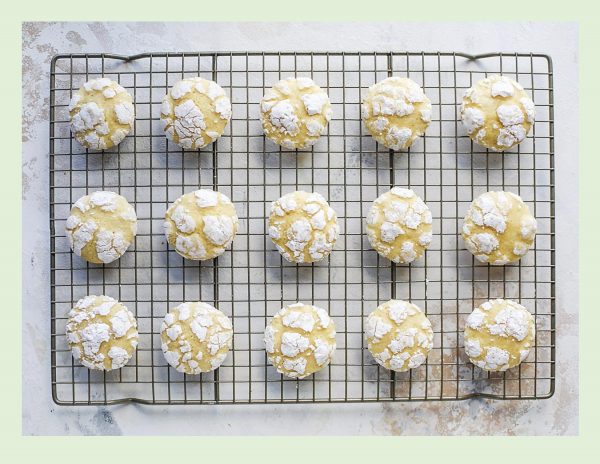
Many of us recall the original chocolate crinkle cookies from the 1960’s ….fudgy & sweet with such a unique look. Most cookies have top crusts that remain relatively soft and flexible as the cookies set during baking. However, if the top surface dries out before the cookie is finished spreading and rising, it hardens, cracks and pulls apart, producing an attractive crinkly, cracked exterior.

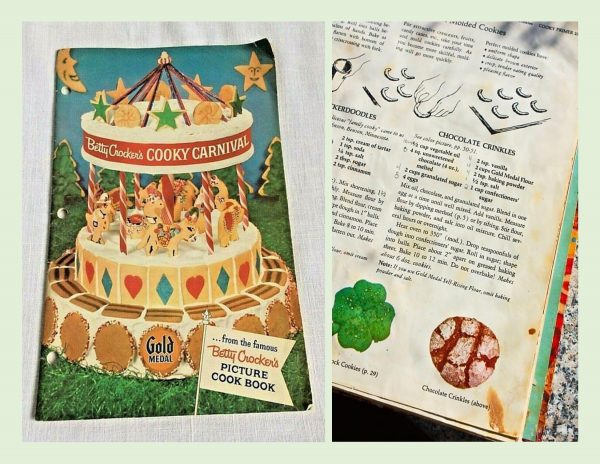
Historically these were a wintertime or Christmas holiday cookie. A women by the name of Helen Fredell of St. Paul, Minnesota, USA is believed to have created the first actual crinkle cookie. The original recipe contained molasses and spices such as cloves, cinnamon and ginger. The recipe was later published in Betty Crocker’s ‘Cooky Carnival Cookbook’. I have also seen a reference to the crinkle cookie having originated in the Philippines.

Whatever the origin, they have definitely evolved over the years. Once you’ve got the hang of the basic recipe your flavor options are endless. For example, a few suggestions are Kahlua, pumpkin, ginger, mocha, peppermint, sesame, cinnamon, peanut butter, matcha, orange, red velvet, egg nog & purple ube etc. etc. Amazing!!

Print Recipe
Lemon Cardamom Crinkle Cookies
Votes: 2
Rating: 5
You:
Rate this recipe!
Servings
COOKIES
Servings
COOKIES
Votes: 2
Rating: 5
You:
Rate this recipe!
Instructions
  1. Preheat oven to 350 F. Line 2 baking sheets with parchment paper.
  2. In a large bowl, whisk together flour, cardamom, baking powder, 1/2 tsp salt, lemon & orange zest; set aside. Sift powdered sugar into another dish to ensure there are no lumps; set aside.
  3. In another bowl, cream together butter & granulated sugar on medium speed for about 2 minutes. Scrape down the bowl with a spatula, add the eggs one at a time until incorporated. Add vanilla & beat until blended. With a spatula, fold in flour mixture.
  4. Divide batter into 24 pieces (about 1 1/2 Tbsp each), then roll the portioned dough into balls. Roll the balls in the sifted powdered sugar & place on baking pan at least 2-inches apart.
  5. Bake 12-14 minutes, until the surface of the cookies has cracked & puffed up. The cookies will not be browned. Cool on a wire rack.
Recipe Notes
  • Creaming the butter & sugar together is such an important step because you are cutting little holes in the butter with the abrasive sugar. Those little holes will expand from the leavening properties of the baking powder during baking ensuring that the cakey, tender texture characteristic of this cookie is achieved.

Vanillekipferl – Gevulde Speculaas

I’ve always enjoyed food history and recreating memories from the past through cooking and baking. I had never realized how much my mother’s cooking was influenced by our German heritage. I guess as one gets older, things that were taken for granted now take on a whole new meaning. Today’s blog features a couple of those very special European treats. 

VANILLEKIPFERL or Vanilla Almond Crescent Cookies  –  Although this little crescent cookie originated in Austria, it has become very traditional in Germany. ‘Vanillin’ became very popular in the early 20th century, after artificial vanilla flavoring was invented. I’ve noticed there are numerous recipes that call for egg yolks in them. My personal preference is to make them without – just a few less calories. ‘Vanilla Sugar’  which is used in many German baked goods can be either bought in the Dr Oetker  brand or you can easily make it yourself. If you like the flavor of anise, you may want to try adding some anise seed to the cookie dough and when baked, dust these with  ‘Anise Sugar’.

GEVULDE SPECULAAS  or Spiced Cookies (Squares) Filled with Almond Paste  –  You’re right, this is very much a Dutch specialty. Some years ago I had the opportunity to spend a little time in the presence of a Dutch baker.  Among the many things I learned at that Dutch bakery was their love of almonds and those unique speculaas spices. In the mid 18th century, the recipe for ‘Spekulatius’  made its way to Germany from Holland and has become another traditional favorite. The origin of the cookie’s name may have derived from the Latin word ‘Spekulum’, signifying ‘mirror image’, which alludes to the wooden mold whose mirror image appears on the cookie. Since I became ‘hooked’ on that ‘speculaas spice’ combination, I like to make a small  pan of these very rich  and wonderful tasting goodies each Christmas. 


Print Recipe


Vanillekipferl / Gevulde Speculaas

Votes: 1
Rating: 5
You:
Rate this recipe!

Course dessert
Cuisine Dutch, German

Servings


Ingredients
Vanillekipferl (Vanilla Almond Crescent Cookies)

Gevulde Speculaas (Spiced Squares filled with Almond Paste)

Speculaas Spice (about 3 Tbsp)

Course dessert
Cuisine Dutch, German

Servings


Ingredients
Vanillekipferl (Vanilla Almond Crescent Cookies)

Gevulde Speculaas (Spiced Squares filled with Almond Paste)

Speculaas Spice (about 3 Tbsp)

Votes: 1
Rating: 5
You:
Rate this recipe!


Instructions
Vanillekipferl
  1. In a food processor, place flour & butter & pulse to combine until mixture resembles coarse crumbs. Place mixture in a large bowl. Add ground almonds, 1/4 cup powdered sugar, 1 pkg vanilla sugar, salt & extract. Knead dough with your hands in bowl until it comes together, about 5 minutes. Divide dough into four equal pieces, shaping each into a ball. Wrap in plastic wrap place in a sealed plastic bag. Refrigerate for at least 30 minutes or up to 2 days.

  2. Preheat oven to 350 F. Line a baking sheet with parchment paper. Remove one ball at a time from refrigerator. Roll into a rope 12 inches in length. Cut into 12 even pieces, rolling each with the palm of your hands to a 3-inch length. Form into a crescent shape & place 2 inches apart on baking sheet. When you have filled the baking sheet, bake for about 12 minutes, just until tips of crescents turn a light golden brown. Using another COLD baking sheet repeat with remaining dough.

  3. Allow cookies to rest on baking sheet for 2-3 minutes. In a small bowl, mix together 1/2 cup powdered sugar remaining package of vanilla sugar. Carefully coat warm cookies in sugar mixture; place on a wire rack to finish cooling. Allow to sit out overnight then transfer to an airtight container for storing or freezing.

Gevulde Speculaas
  1. In a food processor, combine flour, baking powder, sugar, salt & spices. Add chunks of cold butter & pulse into a smooth dough (you can do this by hand if you prefer). If the dough is too dry. you can add a little milk. Wrap dough in plastic wrap & place in refrigerator for 2 hours or up to 2 days.

  2. Either grease or line a 8 x 8" baking dish with parchment paper. Preheat oven to 350 F. Divide dough into 2 portions. Roll out each portion on a lightly floured surface, until they are exactly as big as baking pan. Put one layer in pan & press lightly to fill the bottom. Lightly beat egg with a teaspoon of cold water. Spread 1/3 of egg over dough in pan.

  3. Roll out the almond paste between two sheets of plastic wrap, until it is exactly the size of pan. Press the paste lightly down to fit in the pan, and spread the next 1/3 of egg over it. Place the second layer of dough on top of the paste, press it lightly, making it as smooth as possible. Spread the last 1/3 of the egg wash over dough. Decorate the pastry with the almonds.

  4. Bake about 40 minutes or until they test done. Allow speculaas to cool completely in the pan, then cut into the portion size you prefer.


Recipe Notes
  • If you would like to make the 'Anise Seed Crescent Cookies' instead of the Vanilla Almond version, use vanilla extract instead of almond & add 1 Tbsp of crushed anise seed to the batter. For the 'Anise Sugar', blend (at a high speed), 1 Tbsp aniseed with 1 cup of granulated sugar until it makes a powder.
  • Although Gevulde Speculaas are at their best when fresh, I have never heard any complaints after they have been frozen. I always make sure they are wrapped in an airtight way before freezing.
  • In regards to the 'speculaas spice', I like to make extra so I can use it in anything you would normally use apple or pumpkin pie spice in.