CELEBRATING ST. PATRICK’S DAY!
The term ‘green food’ can mean several things. More and more households are ‘going green’ with their menus, buying food from sustainable local sources. People who are ‘eating greener’ include those who grow their own food and compost all their waste to those who simply take a re-useable bag to the supermarket. Most of us are interested in making decisions that are better for the environment.
Others immediately think ‘green vegetables’. Then of course there are those who, especially at this time of year, may think of the color green and foods with which to celebrate St Patrick’s Day. There is so much you could do with this holiday in terms of food such as rainbows, leprechauns, shamrocks, pot of gold ………
In North America, St. Patrick’s Day is pretty much just a fun day here. Green food has been getting more and more ‘creative’ on this particular holiday. For the most part, it’s an excuse to party and drink some green beer.
In the spirit of St. Patrick’s Day, I wanted to incorporate some ‘green’ food into our day. I decided on some ‘magic’ sunflower seed cookies. These cookies are quite unique in that when you use sunflower butter combined with baking soda in the batter the bread turns green. The green color is a harmless result of natural chemical reactions and doesn’t affect the taste or safety of the cookies.
Sunflower seed butter, often called Sunbutter, naturally turns green when these two ingredients meet during baking. The alkaline baking soda interacts with the acidic chlorogenic acid, producing a green pigment called chlorophyllin. This reaction intensifies as the cookies cool down, leading to the characteristic green hue.
Nevertheless, I thought it was a fun way to put a different twist on today’s green celebrations.
Print Recipe
Green Sunflower Seed Cookies
Votes: 1
Rating: 5
You:
Rate this recipe!
|
|
Votes: 1
Rating: 5
You:
Rate this recipe!
|
Instructions
-
Mix everything together in one bowl until well combined.
Scoop the dough, roll in seeds & place onto a parchment paper lined cookie sheet. This amount will make 12 large balls or 15 small ones.
Bake 10-15 minutes. Remove from oven & cool on wire rack.
Recipe Notes
- It's definitely very important to use baking soda and make sure to mix the batter adequately to disperse the baking soda fully, otherwise the chemical reaction that produces the green color won't happen. It also needs to sit for a few minutes after baking. Some brands (or even jars) of sunflower butter do work better than others, whether it has to do with freshness, added ingredients, or what. It's the secret ingredient to the green color - any other nut butter will just be brown! Look for a jar with as few additives as possible.
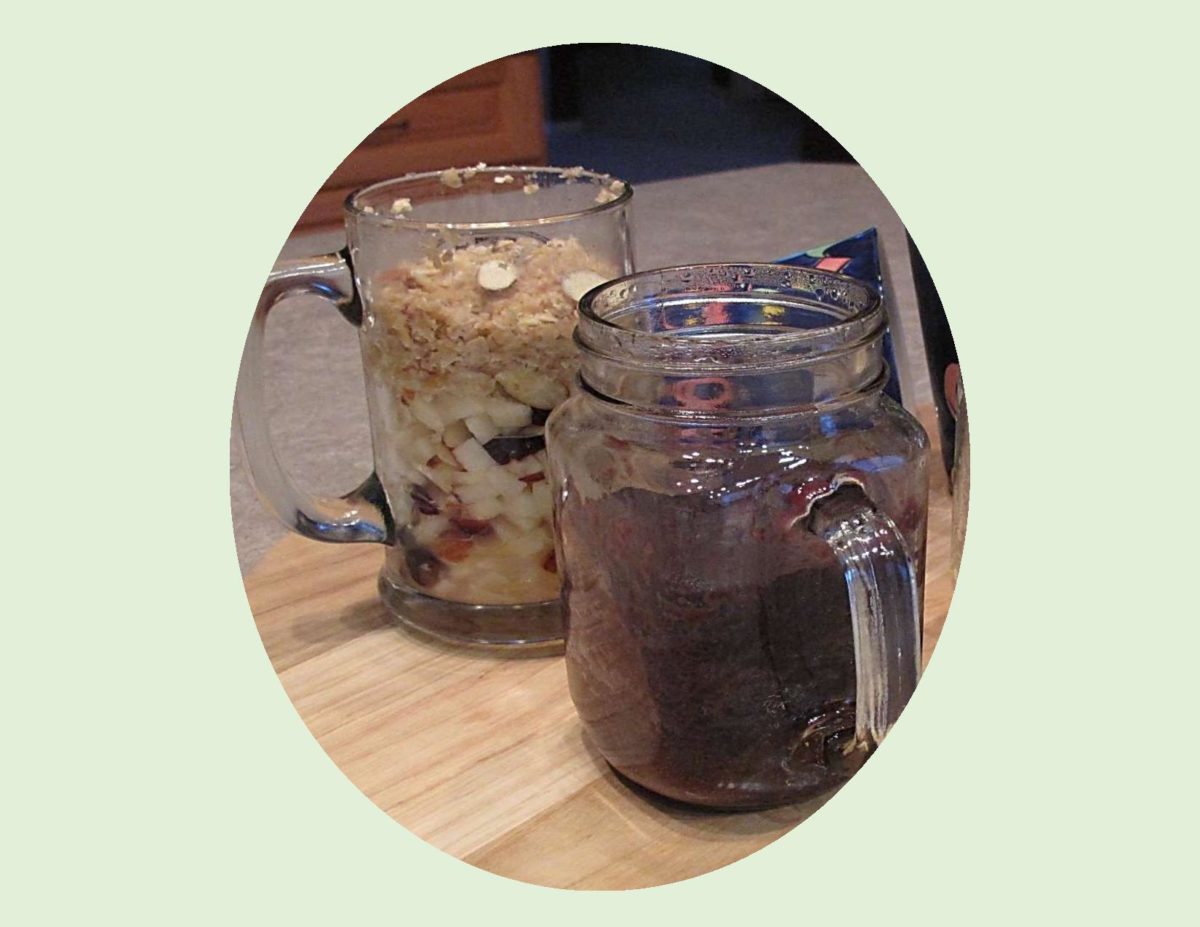
Mug cakes have been around for a while. We seem to like eating food out of mugs. Whether it’s a mug full of chili or just some cereal and milk, we like being able to hold our whole meal in our hands and enjoy it by the spoonful. Mug cakes have gained popularity not only because they are delicious, but because you can make them in five minutes. The technique uses a mug as the cooking vessel and takes just a few minutes to toss in the ingredients. It then goes into the microwave; as the butter in the mixture heats up, it creates air pockets that will cause the cake to quickly rise. The problem is that microwave baking is tricky and not every ‘cake-in-a-mug’ recipe you come across will work well.
I’ve tried a few with varying degrees of success. Nevertheless, they are a great way to satisfy an emergency homemade treat craving without even turning on the oven.
Here are some ideas you might like to try.
Print Recipe
Mug Crumble Cake/ Chocolate Mug Cake
Votes: 1
Rating: 5
You:
Rate this recipe!
|
|
Votes: 1
Rating: 5
You:
Rate this recipe!
|
Instructions
FRUIT CRUMBLE MUG CAKE
-
In a small bowl, combine apple with sugar & butter. Divide between 2 mugs. Cover each with plastic film & pierce several times. Cook in microwave for 1 minute at 800 watts or 50 seconds at 1000 watts. Add dried fruit & nuts & stir.
-
In a bowl, combine butter, brown sugar, oatmeal, flour & salt with your fingertips. Crumble on top of fruit in each mug. Microwave for 1 1/2 minutes at 800 watts or 1 minute 10 seconds at 1000 watts. Remove mugs from microwave & sprinkle with sliced almonds.
CHOCOLATE MUG CAKE
-
In a small bowl, combine dry ingredients. Add milk & oil; whisk together until smooth. Divide between 2 mugs & microwave on high for about 70 seconds. Remove from microwave. Cool a bit before eating.
Recipe Notes
- Be aware that success will depend on knowing how to adjust the cooking time according to YOUR microwave strength (watts). Be careful not to overcook your mug cakes.
- Each recipe should yield 2 mugs worth.

Rhubarb was originally cultivated for its medicinal properties and was not used in European cooking until the late 18th century. The history of rhubarb is very complicated but simply put there are only two broad categories, medicinal and culinary.
Thought of by many as an old fashioned ‘vegetable’, it never has really fallen out of favor. In Germany, rhubarb season is from April until June. There are countless recipes using rhubarb as the German people are very passionate about eating produce they have grown themselves.
I have an inherited love of rhubarb — the way it tastes, its huge beautiful foliage, its hardiness, productiveness …….
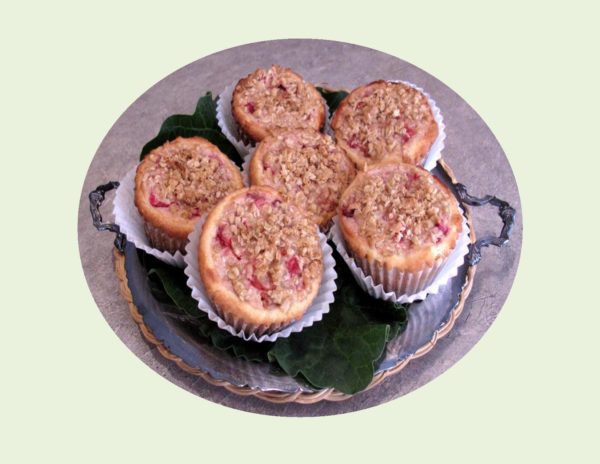
RHUBARB SOUR CREAM PIE (German Rhabarber Sauerrahn Kuchen) has been in my pie ‘go to’ file forever. The combination of these two ingredients works magic. Just for something different, I decided to use the same recipe but make it into tarts today.
Print Recipe
Rhubarb Sour Cream Pie / Tarts
Votes: 1
Rating: 5
You:
Rate this recipe!
|
|
Votes: 1
Rating: 5
You:
Rate this recipe!
|
Instructions
In a small bowl, combine oatmeal, brown sugar, margarine, flour & citrus zest. Cut in margarine until mixture is crumbly. Set aside.
Preheat oven to 400 F. In a large bowl, combine sugar, cornstarch, cinnamon & nutmeg; beat in sour cream & egg. Gently fold in rhubarb. Pour into pastry shell. Sprinkle topping mixture over the filling.
Bake at 400 F. for 15 minutes. Reduce heat to 350 F. & bake for 35-40 minutes or until topping is golden brown. Cool on a wire rack before slicing.
Recipe Notes
- In order to obtain nice slices, refrigerate pie until cold then slice & heat a bit in the microwave if preferred.