The quintessential summer BBQ dessert! Fruit pizza is like a giant cookie, covered with luscious cream, layered with colorful fresh fruit, topped with glaze and a drizzle of chocolate, if you please.
If you have been following my blogs, you have probably already noticed, choice is something I’m big on. Fruit pizza is a classic dessert with so many possibilities. I have always enjoyed to start with the original idea of a recipe and see how many ways I can vary it without getting too involved or requiring a lot of extra ingredients and time.
Since CANADA DAY celebrations are right around the corner I thought it was a good time to enjoy Fruit Pizza ‘personalized’. Here are some ideas to mix and match to your liking.
Print Recipe
Fresh Fruit Pizza
Personalize not only with ingredient choices but the design as well
Votes: 1
Rating: 5
You:
Rate this recipe!
Ingredients
Classic Shortbread or Pecan Shortbread Crust
Frozen Puff Pastry OR Crescent Roll Dough
Cool Whip / Custard Topping
Fresh Fruit (use whatever fruit you prefer)
Chocolate Drizzle (optional)
Ingredients
Classic Shortbread or Pecan Shortbread Crust
Frozen Puff Pastry OR Crescent Roll Dough
Cool Whip / Custard Topping
Fresh Fruit (use whatever fruit you prefer)
Chocolate Drizzle (optional)
|
Votes: 1
Rating: 5
You:
Rate this recipe!
|
Instructions
For Shortbread & Oatmeal Crusts
Preheat oven to 350 F. Lightly grease a 12-inch pizza pan or cookie sheet. In a large bowl, cream butter & sugar until light. Add any flavorings. In another bowl, combine dry ingredients; gradually add to creamed mixture. Mix with a wooden spoon or hand mixer until well blended. Press dough into pan & prick with a fork. Bake 10-15 minutes until golden. Allow to cool completely.
Frozen Puff Pastry
Follow package directions. Cool completely & place on serving tray.
Crescent Roll Dough
Preheat oven to 350 F. Pinch together crescent roll dough as you press into a 12-inch pizza pan. Sprinkle with 1 Tbsp sugar. Bake 10-12 minutes or until golden. Cool completely.
Cream Cheese Topping
In a small bowl, beat cream cheese, lime juice concentrate & sugar until smooth.
Cool Whip/Custard Topping
In a large bowl, whisk together dry pudding mix & milk for 2 minutes. Fold in Cool Whip.
Honey - Yogurt Topping
In a small bowl, whisk together yogurt & honey.
Citrus & Pineapple Glaze
In a small saucepan, combine ingredients. Cook over medium heat until thickens. Remove from heat & cool slightly. Using a pastry brush, gently brush the fruit with glaze. FOR PRESERVE GLAZE: mix preserves with water & brush onto fruit.
TO ASSEMBLE FRUIT PIZZA
Spread topping of choice onto cooled crust & arrange fruit onto. Brush with glaze of choice. Melt chocolate in a bowl over boiling water. Dip a large spoon into chocolate; drizzle, quickly letting the chocolate fall in thin ribbons from the end of the spoon. If chocolate seems to stiff, add a drop of vegetable oil. Let pizza stand until chocolate is firm.
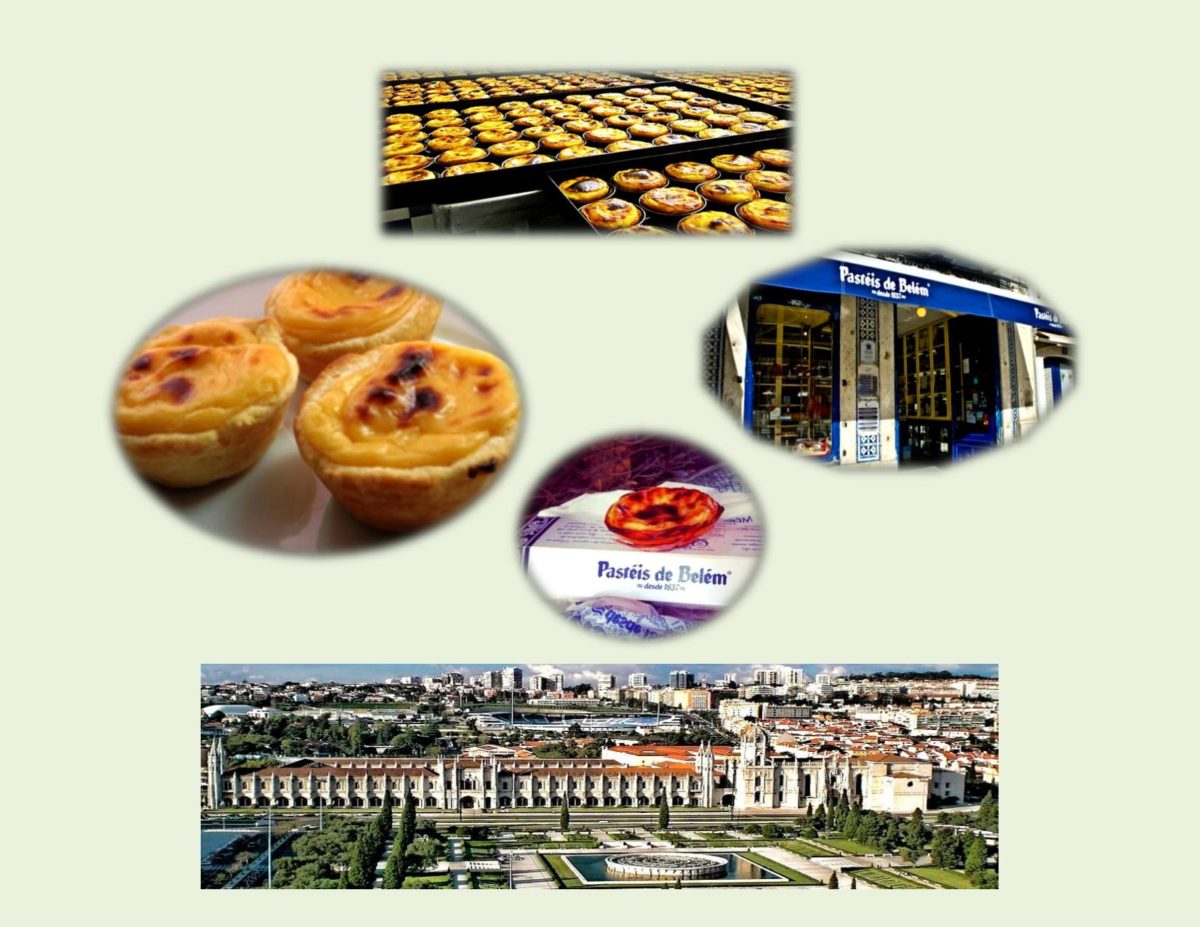
A while back I was in a grocery store and happened to notice a familiar looking little tart being sold. Sure enough, it was some Portuguese custard tarts with their typical characteristic of a ‘browned’ custard. There is no doubt this little sweet treat has universal appeal.
Until Brion and I had the pleasure of visiting Portugal in 2014, I really had never even tasted them or realized what an interesting history these unassuming custard tarts had.
‘Pasteis de nata’ were created by Catholic monks at the Jeronimos Monastery in the district of Belem, in Lisbon. These monks were originally based in France and loved these pastries. At the time, convents and monasteries used large quantities of egg whites for starching clothes, such as nuns’ habits. It was quite common for them to use the leftover egg yolks to make cakes and pastries, as a result these legendary tarts were born!
At the beginning of the nineteenth century, next to the Jeronimos Monastery there was a sugar cane refinery attached to a small general store. Following the extinction of the religious orders and in the face of the impending closing of many of the convents and monasteries in the aftermath of the Liberal Revolution of 1820, the monks started selling pasteis de nata at the sugar refinery to secure some revenue. In 1834 the monastery was closed and the recipe was sold to the sugar refinery. Three years later, the baking of the ‘Pasteis de Belem’ began in the buildings attached to the refinery, following the ancient ‘secret recipe’ from the monastery. Passed on and known exclusively to the master confectioners who hand-crafted the pastries in the’secret room’, this recipe remains unchanged to the present day. The bakery produces something like 10,000+ of these tarts a day, everything being done by hand except the filling of the tart shells.
When you read the recipe it makes you wonder how does a simple little custard tart reach such status. It seems it might be a few things such as ‘secret recipes’, teams of folks who do nothing but make the pastry dough or whip up the filling. Then there are those commercial ovens that blast at 800 F. to get that characteristic ‘browned’ look and taste. Definitely, when you make that many daily you can’t help but get it right!
All that being said, here is an easy way to make some ‘pasteis de nata’ in your own kitchen to enjoy but we all know so much of it is in ‘the taste of a memory’.
Print Recipe
Portuguese Custard Tarts (Pasteis de Nata)
Light, flaky, crispy crust with a lightly sweetened creamy custard
Votes: 1
Rating: 5
You:
Rate this recipe!
|
|
Votes: 1
Rating: 5
You:
Rate this recipe!
|
Instructions
Whisk yolks, eggs, cream, sugar & cornstarch in the top of a double boiler set over simmering water. Cook, stirring with a wooden spoon, until custard is thick enough to coat the back of spoon; remove from heat. Whisk in butter, vanilla & lemon zest. Strain the custard into a bowl. Place a piece of waxed paper directly over the custard; refrigerate until chilled or up to a day.
Starting from the short end, roll each sheet of thawed puff pastry into a log; cut each into 12 equal pieces. Lightly grease 2-12 cup muffin pans. Place a piece of dough in each cup, Pressing dough evenly with your fingers to form a tart shell. Line each tart case with a small round of parchment paper. Fill with baking weights or rice. 'Blind' bake at 400 F. for ABOUT 10 minutes.
Adjust oven temperature to 450 F. Fill tart shells about 2/3 full with cooled custard. Bake for about 10-12 minutes. Adjust to BROIL temperature & brown for 3-5 minutes, watching closely so they don't burn.
Leave to cool in muffin pans for about 5 minutes then turn out carefully on to a wire rack. Serve at room temperature. If preferred, sprinkle with a little ground cinnamon.
Recipe Notes
- Using frozen puff pastry makes it less time consuming but it still seems to take a few times of making them to get your timing just right with each part of the baking process. In the end it's well worth it!

In 2015, my husband Brion and I spent three months in Ecuador. Other than a holiday, we were wanting to check out this country as a possible ‘winter haven’, away from the cold ‘Alberta’ winters. It didn’t quite make the list but it was another adventure in our travels that is valuable in the big picture.
Cuenca is Ecuador’s third-largest city and the economic center of the southern sierra. The city sits on a plateau surrounded by mountains which explains the name Cuenca which means ‘basin’ in Spanish. Four rivers are found in the Cuenca basin and one, the Tomebamba, runs right through the center of the city.
An artistic mecca of southern Ecuador, artisans produce fine leather goods, custom made guitars, filigree jewelry, ceramics as well as the famous Panama hats, which originated in Ecuador not Panama.
Although near the equator, Cuenca sits high in the southern Andes at an altitude of 8300 feet and its residents enjoy year round spring-like weather. Temperatures rarely go beyond highs in the 70’s F.(21 Celsius) and lows in the 50’s F.(10 Celsius), so a sweater or light jacket is sufficient all year long. Rainfall averages around three inches per month.
Cuenca’s two ‘seasons’ are rainy and dry. The rainy season, roughly from January through May, features warm sunny mornings and frequent afternoon showers. During the middle of the dry season (June through December), you can expect long periods of chilly weather and overcast skies.
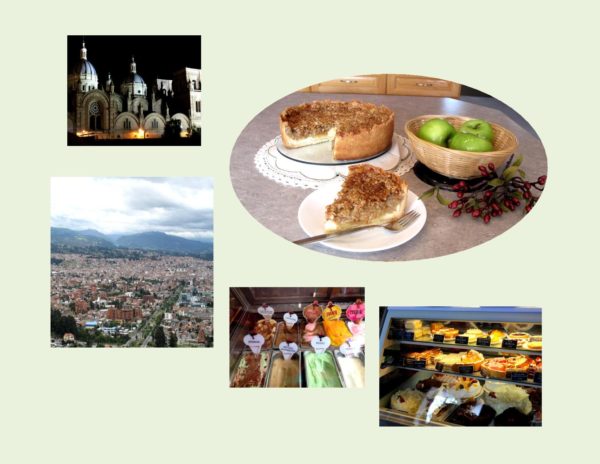
The apartment we had rented was in central Cuenca where we discovered a nice little place called ‘Tutto Freddos’. It was a unique spot where you could enjoy having a variety of things to eat such as pizza, sandwiches, ice cream treats, cakes and pastries with your coffee. It was like a bistro in appearance with its small tables as well as a mezzanine floor. While you enjoyed your coffee and treats you could watch the activity in the streets. Of course being the nature of the country, it never failed to be interesting! One of the treats we had numerous times was what seemed to me like a version of ‘Dutch Apple Pie’. I tried to find out anything I could about it in hopes of duplicating the ‘Taste of a Memory’. Here is my interpretation of this special ‘pie’.
Print Recipe
Dutch Apple Pie
Apple-cream cheese filling with a wonderful blend of 'Dutch' spices, baked in a shortbread cookie crust.
Votes: 1
Rating: 5
You:
Rate this recipe!
|
|
Votes: 1
Rating: 5
You:
Rate this recipe!
|
Instructions
Preheat oven to 375 F. In a food processor, combine flour, powdered sugar & cornstarch. Cover & process until combined; add butter. Pulse with on/off turns until mixture forms fine crumbs. Press mixture onto the bottom & 1 1/2" up the sides of a 9" spring form pan.
Beat cream cheese & 1/4 cup sugar with mixer until well blended. Add egg & vanilla; mix well. Spread onto bottom of crust. Mix remaining sugar, 2 Tbsp flour, & spice blend. Add to apples in a large bowl; toss to coat. Spoon over cream cheese layer.
Mix remaining flour, brown sugar & rolled oats in a medium bowl. Cut in butter until mixture resembles coarse crumbs; sprinkle over apple mixture. Lay a piece of foil loosely over pie to prevent over browning. Bake in bottom third of oven for 20 minutes, uncover & continue to bake for another 30 minutes or until apples are tender.
Recipe Notes
Spice Blend Mix: 4 tsp cinnamon, 1 tsp cloves, 1 tsp nutmeg, 1/4 tsp white pepper, 1 tsp anise seed, 1/2 tsp ginger, 1/4 tsp cardamom, 1/4 tsp mace
- Grind the spices together in a coffee grinder or blender; place in a screw-top jar in the refrigerator.
- Any extra spice mix can be used in recipes calling for 'apple or pumpkin pie spice'.
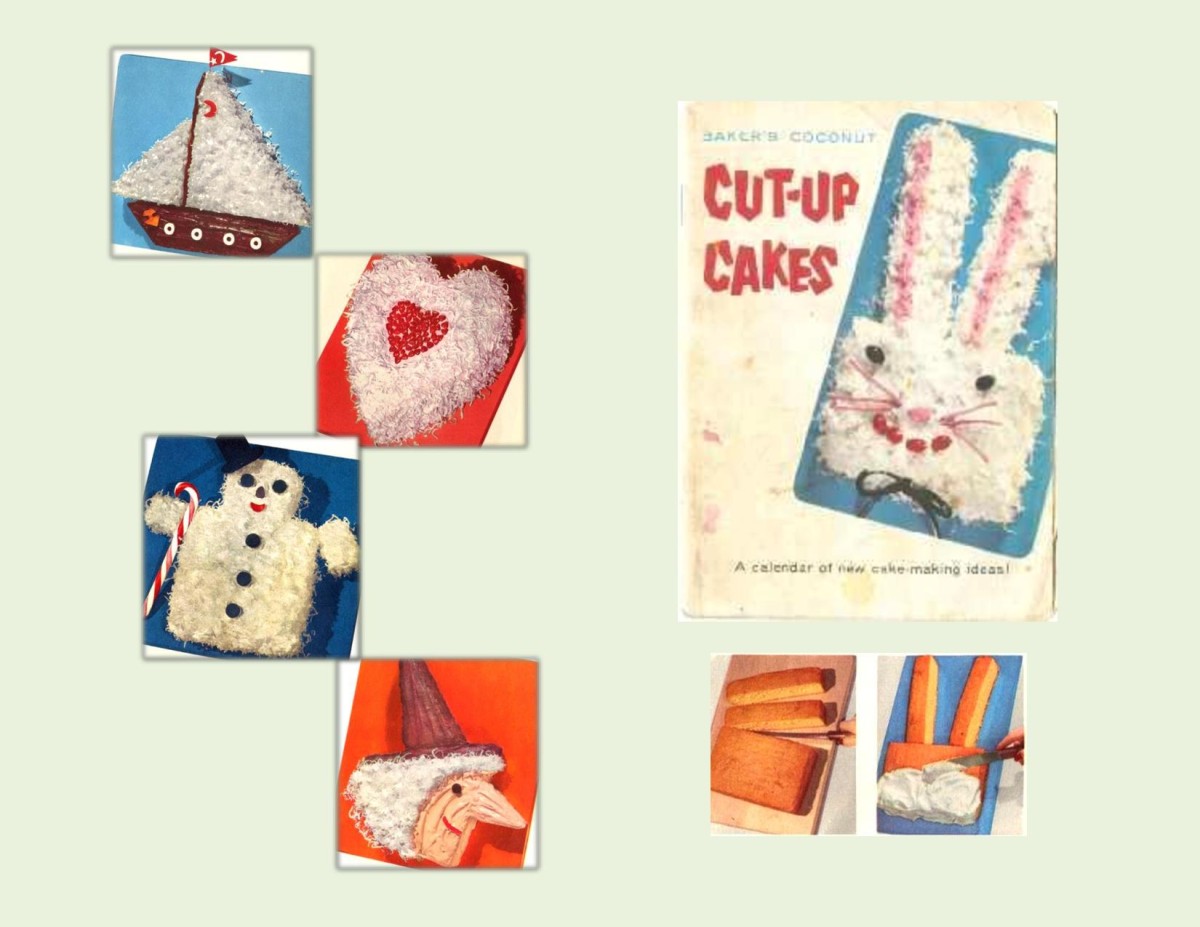
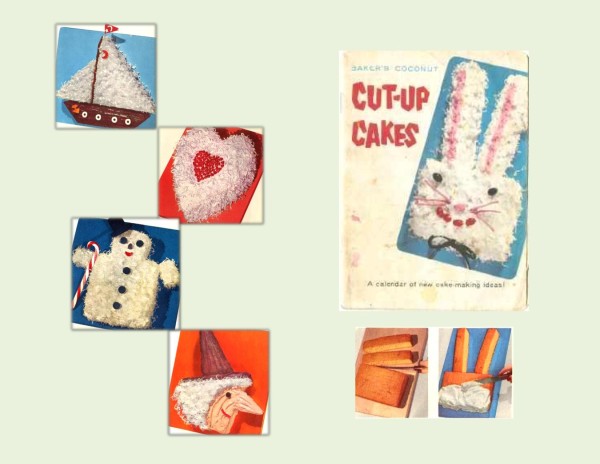
In about 1956, Baker’s Angel Flake Coconut (General Mills) came up with the idea of ‘cut-up cakes’. My mother always had a love for cake decorating and this idea just added a whole new dimension. The company printed a little booklet with a year’s worth of cut-up cake directions.
The cakes were popular because no special tools or pans were needed. Cakes were baked from your own recipe or from cake mixes, usually in either a 13 x 9″ pan or two 8 or 9″ layers. After the cake was cooled, you followed a pattern given in the recipe booklet and cut the cake as directed with a knife, then put the pieces together to form the desired shape. The cake pieces were then covered with frosting, making it appear as one solid cake.
Most of the designs usually incorporated coconut into the decoration. It looked great and of course we loved it. This was the forerunner to the baking industry developing ‘character’ cake pans in shapes of anything imaginable.
Although this old fashioned oatmeal cake came from that time period, it was not used for one of these cut-up cakes. I just thought it would be nice to include it in this blog since it had that wonderful tasting broiled topping made with the well known ‘Angel Flake‘ coconut. This cake was so good but one minute too long under that broiler could destroy it!
Print Recipe
Oatmeal Spice Cake with Broiled Topping
A dense, moist, classic oatmeal cake that has stood the test of time.
Votes: 2
Rating: 4.5
You:
Rate this recipe!
|
|
Votes: 2
Rating: 4.5
You:
Rate this recipe!
|
Instructions
In a small bowl, pour boiling water over oatmeal & margarine; let stand for 10 minutes.
Preheat oven to 350 F. Grease a 9 x 9" baking dish.
In a large bowl, beat eggs with sugar until fluffy. Add vanilla & oat mixture, blend well.
Sift together flour, baking powder, salt, nutmeg & cinnamon.
Combine flour mixture to creamed mixture, blending carefully.
Pour into prepared baking pan; bake 35 minutes or until tests done. Cool for 10 minutes. Do not remove from pan.
For Frosting: Combine all ingredients. Spread evenly over cake. Broil until frosting becomes bubbly. WATCH CAREFULLY!
Let cake cool enough for the topping to be absorbed into the cake.

Today, March 28, was the birth date of my Mother. She passed away in 1978 at the age of sixty. Although 38 years have passed, it seems like it was only yesterday. She was truly an ‘Angel on Earth’, never to be forgotten by her family or by the people who’s lives she touched.
I have so many memories of her wonderful cooking and baking. In her honor today I decided to post a German Poppy Seed Coffee Cake.
Poppy seed has long been a popular ingredient in German and Austrian baked goods. Once again, as in the case of Easter bread, there are a great variety of versions. What always seemed to stick in my memory was that my mother’s poppy seed filling was never dry. It was almost as if the poppy seeds were in a vanilla pudding. If my memory serves me correct, she made it like a jelly roll.
Today I’m trying to re-create that ‘pudding filling’ and use it in a Bundt cake.
Print Recipe
German Poppy Seed Coffee Cake
A tender sour cream coffee cake with a custard-like poppy seed filling.
Votes: 1
Rating: 5
You:
Rate this recipe!
|
|
Votes: 1
Rating: 5
You:
Rate this recipe!
|
Instructions
FILLING
In a saucepan, over medium heat, combine pudding powder, sugar, poppy seed & lemon zest with cold milk, stirring constantly until it begins to simmer.
Simmer for 5 minutes; remove from heat.
CAKE
Preheat oven to 325 F. Grease a 12-cup Bundt pan.
Using a hand held mixer on medium speed, beat sugar, margarine & eggs, scraping bowl occasionally, for 2 minutes.
In a bowl, combine flour, baking powder, baking soda, cinnamon, salt & walnuts. Fold into wet ingredients alternately with sour cream.
Spread half of the cake batter in Bundt pan, pushing it slightly up the sides of pan.
Spoon poppy/pudding mixture over cake batter.
Gently spread remaining cake batter on top.
Bake for 45-50 minutes or until tests done. Remove from oven, place a wire cooling rack over pan. Invert & remove pan.
Serve with a dollop of Greek French Vanilla yogurt if desired or dust with icing sugar.