
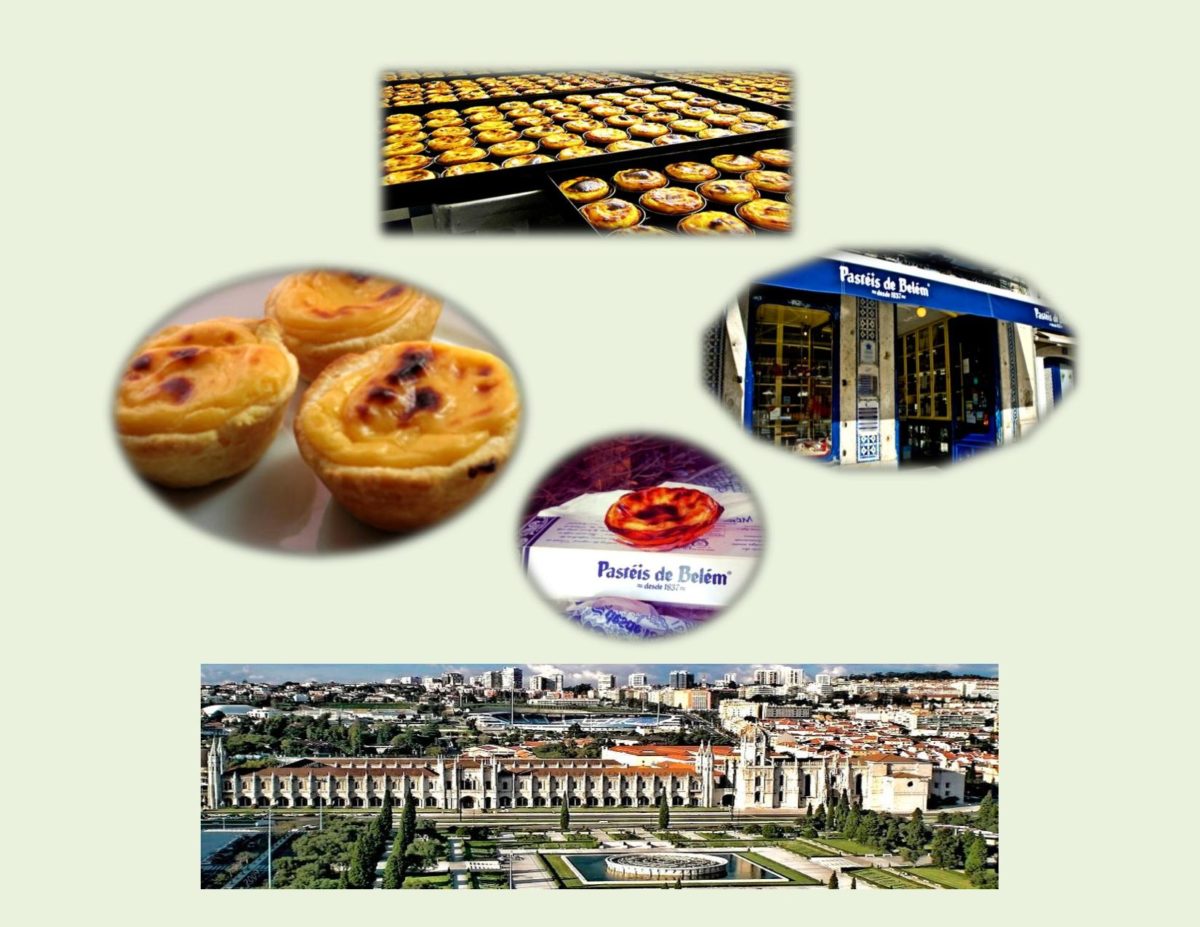
A while back I was in a grocery store and happened to notice a familiar looking little tart being sold. Sure enough, it was some Portuguese custard tarts with their typical characteristic of a ‘browned’ custard. There is no doubt this little sweet treat has universal appeal.
Until Brion and I had the pleasure of visiting Portugal in 2014, I really had never even tasted them or realized what an interesting history these unassuming custard tarts had.
‘Pasteis de nata’ were created by Catholic monks at the Jeronimos Monastery in the district of Belem, in Lisbon. These monks were originally based in France and loved these pastries. At the time, convents and monasteries used large quantities of egg whites for starching clothes, such as nuns’ habits. It was quite common for them to use the leftover egg yolks to make cakes and pastries, as a result these legendary tarts were born!
At the beginning of the nineteenth century, next to the Jeronimos Monastery there was a sugar cane refinery attached to a small general store. Following the extinction of the religious orders and in the face of the impending closing of many of the convents and monasteries in the aftermath of the Liberal Revolution of 1820, the monks started selling pasteis de nata at the sugar refinery to secure some revenue. In 1834 the monastery was closed and the recipe was sold to the sugar refinery. Three years later, the baking of the ‘Pasteis de Belem’ began in the buildings attached to the refinery, following the ancient ‘secret recipe’ from the monastery. Passed on and known exclusively to the master confectioners who hand-crafted the pastries in the’secret room’, this recipe remains unchanged to the present day. The bakery produces something like 10,000+ of these tarts a day, everything being done by hand except the filling of the tart shells.
When you read the recipe it makes you wonder how does a simple little custard tart reach such status. It seems it might be a few things such as ‘secret recipes’, teams of folks who do nothing but make the pastry dough or whip up the filling. Then there are those commercial ovens that blast at 800 F. to get that characteristic ‘browned’ look and taste. Definitely, when you make that many daily you can’t help but get it right!
All that being said, here is an easy way to make some ‘pasteis de nata’ in your own kitchen to enjoy but we all know so much of it is in ‘the taste of a memory’.

| Prep Time | 30 minutes |
| Servings |
tarts
|
- 3 egg yolks
- 2 whole eggs
- 2 cups 5% light cream
- 2/3 cup sugar
- 2 Tbsp cornstarch OR rice flour
- 1 Tbsp butter,
- 1 Tbsp vanilla
- 1 tsp lemon zest
- 450 grams frozen puff pastry, thawed (there are 2 sheets per 450g pkg)
Ingredients
|
|
- Whisk yolks, eggs, cream, sugar & cornstarch in the top of a double boiler set over simmering water. Cook, stirring with a wooden spoon, until custard is thick enough to coat the back of spoon; remove from heat. Whisk in butter, vanilla & lemon zest. Strain the custard into a bowl. Place a piece of waxed paper directly over the custard; refrigerate until chilled or up to a day.
- Starting from the short end, roll each sheet of thawed puff pastry into a log; cut each into 12 equal pieces. Lightly grease 2-12 cup muffin pans. Place a piece of dough in each cup, Pressing dough evenly with your fingers to form a tart shell. Line each tart case with a small round of parchment paper. Fill with baking weights or rice. 'Blind' bake at 400 F. for ABOUT 10 minutes.
- Adjust oven temperature to 450 F. Fill tart shells about 2/3 full with cooled custard. Bake for about 10-12 minutes. Adjust to BROIL temperature & brown for 3-5 minutes, watching closely so they don't burn.
- Leave to cool in muffin pans for about 5 minutes then turn out carefully on to a wire rack. Serve at room temperature. If preferred, sprinkle with a little ground cinnamon.
- Using frozen puff pastry makes it less time consuming but it still seems to take a few times of making them to get your timing just right with each part of the baking process. In the end it's well worth it!

