Bacon & Egg Breakfast Boats

While the ingredients for breakfast sandwiches have been common elements of breakfast meals in the English-speaking world for centuries, it wasn’t until the 19th century in the United States that people began regularly eating eggs, cheese and meat in a sandwich. The first known published recipe for a ‘breakfast sandwich’ appeared in an 1897 American cookbook.

‘Baked egg boats’ became popular almost a decade ago and have been duplicated in many ways ever since! Basically, a quiche that uses a hollowed-out baguette as its base instead of a buttery pie crust. The egg filling is poured into the hollowed-out baguette and baked until the eggs have set, and the baguette is toasted.

This breakfast recipe can be scaled up to feed a larger crowd and is also very portable with endless variations and possibilities! It’s a simple, versatile breakfast at its best!

Print Recipe
Bacon & Egg Breakfast Boats
Votes: 1
Rating: 5
You:
Rate this recipe!
Servings
Ingredients
Servings
Ingredients
Votes: 1
Rating: 5
You:
Rate this recipe!
Instructions
  1. Preheat oven to 325 F.
  2. With a knife, cut out the middle of each baguette, making sure not to cut through the bottom. Take the cut part out. You should end up with a boat-like shape. The empty space should be deep enough & wide enough for filling.
  3. Place baguettes onto a baking tray lined with baking parchment. Set aside.
  4. In a mixing bowl, beat the eggs with a fork. Add in cherry tomatoes, green onion, half of the shredded cheese, bacon, salt, pepper and oregano. Mix well. Pour the mixture into the hollowed-out center of both baguettes.
  5. Transfer the tray into the oven & bake at 325 F. for 30 minutes or until eggs are set & puffed. Remove from oven & sprinkle with the remaining cheese. Bake for another 5 minutes.
  6. Allow to cool for a few minutes before serving.

Butterflied Chicken Drumsticks w/ Roasted Potatoes

While the specific term ‘butterflying’ might be relatively recent, this practice of preparing meat for faster and more even cooking has roots in ancient civilizations, with evidence of similar techniques in ancient Egypt and Greece. 

Chicken drumsticks are guaranteed to be delicious when attached to the whole bird, but when cooked by themselves, there are a few extra challenges. The awkward shape can make it tough to get an evenly brown color on all sides—especially when grilling—leaving some of the skin pale and unappetizing. The simple answer is to butterfly them.

You might ask,’ are butterflied chicken drumsticks worth it’? Absolutely, if you’re an avid fan of grilled/roasted chicken drumsticks. The process has hardly any downsides, between the lower cost, quicker cooking time, and crispier flavor. Spending a few minutes to butterfly the chicken legs is definitely worth it!

The process is pretty straightforward … just pat the legs dry with a paper towel and use a gentle swiping motion (with a sharp knife!) to cut through the meat and expose the bone. Use the knife to separate more of the flesh from the top of the bone until the leg opens up (like a butterfly!). Be careful not to separate the meat completely from the top of the bone.

In this recipe, after the chicken legs have been grilled, they are glazed and roasted on a rack above some potato wedges. The flavor of the overall meal is amazing.

Print Recipe
Butterflied Chicken Drumsticks
Votes: 1
Rating: 5
You:
Rate this recipe!
Servings
DRUMSTICKS
Ingredients
Chicken /Potatoes
Chicken & Potato Spices
Chicken Glaze
Servings
DRUMSTICKS
Ingredients
Chicken /Potatoes
Chicken & Potato Spices
Chicken Glaze
Votes: 1
Rating: 5
You:
Rate this recipe!
Instructions
Chicken & Potato Spices
  1. Mix oil, all of the spices & salt in a large bowl. Set aside.
Chicken
  1. Holding the end of a chicken drumstick, slice on either side of the bone as far as you can without slicing entirely through the meat. Once the initial cuts are made, make an additional cut on both sides of your first cuts again do not cut all the way through the meat. This will open the drumstick up & it will be butterflied.
Potatoes
  1. Wash & cook potatoes in microwave until 3/4 of the way done. Remove from microwave & slice potatoes in wedges.
Spice Rub
  1. Place potatoes in oil/spice mixture. Toss to coat the remove & lay single file on a foil lined baking sheet. Set aside.
  2. Add butterflied chicken to remaining oil/spice mix & toss to coat well. Heat a griddle & fry chicken until golden brown on both sides. While chicken is cooking make the chicken glaze.
Chicken Glaze
  1. In a small bowl whisk together the soy sauce, chili flakes, honey, mustard, olive oil, salt & pepper until it emulsifies, about 30 seconds to 1 minute.
  2. Preheat oven to 375F.
  3. Lay a wire rack over top of potatoes on prepared baking sheet that has been set aside. On the wire rack, place partially cooked chicken drumsticks. Brush chicken with glaze.
  4. Place potato/chicken tray in oven & cook for 20 minutes or until FULLY COOKED & tender. Remove from oven & place potatoes & chicken on serving plates.

Beer Can Burgers

CELEBRATING VICTORIA DAY!

For many Canadians, Victoria Day marks the unofficial beginning of summer. It is Canada’s oldest non-religious holiday and although we still hang on to the British Queen’s name (for old times’ sake), this truly Canadian holiday has everything to do with the end of the cold weather and short days and a lot to do with some great food.

This holiday is called ‘May 2-4’ in some parts of Canada, a name that refers both to the date around which the holiday falls (May 24th) and Canadian slang for a case of twenty-four beers (a ‘2-4’), the popular beverage during the long weekend.

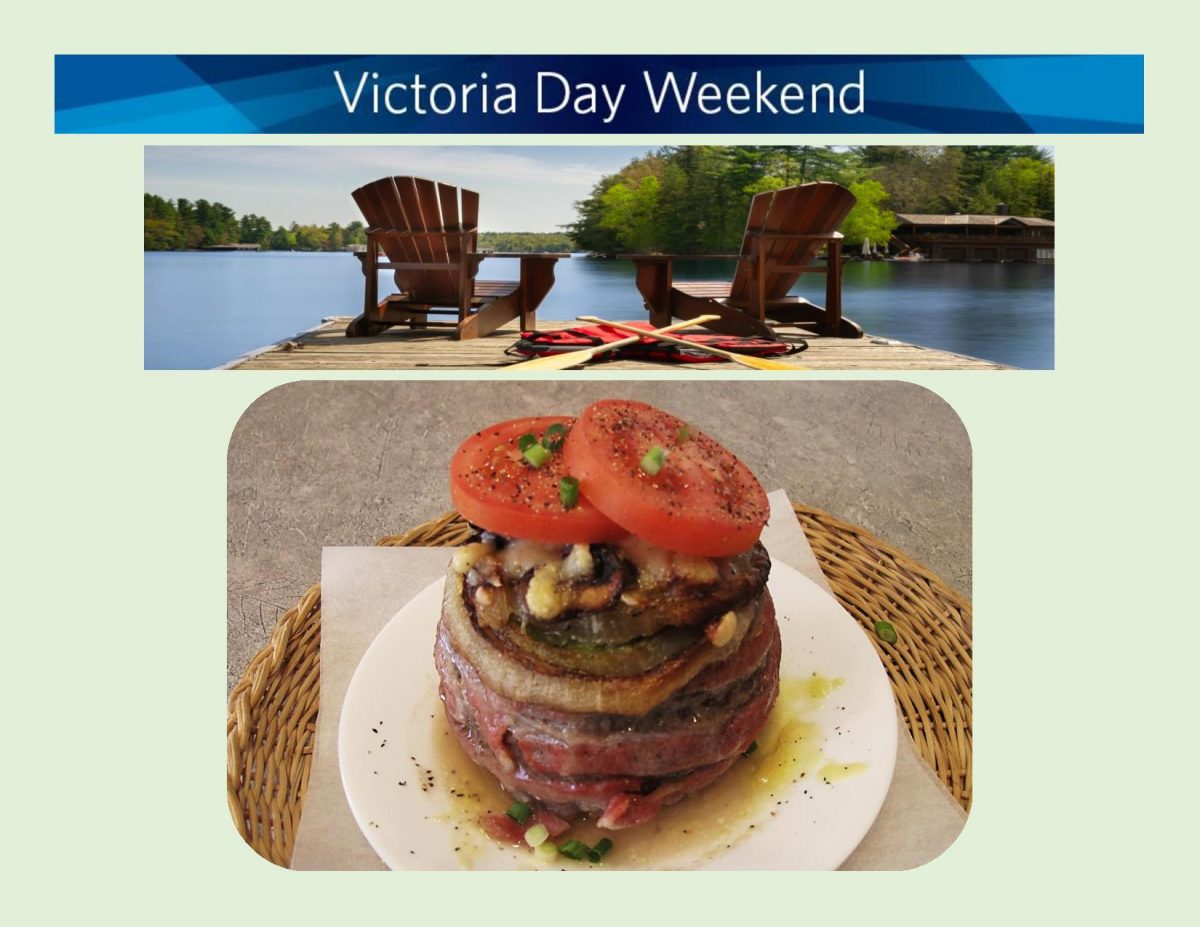
I’m sure, for many this weekend, barbecuing will be up front and center with burgers, steaks and ribs taking top billing. By now we’ve all heard of or tasted Beer Can Chicken but what about Beer Can Burgers? One might think that the burgers were cooked with the beer can inside like the beer can chicken is. They’re not. The burgers are just shaped around the beer can or bottle, then they are filled with whatever you choose to put in them. What you’re trying to achieve is really just a bacon wrapped ‘cup‘ from the ground beef with a filling inside. After this you can either grill (with indirect heat) or bake them low & slow. The bacon renders and caramelizes, so the beef is flavored by both the bacon and the filling inside.

As for the fillings, the sky is the limit as long as you’re using something that’s both pre-cooked and can withstand the long slow cooking. Just a few ideas would be caramelized onions, peppers, mushrooms, hash browns, cheese (of course!), avocado, chili etc. etc.

When making beer can burgers its good to use an 80/20 blend of beef and the standard (not thick) slice bacon. The thing about this kind of burger, is that they are best made with about 285 gms (about 10 oz.) so you can wrap two rows of bacon around them. Reason being, if made smaller, as the burger cooks, the meat shrinks and the filling falls out. The ideal height going up the can or bottle would be about 3 1/4 – 3 1/2 inches.

Beer can burgers can be baked in the oven or done on a grill. They are going to take some time to cook, about 50 minutes to an hour. Low and slow is the key so aim at about 300 F. Once they’re cooked, you can eat as is or add some tomato, lettuce, pickles, etc. I could hardly imagine anyone needing a bun with the size of these burgers … but?!

Whatever you decide to have today, the main thing just enjoy it!

Print Recipe
Beer Can Burgers
Votes: 1
Rating: 5
You:
Rate this recipe!
Course Main Dish
Cuisine American
Servings
Course Main Dish
Cuisine American
Servings
Votes: 1
Rating: 5
You:
Rate this recipe!
Instructions
Caramelized Onions
  1. In a skillet, heat 1 Tbsp oil; add sliced or chopped onion & sprinkle with salt. Cook & stir about 15 minutes or until moisture is evaporated & onion is soft. Reduce heat; sprinkle with 1 1/2 tsp cider vinegar & 1 Tbsp brown sugar. Cook, stirring until caramel brown in color. Transfer to a dish to cool.
Sautéed Mushrooms & Avocado
  1. In the same skillet, add sliced mushrooms, minced garlic & a few drops of water (just to get them sautéing). Sauté until moisture evaporates. Set aside. Peel & cut avocado into 1/2-inch slices; set aside
Cheese
  1. Shred or cube cheese of choice; set aside.
Burgers
  1. In a bowl, combine ground beef with spices. Divide beef in half & form each piece into a ball. Place on a work surface; using a beer can or bottle, press down firmly. With your hands, form beef around can/bottle to a height of about 3 1/4 to 3 1/2 inches. Horizontally wrap, two slices of bacon, one to the bottom of the beef & the next just above on each burger. Carefully remove can/bottle.
  2. Set up grill for indirect heat at around 300 F. Alternately, set a wire rack over a rimmed, foil lined baking sheet & preheat oven to 300 F.
  3. Fill burgers with prepared fillings & cook for about 50 minutes or until meat is cooked. Once cooked, allow them to sit for a few minutes so the burgers & cheese firm up slightly without the burger losing its juiciness.
  4. Enjoy as is or top with whatever you prefer.