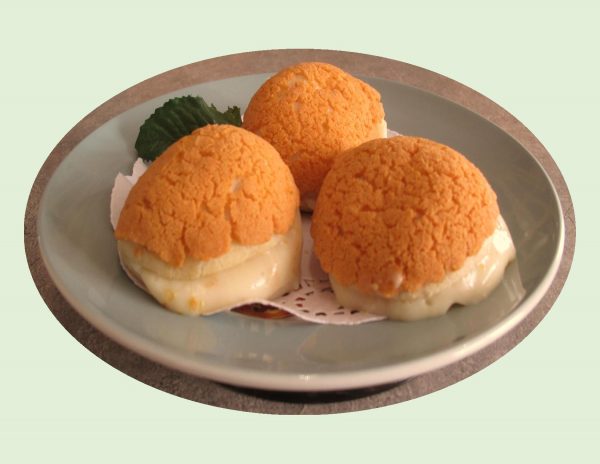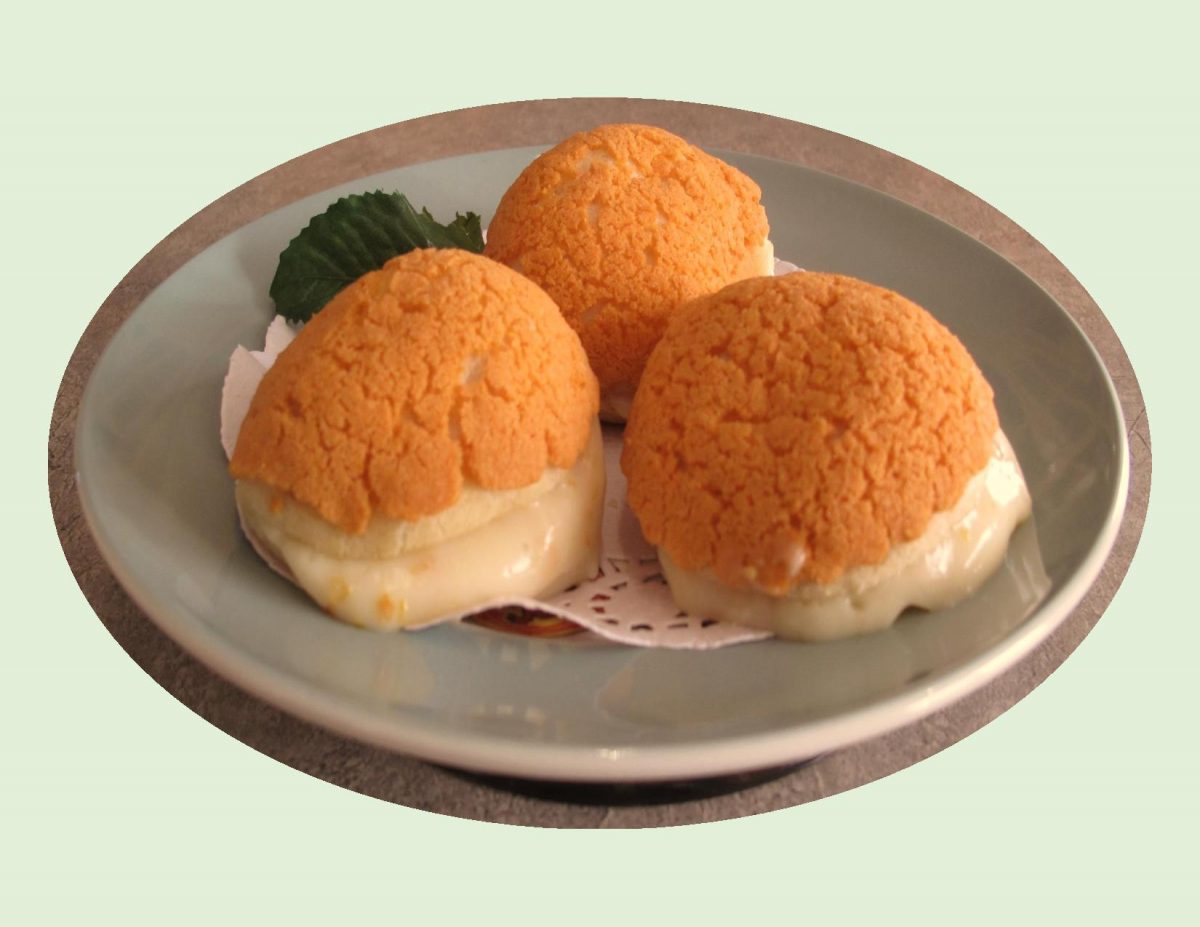
Cream puffs start with choux pastry, a heady mixture of butter, milk, water, eggs & flour. When you combine these ingredients, they become so dense and sticky that it seems impossible they’ll come together as soft, puffy, light, tender. Heat is what initiates the expansion of the dense paste. Steam from the milk and water expands the pastry’s edges, puffing up its capacity until the oven heat provides just enough crispness and structure to hold the puffs’ boundaries. A cream puff expands so dramatically in the oven that it creates a cavern inside to hold any number of things—whipped cream, pastry cream, ice cream or savory fillings.
Cream puff pastry (or choux pastry) is the base for profiteroles (smaller puffs filled with ice cream), éclairs (elongated puffs filled with pastry cream and glazed), croquembouche (a tower of cream puffs held together and drizzled with caramel) and savory appetizer puffs called gougeres with cheese and herbs.
Craquelin (pronounced kra-ke-lan) is a thin biscuit layer that can be added over choux pastries before baking them. It is used to create a crackly appearance, crunchy texture and a buttery sweet taste as well as helping the choux pastry bake evenly to form hollow rounds. This topping reminded me of a similar cookie-like topping used on Mexican sweet bread called ‘conchas’. It certainly dresses up ordinary cream puffs.
Print Recipe
Mandarin Orange Cream Puffs w/ Craquelin Topping
Votes: 1
Rating: 5
You:
Rate this recipe!
Ingredients
Mandarin Orange Pastry Cream
Ingredients
Mandarin Orange Pastry Cream
|
Votes: 1
Rating: 5
You:
Rate this recipe!
|
Instructions
Craquelin
In a food processor, process sugar & butter pieces until it forms large crumbs. Add flour, salt & vanilla; process until a dough forms. Bring the dough together to form a disk.
Roll the dough between 2 pieces of parchment paper until 1/16-inch thickness. Place covered in the freezer for at least an hour then cut the dough into (18) 2-inch circles & keep circles in the freezer until ready to use.
Pastry Cream
In a bowl, whisk together egg yolks, sugar & cornstarch until it turns pale yellow. In a saucepan, combine milk & orange zest; bring to a boil. Remove from heat, slowly add the egg mixture a little at a time, whisking well until fully incorporated.
Return mixture to heat & keep whisking over medium heat until it thickens. Stir in orange juice. Transfer to a bowl & cover with plastic wrap, making sure the wrap touches the surface of the pastry cream. When it comes to room temperature, refrigerate.
When cooled & you are ready to use the pastry cream, whisk with an electric mixer for 15-20 seconds to a smooth texture.
Choux Pastry
Preheat oven to 350 F. Line a couple of cookie sheets with parchment paper.
In a saucepan, combine milk, water, butter & salt; bring to boiling. Add flour, all at once, stirring vigorously. Cook & stir until mixture forms a ball. Remove from heat & add eggs & egg white, one at a time, beating well with a wooden spoon after each addition.
Place dough in a piping bag fitted with a large round tip. Pipe (18) 1 1/2-inch circles. Cover each with a frozen craquelin round circle.
Bake for 30-35 minutes or until golden & firm. Transfer to a wire rack & allow to cool.
Assembly
Carefully slice puffs. Fill a pastry bag with mandarin orange pastry cream & gently fill each puff. Place on serving platter & sprinkle with powdered sugar if you wish.

Halloween is one of the oldest holidays in the world. Few people are aware that its roots date back to Samhain, the ancient Gaelic harvest festival celebrated in Celtic countries, such as Scotland, Ireland and Wales. It was believed that spirits from the underworld and ghosts of dead people could visit the world of the living on the night of October 31st. These spirits could harm the living or take them back to the underworld. To avoid this, people started dressing up as ghosts and spirits, if they left their homes, to confuse the underworld spirits. Bonfires and food played a big part in the festivities.
Over the years, Samhain became merged with the later Christian holidays of All Saint’s Day on November 1st and All Soul’s Day on November 2nd. This explains our modern holiday’s focus on spirits and the dead.
Halloween traditions were brought to America by the Irish and Scottish immigrants. Through time other traditions have blended into Halloween for example the harvest time tradition of craving pumpkins.
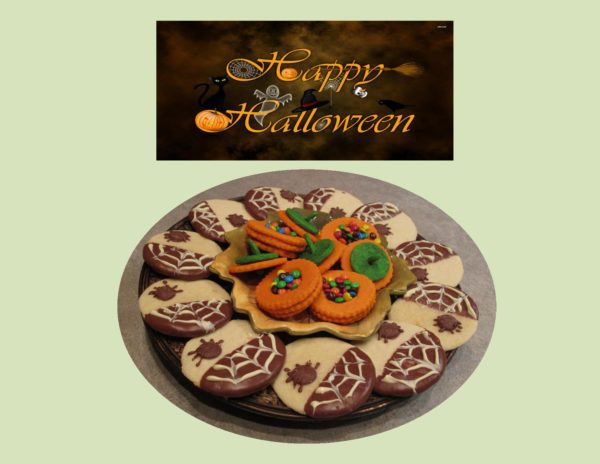
Brion and I live in a ‘young’ neighborhood. We’ve been very fortunate to have great neighbors on either side of us. One family has two boys and the other side has two girls. It is fun to make something special just for ‘our’ little people. This year, I’m making some Halloween cookies for their treat. My choices are SPIDER WEB & 3-D PUMPKIN cookies! Hope they will like them.
Print Recipe
Halloween Cookies
Votes: 1
Rating: 5
You:
Rate this recipe!
Ingredients
Basic Sugar Cookie Dough (enough for both kinds of cookies)
Ingredients
Basic Sugar Cookie Dough (enough for both kinds of cookies)
|
Votes: 1
Rating: 5
You:
Rate this recipe!
|
Instructions
Sugar Cookie Dough
-
In a large bowl, with an electric mixer, cream together butter & sugar until light & fluffy; add orange zest. Beat in eggs & milk. Whisk flour, baking powder, baking soda & salt together in a small bowl. Combine flour mixture with butter/egg mixture.
-
When dough is mixed, divide into thirds. Place one third in a plastic bag & place in the refrigerator. From the remaining dough, take a small amount & knead green food coloring into it. Once the color is fully worked into the dough, place it in another plastic bag & refrigerate. With remaining dough, add orange food color, knead it in, place in a plastic bag & refrigerate for at least 30 minutes or longer. When dough has chilled, cut into pumpkins & spider web cookies.
3-D Pumpkin Cookies (30)
-
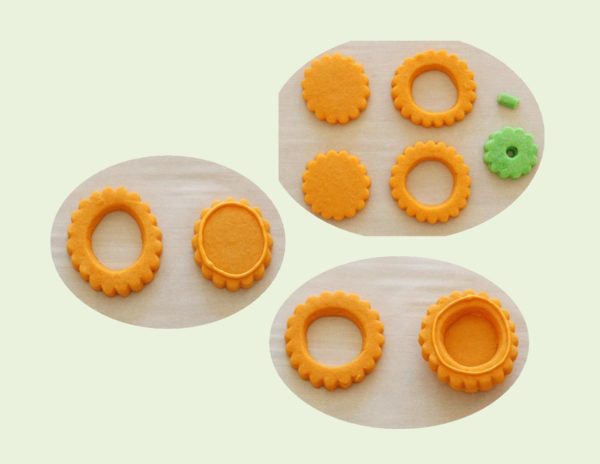
For each 3-D pumpkin you'll need:
(2) Orange scalloped or plain circle cookies 1 7/8" diameter.
(2) Orange scalloped or plain cookies 2 1/4" diameter with a 1 1/4" or 1 1/2" circle cutout.
(1) Green scalloped circle 1 1/4" or 1 1/2" diameter with a hole cutout in the center using a straw.
(1) Green stem, made from rolling a small amount of green dough into a 'snake', & cutting it into pieces about 3/4" long, then bake. Feel free to adjust the sizes a bit based on the cutters you have, or the finished size you desire.
-
Place chilled orange colored dough on a LIGHTLY floured work surface. Place a piece of parchment paper on top of dough. This helps to roll out the dough without adding additional flour. Roll out the dough to about 1/4 of an inch thick. Cut out pumpkin pieces ( 4 per cookie ). Place cookies on prepared baking sheet, topped with either silicone liners or parchment paper. Remove green colored dough from refrigerator; roll as above, cut lid circles & stems ( 1 each per cookie ). Make sure to only put cookie pieces of similar size on the same baking sheet to ensure even baking. Place entire baking sheet (with cookies on it) in the freezer or refrigerator for about 3-5 minutes. This will help them to keep their shape while baking. Preheat oven to 350 F.
-
Bake cookies for 5-6 minutes depending on their size. Bake ONLY until they are just barely beginning to take on a golden tone. After a minute or so, remove cookies from baking sheet to cooling rack. Once cooled, you are ready to assemble the pumpkins.
-
Starting with one of the solid circles & one cutout circle. Add a line of your 'cookie icing' onto the solid circle, then place cookie 'ring' on top.
-
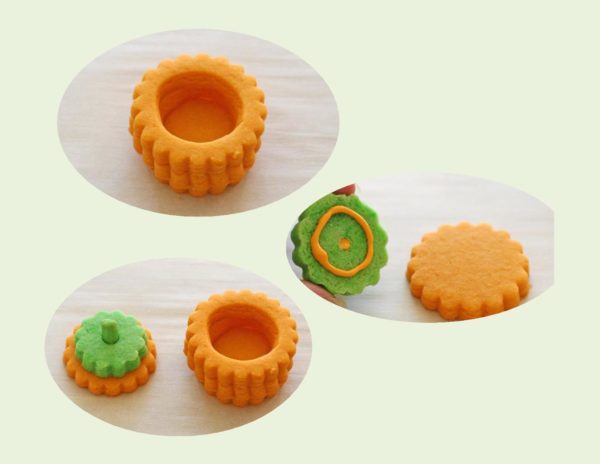
Add a line of cookie icing onto the first cookie 'ring'. Add the second cookie 'ring'. The base of your pumpkin is now complete.
-
Assemble the pumpkin top by first attaching the small green stem to the green circle (using a bit of cookie icing). Then add a line of icing onto the bottom of the green circle, & place the green circle on top of a solid orange circle.
-
Allow the pumpkin top & pumpkin base to dry completely for at least 1-2 hours. Fill pumpkin cavity with mini M&M candies. Arrange on serving dish with tops.
Spider Web Cookies (24)
-
Place remaining chilled dough a LIGHTLY floured work surface. Place a piece of parchment paper on top of dough. Roll dough to 1/8" - 1/4" thickness. Cut circles using a 3-inch round cookie cutter. Place cookies on a parchment lined baking sheet. Bake for about 6-8 minutes, until just golden. Do not allow cookies to brown. After a minute or so, remove cookies from baking sheet to cooling rack. Cool completely.
-
Reserve some regular chocolate chips for spider bodies, however many you plan to make. Place remaining regular chocolate chips in a microwave safe bowl with 1 TBSP shortening. Heat in microwave on high for 1 minute bursts, stirring after each minute, until chocolate is melted & smooth. Dip half of each cookie into chocolate & set aside.
-
In a separate bowl, quickly melt white chocolate chips with 1 TBSP shortening the same way as the semi-sweet chocolate. Pour melted white chocolate into a zip lock baggie & cut off a tiny piece of one corner. Make semi-circles on the dipped chocolate part of the cookie. Use a toothpick & draw lines through both dark & white chocolate from the center out to the outside edge of the cookie to create a web effect.
-
Place a little drip of melted chocolate on the cookie near the web. Use a toothpick to draw out 8 legs from the chocolate. Place a regular chip at one end for the spider body & a mini chocolate chip at the other for the head. Place the cookies on wax paper & allow chocolate to cool & harden before serving.
Recipe Notes
Royal Icing
- 1 egg white
- 1/2 tsp orange extract
- orange gel food color
- 1 1/2 cups powdered sugar
- With an electric mixer, whip egg white, extract & color until frothy. Slowly beat in powdered sugar, a little at a time, until mixture is thick but still liquid enough to beat. Beat on high until the mixture becomes thick & glossy, about 3 minutes. Cover the surface with plastic wrap while waiting to use it.
- Royal Icing will set to a firm, glossy finish when applied to cookie. This icing can be stored , tightly covered, in the refrigerator for up to a week.
