Parsnips, traditionally used in savory dishes, can bring a subtle sweet tenderness to your baked goods. Actually, when roasted or sautéed, their sugars caramelize richly and are well complemented by a variety of seasonings such as orange or lemon zest, ginger and cardamom.
All summer long we grate zucchini and fold it into our batter for a moist and delicious loaf. September rolls around and we switch to apple or pumpkin. When we don’t have those ingredients on hand, we can always rely on carrot or banana bread to satisfy our craving for what is basically cake in disguise.
Root vegetable desserts aren’t exactly a new concept. Incorporating vegetables such as beets, asparagus, sweet potatoes and parsnips … yes, parsnips! That root vegetable that probably only makes an appearance at your table, maybe once or twice a year is actually perfect for moist, cake-y breads etc.
Parsnips look a lot like carrots and can be grated on a box grater the same way. They even share carrot’s subtle sweetness, but parsnips have an earthier, more interesting flavor that pairs perfectly with warm baking spices like cinnamon, ginger and nutmeg. That makes it easy to change up the flavor of your sweet bread, taking it in a distinctly fall/winter direction.
Print Recipe
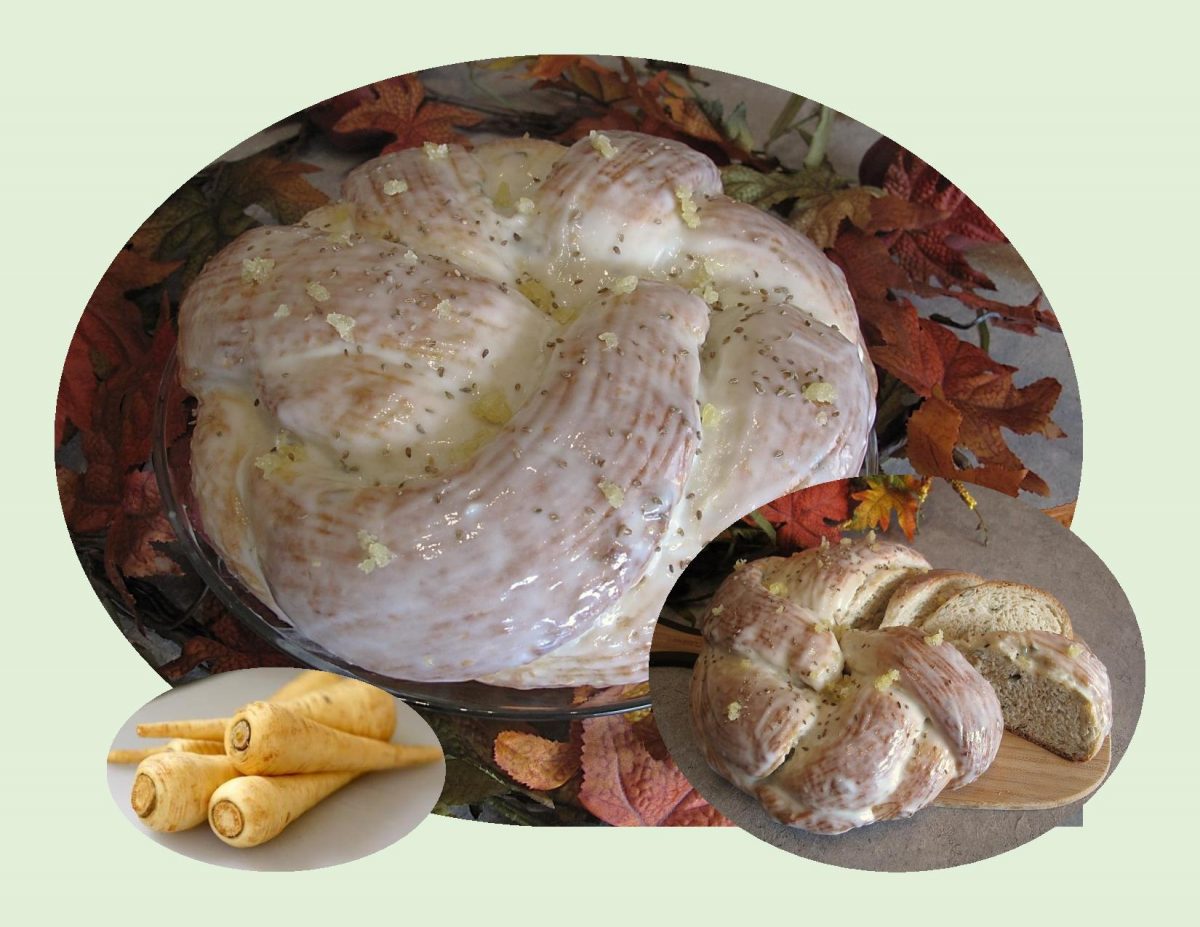
Seeded Parsnip Sweet Braid
Votes: 1
Rating: 5
You:
Rate this recipe!
|
|
Votes: 1
Rating: 5
You:
Rate this recipe!
|
Instructions
Parsnip
Peel & chop parsnip into chunks; place in a pot & cover with water. Bring to a boil & cook until parsnip is fork tender. Remove parsnip from water & measure out 3/4 cup & set aside to cool to lukewarm. Puree parsnip until smooth & measure out 3/4 cup. Allow to cool until lukewarm.
Bread
In a bowl, combine yeast, lukewarm parsnip water & 1 tsp sugar. Allow to sit for about 3 minutes until frothy. Add 3/4 cup pureed parsnips & 2 Tbsp melted butter; combine.
Whisk together, flour, remaining sugar, spices, salt & seeds. Add to the parsnip/yeast mixture & mix until a dough forms. The dough should be a little sticky, but still workable. If the dough seems too wet, add in another 1/4 cup flour at a time, just till it is not overly sticky.
Place dough on a lightly floured work surface & knead for about 5 minutes, or until the dough starts to look glossy & has an elastic quality to it. Place dough in a greased bowl, cover with a towel & place in a draft free place for about an hour, or until the dough has doubled in size.
When dough has risen, place on a lightly floured work surface & roll the dough out into a rectangle roughly 12 x 16-inches. Cut the dough lengthwise into strips 3-inches wide with a pizza cutter or knife. You should have 4 strips.
Transfer the strips to a parchment lined baking sheet a couple of inches apart. Pinch the 4 strands together at the top & start to braid.
Take the left strand & move it over 2 strands (to the right) & under 1 strand back to the left. Switch to the other side: take the most right strand & lift it over 2 strands to the left & back under one strand to the right. Repeat, alternating from left side to right side until loaf is complete. Pinch ends together. Form the braid into a coil like a snail shell. The fuller, top of the braid should be the center, then keep wrapping around until you reach the end. Tuck the end under. It should be fairly snug. Cover with buttered plastic wrap & allow to sit in a warm, draft free place for about 30 minutes.
-
Before placing braid in the oven, brush with melted butter. Bake for roughly 35-40 minutes or until golden brown.
Glaze
In a small bowl, combine cream cheese, powdered sugar & lemon juice; beat until smooth. Adjust glaze to consistency you prefer. When braid has cooled, brush with glaze. Sprinkle with whole anise seeds & candied ginger if you wish.

The name ‘pound cake‘ comes from the fact that the original pound cake contained one pound each butter, sugar, eggs and flour. Originally, no leaveners were used in the cake except for the air whipped into the batter. It was only in the 1900’s that artificial leaveners like baking soda and baking powder were added to reduce the density of the cake. Other variations include the addition of flavoring extracts like vanilla and almond or dried fruits such as cranberries or currants. At times, some or all of the butter was substituted by a cooking or vegetable oil to obtain a moist cake.
One of the most popular variations is the sour cream pound cake. The butter is substituted by sour cream to moisten the cake and also get a tinge of a tangy flavor. Despite all these variations which alter the characteristics and the flavor of the cake drastically, the name pound cake is still used today.
Print Recipe
Raspberry Swirl Pound Cake
Votes: 1
Rating: 5
You:
Rate this recipe!
|
|
Votes: 1
Rating: 5
You:
Rate this recipe!
|
Instructions
Cake
Preheat oven to 350 F. Lightly butter or line pan of choice with parchment paper. (loaf pan or a Bundt pan)).
In a bowl, cream butter & sugar with an electric mixer until pale & fluffy. Add eggs, one at a time, beating well after each addition. Add salt, vanilla & sour cream.
In a small bowl, whisk together flour & baking powder. Combine wet & dry ingredients, then beat on low for about a minute.
Transfer about 1/3 of batter to another bowl. Add raspberry preserves & beat until combined. Add 2-3 drops red gel food color if desired. To remaining batter, add lemon juice & beat until combined.
Assembly/Baking
To preferred baking pan, add a layer of white batter then alternate between pink & white batter. Use a knife to swirl the batters together but don't overdo it or you will end up without a marble effect.
Bake for 60-65 minutes or until a skewer inserted in center of cake comes out clean. If top browns too quickly, lightly cover with a piece of foil paper.
Allow cake to cool in pan for 15 minutes, then remove pan & finishing cooling on a wire rack.
Frosting
In a small bowl, beat cream cheese for about 20 seconds on medium speed. Add powdered sugar & mix to combine well. Drizzle frosting over cooled cake, slice & serve.
Recipe Notes
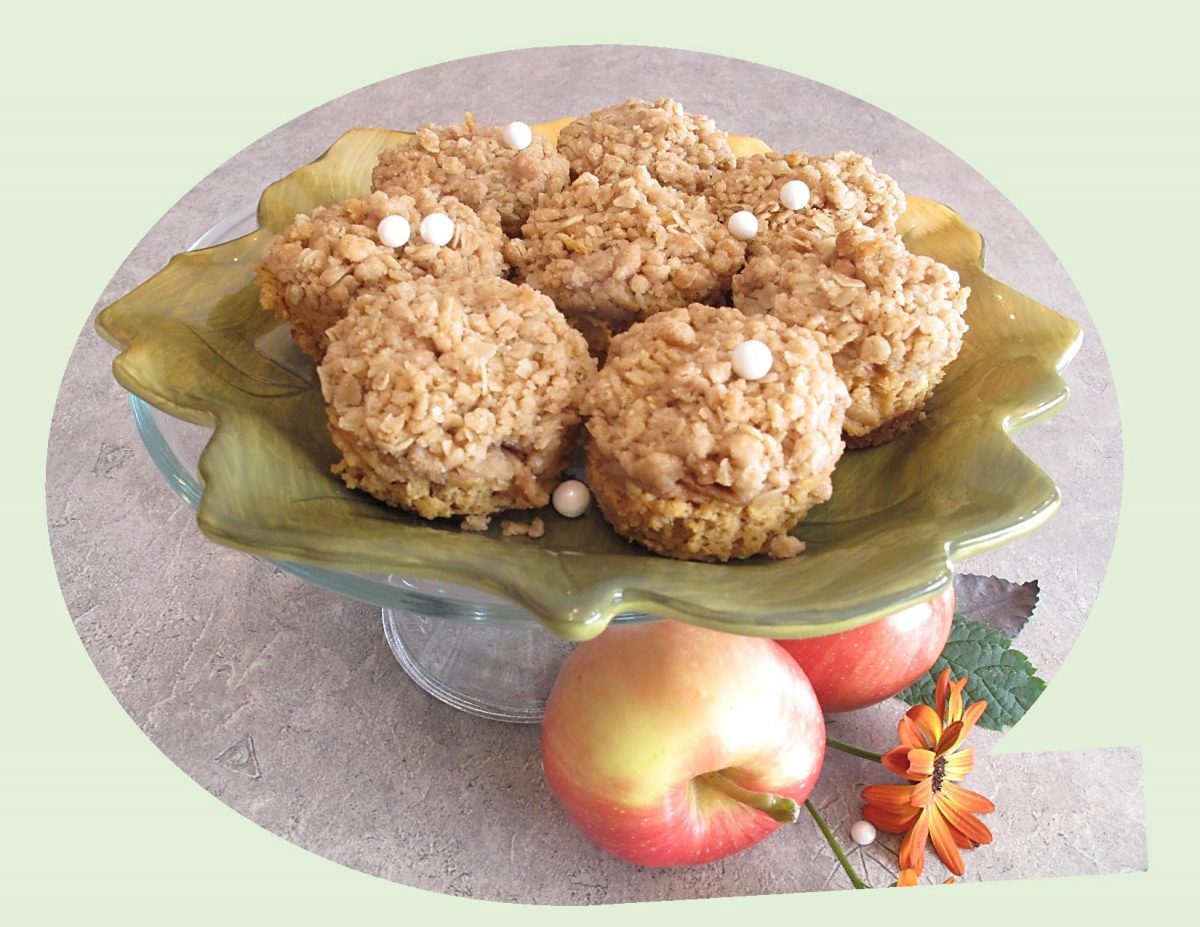
- My choice of baking pans were some mini Bundt pans. I thought they made a nice individual presentation.

Although there are many myths about the origins of the ‘churro’, most people believe there are three realistic stories and in each of them, the original country of churros is different: Spain, China & Ancient Egypt.
First of all, if you are not familiar with churros, they are a sweet snack consisting of a strip of fried dough dusted with sugar or cinnamon and usually served with a small bowl of hot, thick chocolate. Brion & I tasted them for the first time when we were travelling in Spain in the winter of 2014.
The inventor of churros has often been researched, but the truth is that this dessert was created so many years ago, that only a whole country can be named when talking about its beginnings.
Although, today you can find numerous shapes for churros, the traditional one is from Spain, being a large, semi-circle of fried dough. This shape is actually very similar to horns of the ‘churra sheep’ that are native to the Iberian Peninsula.
The relationship between Churros and chocolate is almost inseparable, either in a cup or as a filling. However, this combination is not exclusive because Mexico, Philippines, Argentina & Chile all eat a different kind of churro. In Cuba they created the guava filled churros or eat them with ice cream in different flavors.
As per usual, I’m always looking for a way to have deep fried foods baked. I guess it stems from my many years of being in the commercial food service industry when it seemed everything was deep fried. I resist having to smell or eat anything that has to be fried in hot oil. That being said, here’s my take on a churro dessert that is baked and filling it with some strawberry cream cheese.
Print Recipe
Baked Churro Bowls
Votes: 1
Rating: 5
You:
Rate this recipe!
Ingredients
Strawberry Cream Cheese Filling
Ingredients
Strawberry Cream Cheese Filling
|
Votes: 1
Rating: 5
You:
Rate this recipe!
|
Instructions
Churro Cups
In a medium saucepan over medium heat, add water, butter, and salt. Bring to a boil and stir until butter is completed melted. Turn off heat and add in flour. Stir until all flour is incorporated and becomes a smooth dough ball. Add in eggs and stir into dough, mixing until dough becomes smooth and uniform again. Scoop dough into a pastry bag.
-
Invert your MINI muffin tin or cake pop pan, so that the bottoms are facing up, and lightly grease the exterior of 21 of the molds. I recommend you space them out, skipping every other mold, so that the bowls aren't too close together. Using a star tip, pipe around the greased molds until you cover the entire mold. Make sure when you are piping that each new circle layer is touching the previous layer, so that there are no gaps. Bake for 25-30 minutes until churros turn golden brown and are crispy. A pool of oil will be puddled at the bottom of the baking pan, but you can ignore that.
Gently remove the churro bowls from the molds and let cool for a few minutes. In a small bowl, mix together sugar and cinnamon. Pour into a Ziploc bag. Place one churro into the bag at a time, moving the churro bowl around in the bag until the exterior of the bowl is completely covered in cinnamon sugar. Repeat with remaining churro bowls. Do not skip the sugar step as your churros will have little flavor without the sugar. I also found that the Ziploc bag method works much better than just simply trying to roll the churro bowls in a bowl filled with the cinnamon sugar. Set aside until your filling is ready.
Strawberry Filling
Pulse softened cream cheese, strawberries & sugar in a food processor until smooth. If berries aren't juicy enough & mixture is too thick, adjust consistency with a few drops of milk. If it is too thin, adjust with a little more cream cheese.
I left my filling fairly runny but make it as stiff as you wish, it will taste great no matter what! Fill churro cups with filling & top with more strawberries - whole or sliced. Serve immediately.
Recipe Notes
- Another filling alternative would be some Kahlua & Fresh Fruit:
- 6 cups fresh fruit
- 3 Tbsp brown sugar
- 3/4 cup Kahlua
- Cut fruit into 3/4-inch pieces & place in a bowl, sprinkle with brown sugar.
- Add Kahlua; stir gently. Cover & refrigerate 30 minutes to blend flavors.
There is so much to love about summer, not least of which is the amazing bounty of fresh produce. This summer vegetable torte is a great way to showcase flavorful late-summer vegetables and savory herbs that are available. It is similar to a crustless quiche or a frittata that makes a wonderful addition to a brunch or a backyard barbecue. It can be served warm or cold. Either way, it’s delicious.
One of the baking pans I have found extremely useful over the years is the ‘springform pan’. The function of this pan is to make it possible to take out of the pan a cake which is too fragile to trust to the conventional method of turning it upside down. A pan with a removeable bottom eliminates the need to risk inverting the cake.
A cheesecake might be the best example of a cake needing such a specialty pan. This was just what the late Pierre Franey was thinking of when he introduced the springform pan to New York Times readers back in 1980.
The pan he had in mind was made by Kaiser, a German metal goods company founded in 1919 by Wilhelm Ferdinand Kaiser to provide quality equipment to avid bakers like his wife. The company claims to have invented the springform pan, which it calls ‘the intelligent round cake pan’, and is the world’s largest manufacturer of them. They make 30 types, including one with a glass bottom that can double as a serving plate.
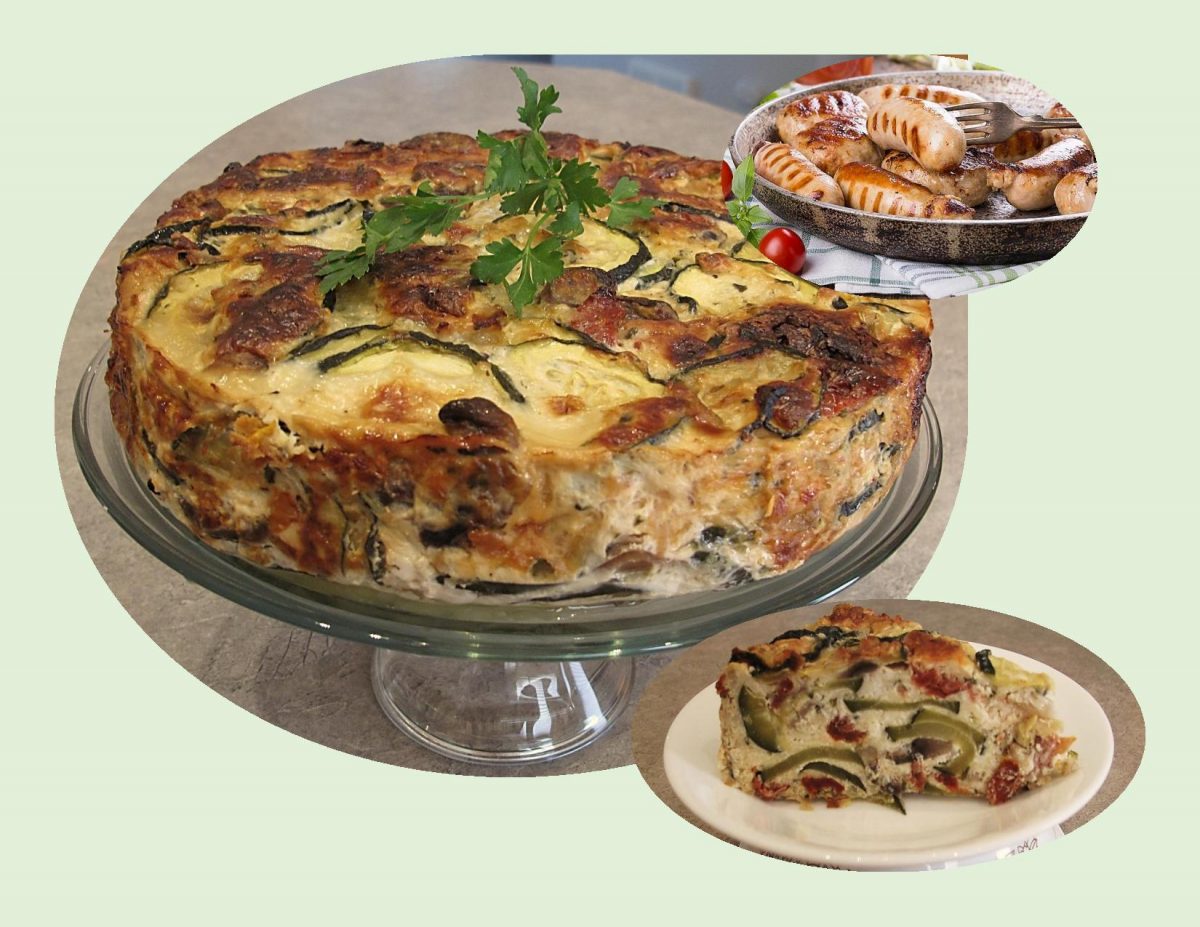
Thinking beyond cheesecake, the springform pan works so good when used to make this torte. The high sides of the torte gives it such a special look. It bakes up firm, but still creamy and delicious. It can be served as a vegetarian main course with a side salad, or served alongside some grilled sausage as we did for our meal.
Print Recipe
Vegetable Torta w/ Chicken/Turkey Sausage
Votes: 1
Rating: 5
You:
Rate this recipe!
Ingredients
- 3 Tbsp olive oil
- 1/2 medium onion, chopped
- 250 gm mushrooms, sliced
- 3 medium zucchini, sliced 1/4-inch thick
- 270 ml sundried tomatoes, drained & sliced
- 170 ml marinated artichokes, drained & sliced, optional
- 250 gm cream cheese, softened
- 6 large eggs
- 1/4 cup 1/2 & 1/2 or heavy cream
- 2 cloves garlic, minced
- 3 Tbsp fresh basil, chopped
- 1 tsp Italian seasoning
- 1/2 tsp EACH salt & pepper
- 250 gm Swiss cheese, grated
|
Votes: 1
Rating: 5
You:
Rate this recipe!
|
Instructions
Place the zucchini in a colander and sprinkle with salt. Let sit for 30 minutes tossing occasionally.
Preheat oven to 375 F. Line a sheet pan with a rack.
After the zucchini sits for 30 minutes, rinse off the salt, drain and pat dry with a few paper towels.
Pour the zucchini slices onto the rack and place in the preheated oven for 30 minutes. Remove and cool.
Reduce oven temperature to 350 F. Brush the bottom & sides of a 9-inch springform pan with oil. Line bottom with parchment paper & brush parchment with oil. Wrap outside of pan with aluminum foil.
In a skillet, heat oil & sauté onion & mushrooms until veggies are tender-crisp, about 10 minutes.
In a large bowl, beat cream cheese until smooth. Beat in eggs until combined ( can still be a bit lumpy). Beat in cream or 1/2 & 1/2. Stir in garlic, basil, Italian seasoning, salt & pepper. Using a slotted spoon to drain off any liquid on sautéed veggies, then add sautéed vegetables & zucchini to egg mixture along with drained sun-dried tomatoes & marinated artichokes. Add grated Swiss cheese; stir with a rubber spatula to combine. Spread mixture in prepared pan & set pan on a baking sheet.
Bake for 1 1/2-1 3/4 hours or until top is puffy & golden brown & the center no longer jiggles when shaken. Remove from oven & allow to cool for 10 minutes in pan, then run a sharp knife around edges of torte to loosen. Gently remove pan sides. Serve warm, room temperature or cold.
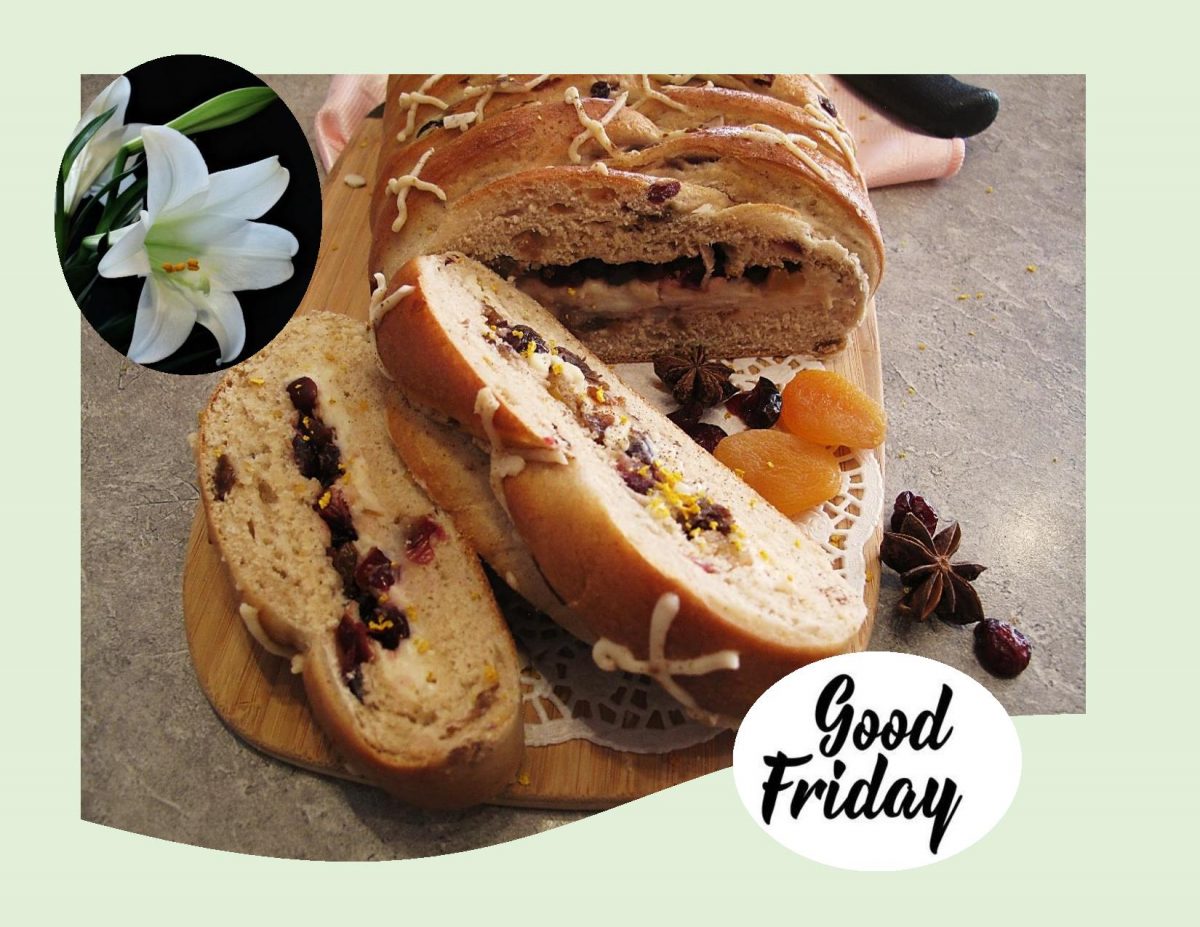
Hot Cross Buns, the sweet roll with a mythical history, are an Easter classic. This simple piece of spiced bread decorated with a cross, while not an extravagant treat, is a global food tradition. Given their long running history, it is no wonder there are so many fables surrounding their origin. From warding off evil spirits to cementing friendships, the stories of hot cross buns can be documented back to 6th century Greece.
While hot cross buns are now sold and enjoyed throughout the year, they were once reserved for Good Friday alone. Brion & I are extremely fond of these little gems, so every year I enjoy to come up with a new version but still not straying away from the original iconic bun (or bread) taste.
Print Recipe
Hot Cross Cream Cheese Braid
Votes: 1
Rating: 5
You:
Rate this recipe!
|
|
Votes: 1
Rating: 5
You:
Rate this recipe!
|
Instructions
Marinate Fruit
In a bowl with a lid, marinate prepared dried fruit in your choice of alcohol or orange juice overnight or at least 30 minutes.
Sweet Dough
In a bowl, combine yeast, lukewarm milk & 1 Tbsp sugar; allow to sit until frothy.
In a bowl, combine flour, salt, cinnamon, cardamom & ginger.
In a larger bowl, melt butter slightly; add remaining sugar, beaten egg, vanilla, a portion of the marinated fruit & frothy yeast mixture. Combine then add flour mixture & continue mixing to combine all ingredients.
On a lightly floured surface, knead dough for about 15 minutes. If necessary, add a bit more flour. Shape into a ball; place in a greased bowl, turn over once or twice to coat the dough with oil. Cover, let rise until doubled, about 1-1 1/2 hours.
Cream Cheese Filling
In a bowl, beat cream cheese, sugar, vanilla & any excess rum drained off fruit until smooth.
Assembly & Baking
On a lightly floured work surface or parchment paper, roll the dough into a 12 x 14-inch rectangle, ensure an even thickness of 1/4 inch.
Along one long side of the dough make parallel, 4-inch long cuts that are 1-inch apart (like piano keys), with a pizza cutter or sharp knife. Repeat on opposite side, making sure to line up these cuts with those you have already made on the other side.
Spoon all but 1/4 cup cream cheese filling down the center of the rectangle. (Reserve the 1/4 cup of the cream cheese for making crosses on baked braid). Leaving 1-inch on the top & bottom unfilled. Smooth cream cheese mixture then top with remaining marinated fruit.
Begin folding the cut side strips of dough in pairs over the filling at an angle, alternating left, then right, as if you were braiding, until you reach the other end. Tuck the ends underneath the braid.
Transfer to a baking sheet; cover with a loose plastic wrap & a towel. Allow to rise in a draft-free place until doubled in size, about 30 minutes. Preheat oven to 350 F. Just before placing braid in the oven, make the egg wash & lightly brush over the top of the braid.
Bake 20 minutes until golden brown. Check after 15 minutes; if the braid is starting to brown to fast, float a piece of foil, shiny side down, over it. Remove from oven & allow to cool slightly.
Decorating
Place 1/4 cup cream cheese mixture in a small piping bag that has been fitted with a small round tip. Make crosses on braid.
Recipe Notes
- If you would prefer, mix all the marinated fruit right into the dough instead of putting some in the filling.
- If you would rather not decorate with some crosses on top, use all cream cheese in the filling, your choice.

Any season is cheesecake season, but some cheesecake recipes have a bit of an edge. Truffles are the perfect summer dessert, especially when there’s lime and guava involved. You can make these without using your oven and since they are kept in the freezer, perfect for hot days. These truffles have a rich and creamy cheesecake interior with lime undertones, a Maria biscuit base, all topped with some guava cardamom drizzle.
For those who aren’t familiar with Maria biscuits, here’s a bit of food history about them (you might have guessed that was coming). On January 23rd, 1874, Queen Victoria’s second son, Alfred, married the Russian Grand Duchess Marie Alexandrovna Romanova. Peek Frean, a London bakery, released a biscuit to honor this, naming it after Marie. They imprinted the name Marie right on the cookie and in a nod to architectural styling at the time, put a beaded border on the cookie’s edges. They also had docker holes in them. The biscuit is made from wheat flour, sugar, palm oil or sunflower seed oil and has a vanilla flavor.
That’s how this very international cookie was created. From England to Russia, to the Philippines, India, Mexico and Puerto Rico, today half of the globe considers Maria biscuits a household staple. They are manufactured and sold by multiple companies around the world.
How this biscuit has travelled the whole world and kept its original look and recipe almost intact for over a century is somewhat of a mystery. Maria Brand is well-known in Canada under the President’s Choice biscuit manufacturer.
Marie biscuit crumbs are a nice trade off for the usual graham wafer crumbs used in so many cheesecake bases. It helps that they aren’t to sweet, so they offer a counter to the other sweet ingredients used and even broken they don’t become complete ‘mush’.
Print Recipe
Lime & Guava Cheesecake Truffles
Votes: 3
Rating: 3.67
You:
Rate this recipe!
|
|
Votes: 3
Rating: 3.67
You:
Rate this recipe!
|
Instructions
Base
In a food processor, pulse Maria biscuit cookies until crushed slightly. Remove from processor & set aside.
Cheesecake Truffles
Zest the lime & set aside half the zest for sprinkling on top of truffles for garnish.
In the food processor, place the other half of the zest with the cream cheese, sugar & vanilla. Juice the lime to obtain 3 Tbsp of juice & add to processor. Combine until smooth.
Using a Tbsp or a mini cookie scoop, scoop small balls of cream cheese mixture onto a sheet of parchment paper. Place balls in freezer.
After about 20 minutes, remove balls from freezer & roll in crushed Maria crumbs. Place back in freezer.
Guava Drizzle
Place guava paste, water & cardamom spice in a small microwave bowl. Heat carefully, mixing well. Set aside to cool then drizzle over cheesecake truffles. Sprinkle with remaining lime zest. Keep frozen in a covered container until ready to serve.
-
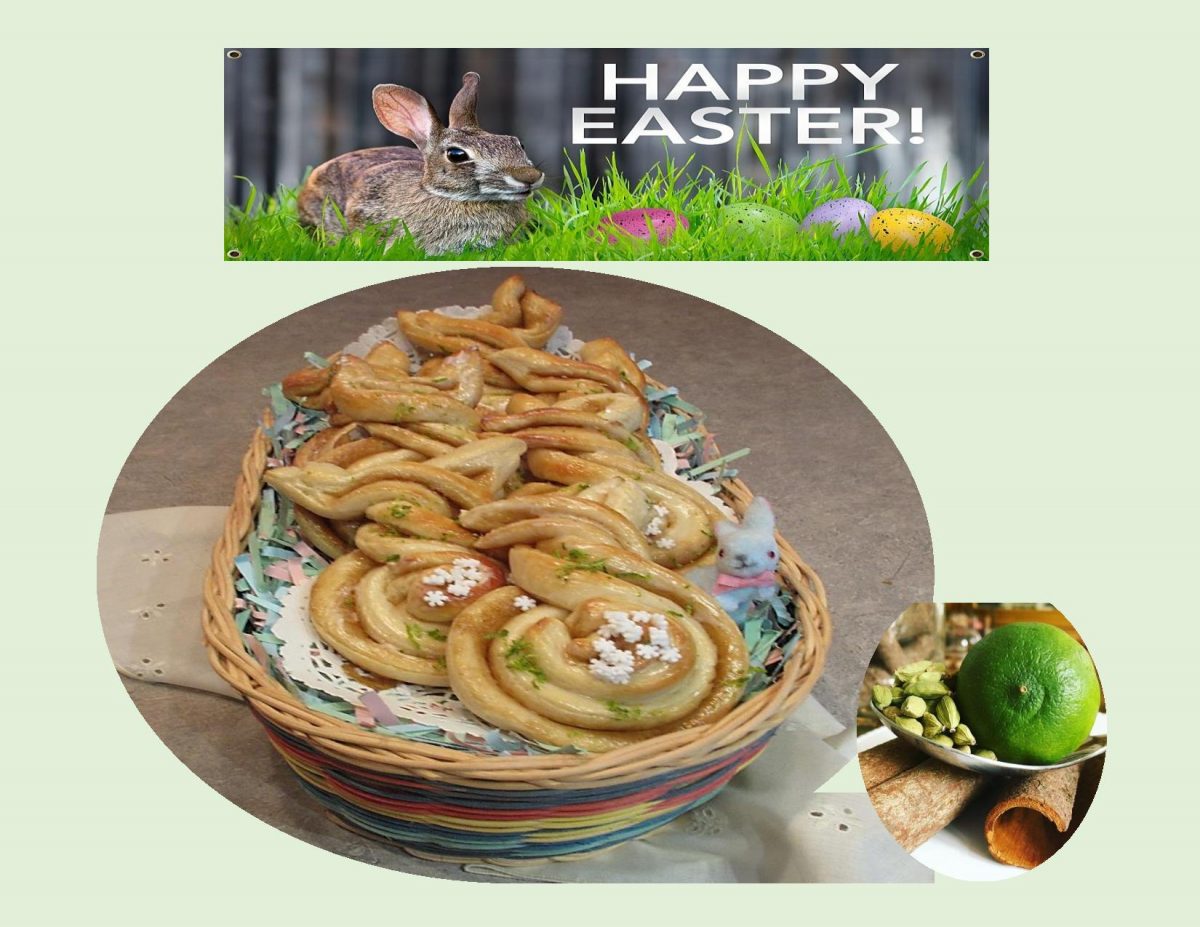
Although we may change the way we celebrate Easter this year, we can still enjoy some great food. One of the special things about any holiday is the brunch that seems to come with it and Easter is no different. The word itself sounds like coziness.
The practice of creating special breads to celebrate holidays, harvests, religious rites and other occasions worldwide, dates back thousands of years. In some cases, breads aren’t symbolic as much as traditional, baked as a reminder of family, togetherness and celebration. They often contain warm spices like cinnamon or cardamom. Some have a touch of liqueur added to them while others are created in special shapes or have little surprises baked in them.
Cardamom may not get the acclaim of cinnamon, nor does it pop up in recipes as often as ginger, but its flavor pairing capabilities are extensive. This is a flavor that you may love or hate, but for me it is very addictive. Warm, subtly spicy, exotically aromatic, a flavor that transforms both sweet and savory recipes into heavenly dishes.
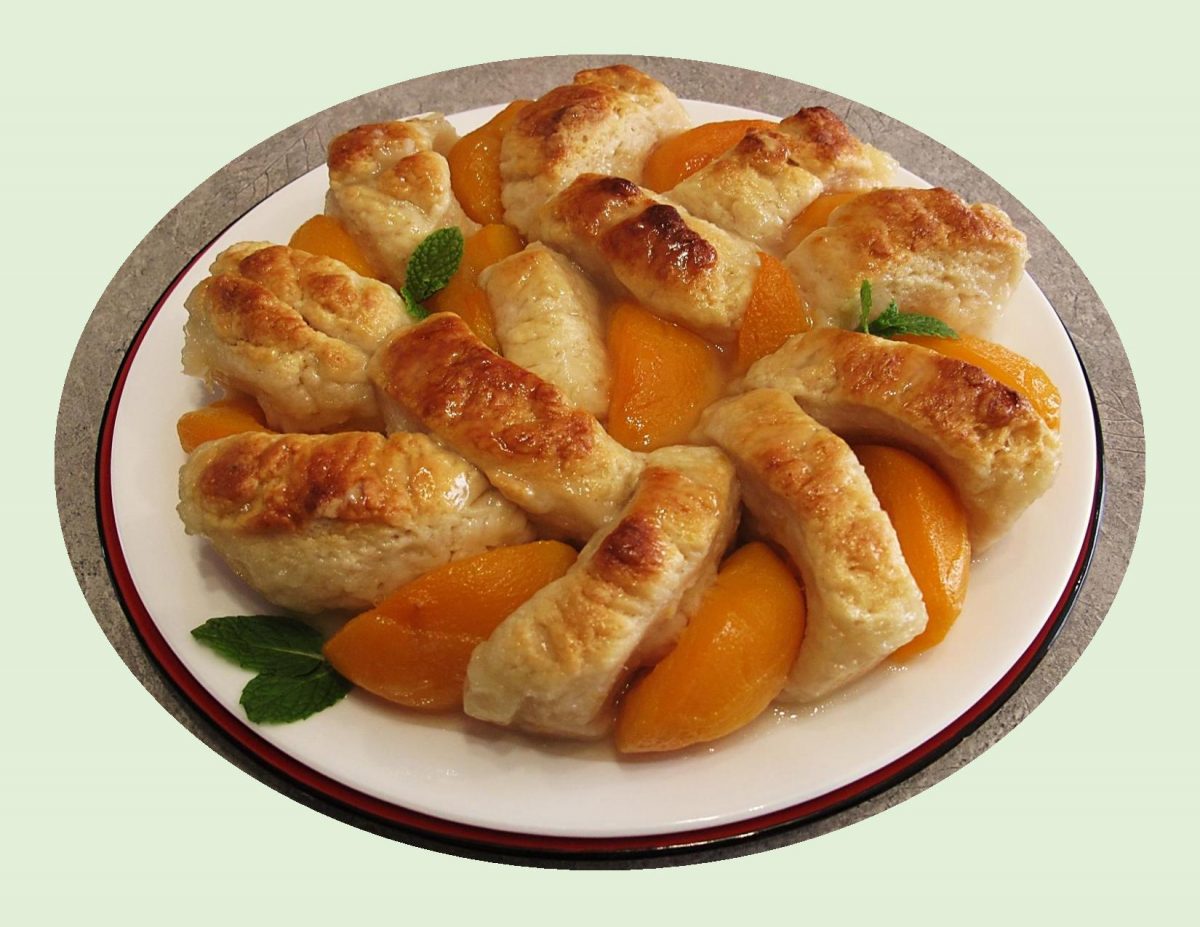
With some simple snipping and shaping, this cardamom sweet dough turns into adorable bunnies for Easter brunch. Edible table décor!
Print Recipe
Cardamom Lime Easter 'Bunnies'
Votes: 1
Rating: 5
You:
Rate this recipe!
|
|
Votes: 1
Rating: 5
You:
Rate this recipe!
|
Instructions
Sweet Dough
In a small bowl, whisk together yeast , 1 tsp sugar & lukewarm milk. Set aside until yeast mixture begins to form a frothy foam, about 5 minutes.
In a large bowl, whisk together flour, remaining sugar & salt. Add yeast mixture, melted butter & egg. Knead until dough comes together in a ball & no longer sticks to the sides of the bowl. Transfer dough to a greased bowl & cover with a tea towel. Set aside in a draft free place until dough doubles in size, about an 1 hour.
Filling
In a small bowl, combine brown sugar, lime zest, cardamom & butter. Mix well. Set aside.
Glaze
In a small bowl, beat together cream cheese, butter & lime juice. Add powdered sugar & mix until glaze consistency. Set aside until buns are baked.
Assemble & Bake
Turn dough onto a lightly floured work surface. Divide in half; roll each half into a rectangle about 12x10-inches. Sprinkle filling evenly over one of the rectangles. Place the second sheet of pastry on top. Lay a piece of plastic wrap over the pastry & lightly roll with a rolling pin.
With a pizza cutter cut 14 strips. You will use 12 of the strips for 'bunnies' & 2 strips for their tails. To form bunnies, overlap one end of strip over the other to form a loop; bring the end that's underneath up over the top end, letting one end extend on each side to make ears.
Place the shaped 'bunnies' on a parchment lined baking sheet, leaving about 2-3-inches between them as they will expand a bit. Cut each of the remaining strips into 6 equal pieces. Roll each into a ball & place it in the loop to form the tail. Loosely cover the 'bunnies' & let them rise for about 15 minutes.
Preheat oven to 350 F. Brush bunnies with egg wash & bake for about 15 minutes until golden brown. Remove from oven & allow to cool slightly on a cooling rack.
While still slightly warm, brush bunnies with glaze. Sprinkle with lime zest & top tails with whites candies.
Recipe Notes
- If you prefer your bunnies to be a bit more plump, instead of making 12, just make 8 or 10.