Potato Cinnamon Rolls

When cinnamon, sugar and butter are mixed together, the result is something many people all over the world find irresistible.

The first cinnamon roll was created in Sweden, around the 1920’s. After World War I, several goods such as sugar, eggs and butter, which had been heavily restricted, eventually returned to the grocery shelves. The spice trade from Southeast Asia also led to the invention of the roll. Cinnamon was not grown locally in the European countries, hence the spice trade from Sri Lanka led to the development of cinnamon use in the European countries.  The influences of German baking techniques combine with Swedish and Danish ingredients can clearly be seen in the making of the cinnamon roll.

In Sweden, October 4th is ‘Kanelbulle’ day or national ‘Cinnamon Roll Day’. This holiday was originally created by the country’s Home Baking Council in 1999 to commemorate their 40th anniversary. Swedish cinnamon rolls are not as sweet and heavy as they are in North America. The dough contains a hint of cardamom spice and they are generally baked in muffin papers to make a more delicate treat.

Our family definitely enjoyed a lot of irresistible cinnamon rolls. As is everything that becomes the ‘norm’, you take it for granted until you no longer have it and it becomes a ‘taste of a memory’.

I recall my mother also making ‘potato’ doughnuts. The mashed potato seems to really add to the flavor of a yeast dough. In keeping with this Swedish ‘holiday’, I am making  POTATO CINNAMON ROLLS  or ‘Twists’.


Print Recipe
Potato Cinnamon Rolls (Twists)
Votes: 1
Rating: 5
You:
Rate this recipe!
Course Brunch, dessert
Servings
twists
Ingredients
Dough
Cinnamon/Sugar Mix
Glaze
Course Brunch, dessert
Servings
twists
Ingredients
Dough
Cinnamon/Sugar Mix
Glaze
Votes: 1
Rating: 5
You:
Rate this recipe!
Instructions
Dough
  1. In a large mixing bowl, combine lukewarm milk with yeast; whisk until yeast is dissolved. Allow to stand about 3 minutes or until foamy. Add warm mashed potato, melted butter, eggs, sugar, cardamom & salt; mix well. Stir in flour, one cup at a time. When dough is completely blended, turn onto a lightly floured surface. Knead for about 10 minutes, until smooth & elastic.
  2. Place dough in a lightly greased bowl, turning dough to completely coat it with grease. Cover with plastic wrap; allow to rise in a draft-free place until doubled in size. Punch down, turn out on a lightly floured work surface & let rest for about 10 minutes.
Cinnamon/Sugar Mix
  1. In a small bowl, combine brown sugar & cinnamon; set aside.
Assembly
  1. Line a baking sheet or two with parchment paper. On a lightly floured surface, roll dough out into a 14 x 14-inch square. Brush with melted butter & evenly sprinkle with cinnamon/sugar mixture. Fold dough into thirds like a business letter, then roll again into a 14 x 8-inch rectangle. Facing the long edge, cut dough into roughly 18 -8-inch strips. Twist each strip several times, slightly stretching it as you do so. Take one end of the twisted strip & coil the dough around your hand twice, then over the top. Coil dough again & tuck the loose end in at the bottom.
  2. Arrange on baking sheets. Cover with plastic & allow to rise in a draft-free place, 45-60 minutes or until doubled in size. Place oven rack in middle position & preheat oven to 350 F.
  3. If you prefer, you can brush rolls with egg wash & sprinkle with pearl sugar or chopped almonds instead of using cream cheese glaze. Bake for 15-20 minutes or until golden brown. While cinnamon rolls are baking, make glaze (if you are using it). With a mixer, beat together cream cheese & butter until light & fluffy. Blend in powdered sugar & vanilla. Add enough milk to achieve a drizzle-like consistency. Drizzle on rolls while still warm.
Recipe Notes
  • Freezer Instructions:   Form cinnamon rolls into twisted shape & place several inches apart on baking sheet to freeze rolls individually. Once frozen, transfer to a resealable plastic freezer bag. When ready to bake, place on a lightly greased baking sheet & allow to come to room temperature before baking.

Pumpkin Spice ‘Chai’ Latte

Fall has definitely arrived! The leaves are turning their beautiful gold and crimson colors and there is a chill in the air. Years ago, when Brion and I made the choice of what trees, shrubs and flowers to plant in our yard, our plan was to showcase the colors of every season. For me, being a farmer’s daughter, watching this seasonal beauty each year has been priceless.

The ‘flavor of fall’ brings pumpkin to mind. When I was a kid, I thought they looked great, made wonderful jack-o-lanterns but didn’t care for the taste at all. Then one day mom made a pumpkin ‘chiffon’ pie and I was hooked. 

In the winter of 2011, Brion and I traveled Turkey for a month. We were meeting our Trafalgar tour group in Istanbul. Arriving a day early gave us time to ‘snoop’ around a bit. Next to our hotel was a ‘Starbucks’, so we went in. When Brion ordered my coffee they gave me a ‘Pumpkin Spice Chai Latte’ by mistake. That pumpkin chai flavor was just incredible. I have been addicted to it ever since.

The Starbucks original pumpkin spice latte turns 14 years old this year. In January 2003, they started developing it to expand their line of seasonal winter drinks. In 2015, real pumpkin puree was added to the drink.

A stay in Istanbul would not be complete without a traditional and unforgettable boat excursion up the Bosphorus, that winding strait that separates Europe and Asia. Its shores are a mixture of past and present, grand splendor and simple beauty. Modern hotels stand next to shore-front wooden villas, marble palaces in contrast to rustic stone fortresses and elegant compounds neighbor small fishing villages. Since Turkey actually straddles two separate continents, its culture features strong elements and traditions from both east and west. At that point in time we found Turkey a relaxed country to travel in which made our time there very enjoyable.

I came across a recipe on a website called greatist.com  for a DIY version of Starbuck’s PUMPKIN SPICE CHAI LATTE.  I couldn’t resist trying it.


Print Recipe
Pumpkin Spice Chai Latte
Votes: 1
Rating: 5
You:
Rate this recipe!
Course dessert
Cuisine American, French
Servings
Course dessert
Cuisine American, French
Servings
Votes: 1
Rating: 5
You:
Rate this recipe!
Instructions
  1. In a small dish, combine 'Pumpkin Pie Spice' ingredients & store in a spice jar with a lid. In a small saucepan over medium heat, whisk together pumpkin puree, 1/2 tsp pumpkin pie spice, milk, syrup & vanilla. Cook, whisking constantly, until mixture starts to steam. Remove from heat & pour mixture into a blender. Cover, hold the lid on tightly; blend for about 15 seconds or until frothy.
  2. Brew the coffee. If you like extra milk foam on top, pour a few tablespoons of milk into a glass jar with a lid while coffee is brewing. Tightly seal & shake for 30-60 seconds. Remove lid & place jar in microwave for 30 seconds.
  3. Divide coffee & milk mixture between 2 mugs. Top with extra milk foam (if using) & sprinkle with a bit of pumpkin spice.

Corned Beef & Cabbage Quiche

CELEBRATING OKTOBERFEST!

Nothing says fall better than Oktoberfest, a tradition dating back to 1810 in Munich, Germany. Originally a celebration of the marriage of the King of Bavaria and Princess Therese. Everybody had so much fun that it was resolved to repeat the celebration, which has been done, every year since. 

Beer enthusiasts from all over the world flock to Munich for Oktoberfest, where they feast on everything from steins of beer to plates of sauerkraut, bratwurst, cabbage rolls, sausage and wiener schnitzel. Bavarian music fills the air to promote the fun atmosphere of Oktoberfest.

While the true celebration has to be experienced in Munich, there are actually some great Canadian events that try to duplicate the festivities without having to travel abroad. In different parts of the country this is a fun and social sampling event featuring many local craft and authentic Bavarian breweries as well as authentic food, Oktoberfest music, dancers, games, etc..

Even if it is a little hard to admit summer has ended and fall is officially here, Oktoberfest seems like a great little celebration to ease into the coming winter months.

I came across this recipe for CORNED BEEF AND CABBAGE QUICHE.  From the reviews I read it sounded pretty good so I thought it was worth a try. It seems to fit the occasion I think.

Print Recipe
Corned Beef & Cabbage Quiche
Votes: 1
Rating: 5
You:
Rate this recipe!
Course Main Dish
Servings
Ingredients
Course Main Dish
Servings
Ingredients
Votes: 1
Rating: 5
You:
Rate this recipe!
Instructions
  1. In a large skillet, melt butter; add onion, cabbage & garlic. Cook, stirring frequently, until vegetables are crisp-tender, about 5-7 minutes. Add water, cover & cook for 5 minutes. Remove cover & cook until liquid evaporates & cabbage begins to brown, about 8-10 minutes longer. It is important to get the liquid out of the cabbage or it will cause quiche to become watery.
  2. Stir in corned beef; remove pan from heat & allow to cool for 15 minutes. Preheat oven to 375 F. In a medium bowl, whisk together eggs, milk, flour, caraway seeds, salt & pepper until blended.
  3. Spread half of cabbage mixture in pie crust. Top with half of the Swiss cheese; repeat layers. Slowly pour egg mixture over ingredients in pie shell. Sprinkle with Parmesan cheese. Bake for 30-40 minutes or until quiche is puffed & golden. Let cool 5 minutes before slicing to serve.
Recipe Notes
  • This quiche is nice baked 'galette' style or using a springform pan instead of a regular pie pan.
  • Recipe inspired by busycooks.about.com

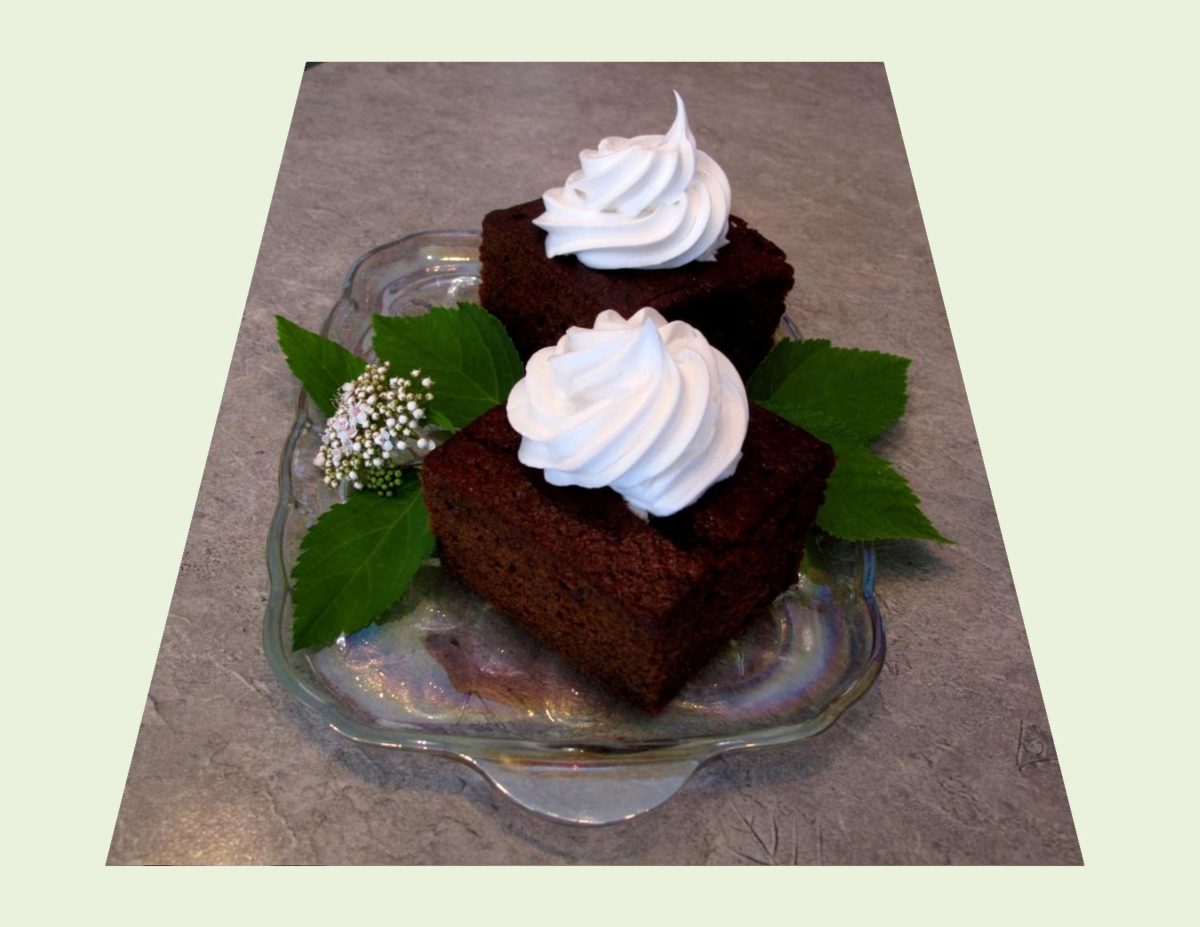
Classic Gingerbread Cake

Gingerbread (cake) is the perfect sweet/spicy dessert for fall and winter, flavored by a ‘strange lumpy little root’. I recall my mother baking gingerbread cake for our supper dessert. She would serve it warm with farm fresh whipped cream. For lack of a better expression, ‘it was to die for’. Strangely enough, I was never fond of molasses but certainly enjoyed that warm gingerbread cake!?

Gingerbread has been baked in Europe for centuries. In some places it was soft, delicately spiced cake, in others, a crisp, flat cookie. Then in other places, warm, thick, dark squares of bread served with lemon sauce or whipped cream.

At first, gingerbread was made with breadcrumbs and sweetened with honey, but as it made its way throughout the world it has been adapted to meet the taste of different cultures. In North America, along with the ground ginger we usually like to add cinnamon, and cloves. Molasses is usually labeled as ‘sulphured’ or ‘unsulphured’ depending on whether sulphur was used in the processing. The unsulphured molasses is lighter in color and tends to have a nicer flavor.

Brion does not remember ever eating gingerbread cake?? I’m going to try to bring back the taste of a memory  with this classic little cake and see what he thinks.

Print Recipe
Classic Gingerbread Cake
Applesauce is such a great addition in that it adds to the cake moistness.
Votes: 1
Rating: 5
You:
Rate this recipe!
Course Brunch, dessert
Servings
Ingredients
Course Brunch, dessert
Servings
Ingredients
Votes: 1
Rating: 5
You:
Rate this recipe!
Instructions
  1. Preheat oven to 350 F. Line a 9-inch square baking dish with parchment paper.
  2. In a medium bowl, cream together sugar & butter until lightened in color & fluffy. Beat in egg, molasses, applesauce & hot water until fully combined.
  3. In a small bowl, whisk together flour, baking soda, salt, cinnamon, ginger & cloves. Whisk into wet ingredients, mixing ONLY until blended.
  4. Bake for 30-35 minutes until cake springs back when touched or a knife inserted comes our clean.
Recipe Notes

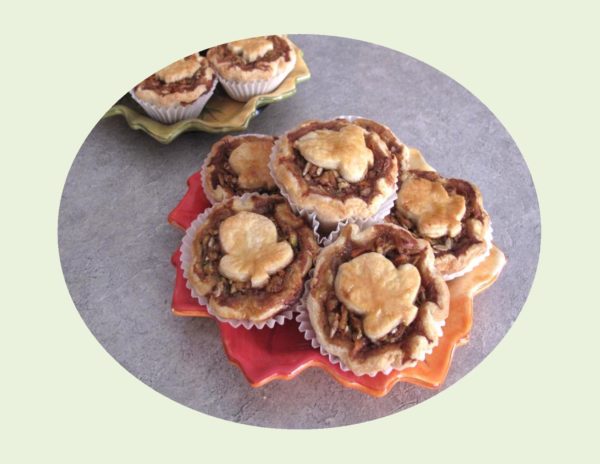
Harvest Pie / Tarts

The name of this pie definitely conjures up a cornucopia  of fall flavors. The idea of combining fruit and vegetables has forever appealed to me.

I have always had a love for zucchini as far back as I can remember. Even though it is served as a vegetable, its technically a fruit because it comes from a flower. It has a golden blossom that grows under the leaves.

A member of the gourd family, zucchini is an easy to grow, summer squash, native to Central America and Mexico. Zucchini became quite popular after the 1940’s with the interest in Italian cookery.

In 1992, I came across a recipe in a little ‘Pillsbury Classic Cookbook’ for HARVEST PIE.  It had a great combination of apples, zucchini, carrots and spices. If you like these ingredients, this ‘classic’ will become a favorite fall ‘go to’ dessert recipe for you.

Print Recipe
Harvest Pie
Votes: 1
Rating: 5
You:
Rate this recipe!
Course Brunch, dessert
Servings
Votes: 1
Rating: 5
You:
Rate this recipe!
Instructions
  1. Preheat oven to 425 F. Line a 9-inch DEEP pie with pastry.
  2. In a large bowl, combine apples, zucchini, carrots, nuts & flour; toss to coat.
  3. In a medium bowl, beat brown sugar & margarine until well blended. Add cinnamon, nutmeg, salt, lemon juice, vanilla, orange zest & 2 eggs; blend well. Add to apple mixture; mix well.
  4. Spoon filling into pie crust-lined pan. Top with second crust & flute; slit crust in several places. In a small bowl, blend egg & water; brush over top crust. Bake for 40-50 minutes or until deep golden brown. Cover pie loosely with foil during the last 15 minutes of baking to prevent excessive browning.
  5. Serve with whipped cream if desired.
Recipe Notes
  • Oven temperatures often vary, so if you prefer, bake pie at a bit lower temperature.

Potato & Brussel Sprouts Gratin

One of the supper dishes I remember my mother teaching me how to make was scalloped potatoes. The recipe read something like this:

  • Wash, pare and slice potatoes. Put a layer in a buttered baking dish, season with salt and pepper. 
  • Dredge lightly with flour, dot with small pieces of butter; repeat until dish is almost full.
  • Add hot milk until it comes almost to the top layer.
  • Cover with buttered crumbs. Bake until soft, about 1 hour. A little chopped onion is an improvement.

Gratins are very popular in Germany. Potato & brussel sprouts gratin is a typical dish during fall and winter season. There are numerous variations such as adding ham or combining it with other vegetables like cauliflower, zucchini, peas and carrots. You could also add an egg to the cream if you like.

I always enjoy looking through mom’s ‘vintage’ recipes. I notice there were definitely lots of casseroles — no wonder they still hold appeal for me. Brion is not big on brussel sprouts but I’m going to incorporate this German specialty into our supper meal and see how it goes?!

Print Recipe
Potato & Brussel Sprouts Gratin
Votes: 1
Rating: 5
You:
Rate this recipe!
Course Main Dish
Servings
Votes: 1
Rating: 5
You:
Rate this recipe!
Instructions
  1. Clean brussel sprouts, cut in half. Peel potatoes, cut about the size of your brussel sprouts. Boil potatoes & brussel sprouts for about 10 minutes in salted water.
  2. In a skillet, add a small amount of butter & fry onions with ground beef. Combine cheese with 1/2 & 1/2 cream, (add some milk if needed) & spices to your taste.
  3. Preheat oven to 400 F. In a 9" buttered casserole dish, layer potato/brussel sprout combo & ground beef. Then pour cream/cheese mixture carefully over all. Combine bread crumbs with Parmesan cheese & sprinkle top of casserole. Bake for 15-20 minutes. Remove from oven & sprinkle with grated cheddar cheese. Serve.

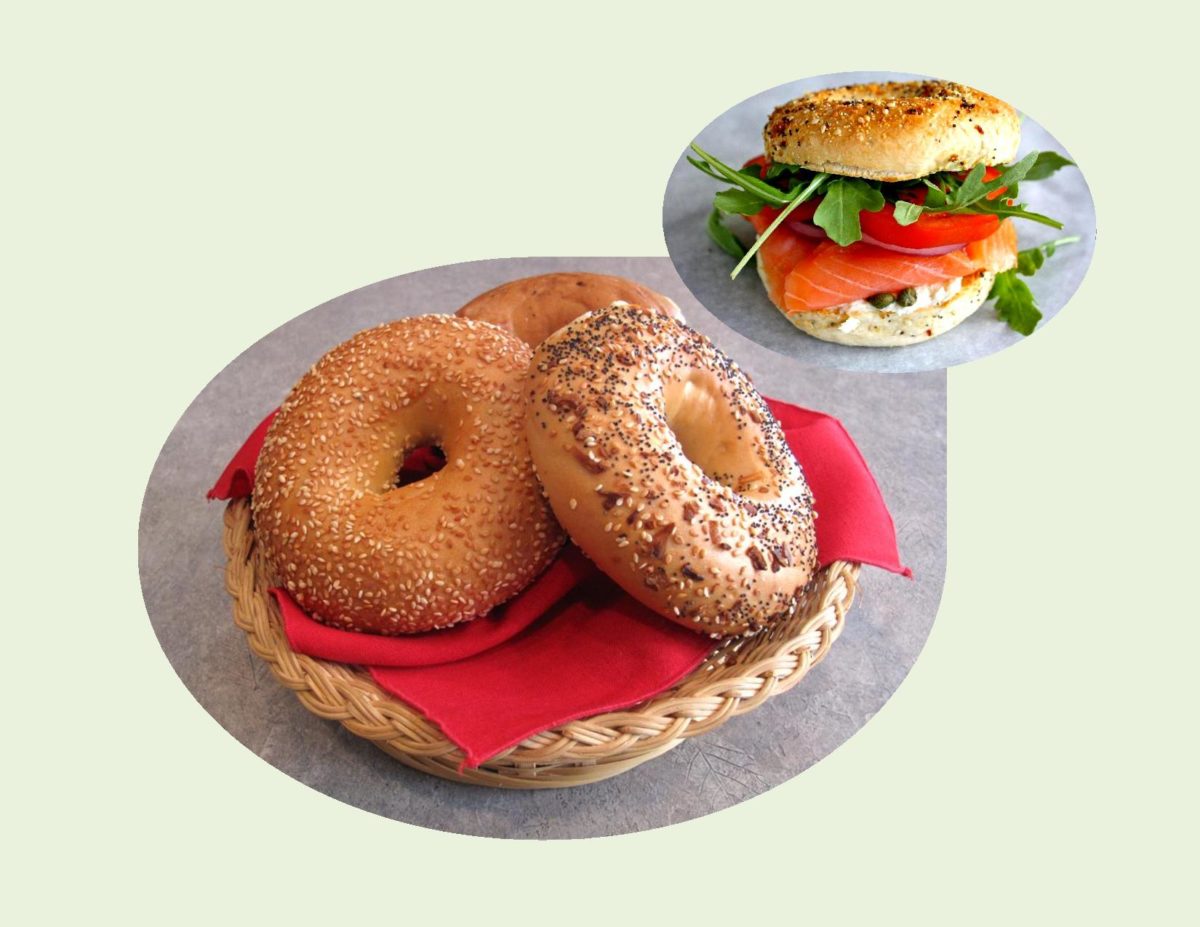
Bagels

Its always the story behind the food — not just the bit that we hold in our hands or put in our mouths that makes it so much more than just something to eat.

The origin of the bagel is still an issue for debate. Most food historians have come to the conclusion that the bagel is of Jewish origin. Apparently originating in South Germany, migrating to Poland and then to North America. This boiled and baked roll with a hole, has endured through the centuries not only because of its heroic legend. It also had the advantage of lasting longer than freshly baked bread due to the boiling process giving it an outer sheen and crunchy protective crust.

In the early 1950’s, Family Circle included a recipe for bagels. The copy read: ‘Stumped for Hors d’oeuvers Ideas? Split these tender little triumphs in halves and then quarters. Spread with sweet butter and place a small slice of smoked salmon on each. For variations, spread with cream cheese, anchovies or red caviar.

The morning combination of bagel, cream cheese and lox (smoked salmon), rose in popularity thanks to the advertising efforts of Joseph Kraft for Philadelphia Cream Cheese. It soon became an alternative to Eggs Benedict or the other Sunday trilogy of bacon, eggs and toast.

I remember being in California in the late 70’s and tasting a bagel with cream cheese & lox for the first time. The bakery/cafes were very popular little boutique restaurants at that time and  it was there that I acquired the taste for this glorious combination. 

Bagelmania, replaced, to a certain extent, the doughnut shops of the earlier 20th century. Their popularity was largely because they didn’t taste ethnic. To the bread and sandwich loving population, the bagel was simply a craving for innovation, but not different enough to appear ethnic.

In the 1960’s, preservatives helped create bagels that stayed fresh for more than a few hours and engineers created mixers that didn’t tear themselves apart trying to work the dough.

For classic bagels you require two ingredients that most home bakers’ generally don’t have in their pantries. One is high-gluten flour and the other is malt syrup. Both should be obtainable at natural food markets. If you can’t find high-gluten flour, use bread flour, preferably unbleached. Regular all-purpose doesn’t contain enough gluten to make a proper bagel. As far as the barley malt syrup goes, honey or brown sugar are acceptable substitutes.

All that being said, if you are still up for making a few bagels here is a recipe from cdkitchen.com you might like.


Print Recipe
Homemade Bagels
Votes: 2
Rating: 5
You:
Rate this recipe!
Servings
Ingredients
Dough
Water for Boiling Bagels
'Everything' Topping
Servings
Ingredients
Dough
Water for Boiling Bagels
'Everything' Topping
Votes: 2
Rating: 5
You:
Rate this recipe!
Instructions
Dough
  1. In a large bowl, stir together water, yeast & sugar. Let rise for 5 minutes. With a wooden spoon, stir in oil, malt & 1 cup of flour. Add salt then enough of remaining flour to make a stiff dough.
  2. On a lightly floured surface, knead for 10-12 minutes. Cover with a floured dish towel & allow dough to rest on board for about 15 minutes. Divide dough into 8 sections & form each section into a ball. Push your thumb through the center, creating a hole, (this method prevents the dough ring from separating as there are no seams). Place on a lightly floured surface, cover & let rest 15-20 minutes, rising about halfway & becoming slightly puffy. In a small bowl, mix all topping ingredients together. Set aside.
Water for Boiling Bagels
  1. Fill a large cooking pot 3/4 full with water. Add the malt syrup & salt. Bring water to a boil. Preheat oven to 450 F. Line 2 large baking sheets with parchment paper. If desired, sprinkle with cornmeal. Set aside.
  2. Line 2 other baking sheets with a kitchen towel, set near stove. Reduce boiling water to a simmer & cook 2 bagels at a time (do not overcrowd pot). Simmer bagels for about 45 seconds on one side, then turn & cook other side for another 45 seconds. Drain bagels on the towel-lined baking sheet.
  3. Carefully place bagels on the parchment-lined baking sheets. Sprinkle bagels with 'everything' topping, leave plain or use a topping of your choice. Place in the hot oven, immediately reduce heat to 425 F., bake about 17-25 minutes. When almost baked, turn bagels over with a pair of tongs. When golden brown remove from oven & cool on a wire rack.
Recipe Notes
  • For a few sweet versions try cinnamon with raisins or use some dried blueberries or cranberries. 

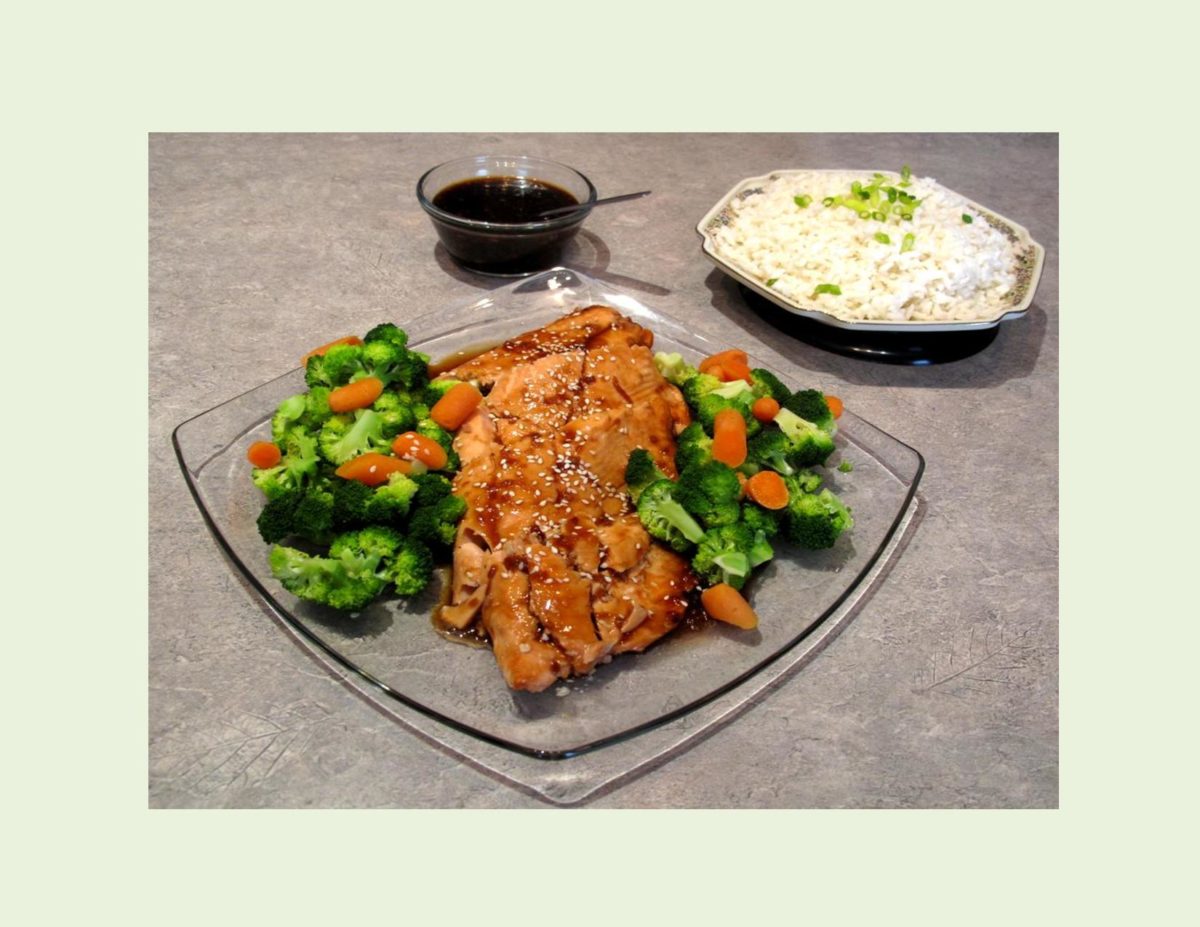
Baked Honey Teriyaki Salmon in Parchment

I’m sure you use or are probably aware of the technique of cooking in parchment paper. The French call it ‘en papillote, the Italians ‘al cartoccio but we Canadians just call it cooking in parchment. This simple, yet elegant culinary tradition infuses the meats, vegetables and herbs together to create unbelievable flavor. Not only does this enclosed packet keep delicate foods like fish moist and intact but cuts down on your clean-up time. It is a super easy way to cook for one and not have lots of leftovers. 

Since fall is upon us and we are back to more of those oven meals, HONEY TERIYAKI SALMON  is the perfect, no-fuss Sunday meal.

Print Recipe
Honey Teriyaki Salmon
Votes: 2
Rating: 4.5
You:
Rate this recipe!
Servings
Ingredients
Honey Teriyaki Sauce
Servings
Ingredients
Honey Teriyaki Sauce
Votes: 2
Rating: 4.5
You:
Rate this recipe!
Instructions
Honey Teriyaki Sauce
  1. In a small saucepan, whisk together soy sauce, 3 Tbsp water, honey, rice vinegar, garlic, ginger & sesame oil. Bring to a boil over medium heat. In a small bowl, whisk together cornstarch with remaining 2 Tbsp water until well combined. Pour into sauce mixture; boil for 1 minute, stirring constantly. Remove from heat & allow to cool slightly about 5-10 minutes.
Salmon & Veggies
  1. Toss broccoli & carrots in olive oil; season with salt & pepper. Cut 4 sheets of 14-inch lengths of parchment paper. Divide broccoli & carrot mixture among sheets layering in center in an even layer. Set aside 1/4 cup of the sauce mixture then brush bottom sides of salmon fillets with a scant tablespoon of the sauce then rotate the salmon over veggies.
  2. Preheat oven to 400 F. Brush tops of salmon with another scant tablespoon of the sauce mixture. Pull sides of parchment inward & seal then roll edges up, leaving a little room for heat to circulate, not wrapping to tightly. Place packets on a baking sheet. Bake until salmon is cooked through, about 25 minutes. Serve with white or brown rice if desired & remaining sauce. Sprinkle with green onions.
Recipe Notes

Rhubarb Tartlets

I never seem to get enough of making use of my rhubarb plants, since this is probably my 4th ‘rhubarb’ blog so far this year. I’m sure any of you that are following my blog stories are tired of hearing about rhubarb but ……… At the risk of boring you with this subject, I still want to share a few other ideas for this seasonal plant.


 Spiced Rhubarb Relish : Place 8 cups chopped rhubarb, 2 cups chopped onion,       1 tsp allspice, 1/2 cup vinegar, 2 cups sugar & 1 1/2 tsp salt in a large pot; bring to a boil. Reduce heat; simmer & cook uncovered on low heat, stirring frequently. Cook until onion becomes tender & mixture thickens. Pour into hot sterilized jars & seal. Nice to serve with red meats.                                                                                        Stewed Rhubarb: In a medium saucepan, heat 4 cups sliced rhubarb with 2/3 cup sugar over medium heat until tender, about 15 minutes. Stir often.                      Rhubarb Smoothie: To cold stewed rhubarb add your choice of frozen berries, low-fat yogurt, orange juice & a banana. Mix in a blender & add honey to taste.  Rhubarb Muffins/Scones: Add 1 cup of finely chopped rhubarb & zest of 1 orange to your favorite batter.                                                                                                                   Rhubarb Applesauce: Heat 3 cups of peeled, sliced apples, 1/3 cup sugar, 1 cup chopped rhubarb over medium heat until apples are soft, about 15 minutes. Stir often. To enhance flavor, add raisins, cinnamon or ginger to taste.                              Rhubarb Cherry Pie: Stir 1 cup coarsely chopped rhubarb with 1 – 540 ml can of cherry pie filling. Bake the same as you would for a cherry pie.                                     Savory Rhubarb Pork Sauce: In a medium saucepan, combine 2 cups sliced rhubarb with 1/3 cup brown sugar, 1 Tbsp cider vinegar & 3/4 tsp fresh, grated ginger. Simmer until soft.

Hopefully you will find one of these ideas useful. Enjoy!

Print Recipe
Rhubarb Mini Flans
Votes: 1
Rating: 5
You:
Rate this recipe!
Servings
Ingredients
Cornmeal Tart Crust
Servings
Ingredients
Cornmeal Tart Crust
Votes: 1
Rating: 5
You:
Rate this recipe!
Instructions
Cornmeal Tart Crust
  1. In a food processor, place flour, cornmeal, salt & sugar; pulse several times to combine. Add butter; process until mixture resembles coarse meal, about 10 seconds. While machine is running, pour the ice water through the feed tube in a slow, steady stream, until the dough just holds together (do not process for more than 30 seconds). Turn the dough out on work surface. Place dough on plastic wrap. Flatten to form disk; wrap & refrigerate at least 1 hour.
Rhubarb Filling
  1. In a medium saucepan, combine rhubarb, both sugars, cornstarch & salt. Cook stirring occasionally, until the rhubarb releases its liquid & begins to breakdown, creating a thick, chunky sauce, about 10 minutes. Remove from the heat & stir in vanilla. Set aside to cool to room temperature.
  2. On a lightly floured work surface, Divide dough into 16 pieces. Line 8 mini flan pans with bottom crusts; rolling the remaining 8 balls into circles for top crusts. Pace circles on parchment paper. Refrigerate bottom & top crusts again for 1 hour.
  3. Preheat oven to 375 F. Divide rhubarb filling among the 8 tarts. Cut a design of choice in the top crusts & fit to mini tarts. Brush with egg wash & sprinkle with sugar. Bake until crust is golden & filling bubbles a little bit, about 20-25 minutes. Serve warm or at room temperature, topped with whipped cream or ice cream.
Recipe Notes
  • These little minis would also be nice made as fruit galettes for something a bit rustic looking.

Pan Bagnat – The French Picnic Sandwich

HAPPY LABOR DAY!

Can you believe it — Labor Day Weekend already! In our part of the world it signals the last of those coveted summer days. Celebrated in Canada as a national statuary holiday week-end. With the many picnics, gatherings and what have you, this specialty sandwich came to mind.

The ‘pan bagnat’ originated in Nice, a city in the south of France that borders the Mediterranean. The name translates to ‘wet bread’ due to the fact that the traditional sandwich is filled with a ‘Nicoise’ salad. This salad generally consists of leafy greens, olives, hard cooked eggs, with the main proteins being tuna fish and anchovies. It is then dressed with a Dijon vinaigrette.

Although it is typically a French sandwich, it is enjoyed by people all over the world. Overtime, many variations to the classic pan bagnat have been made. For those not fond of fish, ham, chicken and salami are good alternatives. For the vegetarian, artichoke hearts, raw peppers, steamed green beans and shallots. The bread used is usually a round, hearty artisian style bread so that the texture is both crusty and chewy.

To make the sandwich, the center of the loaf is scooped out and the filling is layered inside. It is then refrigerated for at least 2 hours or overnight before slicing and serving. Once the flavors all meld together the taste is incredible, the perfect sandwich for a crowd.

Print Recipe
Pan Bagnat - The French Picnic Salad
Votes: 1
Rating: 5
You:
Rate this recipe!
Servings
Votes: 1
Rating: 5
You:
Rate this recipe!
Instructions
  1. Slice the bread in half horizontally. Remove some of the soft interior from both halves; removing MORE from the bottom half than the top. Brush interior of both halves with 2 Tbsp of the olive oil. (If you prefer, you can use mustard/mayo instead)
  2. Layer the meat & cheese inside the bottom half of bread loaf. Begin with ham followed by salami, chicken & cheese. Layer the tomato slices on top of the cheese, followed by the iceberg lettuce Drizzle the remaining 2 Tbsp of olive oil & the vinegar over the lettuce. Season with salt & pepper.
  3. Place the top half of the bread on the lettuce & press down lightly. Tightly wrap the sandwich in 2 layers of plastic wrap & refrigerate for at least 2 hours or up to 1 day. Sit something heavy on top.
  4. Unwrap the loaf; using a long, serrated knife, cut the loaf into 8-10 wedges.