I have an obsession with rhubarb. I think because it is something I grew up with that makes it a nostalgic thing for me. Now, I’ll be the first to admit when it comes to rhubarb, my mind immediately jumps to desserts. But, over the years, I’m leaning more and more to using it in savory ways.
Tart and tangy, with just a little bit of sweet and spicy complexity, this rhubarb sauce is a unique and unexpected twist that is perfect served with coconut shrimp.
Brion & I love coconut shrimp which is really odd given that neither of us like coconut?? One of the nice things about this meal is that it takes minimal prep work but gives great results. We have tried many versions of sweet & spicy sauce with these shrimp and enjoyed them all. Today we’re experimenting with this savory rhubarb sauce. Should be good!
Print Recipe
Coconut Shrimp w/ Spicy Rhubarb Sauce
Votes: 1
Rating: 5
You:
Rate this recipe!
|
|
Votes: 1
Rating: 5
You:
Rate this recipe!
|
Instructions
Rhubarb Sauce
In a heavy saucepan, combine sugar, cider vinegar, ginger, cinnamon & cumin. Bring to a simmer over low heat, stirring until sugar dissolves. Add rhubarb & onion; increase heat slightly & cook until rhubarb is tender & mixture thickens, about 5-7 minutes. Cool then place in a food processor with Hot Red Pepper Jelly & process to a smooth sauce. Adjust the amount of red pepper jelly used to your liking. Set aside.
Coconut Shrimp
Using 3 separate bowls, place flour in the first, beaten egg in the second & panko/coconut mixture in the third.
Clean & devein shrimp. Dust them with flour then dip in the egg & lastly coat with panko/coconut mixture.
Preheat skillet over medium heat. Melt butter then add oil. Once the combo is heated, place the shrimp in the skillet & cook 2-3 minutes on each side until golden brown.
Place cooked shrimp on paper towel then serve with spicy rhubarb sauce. We enjoyed these shrimp as a main course with rice & some steamed broccoli.

Rhubarb is the rebel of the vegetable world. It looks like celery, tastes like sour candy, its leaves are poisonous and unlike most spring and summer produce, its barely edible raw. With such a feisty personality, its no wonder some are intimidated to cook it.
More than any other fruit or vegetable, rhubarb to me is the sign of the changing season. It is the signal that summer is arriving in those ruby red or speckled green & pink stalks. I snap up what I can in the garden and when I see it at the supermarket. I take all I can and more, slicing and freezing the excess for rhubarb cravings that come in winter.
Year-round, I save rhubarb recipe ideas I hope to make once I get my hands on the first stalks of the season. No summer would be complete without cinnamon rhubarb bread …. still warm from the oven and the heavenly smell of cinnamon in the air!
Print Recipe
Cinnamon Roll Rhubarb Bread
Votes: 1
Rating: 5
You:
Rate this recipe!
|
|
Votes: 1
Rating: 5
You:
Rate this recipe!
|
Instructions
Rhubarb Filling
In a saucepan, combine all ingredients except vanilla & food color. Heat to medium high & stir occasionally until rhubarb begins to break down completely. Remove from heat, stir in vanilla & food coloring; allow to cool to room temperature.
Dough
In a small dish, combine yeast with lukewarm water & 1 teaspoon of the sugar. Allow to sit for a few minutes until frothy.
In a large bowl, slightly melt butter; cool a couple of minutes then whisk in egg. In another bowl, whisk together flour, salt & remaining sugar. Add yeast mixture to butter mixture, whisking together. Add flour mixture, combine then turn on a floured work surface & knead for about 5 minutes. Dough will be very soft but not sticky.
Lightly grease bowl, place dough ball in it & cover with a towel. Place in a draft-free place & allow to rise for about 20 minutes. Butter a 9 x 5-inch loaf pan; set aside
Turn the dough onto a lightly floured work surface & press down to deflate it. Fold in the two opposite sides to meet in the middle, then fold in the remaining two sides to meet, so that you've formed the dough into a square. Press down to flatten it slightly, then cover loosely and let stand for 10 minutes
With a floured rolling pin, rolling the dough to form a rectangle that's 12 by 22 inches. Make the corners as square as possible. If you're having trouble with the dough shrinking back, pause briefly before trying again.
Spread rhubarb/cinnamon filling over the dough, leaving a 1-inch border around the edges. Now fold the two long sides of the dough in one at a time, so that the meet each other in the middle. Pinch them together gently to seal the seam. Gently roll over the surface with a rolling pin to flatten the folded dough to about 7 by 25 inches.
Starting at the narrow end, roll up the dough, making a thick spiral. When you get to the end, brush a little egg wash on the loaf at the spot where the end will hit. Pinch the end a bit to seal it.
Carefully & gently place the roll, seam side-down in the buttered pan. The roll of dough should nearly fill it. Cover it loosely with plastic wrap & place in a warm, draft-free place to rise for about 25-30 minutes, until almost doubled & about 2 inches above the top of the pan. Meanwhile, adjust the oven racks so that you have one rack one-third up from the bottom of the oven.
-
Lightly brush remaining egg wash over loaf & bake for about 20 minutes. You may need to cover the top loosely with aluminum foil towards the end of baking to prevent over-browning. Bake until the loaf, when removed from the pan, sounds hollow when tapped with your fingertips. Cool on a rack.
Glaze
Make glaze by whisking together 2 Tbsp rhubarb filling, 1 cup powdered sugar, and enough lemon juice to make the glaze pourable (1-2 tbsp should do it). When bread has slightly cooled, drizzle with glaze if desired.
Hot Cross Buns, the sweet roll with a mythical history, are an Easter classic. This simple piece of spiced bread decorated with a cross, while not an extravagant treat, is a global food tradition. Given their long running history, it is no wonder there are so many fables surrounding their origin. From warding off evil spirits to cementing friendships, the stories of hot cross buns can be documented back to 6th century Greece.
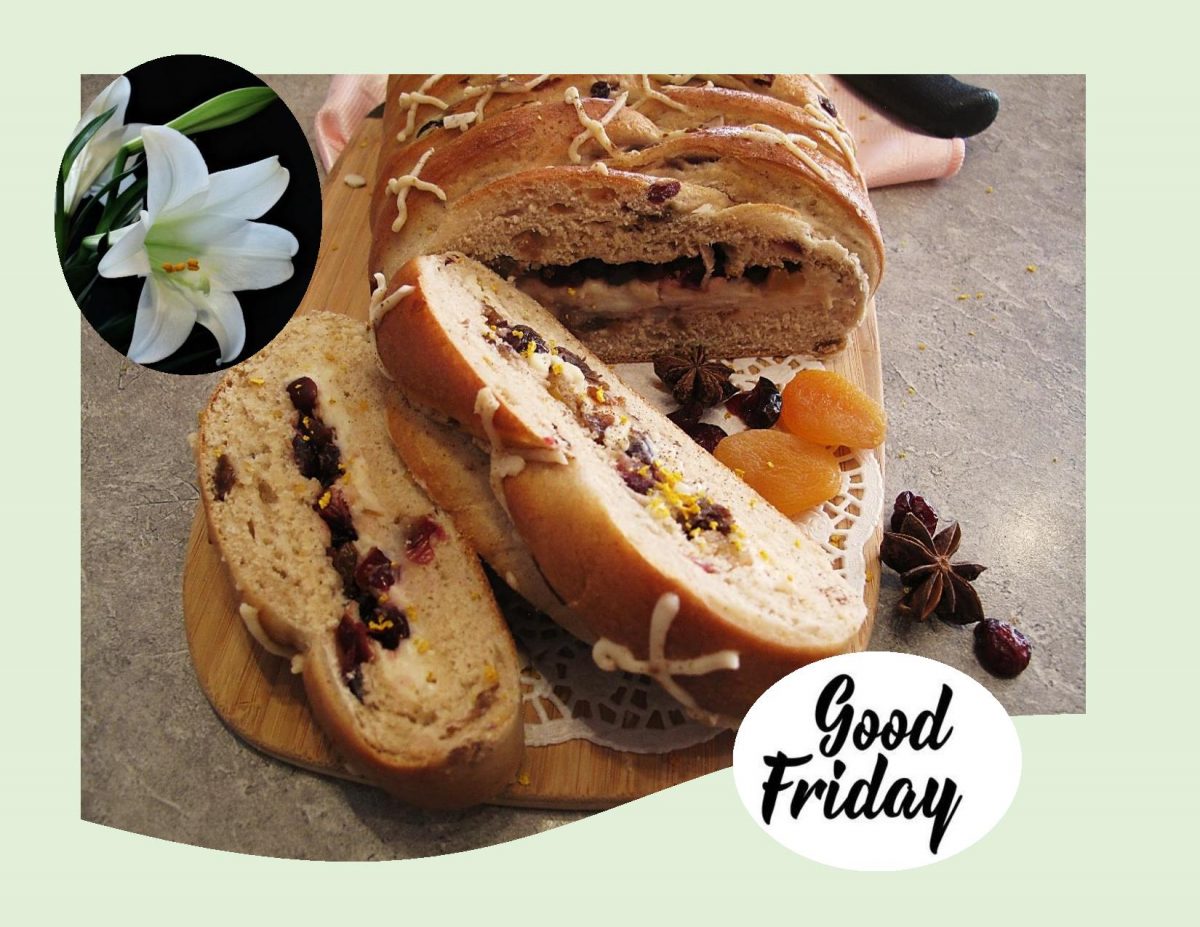
While hot cross buns are now sold and enjoyed throughout the year, they were once reserved for Good Friday alone. Brion & I are extremely fond of these little gems, so every year I enjoy to come up with a new version but still not straying away from the original iconic bun (or bread) taste.
Print Recipe
Hot Cross Cream Cheese Braid
Votes: 1
Rating: 5
You:
Rate this recipe!
|
|
Votes: 1
Rating: 5
You:
Rate this recipe!
|
Instructions
Marinate Fruit
In a bowl with a lid, marinate prepared dried fruit in your choice of alcohol or orange juice overnight or at least 30 minutes.
Sweet Dough
In a bowl, combine yeast, lukewarm milk & 1 Tbsp sugar; allow to sit until frothy.
In a bowl, combine flour, salt, cinnamon, cardamom & ginger.
In a larger bowl, melt butter slightly; add remaining sugar, beaten egg, vanilla, a portion of the marinated fruit & frothy yeast mixture. Combine then add flour mixture & continue mixing to combine all ingredients.
On a lightly floured surface, knead dough for about 15 minutes. If necessary, add a bit more flour. Shape into a ball; place in a greased bowl, turn over once or twice to coat the dough with oil. Cover, let rise until doubled, about 1-1 1/2 hours.
Cream Cheese Filling
In a bowl, beat cream cheese, sugar, vanilla & any excess rum drained off fruit until smooth.
Assembly & Baking
On a lightly floured work surface or parchment paper, roll the dough into a 12 x 14-inch rectangle, ensure an even thickness of 1/4 inch.
Along one long side of the dough make parallel, 4-inch long cuts that are 1-inch apart (like piano keys), with a pizza cutter or sharp knife. Repeat on opposite side, making sure to line up these cuts with those you have already made on the other side.
Spoon all but 1/4 cup cream cheese filling down the center of the rectangle. (Reserve the 1/4 cup of the cream cheese for making crosses on baked braid). Leaving 1-inch on the top & bottom unfilled. Smooth cream cheese mixture then top with remaining marinated fruit.
Begin folding the cut side strips of dough in pairs over the filling at an angle, alternating left, then right, as if you were braiding, until you reach the other end. Tuck the ends underneath the braid.
Transfer to a baking sheet; cover with a loose plastic wrap & a towel. Allow to rise in a draft-free place until doubled in size, about 30 minutes. Preheat oven to 350 F. Just before placing braid in the oven, make the egg wash & lightly brush over the top of the braid.
Bake 20 minutes until golden brown. Check after 15 minutes; if the braid is starting to brown to fast, float a piece of foil, shiny side down, over it. Remove from oven & allow to cool slightly.
Decorating
Place 1/4 cup cream cheese mixture in a small piping bag that has been fitted with a small round tip. Make crosses on braid.
Recipe Notes
- If you would prefer, mix all the marinated fruit right into the dough instead of putting some in the filling.
- If you would rather not decorate with some crosses on top, use all cream cheese in the filling, your choice.
Plantains aren’t meant for eating right out of the peel, but they are transformed into a gently sweet dessert when caramelized.
It’s easy to confuse a plantain with a banana because they look so much alike. Both fruits come from the same family of plants. Though they look alike, the biggest differences between bananas and plantains is in their flavor profile, size, skin thickness and how they’re used in the kitchen.
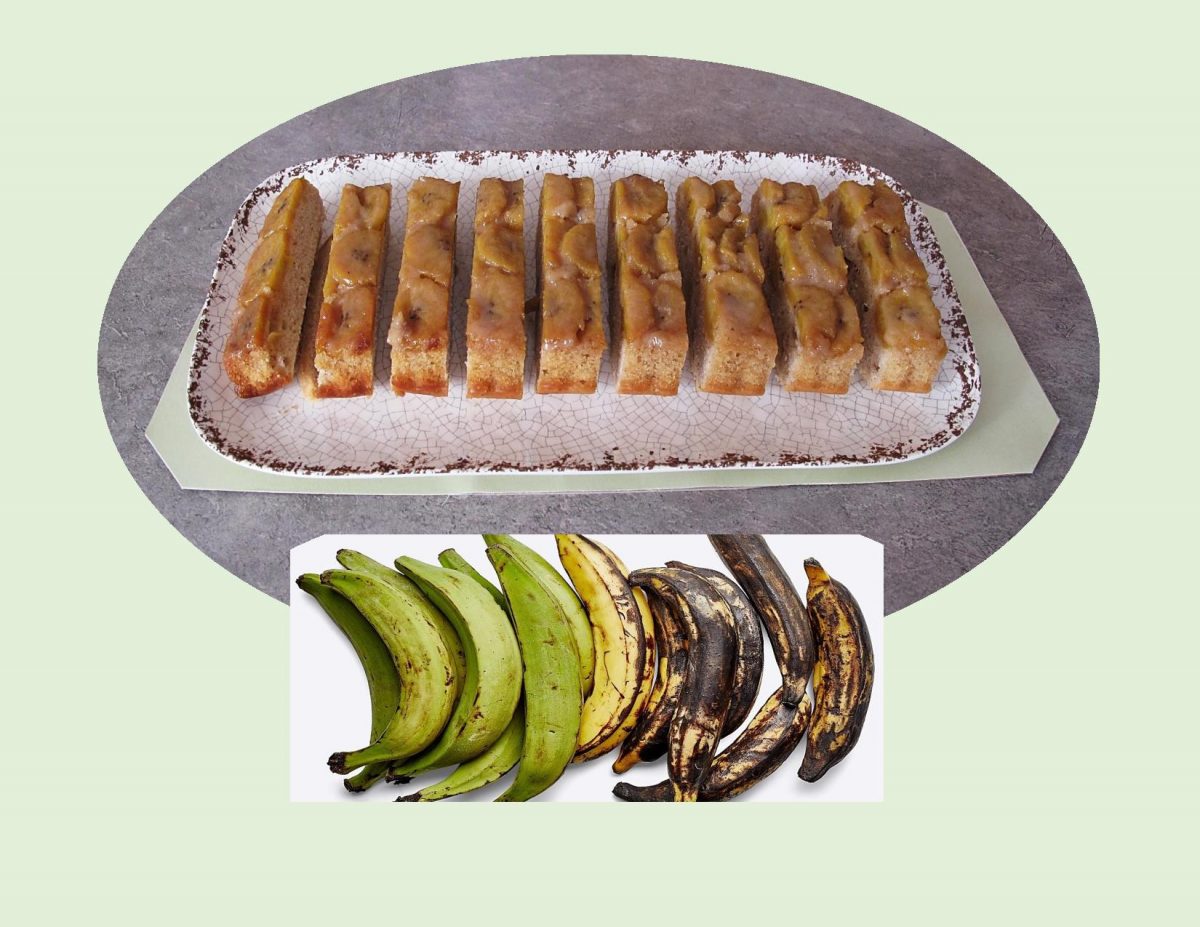
Like bananas, they start green and progress to yellow and then a dark brown-black as they ripen. The darker they are, the sweeter they’ll be. Plantains can be eaten at any stage of ripening, but you’ll need a knife to peel them.
Plantains are starchier and usually larger and tougher than bananas, with a much thicker skin. Very versatile in that they can be boiled, baked or fried.
We grew to like plantains after our extended stay in Ecuador some years ago. Every so often they are a nice treat to have again.
Print Recipe
Plantain Ginger Cakes
Votes: 2
Rating: 5
You:
Rate this recipe!
|
|
Votes: 2
Rating: 5
You:
Rate this recipe!
|
Instructions
Caramelized Plantains
Slice plantains into slices of equal thickness. In a small saucepan, combine butter & sugar; cook until butter has melted & sugar has dissolved. Cook until syrup has thickened; add sliced plantains. Gently stir to coat plantain well. In the bottom of 8 ramekin baking dishes, arrange overlapping slices. Divide any remaining syrup between them. Set aside.
Cake
-
In a bowl, sift together flour, baking powder, baking soda, spices & salt.
In another bowl, beat the butter with sugar until light & fluffy. Add eggs, one at a time then the vanilla. Slowly add one third of the flour mixture & half a cup of the coconut milk. Mix until incorporated.
Add the second third of the flour mixture & the other half of the coconut milk. Finish with the final third of the flour mixture. Mix until all the ingredients are well combined. The batter is smooth & fluffy. Pour the batter over the caramelized plantains, dividing it evenly between the ramekins.
Bake for 30 minutes or until golden brown & a toothpick inserted in the centers comes out clean. Transfer ramekins to a cooling rack & allow to cool for 10 minutes. Loosen the edges of the cake with a spatula & carefully turn each ramekin upside down onto serving plates.
Recipe Notes
- For something different, I decided to make my plantain cake in an oblong tart pan so I could cut it in 'fingers'. Use whatever baking dish you chose, the cake is very adaptable.
The Caramilk chocolate bar is a Canadian creation that has been around since 1968. First produced at the Cadbury factory in Montreal then production moved to the Gladstone factory in Toronto in 1978 and has been made there ever since.
The general name for the candy confection is actually Cadbury Caramilk, but in the USA, this candy bar is more familiarly known as Caramello. The entire styling of the bar is different depending on where it is sold and this can lead to confusion that these are different candy bars when they are actually the same product. There are some variations in the recipe in different countries but the overall taste is remarkably similar.
There have been countless theories and debates about how Caramilk gets the soft flowing caramel inside the Caramilk bar. To date, it is still one of those Canadian enduring mysteries as Cadbury has guarded the Caramilk ‘secret’ for over 50 years.
These apple tart/baskets are certainly taken up a notch by simply adding a piece of Caramilk chocolate to the center. Who knew …. what’s old is new again!
Print Recipe
Caramilk Apple 'Baskets'
Votes: 2
Rating: 5
You:
Rate this recipe!
|
|
Votes: 2
Rating: 5
You:
Rate this recipe!
|
Instructions
Pastry
In a bowl, whisk together flour, sugar & salt. Add cold butter, vanilla & lemon zest. Cut into flour mixture with a pastry blender until dough starts to come together & form clumps. Divide 2/3 of pastry between 10 tart/muffin cups. Using fingertips, evenly press the dough into each cup. With remaining pastry, divide it into 10 balls & flatten each to form a top for each tart. Place pastry in refrigerator until filling is prepared.
Filling
In a saucepan, whisk together 1 1/4 cups water, both sugars, spices, salt & lemon juice. Add the diced apples & simmer for 10-12 minutes to soften apples, stirring occasionally. Combine remaining 1/4 cup water with cornstarch & add to apple mixture; continuing to cook until thickened. Remove from heat & allow to cool.
Assembly/Baking
-
Place a Tbsp of apple filling in each tart shell. Divide the Caramilk bar into 10 pieces. Place one piece in the center of each tart. Divide remaining apple filling between the 10 tarts. Top each with a pastry round & bake for about 35 minutes or until golden.
Serve inverted on a serving plate, either as is or with your choice of topping.

Roly poly pudding also known as shirt sleeve pudding is a traditional British pudding. It was probably created in the early 19th century. The dessert was traditionally made with a ‘suet’ (hard animal fat) dough that was spread with jam and then rolled up and steamed or baked. It got the name ‘shirt sleeve‘ as it was steamed in an actual shirt sleeve.
The pudding is a nostalgic one for many British adults, as it was very popular 30-40 years ago as part of British school dinners, topped with a custard.
Today, roly poly is not only made with a jam filling but also with fresh fruit and served when one needs a comforting ‘retro‘ dessert.
Print Recipe
Blackberry Roly Poly Pudding
Votes: 2
Rating: 5
You:
Rate this recipe!
|
|
Votes: 2
Rating: 5
You:
Rate this recipe!
|
Instructions
Dough/Filling
In a bowl, combine flour, sugar, baking powder & salt. Cut in shortening & butter until crumbly. Add sour cream & blend until ball forms. Roll out on a floured surface into a 15" x 10" rectangle. Spread with 1/4 cup softened butter, sprinkle with remaining filling ingredients. Roll up, jelly-roll style, starting with the long side. Cut into 10 slices. Place slices, cut side down, in a 13" x 9" baking pan.
Topping
-
In a saucepan, combine water, brown sugar & cinnamon. Bring to a boil; remove from heat & stir in cream. Carefully pour hot topping over filled slices.
Bake, uncovered for 35 minutes or until bubbly. The center will jiggle when dessert is hot out of the oven but will set as it sits for a few minutes. Serve warm.
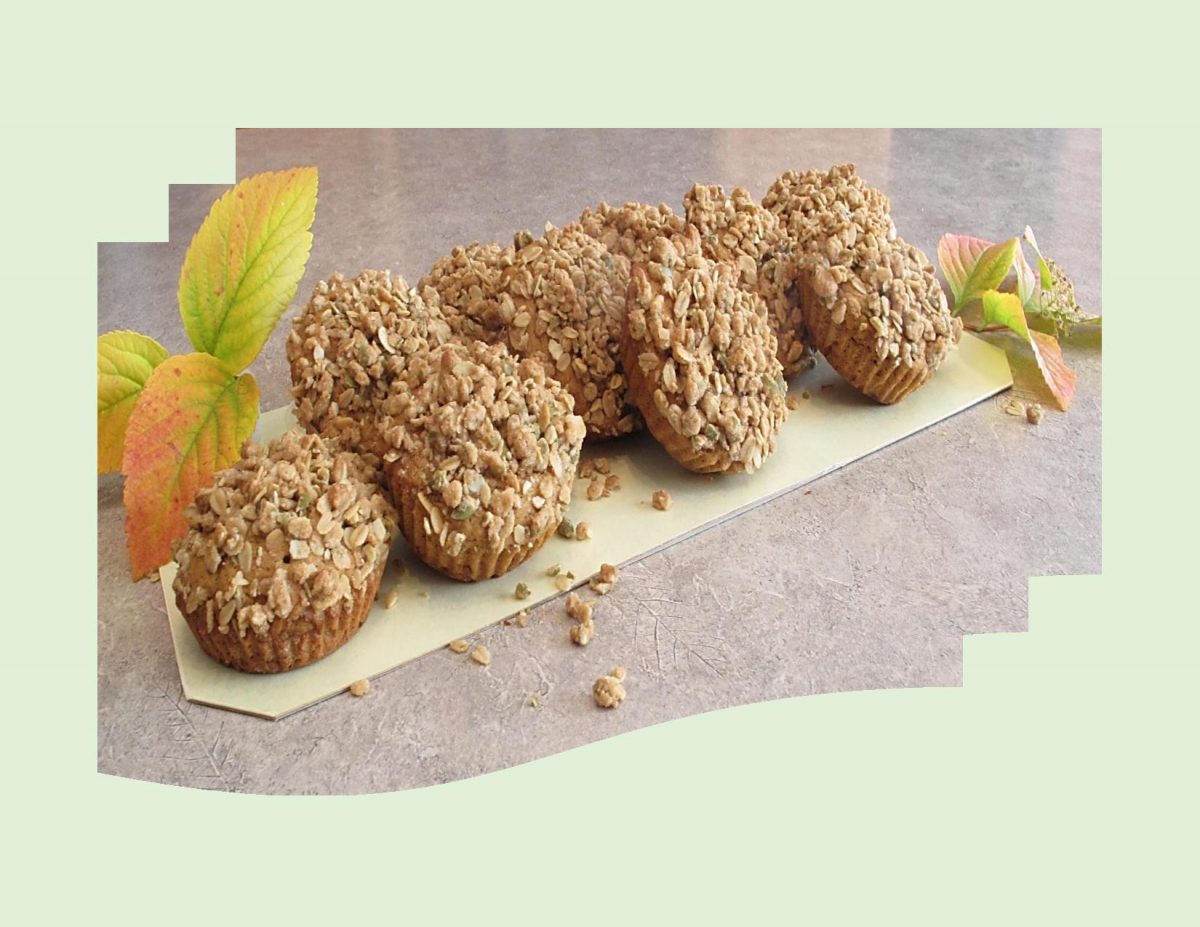
Not whole muffins, just the tops. The idea was first conceptualized by Elaine Benes, a fictional character on the American television sitcom Seinfeld, played by Julia Louis-Dreyfus. I was not a Seinfeld fan and rarely even watched the show but the series lasted for nine years so obviously many did. It centered around four single friends dealing with the absurdities of everyday life in New York City, USA. Something as simple as soup or muffins became the focal point of the show but with a unique twist that only the actors on the show could make funny and memorable.
In a 1997 episode, The Muffin Tops, Elaine helps her old boss open his own business where they only sell the tops of muffins. ‘It’s the best part (nobody likes the stumps), it’s crunchy, it’s where the muffin breaks free of the pan and sort of does its own thing’.
Nowadays we have specific baking pans made just for making muffin tops and I think most food stores sell them. Muffins are an item I’ve certainly made my fair share of over the years in the food industry. But I have to say, I love the whole thing, especially if its soft and cakey.
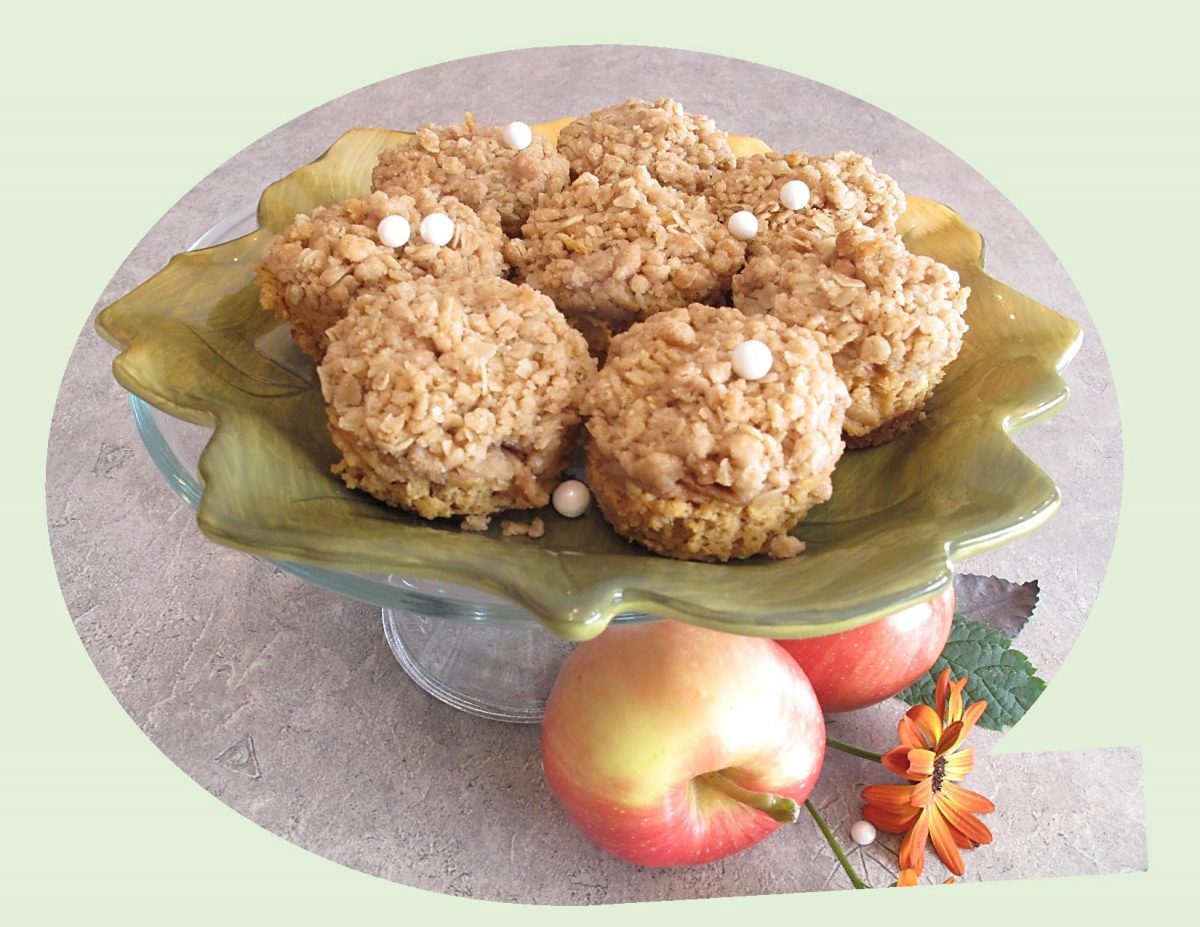
This time of year is usually filled with pumpkin and sweet potato dishes and treats. These muffin tops are quite special with a slight sweet potato flavor packed with plenty of cinnamon, cardamom, ginger and an added bonus of some pepita seeds.
Print Recipe
Sweet Potato Muffin Tops
Votes: 1
Rating: 5
You:
Rate this recipe!
|
|
Votes: 1
Rating: 5
You:
Rate this recipe!
|
Instructions
Streusel Topping
In a small bowl, combine oatmeal, flour, brown sugar, cinnamon & salt. With a pastry blender, cut in butter until mixture resembles coarse crumbs. Add pepita seeds, mix & set aside.
Muffin Tops
Preheat oven to 350 F. Spray a MUFFIN TOP PAN or line with paper cups. (This recipe makes 10 muffin tops the size shown in the blog picture). Set aside.
In a large bowl, whisk together flour, baking powder, baking soda, salt & spices. Set aside.
In a medium bowl, whisk the brown sugar & eggs together; add sweet potatoes, oil, milk & orange zest (or vanilla) & whisk again. Pour the wet ingredients into the dry ingredients & stir until JUST combined. Do not overmix the batter.
Scoop batter into muffin top pan; Sprinkle with streusel topping.
Bake for 10-12 minutes or until a toothpick inserted in the center comes out clean. Cool on wire rack.
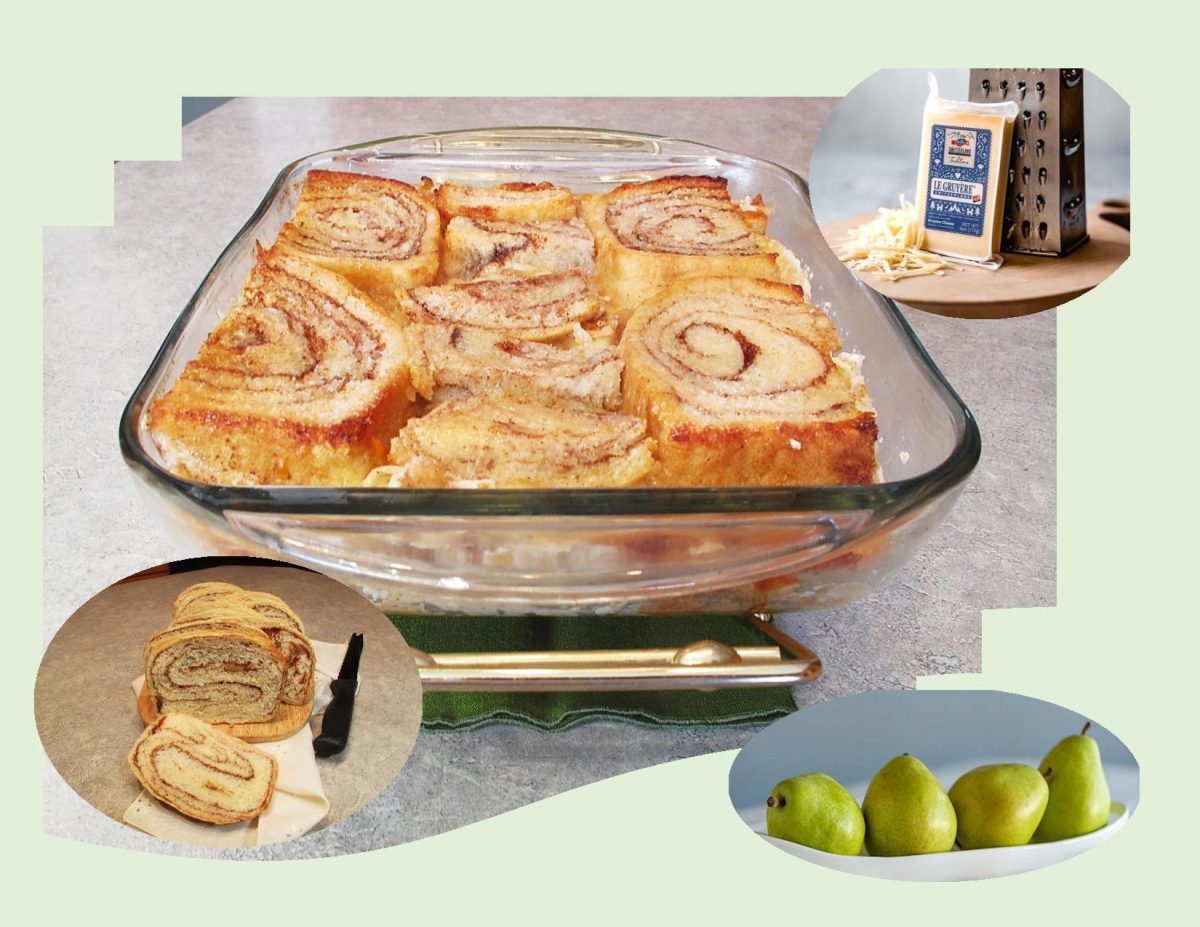
It’s become that time of year. Our warm summer nights have slowly given way to crisp air. Layers have started to enter our daily fashion. Food preparation starts to gravitate towards warmth and comfort food. Pears of all shapes and colors, are waiting for us to pull out our oven mitts and get cooking. And, like so many fruits, there is the right variety for every job.
Here, sweet cinnamon bread meets juicy pears and the savory bite of Gruyere cheese. You want a pear variety that will hold its shape and won’t exude too much moisture as the bread pudding bakes, such as Anjou.
The nutty flavor of Gruyere compliments the pears and the cinnamon bread base. Its all bathed in a milk and egg mixture and left to sit in the fridge overnight. The next morning, simply bake and enjoy with the addition of something salty like you guessed it …. bacon!!
In 2015, ‘The Taste of a Memory’, a memorabilia/cookbook I wrote as a tribute to my wonderful parents, was published. It contained a compilation of stories, articles, recipes and reflections that evoke an intimate memory, a special time period and fond emotion brought about by the aroma and taste of food. Writing them down not only put them in print but allowed me to take a mental journey back to a gentler time.
This bread pudding recipe comes out of the low calorie section of that book. Who says bread pudding can’t be diet food !!
Print Recipe
Pear & Gruyere Bread Pudding
Votes: 1
Rating: 5
You:
Rate this recipe!
|
|
Votes: 1
Rating: 5
You:
Rate this recipe!
|
Instructions
Cinnamon Swirl Bread
In a small bowl, whisk together yeast, 1 tsp sugar & lukewarm water. Set aside until mixture begins to form a frothy foam, about 5 minutes.
In a large bowl, whisk together flour, dry milk powder & salt. Add yeast mixture, melted butter, vanilla, raisins (if using) & beaten egg. Combine until dough comes together in a ball & no longer sticks to the sides of the bowl. Place dough in a lightly greased bowl, cover with plastic wrap & allow to rise until nearly doubled in bulk, about 1 hour.
Grease a 9 x 5-inch loaf pan. In a small dish combine 1/4 cup sugar with 1 Tbsp cinnamon.
On a lightly floured work surface, roll dough into a 9 x 24-inch rectangle. Brush the dough with egg wash mixture & sprinkle with cinnamon /sugar mixture. Starting with a short end, roll the dough into a tight log & place seam-side down into greased 9 x 5-inch loaf pan.
Allow to rise, covered, for 40-60 minutes until loaf has crested 1/2-inch over the rim of the pan. Preheat oven to 350 F. while the bread is rising. Brush the loaf with egg wash & bake for 45-60 minutes, until golden. Cool the loaf in pan for 10 minutes, then transfer to a rack to cool completely.
Bread Pudding
In a large bowl, combine pears, butter & 1 Tbsp sugar; toss gently. Butter a 9 x 9-inch glass baking dish & arrange half of the bread in it. Spoon pear mixture evenly over bread & top with shredded cheese. Arrange remaining bread over cheese.
In a bowl, whisk together remaining 5 Tbsp sugar, milk, egg substitute & cinnamon. Pour milk mixture over bread pudding, pressing down lightly to submerge. Cover & chill 8 hours or overnight.
Preheat oven to 350 F. Uncover, sprinkle with 1 Tbsp sugar evenly over pudding. Bake for 55 minutes or until golden & set. Allow to rest 10 minutes before serving.
Recipe Notes
- If you are making the cinnamon swirl bread, it helps to do this the day before making the bread pudding.
- Alternately you could make your life easier & just purchase the cinnamon loaf at a good bakery.

Cheese, generally speaking, is not a tough sell. Even so, it is hard sometimes to convince someone to stray from the usual cheesy standbys and try something new. Comte is a creamy, nutty tasting French cheese that absolutely deserves to be checked out.
A fairly firm cheese that can be sliced, cubed or grated. Besides being versatile for uses in both sweet and savory cooking, Comte has a good shelf life. If you buy a wedge and it doesn’t get entirely used up, it can sit in the fridge for a week or three and it will be fine.
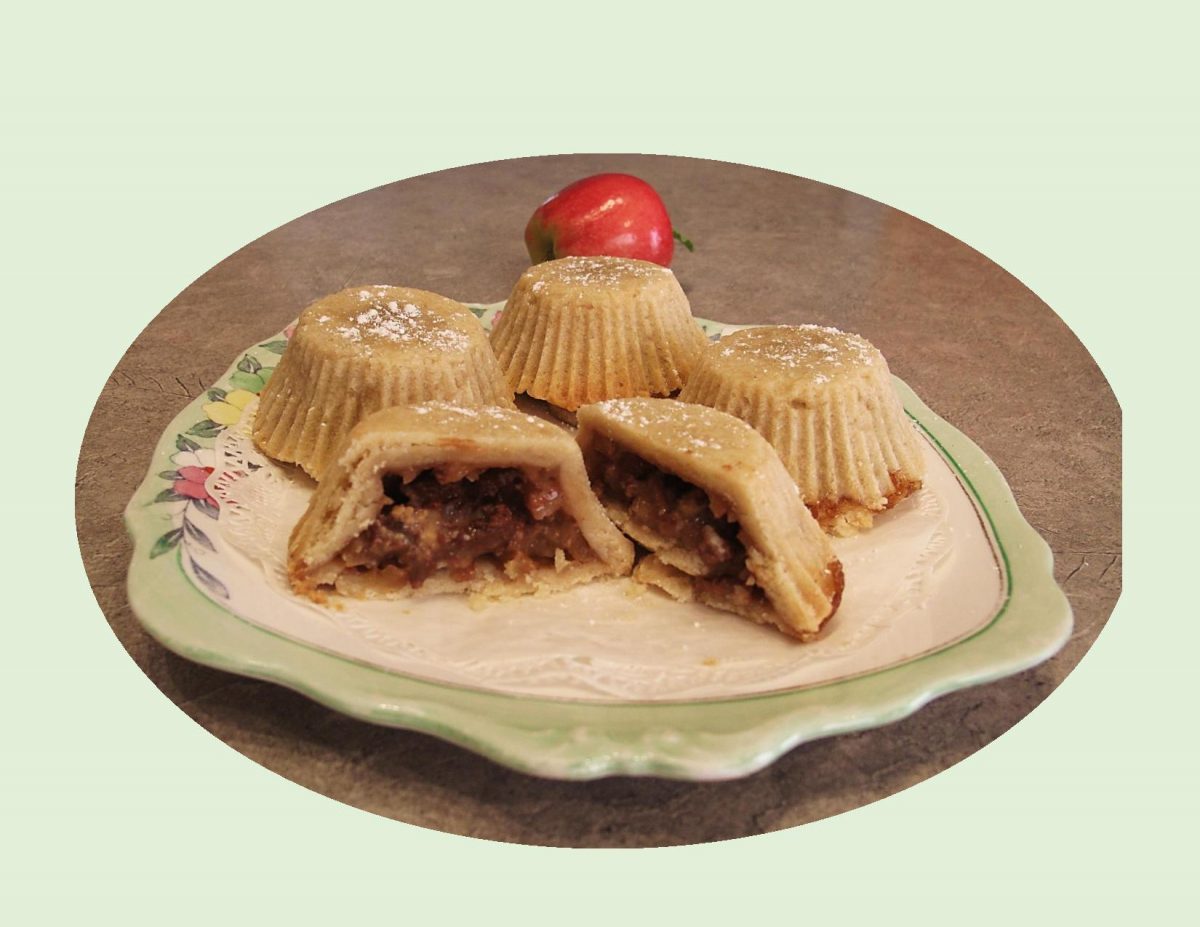
Cheese and dessert pairings are almost better than cheese and wine pairings. If you have the right cheese and dessert, the contrasting flavors complement each other so well you’ll never eat one without the other again. Your probably quite familiar with apple pie and cheddar cheese. The nutty, earthy flavor of the Comte cheese in these little pie bites definitely kicks that ‘sweet-savory’ appeal up a notch.
Print Recipe
Comte Apple Pie Bites
Votes: 1
Rating: 5
You:
Rate this recipe!
|
|
Votes: 1
Rating: 5
You:
Rate this recipe!
|
Instructions
Pastry
In a small bowl, whisk together flour, sugar & salt. Cube butter & cut into the flour mixture with a pastry blender until butter is about pea size & mixture resembles coarse crumbs.
Add cold water, 1 Tbsp at a time, mixing with a fork ONLY until dough starts to pull together. Turn the dough out on a lightly floured surface & shape into a disk. Wrap in plastic & chill for an hour.
Filling
Place the chopped apples, cinnamon, sugar & lemon juice into a skillet over medium high heat. Cook, stirring often, until all the liquid has completely evaporated & the apples have softened, about 7 minutes. Remove from heat & place in a small bowl; add flour. Stir to combine. Cool completely before using. If apples are too wet, drain away any excess liquid.
Assembly
Prepare egg wash. Remove pastry from fridge & roll out to 1/8-inch thickness. Using a 4-inch cookie cutter, cut into 18 rounds.
On each round place a heaping teaspoon of apple filling & sprinkle with a bit of Comte cheese. Fold in half & seal with a fork or alternately use a perogy cutter to cut , fold & seal.
Place the mini turnovers on a parchment lined baking sheet & keep in the fridge or freezer while you continue to make the rest of the pastries.
Baking
-
Brush egg was all over the pastry crusts. Sprinkle with a tiny bit of coarse sugar. Bake for about 14 minutes or until crust is golden brown.
Remove from oven, sprinkle with remaining cheese & place pastries on a wire rack to cool.


")