
Over the last few years, marinated artichokes have become one of the ‘go-to’ ingredients on my pantry shelf. Jarred marinated artichoke hearts add an instant burst of flavor and unlike fresh artichokes, they are available all year around. Might I add, they require zero preparation! Keep in mind, these are the ones in glass jars, not the canned ones that can be flavorless and soggy.
Some of the ways I have made use of them were: as a pizza topping, veggie dip, on crostini, with roasted potatoes, omelettes or in au gratin dishes.
As you have probably noticed if you follow my blog, I love savory pastries all year long. Spring through winter they showcase their ingredients so beautifully. If you’re someone who feels intimidated by pastry, galettes give you opportunity to make a free-form masterpiece. This recipe simplifies it even more by using frozen puff pastry. Yet another reason to keep a package on hand in your freezer.
Print Recipe
Savory Artichoke, Chicken & Mushroom Galette
Votes: 2
Rating: 5
You:
Rate this recipe!
|
|
Votes: 2
Rating: 5
You:
Rate this recipe!
|
Instructions
Filling
Slice breast & marinate in artichoke MARINADE (liquid only) for about 30 minutes. In a skillet, cook chopped bacon, onion, garlic & chopped mushrooms over medium heat until bacon is cooked & the mushrooms have released most of their liquids.
Add the chicken & marinade & continue to cook until the liquid is evaporated. Remove from heat. In a bowl, beat together cream cheese, milk, egg & grated Parmesan cheese & fold into chicken mixture as well as the reserved artichoke pieces.
Pastry
Preheat oven to 425 F. On a large piece of parchment paper, roll out thawed, puff pastry 'SHEET' into a rough 12-inch 'CIRCLE'. Sprinkle half of the mozzarella cheese over pastry, leaving a 1 1/2-inch border. Spoon cooked mixture over cheese then fold edges of pastry in about an inch, 'pleating' to keep filling in. Sprinkle remaining mozzarella cheese on top of filling.
Brush pastry edge with egg wash & bake for 25 minutes or until puff pastry is golden & filling is slightly browning. Remove from oven; slice & serve.
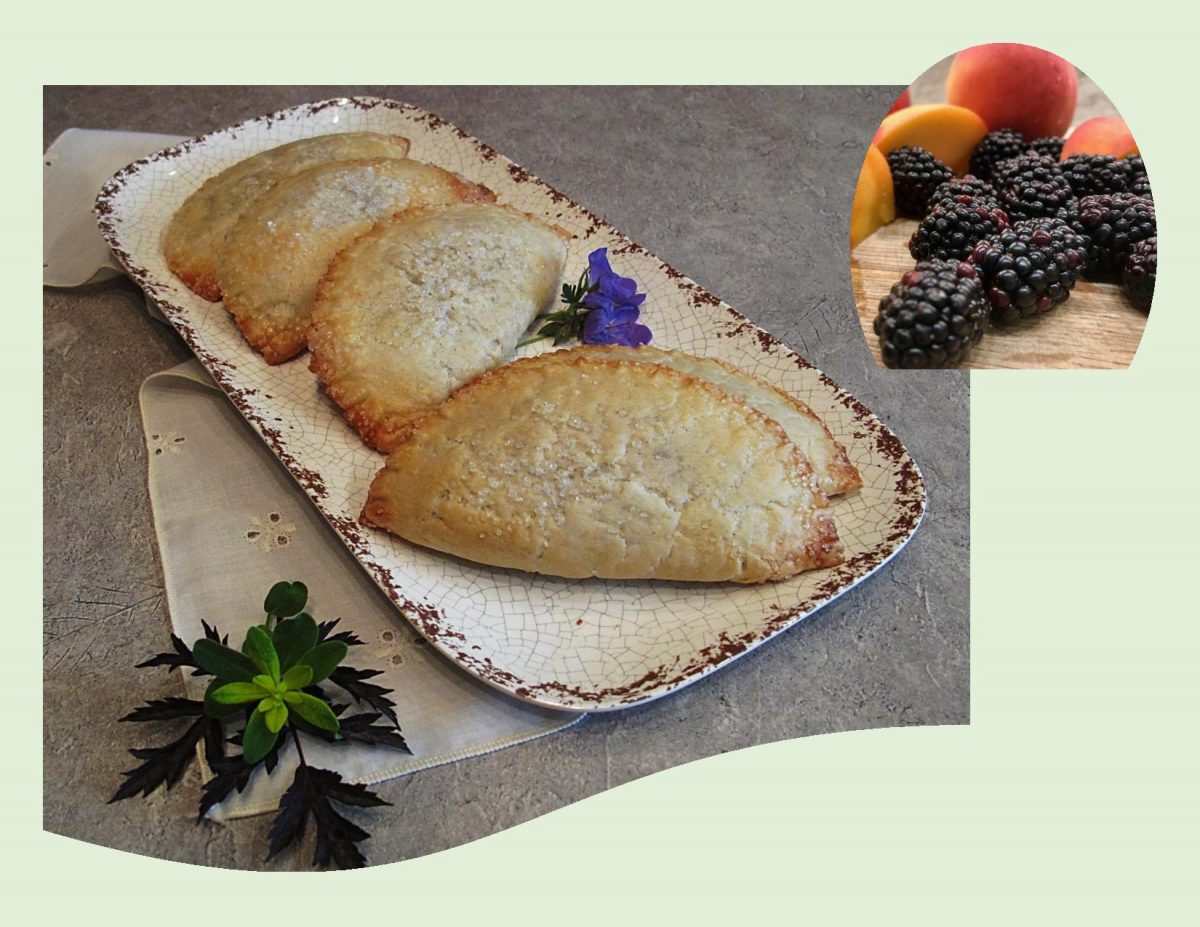
Hand pies are just perfect for this time of year. No fork or plate required —a variety of fresh seasonal fruit available — picnics and barbecues happening. Another great thing is that you can make up a big bunch on a cooler day and freeze them. Personally, I would bake them before freezing so they are ready on short notice but nothing says you have to.
Years ago, hand pies were primarily made with reconstituted dried fruit since fresh fruit is often to juicy to encase it with delicate pastry. Now, a blend of dried and fresh fruit with the help of thickeners can yield a balanced mixture of flavors and textures.
There seems to be various successful ways to go with your pastry from the traditional pie crust to a more biscuit-type pastry. One thing I found that helps to avoid having a ‘gummy’ inside is rolling your dough fairly thin.
When it comes to the filling, I always have the urge to overfill pies, be it full or hand size. Getting it right sure helps to keep them from splitting and leaking.
Hand pies have primarily been deep fried in past but my preference is to bake them. I guess I’ll just never be a deep fried lover of anything. These makes such a nice seasonal combo!
Print Recipe
Blackberry-Peach Hand Pies
Votes: 1
Rating: 5
You:
Rate this recipe!
|
|
Votes: 1
Rating: 5
You:
Rate this recipe!
|
Instructions
Pastry
In a large bowl, whisk together flour, baking powder, baking soda & salt. With fingertips, cut in cold butter until mixture resembles small peas. In a measuring cup, whisk together water, egg & vinegar. Make a well in dry mixture & pour wet mixture into it all at once. With hands, mix until JUST combined. Roll out pastry & cut 8 - 6-inch circles with a pastry cutter. Lay pastry circles on parchment paper lined baking sheet. Refrigerate until ready to fill.
Filling
In a small saucepan, whisk together sugar, cornstarch, cinnamon & salt. Stir in blackberries & peaches. Cook over medium heat until mixture has thicken, about 6-8 minutes. Add vanilla & allow to cool COMPLETELY. In a cup, beat egg with water for the egg wash topping. Set aside
Assembly
Preheat oven to 375 F. When fruit has cooled, remove pastry from fridge & divide filling between pastry circles. Try to keep the filling in the center, away from the outer edges. Brush a line of egg wash over pastry edge then fold hand pie in half. Use a fork to press the pastry layers together forming a seal to keep fruit from leaking. With a sharp knife, cut 3 vents in each pie.
Brush the tops with egg wash & sprinkle with sanding sugar. Bake for 15 minutes or until golden.
Recipe Notes
- Frozen puff pastry can easily be substituted for regular pastry if you wish.
- If you wish, use a hand pie cutter for easy assembly.

Saskatoon berries are very high on my list of nostalgic memories from my childhood. How these little berries can evoke such a flood of treasured thoughts is amazing. Our family farm was located in Southern Alberta, (Canada). If you were to stand on our farmhouse, west veranda, the sight of the ‘foothills’ came into view (foothills are an upland area that flank the eastern side of the Rocky Mountains).
How wonderful it was to be able to pack a picnic lunch on a Sunday afternoon and be able to drive there. It was like a whole different world. A landscape of long ridges and rolling hills covered in native lodgepole pine, aspens and spruce trees. The small streams wound their way through meadows of dwarf birch, willow and prairie grasses. You could easily come across some of the beautiful wildlife such as elk, moose or deer that lived there.
This is where our family would go to pick saskatoon berries. Very often we were accompanied by family friends or relatives. It was such a great time, everyone picking berries together, eating Mom’s fabulous fried chicken and potato salad (etc. etc.) for our picnic lunch. I was looking at some pictures from those times. We must have had some hot dogs on one occasion and I burnt my mouth it seems. What priceless memories!
With ‘saskatoon season’ in full swing, Brion and I thought it would be great to pick our own this year. It certainly can’t get any fresher than that. We chose the U-Pick farm called GROVE BERRY PATCH. This is a family owned and operated farm with 20 acres of saskatoon berries and 1 acre of raspberries, black currants, highbush cranberries and vegetables. They are located 1.5 km south off Highway 16A on Spruce Valley Road, Spruce Grove, Alberta, Canada.
It was such a nice little adventure. The morning was beautiful and the atmosphere of the berry farm and its family owners was very enjoyable. We picked a pail full of gorgeous saskatoons in a short space of time. I had originally started out with thinking I would post one recipe but of course, its turns out to be three. They consist of some Saskatoon Rhubarb Tarts, Saskatoon Butter Tarts and some Saskatoon Cream Cheese Tarts. Yum!
We are adding a few pics, not only of the tarts but some from the berry farm as well as a couple from my childhood days. Hope you enjoy the blog.
Print Recipe
Saskatoon Berry Tarts
Votes: 2
Rating: 5
You:
Rate this recipe!
Ingredients
Filling for SASKATOON RHUBARB TARTS
Filling for SASKATOON BUTTER TARTS
Filling for CREAM CHEESE SASKATOON TARTS
Ingredients
Filling for SASKATOON RHUBARB TARTS
Filling for SASKATOON BUTTER TARTS
Filling for CREAM CHEESE SASKATOON TARTS
|
Votes: 2
Rating: 5
You:
Rate this recipe!
|
Instructions
Pastry
In a medium bowl, whisk together flour, baking powder & salt until completely combined. Cut in butter with a pastry cutter or fork.
Measure the vinegar into a liquid measuring cup, then add enough ice cold water to make 1/2 cup. Pour over flour mixture, gently stir with a fork ONLY until combined. Wrap dough in plastic wrap & place in refrigerator for a minimum of an hour so it can chill well. When ready to use, Roll out dough on a lightly floured work surface. Using a 3 1/2" cookie cutter, cut out tart shells & place them in tart pans.
Saskatoon Rhubarb Filling & Streusel
In a small saucepan, combine saskatoons, diced rhubarb, sugar & cardamom. Set aside. In a small bowl, combine water, lemon juice & cornstarch. Whisk together to make a slurry. Add to to saucepan & cook on medium heat, stirring until mixture becomes thickened. Remove from heat; add vanilla & allow to cool before using.
FOR STREUSAL: Place all streusal ingredients in a small dish & combine with finger tips until crumbly. Spoon berry filling into tart shells & top with streusal. Bake at 375 F. until pastry is golden.
Saskatoon Butter Tart Filling
FOR BERRY TOPPING: In a small saucepan, mix together berries & water; simmer for 10 minutes over low-medium heat. In a separate bowl, mix together sugar & cornstarch then add to the berries & combine. Stir in lemon juice; simmer until mixture slightly thickens. Set aside to cool.
FOR BUTTER TART LAYER: First beat together eggs. In a saucepan, melt the butter then add sugar, vanilla, cream, raisins & beaten eggs. Bring to a boil over medium heat & boil for 3 minutes. Set aside to cool.
TO ASSEMBLE: Place a heaping Tbsp of butter tart mixture into each shell, then fill remainder of the tart shell with the berry topping mixture. DO NOT MIX. Bake at 375 F. for 15-18 minutes or until pastry is golden. Cool before removing from tart pans.
Cream Cheese Saskatoon Tart Filling
FOR BERRY TOPPING: Crush 1 cup of saskatoon berries & place in a small saucepan with 1 cup of water. Simmer about 2 minutes. Strain & return berry juice only to saucepan. Combine sugar & cornstarch; add to sauce. Cook over low heat, stirring constantly until mixture is thick & clear. Remove from heat & stir in remaining 2 cups of saskatoons to glaze & stir gently. Pre-bake tart shells.
FOR CREAM CHEESE LAYER: In a small bowl, blend together cream cheese, lemon zest, sugar & heavy cream. Divide cream cheese mixture between baked tart shells. Top with generous portions of berry topping & serve.
-
Recipe Notes
- The pastry recipe will yield about 48 mini tarts. I had doubled the pastry recipe because I wanted to make all 3 kinds. It's so nice to have some in the freezer for future use.
- If you make the pastry in 2 separate batches it seems to be nicer for some reason.
- If you happen to have any filling left over, it freezes well for another time.

I think sometimes there’s a slight misconception that the main focus of the meal can’t be made using vegetables. A humble vegetable can turn into a gourmet meal with just a little stuffing.
Onions are the ‘workhorses’ of the kitchen and the foundation of so many dishes across the globe. Sometimes its easy to forget how delicious they really are. We tend to under value anything we have perennial access to. As far as red, white and yellow onions, they are generally interchangeable.
Yellow are the driest, good for long cooking. Red onions are faintly sweeter, good for caramelization and when you need a boost in color. White onions are highest in water content and the mildest, good choice for a raw garnish. When it comes to stuffing onions, all three will work.
Because of their layered structure, onions are really easy to hollow out with a spoon. Just keep spooning until you have a good sized cavity. To make use of the onion pulp, I chopped it and then froze it for uses later on. I preferred to bake these stuffed onions but they can also be cooked on the BBQ as well. Great little sweet/savory summer meal!
Print Recipe
Bacon Meatball Stuffed Onions
Votes: 1
Rating: 5
You:
Rate this recipe!
|
|
Votes: 1
Rating: 5
You:
Rate this recipe!
|
Instructions
Cut off the tops & bottoms of the onions & remove the exterior skin. With a spoon, hollow out onions to within about 2-3 outer layers. Set aside. Chop onion pulp & freeze for other uses later.
In a large bowl, combine ground beef, parsley, mushrooms, bread crumbs & all of the spices. Mix well with your hands. Preheat oven to 425 F. Stuff onions with meat mixture; wrap the onion meatballs with 3 strips of bacon each. Secure bacon with toothpicks to keep it from unraveling during cooking.
Place in a baking dish & bake for 40 minutes or until cooked through. Remove from oven & serve with BBQ sauce. Onions can be cut in half to make 4 servings if you wish after baking them.

If you have never eaten a German pancake, think of it as a cross between a souffle and an omelette with undertones of French toast. Often called a Dutch baby pancake and not unlike a sweet Yorkshire pudding. ‘Eggier‘ than your typical pancake, but sweeter and lighter than an omelette, with more pastry-like characteristics. The sides of the pancake rise high above the edges of the pan, creating a light, puffy crust with a tender, custard-like middle.
Story has it that the name ‘Dutch Baby’ was coined when a restaurant owner’s daughter (in the USA) could not pronounce ‘Deutsch’, the German word for German, and out of her mouth came ‘Dutch’. Originally served as three small German pancakes with powdered sugar and fresh squeezed lemon juice, the Dutch Baby, moniker was born.
These German pancake ‘bites’ are kind of a fun spin on the classic Dutch baby pancakes. The fresh apricot/raspberry sauce along with the Greek yogurt filling, bananas and chocolate makes them such a decadent addition to brunch.
Print Recipe
German Pancake Bites
Votes: 1
Rating: 5
You:
Rate this recipe!
|
|
Votes: 1
Rating: 5
You:
Rate this recipe!
|
Instructions
Apricot/Raspberry Sauce
In a food processor, place pitted apricots, lemon juice & sugar; pulse several times until the apricots are COARSELY chopped. Transfer mixture to a saucepan. Lightly boil over medium heat, uncovered for 10 minutes; stirring occasionally to prevent scorching. Add more sugar to taste depending on how sweet your apricots were. Add raspberries & simmer 1-2 minutes or until raspberries are heated through & softened. Set aside until ready to use.
Greek Yogurt Filling
In a bowl, cream together cream cheese & sugar with a hand mixer. Add Greek yogurt & beat on medium-high until smooth & creamy. Set aside until ready to use. Refrigerate if not using right away.
Pancake Bites
Preheat oven to 400 F. In a bowl, using a hand mixer, blend eggs, milk, vanilla, flour & salt until well mixed. Pour a small amount of the melted butter in 8 MINI loaf pans. Pour 1/3 cup of the mixture into each of the individual spaces.
Bake for about 15 minutes. Remove from oven & invert on a cooling rack. Place 'bites' on a serving plate. Divide yogurt filling, placing some in the bottom of each individual pancake. Top each with some apricot/raspberry sauce & some banana slices. Drizzle with chocolate & sprinkle with powdered sugar. Serve immediately.

I remember the first time I heard of sour cream being used in making a rhubarb pie. I could hardly imagine it but once I tried it there was no going back! If you look through some of the older recipe books, there are at least eight or nine different pies made using sour cream. These nostalgic desserts certainly take you back to a simpler time.
Basically this is your classic rhubarb pie except with a sweet/sour cream, custard filling. The sour cream is not assertive; its presence simply provides a rich, creamy background for the rhubarb.
I’m not sure why, but I never get tired of cooking (or eating) rhubarb. Every season, I can’t wait until its ready to use. Last year, Brion and I found another spot for three new plants to grow in our yard, so hopefully they do well. I realize its not for everyone but it is certainly versatile in its uses.
For this rhubarb crostada, I’m using an spiced-oat streusal topping which almost mimics a baked fruit crumble taste. Serving this dessert chilled brings it to its full potential. Of course, when you add a scoop of ice cream!
Print Recipe
Sour Cream Rhubarb Crostada
Votes: 1
Rating: 5
You:
Rate this recipe!
Ingredients
Cornmeal Pastry (OR use purchased refrigerated pastry if you wish)
Ingredients
Cornmeal Pastry (OR use purchased refrigerated pastry if you wish)
|
Votes: 1
Rating: 5
You:
Rate this recipe!
|
Instructions
Cornmeal Pastry
In a small bowl, combine sour cream & ice water; set aside. In a large bowl, whisk together flour, cornmeal, sugar & salt. Using your fingertips, cut in the butter until mixture resembles BOTH coarse crumbs & small peas. Sprinkle the cold sour cream mixture over dough, 1 Tbsp at a time, tossing with a fork to evenly distribute it. After you have added all the liquid mixture, dough should be moist enough to stick together when pressed. Do NOT over work pastry. Press dough into a disk shape; wrap in plastic wrap & refrigerate until ready to use.
Spiced-Oat Topping
In a bowl, combine all topping ingredients with fingertips until crumbly; set aside.
Filling
Preheat oven to 375 F. In a bowl, Mix 1 cup sugar, 3 Tbsp flour, 1 tsp cardamom & orange zest. Stir in slightly beaten eggs & sour cream, add rhubarb; toss gently.
Remove pastry from fridge. Preheat oven to 375 F. On a large sheet of parchment paper, roll out pastry into a 12-inch circle. Place pastry in a 9-inch pie pan, leaving parchment paper underneath it. Pour filling into crostada; gently fold the 1/2-inch of pastry remaining above pie pan rim over edge of crostada. Sprinkle spiced-oat topping over filling. Brush pastry edge with egg wash.
Bake 50-60 minutes until edge is puffed, filling is slightly jiggly & topping is golden. Cover loosely with foil if topping begins to brown too much. Cool at least 3 hours before serving. Slice & serve with a dollop of whipped cream or a scoop of ice cream.
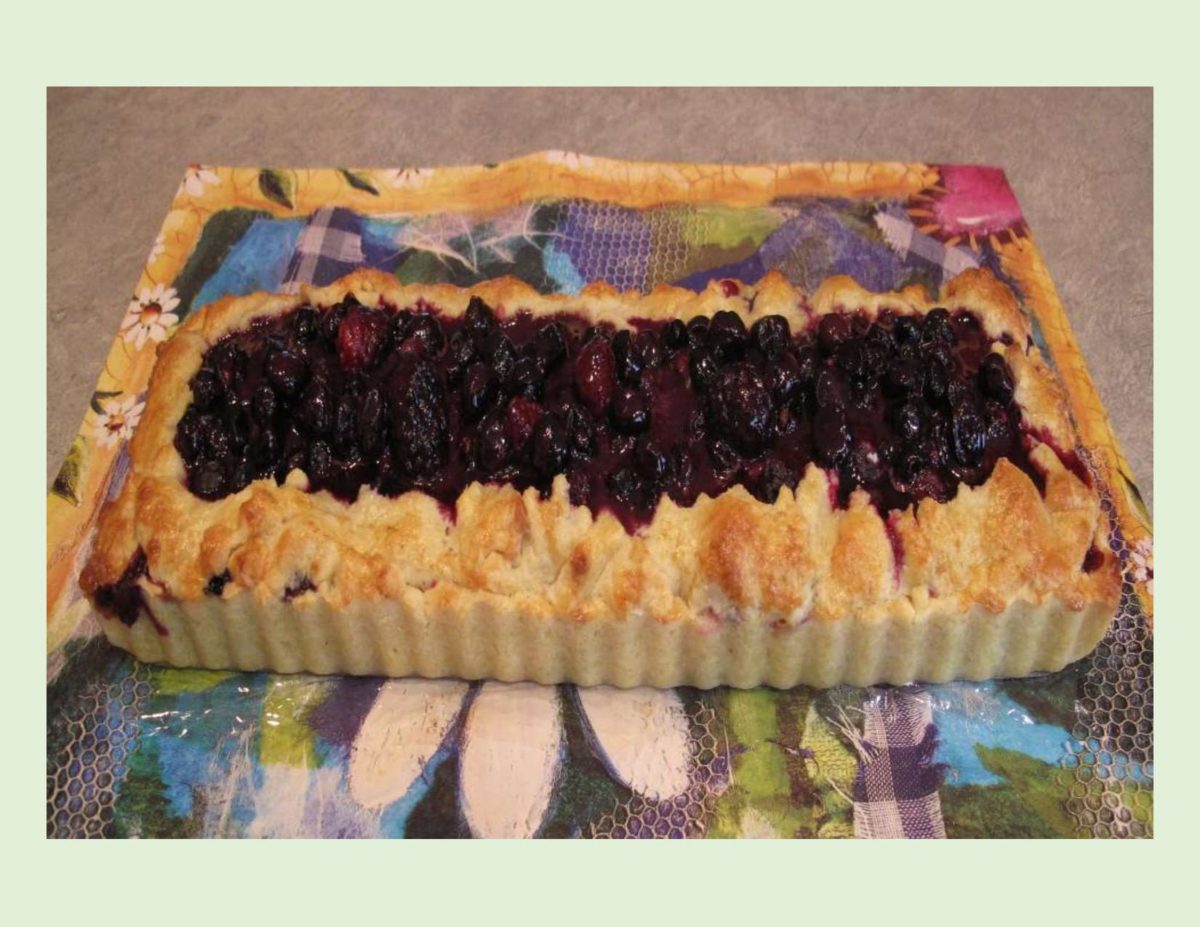
Nothing says summer like fresh fruit and if blackberries aren’t in the mix, you’re missing out. Blackberries have a sweet, tart flavor making them perfect for salads, smoothies, blended into savory sauces, eaten fresh or in desserts.
Blackberries are closely related to raspberries but should not be confused with the black raspberry. Although native to Europe, we can grow them here in Canada. They will thrive in a wide range of soils but good drainage and direct sunlight are a must. Blackberries are the largest of the wild berries, growing on thorny bushes called brambles.
Because blackberries and blueberries make such an amazing combo, using them in this tart seems very fitting. My favorite alternative cornmeal pastry makes a buttery yet slightly crunchy crust. Since it stays so soft, I found it easier to press this pastry into the tart pan as opposed to rolling it out. I added a border after I filled the shell to give it a more rustic look. What more could you want — eye appeal and a fabulous flavor!
I should mention, I’m going to post some balsamic glazed fig & pork kebabs next time. Save a couple of pieces of this tart as they are a perfect ending to that meal.
Print Recipe
Blackberry & Blueberry Rustic Tart
Votes: 1
Rating: 5
You:
Rate this recipe!
|
|
Votes: 1
Rating: 5
You:
Rate this recipe!
|
Instructions
Cornmeal Pastry
In a bowl, whisk together flour, cornmeal, sugar & salt. With fingertips, cut in butter until mixture resembles small peas. In a measuring up, combine ICE water & sour cream. Add to dry mixture. Mix only until combined, do not over mix. Press into your favorite choice of pan ( tart, quiche or pie pans are all good). Place in fridge or freezer until ready to fill.
Filling
Preheat oven to 375 F. In a large bowl, combine berries, sugar, flour & lemon juice; spoon into pastry shell. Brush edges with beaten egg & sprinkle with coarse sugar.
Bake 45-50 minutes or until crust is golden & filling is bubbly. If your pan has a removable bottom, it makes it a lot easier for serving. Cool slightly & serve with whip cream (or ice cream) if you choose.

I have always enjoyed making (and eating) tea breads. They can come in all sizes and even though they are called bread, for most part, I’d say they are cake.
Tea breads are part of the quick bread genre. They are considered quick because they don’t require kneading or rising time. Instead of yeast, usually baking powder or baking soda or a combination of both are used as a leavening agent.
Afternoon tea, the quintessential English custom, was introduced in England by a Duchess in the year 1840. The evening meal in her household was served fashionably late at 8 PM, thus leaving a long period of time between lunch and dinner (supper). The Duchess asked that a tray of tea, bread/butter and cake be brought to her room during the late afternoon. This pause for tea became a fashionable social event. Upper class and society women would change into long gowns, gloves and hats for their afternoon tea which was usually served in the drawing room between four and five PM.
This tea loaf, pairs sweet, ripe strawberries with the bright, clean flavor of lemon zest and is topped off with a tangy kiwi glaze. A match made in food heaven.
Print Recipe
Strawberry Tea Loaf with Fresh Kiwi Glaze
Votes: 1
Rating: 5
You:
Rate this recipe!
|
|
Votes: 1
Rating: 5
You:
Rate this recipe!
|
Instructions
Strawberry Tea Loaf
Preheat oven to 350 F. Grease a 9 X 5-inch loaf pan, line bottom with strip of parchment paper with 2-inch overhang on either end.
In a large bowl, whisk together flour, sugar, baking powder, baking soda & salt. In a separate bowl, whisk eggs, buttermilk, applesauce, lemon zest & vanilla. Pour egg mixture into dry ingredients. Mix just until incorporated. Fold in prepared strawberries. Scrape batter into pan.
Bake 50-60 minutes, or until cake tested with a toothpick in the center comes out clean. Cool loaf in pan, set on wire rack, 20 minutes before using parchment overhang to lift out loaf. Cool completely on rack. Slice & serve with kiwi glaze.
Kiwi Glaze
In a small saucepan, sprinkle gelatin over the cold water & set aside to soften. Peel the kiwi and blend in a food processor or blender until pureed. Be careful not to over-process as the black seeds will break down & change the color of the puree.
Add the kiwi puree to gelatin mixture. Heat mixture to dissolve gelatin but do not over heat. Continue to stir until dissolved. Keep covered in refrigerator until needed.


")


